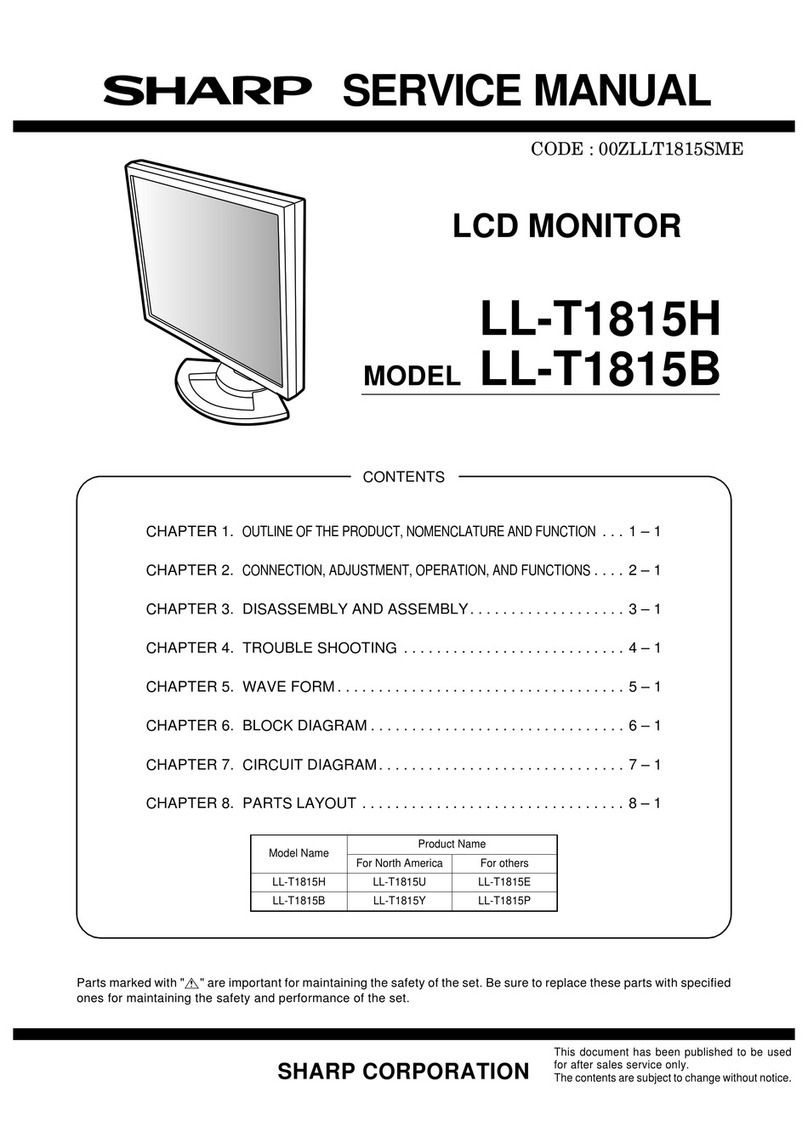
Sharp LL-T1810A User manual

LCD COLOR MONITOR
MODEL LL-T1810A
CHAPTER 1. ..........1
CHAPTER 2. ............4
CHAPTER 3. TROUBLE SHOOTING ............................................................11
CHAPTER 4. WAVE FORM...........................................................................15
CHAPTER 5. BLOCK DIAGRAM ...................................................................24
CHAPTER 6. CIRCUIT DIAGRAM.................................................................25
CHAPTER 7. PARTS LAYOUT......................................................................37
CONTENTS
Parts marked with " " are important for maintaining the safety of the set. Be sure to replace these parts with specified
ones for maintaining the safety and performance of the set.
SHARP CORPORATION This document has been published to be used
for after sales service only.
The contents are subject to change without notice.
SERVICE MANUAL

CHAPTER 1. OUTLINE OF THE PRODUCT, NOMENCLATURE AND FUNCTION
[1] Features
•46 cm [18.1 type] 1280-dots x RGB x 1024-line Anti-Glare and
Low-Refrection TFT color LCD panel
•200 cd/m2high-luminance design
•Connectable to analog RGB output (for CRT)
Multi display mode function that supports resolutions from 640-dot
x RGB x 400-line to up to 1280-dot x RGB x 1024-line
Supports VESA specification, PC9800 series and Power Macin-
tosh.
•Up to 16,770,000 colors are displayable
•Automatic screen adjustment OSD lock function, Auto gain control
function
•The display timing and RGB gain can be more finely adjusted due
to the OSD guide function, in addition to the automatic adjustment
function.
•Power management function
•Supports Plug&Play (VESA:DDC1, DDC2B specifications)
[2] Specifications
1. General specifications
LCD display 18.1 inches (46 cm measured diagonally)
Super-V and Anti Glare Low Reflection TFT LCD module
Resolution (max.) SXGA 1280 x 1024 pixels
Displayable colors (max.) 16.77 million colors (8 bit)
Dot pitch 0.2805(H) 0.2805(V) mm
Brightness (max.) 200cd/m2
Contrast ratio 350:1
Angle of visibility Left-right 150°; Up-down 150°
Screen display size Horizontal 359 mm x Vertical 287.2 mm
Video signal Analog RGB (0.7p-p) [75Ω]
Sync signal Separate Sync (TTL level: +/-), Sync on
Green, Composite Sync (TTL level: +/-)
Frequencies Refer to relevant signal timing (next page)
Automatic screen adjustment options Clock, Phase, H-position, V-position
Expansion compensation Digital screening (enlargement of display to correct VGA/SVGA/XGA)
Plug & Play VESA: DDC1/DDC2B compatible
Power management VESA: based on DPMS
User adjustment options Brightness, Contrast, Clock, Phase
Computer signal input terminal 2 x 15 pin mini D-sub (3 rows)
USB hub function 1 upstream port, 2 downstream ports (bus-powered hub based on USB standard Rev 1.1)
Screen tilt Upward 0° -30°; downward 0° - 5°
Screen swivel 90° from left through right
Power supply AC100-240V (Use special AC adapter)
Temperature of operating environment 5 - 35°C
Power consumption 54W (4.5W when in power-saving mode)
Dimensions (W x D x H, excluding rubber base) 443mm x 218mm x 464mm
Weight Approx. 10.4 kg (excluding AC adapter)
Symbol/PartsCod)
- - - - - - - - - - - - - - - - - - - - - - - - - - - - - - - - - - - - - - - - - - - - - - - - - - - - - - -

2. Technical specifications
Item MIN TYP MAX Unit
Power supply voltage AC 90 100 110 V
DC 11.4 12.0 13.2 V
Working temperature range +5 — +35 °C
Storing temperature range -20 — +60 °C
Humidity range 20 — 85 %RH
Visual angle range Vertical (CR 5) 60 75 — Temperature
Horizontal (CR 5) 60 75 — Temperature
Contrast ratio(CR) (θ= 0°) 230 350 — —
Response speed Leading (τr) — 10 25 ms
Trailing (τd) — 35 50 ms
Screen white chromaticity (X) 0.283 0.313 0.343 —
(Y) 0.299 0.329 0.359 —
White surface luminance (YL) 150 200 — cd/m2
Module model number LQ181E1DR10
Specifications and a part of the appearance are subject to change without notice.
[Power management]
The monitor is based on VESA DPMS (Display Power Manage-
ment Signaling).
To activate the monitor’s Power Management function, both the
video card and the computer must conform to the VESA DPMS
standard.
DPMS mode Screen Power
consumption H-sync V-sync
ON Display on 54W Yes Yes
STANDBY Display off Less than
4.5W
No Yes
SUSPEND Yes No
OFFSTATE No No
DDC (Plug & Play)
This monitor supports the VESA DDC (Display Data Channel) stand-
ard.
DDC is a signal standard for carrying out Plug & Play functions on the
monitor or PC. It transfers information such as degree of resolution
between the monitor and PC. You can use this function if your PC is
DDC compliant and if it is set so that it can detect the Plug & Play
monitor.
There are many varieties of DDC due to the differences between
systems. This monitor works with DDC1 and DDC2B.

NOMENCLATURE AND FUNCTION
Front view
Control Panel
Power button
This button switches the monitor
ON and OFF.
Power LED
Green light: In use
Orange light: Power saving mode or
signal failure
Lamp off: Power OFF
SELECT button
This button is used to select menu options when the
OSD Menu is displayed.
Buttons
When the On Screen Display (OSD) Menu is displayed:
These buttons are used to increase or decrease the
value of a selected option.
When the OSD Menu is not displayed:
These buttons are used to adjust backlight brightness
MENU button
This button is used to pop-up, select and close the
OSD Menu.
INPUT button
Use this button to switch between input signal terminals.
(INPUT 1 INPUT 2)
Front view
Ventilation
openings
Note: Never block the ventilation
openings as this may lead to
overheating inside the monitor
and result in malfunction.
Ventilation
openings
Power terminal
Remove the cover to see the power terminal.
The AC adapter is connected here.
INPUT 2 terminal and USB port
Remove the cover to view the computer
input terminal (INPUT 2) and USB port.
INPUT 2 terminal
A second computer can be connected here.
USB port: Downstream
A USB device can be connected here.
USB port: Upstream
A USB-ready computer or self-powered
USB hub can be connected here.
RGB signal cable: INPUT 1
This is to be connected to the computer's
(i.e. PC etc) analog RGB output terminal.
Security lock anchor
By connecting a security lock (purchased separately) to the security lock
anchor, the monitor is fixed so that it cannot be transported.
The theft prevention hole works in conjunction with Kensington Micro Saver
Security Systems.
30
45
45
5
Adjusting the angle of the monitor
Lightly holding both sides of the monitor,
adjust it to a suitable viewing angle.
Note: When adjusting the angle, be
sure to hold the green section only.
Pressure from hands on the LCD
panel could cause damage.

CHAPTER 2. CONNECTION, ADJUSTMENT, OPERATION, AND FUNCTIONS
[1] CONNECTION, POWER ON/OFF
CONNECTING THE MONITOR TO A POWER SOURCE
Use only the AC adapter supplied.
1. Remove the stand cover.
2. Remove the cover.
3. Connect the AC adapter to the monitor’s power terminal.
4. Replace cover.
5. Connect power cord to AC adapter.
6. Replace stand cover.
7. Place power plug into AC outlet.
(Rear View) Stand cover
Lift one side
Cover
Power terminal
Place cord
on hook
Run cord
through hole.
AC adapter
Cover
Power cord
Fitting the AC adapter inside the stand
Wind the cord
Place adapter
inside stand cavity.
2
11
Stand cover

CONNECTING THE MONITOR TO A COMPUTER
(PC etc.)
When connecting, ensure that both the monitor and computer are
switched off.
Note: If connecting to the Sun Ultra series, a conversion adapter
(purchased separately) may be required.
CONNECTING TO A SECOND COMPUTER
A RGB signal cable (to be purchased separately) is needed to con-
nect a second computer.
1. Remove the cover
2. Connect the RGB signal cable (purchased separately) to the IN-
PUT 2 terminal.
3. Replace the cover.
CONNECTING A USB DEVICE
This monitor can be used with hubs which use the USB standard
(Rev. 1.1).
Downstream (2 ports)
USB devices such as keyboard and mouse can be connected here.
Up to 100mA of power is able to be supplied per port. Devices requir-
ing more than 100mA cannot be connected.
Upstream (1 port)
USB compatible computers and self-powered hubs can be con-
nected. (Bus-powered hubs cannot be connected.)
Notes:•If a USB cable is required, please use the one included.
•Before connecting, ensure that the shape of the USB cable
connector is correct.
•For information regarding the USB function (such as set-up)
please refer to the operation manual of the computer to be
connected.
•Some devices may not be able to be activated. To ascertain
a certain device’s USB compatibility, please contact the
manufacturer of the device.
1. Remove the cover.
2. Connect the USB cable.
3. Replace the cover.
TURNING THE POWER ON
When connecting, ensure that both the monitor and computer are
switched off.
Firmly insert the analog RGB output terminal
(mini D-sub 15 pin with 3 rows) then tighten the
screws each side.
RGB cable
If connecting to a D-sub 15 pin 2 row Apple
Power Macintosh, attach a Macintosh conversion
adapter (to be purchased separately) to
the RGB signal cable.
Macintosh conversion adapter
RGB signal cable
After connecting the adapter,
tighten the screws on each side
to fix into place.
(Rear View) Cover
INPUT 2 terminal
RGB signal cable
(purchased separately)
To the computer's
RGB output terminal
(Rear View) Cover
USB port: Downstream (2 ports)
USB port: Upstream (1 port)
ON
Turn monitor on Turn on device to
which monitor is
connected
Press power button

The power LED
Notes:•Depending on the computer or OS, it may be necessary to
use the computer to install monitor set-up information. If so,
follow the steps below to install the monitor set-up informa-
tion.
•When setting up the monitor or a connected computer for
the first time, connecting an additional computer or after
having changed an aspect of the current system, perform
an automatic screen adjustment before use.
CHANGING BETWEEN INPUT TERMINALS
(INPUT 1 2)
When connected to two computers, use the INPUT button to switch
between input signal terminals (i.e. to choose which computer’s
screen you want displayed.)
TURNING THE POWER OFF
CAUTION!
Do not leave the monitor in contact with rubber or plastic items for
long periods of time as this could lead to color change or change in
shape.
[2] INSTRUCTIONS FOR ATTACHING A
VESA COMPLIANT ARM
An arm or stand based on the VESA standard (purchased separately)
can be attached to the monitor.
Procurement of the arm or stand is at the customer’s discretion.
Arms or stands able to be used
Attachments must satisfy the following.
Compatible with the VESA standard
Have a gap of at least 100 mm x 100 mm between the screw holes
on the section to be attached
Not be likely to fall off or break off after being attached to the
monitor.
How to attach the arm or stand
Note: While following these instructions, please also refer to the in-
stallation instructions in the operation manual included with the
arm or stand
1. Spread out a soft cloth on a suitable horizontal surface.
2. Being careful not to damage the monitor, gently lay the monitor on
it display-side down.
3. Remove the stand cover and the covers to the left and to the right.
4. Remove the two screws, and remove the cover.
5. Remove the four screws and then remove the stand from the
monitor.
Power LED
Green light: In use
Orange light: Power saving mode or signal
failure
Lamp off: Power OFF
INPUT button
Pushing this button switches between input
signal terminals, so that the screen changes to
display any of the machines connected.
OFF
Turn off device to
which monitor is
connected Turn monitor off
Press power button
(Rear view)
Cover Cover
Stand cover
Lift one side
Cover
Two screws
Four screws
Stand

6. Attach the arm to the monitor with the four screws.
[3] ADJUSTING THE SCREEN DISPLAY
If necessary, the screen can be adjusted as follows.
Automatic screen adjustment
The CLOCK, PHASE, H-POS (horizontal positioning) and V-POS
(vertical positioning) functions can be adjusted automatically.
Adjustment of backlight
Brightness of backlight can be adjusted.
Manual adjustment
Fine adjustments can be made using the On Screen Display (OSD)
Menu.
Note: All adjustments will be saved even after turning the power off.
■Useful functions and tips
Resetting MENU 1 (ADJUSTMENT)
MENU 1 (ADJUSTMENT) values can be returned to their original
ex-factory values in one command.
1. Turn on the monitor power.
2. Press the MENU button and the button simultaneously. When
[RESET] appears on the screen, the reset is complete.
■Resetting all adjustment values
All adjustment values can be returned to their original ex-factory val-
ues in one command.
1. Turn off the monitor power.
2. Press the MENU button and the SELECT button simultaneously,
and while doing this press the power button (i.e. turn the power
on). When [ALL RESET] appears on the screen, the reset is com-
plete.
Notes:•While ALL RESET is displayed, the control buttons are dis-
abled.
•It is not possible to reset values when the adjustment lock is
in place. Remove the adjustment lock before attempting to
operate control buttons.
■Adjustment lock function
By disabling the control buttons (i.e. setting the lock) any attempted
changes to adjusted values will be voided.
1. Turn off the monitor power.
2. While pressing the MENU button, press the power button (i.e. turn
the power on). This will set the lock. (When this appears on the
screen, the lock is in place.)
Removing the lock
If the lock is in place and the above-mentioned command is repeated,
the lock will be removed.
Note: When the lock is in place, all buttons other than the power
button are disabled.
■Choosing a message language
Messages displayed on the screen and OSD Menu contents can be
changed to the following languages.
Dutch, English, French, German, Spanish, Italian, Swedish.
1. Turn off the monitor.
2. Pressing the and buttons simultaneously, press the power
button (i.e. turn the power on).
The Language Selection Menu (LANGUAGE) will be displayed on
the screen.
3. Use the SELECT button to choose a language.
4. Press the MENU button.
The setting is complete. From now, messages and adjustment
menus will be displayed in the chosen language.
AUTOMATIC SCREEN ADJUSTMENT
Options in MENU 1 (ADJUSTMENT) can be adjusted automatically
(CLOCK, PHASE, H-POS, V-POS).
Note:
When setting up the monitor or a connected computer for the first
time, connecting an additional computer or after having changed an
aspect of the current system, perform an automatic screen adjust-
ment before use
■Automatic adjustment screen display
To perform an automatic adjustment, first display an image that
makes the entire screen very bright. If you are using Windows, you
can also use the Adjustment Pattern on the accompanying Monitor
Settings Adjustment Disk for Windows.
Displaying the Adjustment Pattern (for Windows)
This explanation is for Windows 95/98/2000, and assumes that the
floppy disk drive is [A drive].
Note: If the floppy disk drive of your computer is not "A drive", please
read the below substituting the floppy disk drive you are using
in place of "A drive" or "A".
1. Place the Monitor Settings Adjustment Disk (provided) into the
computer’s A drive.
2. Open [My Computer] and select [3 Floppy (A:)]. If using Windows
3.1, open [File Manager] and choose "A drive".
3. Double click on [Adj_uty.exe] to run the Adjustment Program. The
Adjustment Pattern will appear.
8~10mm
The screws used to attach the arm should be M4 screws
with a length of 8 mm ~ 10 mm protruding from the surface
to be attached.
Using any other kind of screw may lead to the monitor
falling off or damage to the internal part of the monitor
Screw used to attach arm
Arm
Part of monitor to which arm is attached
Notes:•After completing the adjustment, press the computer’s [Esc]
key to exit the Adjustment Program.
•If your computer’s display mode is set to 65K colors, you
may see the different color levels in each color pattern or
the gray scale may look colored. (This is due to the input
signal specification and is not a malfunction.)
■Adjusting the screen automatically
1. Press the MENU button.
The ADJUSTMENT Menu will be displayed.
2. Press the button.
The screen will become dark and [ADJUSTING] will be displayed.
After a few seconds the ADJUSTMENT Menu will return. (The
automatic adjustment is now complete.)
3. Press the MENU button 4 times to make the On Screen Display
(OSD) Menu disappear.
Notes:•In most cases the monitor is ready to be used after auto-
matic adjustment.
•If necessary due to any of the following, manual adjust-
ments (p. 19) can be made after the automatic adjustment.
•When further fine adjustment is needed.
•When the computer’s video input signals are Composite
Sync or Sync On Green. (Automatic adjustments may
not be possible.)
•When, after command 2 above, [OUT OF ADJUST] is
displayed. (When the screen displays an entirely dark
image, the automatic screen adjustment may be dis-
abled. When making an automatic adjustment, be sure
to either use the Adjustment Pattern or try displaying an
image that makes the entire screen very bright.)
ADJUSTING THE BACKLIGHT
The backlight brightness can be adjusted.
Carry out the commands without the On Screen Display (OSD) Menu
displayed. If the OSD Menu is displayed, press the MENU button
(several times may be required) and begin when the OSD Menu has
disappeared.
1. Without the OSD Menu being displayed, push the or the
button. At the bottom of the screen the BRIGHT bar will appear.
2. Adjust by pressing the button (darker) or button (lighter).
The BRIGHT bar automatically disappears approximately 3 seconds
after the last command.
MANUAL SCREEN ADJUSTMENT
Fine adjustments can be made using the On Screen Display (OSD)
Menu provided.
MENU 1: ADJUSTMENT
CLOCK, PHASE, H-POS (horizontal positioning) and V-
POS (vertical positioning)
MENU 2: GAIN CONTROL
BRIGHT (brightness), CONT (contrast)
MENU 3: WHITE BALANCE
R-CONT (blue-green to red), G-CONT (purple to green),
B-CONT (yellow to blue)
MENU 4: MODE SELECT
INPUT (input mode), 400LINE (resolution), EXPAND
(screen expansion), LEVEL (level of scaling)
■The screen display during adjustment
If using Windows, the Adjustment Pattern on the accompanying Moni-
tor Settings Adjustment Disk for Windows can be used.
If using a computer other than Windows, the adjustment pattern can-
not be used. Display an image that makes the entire screen very
bright, and adjust while watching the screen.
Note: This explanation is based on using the Adjustment Pattern (for
Windows) to make adjustments.
■Adjusting
1. Press the MENU button. The ADJUSTMENT Menu will be dis-
played.
At this point relevant menu options can be adjusted.
Each time the MENU button is pressed, the next menu is selected.
(MENU 1 2 3 4 OSD Menu disappears)
Note: The OSD Menu automatically disappears approximately 20
seconds after the last command.
MENU 1: ADJUSTMENT
MANUAL: Individual menu options are manually adjusted.
AUTO: Every menu option is automatically adjusted
Notes:•Press the button to select AUTO.
•To choose a menu option: SELECT button
•To go to MENU 2: MENU button
Adjustment pattern
ADJUSTMENT
[]
CLOCK 1 2 8
8
91
38
PHASE
H-POS
V-POS
AUTO
1280x1024 V : 60Hz H : 64kHz
[]
ADJUSTMENT
[]
CLOCK 1 2 8
8
91
38
PHASE
H-POS
V-POS
AUTO
1280x1024 V : 60Hz H : 64kHz
ADJUSTMENT
[]
CLOCK 1 2 8
8
91
38
PHASE
H-POS
V-POS
AUTO
1280x1024 V : 60Hz H : 64kHz

CLOCK
The figure below demonstrates how to adjust so that vertical flicker
noise is not emitted. ( buttons)
PHASE
The figure below demonstrates how to adjust so that horizontal flicker
noise is not emitted. ( buttons)
Note: Adjustments to PHASE should be made only after CLOCK has
been correctly set.
H-POS (horizontal positioning) and V-POS
(vertical positioning)
To center the screen image within the boundaries of the screen,
adjust the left-right (H-POS) values and the up-down (V-POS) values.
(buttons)
MENU 2: GAIN CONTROL
BRIGHT (brightness) and CONT (contrast) are optimized before ship-
ment, but depending on the type of computer being used, further
adjustment may be necessary.
MANUAL: Individual menu options are manually adjusted.
AUTO: Every menu option is automatically adjusted using the
Auto Gain Control* function,
Notes:•Press the button to select AUTO.
•To choose a menu option: SELECT button
•To go to MENU 3: MENU button
*Auto Gain Control function
The Auto Gain Control adjusts contrast and brightness based on
the brightest color of the image displayed. If you are not using the
Adjustment Pattern it is necessary to have an area of at least 5
mm x 5 mm of white image displayed, and if not adjustments may
not be possible. (In such case, [OUT OF ADJUST] will appear and
setting values remain unchanged.)
BRIGHT (brightness)
Total screen brightness can be adjusted while watching the color
pattern. ( buttons)
CONT (Contrast)
While watching the color pattern, adjustments can be made so that all
graduations appear. ( buttons)
MENU 3: WHITE BALANCE
WHITE BALANCE can be adjusted as necessary. (As adjustments
are made before shipment, there is no real necessity for further al-
teration.)
Notes:•Not all graduations for COOL and WARM can be displayed.
To display all graduations, set to STD.
•Selecting USER will display the setting values for R-CONT,
G-CONT and B-CONT, enabling fine adjustments.
•To choose a menu option: SELECT button
•To go to MENU 4: MENU button
COOL ... Color tone bluer than standard
– ... Color tone slightly bluer than standard
STD ... Color tone standard setting
– ... Color tone slightly redder than standard
WARM ... Color tone redder than standard
USER
R-CONT button for blue-green
button for red
G-CONT button for purple
button for green
B-CONT button for yellow
button for blue
MENU 4: MODE SELECT
The resolution can be adjusted
Notes:•To choose a menu option: SELECT button
•When adjustment complete: MENU button
Vertical flicker noise
Horizontal flicker noise
Screen frame
GAIN CONTROL
[]
BRIGHT 1 2 8
1 2 8COMT
AUTO
1280x1024 V : 60Hz H : 64kHz
Color pattern
WHITE BALANCE
[]
R-CONT
1280x1024 V : 60Hz H : 64kHz
COOL • • WARM USER
G-CONT
B-CONT
MODE SELECT
[]
400LINE
EXPAND
MAC
1280x1024 V : 60Hz H : 64kHz
LEVEL
640
OFF

INPUT (Input mode)
The input mode can be set ( buttons)
VESA: VESA mode
MAC: Power Macintosh mode
400 LINES (degree of resolution)
You can specify the horizontal resolution of a 400-line screen when
using US text, etc. ( buttons)
640 640 x 400 dot mode
720 720 x 400 dot mode (US text etc.)
Note: As the resolution input for other than 400 lines is done auto-
matically, there is no need to set it.
EXPAND (Screen expansion)
For display modes of less than 1280 x 1024 pixels, the display can
be expanded if desired.
(buttons)
OFF Expansion off
ON Expansion on
Notes:•Display modes of 1280 X 1024 pixels cannot be changed.
•If a resolution of 1280 X 1024 pixels cannot be achieved
even after expansion is attempted, the screen’s perimeter
will display black. (This is not a malfunction.)
LEVEL (Level of scaling)
When EXPAND is ON, the sharpness of the image can be adjusted.
(buttons)
Note: When EXPAND is OFF, no adjustments can be made.
Signal timings
Display mode Hsync Vsync Dot
frequency
VESA 640 x 480 31.5kHz 60.0Hz 25.175MHz
37.9kHz 72.0Hz 31.5MHz
37.5kHz 75.0Hz 31.5MHz
43.3kHz 85.0Hz 36.0MHz
640 x 400 37.9kHz 85.0Hz 31.5MHz
720 x 400 37.9kHz 85.0Hz 35.5MHz
800 x 600 35.1kHz 56.0Hz 36.0MHz
37.9kHz 60.0Hz 40.0MHz
48.1kHz 72.0Hz 50.0MHz
46.9kHz 75.0Hz 49.5MHz
53.7kHz 85.0Hz 52.25MHz
1024 x 768 48.4kHz 60.0Hz 65.0MHz
56.5kHz 70.0Hz 75.0MHz
60.0kHz 75.0Hz 78.75MHz
68.7kHz 85.0Hz 94.5MHz
1152 x 864 67.5kHz 75.0Hz 108.0MHz
1280 x 960 60.0kHz 60.0Hz 108.0MHz
1280 x 1024 64.0kHz 60.0Hz 108.0MHz
80.0kHz 75.0Hz 135.0MHz
US text 720 x 400 31.5MHz 70.0Hz 28.3MHz
Display mode Hsync Vsync Dot
frequency
Power
Macintosh
series
640 x 480 35.0kHz 66.7Hz 30.2MHz
832 x 624 49.7kHz 74.6Hz 57.3MHz
1024 x 768 60.2kHz 75.0Hz 80.0MHz
1152 x 870 68.7kHz 75.0Hz 100.0MHz
Sun Ultra
series 1024 x 768 48.3kHz 60.0Hz 64.13MHz
53.6kHz 66.0Hz 70.4MHz
53.6kHz 70.0Hz 74.25MHz
1152 x 900 61.8kHz 66.0Hz 108.01MHz
71.8kHz 76.1Hz 117.01MHz
1280 x 1024 71.7kHz 67.2Hz 117.01MHz
81.1kHz 76.0Hz 134.99MHz
Notes:•All are compliant only with non-interlace.
•Frequencies for Power Macintosh and the Sun Ultra series
are reference values.
•If the monitor is receiving timing signals that are not com-
patible, [OUT OF TIMING] will appear. Follow your com-
puter’s instruction manual to set the timing to be compatible
with the monitor.
•If the monitor is not receiving any signal (synch signal), [NO
SIGNAL] will appear.
■The connector pin
Input connector diagram (Mini D-sub connector with 15 pins)
Number Function
1 Red video signal input
2 Green video signal input
3 Blue video signal input
4 GND
5 GND
6 For red video signal GND
7 For green video signal GND
8 For blue video signal GND
9 N.C.
10 GND
11 GND
12 DDC data
13 For Hsync signal input
14 For Vsync signal input
15 DDC clock
54321
1514131211
109876

CHAPTER 3. TROUBLE SHOOTING
Yes No
Yes No
Yes No
Yes No
Yes
No
Yes No
Yes No
Yes No
Yes No
Yes No
Yes No
Yes No
Yes No
Yes No
Yes No
Yes No
Yes
Check and remedy any failure according to
the following procedure.
LED color changes in color from orange to
green by pressing power switch? See <An error occurs when
synchronous signal is detected.>
LED comes on in orange soon after RGB
cable is removed? See < An error occurs in power
save mode>.
Back light turn on when RGB cable is
connected? See <Back light goes out
improperly>.
Screen is normal in each video mode? See <Screen is not normal>.
No failure.
< An error occurs when synchronous signal is detected.>
Input signal port is the port to which RGB
cable is connected? Press INPUT key to switch over input
signal port to the correct one.
DC+12V is output from the dedicated
AC adapter? Check dedicated AC adapter.
Test terminal TP8 shows DC+12V?
Check DC+12V power supply line and power
supply circuit around fuse (DC jack board).
Test terminal TP4 shows DC+5V? Check DC+5V power supply line (MVCC)
and power supply circuit around the IC4.
IC34 No. 19 pins signal input is at H level
(DC+5V)? Check RESET circuit around IC29.
IC34 No. 22 pins signal input is normal?
(See waveform diagram 1.) Check clock circuit around IC34 and X1.
IC34 No. 55 pins signal output is at H level
(DC+5V)? Check the microprocessor control circuits
around IC29 and IC34.
Test terminal TP2 shows DC+5V? Check DC+5V power supply line (BVCC)
and power supply circuit around IC6.
Test terminal TP6 show sDC+5V? Check DC+5V power supply line (ANVCC)
and power supply circuit around IC15.
IC 24 Nos. 8, 9, 17 and 18 pins signal outputs
are normal? (See waveform diagrams 2 and 3)
Check Dsub board, cable and CN5,6.
IC34 Nos 6 and 7 pins signal inputs are
normal? (See waveform diagrams 4 and 5.)
Check signal processing circuit around IC14,
IC17, IC18, IC21, IC38, IC500, IC501 and IC503.
IC34 No. 58 pins signal output is at H level
(DC+5V)?
Continued on the next page.
Check the microprocessor control circuits
around IC29 and IC34.

No
Yes No
Yes
No
Yes No
Yes No
Yes No
Yes No
Yes No
Yes No
Yes No
Yes
Yes No
Yes No
Yes
Continued from the preceding page.
IC34 No. 51 pins signal output is at H level
(DC+5V)?
IC34 No. 52 pins signal output is at L level
(0V)?
Check circuits around (LED, cable, etc.).
Check the microprocessor control circuits
around IC29 and IC34.
Check the microprocessor control circuits
around IC29 and IC34.
< An error occurs in power save mode >
IC34 No. 56 pins signal output is at t L level
(0V)? Check microprocessor control circuits
around IC28 and IC34.
IC34 Nos. 51 and 52 pins signal outputs
show H level (DC+5V)?
Check circuits around LED (operation
board, cable, etc.).
Check microprocessor control circuits
around IC28 and IC34.
< Back light goes out improperly>
No.1 pins of CN1 and CN2 show DC+12V?
Check DC+12V power supply line and
power supply circuit around fuses F1 and F2.
No.4 pins of CN1 and CN2 show DC+5V? Check inverter board unit and cable.
IC34 No. 55 pins signal output is at the
H level (DC+5V)? Check microprocessor control circuit
around IC29 and IC34.
Test terminal TP1 shows DC+11V? Check DC+11V power supply line (+11V)
and power supply circuit around IC1.
IC34 No. 54 pins signal output is at the
L level (0V)?
No. 5 pins of the CN1 and CN2 show
DC+5V?
No. 3 pin of CN1 and CN2 shows 0 V when
brightness is maximum (OSD display, BRIGHT 31)?.
Check circuit around operation board
(operation board, cable, etc.)
Check inverter board unit.
Check light in LCD module.
Nos. 1 and 2 pins of CN2 on inverter
board unit show approx. 1800 Vrms?
(Use caution to avoid an electrical shock!
Use a high-voltage probe (more than
100:1) for measuring voltage.)
Check microprocessor control circuit
around IC29 and IC34.
Check DC+11V power supply line (+11V)
and power supply circuit around IC1.

No
Yes No
Yes No
Yes Yes No
No
No
No
No
<Screen is not normal >
Test terminal TP3 shows DC+5V?
Check DC+5V power supply line (VCC and
ADVCC) and power supply circuit around IC5.
IC25 No. 1 pin shows DC+5V? Check DC+5V power supply line for PLL
and power supply circuit around the IC24.
Test terminal TP5 shows DC+3.3V? Check DC+3.3V power supply line (LVCC)
and power supply circuit around IC7.
Entire screen of LCD display remains
white?
Signal outputs of clocks FL3, FL4, DE FL2 and FL5
are normal? (See waveform diagrams 6 and 7.)
Check LCD control signal circuit around
OSC1, OSC2, IC26, IC27 and IC35.
Check LCD connector and LCD module.
Entire screen of LCD display remains
black? IC34 No. 56 pins signal output is at the
H level (DC+5V)? Check microprocessor control circuit
around IC29 and IC34.
No
Yes
Yes
No
Yes
No
No
Check LCD control signal circuit around
IC26 and IC27.
LCD screen size is abnormal?
Adjustment items of “ADJUSTMENT” and
“MODE SELECT” are set correctly? Adjust and set screen according to the
LCD screen setting procedure.
Signal outputs of IC 25 No. 24 pin and IC23 No. 8
pin are normal? (See waveform diagrams 8 and 9.)
Check PLL circuit around IC23, IC25 and
IC34.
LCD screen trembles or flickers?
Check PLL circuit around IC23, IC25 and
IC34.
Continued on the next page.
Adjust and set screen according to the
LCD screen setting procedure.
Adjustment items of “ADJUSTMENT” and
“MODE SELECT” are set correctly?
Check LCD control signal circuit around
IC26 and IC27.

No Yes No
No No
No
No
No
No
Yes No
No
No
No
Yes
Yes
Yes
Yes
Yes
Yes
Yes
Yes
Yes
Digital color signal inputs and outputs of IC23 and IC27
are normal? (See waveform diagrams 13, 14 and 15.)
Check color signal processing circuit
around IC23 and IC27.
Check microprocessor control circuit
around IC27, IC28 and IC34.
LCD screen adjustment settings are
stored in memory properly? Check the memory circuit around the IC30
and IC34.
Inputs are switched over properly?
IC34 No.3 pins output signal normal?(The signal
is at H level for INPUT1 and at L level for INPUT2.)
Check microprocessor control circuit
around IC14 and IC34.
Check Dsub board, cable and CN5, 6.
LCD is normal.
Continued from the preceding page.
LCD screen color is abnormal? Adjustment items of “GAIN CONTROL” and
“WHITE BALANCE” are set correctly?
Analog color signal outputs of IC 14 Nos. 25, 27, 30 and
35 pins are normal? (See waveform diagrams 10 and 11.)
Check video switch circuit around IC14.
Analog color signal outputs of No. 15 pins of IC 401, IC402
and IC403 are normal? (See waveform diagram 12.)
Check video amplifier circuit around IC401,
IC402, IC403 and IC28.
Digital color signal output of IC 23 is
normal? (See waveform diagram 13.) Check AD converter circuit around IC23.
Digital color signal input and output of IC 27 is
correct? (See waveform diagrams 14 and 15.)
Check color signal processing circuit
around IC27.
Digital color signal inputs and outputs of
IC8, IC9 and IC10 are normal? Check color signal processing circuit
around IC8, IC9 and IC0.
Check LCD connector and LCD module
OSD display of LCD screen is abnormal?
Signal outputs of IC31 Nos. 13, 15 and 17
pins are normal? (See waveform diagram 17.)
Check OSD display circuit around IC31,
IC33 and IC34.
Check color signal processing circuit
around IC 27.
LCD screen is normal at composite syn.
and sync.-on-green?
Check synchronous signal processing circuit
around IC18, IC19, IC21, IC22 and IC38.
GAIN CONTROL AUTO operates properly?
Adjust and set screen according to the
LCD screen setting procedure.
Yes
No
Yes
Yes
No
No
No
Yes

CHAPTER 4. WAVE FORM
1. WAVE FORM DESCRIPTION
Waveform measurement condition: Input each of the display patterns
and measure the waveform (timing chart).
Wave-form
No. Measurement point Name of waveform Display pattern
1 22 pin of the IC34 XIN Arbitrary
2 9 pin, 18 pin of the IC14 VSYNC Arbitrary
3 8 pin, 17 pin of the IC14 HSYNC Arbitrary
4 6 pin of the IC34 MPU VSY Arbitrary
5 7 pin of the IC34 MPU HSY Arbitrary
6 FL4, FL3 LCD CLKA, CLKB Arbitrary
7 FL2, FL5 LCD DEA, DEB Arbitrary
8 24 pin of the IC24 DSYNC Arbitrary
9 8 pin of the IC23 ADCLKOUT Arbitray
10 25 pin of the IC14 SOGOUT 16 monochromatic gradation patterns
11 27 pin, 30 pin, and 35 pin of the IC14 VSwitch RGB OUT 16 monochromatic gradation patterns
12 16 pin of the IC401, IC402 and IC403 VAmp RGB OUT 16 monochromatic gradation patterns
13 52 ~ 59 pins and 62 ~ 69 pins of (R) of the IC23
32 ~ 39 pins and 42 ~ 49 pins of the (G) of the IC23
12 ~ 19 pins and 22 ~ 29 pins of (B) of the IC23
A/D OUT DATA Monochrome pattern at every 2 lines
14 242 ~ 259 pins, 262 ~ 268 pins, 276 ~ 278 pins,
281 ~ 292 pins, and 295 ~ 302 pins of the IC27 ASIC IN DATA Monochrome pattern at every 2 lines
15 156 ~ 163 pins, 166 ~ 174 pins, 177 ~ 183 pins, 191 ~ 204 pins, and
207 ~ 216 pins of the IC27 ASIC OUT DATA Monochrome pattern at every 2 lines
16 1, 3, 4, 6, 7, 9, 10, 12, 13, 17, 18, 20, 21, 60, 61, 63, 64, 68, 69, 71, 72,
74, 75, 77, 78, 80, 81, 83, 84, 97, 98 and 100 pins of the IC8, IC9, and
IC10
SGRAM IN/OUT
DATA Monochrome pattern at every 2 lines
17 13, 15, and 17 pins of the IC31 OSD COLOR DATA Black pattern on entire screen OSD
menu display
CAUTION
(1) Use the probe TektronixP6139A
(2) Reception mode : VESA 1024 x 768
H:60.024 kHz V:75.075 Hz
DOTCLK:78.750MHz
Oscilloscope : Tektronix TDS744A
Input signal : VESA1024 x 768
H: 60.02 kHz V: 75.075 Hz
DOTCLK: 78.750MHz

WAVE FORM 1 : XIN (22 pin of the IC34)
Frequency 7.987MHz
Display Screen : arbitrary
WAVE FORM 2 : VSYNC (9 pin, 18th pin of the IC14)
Frequency 75Hz
Display Screen : arbitrary
WAVE FORM 3 : HSYNC (8 pin, 17 pin of the IC14)
Frequency 80kHz
Display Screen : arbitrary
WAVE FORM 4 : MPU VSY (6 pin of the IC34)
Frequency 75Hz
Display Screen : arbitrary
WAVE FORM 5 : MPU HSY (7 pin of the IC34)
Frequency 80kHz
Display Screen : arbitrary
WAVE FORM 6 : LCD CLKA, CLKB (FL4, FL3)
Frequency 50MHz
Display Screen : arbitrary

WAVE FORM 7 : LCDDEA, DEB (FL2, FL5)
Frequency 70kHz
Display Screen : arbitrary
WAVE FORM 8 : DSYNC (24 pin of the IC25)
Frequency 80kHz
Display Screen : arbitrary
WAVE FORM 9 : ADCLKOUT (8 pin of the IC23)
Frequency 65MHz
Display Screen : arbitrary
WAVE FORM 10 : SOGOUT (25 pin of the IC14)
Display Screen : 16 monochromatic gradation patterns
WAVE FORM 11 : VSwitch RGB OUT (27 pin , 30 pin and
35 pin of the IC14)
Display Screen : 16 monochromatic gradation patterns
WAVE FORM 12 : VAmp RGB OUT (16 pin of the IC401,
IC402 and IC403)
Display Screen : 16 monochromatic gradation patterns

WAVE FORM 13 : A/D OUT DATA
Display Screen : Monochrome pattern at every 2 lines
WAVE FORM 14 : ASIC IN DATA
(242 ~ 259 pins, 262 ~ 268 pins,
276 ~ 278 pins, 281 ~ 292 pins,
295 ~ 302 pins of the IC27)
Display Screen : Monochrome pattern at every 2 lines
WAVE FORM 15 : ASIC OUT DATA
(156 ~ 163 pins, 166 ~ 174 pins,
177 ~ 183 pins, 191 ~ 204 pins,
207 ~ 216 pins of the IC27)
Display Screen : Monochrome pattern at every 2 lines
WAVE FORM 16 : ASIC IN/OUT DATA
(1, 3, 4, 6, 7, 9, 10, 12, 13, 17, 18, 20, 21,
60, 61, 63, 64, 68, 69, 71, 72, 74, 75, 77,
78, 80, 81, 83, 84, 97, 98, 100 pins of
IC8, IC9 and IC10)
Display Screen : Monochrome pattern at every 2 lines

WAVE FORM 17 : OSD COLOR DATA
(13, 15, 17 pins of IC31)
Display Screen : All black pattern OSD menu display
2. CIRCUIT DIAGRAM
Main board (Ver.7)
Sheet No. Description
1 RGB signal input
2 Synchronizing separator
3 A/D converter and PLL circuit
4 ASIC circuit
5SGRAMcircuit
6 Microprocessor
7 LCD output connector circuit
8 Power supply circuit
DC jack board
Sheet No. Description
1 DC jack and fuse circuit
LED & SW board
Sheet No. Description
1 LED and switch circuit
D-sub board
Sheet No. Description
1 D-Sub connector and DDC circuit
Other manuals for LL-T1810A
1
Other Sharp Monitor manuals

Sharp
Sharp PN-70TW3 User manual

Sharp
Sharp PN-80TH5 User manual

Sharp
Sharp LC-28HM2 User manual

Sharp
Sharp PN-465U User manual

Sharp
Sharp PN-Y555 User manual

Sharp
Sharp LV-70X500E User manual

Sharp
Sharp PN-R496 User guide

Sharp
Sharp PN-C703D User manual

Sharp
Sharp AQUOS LB-1085 User manual

Sharp
Sharp LL-153A User manual

Sharp
Sharp LL-173C Guide

Sharp
Sharp PN-HW751 User manual

Sharp
Sharp PN-L601B User manual

Sharp
Sharp LL-T15G1 User manual

Sharp
Sharp T19D1-H - LL - 19" LCD Monitor User manual

Sharp
Sharp PN-L803C User manual

Sharp
Sharp LL-T2015 User manual

Sharp
Sharp PN-C805B User guide

Sharp
Sharp LCD MONITOR User manual

Sharp
Sharp PN-HW501T User manual