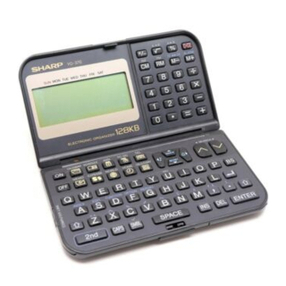
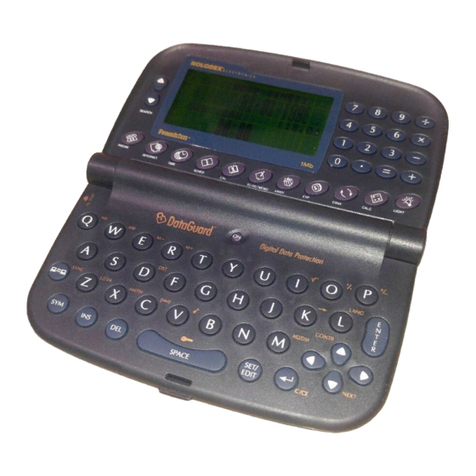
Sharp IQ-7000 User manual

SHARR

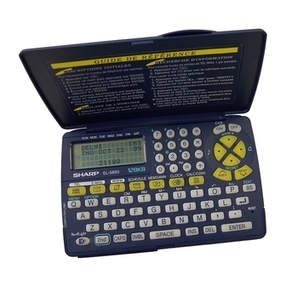
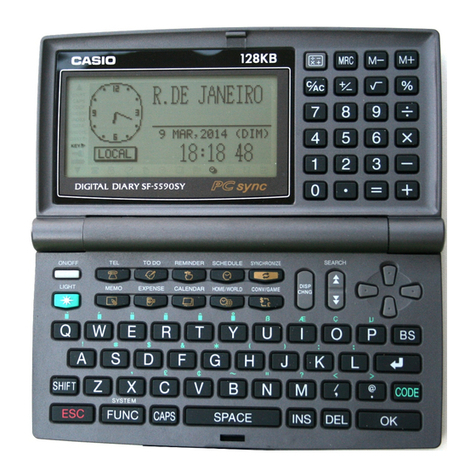
Congratulations on purchasing the IQ-7000 Electronic Organizer. Please
read this operation manual carefully to familiarise yourself with all the
features of the Organizer and to ensure years of reliable operation. Also,
make it a point to keep this operation manual on hand for reference.
Before using this Organizer, make sure to remove the insulation band
which covers the battery contacts and prevents battery depletion (refer to
Page 9). The Organizer cannot be turned on until this insulation band is
removed.
l The information provided in this manual is subject to change without
notice.
NOTICE
l SHARP strongly recommends that separate permanent written records be kept of all
important data. Data may be lost or altered in virtually any electronic memory product
under certain circumstances. Therefore, Sharp assumes no responsibility for data lost
or otherwise rendered unusable whether as a result of improper use, repairs, defects,
battery replacement, use after the specified battery life has expired, or any other cause.
l SHARP assumes no responsibility, directly or indirectly, for financial losses or claims
from third persons resulting from the use of this product and all of its functions, such
as stolen credit card numbers, the loss of or alteration of stored data, etc.

lntroductlon
Features of the Organizer
Local time zone clock function (HOME time)
Displays current date and time.
+
PAGE 36
-
International clock function (WORLD time)
Displays current date, time, and the difference in time between the city in question and
HOME time for 212 cities around the world.
4
PAGE 45
Schedule function
Allows you to store important dates and events. tmportant dates wilt also be flagged on
the calendar to remind you to check them. A schedule alarm can be set to
remind
you in
advance of a scheduled time.
+
PAGE 50
Calendar function
Contains a calendar, which extends from the year 1901 to 2099. Important dates on your
monthly calendar will be flagged, so you can check what has been scheduled for any
designated day or week. Pressing a single key then gives you your weekly, and then daily,
calendar
+
PAGE 70
Telephone book function
Three telephone lists allow you to list business and private numbers separately. Phone
numbers can be recalled in alphabetical order using the sequential search function, or
directly recalled by entering. --f PAGE 87
Memo function
Allows you to note important details, such as timetables. Also stores price lists, etc., and
can perform calculations with the stored data.
+
PAGE 98
Calculator
Contains a lo-digit calculator with memory. The calculator also features a paperless
printer which displays all the steps of a given calculation, allowing you to scroll up and
down the process.
+
PAGE 114
Secret function
Protects personal information. A password is required to see the information you mark as
secret.
+
PAGE 132
User dictionary
Stores frequently used words or sentences, enabling their easy input in any mode.
+
PAGE143
Peripheral devices
Using the optional IC cards, you can convert the Organizer into a variety of specialty
computers easily and instantly. Additional interfaces with printers, cassette recorders, and
data transfer cables make the Organizer as powerful as you want it to be. --f PAGE 157
3

Contents
Contents
BEFORE USE
..................................................................
9
Inputting and recalling data..
.......................................................... 10
QUICK GUIDE
.................................................................
12
Command centre
........................................................................... 12
Setting the date and local time (HOME time).
................................ 13
Schedule function
.......................................................................... 16
Calendar function..
......................................................................... 17
Telephone directory function
.......................................................... 19
Connecting the IC cards
................................................................ 21
GETTING STARTED
.......................................................
22
Parts
included
................................................................................
22
Display symbols..
...........................................................................
24
Key notations ................................................................................. 25
Turning the power on and off..
....................................................... 26
Contrast adjustment..
..................................................................... 27
Turning the “beep” on and off
........................................................ 27
The operational guide
.................................................................... 28
BASIC ENTRY PROGRAMMES.....................................
29
Inputting characters
....................................................................... 29
Making corrections
.........................................................................
32
Alternating between the 8-line and 4-line displays..
....................... 35
USING THE STANDARD AND WORLD CLOCKS..
.......
36
Displaying the standard or world time..
.......................................... 36
Setting the standard clock
.............................................................. 37
Selecting
a city for the
HOME time..
......................................... 37
Setting the HOME time for the built-in clock..
........................... 40
Changing the standard city
............................................................
44
Checking the times in cities around the world
................................ 45
Looking up the time for other cities on the world clock..
........... 47
USING THE SCHEDULE FUNCTION
.............................
50
Inputting data in the SCHEDULE mode..
....................................... 50
4

Inputting items from the CALENDAR mode..
............................ 50
Inputting items from the SCHEDULE mode..
............................ 53
Scheduling
items without times.. ...............................................
56
Recalling scheduled data..
............................................................. 57
Recalling today’s agenda..
........................................................
57
Recalling scheduled items from the CALENDAR mode..
......... 57
Recalling scheduled items from the SCHEDULE mode
........... 59
Recalling only scheduled dates (i.e., engagements only)
......... 59
Recalling scheduled items from the SCHEDULE mode
by entering the date numerically..
.............................................
60
Recalling scheduled items using the first letter(s)
of the
item .................................................................................
61
Recalling scheduled items with a keyword search..
..................
62
Editing scheduled data..
.................................................................
64
Copying scheduled data
................................................................
65
Deleting scheduled data
................................................................ 66
Deleting one agenda item
at a time ..........................................
67
Deleting the agenda for an entire month
................................... 67
Deleting the agenda for an entire week or day..
....................... 68
Deleting all of the data in the schedule memory..
..................... 68
USING THE CALENDAR FUNCTION
.............................
70
Displaying and changing the monthly calendar
............................. 70
Changing the month
with(v
or(.
........................................
71
Recalling a date with the numerical keys..
................................
72
Recalling a month by designating the year and month..
...........
74
Looking at the agenda in the CALENDAR mode..
......................... 75
USING THE
ANNIVERSARY
FUNCTION..
.....................
Inputting anniversaries..
.................................................................
Specifying the date (month and day)
........................................
Designating anniversaries by their positions
relative to
months
and weeks
...................................................
Recalling anniversaries..
................................................................
Editing,
adding, or deleting anniversaries..
....................................
Editing an
anniversary entry
.....................................................
Adding
an
anniversary entry..
...................................................
Deleting anniversary entries
.....................................................
79
79
79
81
82
83
83
84
85
5

Contents
USING THE TELEPHONE DIRECTORY..........
a..
...........
87
Designating the file names
.............................................................
87
Entering
listings..............................................................................
88
Recalling
listings ............................................................................ 91
Recalling a listing with a sequential search
..............................
92
Recalling a listing with a direct search..
....................................
92
Recalling a listing with a keyword search..
...............................
93
Editing listings..
..............................................................................
94
Copying
listings.. ............................................................................
95
Deleting
listings.. ............................................................................
95
Deleting single listings
..............................................................
95
Deleting entire directories
(TEL1
,
TEL2, or TEL3).
...................
96
USING THE MEMO FUNCTION
......................................
98
Inputting memos
............................................................................
98
Recalling
memos ........................................................................... 99
Recalling memos with a sequential search.
.............................. 100
Recalling memos with a direct search
...................................... 101
Recalling memos with a keyword search
.................................. 102
Correcting
memos.. ........................................................................ 102
Copying
memos............................................................................. 103
Deleting memos..
...........................................................................
104
Deleting single
memos.. ............................................................
104
Deleting entire memos..
............................................................ 105
Rearranging
memos ...................................................................... 106
Performing calculations with the memo data
................................. 107
Inputting the data to be calculated..
.......................................... 107
Summing memo data..
.............................................................. 109
USING THE ORGANIZER AS A CALCULATOR.......... .114
Using the Organizer in the CALC mode..
....................................... 114
Using the PAPERLESS PRINTER calculation..
.............................
1 16
Inputting data..
.......................................................................... 116
Editing and deleting the calculation data..
................................ 118
Adding new data for calculation
................................................ 120
Application
................................................................................ 121
When the error message appears
................................................. 124
6

USING THE ALARM FUNCTION
...................................
.
125
Setting the
alarm
to ring ................................................................. 125
Setting the schedule alarm
....................................................... 126
Displaying the times for which the alarm has been set..
........... 128
Using the daily alarm function..
...................................................... 129
Setting the daily alarm
..................................................... ........ 129
Deleting the daily alarm settings..
.............................................
131
USING THE SECRET FUNCTION
..................................
132
Inputting a password..
.................................................................... 132
Coding data as secret data
............................................................ 133
Coding previously input data as secret data..
........................... 133
Coding new data as secret data
............................................... 135
Turning off the secret function
....................................................... 136
Turning on the secret function
....................................................... 136
Recalling secret data
..................................................................... 137
Declassifying secret data by removing the secret code..
............... 137
Deleting and changing the password..
........................................... 138
What to do if you forget the password
........................................... 140
USING THE MISCELLANEOUS FUNCTIONS...............
142
Checking
the
memory capacity..
.................................................... 142
Using the
user dictionary
............................................................... 143
Storing data in the user dictionary
............................................ 144
Recalling data in the user dictionary..
....................................... 145
Editing the items
in the user dictionary..
................................... 147
Deleting the items from the user dictionary..
............................. 148
Setting the miscellaneous “DATE FORMAT” and
“CALENDAR FORMAT” functions
................................................. 149
Setting
“DATE FORMAT”
......................................................... 149
Setting “CALENDAR FORMAT”
...............................................
151
USING THE OTHER FUNCTIONS
..................................
153
Using the clip function..
.................................................................. 153
Temporarily storing displayed data..
......................................... 153
Temporarily storing data during editing..
................................... 154
Recalling data you have temporarily stored..
............................ 155
Using the time stamp function..
...................................................... 155
7

PERIPHERAL DEVICES
.................................................
157
Installing the various
IC
cards..
......................................................
158
Printing out information stored in the Organizer with the
CE-50P
Printer
............................................................................... 159
Printing out the telephone directory listings
.............................. 160
Printing out items from the schedule agendas
.......................... 161
Printing out the memos..
........................................................... 162
Printing out calendar items, anniversaries, and items
from
the
user dictionary
............................................................ 163
Data communications between two Organizers
............................. 164
Transferring data from Organizer to Organizer..
....................... 165
Verifying data
............................................................................ 168
Receiving data
.......................................................................... 169
Recording information on
cassette tapes.......................................
172
Saving data from the Organizer on a tape
................................ 173
Verifying that the data has been saved properly on the tape
....
175
Loading data from the tape back into the Organizer..
............... 177
PC LINK transfer
............................................................................ 180
APPENDICES
.........................................
.
........................
183
Caring for your Organizer
.............................................................. 183
When trouble
occurs ......................................................................
184
Troubleshooting
.............................................................................
185
Replacing the batteries
.................................................................. 186
Precautions when replacing the batteries
................................. 186
Operating batteries
................................................................... 187
Memory backup battery
............................................................ 189
Specifications..
............................................................................... 191
LIST OF WORLD CITIES
..... . . .......... . . ......... . . .....‘............
194
a

Be sure to perform the following procedures before using the Organizer for
the first time :
1. Remove the insulation band.
The insulation band was inserted in the
battery compartment before shipment
to prevent battery discharge. It must be
removed before use. Pull it out as
shown in the illustration.
Note:
When you remove the insulation band,
write down the date on the label of the
memory backup battery (refer to page
189.)
2. RESET operation
To reset the internal clock and data,
press the RESET switch on the back of
the Organizer using the tip of a
ball-point pen, as shown in the
illustration.
3. Press the RESET switch again.
The Organizer is reset and the monthly calendar is displayed.
New York then appears as the standard city for HOME time. The time
and date are reset to 12:00 midnight, January 1, 1989.
9

Before use
Inputting and recalling data
In this manual, notations such as
(1
andare instructions to
0
@?l
press those keys.
Also, illustrations such as:
describe what will be displayed after pressing the keys the
manual tells you to press.
1. Inputting data using the MEMO mode
For example, input “NEW YORK”.
1.
Select the MEMO mode.
The memo display appears and data
CAPS
can now be entered.
E
2. Enter “NEW YORK” using the alphabet keys and space key.
NEW
[I
YORK
Note: If you mistakenly enter the
wrong letters, press
[I
and re-enter the
entire item.
:
3. Store the data you have input.
The data you have input will now be
stored in the memory.
CAPS
IO

Before use
4. Turn the power off.
After the data has been input by pressing
[I
, the power may
be turned off.
r--cm-j
2. Recalling information stored in the MEMO mode
1. Turn the power on.
I
The MEMO mode will be selected.
2. Recall the stored data.
El
Now “NEW YORK” is recalled.
The above is a brief, general example. For more detail, see the
section relating to the relevant function.
11

Command centre
The top two rows of keys are the Command Centre. Just press the key
that’s labelled with the function you need. There are seven functions built
in:
1. Calendar: monthly, weekly, and daily versions
2. Schedule: appointments and deadlines
3. Telephone: names, telephone numbers, addresses
4. Memo: open memory, can calculate memo data
5. Calculator: features paperless printer with What If
6. World Time: date and time for over 200 cities
7. Home Time: date and time in your home city
You can store information in the SCHEDULE, TEL, and MEMO modes.
You can retrieve information from the CALENDAR (showing items from
Schedule), SCHEDULE, TEL, and MEMO modes. And you may update
anytime. The Card key gives you different software, depending on which
IC card you use (IC cards are optional).
Moving around the Organizer’s display screen is quick and easy.
m
and
L2_1
show you new displays.
a,
I,,
m,
and
m
move you around on
the current display.
The Organizer is packed with other valuable features. An alarm enclosed
within the Organizer beeps to alert you to upcoming appointments or for
any other reason you choose, and can display a message. The Secret
function protects personal information. The choice of two character sizes
allows you to emphasize some entries at the expense of others. And of
course, the Organizer may be connected to other devices, like printers,
cassette recorders, and computers.
12

Chick guide
Setting the date and local time (HOME
time)
If you set the standard clock to your local time, you can look up the current
date and time whenever you wish. In addition, it keeps track of the monthly
calendar and the weekly and daily schedules, and keeps track of the time.
Setting the standard city
For example, set “NEW YORK” to be the standard city and December 12,
1988,1:30PM
to be the HOME time:
1.
Recall the standard clock setting display.
Set the standard city and HOME
!
TIME/DATE
cAps
time.
l(;IT’-f
t
Note: First set the standard city and then set the HOME time.
Otherwise, if you set the HOME time first, it will be based on the
city previously set.
2. Select “2 CITY”.
2
Now, the standard city selection display appears.
13

Quick guide
The countries in which the cities are located are arranged in alphabetical
order. If you press
(UI
, for example, the cities in countries beginning
with the letter “U” (U.S.A., etc.) will be displayed. Each time you press
m,
the next three cities will appear on the display. Each time
m
is
pressed, the previous three cities appear on the display. If the keys are
pressed continuously, the city list will change continuously in forward or
reverse order.
3. Recall the display containing “NEW YORK”.
upJ...lq
2
2 is the number that appears next
to New York.
After “NEW YORK” is selected the previous display reappears.
l When and where daylight saving time applies, press
I-1
121
to put
“0”
before the names of cities.“;<:“appears before
the time of summer time or daylight saving time (DST). If you press
these keys a second time,
“0”
disappears.
Setting your local time as HOME time for the built-in clock
1.
Enter “1 TIME/DATE”.
After the previously set HOME time appears on the display, the new
HOME time can be input.
14

Quick guide
2. Set the new HOME time.
0130
IPM)*
l In this example, the HOME time is
set at 1:30 PM.
l If “24” is displayed on the left side, press 1121)24
1
to display
“12” (i.e., to operate using the 1%hour clocksystem) before you input
the new HOME time.
3. Enter the date.
!XJ
12121988
Move the cursor “m” and input the
date.
4. Store the entry.
After the new HOME time is set, the previous display reappears.
l Whenever you would like to check the current date and local time,
press
PE].
l
To reset the HOME time for another city, repeat the above procedure.
l To learn the current time in other cities, press
-1
[I.
Then select a city and press
[WoRLDI
to display the
current time in that city.
15

Quick guide
Schedule function
The schedule function allows you to input and recall items on your schedule
agenda. A schedule alarm can also be set to remind you of the arrival (or
imminent arrival) of appointments.
Schedules are also accessible from the CALENDAR mode.
For example, to input “January 20, 1989
-
10:OOAM
to
2:OOPM
-
ABC
PROJECT MEETING”:
1. Select the SCHEDULE mode.
1SCHEDULE
]
The date and HOME time will appear.
2. input the date.
-1
01201989
1SCHEDULE
]
Input the date in accordance with the display prompt. The month and
day each require 2 digits. When these consist of only one digit, input
“0”
before the digit.
3. Input the agenda items.
101212[PMj
ABC
m
PROJECTM
MEETING
pN7m-j
CAPS
r
Input the start and finish times.
16

Quick guide
l When “CAPS” appears on the display, capital letters are input, and
when not, small letters are input. Pressing
-1
alternates
between capital and small letters.
lTo enter the date, either press
m
and input the date directly
or press
L1]
or
m
until the desired date appears on the display.
When these keys are pressed continuously, the date will change
continuously, forward and reverse.
Once the items are in the schedule agenda, they are displayed along with
the date.
l If you add another agenda item to a day on which previous items
have been input, the Organizer sorts the items into their order of
occurrence.
l To edit an agenda, press
[m
IEDIT]
so that the cursor
flashes, then move the cursor over the letter(s) by pressing
I)I,
m,
Fj,
or
m
and correct them.
l To delete an entry, display the entry and press
-1.
The
delete prompt appears. Press
r].
(To retain the data, press
I.1
Calendar function
The Organizer features a built-in calendar for the years 1901 to 2099. On
the monthly calendar display, look for dates with
‘I.
”
to the right. These
are dates on which you have items scheduled. To input or edit schedule
items, switch back to the SCHEDULE mode.
1. Select the CALENDAR mode.
1CALENDAR
]
The monthly calendar display appears.
17

Quick auide
Move the cursor by pressing
m,
m,
@,
or
m
and select a date.
Pressing
m
or
m
changes one month at a time. If you hold the key
down, the calendar scrolls forwards or backwards.
2. Pressing 1CALENDAR 1a second time displays the weekly schedule.
1CALENDAR 1
l Pressing
m
displays the weekly schedule for the previous week.
Pressing
a
displays the coming week’s schedule.
lPressing
(ror
m
moves the cursor to another day of the week.
3. Pressing
[
CALENDAR
J
a third time displays the daily schedule.
1CALENDAR 1
The Organizer displays the agenda for the day which was flashing
on the monthly calendar.
l On the daily schedule, the scheduled times are displayed
graphically.
l If
[
SCHEDULE 1is pressed from the CALENDAR mode, the
scheduled items for the day which was flashing will be displayed.
18

Quick guide
If you press
-1
1CALENDAR
I,
the current date (according
to the built-in clock) will be displayed.
When items are scheduled in the morning,
”
n
”
appears at that day’s
upper right on the monthly calendar, and for appointments after noon
it appears at the lower right of the date.
Telephone directory function
The telephone directory stores the names, telephone numbers, and
addresses of business clients, companies, personal friends, and so on.
The telephone listings stored in the Organizer can be looked up
1. by sequential order search, one at a time,
2. by direct search, specifying the first letter(s) of the word, or
3. by keyword search for a certain word included in the listing which you
would like to look up.
These search methods can also be used in the SCHEDULE and MEMO
modes.
Inputting telephone listings
To input the following telephone listings, for example,
“EDWARDS BOB 201-265-5600 FAX 265-l 869 President, AbC Co.”
“DAVIS MIKE 214-456-7890 Davis Assoc.”
1.
Select the TEL mode.
Cycle through the three TEL groups until the TEL1 directory is
displayed.
19

Quick guide
2. Input the telephone listing name.
EDWARDS BOB
[I
When “CAPS” appears on the display, capital letters are input, and when
not, small letters are input. Pressing
-1
alternates between
capital and small letters.
3. Input the telephone number and the fax number.
201-529-8200
a
FAX
265-
1869 -ENTER)
4. Input the address and the name of the person’s employer.
President
m
AbC
Co.
[ENTER]
The date for “EDWARDS BOB” has
been stored.
5. Input the data for “DAVIS MIKE” as above.
DAVIS MIKE
-1
214-456-7890
(-1
Davis Assoc.
1-1
20
Table of contents
Other Sharp Organizer manuals

Sharp
Sharp EL-6053 User manual

Sharp
Sharp EL-6890 Quick start guide

Sharp
Sharp YO-520 User manual

Sharp
Sharp Intellisync User manual

Sharp
Sharp OZ-5500 User manual

Sharp
Sharp ZQ-700 User manual

Sharp
Sharp EL-6710S User manual

Sharp
Sharp EL-6810 Series User manual

Sharp
Sharp EL-6850 User manual

Sharp
Sharp EL-6520 User manual