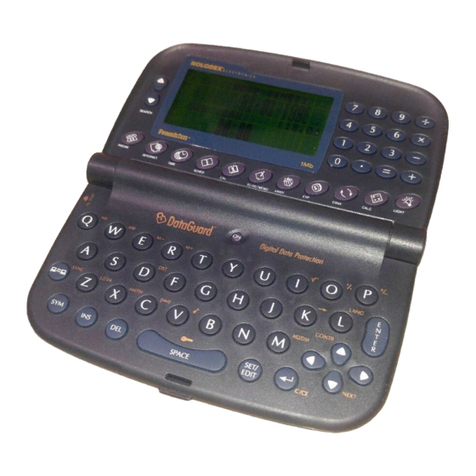
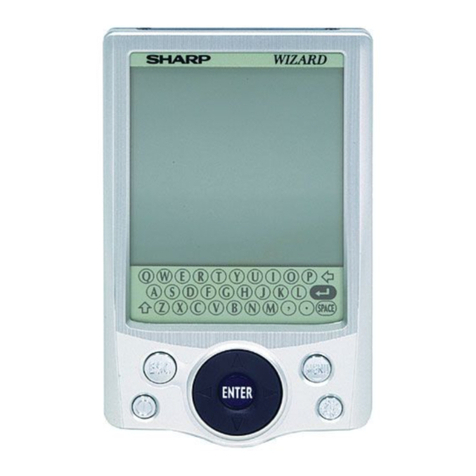
Sharp ZQ-6100M User manual

SHARP,
=
nee
Oesen
7
are

INTRODUCTION
Congratulations
on
purchasing
the
ZQ-61
0OM/ZQ-6300M
Electronic
Organizer.
On
the
facing
page
is
a
quick
index
to
the
main
functions
of
your
new
Organizer.
Please
read
this
operation
manual
thoroughly
to
familiarize
yourself
with
all
the
features
of
the
Organizer
and
to
ensure
years
of
reliable
operation.
You
may
also
find
it
useful
to
keep
this
operation
manual
on
hand
for
reference.
e
The
only
difference
between
the
ZQ-6100M
and
the
ZQ-6300M
is
memory
capacity.
e
Unless
otherwise
specified,
the
text
and
materials
in
this
manual
apply
to
both
models.
2
One
of
the
models
described
in
this
manual
may
not
be
available
in
some
countries.
e
Some
of
the
accessories
described
in
this
manual
may
not
be
available
in
some
countries.
NOTICE
e
SHARP
strongly
recommends
that
separate
permanent
written
records
be
kept
of
all
important
data.
Data
may
be
lost
or
altered
in
virtually
any
electronic
memory
product
under
certain
circumstances.
Therefore,
SHARP
assumes
no
responsibility
for
data
lost
or
otherwise
rendered
unusable
whether
as
a
result
of
improper
use,
repairs,
defects,
battery
replacement,
use
after
the
specified
battery
life
has
expired,
or
any
other
cause.
SHARP
assumes
no
responsibility,
directly
or
indirectly,
for
financial
losses
or
claims
from
third
persons
resulting
from
the
use
of
this
product
and
any
of
its
functions,
such
as
stolen
credit
card
numbers,
the
loss
of
or
alteration
of
stored
data,
etc.
¢
The
information
provided
in
this
manual
is
subject
to
change
without
notice.

Features
of
the
Organizer
Home
and
World
Clocks
—PAGE
25
The
Calendar
PAGE
35
Your
Schedule
—PAGE
41
Things
To
Do
PAGE
55
Anniversaries
and
Special
Periods
—PAGE
69
Telephone
Directory
PAGE
75
Business
Card
File
~PAGE
83
Memo
Pad
—PAGE
95
Outline
Processor
—PAGE
107
Calculator
PAGE
121
Secret
Information
—PAGE
127
Other
Functions
-PAGE
133
Peripherals
—PAGE
149
Appendix
~
PAGE
179
1

CONTENTS
BEFORE
USE
ieee
bees
kee
iebi
esis
esuesiwen
eases
7
Caring
for
Your
Organizer
...........00
eee
eee
eee
eens
7
Before
Anything
Else!
.........
0...
ccc cee
cee
ee
eee
eee
8
GETTING
STARTED
.........02
cece
cece
cence
ner
ences
11
The
Display
and
Keyboard
.............
2.
eee
eee eee
eee
11
Display
Symbols
..
22.0...
6...
eee
ee
ee
eee
erences
12
Key
Notation
Conventions
............
00
eee
ee
eee
eee
13
Power
On
and
Off
2.
ssc.
ce
cece
cs
egse
se
iieawedeweanet
14
Contrast
Adjustment
..........
00.
c
cece
eee
eee
eee
14
Keyboard
Beep...
22.
ccc
c
cece
cece
eee
ecenenes
15
HOD
gece
rec
ceee
shy
ne
weed
Hhor
eee
ee
eee
es
15
BASIC
ENTRY
PROCEDURES
................--20-20-s
17
Making
Entries
3.
i2c6ss0ni
wes
bes
ign
ec
eran
aa
eas
17
Making
Corrections
............
02.
cece
ccc
ence
entees
20
8-Line
and
4-Line
Displays
........--.-+.2--02eee
eens
22
HOME
AND
WORLD
CLOCKS
............220eeeceeeeee
25
HOME
CloGk
ociauc
cea
tte
roaeaity
eer
Seon
ewes
bee
25
WORLD
Glock”
£:.5-cieusntassed
macabre
dua
beens
32
Enabling
and
Disabling
DST
........----.
eee
eee
eee
ee
34
THE.CALENDAR
......nc
ccc
cess
cn nc
ccnrarcceenserees
35
Selecting
the
Monthly
Calendar
...........-..-+--22eee
36
YOUR
SCHEDULE
2...
2c
ccc
ccc
ccc
en
cccccncceeveuns
41
Making
a
New
Schedule
Entry
..........
2...
ee
sees
ees
42
Retrieving
Schedule
Entries
..............
0...
ee
eee
eee
44
Viewing
Your
Schedule
..........-..
00
eee
e
renee
eens
46
BOWING
25.0562
icas
tek
ewes
Veda
ia
wees
49
Deleting
23.405
desk
Stas
dete
nda
eee
ee
ANE
ee
ne
ees
49
Schedule
Alarms
s.cc24
2624
bee
ee
eek
eG
ene
eee
as
50
THINGS
TO
DO
c.hoiaihes
ic
txria
he
teewacaweeesetaees
55
2

Making
an
Entry
2.22.00...
ccc
cece
cece
ecu
a
eee
55
Retrieving
a
TO
DO
Entry
...........
0.
cece
eee
cece
59
Checking
Off
Completed
Items
.............0.ceceeece
62
Eng
Enties:2)s.2.3
5%
leacaG.ov
cece
ene
Ch
Sane
Saude
63
Editing
the
Category
Menu
................ccccceeeee
65
Deleting
Entries
................
Dieu
ee
aoe
seaes
67
ANNIVERSARIES
AND
PERIODS
...................00-
69
Making
an
Anniversary
Entry
.....2...
0.0...
cc
eu
eeee
69
Making
a
Period
Entry
.........0..
0...
ccc
cece
cee
eeee
71
Retrieving
Anniversary
and
Period
Entries
........0.....
72
Editing
Anniversary
and
Period
Entries
.................
72
Deleting
Anniversary
and
Period
Entries
................
73
THE
TELEPHONE
DIRECTORY
..............-0..cc00ee
75
Designating
the
Directory
Names
..................00.
75
Using
the
Free
Fields
.........0.00
00.
c
cece
ec
caceuccee
76
Making
Telephone
Listings
................ccceceeecee
77
Retrieving
a
Listing.........
0.00.
c
cece
ccc
c
eee
ce
cece
79
Editing
UIStiNGS:
.<:ciies
dads
sib.
Ges
ben
eadad
cc
oa
weuultes
81
Deleting
Listings
........
0...
0.
cece
cece
enc
cuceueece
81
BUSINESS
CARD
.............2ccccceescceccccecucee
83
Using
the
Free
Fields
............
0
ccc
cc
eecceeeceees
83
Making
Business
Card
Entries
................000
cece
84
Retrieving
Business
Card
Entries
.................00..
88
Editing
EMbi@S
vo
coc
505
Gv
Savas
ead
olvald
oe
ba
sea
das
90
DeletNG
ENUISS
2c.
x
siscacaswcr
Beka
gerele
whee
Dad
oh
aieSe
ice
93
KEEPING
MEMOS
..............
0c
cece
ceeccccceceuace
95
Making
M@mMmos
5.6
0.<202e
day
edna
nek
ee
deededaucs
95
Retrieving
Memos
...........
0...
c
cece
ee
eccecceuceee
96
Editing
Memos
..............
00.
c
cece
eee
c
eee
u
ees
98
Deleting
Memos
............
00.
c
cece
cece cece
aeeee
98
Rearranging
Memos
...........0...ccceceecceceecuce
98
Memo
Calculations
............
00.
cece
cece
cc
ceeaee
100
THE
OUTLINE
FUNCTION
..........
2.2.
cee
e
eee
eee
107
Structure
of
an
Outline
..............
0.0.
cee
eee
eee
107
Entering
an
Outline
.
2.2...
cence
cece
scence
eeasenaner
108
Retrieving
Outlines
.............-2-2
eee
e
eee
eee
110
Viewing
an
OUUine:
..siacc
yar
sed
cate
daca
baleen
bes
113
Restructuring
...........
2.
cece
wee
eee
ee
eee
eens
115
Editing
TOPICS:
{v)s44
ces
eetewenss
tae
eee
utah
119
Deleting
Outlines
............
0c.
c
cece
cece
cece
ees
120
CALCULATOR
ccc
cobb
canteiee
wee
cecil
denwesdeuses
121
Calculator
s.r
nee
hs
Ga
eea
ee
We
ra
en
ea
121
Paperless
Printet
«<<.
accbkned
poids
siete
dns
eee dae
123
When
the
Error
Indicator
Appears
..............-2-05-
126
THE
SECRET
FUNCTION
............
ces
e
nce
ee
enee
127
Setting
a
Password
..........
cece
cece
ence
eens
127
Marking
an
Entry
as
Confidential
...................65
128
Turning
the
Secret
Function
Off
and
On
...............
129
Retrieving
Secret
MARK*ED
Entries
...............-.-
130
Declassifying
Secret
Data
............
0...
e
eee eee
eee
130
Removing
the
Password
..............
2.
cee
e
eens
130
Changing
the
Password
............
22:
ccc
cece
eee eee
130
Forgotten
Passwords
.............
cc
ccc
ccc
cnerececs
131
OTHER
FUNCTIONS.
aio
jes
sees
cee
e
es
be
tiemedseenene
133
Clip
S
Paste:
oe
pic
g
se
ced
tekeriis
wae
th
ote
texs
ae
133
Time/Date
SIAMD
2.66255
feces
Se
bees
weteee
eee
as
137
Global
Seek
Search
...........
2...
c
cece
eee
eee
eens
138
The
Function
Menu...
6.6...
eee
ce
eee
ees
139
PERIPHERALS
......
ce
scnccn
enn
encnnsenncnescunenne
149
PHANG
OU
ic
viec
ch
Gib
t
eer
he
ae
oe
ete
eeas
eases
149
Transferring
Data
2...
0...
cece
eee eee
eee
eee
152
Terminal:
PUAGCHON
£6
s.0
jee
Ss
0
See
Cie
e
de
da
wee
ele
ede
159
External
Power
Supply
......-.-.--....0.
eee
eee
reese
177

Data
Transfer
Restrictions
.............000ccceeceeee
179
MOSEL
cttw
tance
gee
thes
Ok
fh
oetae
Mi
On
ety
181
Troubleshooting
..........
0.
cc
cece
ccc
ccecccceeceee
182
Battery
Replacement
...............ccc
cece
eeeee
..
183
Specifications
2.2.20...
ccc
cece
cece
ecceee
187

BEFORE
USE
Caring
for
Your
Organizer
Do
not
carry
the
Organizer
around
in
your
back
pocket,
as
it
may
break
when
you
sit
down.
The
.
display
is
made
of
glass
and
is
particularly
vulnerable.
Keep
the
Organizer
away
from
extreme
heat
such
as
on
a
car
dashboard
or
near
a
heater,
and
avoid
exposing
it
to
excessively
humid
or
dusty
environments.
Avoid
subjecting
the
Organizer
to
severe
impacts.
Clean
with
a
soft,
dry
cloth
using
no
solvents.
Do
not
use
a
sharp
pointed
object
or
exert
too
much
force
when
pressing
the
keys.
Avoid
excessive
physical
stress.
Carrying
the
Organizer
in
a
bag
together
with
sharp
or
hard
objects
can
scratch
it.

Before
Anything
Else!
Before
you
can
use
the
Organizer,
it
must
be
initialized.
1.
Initializing
the
Organizer
1.
Hold
the
key
to
the
right
of
the
display,
and
press
and
release
the
BLL
DATA
RESET
switch
on
the
back
j
with
a
ball-point
pen.
Keep
CLEAR
down
until
the
ne
CYAN
display
on
the
right
appears.
2.
Press
the
key
on
the
keyboard.
week
JAN
199
See
;
a
41S
1G
1
21
82
29 74
|
#6
€3
30
31
[|
v364]
B
The
Organizer
is
now
initialized
and
the
monthly
calendar
displayed.
Notes:
e
Press
the
RESET
switch
with
the
tip
of
a
ball-point
pen
or
similar
object,
not
anything
breakable
like
a
pencil
point
or
needle.
e
When
the
power
is
turned
on
for
the
first
time,
and
in
some
other
cases,
the
message
‘The
Organizer
is
not
initialized...
CLEAR
ALL
memory
contents.”
may
appear.
If
this
occurs,
press
to
initialize
the
Organizer
to
proceed.
2.
Selecting
the
guidance
language
The
Organizer
can
give
you
guidance
in
German,
English,
Spanish,
French,
Italian,
Finnish
or
Swedish.
(For
further
details,
refer
to
“Guidance
language,”
page
145.)
The
default
guidance
language
is
English.
Skip
this
section
if
you
wish
to
use
your
Organizer
in
English
mode.
8

For
example,
select
German
as
the
guidance
language.
1.
Display
the
Function
menu.
FUNCTION
¢
FUNCTION
>
A
NEMORY
CHECK
USERS
DIC
ST
@
TEL
FILE
RANE
g
FREE
FIELI
WE
f
wait
La
START-UP
DISPLAY
2.
Display
the
second
page
of
the
Function
menu.
__&
FUNCTION
>
LANGUAGE
3.
Select
LANGUAGE.
8
DEUTSCH
"as
StiOMT
aPENGLISH
g
SVENSKA
B
ESPAADL
D
FRAWGATS
8
ITALIANO
The
»
mark
indicates
ENGLISH
is
selected
as
the
guidance
language.
4.
Select
DEUTSCH.

Select
the
MEMO
mode
and
check
to
see
that
the
display
is
in
German.
fee
NOTTZEN
ik
TITEL
?
*
HILFE
AUFRUFEMS!
2nd
Js
DANN
[HELP]
4
3.
Setting
the
time
and
date
To
set
the
time
and
date
for
the
HOME
clock,
refer
to
“Setting
the
HOME
clock”
on
page
26.
10

GETTING
STARTED
The
Display
and
Keyboard
Display
Power
ON/OFF
keys
Cursor
keys
MENU
EXP/COL
coca
eafea}
cafes
este)
anva4x3
eee
:
Ce
ral
ce)
ca)
ey
ct
C7
Ce
C2)
3)
@
Gs)
port
AaWMeaOwonoe
WONOOOWOWOE
4-pin
option
p2BooOosg
wag
0ow
port
>
6
GS
be)
(Se
fe)
Ge
Care]
|
supply
port
Command
center
Search
keys
CAUTION:
¢
Do
not
connect
the
15-pin
computer
link
port
and
the
4-pin
option
port
simultaneously,
as
this
may
result
in
damage.
11

Display
Symbols
The
following
symbols
displayed
at
the
bottom
of
the
display
indicate
various
operating
parameters
and
conditions.
EDIT
2nd
CAPS
*
[s]
)
4
th<«->
Operating
battery
level
is
low
and
the
batteries
require
replacement.
(See
page
184.)
The
entry
on
the
display
may
be
edited.
has
been
pressed.
Uppercase
letters
can
be
typed
in
directly
without
C#
|.
(To
type
in
lowercase
letters,
press
[CAPS]
to
cancel
this
symbol.)
The
data
appearing
on
the
display
is
secret
data
accessible
only
when
the
Secret
function
is
off.
The
Secret
function
is
in
effect.
(Secret
data
cannot
be
recalled
without
the
password.)
A
beep
will
sound
when
a
key
is
pressed.
(To
disable
this
function,
press
.)
Any
alarms
stored
will
sound
at
the
set
time.
There
is
more
data
which
is
not
on
the
display.
The
data
can
be
displayed
by
pressing
La],
Lv],
[<1],
or
e
inthis
manual,
these
symbols
will
be
indicated
only
when
necessary
for
illustration
purposes.
12

Key
Notation
Conventions
In
this
manual,
the
following
notations
are
used
for
key
operations
and
functions.
Convention
Keys
with
only
one
function
always
appear
with
the
function
enclosed
in
a
box.
Keys
with
multiple
functions
appear
with
only
the
contextually
appro-
priate
function
boxed.
For
example,
will
sometimes
appear
as
MARK#]
and
sometimes
as
[a].
Alphabetic
keys
with
multiple
functions
appear
sometimes
as
unboxed
letters
and
sometimes
as
the
boxed
function
name,
as
per
context.
Alphabetic
and
numeric
keys
are
notated
only
with
unboxed
letters
or
numbers.
The
key
This
key
is
used
to
activate
any
of
the
specific
functions
indicated
in
blue
on
the
keyboard.
Press
and
then
the
function
key
(for
example,
to
set
the
alarm
function).
You
do
not
need
to
hold
this
key
down.
Example:
CH)
key
To
type
in
letter
“H”
:
H
To
use
the
HELP
function:
HELP
The
[2]
key
The
Organizer
has
two
[|
keys.
These
keys
are
used
to
select
uppercase
or
lowercase
letters
or
to
access
the
symbols
above
keys
marked
in
white,
and
in
combination
with
the
cursor
keys
when
making
or
editing
an
entry.
This
key
must
be
held
down
while
you
press
the
desired
key.
13

Power
On
and
Off
Pressing
turns
the
power
on.
Pressing
turns
the
power
off.
CR
(Fm
PAR
781
FEN
Power
On
Power
Off
rT
Auto
power
off
When
no
key
has
been
pressed
for
approximately
6
minutes,
the
Organizer
automatically
turns
off
to
save
the
batteries.
Press
to
turn
the
power
on
again.
e
If
the
Organizer
turns
off
during
entry
input,
the
entry
will
be
lost.
Contrast
Adjustment
Depending
on
viewing
conditions
you
may
wish
to
adjust
the
display
contrast.
1.
Press
FUNCTION]
to
display
the
Function
menu.
[2nd]
[FUNCTION]
«
FUNCTION
>
MEMORY
CHECK
B
USER'S
BIC
B
LCD
CONTRAST
TEL
FILE
NAME
LETION
@
FREE
FIELD
NAME
SCHEDULE
ALARM
F
B
DAILY
ALARM
M
START-UP
DISPLAY
14

2.
Select
LCD
CONTRAST.
2
¢
LCD
CONTRAST
>
a
~
[ARK
~
LIGHT
3.
Use
[4]
and
[¥]
to
adjust
the
contrast.
4.
Press
to
exit.
Keyboard
Beep
While
the
symbol
.)is
lit,
a
beep
will
sound
when
a
key
is
pressed.
To
turn
the
beep
on
and
off,
press
[2nd]
[}].
Help
While
using
any
of
the
major
functions,
you
can
call
up
step-by-step
instructions
on
the
display
by
pressing
HELP]
.
Display
the
help
screen
for
the
TEL
mode.
1.
Press
to
select
the
TEL
mode.
2.
Press
and
the
TEL
mode
help
screen
menu
will
be
displayed.
‘:
TT
wad
te
LIKE
HELP
HELP
iH
?
e
Adifferent
help
screen
menu
will
appear
depending
upon
which
mode
you
are
in.
15

3.
Enter
the
number
corresponding
to
the
topic
on
which
you
need
help
(for
example,
5
in
this
case)
and
the
help
screen
for
that
topic
will
be
displayed.
e
If
you
want
to
display
a
help
screen
for
another
topic,
press
to
view
the
next
help
screen
or
to
view
the
previous
one.
SOME
EDITING
TIPS:
;
#
Use
[INS]
to
suitch
between
insertina
text
and
averuriting
tert
;
#
The
"4"
suibols
serarate
the
fields
*
To
make
a
copy
of
an
entry
during
ENIT
modes
press
[
2nd
Js
then
[ENTER]:
to
store
it
as
0
new
entry
t
4
e
Press
to
return
to
the
help
screen
menu
and
select
another
topic.
4.
To
return
to
the
TEL
mode
entry
screen,
press
twice.
e
Help
can
be
displayed
when
*PRESS
[2nd]
THEN
[HELP]
FOR
GUIDANCE
appears
on
the
screen
or
while
data
is
being
input,
retrieved,
or
edited.

BASIC
ENTRY
PROCEDURES
You
can
type
in
and
correct
information
in
7
modes:
SCHEDULE,
TEL,
MEMO,
BUSINESS
CARD,
OUTLINE,
ANN/PERIOD,
and
TO
DO.
Making
Entries
To
practice
typing
in
characters,
select
the
MEMO
mode,
and
experiment
as
follows.
TITLE
HK
aie
‘ack
TITLE
?
#PRESS
[
2nd
]
THEN
[HELP]
FOR
GULDANCES:
Ordinary
alphabetic
entries
1.
With
the
symbol
CAPS
displayed
(uppercase
mode),
type
in
uppercase
letters,
for
example,
“ABCDE”.
ABCDE
ARIE
e
Enter
lowercase
by
holding
down
(_#
|.

2.
To
type
in
lowercase
letters,
press
|CAPS|
to
cancel
CAPS
on
the
screen.
ABCDE
OpehEabede
_
e
Enter
uppercase
by
holding
down
;
Accented
characters
Accented
characters
not
in
the
ordinary
English
alphabet
(as
in
French,
German,
and
Spanish)
can
be
typed
in.
Characters
with
any
of
the
accent
marks
~
“
~ °
~
andthe
characters
A,
8,
and
¢
may
be
entered
by
using
[2nd]
.
1.
Type
in
“A”
and
“ii”.
a
Ai
[o]
A
Eas
2.
Type
in
“é”,
“6”,
and
“8”
(Beta).
CI.
[2nd]
[*]
©
[2nd]
[8
J
The
above
accented
characters
and
other
characters,
including
Greek,
may
also
be
entered
as
symbols.
See
“Special
symbols”
below.
AisSB_

Numeric
entries
Type
in
“12345”.
12845
|
(aS
|
Special
symbols
Press
to
call
up
the
Special
symbol
menu.
There
are
a
total
of
17
symbol
display
screens
with
10
symbols
per
screen.
Press
and
to
step
through
the
screens
and
the
number
key
corresponding
to
the
symbol
you
want.
Type
in
“\”
(backslash).
1.
Activate
the
Special
symbol
menu.
SMBL
¢
The
first
screen
always
shows
the
10
most
recently
used
symbols.
2.
Step
through
the
screens
of
symbois
until
“\"
appears.
3.
Press
corresponding
to
“\"
on
the
list.
e
To
exit
the
Special
symbol
menu
without
selecting
a
symbol,
press
e
All
the
symbols
marked
on
the
keyboard
in
white
are
available
either
directly
or
while
holding
down
:
e
The
minus
key
doubles
as
a
hyphen,
and
moves
the
cursor
to
the
next
line.
19
This manual suits for next models
1
Table of contents
Other Sharp Organizer manuals

Sharp
Sharp EL-6920 User manual

Sharp
Sharp ZQ-290 User manual

Sharp
Sharp ZQ-290HS User manual

Sharp
Sharp EL-6053 User manual

Sharp
Sharp Wizard OZ-590A User manual

Sharp
Sharp YO-270 User manual

Sharp
Sharp EL-6710S User manual

Sharp
Sharp ZQ-2400 User manual
Sharp
Sharp ZQ-800 User manual
Sharp
Sharp EL-6890 Quick start guide

Sharp
Sharp Wizard OZ-570 User manual

Sharp
Sharp EL-6900 User manual

Sharp
Sharp Wizard OZ-770PC User manual

Sharp
Sharp EL-6520 User manual

Sharp
Sharp EL-6490 User manual

Sharp
Sharp ZQ-700 User manual

Sharp
Sharp EL-6051 User manual

Sharp
Sharp EL-6090 User manual

Sharp
Sharp EL-6620 User manual

Sharp
Sharp EL-6985 User manual