ENGLISH
TABLEOFCONTENTS
PRECAUTIONS1
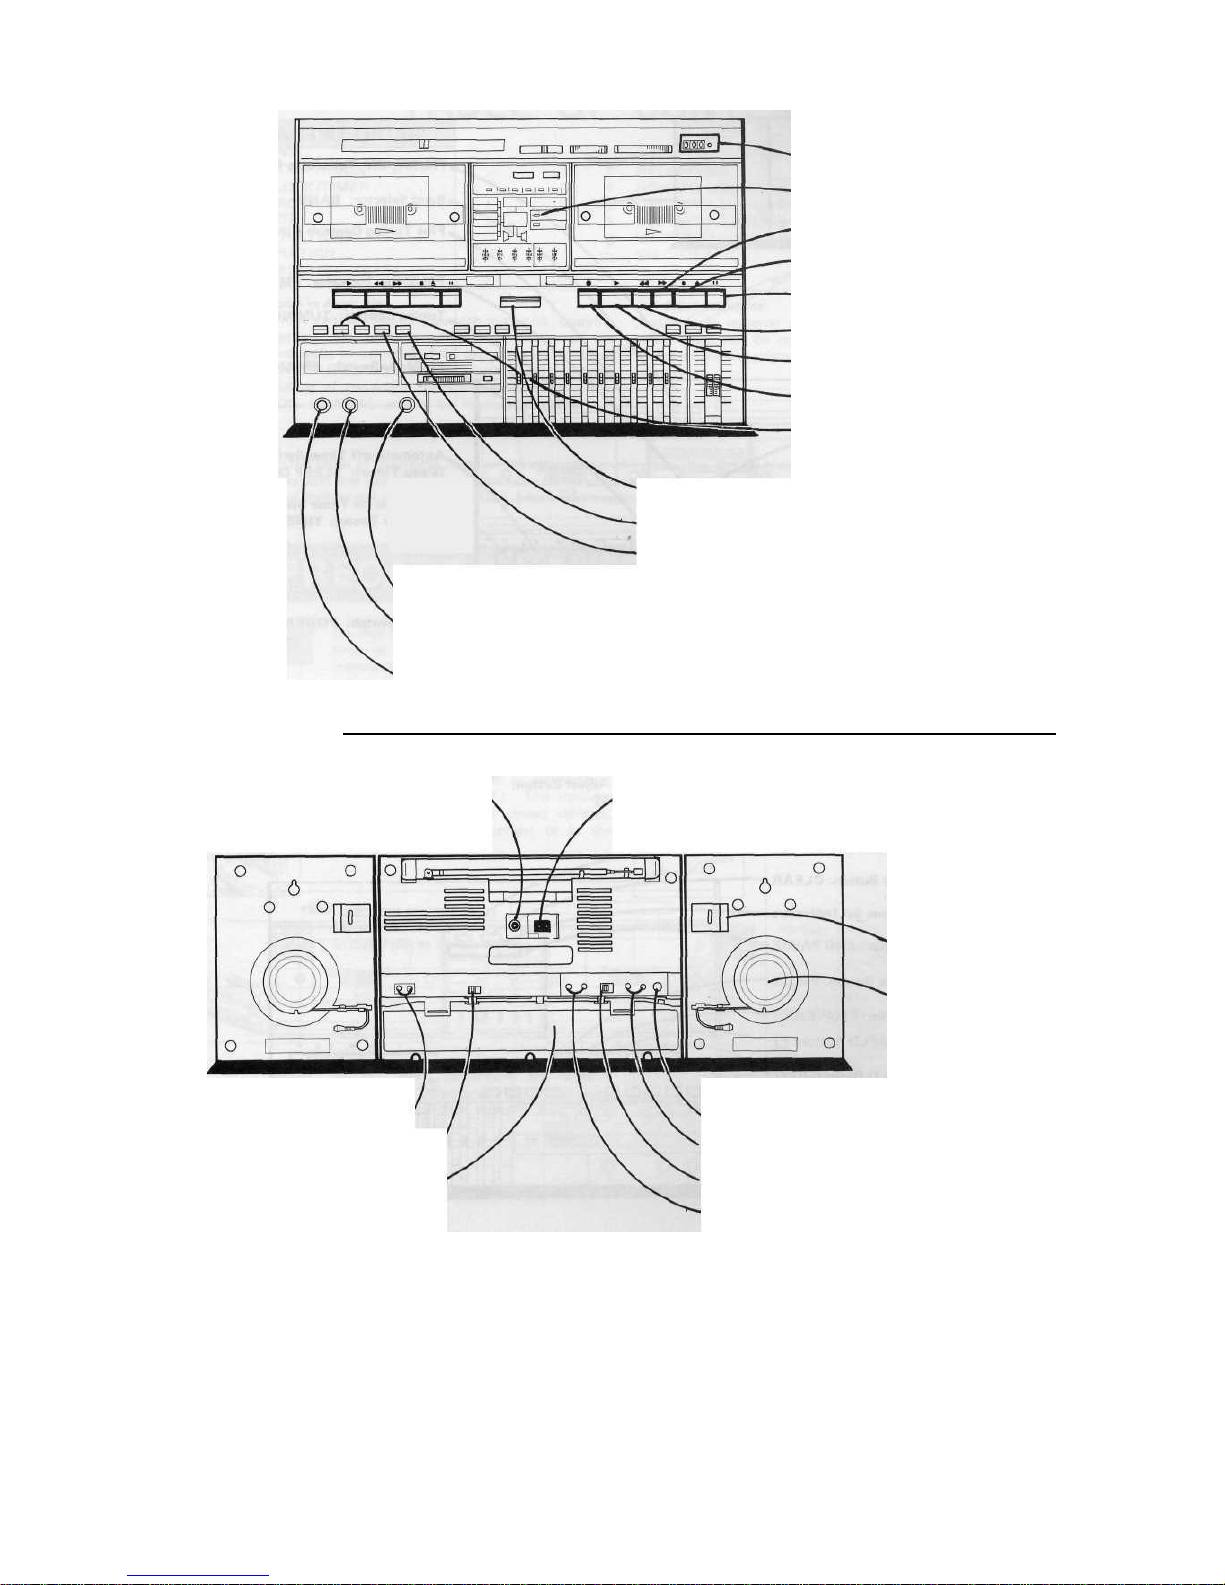
NAMESOFCONTROLS2
BUILT-INCLOCK/TIMER4
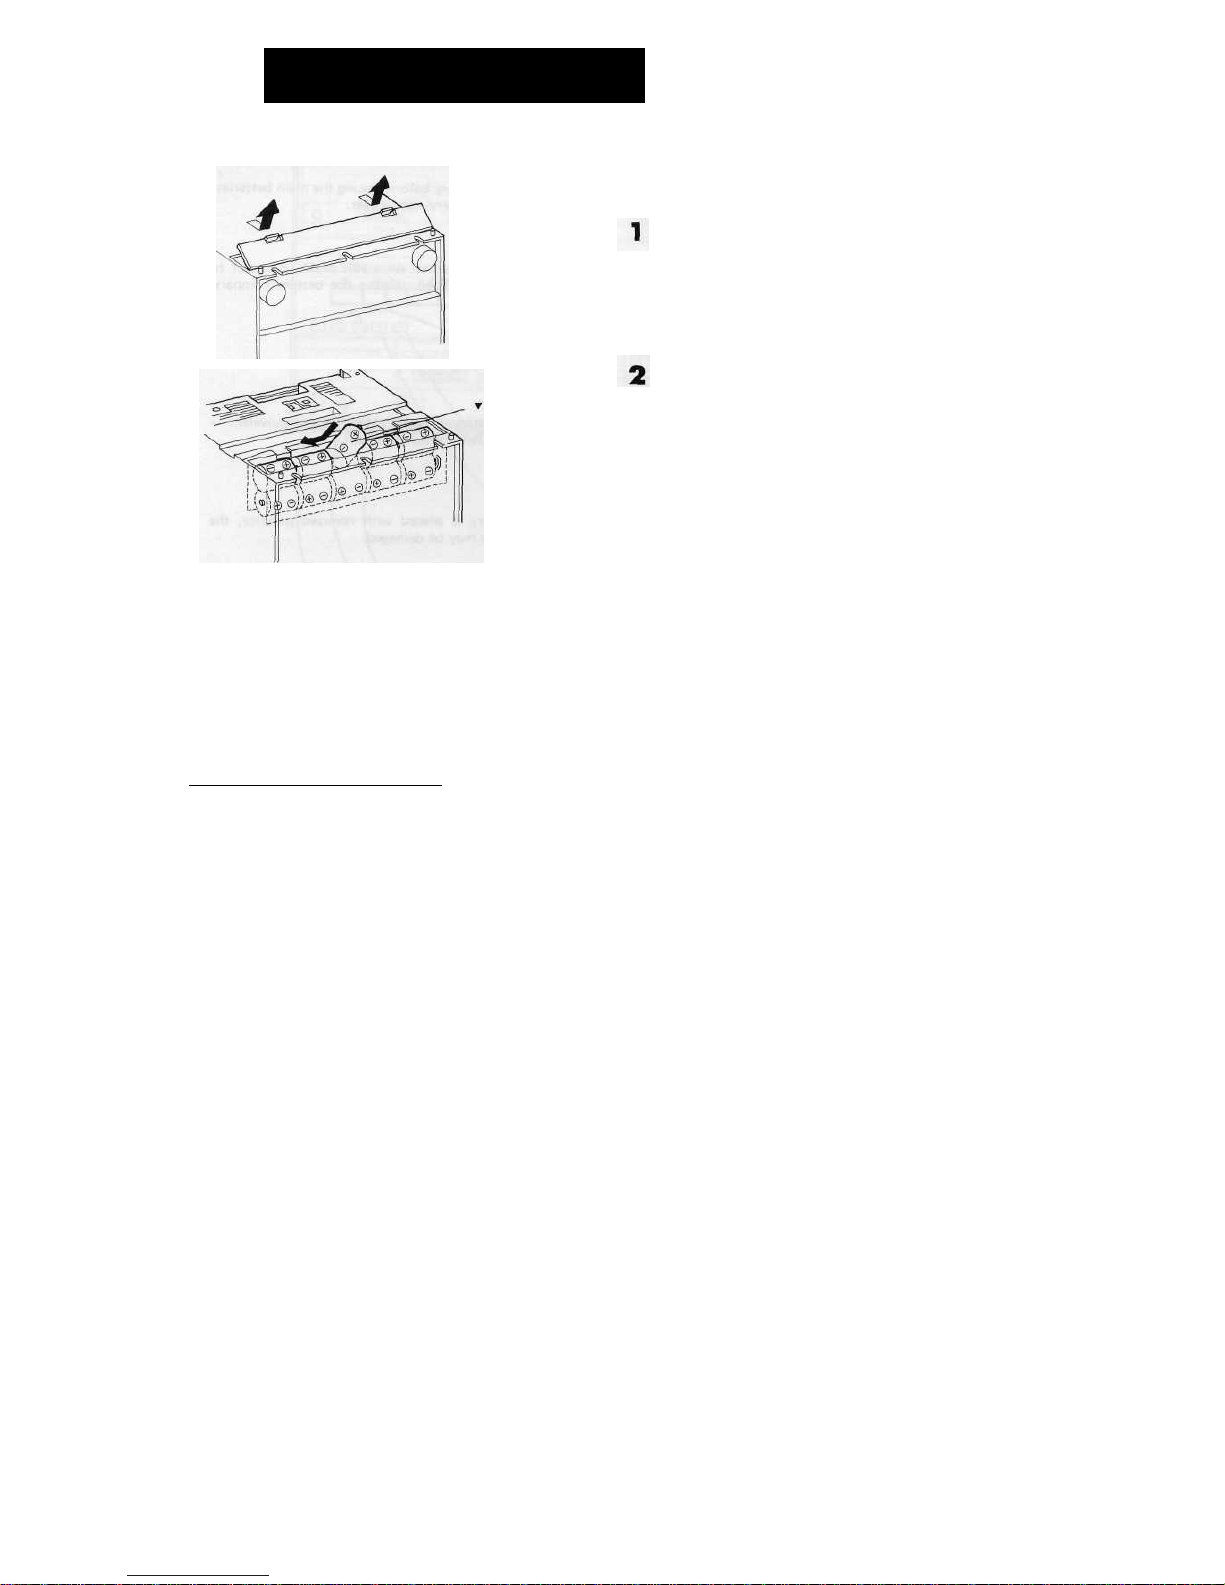
POWERSOURCE..............................................5
SPEAKERBOX7
COMMONFUNCTIONS8
RADIOOPERATION10
LOADINGCASSETTETAPES..........11
CASSETTEPLAYBACK 12
RECORDING15
HOWTOUSEBUILT-INTIMER17
USEWITHMICROPHONES(notsupplied)19
USEWITHEXTERNALUNITS20
MAINTENANCE21
SPECIFICATIONS21
NoteforusersinAustralia:For othercountries:
Copyrightmay.existinmaterialyouwishtorecord.CopyingAudio-visualmaterialmayconsistofcopyrightedworks
orbroadcastingsuchmaterialwithoutpermissionofthewhichmustnotberecordedwithouttheauthorityofthe
relevantlicensee(s)orowner(s)ofthecopyrightisprohibitedownerofthecopyright.Pleaserefertorelevantlawinyour
bylaw.SHARPisnotina positiontoauthorisethecopyingcountry.
orbroadcastingofcopyrightmaterialsandnothinginthis
OPERATIONMANUALshouldbeimpliedasgivingthat
authority.
Thelastletterofthemodelnameonthecatalogue,packingcase,etc.indicatesthecolouroftheproduct.
Operationsandspecificationsarethesameforallunitsregardlessofthecabinetcolour.
•ThephotographshowsGF-800Z(D},adarkgreymodel.
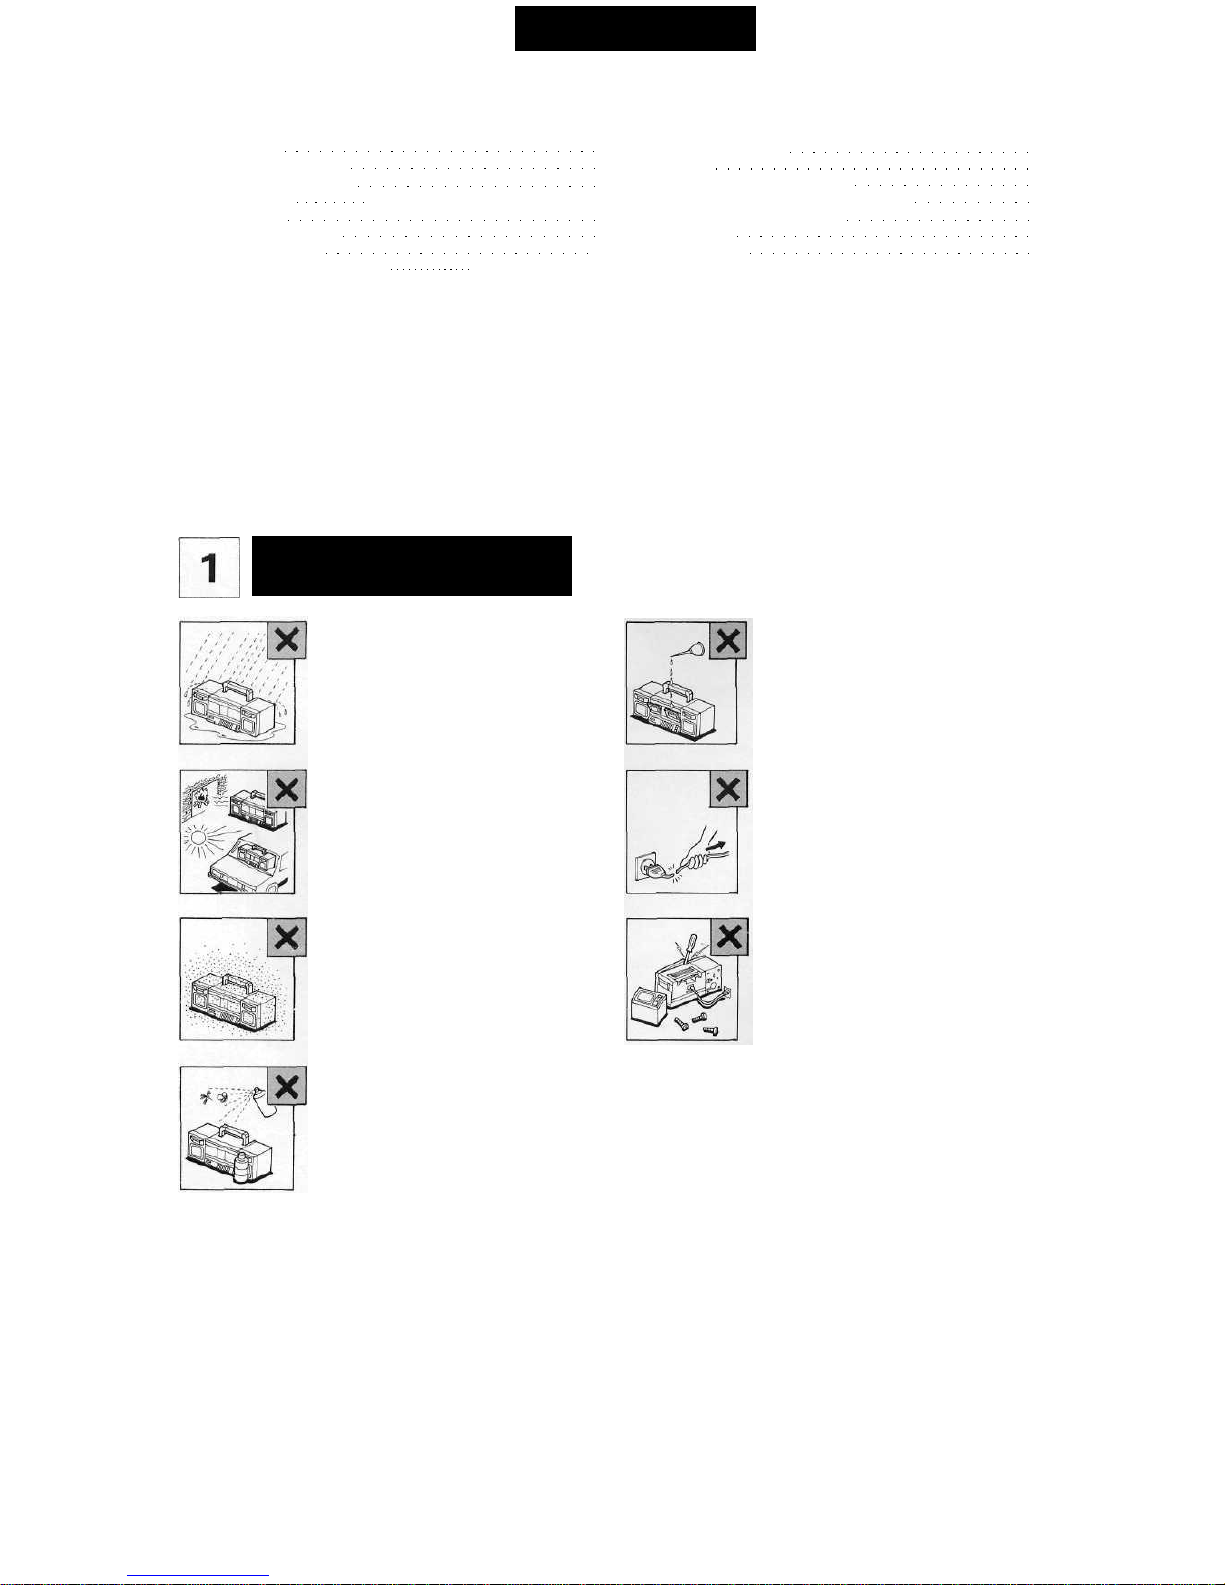
PRECAUTIONS
Donotexposetheunittorainormois-
ture,asthiswillresultindamageto
internalcircuitry.
Donotexposetheunittotemperature
higerthan60°C(140°F).Thisincludes
leavingtheunitinsideclosedvehicles,
placingitindirect sunlightorinthe
vicinityofheaters,etc.
Donotlocateorstoretheunitinhumid
ordustyplacesfora longtime.
Donotapplypetroleum,anyorganic
solvents,orinsecticidestothecabinet
surface,asthismayresultincrackingor
othersurfacedamage.
Donotapplyoiltoanypartofthe
mechanicalunit.
BesuretoholdtheACsupplyplug—
NOTTHELEAD— whenremovingthe
plugfromtheACoutlet.Removingthe
plugbypullingtheleadmayresultin
damagedorbrokenconnections.
RemovetheACsupplyleadbeforeservic-
ingorcleaningheads,pinchrollers,etc.
Donotremovetheunit'scover,asitmay
resultinelectricshockormalfunction.
Referallservicesandrepairstoyourlocal
SHARPdealers.
DonotusethisunitwithACvoltagesotherthanthose
specified,asitmayresultindamage,fire,etc.SHARPmay
NOTbeheldresponsiblefordamageresultingfromusingthe
unitwiththevoltagenotspecified.
1


 User manual")


 User manual")


 User manual")