Sharp MD-X8 User manual

OPERATION MANUAL
MODEL
MD-X8
MD/CD STEREO
MD-X8 MD/CD stereo consisting of
MD-X8 MD/CD stereo
CP-X8 2 way speaker system.
Thank you for purchasing this SHARP product.
For the best performance, read this manual carefully.
It will guide you in operating your SHARP product.
Page
BASIC INFORMATION ON MINIDISCS .......................................... 26
RECORDING ............................................................................... 27-30
EDITING ...................................................................................... 31-37
HOW TO USE THE BUILT-IN TIMER ......................................... 38-43
USING EXTERNAL UNITS ......................................................... 44-48
CHANGING THE MESSAGES DISPLAYED WHEN THE POWER
IS TURNED ON/OFF ................................................................... 49-51
WHAT IS A MINIDISC? .................................................................... 52
MINIDISC SYSTEM LIMITATIONS .................................................. 53
TROUBLESHOOTING ................................................................ 54-55
RESETING THE MICROCOMPUTER .............................................. 56
MAINTENANCE ............................................................................... 57
SPECIFICATIONS ............................................................................ 57
CALLING FOR SERVICE.................................................. Back cover
LIMITED WARRANTY....................................................... Back cover
CONTENTS Page
IMPORTANT SAFEGUARDS ............................................................ 1
SPECIAL NOTES ............................................................................ 1-2
PRECAUTIONS .................................................................................. 2
NAMES OF CONTROLS AND INDICATORS................................. 3-4
PREPARATION FOR USE .............................................................. 5-7
DISPLAY SECTION ........................................................................... 8
MULTI CONTROL BUTTON .............................................................. 9
SETTING THE CLOCK .................................................................... 10
SOUND CONTROL ..................................................................... 11-12
HOW TO ENTER CHARACTERS ............................................... 13-16
COMPACT DISC OPERATION ........................................................ 17
MINIDISC OPERATION ................................................................... 18
RADIO OPERATION ................................................................... 19-20
PROGRAMMING RADIO STATION NAMES .................................. 21
VARIOUS CD AND MD OPERATIONS ..................................... 22-25
AM loop antenna x 1
[92LL-ANT1676A]
"AA" size battery
(UM/SUM-3, R6, HP-7
or similar) x 2
[UBATU0001AWZZ]
Blank (Recordable)
miniDisc (60 minutes
recording length) x 1
[UDSKM0001AFZZ]
Speaker wire x 2
[92L291-0055]
A0006
Note:
Parts and equipment mentioned in this operation manual other than those shown on the above are not included.
FM antenna x 1
[92LF-ANT1533A] Remote control x 1
[RRMCG0101AWSA]
ACCESSORIES
VOLUME/
3DSURROUND
POWER
MD TUNER CD
REC
PROGM
REC
MODE
CLEAR
SYNCHRO
REC
P-MODE
AUTO
MARK
TIME
AUX
>
10
54321
10/09876
12
ST BAND
3
PLAY
*FRONT 98.6.23, 10:28 AM1

1
12 Outdoor Antenna Grounding - If an outside antenna is connected to
thereceiver,besuretheantenna systemisgroundedsoastoprovide
some protection against voltage surges and built-up static charges.
Article 810 of the National Electrical Code, ANSI/NFPA 70, provides
information with regard to proper grounding of the mast and support-
ing structure, grounding of the lead-in wire to an antenna discharge
unit,sizeofgroundingconductors,locationofantenna-dischargeunit,
connectiontogroundingelectrodes,andrequirementsfortheground-
ing electrode.
13 Non use Periods - The power cord of the appliance should be
unplugged from the outlet when left unused for a long period of time.
14 Object and Liquid Entry - Care should be taken so that objects do not
fall and liquids are not spilled into the enclosure through openings.
15 Damage Requiring Service - The appliance should be serviced by
qualified service personnel when:
AThe power-supply cord or the plug has been damaged; or
BObjects have fallen, or liquid has been spilled into the appliance; or
CThe appliance has been exposed to rain; or
DThe appliance does not appear to operate normally or exhibits a
marked change in performance; or
EThe appliance has been dropped, or the enclosure damaged.
16 Servicing - The user should not attempt to service the appliance
beyondthatdescribedintheoperatinginstructions.Allotherservicing
should be referred to qualified service personnel.
17 Grounding or Polarization - Precautions should be taken so that the
grounding or polarization means of an appliance is not defeated.
1 Heed Warnings - All warnings on the appliance and in the operating
instructions should be adhered to.
2 Follow Instructions - All operating and use instructions should be
followed.
3 Water and Moisture - The appliance should not be used near water -
for example, near a bathtub, washbowl, kitchen sink, laundry tub, in
a wet basement, or near a swimming pool, etc.
4 Carts and Stands - The appliance should be used only with a cart or
stand that is recommended by the manufacturer.
• Anappliance andcart combination shouldbe moved
with care.
Quick stops, excessive force, and uneven surfaces
may cause the appliance and cart combination to
overturn.
5 Wallor CeilingMounting -The applianceshouldbe mountedto awall
or ceiling only as recommended by the manufacturer.
6 Ventilation - The appliance should be situated so that its location or
positiondoesnotinterferewithitsproperventilation.Forexample,the
applianceshouldnotbesituatedonabed,sofa,rug,orsimilarsurface
that may block the ventilation openings; or, placed in a built-in
installation, such as a bookcase or cabinet that may impede the flow
of air through the ventilation openings.
7 Heat-Theapplianceshouldbesituatedawayfromheatsourcessuch
as radiators, heat registers, stoves, or other appliances (including
amplifiers) that produce heat.
8 Power Sources - The appliance should be connected to a power
supply only of the type described in the operating instructions or as
marked on the appliance.
9 Power-CordProtection-Power-supplycordsshouldberoutedsothat
theyare notlikely tobe walkedonor pinchedby itemsplaced uponor
against them, paying particular attention to cords at plugs, conven-
ience receptacles, and the point where they exit from the appliance.
10 Do not use liquid cleaners or aerosol cleaners. Use a damp cloth for
cleaning.
11 PowerLines-Anoutdoorantennashouldbelocatedawayfrompower
lines.
ELECTRIC
SERVICE
EQUIPMENT
ANTENNA LEAD IN
WIRE
GROUND
CLAMP
POWER SERVICE GROUNDING
ELECTRODE SYSTEM
(NEC ART 250, PART H)
GROUND CLAMPS
GROUNDING CONDUCTORS
(NEC SECTION 810-21)
ANTENNA DISCHARGE UNIT
(NEC SECTION 810-20)
EXAMPLE OF ANTENNA GROUNDING AS PER
NATIONAL ELECTRICAL CODE
NEC - NATIONAL ELECTRICAL CODE
S2898A
IMPORTANT SAFEGUARDS
CAUTION
All the safety and operating instructions should be read before the
appliance is operated, and should be retained for future reference.
Electrical energy can perform many useful functions. This unit has been
engineered and manufactured to assure your personal safety. Improper
use can result in potential electrical shock or fire hazards. In order not to
defeat the safeguards, observe the following basic rules for its installa-
tion, use and servicing.
FOR YOUR RECORDS
For your assistance in reporting this unit in case of loss or theft, please record below the model number and serial number which are located on
the rear of the unit.
Please retain this information.
Model number
Serial number
Date of purchase
Place of purchase
SPECIAL NOTES
CAUTION
RISKOF ELECTRIC SHOCK
DO NOT OPEN
CAUTION: TO REDUCE THE RISK
OF ELECTRIC SHOCK, DO NOT
REMOVE COVER (OR BACK).
NO USER-SERVICEABLE PARTS
INSIDE. REFER SERVICING TO
QUALIFIED SERVICE PERSONNEL.
Thelightningflashwitharrowheadsymbol,
within an equilateral triangle, is intended
to alert the user to the presence of
uninsulated “dangerous voltage” within
the product’s enclosure that may be of
sufficientmagnitudetoconstituteariskof
electric shock to persons.
Theexclamationpointwithinanequilateral
triangle is intended to alert the user to the
presence of important operating and
maintenance(servicing)instructionsinthe
literature accompanying the appliance.
*01-16 98.6.23, 10:29 AM1

2
0001
PRECAUTIONS
0002
HH
HH
HGeneral
IPlease ensure that the equipment is positioned in a well ventilated
area and ensure that there is at least 5 cm of free space along the
sides, top and back of the equipment.
IDo not use oil, solvents, gasoline, paint thinner or insecticides on the
unit.
IDonotexposetheunittomoisture,totemperatureshigherthan140°F
(60°C) or to extreme low temperatures.
IKeep the unit away from direct sunlight, strong magnetic fields,
excessive dust, humidity and electronic/electrical equipment (home
computers, facsimiles, etc.) which generates electrical noise.
IHold the AC power plug by the head when removing it from the AC
outlet, since pulling the cord can damage internal wires.
IRemove the AC power plug from the AC outlet before cleaning.
This unit contains dangerous voltages.
Do not remove the outer cover, as this may result in electric shock.
Refer internal service to your local SHARP service facility.
IUse the unit on a firm, level surface free from vibration, and do not
place anything on the top of the unit.
IIf the unit does not work properly while in use, press the POWER
button to turn the power off, then disconnect the AC power cord from
the AC outlet. Plug the AC power cord back in, and then press the
POWER button to turn the power on.
IIfan electrical storm istaking place near you,it is suggestedthat you
disconnect the AC power cord from the AC outlet for safety.
IBefore moving the unit, be sure to remove all CDs and MDs from the
unit. Then, turn the power off and unplug the AC power cord.
Ifyou movethe unit withCDs or MDsleft init, they mayjam insidethe
unit, leading to damage.
Warning:
The voltage used must be the same as that specified on this unit. Using
this product with a higher voltage than that which is specified is danger-
ous and may result in a fire or other type of accident causing damage.
SHARP will not be held responsible for any damage resulting from use
of this unit with a voltage other than that which is specified.
HH
HH
HVolume control
The sound level at a given volume setting depends on a combination of
speaker efficiency, location and many other factors.
Itisadvisable toavoid exposuretohigh volumelevels,which occurwhile
turning the unit on with the volume control setting up high, or while
continually listening at high volumes.
HH
HH
HCondensation
Sudden temperature changes and storage or operation in an extremely
humid environment may cause condensation inside the cabinet.
Condensation can cause the unit to malfunction.
Follow the procedure below to eliminate condensation.
II
II
ICD and MD pickups
Leave the power on with no disc in the unit until normal playback is
possible (about 1 hour).
II
II
IRemote control
Wipe off any condensation on the transmitter window with a soft cloth
before operating the unit.
=(Continued)
WARNING
FCCRegulations state that any unauthorizedchanges or modifications to
thisequipmentnotexpressly approvedbythemanufacturercouldvoidthe
user’s authority to operate this equipment.
SPECIAL NOTES FOR FCC COMPOSITE DEVICE:
Thisdevice is a compositesystem. The digital devicecomponent may not
cause harmful interference.
IIt is the intent of Sharp that this product be used in full compliance with
the copyright laws of the United States and that prior permission be
obtined from copyright owners whenever necessary.
IUS and foreign patents licensed from Dolby Laboratories Licensing
Corporation.
ISRS technology licensed from SRS Labs. SRS technology holds the
followingpatents:U.S.PatentNo.4,748,669,U.S.PatentNo.4,841,572.
I, the SRS Logo and the are
registered trademarks of SRS Labs, Inc.
Note:
This equipment has been tested and found to comply with the limits for a
Class B digital device, pursuant to Part 15 of the FCC Rules.
Theselimitsaredesignedtoprovidereasonableprotectionagainstharmful
interference in a residential installation.
This equipment generates, uses, and can radiate radio frequency energy
and, if not installed and used in accordance with the instructions, may
cause harmful interference to radio communications.
However, there is no guarantee that interference will not occur in a
particularinstallation. Ifthis equipmentdoes causeharmfulinterference to
radio or television reception, which can be determined by turning the
equipment off and on, the user is encouraged to try to correct the
interference by one or more of the following measures:
IReorient or relocate the receiving antenna.
IIncrease the separation between the equipment and receiver.
IConnect the equipment into an outlet on a circuit different from that to
which the receiver is connected.
IConsult the dealer or an experienced radio/TV technician for help.
Caution - use of controls or adjustments or
performance of procedures other than those
specified herein may result in hazardous radiation
exposure.
WARNING:TOREDUCETHERISKOFFIRE
OR ELECTRIC SHOCK, DO NOT EXPOSE
THISAPPLIANCETORAINORMOISTURE.
0049
HH
HH
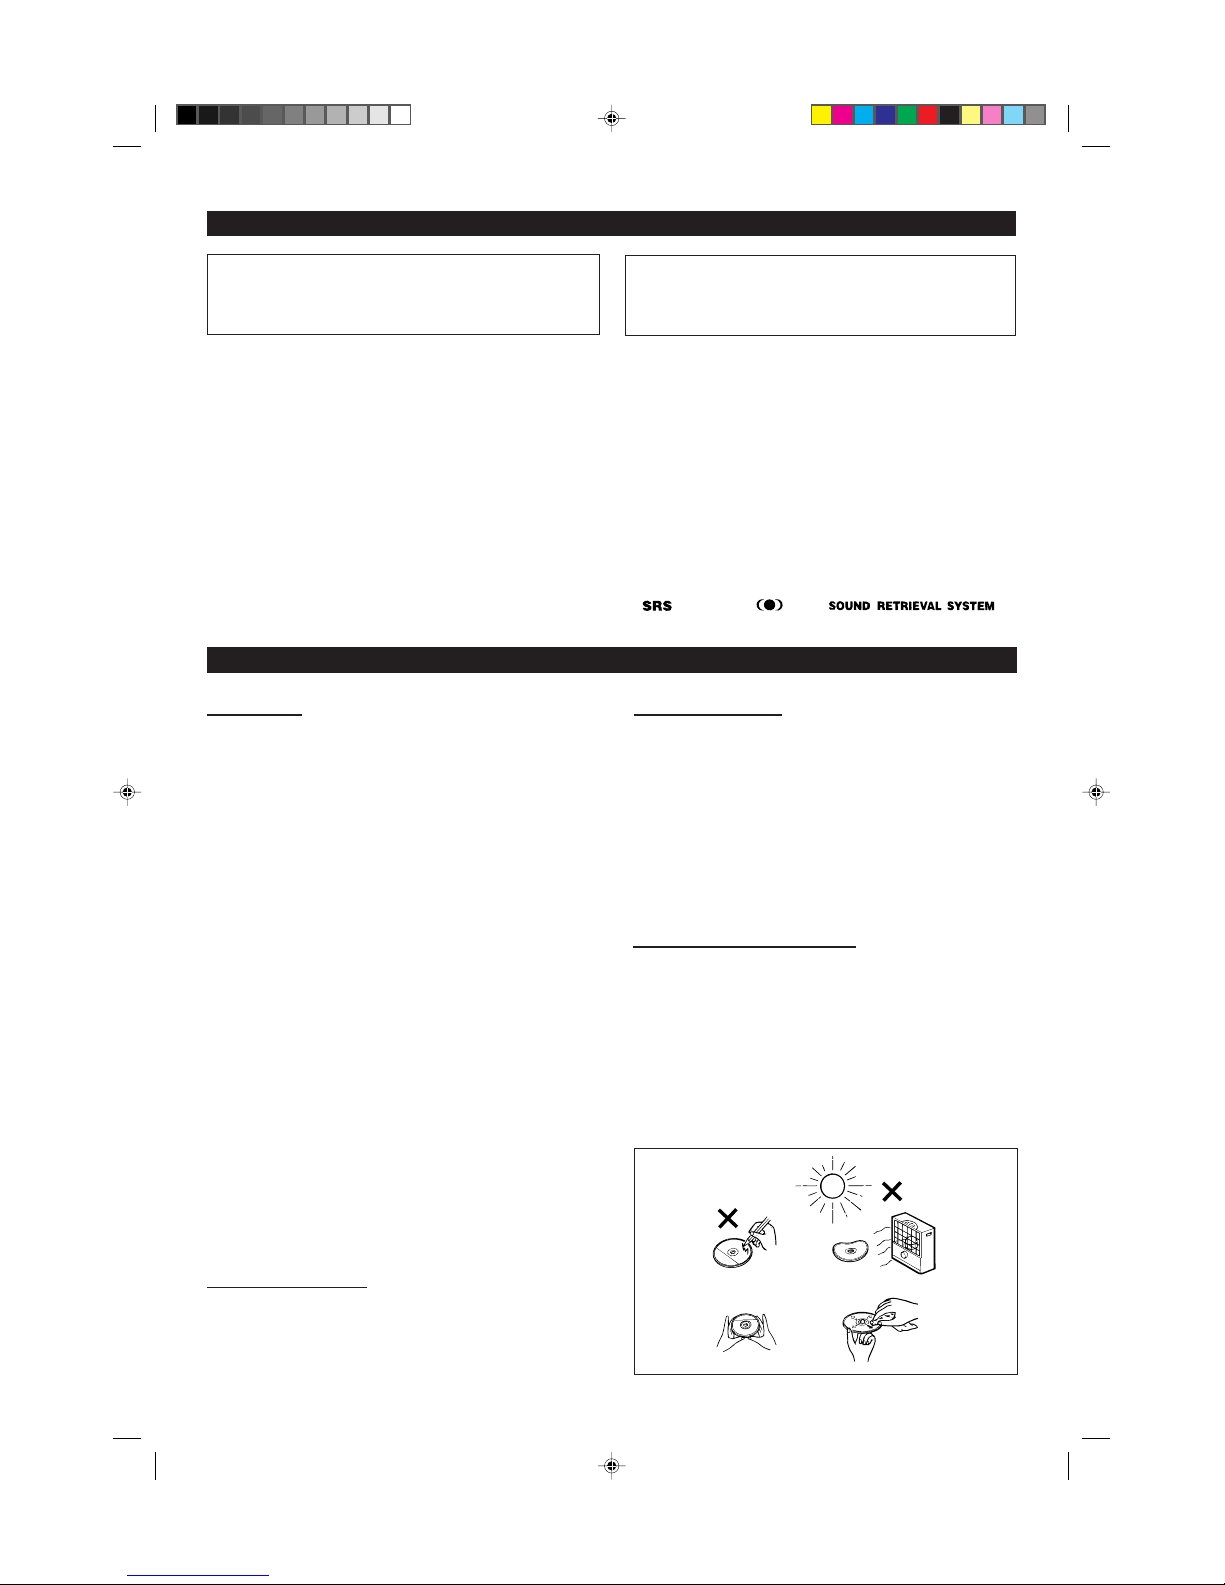
HCare of compact discs
Compactdiscsarefairlyresistanttodamage,howevermistracking
can occur due to an accumulation of dirt on the disc surface.
Follow the guidelines below for maximum enjoyment from your
CD collection and player.
IDo not write on either side of the disc, particularly the non-label side.
Signalsarereadfromthenon-labelside. Do notmarkonthissurface.
IKeep your discs away from direct sunlight, heat, and excessive
moisture.
IAlwayshold CDsbythe edges.Fingerprints, dirt,or wateron theCDs
can cause noise or mistracking. If a CD is dirty or does not play
properly, clean it with a soft, dry cloth, wiping straight out from the
center, along the radius.
*01-16 98.6.23, 10:29 AM2

3
NAMES OF CONTROLS AND INDICATORS
II
II
IFRONT PANEL
1. Power Button: POWER
2. Remote Control Sensor
3. MD 00
00
0MD Edit Button: MD 00
00
0MD
4. CD Track Select Button: TRACK
5. Personal Computer Mode Indicator
6. LCD Display
7. Name / TOC-Edit Button: NAME/TOC EDIT
8. Auxiliary Input (Digital/Analog / Phono) Button: AUX
9. Tuner Call (Band Select) Button: TUNER (BAND)
10. 3D Surround Indicator
11. CD Disc Trays
12. Headphones Jack: PHONES
13. MD Edit/Auxiliary 1 (Analog) Input Jack: MD IN/AUX1
14. Auxiliary Input Level (Analog) Control: INPUT LEVEL
15. Microphone Jack: MIC
16. Microphone Input Level Control: MIC VOL
17. Personal Computer Connect Jack: PC CNT
18. Keyboard Connect Jack: KEYBOARD
19. CD Open / Close Buttons: 77
77
7
20. CD Play Buttons: PLAY 1-3
21. MD Compartment
22. MD Indicator
23. CD Edit Button: CD 00
00
0MD
24. Record Button and Indicator
25. Computer Network Button
26. MD Eject Button: 77
77
7
27. MD Play/Pause Button and Indicator: 0606
0606
06
28. MD Stop Button : HH
HH
H
29. Volume Control: VOLUME
30. 3D Surround Button: 3D SURROUND
31. Extra Bass Button: X-BASS
32. Equalizer Button: EQUALIZER
33. Timer/Delete Button: TIMER / DELETE
34. Multi Control Button: MULTI CONTROL
35. Display Button: DISPLAY
36. Enter Button: ENTER
37. Tuning Up-Down/Cursor Buttons: 33
33
3 / 22
22
2
38. Message Button: MESSAGE
39. CD Play/Pause Button and Indicator: 0606
0606
06
40. CD Stop Button: HH
HH
H
II
II
IREAR PANEL
1. AM Antenna Terminal
2 AM Antenna Ground Terminal
3. FM Antenna Terminal
4. FM Antenna Ground Terminal
5. Analog Output Jacks
6. AUX2 (Analog) Input Jacks
7. Phono Input Jacks
8. Phono Ground Terminal
9. Reset Button
10. Auxiliary Digital 1 Input Jack (Optical)
11. Auxiliary Digital 2 Input Jack (Coaxial)
12. Speaker Terminals
1
2
3
4
5
6
7
8
9
10
11
12
28
29
30 31
32 33
34 35
37
39
36
38
40
21
13 14 15 16 171819 20
22 23 24 25 26 27
POWER
MD/CD STEREO MD-X8
MD MD CD MD
CD / MD MD EDIT
TRACK
VOLUME
3D
SURROUND
X-BASS
NAME/
TOC EDIT TIMER/
DELETE DISPLAY
MESSAGEAUXTUNER
DISC-1
DISC-2
DISC-3
PHONES MD IN/AUX1 INPUT LEVEL MIC MIC VOL PC CNT KEYBOARD
(BAND)
TUNING / CURSOR
EQUALIZER
ENTER
1 2 3
PLAY
1
2
3
MULTI CONTROL
DOWN UP
REC
1
2
3
4
5
6
7
8
9
12
ANALOG IN/OUT
PHONO
AUX DIGITAL IN
RESET
RIGHT LEFT
RIGHT
GND
LEFT
RIGHT
RATED SPEAKER
IMPEDANCE : 6 OHMS
LEFT
OUT
AM
GND
GND
FM
75 OHMS
AUX 2
IN
DIGITAL 1
OPTICAL
DIGITAL 2
COAXIAL
ANTENNA
SPEAKERS
10
11
*01-16 98.6.23, 10:29 AM3

4
(Continued)
II
II
IREMOTE CONTROL
1. Record Mode Button: REC MODE
2. Record Button: II
II
I
3. Clear Button: CLEAR
4. Program Button: PRGM
5. Play Mode Button: P-MODE
6. Synchro Record Button: SYNCHRO REC II
II
I
7. Auto Mark Button: AUTO MARK
8. Time Display Select Button:TIME
9. Auxiliary Input (Digital/Analog / Phono) Button: AUX
10. Tuner Preset/CD/MD Track Number Input Buttons
11. Remote Control Transmitter Window
12. 3D Surround On/Off Button: SURROUND ON/OFF
13. Pre-Equalizer Button: PRE-EQ
14. Extra Bass Button: X-BASS
15. Volume / 3D Surround Button: VOLUME / 3D SURROUND
16. Wide/Center Button: WIDE/CENTER
17. Power Button: POWER
18. MD Stop Button: HH
HH
H
19. MD Play/Pause Button: 0606
0606
06
20. Tuner Stereo Button: ST
21. Tuner Band Button: BAND
22. Display Button: DISPLAY
23. Name/TOC-Edit Button: NAME/TOC EDIT
24 Tuning Up-Down/Cursor Buttons: 33
33
3/ 22
22
2
25. Enter Button: ENTER
26. Multi Control Button
27. Message Button: MESSAGE
28. Timer/Delete Button: TIMER/DELETE
29. CD Play Buttons: Play
1
-
3
30. CD Play/Pause Button: 0606
0606
06
31. CD Stop Button: HH
HH
H
1
11
12
13
14
15
16
17
18
19
20
21
2
3
4
8
9
10
22
23
24
25
26
27
28
29
30
31
56 7
VOLUME/
3D SURROUND
POWER
MD TUNER CD PLAY
12
ST BAND 3
PRGM CLEAR P-MODE TIME >10
54321
10/09876
REC REC
MODE AUTO
MARK AUX
SYNCHRO
REC
1
23
4
II
II
ISPEAKER
1. Dome Tweeter
2. Woofer
3. Speaker Terminals
4. Speaker Duct
*01-16 98.6.23, 10:29 AM4

5
PREPARATION FOR USE
IUnplug the AC power cord from the AC outlet before connecting
or disconnecting any component.
HH
HH
HAntenna connection
(1) Supplied FM antenna
Connect the FM antenna wire to the FM 75 OHMS terminal and
positiontheFMantennawire inthedirection wherethestrongest
signal can be received.
(2) Supplied AM loop antenna
Connect the AM loop antenna wire to the AM LOOP and GND
terminals.
Position the AM loop antenna for optimum reception.
Placethe AM loopantennaon a shelf,etc., or attachitto a stand
or a wall with screws (not supplied).
Notes:
IIf static is still heard even after adjusting the position of the AM loop
antenna, try reversing the wires.
IDonotplacetheAMloopantennaandtheFMantennawireontheunit.
Itmayresultinnoisegeneration, sincetheunitisequippedwithdigital
electronics.
Place the AM loop antenna and the FM antenna wire away from the
unit for better reception.
IIf the AM loop antenna and the FM antenna wire are placed near the
AC power cord, interference may result.
(3) Outdoor FM antenna
To connect a 75 ohm coaxial cable antenna, use the terminals
marked FM 75 OHMS and GND.
To connect an outdoor antenna to the unit, it is recommended
that a 75 ohm coaxial cable be used. Its shielded construction
resists most types of electrical interference that can cause
reception noise.
ConsultyourSHARPaudiodealerforsuggestions on the type of
antenna best suited for your area.
Note:
When an outdoor FM antenna is used, disconnect the supplied FM
antenna wire from the FM 75 OHMS terminal.
(4) Outdoor AM antenna
Use an outdoor AM antenna if you need better reception.
Consult your dealer.
Note:
When using an outdoor AM antenna , be sure to keep the wire of the AM
loop antenna connected.
HH
HH
HSpeaker connection
Connect each speaker wire to the SPEAKER terminals as
shown.
IConnecttheblackwiretotheminus(–)terminalandtheredwiretothe
plus (+) terminal.
Cautions:
IDo not let the bare speaker wires touch each other as this may
damage the amplifier and/or speakers.
IWhen connecting the speakers to the unit, connect the wires to the
speakers first, and then to the terminals on the unit.
IWhen connecting the speakers to the unit, be sure to connect the
speaker wires properly. Do not mistake the right channel for the left
channel and the plus (+) terminal for the minus (–) terminal.
IUse these SPEAKER terminals for CP-X8 only, do not connect them
to speakers other than CP-X8s.
IDo not allow any objects to fall into or to be placed in the bass reflex
ducts.
1
(1)
(2)
2 3
AM
GND
GND
FM
75 OHMS
ANTENNA
1
Assemble the AM antenna.
2 3
AM
GND
GND
FM
75 OHMS
ANTENNA
25feet
(7.5m)
49feet
(15m)
Ground
rod
(4) (3)
1 2 3
1 1
Right speaker
Bass reflex
duct
Left speaker
RIGHT
RATED SPEAKER
IMPEDANCE : 6 OHMS
LEFT
SPEAKERS
22
Black
Black
Black
Black Red
Red Black Red
*01-16 98.6.23, 10:29 AM5

6
HH
HH
HRemoving the speaker grilles
1Remove the lower part of the speaker grille first.
2Remove the upper part of the speaker grille.
Caution:
When the speaker grilles are removed, the speaker diaphragms are
exposed. Make sure nothing comes into contact with the speaker
diaphragms.
HH
HH
HMounting the speaker grilles
Fitthefourpostsonthespeakergrilleintothemountingholesand
push them lightly with the palm of your hand to secure.
HH
HH
HPlacing the system
IBe sure to keep space between the units for ventilation.
IKeep the back and sides of this unit at least 2"(5cm) away from the
wall.
IIfanykindofmagnetoranelectromagnetisplacedtooclosetotheTV
set and the system, irregular color may be seen.
TV set location
IDependingon the particularlocation of a TVset, color variationsmay
be seen on the TV screen. If this happens, move the system and its
speakers away from the TV and turn off the TV set. After 15 - 30
minutes, turn on the TV again.
TheTV'sowndemagnetizingfunctionshouldeliminatethevariations.
However,if thecolor stilldoes not lookright, movethe systemfurther
away from the TV set.
Note:
IA cooling fan is built into this product to avoid heat buildup.When the
power is turned on, the cooling fan will run.
When the volume is increased, the cooling fan will run at high speed.
HH
HH
HConnecting the AC power cord
IAfterconnectingthespeakers, plugtheAC powercordintoa conven-
ient AC outlet. The LCD will present a demonstration display.
IUnplug the AC power cord from the AC outlet if the unit is not to be
used for a prolonged period of time.
Note:
IIftheleadwiresofa speakerwireareshort-circuitedwhileconnecting
a speaker with the power on, the protection circuit will activete
resulting in no sound. Disconnect the AC power cord from the AC
outlet, and connect it again.
HH
HH
HDemonstration display
IAfterthe powercordis unpluggedor apower failureoccurs, whenthe
poweristurnedbackon,theLCDwillpresentademonstrationdisplay.
If this happens, set the clock (see page 10) to cancel the demonstra-
tion display on the LCD.
SETTING THE CLOCK
(Continued)
,,
,,
To an AC outlet
AC 120V, 60Hz
WWWWWWWWWWWWWWWWWWWWW
AMER I CANWKEYBOARDWWWW
WWWWWWMDWWORLDWWWWWWW
WWWELCOMEWTOWSHARPWWW
WWWWWWWWWWWWWWWWWWWWW
Left speaker Leavea spaceof atleast 2"(5cm). Right speaker
More than 2"(5cm)
*01-16 98.6.23, 10:29 AM6

7
HH
HH
HRemote control
IWhen inserting or removing the batteries, push them towards the ë
battery terminals.
IInstalling the batteries incorrectly may cause the unit to malfunction.
Precautions for battery use:
IInsert the batteries according to the direction indicated in the battery
compartment.
IReplace all old batteries with new ones at the same time.
IDo not mix old and new batteries.
IRemovethebatteriesiftheyareweakoriftheunitisnotinuseforlong
periods to prevent potential damage due to battery leakage.
Caution:
Do not use rechargeable batteries (nickel-cadmium battery, etc.)
Notes concerning use:
IReplace the battery if control distance decreases or operation be-
comes erratic.
IPeriodically clean the transmitter window on the remote control and
the sensor on the main unit with a soft cloth.
IExposingthesensoron themainunitto stronglightmayinterfere with
operation. Change the lighting or the direction of the unit.
IKeep the remote control away from moisture, excessive heat, shock,
and vibrations.
(Continued)
2 "AA" size batteries
(UM/SUM-3, R6, HP-
7 or similar)
15˚
15˚
8" to 20'
(0.2m-6m)
*01-16 98.6.23, 10:29 AM7

8
DISPLAY SECTION
WWW3 FOR EVERWWWWWWWW
WWW2WAVEWWWWWWWWWWWW
WWW1 LOVE SONGWWWWWWW
BEST HITSWWWWWWWTOTAL
MD 1 2WWW 55:08
MDWWW12WWW55:08WTOTAL
BESTWHITS
Lighten
Darken
Lighten Darken
Standard character display
Extra large character display
DISPLAY
MULTI CONTROL
MIN.WWWWWWWWWWWWWMAX .
WWWWWWWWWWWWWWWWWWWWW
WWWCONTRASTWADJUSTWWW
DISPLAY
HH
HH
HTo change the contrast of the display
1Turn the power on, and hold down the DISPLAY button for
more than 0.5 seconds.
2Press the MULTI CONTROL button to change the contrast.
IThe contrast is adjustable in 16 steps.
IIfnooperationisperformedfor10secondsormore,theunitwillreturn
to the original screen.
IIf you operate your personal computer using a separately available
sound card, you cannot adjust the contrast.
HH
HH
HCharacter display
Youcanselectastandardcharacterdisplayoranextralarge
character display for the display on this product.
IStandard character display
The default display mode set at the factory.
Track names are displayed on 4 lines so that you can check several
track names at the same time.
IExtra large character display
When track names are displayed using extra large characters, you
can read the names at a distance.
HH
HH
HTo change the size of the characters
(extra large character display)
Turn the power on while the MD is in the stop mode, and press
the DISPLAY button.
IIf the DISPLAY button is pressed again, the characters will return to
their original size.
*01-16 98.6.23, 10:29 AM8

9
MULTI CONTROL BUTTON
The MULTI CONTROL button is used to select CD or MD
tracknumbers (page 22) ,selectprogrammedradio stations
(page 21) and to enter characters (page 13) .
IThe MULTI CONTROL button has different functions depending on
the mode or the position you select.
TIMEWADJUST
SLEEPWSET
TIMERWSET
CLOCKWWWWW amW0:00
DAYWWWWWWW 01WWWWW
MONTHWWWWW01WWWWW
YEARWWWWW '99WWWWW
CALENDARW&WCLOCK
WWW5WBEWSHARPWWW
WWW4WSTARWDUSTWW
WWW3WFORWEVERWWW
W2WWAVEWWWWWWW
MDWWWW 2W-WW 6:01W
WWWWWWWWWWWWWWWWWWWWW
WW12WGOODWBYEWWWWWWWW
MDWWWW 9W-WW 3:52WWWWWW
HH
HH
HTo select CD or MD track numbers
IWhenyoupress the right or lower position onthe MULTI CONTROL
button, the track number will be increased by one.
IWhen you press the left or upper position on the MULTI CONTROL
button, the track number will be decreased by one.
HH
HH
H
Menus for the timer and MD editing
IWhenyou presstheupperorlowerpositionontheMULTI CONTROL
button, you can scroll through the menus to select the one you want.
IWhen you press the left or right position on the MULTI CONTROL
button while looking at the timer menu, you can select the value for
each item.
*01-16 98.6.23, 10:29 AM9

10
SETTING THE CLOCK
When you have set the date and time, this unit can be used
as a clock. It can be used for timer recording or for timer
playback. It is also used to store the MD recording date in
memory.
1Turn the power on.
2Press the TIMER/DELETE button.
3Within10seconds,pressthe or ontheMULTICONTROL
button to select TIME ADJUST.
4Within 10 seconds, press the ENTER button.
IThe unit will enter the date setting mode.
5Press the 1or 0 on the MULTI CONTROL button to adjust
the year.
IPress the button once to increase or decrease the year by one. Keep
pressing it to advance continuously.
IFor any year after 2000, use "00" for 2000, "01" for 2001, and so on.
6Press the on the MULTI CONTROL button to select the
month.
7Pressthe or onthe MULTICONTROLbuttonto adjustthe
month.
8Pressthe ontheMULTICONTROLbuttontoselecttheday.
9Pressthe or ontheMULTICONTROLbuttontoadjustthe
day.
10
Press the on the MULTI CONTROL button to select the
hour.
11
Pressthe or ontheMULTICONTROLbuttontoadjustthe
hour.
IOn the display, midnight is shown as "AM 12:00" and noon is shown
as "PM 12:00". When setting the time, be careful to set AM or PM
according to the current time.
12
Press the on the MULTI CONTROL button to select the
minute.
13
Pressthe or ontheMULTICONTROLbuttontoadjustthe
minute.
14
Press the ENTER button to start the clock at the top of the
minute.
IThe clock starts operating.
Notes:
IIn the event of a power failure or when the AC power cord is
disconnected, the clock setting will be lost. Reset the time.
IWhile recording an MD, you cannot set the date and clock. Be sure
to set the date and clock before recording.
IThe range of dates that can be entered is from July 1, 1997 to
December 31, 2049.
To change the setting
IAfter performing steps 1 - 4 above,
➀Press the or on the MULTI CONTROL button to select
the item (YEAR, MONTH, DAY or CLOCK) you want to
change.
➁Press the or on the MULTI CONTROL button to change
the setting.
➂Press the ENTER button.
To check the time
When the power is off, the time appears on the display.
WhenthepowerisonandyoupresstheTIMER/DELETEbutton,
the time will appear for about 10 seconds on the display.
IThe year, month and day will not be displayed.
TIMER/
DELETE
ENTER
MULTI CONTROL
2
3
4
5
6
7
8
9
10
11
12
13
14
TIMEWADJUST
SLEEPWSET
TIMERWSET
TIMEWADJUST
SLEEPWSET
TIMERWSET
CLOCKWWWWWamW0:00
DAYWWWWWWW27WWWWW
MONTHWWWWW09WWWWW
YEARWWWWW '98WWWWW
CALENDARW&WCLOCK
CLOCKWWWWWamW0:00
DAYWWWWWWW27WWWWW
MONTHWWWWW09WWWWW
YEARWWWWW '98WWWWW
CALENDARW&WCLOCK
CLOCKWWWWWamW9:00
DAYWWWWWWW27WWWWW
MONTHWWWWW09WWWWW
YEARWWWWW '98WWWWW
CALENDARW&WCLOCK
CLOCKWWWWWamW9:00
DAYWWWWWWW27WWWWW
MONTHWWWWW09WWWWW
YEARWWWWW '98WWWWW
CALENDARW&WCLOCK
CLOCKWWWWWamW9:35
DAYWWWWWWW27WWWWW
MONTHWWWW ' 09WWWWW
YEARWWWWW '98WWWWW
CALENDARW&WCLOCK
MDLNODDISCWCL OCK
W
W
W
CLOCKWWWWWam :
DAYWWWWWWW01WWWW
MONTHWWWWW01WWWW
YEARWWWWW '99WWWW
CALENDARW&WCLOCK
000
CLOCKWWWWWam :
DAYWWWWWWW01WWWW
MONTHWWWWW01WWWW
YEARWWWWW '98WWWW
CALENDARW&WCLOCK
000
CLOCKWWWWWam :
DAYWWWWWWW01WWWW
MONTHWWWWW01WWWW
YEARWWWWW '98WWWW
CALENDARW&WCLOCK
000
CLOCKWWWWWam :
DAYWWWWWWW01WWWW
MONTHWWWWW09WWWW
YEARWWWWW '98WWWW
CALENDARW&WCLOCK
000
CLOCKWWWWWam :
DAYWWWWWWW01WWWW
MONTHWWWWW09WWWW
YEARWWWWW '98WWWW
CALENDARW&WCLOCK
000
*01-16 98.6.23, 10:29 AM10

11
SOUND CONTROL
HH
HH
HVolume
Main unit operation
When you turn the VOLUME control toward the UP position, the
volume will increase. When you turn it toward the DOWN posi-
tion, the volume will decrease.
Remote control operation
Whenyoupressthe positionontheVOLUME/3DSURROUND
button, the volume will increase. When you press the position
on the VOLUME/3D SURROUND button, it will decrease.
HH
HH
HPre-programmed equalizer
Whenthe EQUALIZER(PRE-EQ) button ispressed, the current
mode setting will be displayed. To change to a different mode,
press the EQUALIZER (PRE-EQ) button repeatedly.
FLAT : The sound is not modified.
HEAVY-2 : Bass and treble are emphasized a lot.
HEAVY-1 : Bass and treble are slightly emphasized.
VOCAL : Vocals (midrange tones) are emphasized.
SOFT-2 : Treble is reduced a lot.
SOFT-1 : Treble is cut a little.
HH
HH
HExtra bass (X-BASS)
Press the X-BASS button to emphasize the bass region of the
frequency spectrum.
"X-BASS ON" will appear.
Press the X-BASS button again to cancel the extra bass mode.
"X-BASS OFF" will appear.
UP
DOWN UP
DOWN
VOLUME
DOWN UP
MDLNODDISCWCLOCK
PQRSTUVWXOPQRSTUV
W
PQRSTUVWXOPQRSTUV
W
PQRSTUVWXOPQRSTUV
W
PQRSTUVWXOPQRSTUV
W
PQRSTUVWXOPQRSTUV
W
PQRSTUVWXOPQRSTUV
W
PQRSTUVWXOPQRSTUV
W
PQRSTUVWXOPQRSTUV
W
EQUALIZER
FLAT
HEAVY - 2
VOCAL
SOFT - 2
HEAVY - 1
SOFT - 1
PQRSTUVWXOPQRSTUV
W
PQRSTUVWXOPQRSTUV
W
PQRSTUVWXOPQRSTUV
W
PQRSTUVWXOPQRSTUV
W
X-BASS
X-BASS-ON
X-BASS-OFF
*01-16 98.6.23, 10:29 AM11

12
(Continued)
HH
HH
H3D SURROUND
About 3D surround:
SRS is a breakthrough technology that creates 3-dimensional
soundbyprocessingsoundsignalsbasedonthehumanauditory
system. It produces real depth and localization of the sound
image which cannot be accomplished by ordinary stereo. SRS
only requires two speakers.
IYou can also adjust the sense of width or the sense of depth.
When the 3D SURROUND button on the main unit, or the
SURROUND ON/OFF button on the remote control is pressed,
the3DSURROUNDindicatorwilllightand"3DSURROUND"will
be displayed on the LCD. When the button is pressed again, the
3D surround mode will be canceled.
HH
HH
H Adjusting the sense of width or depth
Remote control operation
1Press the WIDE/CENTER button in the 3D surround mode to
select "WIDE" or "CENTER".
2When WIDE is selected:
When the + side on the VOLUME/3D SURROUND button is
pressed, the sound will grow wider. When the - side on the
VOLUME/3DSURROUNDbuttonispressed,thesoundwidth
will be reduced.
IBy adjusting the WIDE level, the apparent distance between the left
andtherightspeakerswillseemtochange. (Thewiderthesetting,the
more distance there will seem to be between the speakers.)
When CENTER is selected:
When the + side on the VOLUME/3D SURROUND button is
pressed, the sense of depth will increase. When the - side on
the VOLUME/3D SURROUND button is pressed, the sense
of depth will decrease.
IBy adjusting the CENTER level, the sense of depth will change.
(The higher the center level, the greater the sense of depth.)
CENTERWIDE
WIDE CENTER
CENTER
WIDE
3D SURROUND
indicator
3D SURROUND
SOUNDWRETR I EVAL
3DBSURROUND
*01-16 98.6.23, 10:29 AM12

13
HOW TO ENTER CHARACTERS
HH
HH
HEntering characters
Characters are used for the MD disc names and track names,
radiostationnames,andmessagesdisplayedwhenthepoweris
on or off.
Characters can be entered in the standard character size or the
extra large character size. (The method for entering characters
depends on the size.)
IRadio station names cannot be entered as extra large characters.
3WFORWEVERWWWWWWWW
2WWAVEWWWWWWWWWWWW
1WLOVEWSONGWWWWWWW
BESTWHITSWWWWWWWWWWWW
MDWWW12WWW 55:08WTOTAL
P0 4 OOO
P0 3 OOOOO
P0 2 OOO
P0 1 OOOO
FM ST 87.6 MHz
O
HAPPYHBIRT
nopqrstuvwxyz *0# , . ; :_
abcdefghi jk lm789 ( )@
NOPQRSTUVWXYZ456 ! ?&%$
ABCDEFGH I JKLM1 23 +_/=
]
,,
,
ABCDEFGH I J
MD disc names or track names(pages 36 and 37)
Radio station names (page 21)
Message displayed when the power is on or off (pages 49-51)
Standard character display
Extra large character display
*01-16 98.6.23, 10:29 AM13

14
(Continued)
HH
HH
HEntering standard size characters
Preparation
Put the unit in the mode in which characters can be
entered.
ITo store radio station names in memory, perform steps 1 - 3 on page
21.
ITo create a disc name on an MD, perform steps 1 - 3 on page 36.
ITochangethemessagesdisplayedwhenthepoweristurnedonoroff,
perform steps 1 - 3 on page 49 or on page 51.
1Press the , , or on the MULTI CONTROL button to
make the character you want to enter start flashing.
IEachtimethebuttonispressed,thecharacterwhichisflashingwillbe
changedbyoneinthedirectionprintedonthebutton.Whenthebutton
is held down, the selection will move continuously in that direction.
ITo enter a space, make the symbol flash.
2Press the ENTER button.
IThe selected character will appear in the character entry column.
Then,performsteps1 -2repeatedlyto entertheothercharacters you
need.
3After entering all the characters
For a radio station name, MD disc name, or MD track
name:
Press the NAME/TOC EDIT button.
For the messages displayed when the power is turned
on or off:
Press the MESSAGE button.
IThe characters will be stored in memory.
HH
HH
HTo correct, add, or delete a character
1Press the 3TUNING/CURSOR 2button to move to the
positionof thecharacter you wantto delete, correct,or add. It
will flash when selected.
2When you want to delete or correct a character:
Press the TIMER/DELETE button.
IThe character will be erased.
IIf you want to correct a character, then, enter the correct character.
When you want to add a character:
Press the MULTI CONTROL button to select the position
where you want to add a character, select the new charactor
and then press the ENTER button.
3Finally, perform step 3 above.
1
2
nopqrstuvwxyz*0# , . ; : _
abcdefghi jklm789 ( )@
NOPQRSTUVWXYZ456 ! ?&%$
ABCDEFGH I JKLM1 23+ _/=
]
,,
,
nopqrstuvwxyz*0# , . ; : _
abcdefghi jklm789 ( )@
NOPQRSTUVWXYZ456 ! ?&%$
ABCDEFGH I JKLM1 23+ _/=
]
,,
,
L
_
1
2
nopqrstuvwxyz*0#, . ; :_
abcdefghi jklm789 ( )@
NOPQRSTUVWXYZ456 ! ?&%$
ABCDEFGH I JKLM1 23+ _/=
]
,,
,
BISTqHITSvw
nopqrstuvwxyz*0#, . ; :_
abcdefghi jklm789 ( )@
NOPQRSTUVWXYZ456 ! ?&%$
ABCDEFGH I JKLM1 23+ _/=
]
,,
,
BESTqHITSvw
ENTER
MESSAGE
TIMER/
DELETE
NAME/
TOC EDIT
T
U
N
I
N
G
/
C
U
R
S
O
R
MULTI CONTROL
TUNING/CURSOR
*01-16 98.6.23, 10:30 AM14

15
(Continued)
HH
HH
HEntering extra large characters
In the case of the extra large characters, the characters you
can choose from are as follows:
EachtimetheDISPLAYbuttonispressed,thecharactertypewill
change.
Each time the or on the MULTI CONTROL button is
pressed, a different series of characters will appear.
Preparation
Put the unit in the mode in which characters can be
entered.
ITo create an MD disc name, perform steps 1 - 3 of the "To creat a
disc name "section on page 36.
ITo create an MD track name, perform steps 1 - 2 of the "To creat a
track name "section on page 36.
ITochangethemessagesdisplayedwhenthepoweristurnedonoroff,
perform steps 1 - 3 on page 49 or on page 51.
1Press the DISPLAY button to select the type of character you
want to enter.
IEach time the button is pressed, the type of character will change.
2Press the or on the MULTI CONTOROL button to move
the cursor to the character you want to enter.
3Press the ENTER button.
4Perform steps 1 - 3 repeatedly to enter the characters you
need.
5After entering all the characters
For a radio station name, MD disc name, or MD track
name:
Press the NAME/TOC EDIT button.
For the messages displayed when the power is turned
on or off:
Press the MESSAGE button.
IThe characters will be stored in memory.
1
2
3
ABCDEFGH I J
ABCDEFGH I J
B
ABCDEFGH I J
ABCDEFGH I J
abcdefghi j 1234567890
ABCDEFGH I J
klmnopqrst *
#
,.;:
_
abcdefghi j
>
()
@
KLMNOPQRST
<
!
?
&%$
ABCDEFGH I J
+_/=
,
,
,
1234567890
UVWXYZ.,/
/
uvwxyz . , /
ENTER
MESSAGE
NAME/
TOC EDIT DISPLAY
MULTI CONTROL
*01-16 98.6.23, 10:30 AM15

16
(Continued)
HH
HH
HTo enter characters from a computer
keyboard
You can enter characters by connecting a keyboard.
Keyboard you can use:
YoucanuseanykeyboardwhichcanbeconnectedtoaWindows
personal computer and has the plug shape shown to the left.
(Macintosh keyboards cannot be used.)
IYou must use a DC 5V keyboard(maximum 300 mA).
1When the power to the main unit is off, connect a keyboard to
the KEYBOARD terminal.
2Turn the power to the main unit on.
3Put the unit in the mode which characters can be entered.
ITo store radio station names in memory:
Perform steps 1 - 3 on page 21.
ITo create a disc name on an MD:
Perform steps 1 - 3 of the "To creat a disc name"section on page 36.
ITo create a track name on a MD:
Perform steps 1 - 2 of the "To create a track name "section on page
36.
ITochangethemessagesdisplayedwhenthepoweristurnedonoroff:
Perform steps 1 - 3 on page 49 or on page 51.
4Enter the characters from the keyboard.
How to enter lower-case or upper-case letters:
Normally, lower-case letters are entered.
Holddown the Shiftkey and pressany letter key.An upper-case
letter will be entered.
Space key:
Enters a space and moves the cursor one character to the right.
Delete key:
ThiskeyhasthesamefunctionastheTIMER/DELETEbuttonon
the main unit.
The letter under the cursor will be erased, and the letters to the
right will move one character to the left.
Enter key:
This key has the same function as the NAME/TOC EDIT button
on the main unit.
However, although the letters you enter can be checked after
they are entered, the unit cannot be put in the stand-by state for
entering letters.
key:
Thiskeyhasthesamefunctionasthe3buttononthemainunit.
The cursor will move one character to the left.
key:
Thiskeyhasthesamefunctionasthe2 buttononthemainunit.
The cursor will move one character to the right.
The other keys on the keyboard are disabled.
KEYBOARD
F1
12
Q
A
ZXCVBNM
<>
,.
?
SDFGHJKL:
:
;
"
'
WE R T Y U I OP {
[}
]
34567890 - =
ESC F2 F3 F4 F5
!~
`#@$%
^
ij
_+
/
&
F6 F7 F8 F9 F10 F11 F12
Print
Screen
SysRq
Scroll
Lock Pause
Break Num
Look
Num
Look
Insert Home
Delete End Home PgUp
Page
Up
Caps
Lock
Tab
Enter
ShiftShift
CtrlCtrl AltAlt
Page
Down
End
Ins Del
PgDn Enter
Casp
Lock Scroll
Lock
7
89
4
56
1
0
23
Keys you can use
Note:
Do not plug in or unplug the keyboard plug while the power is on, as this
may lead to damage.
Characters shown with the mark cannot be enterred.
*01-16 98.6.23, 10:30 AM16

17
0049
COMPACT DISC OPERATION
HH
HH
HLoading and playing CD
1Press the CD Hbutton.
IThe power will be turned on automatically,and the unit will enter the
CD playback mode.
2Press the 7button to open the disc tray.
IIt is impossible to open multiple disc trays at a time.
3Place the CD (s) on the disc tray, with the labeled side facing
up.
IBe sure to place 8 cm (3" ) CDs in the middle of the disc holders.
Caution:
Do not stack CDs in the tray.
This can damage the player and the CDs.
4Press the 7button to close the disc tray.
IThe total number of tracks and the total disc playing time will be
displayed.
5Press the CD 06 button.
IPlayback will begin from track 1 on DISC -1.
IDISC-1,DISC-2andDISC-3will beplayedcontinuouslyinthat order.
IIf you pressthe CD PLAY 2button after pressingthe CD 06 button,
DISC-2 and DISC-3 will be played continuously.
IIf you pressthe CD PLAY 3button after pressingthe CD 06 button,
only DISC-3 will be played.
IWhen all of the tracks on the CDs completed playing, it stops
automatically.
IAfter the disc finishes playing, the next disc will be automatically
played.
IWhenthere is noCD in oneof the disctrays, that traywill be skipped,
and the next CD will be played.
Direct playback:
When a CD is loaded in the disc tray, simply pressing any of the
CD 06 button or one of the CD PLAY buttons (1-3) on the main
unit or on the remote control will turn the power on and start
playback.
Note:
IIfthedisctrayisopenwhenyoupressoneofthesebuttons,itwillclose
automatically.
To interrupt playback:
Press the CD 06 button.
Press the CD 06 button to resume playback from the same
point.
To stop playback:
Press the CD Hbutton.
To remove the CDs:
While in the stop mode, press the 7button.
To switch the unit off after use:
Press the POWER button to turn the power off.
WWWW
STOP
DISC1
CDWWW16WWW 56 : 13 TOTAL
Number of tracks on
the selected disc Total playing time of the
selected disc
Disc number
selected
The trays containing a CD are displayed.*
*This indicator will light even if the CD tray is opened and
closed without inserting a CD.
This indicator will go out after checking for a CD, if the tray
is empty.
To play a specific CD:
Pressthe buttonnumber forthe CDyou wantfrom theCD PLAYbuttons
(1-3) on the main unit or on the remote control.
IOnly the selected CD will be played.
Note:
IIfyoupressthe CD06 buttonon themainunitor remotecontroleven
though you have selected DISC-2 or DISC-3 previously, continuous
playback will start from the track 1 on DISC-1.
1 2 3
PLAY
1 2 3
PLAY
1
2
3
CD
CD
*17-21 98.6.23, 0:11 PM17

18
0048
MINIDISC OPERATION
HH
HH
HLoading and playing MiniDiscs
1Press the MD Hbutton.
IThe power will be turned on automatically,and the unit will enter the
MD playback mode.
2Load a recorded MiniDisc in the direction indicated by the
arrow on the MiniDisc, with the labeled side facing up.
IThe total number of tracks and the total disc playing time will be
displayed. At this time, the MD indicator will light.
3Press the MD 06 button.
ITheMDplaybackindicatorwilllightandplaybackwillbeginfromtrack
1on the disc you have specified.
IWhenthelast trackhasbeen playedback,this unitwillstop automati-
cally.
To interrupt playback:
Press the MD06 button.
IThe MD playback indicator will flash.
IPress the MD06 button to resume playback from the same point.
To stop playback
Press the MD Hbutton.
To remove a MiniDisc:
Press the 7button.
IThe MiniDisc will be ejected.
Notes:
IAlthoughvibrationwill notnormally causeaMiniDisc toskip,you may
hear a skip in the sound if there is continuous vibration.
IWhenyou listen to MiniDiscsnear a radio ora TV set, theradio or the
TV set may pick up noise.
Keep the unit as far away as possible from tuners.
IWhenaoptionally availablesoundcardisused,anMDinsertedinthis
product can be played from a personal computer.
Direct playback
If a MiniDisc is loaded in the unit, pressing the MD 06 button
turns the power on, and begins playback.
After use:
Press the POWER button to turn the power off.
Note:
IThe power cannot be turned off while reading the information on a
MiniDisc.
IIf no disc and track names have been recoded on an MiniDisc, they
will not appear on the display.
MD indicator
Total number
of tracks Total playing time
Disc name Track name
3WFORWEVERWWWWWWWW
2WWAVEWWWWWWWWWWWW
1WLOVEWSONGWWWWWWW
BESTWHITSWWWWWWWWWWWW
MDWWW12WWW 55:08WTOTAL
Cautions:
IDo not carry the unit with a disc left in a disc tray. The disc may
come loose inside the unit and be damaged or cause damage
to the unit. This may also cause malfunctions.
IIf you press the CD 06 button, one of the CD PLAY buttons (1-3)
onthemain unitor remotecontrol,or anyof theCD7buttons while
thedisctrayisopen,thedisctraywill closeautomatically.Therefore,
be careful not to get your fingers caught in the disc tray.
IDo not place two CDs in one disc position.
IDo not push the disc tray while it is moving.
IIf the power fails while the tray is open, wait until the power is
restored before trying to close it.
IIf the disc tray is stopped forcibly, “ERROR” will appear on the
display and the unit will not function.
If this occurs, turn the power off, and turn it on again.
IIfTVorradiointerferenceoccursduringCDoperation,movetheunit
away from the TV or radio.
IIf the disc is damaged, dirty, or loaded upside down, the disc will be
skipped and the next disc will be automatically played.
IIf the main unit is subjected to a sharp jolt or it is used where
vibrations are present, sound dropouts may occur. Use the unit in a
stable environment.
IIfthevolumeissettotoohigh,adropoutmayoccurduetovibrations
fromthespeakers.Ifthishappens,movethemainunitawayfromthe
speakers or turn down the volume.
IDo not use CDs with loose cellphane tape or stickers or CDs which
have glue left on the surface from tape or stickers. If such a CD is
inserted, you may not be able to remove the CD or the unit may
cause malfunction.
MINIDISC OPERATION
(Continued)
MD playback indicator
MD indicator
MD
MD
*17-21 98.6.23, 0:11 PM18

19
HH
HH
HTuning
1Press the TUNER (BAND) button.
IThe power is turned on, and the tuner is selected.
2Press the TUNER (BAND) button to select the desired fre-
quency band (FM or AM) .
3Tune in to the desired station using the 3 TUNING/CUR-
SOR 2button.
Auto tuning:
Whenthe 3 TUNING/CURSOR2buttonispressedformore
than 0.5 seconds and then released, the tuning stops at the first
receivable broadcast station.
Notes:
IWhen radio interference occurs during auto tuning, auto tuning may
stop automatically at that point.
IIf a weak station signal is found during auto tuning, the station will be
skipped.
ITo stop auto tuning, press the 3 TUNING/CURSOR 2button
again.
Manual tuning:
Press the 3TUNING/CURSOR 2button as many times as
necessarytoadjustthe frequency display to the frequency of the
desired station.
4To receive FM stereo, press the ST button on the remote
control so that the "FM ST" indicator appears.
I“j” will appear when an FM broadcast is in stereo.
5IftheFMstereoreceptionisweak,presstheST buttonsothat
the “FM ST” indicator goes out.
IAlthough the reception changes to monaural, the sound becomes
clearer.
After use:
Press the POWER button to turn the power off.
Direct playback:
Just pressing the TUNER (BAND) button will turn on the
power automatically. The radio station you were listening to
last will be tuned in.
Notes:
IThe memory recalls the last station received even after changing the
TUNER (BAND) button or function selector buttons, or pressing the
POWER button to turn the power off.
IIfyou arelisteningtotheradionearpersonalcomputers,radios,orTV
sets,various noiseorinterferencemaybe heard.Keep thisunit asfar
away as possible from these products.
RADIO OPERATION
FM stereo
indicator Frequency FM stereo
reception indicator
W-WWWWWW
-12
WWW
-4
WWWW
0
W>W
RWWWWWWWWWWWWWWWWWWWW
LWWWWWWWWWWWWWWWWWWWW
W-WWWWWW
-12
WWW
-4
WWWW
0
W>W
FMWSTWWWW 87.5WMHzWWWW
T
U
N
I
N
G
/
C
U
R
S
O
R
TUNING/CURSOR
TUNER
(BAND)
ST BAND
TUNER
*17-21 98.6.23, 0:11 PM19
Other manuals for MD-X8
2
This manual suits for next models
1
Table of contents
Other Sharp Stereo System manuals

Sharp
Sharp CD-C452 User manual

Sharp
Sharp XL-DAB227NH User manual

Sharp
Sharp XL-MP150H User manual

Sharp
Sharp GX-CD1300MP MK2 User manual

Sharp
Sharp XL-DH10NH User manual

Sharp
Sharp CD-BA2600 User manual

Sharp
Sharp CD-G15000 User manual

Sharp
Sharp CP-X99 User manual

Sharp
Sharp XL-DV50H User manual

Sharp
Sharp XL-MP8H User manual

Sharp
Sharp XL-UR230H User manual

Sharp
Sharp GF-575H User manual

Sharp
Sharp CD-ES9 User manual

Sharp
Sharp XL-DV60 User manual

Sharp
Sharp CD-XP205V User manual

Sharp
Sharp CD-C405W User manual

Sharp
Sharp CD-BA150 User manual

Sharp
Sharp CD-ES700 User manual

Sharp
Sharp CD-PC3500 User manual

Sharp
Sharp WQ-790W User manual