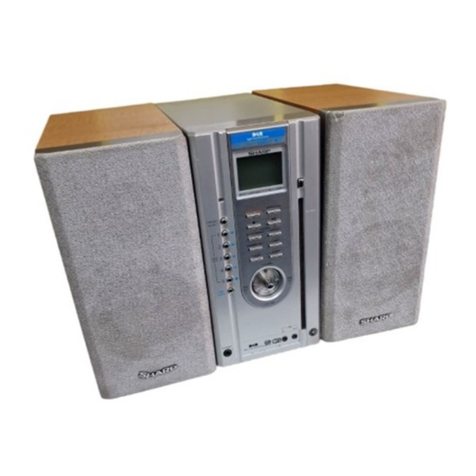
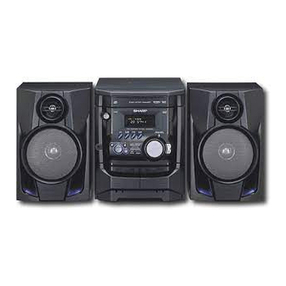
Sharp QT-MP3W User manual

QT-MP3W
– 1
SERVICE MANUAL
CONTENTS
Parts marked with " " are important for maintaining the safety of the set. Be sure to replace these parts with specified ones
for maintaining the safety and performance of the set.
!
This document has been published to be used
for after sales service only.
The contents are subject to change without notice.
PORTABLE CD STEREO SYSTEM
QT-MP3W
MODEL
/
No. S9632QTMP3W//
In the Interests of user-safety the set should be restored to
its original condition and only parts identical to those
specified be used.
CHAPTER 1. GENERAL DESCRIPTION
[1] Precaution For Using Lead-Free Solder ....... 1-1
[2] Safety Precaution For Service Manual.......... 1-2
[3] Voltage Selection .......................................... 1-2
[4] AC Power Supply Cord and
AC Plug Adaptor ........................................... 1-2
[5] Specifications ................................................ 1-3
[6] Names Of Parts............................................. 1-4
CHAPTER 2. ADJUSTMENTS
[1] Tuner Section ................................................ 2-1
[2] Mechanism Section....................................... 2-2
CHAPTER 3. BLOCK DIAGRAM
[1] Block Diagram............................................... 3-1
CHAPTER 4. CIRCUIT DESCRIPTION
[1] Waveforms Of CD Servo Circuit ....................4-1
[2] IC Voltage ......................................................4-3
CHAPTER 5. CIRCUIT SCHEMATICS AND PARTS
LAYOUT
[1] Notes On Schematic Diagram .......................5-1
[2] Types Of Transistor And LED ........................5-1
[3] Schematic Diagram .......................................5-2
[4] Wiring Side Of PWB ....................................5-12
CHAPTER 6. FLOWCHART
[1] Troubleshooting .............................................6-1
CHAPTER 7. OTHERS
[1] Function Table Of IC......................................7-1
[2] LCD Display.................................................7-10
PARTS GUIDE

QT-MP3W
1 – 1
AudioXL-MP150Service ManualXLMP150Market
[1] Precautions For Using Lead-Free Solder
1.Employing lead-free solder
Example:
Indicates lead-free solder of tin, silver and copper.
2.Using lead-free wire solder
3.Soldering
When the tip of the soldering bit is blackened during use, file it with steel wool or fine sandpaper.
Be careful when replacing parts with polarity indication on the PWB silk.
Lead-free wire solder for servicing
Ref No. Description
Parts No.
PWB-A1
PWB-A4
PWB-A2
PWB-A3
PWB-C
92LMP300280047
92LMP300180024
92LMP300380092
92LMP301280047
92LMP301380047
AUDIO
TUNER
CONTROL
RECTIFIER
TAPE
The LF symbol indicates lead-free solder, and is attached on the PWB and service manuals.The alphabetical
character following LF shows the type of lead-free solder.
When fixing the PWB soldered with the lead-free solder, apply lead-free wire solder. Repairing with
conventional lead wire solder may cause damage or accident due to cracks.
As the melting point of lead-free solder (Sn-Ag-Cu) is higher than the lead wire solder by 40 C, were
commend you to use a dedicated soldring bit, if you are not familiar with how to obtain lead-free wire solder or
soldering bit, contact our service station or service branch in your area.
As the melting point of lead-free solder (Sn-Ag-Cu) is about 220 C which is higher than the conventional lead
solder by 40 C, and as it has poor solder wettability, you may be apt to keep the soldering bit in contact with the
PWB for extended period of time. However, since the land may be peeled off or the maximum heat-resistance
temperature of parts may be exceeded, remove the bit from the PWB as soon as you confirm the steady
soldering condition.
Lead-free solder contains more tin, and the end of the soldering bit may be easily corrected.Make sure to turn on
and off the power of the bit as required.
If a different type of solder stays on the tip of the soldering bit, it is alloyed with lead-free solder. Clean the bit
after every use of it.
"AUDIO, CONTROL, RECTIFIER, CD, TUNER, TAPE PWB" of this model employs lead-free solder.
PWB-B 92LMP300980056
CD
CHAPTER 1.
GENERAL DESCRIPTION

QT-MP3W
1 – 2
[2] Safety Precaution For Service Manual
Precaution to be taken when replacing and servicing the Laser Pickup.
/
[3] Voltage Selection
[4] AC Power Supply Cord and AC Plug Adaptor
92L15911022019
92L15124023002

QT-MP3W
1 – 3
[5] Specifications
FOR A COMPLETE DESCRIPTION OF THE OPERATION OF THIS UNIT, PLEASE REFER
TO THE OPERATION MANUAL.
■
■■
■
As part of our policy of continuous improvement, SHARP reserves the right to make design and
specifcation changes for product improvement without prior notice. The performance specification
figures indicated are nominal values of production units .There maybe some deviations from these
values in individual units.
General
Radio
Frequency range FM: 88 - 108 MHz
AM: 531 - 1602 kHz
Tape recorder
CD player
Frequency response 80 - 8,000 Hz (Normal tape)
Signal/noise ratio 40 dB
Wow and flutter 0.3% (WRMS)
Motor DC 9 V electric governor
Bias system AC bias
Erase system Magnet erase
Type Compact disc player
Signal readout Non-contact, 3-beam semiconductor
laser pickup
D/A converter 1-bit D/A converter
Frequency
response 60 - 20,000 Hz
Power source
AC 110 - 127/ 220 - 240 V, 50/60 Hz
DC12V ["D" size (UM/SUM-1, R20 or HP-
2) battery x 8]
Power
consumption
Power on: 13 W
Power stand-by: 1.4 W
Output power
RMS : 4 W (2 W + 2 W)
(DC OPERATION, 10% T.H.D)
Speakers
9 cm (3-1/2") full range speaker x 2
Dimensions
Width: 410 mm (16-1/8")
Height: 150 mm (6")
Depth: 245 mm (9-1/2")
Weight
2.7 kg (5.9 lbs.) without battery

QT-MP3W
1 – 4
[6] Names Of Parts
Top panel
Front panel
Back Panel
Display
PAUSE
FUNCTION
OFFON
MIN
MAX
MIC
RADIO
TAPE (STAND-BY)
CD
STOP/EJECT F.FWD REWIND PLAY RECORD
OPEN
BAND
AM
FM
KHz
1600
1400
1200
1000
800
700
600
530
AM
MHz
108
106
104
102
100
96
92
90
88
FM
P
U
S
H
/
C
L
O
S
E
V
O
L
U
M
E
T
U
N
I
N
G
X-BASS
/
ON
21 3 4 5 6 7 8 9 10 11
3
10 11 12 13 14 15
6542178
9
1. Cassette Compartment
2. FM Stereo Indicator
3. Folder Down Button
4. Power on Indicator
5. Folder Up Button
6. Memory Button
7. Repeat/Random Button
8. Fast Reverse/Track Down Button
9. Fast Forward/ Track Up Button
10. Play/Pause Button
11. Stop Button
1. Headphone Socket
2. X-Bass On/Off Button
3. Volume Control
4. Function switch
5. CD Compartment
6. CD Door Open Button
7. Tuner Band Selector
8. Tuning Control
9. Build-in Mic
10. Tape Pause Button
11. Tape Stop/Eject Button
12. Tape Fast Forward Button
13. Tape Rewind Button
14. Tape Play Button
15. Tape Record Button
1. FM Stereo/Mono mode/Beat Cancel Selecto
r
2. Battery Compartment
3. Voltage Selector
4. AC Input Socket
1. MP3 Indicator
2. WMA Indicator
3. Disc Play Indicator
4. Folder Indicator
5. Repeat mode Indicators
6. Memory Indicator
7. Random Indicator

QT-MP3W
2 – 1
CHAPTER 2. ADJUSTMENTS
[1] Tuner Section
Use a plastic screw driver for adjustments.
Adjust the intermediate frequency of AM and FM to the frequency of ceramic filter.
Set of unit
Supply voltage
:
DC 12.0V
speaker impedance
:
4ohms
standard output
:
50 mW
Function switch
:
RADIO
Parts Location:
a. AM Adjustment Band switch: MW
SG Position of VTVM
Input Output Frequency Tuning dial Oscilloscope
Closed the output Connect sweep
termial by sweep generator to 465 KHz Low T103
generator, it place IC101(17) PIN(A)
to MW ANT
2Connect AM SG to Connect VTVM to 522 KHz Low end T101
3test loop speaker terminals. 1620 KHz High end C4
4Connect AM SG to Connect VTVM to 600 KHz 600 KHz MW ANT COIL Max.
5test loop speaker terminals. 1400 KHz 1400 KHz C3 Max.
b. FM Adjustment Band switch: FM FM Dummy antenna: 75 ohms unbalance
SG Position of VTVM
Input Output Frequency Tuning dial Oscilloscope
2Connect FM SG to Connect VTVM to 87.35 MHz Low end L102
3FM.ANT & D101(-) speaker terminals. 108.25 MHz High end C1
4Connect FM SG to Connect VTVM to 90.0 MHz 90.0 MHz L101 Max.
5FM.ANT & D101(-) speaker terminals. 106.0 MHz 106.0 MHz C2 Max.
Tuning
coverage
Tracking
Adjusting
Circuit Connections Adjustment
IF1
Step
Step Adjusting Connection Adjustment
Circuit
Tuning
coverage
Tracking
L102
C1 C3
C2 C4
T103 T101
L101

QT-MP3W
2 – 2
[2] Mechanism Section
1 HEAD AZIMUTH ADJUSTMET
( 1 )Load the test tape TCC-182A 8KHz for azimuth
adjustment.
( 2 )Press the PLAY button.
( 3 )Use a cross-tip screwdriver to turn the screw for azimuth
adjustment so that the left and right output are maximized.
( 4 )Press the STOP button.
( 5 )After completion of the adjustment. Use thread lock (TB-1401B)
to secure the azimuth-adjustment screw.
2 AC BIAS FREQUENCY ADJUSTMENTS
( 1 )Connect frequency counter to CN201 (BS).
( 2 )R/P swith in recording state.
( 3 )Adjusting T201 use a plastic screwdriver, AC bias frepuency; 62+-1KHZ.
3 TAPE SPEED ADJUSTMENT
( 1 )Insert the test tape (MTT-111N,3,000 HZ).
( 2 )Press the PLAY button.
( 3 )Use a flat-tip screwdriver to turn the MOTOR VR.
Adjust MOTOR VR so that the frequency counter
become 3,000Hz.
CASSETTE MECHANISM SECTION
CASS DECK

QT-MP3W
2 – 3
HEAD AZIMUTH ADJUSTING SCREW
Tape recorder section
Items
Items Measurement method Standard Adjusting
Values positions
1 Playback the test tape TCC-182A(8KHz) Maximum Adjust the head
output azimuth screw
only
left and right output levers become
maximum, After adjustment, lock the head
azimuth at least by half turn.
Confirmation Adjust VR401 so that the frequency counter
playing back the test tape TCC-112 (3KHz)
with ending forward winding of the tape.
Tape speed MOTOR VR
of tape speed of deck
:3,010Hz
+/-15Hz
Reference Values for Confirmation Items
Measurement method Standard Adjusting]
Values positions
Wow & flutter When the test tape TCC-112 (3KHz) has
been mechanism at the beginning of
forward wow & flutter should be 0.25% or
less (WRMS).
0.25% or
less
(WRMS)
(Load resistance:
8Ө
Ө
)
Confirmation
of head angle
:Measurement output
terminal
Sparker R
Measurement
conditions
:Test tape
:Test tape
TCC-112 (3KHz)
:Measurement output
terminal
Measurement
conditions
:Test tape
:Measurement output
terminal
Speaker terminal
TCC-182A (8KHz)
Headphone terminal
Headphone terminal
Headphone terminal
TCC-112(3KHz)

QT-MP3W
2 – 4
Electrical Performance
Standard Adjusting
Values positions
1 With the recording and playback
mechanism, load the test tapes TDK-D60
TDK-D60, and set the mechanism to the
recording and pausing condition in advance. 4.5 A
+/-0.5 A
2 After connecting 100 in series to the
recorder head, measure the bias current
with a valve voltmeter at both of the
terminals.
Adjustment of
recording and
playback
frequency
characteristics
1 With the recording and playback Output
mechanism, load the test tapes (TDK-D60) deviation
and set the mechanism to the between
recording and pausing condition in 1KHz and
advance. 8KHz
2 While repetitively inputting the reference :-1dB +/-2dB
frequency signal of 1KHz and 8KHz from
OSC IN, record and playback the tape.
3 While receding and playback the test tape
Lch and Rch so that the output
deviation between 1KHz and 8KHz
becomes -1dB +/-2dB.
Reference Values for Electrical Function Confirmation Items
Measurement method Standard Adjusting
Values positions
1 While changing over to and form BIAS 1
and 2, confirm that the frequency is
changed.
62KHz T201
+/-6KHz
2 With the recording and playback
mechanism, load the test tape.
(TDK-D60), and set the mechanism to the
recording and pausing condition in advance.
3 Confirm that the BIAS TP frequency on the
P.C. board is 62KHz +/-6KHz.
Items
Items
Measurement
conditions
Playback
:Test tape
:Measurement
P.C. board
Recording
bias
frequency
OSC IN
TDK-D60
:Measurement
input terminal
(REF.:- 10dB)
:Reference frequency
1KHz and 8KHz
:Test tape
Adjustment of
recording bias
current
(Reference
Value)
headphone
terminals
:Measurement
output terminal
Measurement
conditions
:Mode
TDK-D60
Recording mode
:Test tape
Playback mode
terminal
Both recording and
BIAS TP on
TDK-D60

QT-MP3W3
3 – 1
CHAPTER 3. BLOCK DIAGRAM
A
B
C
D
E
F
G
H
123456
Figure 1: BLOCK DIAGRAM (1/2)

QT-MP3W
3 – 2
78 9 10 11 12
Figure 2: BLOCK DIAGRAM (2/2)

QT-MP3W4
4 – 1
CHAPTER 4.
CIRCUIT DESCRIPTION
[1] Waveforms Of CD Servo Circuit
< Z1 : 2.5M > < Z1 :1 00K >
< Z1 : 2M > < Z1 : 2M >
< Z1 : 25K >
CH 4
Display500ms/div
100ms/div 1s/div
20µs/div
Freq(C1) *****
Position
Coupling
DC1M
Probe
10:1
Offset
0:32 V
Bandwidth
Edge CH4
Auto
0.50 V
Edge CH4
Auto
0.50 V
CH1 10:1
1.00 V/div
DC Full
Edge CH4
Auto
0.50 V
CH1 10:1
2.00 V/div
DC Full
CH1 10:1
1.00 V/div
DC Full
Edge CH4
Auto
0.50 V
CH1 10:1
2.00 V/div
DC Full
CH2 10:1
2.00 V/div
DC Full
CH3 10:1
2.00 V/div
DC Full
CH4 10:1
2.00 V/div
DC Full
Edge CH4
Auto
0.001 kV
CH1 10:1
5.00 V/div
DC Full
CH2 10:1
5.00 V/div
DC Full
CH3 10:1
5.00 V/div
DC Full
Full
ONOFF
-0.20div
CH 4
Display
Position
Coupling
DC1M
Probe
10:1
Offset
Bandwidth
Freq(C1)
FR-A(C4) Freq(C2) 50.00000kHz
40.00000kHz
43.75492kHz Full
ONOFF
- 3.00div
MEASURE
Mode
Item Setup
Delay Setup
1Cycle Mode
OFF
Time Range1
Time Range2
ON
ON
1.57000div
1.77000div
Freq (C1)
50.00000kHz
0.2vCH1 A>0.2µs
˜
0:82 V
1
IC902 19
2
IC901 24
6
IC901 12
2
IC901 24
1
IC902 19
4
IC902 24
3
IC902 4
5
IC902 10
9
IC901 21
8
IC901 22
7
IC901 23

QT-MP3W
4 – 2
13
IC901 31
12
IC901 33
11
IC901 32
10
IC901 43
3
IC902 4
10
IC901 64
< Z1 : 2.5M >
< Z1 : 2M > 1s/div
500ms/div
CH1 10:1
2.00 V/div
DC Full
CH1 10:1
2.00 V/div
DC Full
Edge CH4
Auto
0.50 V
CH1 10:1
5.00 V/div
DC Full
CH2 10:1
2.00 V/div
DC Full
CH3 10:1
2.00 V/div
DC Full
CH4 10:1
2.00 V/div
DC Full
Edge CH4
Auto
0.50 V
Freq (C1)
22.22222kHz
Freq (C1)
P1sN (C4)
FR-A (C4)
31.25000kHz
5.891783kHz
1133

QT-MP3W
4 – 3
[2] IC Voltage
PIN PIN PIN
NO NO NO NO PIN
NO
1 1.35 33 0.00 1 3.20 1 1.64 33 1.65 1 3.54
2 3.20 34 0.00 2 1.65 2 1.64 34 1.65 2 3.56
3 0.00 35 0.00 3 1.65 3 0.00 35 1.65 3 1.65
4 0.00 36 0.00 4 1.65 4 3.14 36 1.65 4 0.00
5 0.00 37 0.00 5 1.65 5 2.70 37 0.00 5 7.10
6 3.65 38 0.00 6 0.00 6 3.20 38 1.65 6 3.20
7 0.00 39 0.00 7 2.61 7 1.10 39 1.65 7 7.70
8 3.65 40 1.35 8 0.00 8 3.20 40 3.20 8 0.00
9 3.65 41 0.00 9 1.65 9 0.00 41 1.55 9 0.00
10 0.00 42 3.67 10 1.65 10 3.65 42 1.51 10 1.65
11 0.00 43 0.00 11 1.65 11 3.65 43 0.00 11 3.56
12 0.00 44 0.00 12 1.00 12 0.00 44 3.00 12 3.56
13 0.00 45 0.00 13 3.00 13 0.00 45 1.40 13 0.00
14 0.00 46 3.67 14 1.65 14 3.24 46 0.00 14 0.00
15 1.64 47 0.00 15 1.65 15 0.00 47 1.40 15 0.00
16 1.65 48 0.00 16 1.65 16 0.75 48 1.40 16 0.00
17 0.00 49 3.66 17 0.75 17 1.64 49 3.20 17 3.56
18 1.64 50 0.00 18 1.65 18 0.00 50 2.52 18 3.56
19 1.65 51 3.66 19 1.22 19 1.50 51 0.00 19 1.65
20 0.00 52 0.00 20 1.65 20 3.23 52 1.64 20 0.00
21 1.34 53 3.66 21 2.37 21 1.00 53 1.63 21 7.70
22 0.00 54 0.00 22 0.77 22 0.00 54 1.62 22 7.70
23 0.00 55 1.35 23 1.65 23 1.55 55 1.62 23 1.65
24 0.00 56 0.00 24 0.00 24 1.65 56 1.64 24 0.00
25 0.00 57 1.36 25 3.20 57 1.64 25 1.65
26 0.00 58 0.67 26 1.65 58 1.64 26 3.57
27 0.00 59 0.80 27 1.65 59 1.64 27 3.56
28 0.00 60 0.00 28 0.75 60 1.64 28 0.00
29 0.00 61 0.00 PIN 1.65 61 1.64
30 0.00 62 3.66 NO 30 1.00 62 1.65
31 0.00 63 0.00 1 0.00 31 1.65 63 1.64
32 0.00 64 0.95 2 0.00 32 1.65 64 3.20
3 0.00 PIN
4 0.65 NO
5 0.00 1 13.20
6 0.00 2 6.50
7 0.00 3 12.20
8 0.00 4 1.17
9 0.00 5 0.00
10 3.64 6 13.10
11 0.40 7 0.00
12 0.00 8 0.00
13 0.00 9 1.17
14 0.00 10 12.20
15 0.00 11 6.50
16 5.36 12 13.80
VOLTAGE VOLTAGEVOLTAGE
IC904
TC94A34FG TC94A58FAG IC903
TA2157FNG
VOLTAGE
MM1669A
IC901 IC902
VOLTAGE
IC501
TC4052BP
VOLTAGE
VOLTAGE
PIN
NO
VOLTAGE
IC301
LA4227
PIN

QT-MP3W5
5– 1
CHAPTER 5. CIRCUIT SCHEMATICS AND PARTS LAYOUT
[1] Notes On Schematic Diagram
•Resistor:
To differentiate the units of resistors, such symbol as
K and M are used: the symbol K means 1000 ohm
and the symbol M means 1000 kohm and the resis-
tor without any symbol is ohm-type resistor.
Besides, the one with “Fusible” is a fuse type.
• Capacitor:
To indicate the unit of capacitor, a symbol P is used:
this symbol P means pico-farad and the unit of the
capacitor without such a symbol is microfarad. As to
electrolytic capacitor, the expression “capacitance/
withstand voltage” is used.
(CH), (TH), (RH), (UJ): Temperature compensation
(ML): Mylar type
(P.P.): Polypropylene type
• Schematic diagram and Wiring Side of P.W.Board
for this model are subject to change for
improvement without prior notice.
• The indicated voltage in each section is the one
measured by Digital Multimeter between such a
section and the chassis with no signal given.
1. In the tuner section,
indicates AM
indicates FM stereo
2. In the audio section, a tape is being played back.
3. In the deck section, a tape is being played back.
( ) indicates the record state.
4. In the rectifier section, a tape is being played
back.
5. In the CD section, the CD is stopped.
•Parts marked with “ “ ( ) are
important for maintaining the safety of the set. Be
sure to replace these parts with specified ones for
maintaining the safety and performance of the set.
[2] Types Of Transistor And LED
REF. NO DESCRIPTION POSITION
VR301 VOLUME MAX—MIN
SW701 USB ON—OFF
SW702 CD ON—OFF
SW703 Memo / Folder ON—OFF
SW704 Repeat / Random ON—OFF
SW705 Stop ON—OFF
SW706 Play/Pause ON—OFF
SW707 Fast Reverse / Track Down / Folder Down ON—OFF
SW708 Fast Forward / Track Up / Folder Up ON—OFF
HY3C
HY4C
B
(3)
E
(1)
C
(2)
TOP
VIEW
TOP VIEW
B764
9014C
S8050
9015C
VIEW
FRONT
ECB
(S)(G)(D)
(1)(2)(3)
1N4001
1N4148
FRONT
VIEW
92L22708030000
92L22708050012
92L22708050001

QT-MP3W
5 – 2
[3] Schematic Diagram
Figure 5-1: TUNER SCHEMATIC DIAGRAM
A
B
C
D
E
F
G
H
123456

QT-MP3W
5 – 3
Figure 5-2: DISPLAY SCHEMATIC DIAGRAM
A
B
C
D
E
F
G
H
123456

QT-MP3W
5 – 4
A
B
C
D
E
F
G
H
123456
Figure 5-3: AUDIO SCHEMATIC DIAGRAM

QT-MP3W
5 – 5
A
B
C
D
E
F
G
H
123456
Figure 5-4: TAPE SCHEMATIC DIAGRAM

QT-MP3W
5 – 6
A
B
C
D
E
F
G
H
123456
Figure 5-5: POWER SCHEMATIC DIAGRAM
Other manuals for QT-MP3W
1
Table of contents
Other Sharp Stereo System manuals

Sharp
Sharp AQUOS CD-BA250 User manual

Sharp
Sharp XL-UH220H User manual

Sharp
Sharp XL-MP45H User manual

Sharp
Sharp CD-BK250W User manual

Sharp
Sharp XL-MP150 User manual

Sharp
Sharp CD-C621H User manual

Sharp
Sharp XL-3000H User manual

Sharp
Sharp XL-MP110H User manual

Sharp
Sharp CD-DH790N User manual

Sharp
Sharp CD-DK891N User manual

Sharp
Sharp XL-30V User manual

Sharp
Sharp QT-CD210H User manual

Sharp
Sharp XL-1200 User manual

Sharp
Sharp XL-1600 User manual

Sharp
Sharp XL-MP130 User manual

Sharp
Sharp CD-BA200 User manual

Sharp
Sharp CD-C250X BK User manual

Sharp
Sharp CD-MPX870 User manual

Sharp
Sharp CD-BA300 User manual

Sharp
Sharp XL-MP9H User manual