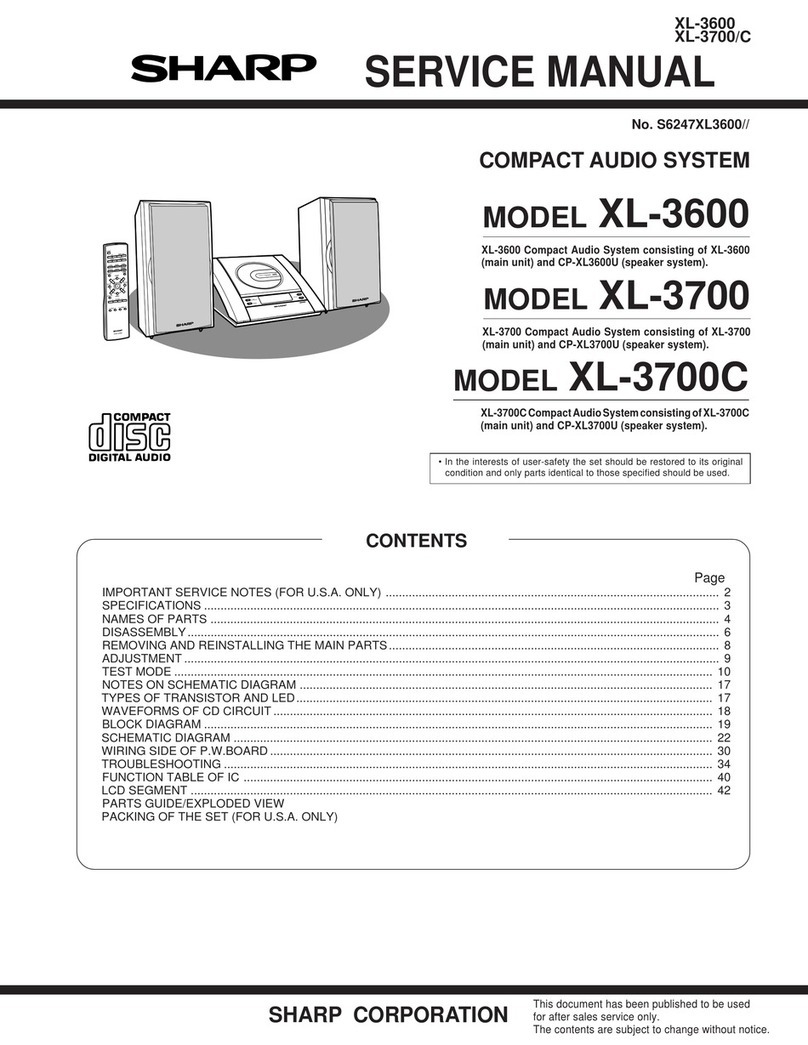
Sharp XL-S10 User manual

SERVICE MANUAL
XL-S10
No. S3412XLS10///
MICRO COMPONENT SYSTEM
XL-S10
MODEL
SHARP CORPORATION
CONTENTS
This document has been published to be used
for after sales service only.
The contents are subject to change without notice.
CHAPTER 1. GENERAL DESCRIPTION
[1] IMPORTANT SERVICE NOTES (FOR
U.S.A. ONLY) ................................................. 1-1
[2] SPECIFICATIONS ......................................... 1-1
[3] NAMES OF PARTS........................................ 1-2
CHAPTER 2. ADJUSTMENTS
[1] ADJUSTMENT ............................................... 2-1
[2] TEST MODE .................................................. 2-2
[3] When the CD does not function ..................... 2-3
CHAPTER 3. MECHANICAL DESCRIPTION
[1] DISASSEMBLY .............................................. 3-1
CHAPTER 4. DIAGRAMS
[1] BLOCK DIAGRAM ......................................... 4-1
CHAPTER 5. CIRCUIT DESCRIPTION
[1] VOLTAGE....................................................... 5-1
CHAPTER 6. CIRCUIT SCHEMATICS AND PARTS
LAYOUT
[1] NOTES ON SCHEMATIC DIAGRAM ............6-1
[2] TYPES OF TRANSISTOR AND LED ............6-1
[3] WIRING SIDE OF P.W.BOARD/SCHE-
MATIC DIAGRAM ..........................................6-2
CHAPTER 7. OTHERS
[1] FUNCTION TABLE OF IC .............................7-1
[2] LCD DISPLAY ...............................................7-3
Parts Guide
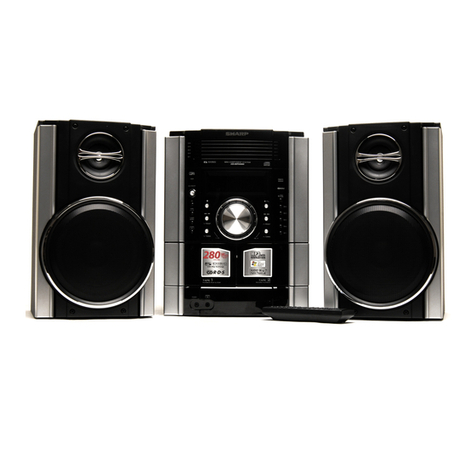
XL-S10 Micro Component System consisting of XL-S10
(main unit) and CP-S10 (speaker system).
•
In the interests of user-safety the set should be restored to its origi-
nal condition and only parts identical to those specified be used.

XL-S10
1 – 1
AudioXL-S10Service ManualXLS10MarketE
CHAPTER 1. GENERAL DESCRIPTION
[1] IMPORTANT SERVICE NOTES (FOR
U.S.A. ONLY)
BEFORE RETURNING THE AUDIO PRODUCT
(Fire & Shock Hazard)
Before returning the audio product to the user, perform the following
safety checks.
1. Inspect all lead dress to make certain that leads are not pinched or
that hardware is not lodged between the chassis and other metal
parts in the audio product.
2. Inspect all protective devices such as insulating materials, cabinet,
terminal board, adjustment and compartment covers or shields,
mechanical insulators etc.
3. To be sure that no shock hazard exists, check for leakage current in
the following manner.
* Plug the AC line cord directly into a 120 volt AC outlet.
* Using two clip leads, connect a 1.5k ohm, 10 watt resistor paral-
leled by a 0.15µF capacitor in series with all exposed metal cabinet
parts and a known earth ground, such as conduit or electrical
ground connected to earth ground.
* Use a VTVM or VOM with 1000 ohm per volt, or higher, sensitivity
to measure the AC voltage drop across the resistor (See diagram).
* Connect the resistor connection to all exposed metal parts having a
return path to the chassis (antenna, metal cabinet, screw heads,
knobs and control shafts, escutcheon, etc.) and measure the AC
voltage drop across the resistor.
All check must be repeated with the AC line cord plug connection
reversed.
Any reading of 0.3 volt RMS (this corresponds to 0.2 milliamp. AC.) or
more is excessive and indicates a potential shock hazard which must
be corrected before returning the audio product to the owner.
[2] SPECIFICATIONS
FOR A COMPLETE DESCRIPTION OF THE OPERATION OF THIS UNIT, PLEASE REFER
TO THE OPERATION MANUAL.
TO EXPOSED
METAL PARTS
CONNECT TO
KNOWN EARTH
GROUND
TEST PROBE
0.15 µ F
1.5k ohms
10W
VTVM
AC SCALE
Specifications for this model are subject to change without prior notice.
■General
■Amplifier
■Tuner
■CD player
■Cassette deck
■Speaker
Power source AC 120 V, 60 Hz
Power
consumption
28 W
Dimensions Width: 6-5/16" (160 mm)
Height: 9-1/2" (242 mm)
Depth: 9-7/8" (250 mm)
Weight 5.1 lbs. (2.3 kg)
Output power 5 watts minimum RMS per channel into 4
ohms from 100 Hz to 15 kHz, 10% total har-
monic distortion
Output terminals Speakers: 4 ohms
Headphones: 16 - 50 ohms
(recommended: 32 ohms)
Subwoofer pre-out (audio signal):
500 mV/47 k ohms
Input terminals Video/Auxiliary (audio signal):
500 mV/47 k ohms
Frequency range FM: 87.5 - 108.0 MHz
AM: 530 - 1,720 kHz
Type Compact disc player
Signal readout Non-contact, 3-beam semiconductor laser
pickup
D/A converter 1-bit D/A converter
Frequency
response
20 - 20,000 Hz
Dynamic range 90 dB (1 kHz)
Frequency
response
125 - 8,000 Hz (normal tape)
Signal/noise ratio 50 dB (recording/playback)
Wow and flutter 0.3 % (WRMS)
Type 4" (10 cm) full-range speaker (magnetically
shielded)
Maximum input
power
10 W
Rated input power 5W
Impedance 4ohms
Dimensions Width: 5-1/8" (130 mm)
Height: 9-7/16" (240 mm)
Depth: 6-5/16" (161 mm)
Weight 3.3 lbs. (1.5 kg)/each
XL-S10
1 – 2
[3] NAMES OF PARTS
1. CD Compartment
2. Power On/Stand-by Button
3. Volume Control
4. Bass/Treble Selector Button
5. Function Selector Button
6. Memory/Set Button
7. Clear Button
8. Cassette Compartment
9. CD Eject Button
10. Remote Sensor
11. CD Track Up or Fast Forward,
Tuner Preset Up Button
12. CD Play or Pause, Tuning Up Button
13. CD Stop, Tuning Down Button
14. CD Track Down or Fast Reverse,
Tuner Preset Down Button
15. Headphone Jack
16. Tape Record Button
17. Tape Play Button
18. Tape Rewind Button
19. Tape Fast Forward Button
20. Tape Stop/Eject Button
21. Tape Pause Button
22. Volume Indicator
23. Equalizer Indicator
24. Sleep Indicator
25. Tape Record Indicator
26. Timer Play Indicator
27. CD Repeat Play Indicator
28. CD Play Indicator
29. Auxiliary Indicator
30. CD Random Play Indicator
31. Memory Indicator
32. FM Stereo Mode Indicator
33. FM Stereo Receiving Indicator
34. FM/AM Loop Antenna Jack
35. Video/Auxiliary (Audio Signal) Input Jacks
36. Subwoofer Pre-output Jack
37. Speaker Terminals
38. AC Power Cord
30
1
2
3
4
5
6
7
8
9
10
11
12
13
14
15 16 17 18 19 20 21
3227 31
24
25
26
3328 29
34
37
38
35
22
23
36
1. Full-Range Speaker
2. Speaker Wire
3. Remote Control Transmitter
4. Power On/Stand-by Button
5. CD Button
6. CD Fast Reverse, Tuning Down Button
7. Video/Auxiliary Button
8. CD Track Down, Tuner Preset Down Button
9. CD Play Button
10. CD Stop Button
11. Memory Button
12. Clear Button
13. Clock Button
14. Treble Up and Down Buttons
15. Bass Up and Down Buttons
16. Volume Up and Down Buttons
17. Tuner and Band Selector Button
18. Tape Button
19. CD Fast Forward, Tuning Up Button
20. CD Track Up, Tuner Preset Up Button
21. CD Pause Button
22. Random/Repeat Button
23. Timer Button
24. Sleep Button
2
1
3
4
5
7
8
9
10
11
12
13
14
15
16
17
18
19
20
21
22
23
24
6

XL-S10
2 – 1
AudioXL-S10Service ManualXLS10MarketE
CHAPTER 2. ADJUSTMENTS
[1] ADJUSTMENT
1. MECHANISM SECTION
•Driving Force Check
•Torque Check
•Tape Speed
2. TUNER SECTION
fL: Low-range frequency
fH: High-range frequency
•AM IF/RF
Signal generator: 400 Hz, 30%, AM modulated
•Check FM VT
Signal generator: 1 kHz, 40 kHz dev., FM modulated
•FM Mute Level
Signal generator: 1 kHz, 40 kHz dev., FM modulated
•FM Detection
Signal generator: 10.7 MHz FM sweep generator
•FM RF
Signal generator: 1 kHz, 75 kHz dev., FM modulated
3. CD SECTION
•Adjustment
Since this CD system incorporates the following automatic adjust-
ment functions, readjustment is not needed when replacing the
pickup. Therefore, different PWBs and pickups can be combined
freely.
Each time a disc is changed, these adjustments are performed
automatically. Therefore, playback of each disc can be performed
under optimum conditions.
Torque Meter Specified Value
Play: TW-2111 Over 80 g
Torque Meter Specified Value
Play: TW-2111 30 to 80 g.cm
Fast forward: TW-2231 70 to 180 g.cm
Rewind: TW-2231 70 to 180 g.cm
Test Tape Adjusting
Point
Specified
Value
Instrument
Connection
MTT-111 Variable
Resistor in
motor.
3,000 ± 30 Hz Speaker Ter-
minal (Load
resistance: 6
ohms)
Figure 1
Test Stage Frequency Frequency
Display
Setting/
Adjusting
Parts
Instrument
Connection
IF 450 kHz 1,602 kHz L305 *1
AM Band
Coverage
— 522 kHz (fL): L306
1.1 ± 0.1 V
*2
AM Tracking 990 kHz 990 kHz L302 *3
*1. Input: IC301 1Pin Output: IC301 23Pin
*2. Input: Input is not connected Output: TP-VT(IC301 28Pin)
*3. Input: Antenna Output:IC301 23Pin
Frequency Display Check
Point
Instrument
Connection
87.5 MHz 87.5 MHz 1.5V ± 1.0V TP-VT
108 MHz 108 MHz 5.0V ± 1.0V TP-VT
TAPE MECHANISM
VARIABLE RESISTOR
IN MOTOR
Frequency Display Adjusting
Parts
Instrument
Connection
98.00 MHz
(30 dBµV)
98.00 MHz Input: Antenna
Output: Speaker Terminal
Test
Stage
Frequency Frequency
Display
Setting/
Adjusting
Parts
Instrument
Connection
FM IF 10.7 MHz 98.00 MHz Input: Pin 36 of
IC301
Output: Pin 23
of IC301
Test
Stage
Frequency Frequency
Display
Setting/
Adjusting
Parts
Instrument
Connection
FM Band
Coverage
— 87.50 MHz (fL): L307
1.5 ± 0.1 V
*1
FM RF 98.00 MHz
(10 ~ 20dB)
98.00 MHz L304 *1
*1. Input: Antenna Output: 23 Pin of IC301
Figure 2 ADJUSTMENT POINTS
CNP301
L306
IC301
L304
FM RF
L302
L307
L305
MAIN PWB-A1
AM IF
AM ANT.
FM OSC.
FM BAND
COVERAGE fL
AM BAND
COVERAGE fL
TP-VT=28Pin
AM
Tracking

XL-S10
2 – 2
[2] TEST MODE
Test Mode Key Operation
All test modes can be terminated by turning off the power with POWER key.
•Preset clear test
All tuner preset stations are cleared.
•Preset set test
Stations are set according to destination.
•Display test
When test mode is activated, the entire display lights up. As the “PLAY” button is pressed, half of the display lights up alternately.
•CD test
In step 5, hold down the AUX button on the remote control. The tracking servo is switched on/off.
From step 3, the pick up can be moved with the FF/REW button.
•Soft reset test
All data in RAM is cleared.
•VOLUME test
Starting from level 23 (default), check all the levels (0 - 23 - MAX).
•TIMER test
Start the timer at 1:00. When it reaches 1:05, turn on the power with the AUX function and turn off the power after about 30 seconds.
(In the test mode, fade-in and fade-out are not required.)
•ALL KEY test
In the test mode, hold down all the buttons on the main unit and then press the “POWER” button. “OK” appears.
If only the “POWER” key is pressed, “ERROR” appears.
KEY1 KEY2 KEY3 TEST CONTENTS INDICATION
Memory Preset Down Power Preset clear Tu CL
Memory Stop Power Preset set FM P-01
Memory Play Power Display
Memory Preset up Power CD T-1
Memory Clear Power Soft reset CL
Bass/treble Preset down Power Volume T-3
Bass/treble Play Power Timer test T-4
Bass/treble Clear Power all key T-6
September 12 Days Indication Change
CH BAND FREQUENCY
1 FM STEREO FM 87.50 MHz
2 FM 108.00 MHz
3 FM 98.00 MHz
4 FM 90.00 MHz
5 FM 106.00 MHz
6 AM AM 530 kHz
7 AM 1720 kHz
8 AM 990 kHz
9 AM 600 kHz
10 AM AM 1400 kHz
11 ——————
·
·
35
36 FM MONO FM 106.0 MHz
37 FM 90.0 MHz
38 FM 98.0 MHz
39 FM 108.0 MHz
40 FM 87.5 MHz
CH BAND FREQUENCY
[cd step 1] Enter test mode. ←———————
↓Hold down the “memory” button
[cd step 2] After some steps, the laser turns on.
↓Hold down the “memory” button
[cd step 3] After some steps, focus search is performed.
↓Hold down the “memory” button
[cd step 4] After some steps, CLV rotation is performed.
↓Hold down the “memory” button
[cd step 5] CD playback starts.
↓Hold down the “stop” button to return to [cd step 1] ––––––––––

XL-S10
2 – 3
[3] When the CD does not function
The CD section may not operate when the objective lens of the optical pickup is dirty. Clean the objective lens, and check the playback operation.
When this section does not operate even after the above step is taken, check the following items.
Turn the power off.
Gently clean the lens with a lens cleaning tissue and a small amount of isopropyl alcohol.
Do not touch the lens with the bare hand.
Parts code
1. CD optical pickup Lens cleaner disc UDSKA0004AFZZ
HOW TO USE
1. Using the brush in the cleaner cap, apply 1 or 2 drops of the cleaning fluid to the brush on the CD cleaner disc which has
the mark next to it.
2. Place the CD cleaner disc onto the CD disc tray with the brush side down, then press the play button.
3. You will hear music for about 20 seconds and the CD player will automatically stop. If it continues to turn, press the stop
button.
CAUTION
The CD lens cleaner should be effective for 30~50 operations, however if the brushes become worn out earller then please
replace the cleaner disc.
If the CD cleaner brushes become very wet then wipe off any excess fluid with a soft cloth.
Do not drink the cleaner fluid or allow it to come in contact with the eyes. In the event of this happening then drink and /
or rinse with clean water and seek medical advice.
The CD cleaner disc must not be used on car CD players or on computer CD ROM drives.
All rights reserved. Unauthorized duplicating, broadcasting and renting this product is prohibited by law.
Cleaner Liquid Cleaning Disc
PARTS CODE: UDSKA0004AFZZ

XL-S10
3 – 1
AudioXL-S10Service ManualXLS10MarketE
CHAPTER 3. MECHANICAL DESCRIPTION
[1] DISASSEMBLY
Note 1:
After removing the connector for the optical pickup from the connector,
wrap the conductive aluminium foil around the front end of the connec-
tor so as to protect the optical pickup from electrostatic damage.
Caution on Disassembly
Follow the below-mentioned notes when disassembling the unit and
reassembling it, to keep it safe and ensure excellent performance:
1) Take cassette tape and compact disc out of the unit.
2) Be sure to remove the power supply plug from the wall outlet
before starting to disassemble the unit.
3) Take off nylon bands or wire holders where they need to be
removed when disassembling the unit. After servicing the unit,
be sure to rearrange the leads where they were before disas-
sembling.
4) Take sufficient care on static electricity of integrated circuits and
other circuits when servicing.
STEP REMOVAL PROCEDURE FIGURE
1 Top Cabinet 1. Screw...........................(A1) x 5
2. Socket.........................(A2) x 2
3. Flat Cable....................(A3) x 1
1
2 Side Panel 1. Screw...........................(B1) x 4 1
3 Rear Panel 1. Screw..........................(C1) x 3
2. Screw..........................(C2) x 2
1
2
4 Main PWB 1. Screw..........................(D1) x 2
2. Socket.........................(D2) x 2
3. Socket.........................(D3) x 1
2
5 Front Panel 1. Screw...........................(E1) x 2 3
6 Power PWB 1. Screw...........................(F1) x 2
2. Screw...........................(F2) x 1
3
7 Display PWB 1. Knob............................(G1) x 1
2. Screw..........................(G2) x 8
4
8 Tape Mechanism 1. Screw..........................(H1) x 1
2. Screw..........................(H2) x 4
4
9 Open/Close
Switch PWB
1. Screw...........................(J1) x 1
2. Hook............................(J2) x 2
5
10 CD Mechanism 1. Screw...........................(K1) x 4 5
Figure 1
Figure 2
Figure 3
(A3)x1
(A2)x2
Top Cabinet Open/Close
Switch PWB
CD Mechanism
Side Panel
(Right)
Rear Panel
(C1)x2
ø3x10mm
(C1)x1
ø3x10mm
Side Panel
(Lift)
(A1)x1
ø3x10mm
(A1)x2
ø3x10mm
(A1)x1
ø3x10mm
(A1)x1
ø3x10mm
(B1)x2
ø3x10mm
(B1)x2
ø3x10mm
Top Cabinet
(D1)x2
ø3x10mm
(D2)x1
(C2)x2
ø3x10mm
Top Cabinet
(D2)x1
(D3)x1
Main PWB
Power PWB
(E1)x2
ø3x10mm
(F1)x2
ø3x10mm
(F2)x1
ø3x10mm
Power
PWB
PWB
AC cord
Front Panel

XL-S10
3 – 2
Figure 4
Figure 5
Open
Cassette
Holder
(G2)x8
ø2.6x10mm
(H2)x4
ø3x10mm
(H1)x1
ø2.6x10mm
(G1)x1
Front Panel
Display PWB
PWB
Spring
Lever
Tape
Mechanism
(J1)x1
ø2.6x10mm
(J2)x2
(K1)x4
ø2.6x10mm
Open/Close
Switch PWB
Top Cabinet
CD Mechanism

XL-S10
3 – 3
—MEMO—

XL-S10
4 – 1
AudioXL-S10Service ManualXLS10MarketE
CHAPTER 4. DIAGRAMS
[1] BLOCK DIAGRAM
1
2
3
AM ANT.
BAND PASS
FILTER
FM IF
AM IF
75KHz
AM IF
FM IF
FM IF
+B
1
2
3
3
2
16
5
4
321
456
LA6548ND
19202136 35 34
123 1817164 5 6 7 8 9 10 11 12 13 14 15
LV23002M
33 32 31
3
2
16
5
4
222324252627282930
VP
VTCC
FM:1.5V-5.0V
AM:1V-8V
1-SLD
G-SLD
0+SLD
0-SLD
TCAP
RESET REG-TR
0-SPD
0+SPD
G-SPD
REF-IN
1-SPD
G-TRK
REG-OUT
0+TRK
0-TRK
0-FCS
I-TRK
G-FCS
1-FCS
GND
GND
GND
0+FCS
GND
GND
GND
MUTE
VCC VCC
30
29
28
27
26
25
24
23
22
21
20
19
18
17
16 15
14
13
12
11
10
9
8
7
6
5
4
3
2
1
FMRF-IN
FMRF-OUT
VCC2
FM-OSC
AM-OSC
B02
B01
LP-OUT
LP-IN
PD
AGC
AMLOWOUT
DET-OUT
MPX-IN
VDD
XOUT
XIN
D0
CL
DI
R-OUT
L-OUT
FM-IET
P-CCMP
P-DET
CE
VSS
P-DET
FMRF-IN
VCC1
AM-MIX
GND1
FM-MIX
REG
AMRF-IN
AM LOOP
ANTENNA
FM ANTENNA
FOCUS/TRACKING/
SPIN/SLED DRIVER
AM OSC
FM RF
FM OSC
FM FRONT END
1
3
2
4
1
2
3
123457612 10 9 81113
LA4631++
POWER AMP.
+
–
–
+
AMP_A1_ON
(R)
(L)
CD_A1_VCC
CD_A1_VCC
P-ON
TP-VM
MA-VCC
123
POWER
TRANSFORMER
630mA 125V
AC POWER
SUPPLY CORD
AC 120 V, 60 Hz
HEADPHOMES
SPEAKER
TERMINAL
L-CH
R-CH
TP-VT
VIDEO/AUX
IN
SUB
WOOFER
OUT
L
R
J102
CNP301
L302
D307
D306
L304
L307
D305 L306
D308
X301
D309
Q301
CF303
CF304
CF301
L305
Q371
CF302
IC301
IC802
D802
Q801
Q802
CF306
Q302
IC101
J101
J103
F653
CNP101
CNW101
CNS101
D104
D101
D103
D102
Q101
Q103
D106
Q102
Q502
PT1
PLL(TUNER)
FM IF DET./FM MPX./AM IF
CONSTANT
VOLTAGE
CONSTANT
VOLTAGE
CON
S
VOL
T
CONSTANT
VOLTAGE
AM BAND
COVERAGE fL
AM
Tracking
Figure 4-1 BLOCK DIAGRAM (1/3)

XL-S10
4 – 2
CNS701
M
10
18
13
14
12
11
15
17
16
1
2
3
4
5
6
7
8
9
16.9344MHz
12320 19 18
21
22
32
38
39
40
414243585960
61
62
63
80
79
78
LA6548ND
13141516 12 11 10 123456789
1234567
123456
LC78646E
4567891011121314151617
24
25
62
27
28
9
2
30
31
32
33
34
5
3
36
7
3
44456
44748490
551525354556
557
64
65
66
67
68
69
70
71
72
73
74
75
76
77
FE
RFMON
1-SLD
G-SLD
0+SLD
0-SLD
TCAP
RESET REG-TR
0-SPD
0+SPD
G-SPD
REF-IN
1-SPD
G-TRK
REG-OUT
0+TRK
0-TRK
0-FCS
I-TRK
G-FCS
1-FCS
GND
GND
GND
0+FCS
GND
GND
GND
MUTE
VCC VCC
VWRQ
VRES
DRF
CE
CL
DI
DO
CONT3
CONT2
PD01
PD02
VVSS
PCKIST
VVDD
VDD5
VSS
LDD
FR
LDS
DATA
DATACK
REF1
TDO
ADAVSS
ADAVDD
JITTC
RFMON
TE
TEC
FE
RSVSS
RFVDD
RF
VREF
TIN2F
TIN1E
FIN2B
FIN1A
LCHO
LVSS
RVSS
RCHO
RVDD
XVDD
EFMIN
SLCIST
SLCO
XOUT
XIN
FSX/16MIN
XVSS
C2F
EFLG
IGMOUT
ASRACK
ASDFIN
LRSY
TEST
DOUT
VDD
VSS
MON15
MON14
MON13
ASDACK
MON12
DEFECT
SBCK/FG
CONT5
CONT4
GPDAC
SLDO
SPDO
MON11
FSEQ
V/1P
FDO
30
29
28
27
26
25
24
23
22
21
20
19
18
17
16 15
14
13
12
11
10
9
8
7
6
5
4
3
2
1
F
B
A
E
+
+
+
+
+
-
-
-
-
-
FO+
TR+
TR-
FO-
ACTUATOR
TR+
FO+
FO-
C
F
B
A
E
1/2V
+5V
TR-
1/2VCC
C
-
+
D
VCC
VC
LD
VR
MD
D
GND
GND
LD
VR
MD(PD)
CD PICKUP UNIT
+
+
–
–
SP+
SP–
SL+
SL–
PU-IN
GND
PICKUP IN
SLED
MOTOR
SPINDLE
MOTOR
MM
514623
16151413121110987654321
CD SERVO
FOCUS/TRACKING/
SPIN/SLED DRIVER
FROM DISPLAY PWB
LVDD
TP8
1
2
3
1
TAPE
MOTOR
PLAY
2
3
4
1
2
3
4
1
2
3
3
2
1
P.B.
C
B
A
D
REC.
+B
+B
8
7
6
5
4
156
17
18
1190
224
32
22
2128
27
62
25
43 2 1
BD3881FV
RECORD/PLAYBACK AMP.
13 12 11 10 9 8 7 6 514
_
A1_VCC
TP-VM
GND
SD
VCC
TRE2
TRE1
VCC2
VOL2
VOL1
SEL-OUT1
SEL-OUT2
PB2P
PB2N
PB1P
PB1N
REC10
REC1N
REC2N
REC20
C2
C1
B2
B1
A2
A1
OUT1
BB1
OUT2
BB2
R-CH
L-CH
RECORD/PLAYBACK
HEAD
ERASE HERD
TAPE MECHANISM ASS'Y
VP
D-GND
0-POWER
1-TP-STATE
0-EVRCLK
0-EVR-SD0
0-AMP-ON
0-TU-CE
0-TU-SDO
0-TU-SCK
1-TU-SDI
0-CD-CE
I-CD-WRQ
0-CD-CLK
O-CD-CMD
1-CD-DATA
0-CD-/RESET
I-CD-DRF
IC802
CNW802
CNS802
CNS801
CFW801
Q803
D801
X801
CNP503
IC801
D802
Q801
Q802
Q502
IC201 S501
CNA501
CNP501
CNA502
M501
SW501
CNP502
L501
Q503
LASER
DRIVER
CONSTANT
VOLTAGE
CONSTANT
VOLTAGE
CONSTANT
VOLTAGE
Figure 4-2 BLOCK DIAGRAM (2/3)

XL-S10
4 – 3
CNP503
1
2
1
2
3
VOLUME
21
60 59 58 57 56 55 54 53 52 51 50 49 48 47 46 45 44 43 42 41
+B
+B
REMOTE
SENSOR
321
181716151413121110
987654321
242322212019181716151413121110987654321
1
CD LID
2
61
62
63
64
65
66
73
72
71
70
69
68
67
80
79
78
77
76
75
74
2019181716151413121110987654321
21
22
23
24
25
26
27
28
29
30
31
32
33
34
40
39
38
37
36
35
IXA007SJ
IXA019SJ
OUT
VCC
GND
VP
D-GND
O-POWER
I-TP-STATE
O-EVR-SCK
O-EVR-SDO
O-AMP-ON
O-CD-CE
O-CD-CLK
O-CD-CMD
I-CD-DATA
I-CD-WRQ
O-CD-/RESET
1-CD-DRF
O-TU-CE
O-TU-SDO
O-TU-SCK
I-TU-SDI
VSS2
VDD2
S14
S13
S12
S11
S10
S9
S8
S7/PA7
S6/PA6
S5/PA5
S4/PA4
S3/PA3
S2/PA2
S1/PA1
S0/PA0
P73/INT3/TOIN
P72/INT2
P71/AN9
P70/AN8
P87/AN7
P86/AN6
P85/AN5
CF2
P84/AN4
P83/AN3
P82/AN2
P81/AN1
P80/AN0
VDD1
CF1
VSS1
XT2/AN11
XT1/AN10
RESET
P17
P16
P15/SC1
P14/SI1
S19
S18
S17
S16
S15
S14
S13
S12
S11
S10
S9
S8
S7
S6
S5
S4
S3
S2
S1
S0
C3
C2
C1
C0
V1/PL4
V2/PL5
V3/PL6
S39
S38
S37
S36
S35
S34
S33
S32
S31
S30
S29
S28
S27
S26
S25
S24
S15
P13/S01
P12/SC0
P11/S10
P10/S00
P07
P06
P05
P04
P03
P02
P01
P00
PWM3
VDD3
VSS3
PWM2
COM3
COM2
COM1
COM0
TO MAIN PWB
SYSTEM
MICROCOMPUTER
FL DISPLAY
AT24C16
PATCH CPU
1
2
3
4
5
6
7
8
L702
CNS701
Q706
Q705
Q701
Q704Q702
L701
X702
32.768KHz
Q703
RX701
SW700
SW702~705
SW707~711
CNW702
CNS702
SW701
CNP702
IC701
LCD701
LED701~704
IC7A1
RESET
Figure 4-3 BLOCK DIAGRAM (3/3)

XL-S10
5 – 1
AudioXL-S10Service ManualXLS10MarketE
CHAPTER 5. CIRCUIT DESCRIPTION
[1] VOLTAGE
1.6 V
1.0 V
1.6 V
1.67 V
3.2 V
0V
1.6 V
1.6 V
1.6 V
1.6 V
1.6 V
1.6 V
1.6 V
1.7 V
1.58 V
1.6 V
1.57 V
3.2 V
0V
1.6 V
1.6 V
1.6 V
1.6 V
1.6 V
1.6 V
1.5 V
0V
1.5 V
0V
0V
1.0 V
0V
0V
0V
1.5 V
1.5 V
0V
3.2 V
3.2 V
0V
3.5 V
1.7 V
0V
0V
1.75 V
3.8 V
3.1 V
1.4 V
1.6 V
1.5 V
0V
0V
1.25 V
1.25 V
1.52 V
1.52 V
1.58 V
1.58 V
1.0 V
0V
0.18 V
3.0 V
1.9 V
3.0 V
3.9 V
3.3 V
0V
3.2 V
0V
0V
0V
3.1 V
0.54 V
1.35 V
0V
1.0 V
3.26 V
2.5 V
0V
3.2 V
1
2
3
4
5
6
7
8
9
10
11
12
13
14
15
16
17
18
19
20
21
22
23
24
25
26
27
28
29
30
31
32
33
34
35
36
37
38
39
40
41
42
43
44
45
46
47
48
49
50
51
52
53
54
55
56
57
58
59
60
61
62
63
64
65
66
67
68
69
70
71
72
73
74
75
76
77
78
79
80
PIN
NO. VOLTAGE
IC801
4.45 V
0V
0V
0V
4.42 V
2.126 V
2.710 V
0V
2.305 V
2.637 V
5.19 V
5.26 V
1.324 V
0.115 V
3.205 V
2.021 V
5.56 V
5.19 V
5.13 V
0V
0V
4.97 V
5.11 V
0V
0V
0V
0V
0V
5.10 V
0V
0V
0V
0V
0V
0V
0V
0V
0V
0V
5.11 V
2.33 V
2.324 V
2.03 V
2.26 V
2.38 V
2.50 V
2.50 V
2.50 V
2.50 V
2.50 V
2.50 V
2.50 V
2.50 V
2.44 V
2.37 V
2.44 V
2.32 V
2.38 V
0V
0V
2.48 V
2.48 V
2.47 V
2.48 V
1.63 V
0V
1.0 V
2.13 V
5.0 V
0V
0V
0V
4.96 V
5.0 V
0.7 V
0V
1.12 V
3.4 V
0.7 V
0V
1
2
3
4
5
6
7
8
9
10
11
12
13
14
15
16
17
18
19
20
21
22
23
24
25
26
27
28
29
30
31
32
33
34
35
36
37
38
39
40
41
42
43
44
45
46
47
48
49
50
51
52
53
54
55
56
57
58
59
60
61
62
63
64
65
66
67
68
69
70
71
72
73
74
75
76
77
78
79
80
PIN
NO. VOLTAGE
IC701
2.25 V
2.28 V
2.59 V
0V
5.08 V
2.23 V
2.25 V
4.0 V
3.9 V
2.9 V
2.43 V
2.43 V
0V
0V
0V
0V
0V
0V
1.82 V
1.67 V
3.9 V
2.24 V
0.69 V
2.57 V
2.1 V
2.5 V
2.0V
3.1 V
2.7 V
2.1 V
4.9 V
5.1 V
4.9 V
5.1 V
0V
0.97 V
1
2
3
4
5
6
7
8
9
10
11
12
13
14
15
16
17
18
19
20
21
22
23
24
25
26
27
28
29
30
31
32
33
34
35
36
PIN
NO. VOLTAGE
IC301
8.8 V
1.5 V
0V
1.5 V
-1.3 V
11.5 V
17.7 V
0V
0V
0V
0V
8.4 V
0V
1
2
3
4
5
6
7
8
9
10
11
12
13
PIN
NO. VOLTAGE
IC101
17.5 V
8.6 V
17.3 V
E
C
B
PIN
NO. VOLTAGE
Q101
0.19 V
17.0 V
0.77 V
E
C
B
PIN
NO. VOLTAGE
Q102
10.7 V
17.3 V
10.8 V
E
C
B
PIN
NO. VOLTAGE
Q301
1.0 V
2.8 V
1.77 V
E
C
B
PIN
NO. VOLTAGE
Q302
0V
3.5 V
0.8 V
E
C
B
PIN
NO. VOLTAGE
Q371
7.1 V
7.6V
7.8 V
E
C
B
PIN
NO. VOLTAGE
Q502
0.17 V
0.17 V
0V
E
C
B
PIN
NO. VOLTAGE
Q503
5.84 V
14.10V
6.50 V
E
C
B
PIN
NO. VOLTAGE
Q702
0V
0V
0.64 V
E
C
B
PIN
NO. VOLTAGE
Q701
4.3 V
8.4 V
5.0 V
E
C
B
PIN
NO. VOLTAGE
Q703
0V
6.55 V
0.63 V
E
C
B
PIN
NO. VOLTAGE
Q704
0V
5.2 V
0V
E
C
B
PIN
NO. VOLTAGE
Q705
0V
4.9 V
0V
E
C
B
PIN
NO. VOLTAGE
Q706
3.3 V
7.17 V
4.18 V
E
C
B
PIN
NO. VOLTAGE
Q801
3.22 V
6.15 V
3.9 V
E
C
B
PIN
NO. VOLTAGE
Q802
2.77 V
1.83 V
2.0 V
E
C
B
PIN
NO. VOLTAGE
Q803
0V
0.8 V
0.6 V
E
C
B
PIN
NO. VOLTAGE
Q103
8.46 V
3.19 V
1.60 V
1.61 V
3.87 V
2.75 V
0V
0V
0V
3.72 V
3.70 V
1.60 V
1.60 V
3.22 V
7.39 V
3.21 V
3.83 V
1.60 V
1.60 V
3.91 V
3.80 V
0V
0V
0V
3.53 V
4.11 V
1.61 V
1.60 V
1.61 V
8.44 V
1
2
3
4
5
6
7
8
9
10
11
12
13
14
15
16
17
18
19
20
21
22
23
24
25
26
27
28
29
30
PIN
NO. VOLTAGE
IC802
3.66 V
3.68 V
3.65 V
3.65 V
3.65 V
3.65 V
3.65 V
3.65 V
3.65 V
3.65 V
3.65 V
7.55 V
3.65 V
0V
3.65 V
3.65 V
3.65 V
3.65 V
3.65 V
3.65 V
3.65 V
3.65 V
3.65 V
3.65 V
3.65 V
3.65 V
3.65 V
3.65 V
1
2
3
4
5
6
7
8
9
10
11
12
13
14
15
16
17
18
19
20
21
22
23
24
25
26
27
28
PIN
NO. VOLTAGE
IC201
0V
0V
0V
0V
0V
0V
5.0 V
5.2 V
1
2
3
4
5
6
7
8
PIN
NO. VOLTAGE
IC7A1

XL-S10
5 – 2
—MEMO—

XL-S10
6 – 1
AudioXL-S10Service ManualXLS10MarketE
CHAPTER 6. CIRCUIT SCHEMATICS AND PARTS LAYOUT
[1] NOTES ON SCHEMATIC DIAGRAM
•Resistor:
To differentiate the units of resistors, such symbol as K and M are
used: the symbol K means 1000 ohm and the symbol M means
1000 kohm and the resistor without any symbol is ohm-type resis-
tor. Besides, the one with “Fusible” is a fuse type.
• Capacitor:
To indicate the unit of capacitor, a symbol P is used: this symbol P
means pico-farad and the unit of the capacitor without such a sym-
bol is microfarad. As to electrolytic capacitor, the expression
“capacitance/withstand voltage” is used.
(CH), (TH), (RH), (UJ): Temperature compensation
(ML): Mylar type
(P.P.): Polypropylene type
• Schematic diagram and Wiring Side of P.W.Board for this model
are subject to change for improvement without prior notice.
• The indicated voltage in each section is the one measured by Digi-
tal Multimeter between such a section and the chassis with no sig-
nal given.
1. In the tuner section,
indicates AM
indicates FM stereo
2. In the main section, a tape is being played back.
3. In the deck section, a tape is being played back.
4. In the power section, a tape is being played back.
5. In the CD section, the CD is stopped.
• Parts marked with “ ” ( ) are important for
maintaining the safety of the set. Be sure to replace these parts
with specified ones for maintaining the safety and performance of
the set.
[2] TYPES OF TRANSISTOR AND LED
REF. NO DESCRIPTION POSITION
SW501 PLAY ON—OFF
SW700 VOLUME ON—OFF
SW701 CD LID ON—OFF
SW702 ON/STAND-BY ON—OFF
SW703 FUNCTION ON—OFF
SW704 BASS/TRBLE ON—OFF
SW705 MEMORY/SET ON—OFF
SW707 TUNING UP ON—OFF
SW708 TUNING DOWN ON—OFF
SW709 PRESET UP ON—OFF
SW710 PRESET DOWN ON—OFF
SW711 CLEAR ON—OFF
REF. NO DESCRIPTION POSITION
(1) (2) (3)
(S) (G) (D)
EC B
FRONT
VIEW FRONT
VIEW
2SC5395 F+ SVC201
FRONT
VIEW
BCE
FRONT
VIEW
2SB1370 E+ 2SC3052 F+
2SC5477++
2SA1235 F+
BE
C
SVC347SMPG3372X

XL-S10
6 – 2
[3] WIRING SIDE OF P.W.BOARD/SCHEMATIC DIAGRAM
Figure 6-2 SCHEMATIC DIAGRAM (1/8)
A
B
C
D
E
F
G
H
123456
6-4,6-5 2~11 - A
SVC201
SVC201
4.7/50
75kHz
100K
10P(CH)
0.1
47K
1K
390
10µH
47µH
1/50
1/50
0.01
1
2
3
1µH
1/50
AM ANT.
BAND PASS
FILTER
10
0.001
10P
0.1
33
100
330
2.2K
680
2SC5477++
1SS133
1SS133
0
0
234567
1
0
22/50
1/50
0.001
5P(CH)
0.1
0.001
100P
FM IF
FM IF
FM IF
AM IF
AM IF
33P
33P
(UJ)
(UJ)
(UJ)
5P
0.01
0.01
0.001
100K
2SC5477++
220
100K
2.2K
1K
4.7K
22/50
0.1
1K
0.018
0.0047
0.1
330
0.022
22/50
4.7K
0.01
0.1
+B +B +B
+B
+B +B
+B +B
+B
+B +B
+B
+B
+B
+B
+B
+B
0.1
0.47/50
0
47
10K
22/50
10K
MTZJ3.6B
1K
1K
47K
1K
100K
MTZJ120B
10P(CH)
2SC3052F+
0.33/50
100P(CH)
100K
100K
12P
(CH)
0.01
1
2
3
100P
100P
3.3K
1/50
10µH 10
0.1
0.1
3
2
16
5
4
321
456
100K
SVC347S
19202136 35 34
123 1817164 5 6 7 8 9 10 11 12 13 14 15
LV23002M
33 32 31
560P
27P
(CH)
3
2
16
5
4
0.022
222324252627282930
VP
VTCC
FM:1.5V-5.0V
AM:1V-8V
TP-VT
3
0
2
9
2
8
2
7
2
6
2
5
2
4
2
3
2
2
2
1
2
0
1
9
1
8
1
7
1
6
FMRF-IN
FMRF-OUT
VCC2
FM-OSC
AM-OSC
B02
B01
LP-OUT
LP-IN
PD
AGC
AMLOWOUT
DET-OUT
MPX-IN
VDD
XOUT
XIN
D0
CL
DI
R-OUT
L-OUT
FM-IET
P-CCMP
P-DET
CE
VSS
P-DET
FMRF-IN
VCC1
AM-MIX
GND1
FM-MIX
REG
AMRF-IN
AM LOOP
ANTENNA
FM ANTENNA
TO MAIN PWB
AMP./TAPE SECTI
O
MAIN PWB-A1(1/2)
FM RF
FM OSC.
FM BAND COVERAGE fL
FM FRONT END
CNP301
C301
D302
D303
JR304
L302
D307
D306
C309
C307
C399
L304
JR302
C317
C316
C318
C314
L307
R328
R307 R305
C306
C308
R303
C305 R304
D305 C311
C310
C345
R310
L306
R311
C332
C329
C335
C321
R327
C344
R314
C343
C333
R316
C312
R308
R329
C320
R313
D308
C325
X301
R319
C341
C342
C351
R315
C326
C330
C338
R326
R324
R322
D309
Q301
L308
C340
R325
R318
R317
C328
C324
C327
C322
C331
C323
CF303
L305
C372
R371
R374
R375
R376
Q371
CF304
JR303
R372
C315 C313
R312
C319
R309
CF302
C334
C337
C336
R321
R320
C339
R323
L303 R302
C302
C303
L301
IC301
C801
R306
L801
CF301
CF306
Q302
PLL(TUNER)
FM IF DET./FM MPX./AM IF
AM BAND
COVERAGE fL
AM
Tracking
NOTES ON SCHEMATIC DIAGRAM can be found on page 6-1

XL-S10
6 – 3
Figure 6-3 SCHEMATIC DIAGRAM (2/8)
78 9 10 11 12
IC701:IXA007SJ 6-6 2-D
IC701:IXA019SJ 6-8 2-D
CNS701
6-4,6-5 2~11 - A
33K
33K 0
H
100K
89
10 11 12 13 14 15 16 17
MTZJ3.9B
6.8K 6.8K
MTZJ5.1B
6.8K
6.8K
6.8K
10
18
13
14
12
11
15
17
16
1
2
3
4
5
6
7
8
9
6.8K
6.8K
6.8K
6.8K
0.1
100P
47K
15K
+B
+B +B
+B
+B +B +B
+B
+B +B
+B
+B
+B
+B
1/50
1/50
18
+B 18
18
0.1
100
100
0.1
0.1
15K
10K
1K
12
12
2SC3052F+
2SC5395F+
100
12K
10K
6.8K
1K
0.1
100/10
330
100
470
1K
0.1
12P(CH)
12P(CH)
16.9344MHz
10K
100P(CH)
100P(CH)
0.1
33/16
33K
100K
33K
0.1
100/6.3
100/6.3
100/6.3
0.1
470
10
2SA1235F+
12K
0.1
0.047
1/50
100K
0.047
0.1 100P
330
0.0022
10K
10/16
47P
0.0022
10/16
47
100/6.3
0.1
0.1
0.1
680
680
1.2K
27K
220
12320 19 18
21
22
32
38
39
40
414243585960
61
62
63
80
79
78
LA6548ND
13141516 12 11 10
123456789
1234567
123456
LC78646E
4567891011121314151617
24
25
62
27
28
9
2
30
31
32
33
34
5
3
36
7
3
44456
44748490
551525354556
557
64
65
66
67
68
69
70
71
72
73
74
75
76
77
VP
D-GND
0-POWER
1-TP-STATE
0-EVRCLK
0-EVR-SD0
0-AMP-ON
0-TU-CE
0-TU-SDO
0-TU-SCK
1-TU-SDI
0-CD-CE
I-CD-WRQ
0-CD-CLK
O-CD-CMD
1-CD-DATA
0-CD-/RESET
I-CD-DRF
FE
RFMON
TP7
TP6
TP5
1-SLD
G-SLD
0+SLD
0-SLD
TCAP
RESET REG-TR
0-SPD
0+SPD
G-SPD
REF-IN
1-SPD
G-TRK
REG-OUT
0+TRK
0-TRK
0-FCS
I-TRK
G-FCS
1-FCS
GND
GND
GND
0+FCS
GND
GND
GND
MUTE
VCC
VCC
VWRQ
VRES
DRF
CE
CL
DI
DO
CONT3
CONT2
PD01
PD02
VVSS
PCKIST
VVDD
VDD5
VSS
LDD
FR
LDS
DATA
DATACK
REF1
TDO
ADAVSS
ADAVDD
JITTC
RFMON
TE
TEC
FE
RSVSS
RFVDD
RF
VREF
TIN2F
TIN1E
FIN2B
FIN1A
LCHO
LVSS
RVSS
RCHO
RVDD
XVDD
EFMIN
SLCIST
SLCO
XOUT
XIN
FSX/16MIN
XVSS
C2F
EFLG
IGMOUT
ASRACK
ASDFIN
LRSY
TEST
DOUT
VDD
VSS
MON15
MON14
MON13
ASDACK
MON12
DEFECT
SBCK/FG
CONT5
CONT4
GPDAC
SLDO
SPDO
MON11
FSEQ
V/1P
FDO
30
29
28
27
26
25
24
23
22
21
20
19
18
17
16 15
14
13
12
11
10
9
8
7
6
5
4
3
2
1
F
B
A
E
+
+
+
+
+
-
-
-
-
-
FO+
TR+
TR-
FO-
ACTUATOR
TR+
FO+
FO-
C
F
B
A
E
1/2V
+5V
TR-
1/2VCC
C
-
+
D
VCC
VC
LD
VR
MD
D
GND
GND
LD
VR
MD(PD)
CD PICKUP UNIT
CD MECHANISM UNIT (227)
MECHANISM PWB
+
+
–
–
SP+
SP–
SL+
SL–
PU-IN
GND
PICKUP IN
SLED
MOTOR
SPINDLE
MOTOR
MM
514623 16 15 14 13 12 11 10 9 8 7 6 5 4 3 2 1
CD SERVO
FOCUS/TRACKING/
SPIN/SLED DRIVER
FROM DISPLAY PWB
TO MAIN PWB
AMP./TAPE SECTION
LVDD
TP8
IC802
C803
R812
C802
C801
CNW802
CNS802 CNS801
CFW801
R814
R816
R813
R815
R821
Q803
C814
C815
R826
R824
R822
R830
JR801
R832
R829
R827
R828
C820
R831
D801
C826
C825
C829
C824
C827
R833
C832
C831 C830
R836
C828
C817
C813
R834
C823
C816
C811
C819
C808
C807
R817
R818
C818
C821
R823
C810
C809
C812
R825
X801
R551
R559 R558
R552
R553
R555
R556
R557
R554
C833
C834
R841
CNP503
R546
R545
R544
C838
R842
C837
C836
C835
R839
R840
R838
IC801
C806
R809
R811
R810
R808
D802
C804
R806
R803
R801
R804
R802
Q801
Q802
1
R837
FM SIGNAL
AM SIGNAL
CD SIGNAL

XL-S10
6 – 4
Figure 6-4 SCHEMATIC DIAGRAM (3/8)
A
B
C
D
E
F
G
H
123456
6-2,6-3 2~11 - H
3.3K
0.0022 6.8K
1/50
6.8K
1
3
2
4
1
2
3
0.0022
100
2SB1370E+ 2.2K
47/25
1K
1K
10
10
220/6.3
0.1
1K
8.2K
8.2K
1/50
4.7K
4.7K
0.1
1.5K
100/16
0.0022
33K
3.3K
3.3K
22/50
220
220
0.1
10
10
0.1
0.1 0.1
0.1
10
0.1
0.1
0.1
1000/16
1/50
22/50
4.7/50
330K
0.1
0.1
22K
0.047
1µH
0.1
0.1/50
6.8K
1/50
4.7K
680
220/16
0.01
2SC3052F+
1SS133
6800/25
0.1
0.1
1N4004A
1N4004A
1N4004A
2SC3052F+
0.0022
MTZJ6.8B
0.1
1N4004A
100
33K
1000/16
47/25 +B
+B
+B
+B
+B
+B
+B +B
+B
+B
+B
+B
+B
+B
+B
+B
+B
+B
+B
+B
+B +
B
2SC5395F+
330K
22K
10P
123457612 10 9 81113
15
1
(CH)
1
14
LA4631++
POWER AMP.
+
–
–
+
10
AMP_A1_ON
(R)
(L)
CD_A1_P_A1_GND
CD_A1_VCC
EMC-GND
EMC-GND
TP-GND
D-GND
A-GND
SP-GND
P-ON
TP-VM
MA-VCC
GND
SD
BB2
123
POWER
TRANSFORMER
630mA 125V
POWER PWB-A3
AC POWER
SUPPLY CORD
AC 120 V, 60 Hz
HEADPHOMES
SPEAKER
TERMINAL
VIDEO/AUX
IN
SUB
WOOFER
OUT
L-CH
R-CH
234567
1
TO MAIN PWB
TUNER/CD SECTION
MAIN PWB-A1(2/2)
S101
NOT USED
L
R
J102
C112
C130
R119
R120
R121
C111
R105
R108
C110
IC101
C116
C120
C115
C122
C123
C121
C125
R131
C133
C119
R117
R116
R112
C127
R113
C126
C117
C134 R132
L103
C105
R106
R103
C109
C104 C108
L102
C102 R104
C106
C107
C103
R107
J101
R102
R101
J103 L101
C101
F653
CNP101
CNW101
CNS101
D104
C113
C114
D101
D103
D102 Q101
R118
R110
R111
C129
C124
Q103
D106
C118
Q102
D105
C128
R109
R114
R502
C505
R549
R550
R503
R501
C502
C501
Q502
C506
R507
C504
C503
R505
R504
R508
C507
R509
C508
PT1
R115
NOTES ON SCHEMATIC DIAGRAM can be found on page 6-1

XL-S10
6 – 5
Figure 6-5 SCHEMATIC DIAGRAM (4/8)
78 9 10 11 12
M
6-2,6-3 2~11 - H
100
47/25
100K
100K
1
2
3
1
TAPE
MOTOR
PLAY
2
3
4
0.1
1
2
3
4
390
10K
2.2K
22K
1
2
3
5.6K
1K
2.2K
33K
6.8K
33K
6.8K
1K
1K
390K
0.015
0.1/50
0.1/50
6.8K
0.1/50
6.8K
0.1/50
12K
0.22/50 68 100/35
0.015
390K
12K
0.22/50
68
100/35
0.0012
15K
0.0012
15K
220/16
1SS133
0.0056
0.01
0.0027
0.0027
18K
8.2
2SC3052F+ 3
2
1
820P
P.B.
C
B
A
D
REC.
820P
0.01
0.01
47K
100
100
47K
47K
B
B
+B
B
+B
+B
+B
+B
+B
+B
0.0033
0.0033
10P
470P
470P
47K
3.3K
3.3K
3.3K
3.3K
47K
3.3K
3.3K
47K
6.8K
6.8K
8
7
6
5
4
156
17
18
1190
224
32
22
2128
27
62
25
43 2 1
BD3881FV
RECORD/PLAYBACK AMP.
47P 47P (CH)
(CH)
(CH)
13 12 11 10 9 8 7 6 514
GND
SD
VCC
TRE2
TRE1
VCC2
VOL2
VOL1
SEL-OUT1
SEL-OUT2
PB2P
PB2N
PB1P
PB1N
REC10
REC1N
REC2N
REC20
C2
C1
B2
B1
A2
A1
OUT1
BB1
OUT2
BB2
R-CH
L-CH
RECORD/PLAYBACK HEAD
ERASE HERD
TAPE MECHANISM ASS'Y(226)
89
10 11 12 13 14 15 16 17
TO MAIN PWB
TUNER/CD SECTION
R
550
C506
C507
C513
C511
R506
C516
C515
C521
C524
C535
R561
R563
R562
R564
C510
R509
C509
R510
C508
R524
C520
C519
R522
R520
R518
R519
R516
R515
R514
R513
R511
R523
R521
R526
R525
R530
R528
C525
C526
C528
C527
R532
R543
IC201
R548
R547
R535
C532
R536
R541 C534
C531
R533
R534
R542
C533
R537
S501
C529
C530
R529
R527
R538
CNA501
CNP501
CNA502
M501
SW501
CNP502
C522
R539
R540
R531
D501
C517
L501
C518
C514
R560
C512 R512
R517
Q503
C523
FM SIGNAL
CD SIGNAL
PLAYBACK SIGNAL
RECORD SIGNAL
AUX SIGNAL

XL-S10
6 – 6
Figure 6-6 SCHEMATIC DIAGRAM (5/8)
A
B
C
D
E
F
G
H
123456
6-3 12 - G
CNP503
12
12
3
VOLUME
2
1
0
3.9K
22K
1K
1K
330K
1K
0.01
4.7K
0.001 0.001
0.1
47K
22K
22K
10K
10K
150K
330K
0.001
0.01 100K
100K
2SC3052F+
3.3K
3.3K
10K
100K
+B
+B
+B +B
+B +B
+B +B +B
+B
+B
+B
+B
+B
10K
0.1
15P
22µH
330
22K
2SC3052F+
2SC3052F+
1SS133
MTZJ5.1B 1SS133
1.2K
1.2K
0.1
0.1
2SC3052F+
2SC5395F+
1K
1K
1K
3.3K
3.3K
3.3K
1K
3.3K
3.3K
3.3K
3.3K
3.3K
3.3K
3.3K
220/10 0.047
10P
18
17
16
15
14
13
12
11
10
9
8
7
6
5
4
3
2
1
3.3K
3.3K
1
CD LID
2
15P(CH)
(CH)
(CH)
VP
D-GND
O-POWER
I-TP-STATE
O-EVR-SCK
O-EVR-SDO
O-AMP-ON
O-CD-CE
O-CD-CLK
O-CD-CMD
I-CD-DATA
I-CD-WRQ
O-CD-/RESET
1-CD-DRF
O-TU-CE
O-TU-SDO
O-TU-SCK
I-TU-SDI
TO MAIN PWB (1/2)
DISPLAY PWB-A2
SWITCH PWB-A5
ON/
STAND-B
TUNING
UP
32.768K
H
R714
R716
R711
R712
R713
R710
R701
R703
R705
R706
R709
R707
R708
R715
R702
R704
CNS701
R764
R721
C723
R717
R718
R723 R725
R771
Q705
Q701
R720
R719
C717
Q704
Q702
C718
D701
D703
D704
R733
Q706
R729
C720 R732
C702
C701
JR701
C708
L701
C706
X702
C709
C
R765
R731
C710
SW700
SW702
R
R728
R730
R734
R736
SW707
R726
R727
R760
C714
C715
C705 C703
R739
R740
R724
R763
CNW702
CNS702
SW701
CNP702
NOTES ON SCHEMATIC DIAGRAM can be found on page 6-1
When you replace IC701 (System Microcomputer), please use RH-IXA019SJZZ
and remove the lead wire (CFA701,702).
Other manuals for XL-S10
1
Table of contents
Other Sharp Stereo System manuals

Sharp
Sharp CD-K491W User manual

Sharp
Sharp DK-KP80PH User manual

Sharp
Sharp XL-3500H User manual

Sharp
Sharp MD-X60H User manual

Sharp
Sharp CD-DK890N User manual

Sharp
Sharp CP-X99 User manual

Sharp
Sharp XL-HP500W User manual

Sharp
Sharp CD-ES600 User manual

Sharp
Sharp CD-DP2500H User manual

Sharp
Sharp cd-mpx880 User manual

Sharp
Sharp CD-C471 W User manual

Sharp
Sharp XL-MP130 User manual

Sharp
Sharp XL-MP110E User manual

Sharp
Sharp CD-E200H User manual

Sharp
Sharp CD-BA160H User manual

Sharp
Sharp XL-MP40H User manual

Sharp
Sharp DK-KP95PH User manual

Sharp
Sharp CD-C470W User manual

Sharp
Sharp CD-MPX200W User manual

Sharp
Sharp CD-BA250H User manual