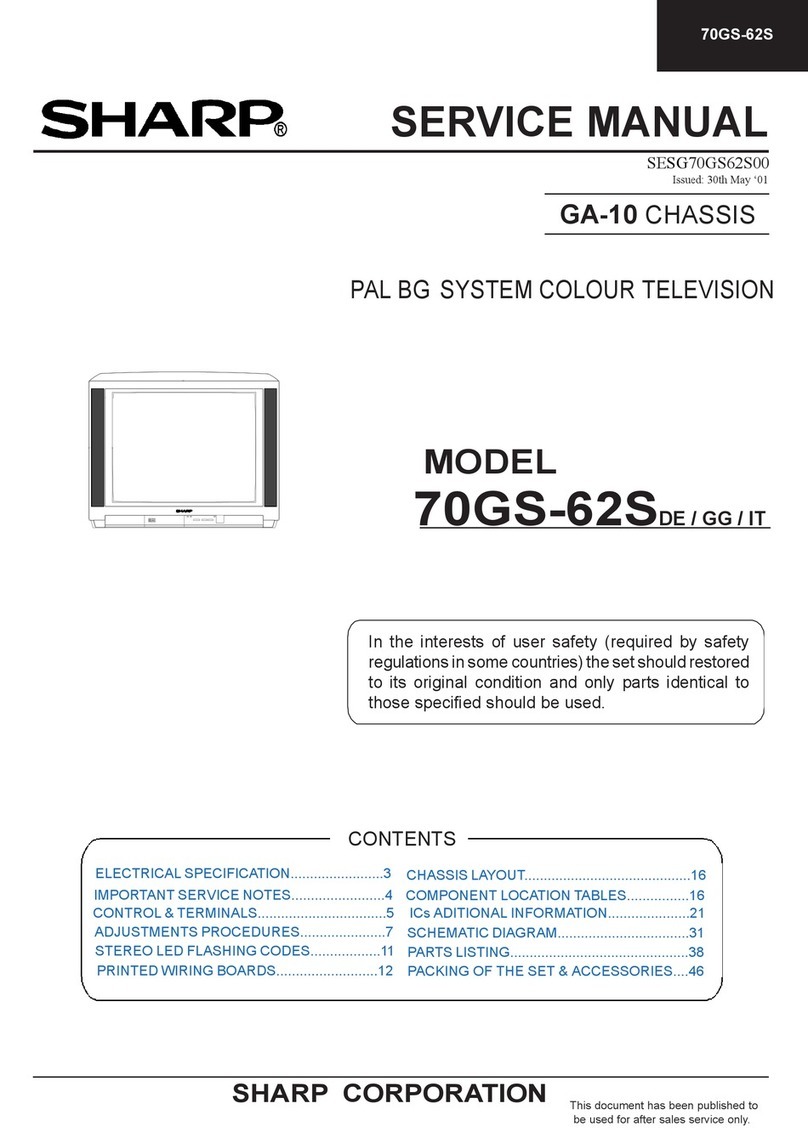
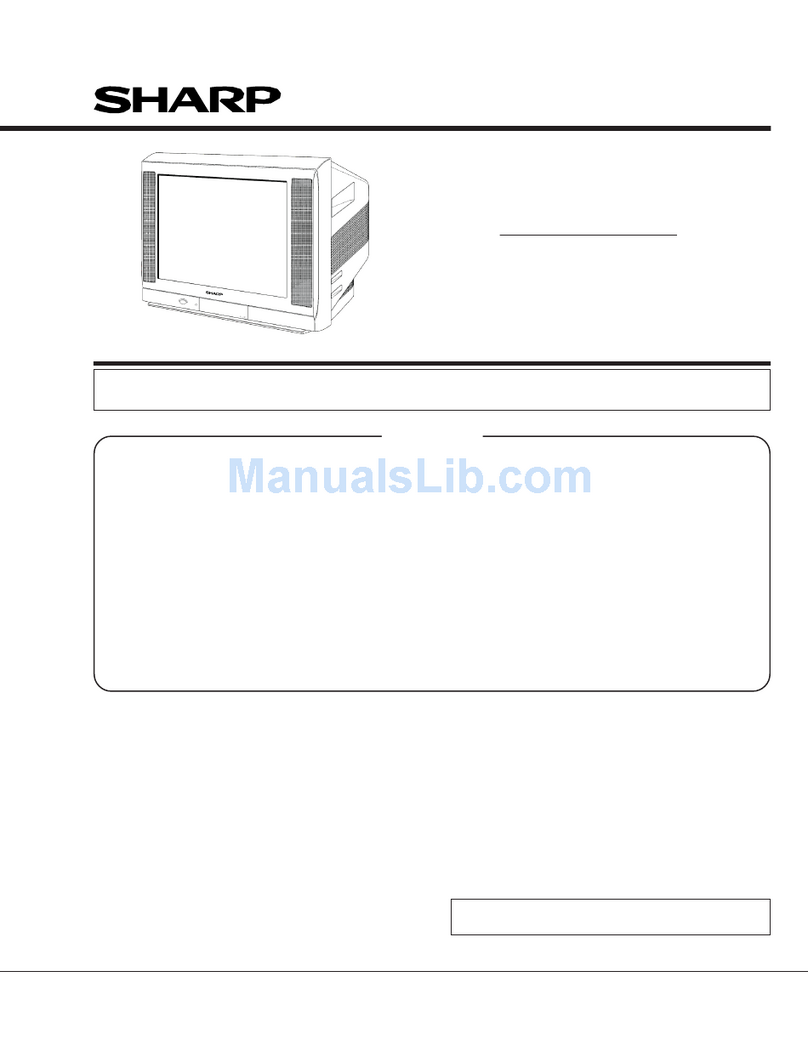
Sharp 21S-FX10F User manual

CHAPTER 1. SPECIFICATIONS
[1] SPECIFICATIONS...................................... 1-1
CHAPTER 2. IMPORTANT SERVICE NOTES
[1] IMPORTANT SERVICE NOTES ................ 2-1
CHAPTER 3. ADJUSTMENT PRECAUTIONS
[1] ADJUSTMENT PRECAUTIONS ................ 3-1
[2] ADJUSTMENT ........................................... 3-12
CHAPTER 5. TROUBLE SHOOTING FLOWCHART
[1] TROUBLE SHOOTING FLOWCHART ...... 5-1
CHAPTER 6. SOLID STATE DEVICE BASE DIAGRAM
[1] SOLID STATE DEVICE BASE DIAGRAM.. 6-1
CHAPTER 7. CHASSIS LAYOUT
[1] CHASSIS LAYOUT .................................... 7-1
CHAPTER 8. BLOCK DIAGRAM
[1] BLOCK DIAGRAM : MAIN UNIT................ 8-1
[2] BLOCK DIAGRAM : CRT UNIT.....................8-3
[3] BLOCK DIAGRAM : SURROUND UNIT......8-3
CHAPTER 9. DESCRIPTION OF SCHEMATIC DIA-
GRAM
[1] DESCRIPTION OF SCHEMATIC DIAGRAM.9-1
CHAPTER 10. WAVEFORMS
[1] WAVEFORMS ..............................................
10-1
CHAPTER 11. SCHEMATIC DIAGRAM
[1] SCHEMATIC DIAGRAM : CRT UNIT ...........
11-1
[2] SCHEMATIC DIAGRAM : MAIN UNIT .........
11-2
[3] SCHEMATIC DIAGRAM : SURROUND
UNIT.................11-4
CHAPTER 12. PRINTED WIRING BOARD ASSEM-
BLIES
[1] PWB-A : MAIN UNIT ....................................
12-1
[2] PWB-B : CRT UNIT ......................................
12-3
[3] PWB-C : SURROUND UNIT........................12-4
Parts Guide
SERVICE MANUAL
xxxxxxxxx
TopPage
21S-FX10F/10S/10N/10U
No. S7810621SFX10F
COLOUR TELEVISION
Chassis No.GA-7S
MODEL
Auto Fine Tuning
NTSC Colour Comb Filter
High Contrast Picture ( Black Stretch
Circuit)
AV Stereo
Multi Languages OSD
(English/French/Arab/Russia)
Surround Sound Effect
(With Bass/Treble/Balance)
Front AV IN & Rear AV IN / OUT
Terminals
FEATURES
Multi 18 Systems ( 21S-FX10U / 10N )
Multi 21 Systems ( 21S-FX10F / 10S )
Full Auto System
100-CH Program Memory
CATV (Hyper Band Ready)
Hotel Mode
White Temperature Select
Off Timer
Blue Back Function
Aperture Control Circuit
AV Mode (3 Mode)
Child Lock
Component In
AVL Function
Loundness Function
M P-In Jack
Picture Noise Reduction Function
Frequency Synthesizer Tuner
In the interests of user-safety (Required by safety regulations in some countries) the set should be restored to its original condition and
only parts identical to those specified should be used.
CONTENTS
The chassis in this receiver is partially hot. Use an isolation transformer between the line cord plug and power receptacle, when servicing
this chassis. To prevent electric shock, do not remove cover. No user-serviceable parts inside. Refer servicing to qualified service personnel.
WARNING
21S-FX10U
CHAPTER 4. MEMORY MAP
[1] MEMORY MAP.............................................4-1
21S-FX10F
21S-FX10S
21S-FX10N
1 Edition
21S-FX10F/10S/10N/10U
1 – 1
CHAPTER 1. SPECIFICATIONS
[1] SPECIFICATIONS
Convergence ................................................................................................................ Self Convergence System
Focus
.......................................................................................................................
Electro-Static Focusing
Sweep Deflection .........................................................................................................................................Magnetic
Intermediate Frequencies
Picture IF Carrier ................................................................................................................................. 38.9MHz
Sound IF Carrier Frequency
6.5MHz ............................................................................................................................................. 32.4MHz
6.0MHz ............................................................................................................................................. 32.9MHz
5.5MHz ............................................................................................................................................. 33.4MHz
Colour Sub-Carrier Frequency........................................................................................................... 34.47MHz
Cabinet material ..................................................................................................................................... All Plastics
Specifications are subject to change without prior notice
Aerial Input Impedance
VHF/UHF .......................................................................................................................... 75 ohms Unbalanced
Receiving System ..................................................... PAL I, B/G, D/K & SECAM B/G, D/K, K1( 21S-FX10U/10N )
Receiving Channel
VHF-Channels ......................................................................................... E2(48.25MHz) thru E12(224.25MHz)
C1(49.75MHz) thru C12(216.25 MHz)
S1(105.25MHz) thru S41(463.25HMz)
UHF-Channels ..................................................................................... E21(471.25MHz) thru E69(855.25MHz)
C13(471.25MHz) thru C57(863.25MHz)
.
Power Input ..................................................................................................................... 110 ~ 240V AC 50/60 Hz
Power Consumption........................................................................................................................................ 98W
Audio Power Output Rating ............................................................................................................... 3W(rms) x 4
Voice Coil Impedance .............................................................................................................32 ohms at 400 Hz
...............................................................................................................................
Speaker
9 x 5 cm Elliptic (4 pcs)
Size
Dimensions ..................................................................................................................................... Width: 577mm
Height: 467mm
Depth: 340mm
Weight(approx): 20 kg
NTSC B/G & NTSC M (AV only)
PAL I, B/G, D/K, M & SECAM B/G, D/K, K1( 21S-FX10F/10S )

21S-FX10F/10S/10N/10U
2 – 1
TV21S-FX10F/10S/10N/10UService Manual21S-FX10F/10S/10N/10UMarketE
CHAPTER 2. IMPORTANT SERVICE NOTES
[1] IMPORTANT SERVICE NOTES
Maintenance and repair of this receiver should be done by qualified service personnel only.
1. SERVICE OF HIGH VOLTAGE SYSTEM AND PICTURE TUBE
When servicing the high voltage system, remove static charge from it by connecting a 10K ohm resistor in series with an insulated wire (such as a test
probe) between picture tube dag and 2nd anode lead. (AC line cord should be disconnected from AC outlet.)
1) Picture tube in this receiver employs integral implosion protection.
2) Replace with the same type number of picture tube for continued safety.
3) Do not lift picture tube by the neck.
4) Handle the picture tube only when wearing shatterproof goggles and after discharging the high voltage completely.
2. X-RAY
This receiver is designed so that any X-Ray radiation is kept to an absolute minimum. Since certain malfunctions or servicing may produce potentially
hazardous radiation with prolonged exposure at close range, the following precautions should be observed:
1) When repairing the circuit, please make sure do not increase the high voltage of the set to more than 26.0kV (at beam 0µA).
2) To keep the set in a normal operation, please make sure it’s function at 23.0kV ±1.0kV (at beam 1000µA). The set has been factory - adjusted to
the above-mentioned high voltage.
*If there is a possibility that the high voltage fluctuates as a result of the repairs, never forget to check for such high voltage after the work.
3) Do not substitute a picture tube with unauthorizerd types and/or brands which may cause excessive X-ray radiation.
3. BEFORE RETURNING THE RECEIVER
Before returning the receiver to the user, perform the following safety checks.
1) Inspect all lead dress to make certain that leads are not pinched or that hardware is not lodged between the chassis and other metal parts in the
receiver.
2) Inspect all protective devices such as non-metal control knobs, insulating materials, cabinet backs, adjustment and compartment covers or
shields, isolation resistor-capacity networks, mechanical insulators etc.

21S-FX10F/10S/10N/10U
3 – 1
TV21S-FX10F/10S/10N/10UService Manual21S-FX10F/10S/10N/10UMarketE
CHAPTER 3. ADJUSTMENT PRECAUTIONS
[1] ADJUSTMENT PRECAUTIONS
This model's setting are adjusted in two different ways: through the I2C bus control and in the
conventional analog manner. The adjustments via the I2C bus control include preset-only items and
variable data.
1. Setting the service mode by the microprocessor.
(1). Press and hold the local key "VOL DOWN" & "CH UP" when power on the main switch,
TV will enter into the SERVICE MODE in Adjustment Mode.(The initial value of EEPROM
are automatically preset when new EEPROM is used).
Service Mode also can be reached by pressing "Service" key (code: 81 Hex)
(2). Press the CH DOWN / UP key on the remote controller to select the items
one by one in Adjustment Mode.
(3). Using the VOLUME UP/ DOWN key on the remote controller, the data can be modified.
(4). When press the local key "VOL DOWN" & "CH UP" at the same time,
it will be released from the service mode.
(5) Press the MENU key on the remote controller to enter into NVM mode.
Press MENU key again to leave the NVM mode return to Adjustment Mode.
( Not recommended to modify the data unless as listed in BUS SETUP data)
(6) Press both CH-UP and VOL-DOWN buttons on the TV set simutaneously or press
the "SERVICE" (81HEX) key again, it will switch to the NORMAL mode position, and
the microprocessor is out of the SERVICE mode.
2. Factory Presetting.
(1). Press remote controller key of code "ED"for 4 seconds, the initial values are
automatically preset.
(2). The initial data are preset as listed in page 5~8.
(3). Make sure whether the data need to modify or not (Initial data).
( Refer to BUS SETUP DATA)
Note: Once the chassis has been assembly together and in ready condition, please make
sure it's go through initialize process (see sect 2 above)
Precaution: If haven't done this initialization, malfunction might be happen.

21S-FX10F/10S/10N/10U
3 – 2
***Below are the adjustment items that should be done, PLS FOLLOW THE PROCEDURE.
Otherwise some adjustment items will not be accurate.
NO *** REVISION
1 BUS SET UP
2 RF-AGC
3 FOCUS ADJ
4 V-SLOPE
5 V-SHIFT50
6 V-AMP-50
7 H-SHIFT-50
8 EW-W-50
9 E/W-PAR-50
10 UPCOR-PAR
11 LOCOR-PAR
12 H-BOW
13 H-PAR
14 EW-TRAP
15 SCREEN
16 WHITE BALANCE
17 SUB-BRIGHTNESS
18 SUB-CONTRAST
19 BEAM CURRENTCHECK
20 SUB-COLOR
21 SUB-TINT
22 HV PROTECTOR CHECK
23 OTHER PROTECTOR CHECK
24 AV OUT CHECK
25 AV IN CHECK
26 COMPONENT IN CHECK
27 CONTRAST CONTROL CHECK
28 COLOR CONTROL CHECK
29 BRIGHTNESS CONTROL CHECK
30 TINT CONTROL CHECK
31 SHARPNESS CONTROL CHECK
32 CH DISPLAY COLOR CHECK
33 SURROUND CHECK
34 TREBLE CHECK
35 BASS CHECK
36 BALANCE CHECK
37 LOUDNESS CHECK
38 NORMAL DISPLAY CHECK
39 WHITE TEMP CONTROL CHECK
40 COLOR SYSTEM CHECK
41 SOUND SYSTEM CHECK
42 MP-IN CHECK
43 NOISE MUTE CHECK
44 OSD LANGUAGE QUANTITY CHECK
45
SHOCK TEST CHECK
ADJUSTMENT ITEM
EFFECTIVE MODEL
ALL MODELS
ADJUSTMENT ITEM

21S-FX10F/10S/10N/10U
3 – 3
86(5'$7$,16(59,&(02'(
:KLOH6(59,&(PRGH21((3520'$7$ZLOOVZLWFKWRWKHVHUYLFHGDWD
$OVRRQFH6(59,&(PRGH2))((3520ZLOODOVRVZLWFKWRVHUYLFHGHIDXOWGDWD
,QWKHVHUYLFHPRGHWKHXVHUGDWDHVWDEOLVKDVEHORZ
86(5'$7$ 02'(/6
&2175$67 0$;
&2/285 &(17(5
%5,*+71(66 &(17(5
7,17 &(17(5
6+$531(66 &(17(5
:+,7(7(03 &(17(5
692/80( 0,1
6855281' 6855281',,
75(%/(
%$66
%$/$1&(
/28'1(66 21
$9/ 2))
%/8(%$&. 2))
&6<67(0 $872
66<67(0
)RUHDFK&+GDWDLVVDPHDVEHIRUHVZLWFKWR6HUYLFHPRGH
7KHIORZRI0RGHOLVWDVIROORZLQJ
'LUHFW.H\LQ0RGHIRU6HUYLFH,WHPVLQ6HUYLFH0RGH
5&&2'(+(; 6(59,&(,7(0
9$039$03
96+,96+,
' 96/23(
+6+,+6+,
%& (::(::
& +3$5
9/,1
( &8756
' 68%&2/25
68%7,17
( 96'
' 68%%5,
$//02'(/6

21S-FX10F/10S/10N/10U
3 – 4
**AFTER INITIALIZED THE EEPROM (REFER TO FACTORY PRESETTING), READ DATA FROM
EEPROM ADDRESS 00H ~ 03H,AND COMPARE TO THE LIST BELOW, IF DIFFERENT,
INITIALIZE THE EEPROM.
ADDRESS DATA ADDRESS DATA
00H: 00H 02H: 03H
01H: 00H 03H: 13H
*** There are two stages of service mode. First stage is ADJUSTMENT MODE; data from 01~32.
To go into second stage of service mode , press MENU key.Second stage is NVM MODE data from 000~3FF
ADJUSTMENT MODE (01~32)
1) Press CH UP/CH DOWN to select the item.
1) Press VOL UP/VOL DOWN to modify/ adjust the data.
01 RF-AGC
0…63 UOC-TV 23 AUTO
02 V-SLOPE
0…63 UOC-TV 31 ADJ
03 V-SHI-50
0…63 UOC-TV 36 ADJ
04 V-AMP-50
0…63 UOC-TV 20 ADJ
05 H-SHI-50
0…63 UOC-TV 30 ADJ
06 EW-W-50
0…63 UOC-TV 28 ADJ
07 E/W-PAR-50
0…63 UOC-TV 36 ADJ
08 H-PAR
0…63 UOC-TV 30 ADJ
09 H-BOW
0…63 UOC-TV 30 ADJ
10 UPCOR-PAR
0…63 UOC-TV 42 ADJ
11 LOCOR-PAR
0…63 UOC-TV 44 ADJ
12 E/W TRAP
0…63 UOC-TV 30 ADJ
13 V-LIN
0…63 UOC-TV 32 FIX
14 S-COR
0…63 UOC-TV 32 FIX
15 DRI-RS
0…63 UOC-TV 32 ADJ
16 DRI-GS
0…63 UOC-TV 32 ADJ
17 DRI-BS
0…63 UOC-TV 32 ADJ
18 CUT-RS
0…63 UOC-TV 16 ADJ
19 CUT-GS
0…63 UOC-TV 16 ADJ
20 CUT-BS
0…63 UOC-TV 16 ADJ
21 SUB-BRI
0…63 UOC-TV 24 ADJ
22 SUB-CON
0…63 UOC-TV 59 ADJ
23 SUB-COL
0…63 UOC-TV 10 ADJ
24
SUB-TINT 0…63 UOC-TV 36 ADJ
25
SUB-SHARP 0…63 UOC-TV 32 FIX BUS SETUP
26
V-SHI-60 0…63 UOC-TV 31 FIX
27 V-AMP-60
0…63 UOC-TV 31 FIX
28 H-SHI-60
0…63 UOC-TV 38 FIX
29 EW-W-60
0…63 UOC-TV 32 FIX
30
E/W-PAR-60 0…63 UOC-TV 31 FIX
31 VSD
0/1 UOC-TV 0 FIX
32 CUT OFF
0…63 UOC-TV 25 FIX
33 DCXO
0…3 UOC-TV 2 FIX
34 ISP MODE
0/1 UOC-TV 0 FIX
35 BLOC
0…15 UOC-TV 4 FIX
36 SUB-VOL
0…60 UOC-TV 60 FIX
PLS REFER TO ADJ
ITEM FOR WHITE
BALANCE
REMARK
PLS REFER TO ADJ
ITEM FOR
HORIZONTAL,
VERTICAL,
DEFLECTION LOOP
Item
Setting Item
Setting Range
IC
Default (DEC)
FIX/ADJ/AUTO

21S-FX10F/10S/10N/10U
3 – 5
NVM MODE ITEMS (1/4)
1) Press CH UP / CH DOWN key to move the highlighted cursor (between NVM address and NVM data)
2) To change NVM address / modify data: VOL UP key= increase 0ne step data ; VOL DOWN key= decrease one step data ;
0~9 key = 0~9 ; FAV key A( RED) =A ; FAV key B (GREEN)=B; FAV key C (YELLOW)=C; FAV key D (BLUE)=D;
DATA MICON DEFAULT EEPROM RANGE REMARKS
D7 D6 D5 D4 D3 D2 D1 D0 [hex] [hex]
0000
0001
0002 03 00-FF
FIX
0003 13 00-FF
FIX
0008 17 00-3F
AUTO
0009 1F 00-3F
ADJ
000
A
24 00-3F
ADJ
000
B
14 00-3F
ADJ
000
C
1E 00-3F
ADJ
000
D
1C 00-3F
ADJ
000
E
24 00-3F
ADJ
000F 1E 00-3F
ADJ
0010 1E 00-3F
ADJ
0011 2A 00-3F
ADJ
0012 2C 00-3F
ADJ
0013 1E 00-3F
ADJ
0014 20 00-3F
FIX
0015 20 00-3F
FIX
0016 20 00-3F
ADJ
0017 20 00-3F
FIX
0018 20 00-3F
ADJ
0019 10 00-3F
ADJ
001
A
10 00-3F
ADJ
001
B
18 00-3F
ADJ
001
C
3B 00-3F
ADJ
001
D
0A 00-3F
ADJ
001
E
24 00-3F
ADJ
001F 20 00-3F
BUS SETUP
0020 21 00-3F
FIX
0021 20 00-3F
FIX
0022 21 00-3F
FIX
0023 21 00-3F
FIX
0024 29 00-3F
FIX
0025 1C 00-3F
FIX
0026 1F 00-3F
FIX
0027 1A 00-3F
BUS SETUP
0028 1F 00-3F
FIX
0029 20 00-3F
FIX
002
A
28 00-3F
FIX
002
B
20 00-3F
FIX
002
C
20 00-3F
FIX
002
D
22 00-3F
FIX
002
E
20 00-3F
FIX
002F 1D 00-3F
FIX
0030 20 00-3F
FIX
0031 20 00-3F
FIX
0032 1F 00-3F
FIX
0033 20 00-3F
FIX
0034 28 00-3F
FIX
0035 20 00-3F
FIX
0036 20 00-3F
FIX
0037 22 00-3F
FIX
0038 20 00-3F
FIX
0039 1D 00-3F
FIX
003
A
20 00-3F
FIX
003
B
20 00-3F
FIX
003
C
27 00-3F
FIX
003
D
23 00-3F
FIX
003
E
1F 00-3F
FIX
003F 0B 00-3F
FIX
Note: Highlighted items cannot be adjusted due fixed by software.( if adjusted it will has no effect)
ADDRESS
(HEX)
LOCKING PASSWORD
0000
0000-270F
FIX
PACKAGE NUMBER (MSB)
PACKAGE NUMBER (LSB)
V-SLOPE (02)
V-SHI-50 (03)
V-AMP-50 (04)
H-SHI-50 (05)
EW-W-50 (06)
E/W-PAR-50 (07)
H-PAR (08)
H-BOW (09)
UPCOR-PAR (10)
LOCOR-PAR (11)
E/W-TRAP (12)
V-LIN (13)
S-COR (14)
DRI-RS (15)
DRI-GS (16)
DRI-BS (17)
CUT-RS (18)
CUT-GS (19)
SUB-BRI (21)
SUB-CON (22)
SUB-COL (23)
SUB-TINT (24)
SUB-SHARP (25)
DRI-RS-DVD
DRI-GS-DVD
DRI-BS-DVD
CUT-RS-DVD
CUT-GS-DVD
SUB-BRI-DVD
SUB-CON-DVD
SUB-TINT-DVD
DRI-RC
DRI-GC
DRI-BC
CUT-RC
CUT-GC
DRI-RW
DRI-GW
DRI-BW
CUT-RW
DRI-RW-DVD
DRI-GW-DVD
CUT-GW
DRI-RC-DVD
DRI-GC-DVD
DRI-BC-DVD
RF-AGC (01)
VER-AMP-P50
H0R-SHI-P50
EW-W-P50
DRI-BW-DVD
CUT-GW-DVD
VER-SHI-P50
CUT-RW-DVD
CUT-RC-DVD
CUT-GC-DVD

21S-FX10F/10S/10N/10U
3 – 6
19002'(,7(06
'$7$ 0,&21'()$8/7 ((35205$1*( 6(77,1*'$7$
' ' ' ' ' ' ' ' >KH[@ >KH[@ >KH[@
)
),;
) )
),;
) )
),;
)
),;
)
),;
) )
),;
)
),;
)
),;
)
),;
$ )
),;
$
( )
),;
%
)
),;
&
),;
'
)
),;
(
)
),;
) )
),;
)
),;
)
),;
)
),;
)
),;
)
),;
)
),;
)
),;
)
),;
)
),;
)
),;
$
)
),;
%
)
),;
&
)
),;
'
)
),;
(
)
),;
) )
),;
)
),;
& (
),;
(
%866(783
' (
%866(783
(
),;
(
),;
(
),;
(
),;
(
),;
% (
),;
$
% (
),;
%
(
),;
&
) (
),;
'
) (
),;
(
(
),;
) (
),;
( (
),;
) (
),;
) (
),;
)
),;
) &
),;
$ &
),;
) &
),;
&
),;
$ &
),;
&
),;
$
( (
),;
%
( (
),;
&
( (
),;
'
( (
),;
(
(
),;
) (
),;
1RWH+LJKOLJKWHGLWHPVFDQQRWEHDGMXVWHGGXHIL[HGE\VRIWZDUHLIDGMXVWHGLWZLOOKDVQRHIIHFW
2))6(7B2)B&2/B'9'B),(/'B)5(4B+=
2)7,17$'-
%%7,17
8%$66B086&
2)6+31
2)6+31
2)7,1779
2)7,17$9
2)&2/6
2)&2/1
2)6+33
2)6+36
2)&2/1
2)6+379
2)6+3$9
2)6+3'9'
2)&2/79
2)&2/$9
2)&2/'9'
2)&2/3
'5,5/:'9'
'5,%/:'9'
&875/:'9'
&87*/:'9'
'5,*/&'9'
'5,%/&'9'
&875/&'9'
&87*/&'9'
'5,%/:
&875/:
&87*/:
'5,5/&'9'
&875/&
&87*/&
'5,5/:
'5,*/:
'&;2
'5,5/&
'5,*/&
'5,%/&
$''5(66
+(;
+6+,
9$03
96+,
(:3$53
'5,*/:'9'
(::
(:3$5
9(56+,3
9(5$033
+56+,3
(::3
(:3$53
&872))
8%$66B1(:6
8%$66B029
875(%/(B086&
875(%/(B1(:6
875(%/(B029
8%5,086&
8%5,1(:6
8&2/1(:6
8&2/086&
8%5,029
8&2/029

21S-FX10F/10S/10N/10U
3 – 7
19002'(,7(06
'$7$ 0,&21'()$8/7 ((35205$1*( 6(77,1*'$7$
' ' ' ' ' ' ' ' >KH[@ >KH[@ >KH[@
& &
),;
&
),;
& &
),;
( (
),;
(
),;
(
),;
) )
),;
)
),;
)
),;
)
),;
$
),;
%
)
),;
&
) (
),;
'
$ )
),;
(
% ))
),;
) ) &
),;
( &
),;
' &
),;
) (
),;
&
),;
$
),;
%
& &
),;
&
)
),;
'
&) ))
),;
(
))
),;
) )
$'-
$
)
),;
$
$ ))
),;
$
)
),;
$
)
),;
$
)
%866(783
$
)
),;
&
)
),;
&
)
),;
&
$ )
),;
)
(
%866(783
)
)
%866(783
1RWH+LJKOLJKWHGLWHPVFDQQRWEHDGMXVWHGGXHIL[HGE\VRIWZDUHLIDGMXVWHGLWZLOOKDVQRHIIHFW
$''5(66
+(;
8&21086&
8&211(:6
8&21029
86+3086&
86+31(:6
86+3029
26'%5,*+71(66
932626'
+32626'
$872$*&0$;
690176&
9(5$0367$57
2))6(7B2)B&2/B'9'B),(/'B)5(4B+=
932626'+=
60(/*$,1
)'$&92/
)'$&92/
)'$&92/
237,21B+27(/B0$;B92/
237,21B+27(/B35*
68%92/
2))6(7B7,17B1
2))6(7B6+$531(66B/1$
67$570(5
67230(5
&87%6
$9B%5,
&87%6'9'
67$570(5
2))B&21
2))B%5,
$9/B92/B67(3'2:1/(9(/
)$&725<6+,3287/$1*8$*(
)$&725<6+,32876281'6<67(0
)781B2))6'(0B,)

21S-FX10F/10S/10N/10U
3 – 8
NVM MODE ITEMS (4/4)
D7 D6 D5 D4 D3 D2 D1 D0
(HEX) (HEX)
00CD
TUNER BAND
02
00-83
FIX
00D2
21
00-FF
FIX
00D3
11
00-FF
FIX
00D4
40
00-FF
FIX
00D5
00
00-FF
FIX
00D6
67
00-FF
FIX
00D7
35
00-37
FIX
00D8
66
00-FF
FIX
00D9
84
00-FF
FIX
00DA
41
00-F7
FIX
00DB
04
00-0F
FIX
00DC
0B
00-FF
FIX
00DD
45
00-77
FIX
00DE
13
00-77
FIX
00E6
04
00-FF
FIX
00E7
D1
00-FF
FIX
00E8
5D
00-AF
FIX
00E9
77
00-FF
FIX
00EA
77
00-FF
FIX
00EB
02
00-AF
FIX
00EC
92
00-BE
FIX
00ED
04
00-1F
BUS SETUP
00F 4
PWL VSD (31) VIRGIN BPB2 FMI MUS PHI FORCE DSK-NOT-PAL-AV
92
00-FF
FIX
00F 5
DSK-NOT-PAL-DVD DSK-PAL-DVD DSK-PAL-AV BKS GAM BSD LCKEY-SRV-ENTER INCL-AV
1B
00-FF
FIX
00F 6
AVL_GAIN
AVL ISP MODE (34) AEVS_ITEM_POR ERR-VERTG ERR-SUPVOL ERR-XRAY ERR-1-8-SUP
0C
00-BF
FIX
00F 7
OPTION_SMUTE_L CP-TUNER TFR OPTION_HOTEL LOUDNESS_HIGH_BOOST DTR AGN DSG
49
00-7D
FIX
00F 8
OPTION_ SURROUND OPTION_DVD OPTION_AV2
MULTI21_SYS_
OPTION
DMP50_SELECTION CB
DSGLS_SELECTIO
N
CBS
E4
00-F5
FIX
00F 9
OPTION_AVL_
OSD
OPTION_TREBL
E_LIMIT
OPTION_BASS_
LIMIT
OPTION_AVL_ON_VOL_TBL
OPTION_LNA
_BOOSTER
OPTION_SHAKIT OPTION_MPIN
45
00-7F
FIX
Note: Highlighted items cannot be adjusted due fixed by software.( if adjusted it will has no effect)
CL3-0
YD COMP
MICON
DEFAULT
REMARKS
EEPROM RANGE
YD AV-N443
YD AV-N358
YD SECAM
YD PAL
TUNER SELECTION
NVM
address
EEPROM ITEMS
YD N443
YD N358
YD AV-SECAM
YD AV-PAL
LOUDNESS_LD4 (SHAKIT only)
PW-TIME
SVM2-0-PAL
WBR-50-F-C-P
WBF-50-F-C-P
WBR-60-F-C-P
WBF-60-F-C-P
BLOC (35)
LOUDNESS_LDS0-2
FTUN_OFFSDEM_IF
PWLDAC
WBF-60-F-C-P (during Blue Back)
WBF-50-F-C-P (during Blue Back)
LOUDNESS_LD2 (SHAKIT only)
LOUDNESS_LD1 (SHAKIT only)
LOUDNESS_LD3 (SHAKIT only)
PEAKFREQPALN
PEAKFREQPALM
PEAKFREQPAL443
COR1-0
PEAKFREQDVD
PEAKFREQSECAM
PEAKFREQNTSCM
PEAKFREQNTSC443
PW-LAST
AUDIO-CFG
PHI
H-POS-FINE
PRESET_WS_NEWS
PRESET_COR_NEWS
PRESET_WS_MUSC
PRESET_COR_MUSC
PRESET_WS_CTM
PRESET_COR_CTM
PRESET_WS_MOV
PRESET_COR_MOV
PRESET_SURROUND_NEWS
PRESET_SURROUND_MUSC
TREBLE_FREQ_SELECTION
BASS_FREQ_SELECTION
RPO
RPA
SOC
AAS0_1
PRESET_SURROUND_MOV
PSYS_CHSE_COLOR
LANGUAGE_OPTION
FSND_AGNE_SELECTION

21S-FX10F/10S/10N/10U
3 – 9
21S-FX10U 21S-FX10N 21S-FX10F/10S
01F
SUB-SHARP (25)
1E 1E 1E
FIX
(Data same as adjustment item
25 SUB-SHARP = 30 (decimal)
027
SUB-TINT-DVD
24 24 24 FIX
062
OF-COL-AV
21 21 21 FIX
063
OF-COL-DVD
2A 2A 2A FIX
0A4
AV2_BRI
24 24 24 FIX
0ED
LANGUANGE OPTION /
FSND_AGNE_SELECTION / RPO
14 14 14 FIX
6FE
FACTORY SHIPOUT SOUND SYSTEM
03 01 01 FIX
6FF
FACTORY SHIPOUT LANGUAGE
02 00 03 FIX
0EE
OPTION_SHAKIT_LOUDNESS_DSP
01 01 01 FIX
0F8
SURROUND OPTION/DVD OPTION/AV2
OPTION/MULTI 21 SYS.OPTION/CB/CBS
E4 E4 F4 FIX
0F9
AVL OSD POSITION/TREBLE LIMIT
OPTION/BASS LIMIT OPITION/LNA
BOOSTER OPTION/AVL ON VOL TABLE
OPTION/SHAKIT OPTION/MP IN OPTION
41 41 41 FIX
REMARK
EEPROM ITEMS
Address
(HEX)
BUS SET UP (EEPROM DATA)
Data (HEX)

21S-FX10F/10S/10N/10U
3 – 10
INITIAL SETTING
1.) Execute MCL 1 key to set the following data in EEPROM.
2.) After set the MCL , please set the MODEL SET ( 17 HEX or 232 DEC).
CH-No Fv (MHz) Sound Sys
0
1 48.25 B/G
2 62.25 B/G
3 77.25 D/K
4 175.25 B/G
5 182.25 B/G
6 183.25 D/K
7 191.25 D/K
8 196.25 B/G
9 199.25 M
10 210.25 B/G
11 224.25 B/G
12 471.25 B/G
13 487.25 I
14 503.25 B/G
15 575.25 B/G
16 583.25 B/G
17 599.25 B/G
18 621.25 M
19 639.25 D/K
20 703.25 B/G
21 735.25 I
22 767.25 B/G
23 815.25 B/G
24 855.25 I
25 855.25 B/G
26 55.25 M
27 83.25 M
28 183.25 M
29 193.25 M
30 217.25 M
31 471.25 M
32 477.25 M
33 693.25 M
34 885.25 M
35 112.25 B/G
36 168.25 B/G
37
38 294.25 B/G
39 463.25 B/G
40
41 647.25 B/G
42 663.25 B/G
43 679.25 B/G
44 174.95 B/G
45 175.55 B/G
46
47
48
49
50
51
52
53
54
55
56
57
58
59
60
61
62
63
64
65
66
67
68
69
MCL1 (HEX AE)
70

21S-FX10F/10S/10N/10U
3 – 11
SHIPPING SETTING & CHECKING
(1) The following default data has been factory-set for the E2PROM follow by pressing MODEL SET key.
LANGUAGE
ENGLISH
ITEMS DATA SETTING
LAST POWER ON
LAST TV/AV MODE TV MODE
LAST POSITION CH 1
FLASHBACK CHANNEL CH 1
1/2 DIGIT ENTRY 2 DIGIT ENTRY
VOLUME 0 (Min)
BLUE BACK OFF
OFF TIMER --:--
CHILD LOCK OFF
PASSWORD 0000
MP-IN ON
AFT ALL CH ON
COLOR SYSTEM ALL CH AUTO
SKIP ALL CH OFF
FAVORITE PROGRAM A CH 10
FAVORITE PROGRAM B CH 20
FAVORITE PROGRAM C CH 30
FAVORITE PROGRAM D CH 40
AV MODE MOVIE
CONTRAST 60
COLOUR +6
BRIGHTNESS 0
TINT 0
SHARPNESS +6
PICTURE NR OFF
WHITE TEMP 0
SURROUND ONII
TREBLE +6
BASS +5
LOUDNESS ON
A
VL OFF
FACTORY SETTING BY MODEL
(Reference: Geomagnetism Adjustment)
MODEL MAGNETIC FIELD(V, H) nT BACKGROUND LANG. S-SYS LANG QTY
NIGERIA -10,000 40,000 12300°K ENGLISH B/G 4
MIDDLE EAST 30,000 20,000 12300°K
A
RAB B/G 4
UKRAINE 40,000 20,000 12300°K RUSSIA D/K 4
4: ENGLISH/FRENCH/ARAB/RUSSIA
B/G
SOUND SYSTEM

21S-FX10F/10S/10N/10U
3 – 12
[2] ADJUSTMENT
ADJUSTMENT PRECAUTION: Makesure TV Set is in “Normal Condition” before switch to Service Mode for Adjustment.
1. PIF ADJUSTMENT CHECKING
2. FOCUS ADJUSTMENT
NO ADJUSTMENT POINT ADJUSTMENT CONDITION / PROCEDURE WAVEFORM OR OTHERS
1RF-AGC TAKE OVER
POINT ADJUSTMENT
(I2C BUS CONTROL)
(AUTO & MANUAL ADJ)
* for Auto ADJ
(1) Receive "PAL COLOR BAR"
signal
56 ± 1 dBµV (75 ohm open).
(1) Go to service mode.
(2) Go to service data 01 RF-AGC,
press R/C to operate auto key
(Hex C1). Blue display with OK
sign indicates the adjustment is
working properly
(3) If appear red display with NG
sign, increase data some step
and please repeat step 2.
(4) Proceed step4&5inmanual
mode.
TV SET
OSCILLOSCOPE
BIAS BOX
+
-
TP201
0.1V
1.0V -
+
(1) Receive "PAL COLOR BAR" signal.
Signal Strength: 56 ± 1dBµV (75 ohm open)
(2) Connect the oscilloscope to JA402 (Tuner's
AGC Terminal) as shown in figure 3-1.
(3) Call "01 RF-AGC" mode in service mode.
Adjust the "01RF AGC" bus data to obtain
the Tuner output pin drop 0.1~1.0V below
maximum voltage.
(4) Change the antenna input signal to
63 ~ 67dBµV, and make sure there is
no noise.
(5) Turn up the input signal to 90 ~ 95 dBµV to
be sure that there is no cross modulation beat.
signal strength :
NO ADJUSTMENT POINT WAVEFORM OR OTHERS
1FOCUS (1) Receive the "Monoscope Pattern" signal.
(2) Press R/C to set Picture NORMAL condition.
(3) Adjust the focus control to get the best
focusing.
ADJUSTMENT CONDITION / PROCEDURE
Focusing
Point
(middle of
center and
edge of
monoscope
pattern)

21S-FX10F/10S/10N/10U
3 – 13
3. HORIZONTAL, VERTICAL, DEFLECTION LOOP ADJUSTMENT
NO ADJUSTMENT POINT WAVEFORM OR OTHERS
1V-SLOPE
(I2C BUS CONTROL)
ADJUSTMENT CONDITION / PROCEDURE
(1) Receive Monoscope Pattern Signal
(PAL 50 Hz).
(2) Choose the service data 02 V-SLOPE.
(3) Adjust the V-SLOPE as shown in Figure 1.1
CAUTION:- PLEASE AGING TV MORE THAN
10 MINUTES BEFORE ADJUSTMENT.
2V-SHIFT50
(I2C BUS CONTROL)
(1) Receive Monoscope Pattern Signal
(PAL 50 Hz).
(2) Choose the service data 03 V-SHI-50
(3) Adjust V-SHI-50 bus data to have a most
acceptable vertical position, the monoscope
pattern should be Balance in vertical position.
Note: B line (Monoscope middle line) must
same or nearest higher position to the A
mark (Tube middle mark),refer to the attach
drawing.
Figure 1.1
Figure:
3V-AMP-50
(12C BUS CONTROL)
(to be done
V-shift adj)
(1) Receive Monoscope Pattern Signal
(PAL 50 Hz).
(2) Choose the service data 04 V-AMP-50.
(3) Adjust V-AMP-50 bus data until the overscan
become 10 ± 1.5 %.
Caution 1: Pls aging TV more than
10 minutes before adjustment
4H-SHIFT-50
(I2C BUS CONTROL)
(1) Receive Monoscope Pattern Signal
(PAL 50 Hz).
(2) Choose the service data 05 H-SHI-50.
(3) Adjust the H-SHI-50 bus data to have a
balance position to spec of A=B
(as attach drawing).
(4) If cannot make it to A=B, adjust from the
best point so that Bslightly smaller than A.
A = Out of spec
B=OK
C = Out of spec
A
B
C
A
OK OK NG
B
AB

21S-FX10F/10S/10N/10U
3 – 14
NO ADJUSTMENT POINT WAVEFORM OR OTHERS
5EW-W-50
(I2C BUS CONTROL)
ADJUSTMENT CONDITION / PROCEDURE
(1) Receive Monoscope Pattern Signal
(PAL 50 Hz).
(2) Choose the service data 06 EW-W-50.
(3) Adjust EW-W-50 bus data until the overscan
becomes 10 ± 1.5 %.
6E/W-PAR-50
(I2C BUS CONTROL)
(1) Receive CrossHatch Pattern Signal
(PAL 50 Hz).
(2) Choose the service data 07 E/W-PAR-50.
(3) Adjust the 2nd vertical line from the right
end of the crosshatch pattern so that the
middle 4 blocks are straight.
7UPCOR-PAR
(I2C BUS CONTROL)
(1) Receive CrossHatch Pattern Signal
(PAL 50 Hz).
(2) Choose the service data 10 UPCOR-PAR.
(3) Adjust the 2nd upper vertical line from the
right end of the crosshatch pattern so that the
upper line are straight.
8LOCOR-PAR
(I2C BUS CONTROL)
(1) Receive CrossHatch Pattern Signal
(PAL 50 Hz).
(2) Choose the service data 11 LOCOR-PAR.
(3) Adjust the 2nd lower vertical line from the right
end of the crosshatch pattern so that the
bottom line are straight.
9H-BOW
(I2C BUS CONTROL)
(1) Receive CrossHatch Pattern Signal
(PAL 50 Hz).
(2) Choose the service data 9 H-BOW.
(3) Adjust the 2nd vertical line from the end of the
crosshatch pattern until line is straight
(4) Please refer Figure 9.1
10 H-PAR
(I2C BUS CONTROL)
(1) Receive CrossHatch Pattern Signal
(PAL 50 Hz).
(2) Choose the service data 8 H-PAR.
(3) Adjust the 2nd vertical line from the end of the
crosshatch pattern line is straight
(4) Please refer Figure 10.1
11 EW-TRAP
(I2C BUS CONTROL)
(1) Receive CrossHatch Pattern Signal
(PAL 50 Hz).
(2) Choose the service data 12 EW-TRAP.
(3) Adjust the 2nd vertical line from the right
end of the crosshatch pattern so that the
D1 (center area of the second vertical
line - edge of screen) and D2 (top area of
the second vertical line - edge of screen)
are same.
H-PAR
Figure 9.1
Figure 10.1
H-BOW
D2
D1

21S-FX10F/10S/10N/10U
3 – 15
4. SCREEN, WHITE BALANCE, SUB-BRIGHTNESS & SUB-CONTRAST ADJUSTMENT
NO ADJUSTMENT POINT WAVEFORM OR OTHERS
1SCREEN
ADJUSTMENT
(I2C BUS CONTROL)
ADJUSTMENT CONDITION / PROCEDURE
(1) Make sure the following items are in INITIAL
DATA before adjust CRT cutoff
(a) 15 DRI-RS = 32
(b) 16 DRI-GS = 32
(c) 17 DRI-BS = 32
(d) 18 CUT-RS = 16
(e) 19 CUT-GS = 16
(f) 20 CUT-BS = 16
(f) 21 SUB BRI = 24
(g) 22 SUB CON = 59
(h) 32 CUT OFF = 25
(i) 35 BLOC= 4
(2) Switch TV to video mode, blue back off, with
no signal and press R/C to set picture into
normal condition.
(3) Go to service mode, select item 31 VSD
(dark screen display)
(4) Adjust the Screen so that cut-off line appear in
low bright, then judge that whether the cut-off
line appear in Red or Green or Blue color, in
this condition between CUT-RS & CUT-GS &
cut-BS, fix the data of the color appear in
cut-off line and adj the other two cut-off data
(Note 1) so that cut-off line color become white.
(5) Turn the screen VR of FBT so that cut-off line
just disappear
(1) WHITE (HIGH BEAM)
(In Window Pattern Signal)
First use Minolta Color Analyzer CA100, let the
gun point at Dark White position (as drawing
attach), Adj SUB-BRI until LUMINANCE Y
become 4 cd/m2, then let the gun point at
White position (as drawing attach), Adj SUB-
CON until LUMINANCE Y become: 150 cd/m2.
Adj the DRI-RS & DRI-BS until the axis of color
temperature become
12300 K X : 0.272 , Y : 0.275
(2) DARK WHITE (LOW BEAM)
Let the gun point at Dark White position, if
the color temperature data shift away from
the data adjusted in Item 1 Screen
adjustment, adjust CUT-RS, CUT GS
& CUT-BS.
Please fix the first colour appears in Screen
adj item step (4) is fixed, adj the other two
so that to obtain the similar axis as above.
**Repeatstep1&2togetaregulated
position
Note 1:
CUT-RS UP RC key "1" (HEX 80)
CUT-RS DOWN RC key "4" (HEX 20)
CUT-GS UP RC key "2" (HEX 40)
CUT-GS DOWN RC key "5" (HEX A0)
CUT-BS UP RC key "3" (HEX C0)
CUT-BS DOWN RC key "6" (HEX 60)
*Note : Signal using W/B Pattern
Generator SX-1006 (IWATSU)
or equivalent.
Window Pattern Signal output
level are as above:
2WHITE BALANCE ADJ
(to be done after
screen adj)
(I2C BUS CONTROL)
WINDOW PATTERN SIGNAL
White
50% IRE5.5% IRE 9.5% IRE
Dark
White
°

21S-FX10F/10S/10N/10U
3 – 16
NO ADJUSTMENT POINT WAVEFORM OR OTHERS
3SUB-BRIGHTNESS
(to be done after
screen, white
balance adj)
(I2C BUS CONTROL)
ADJUSTMENT CONDITION / PROCEDURE
(1) In Window Pattern Signal condition.
(2) Using Minolta Color Analyzer CA-100,
let the gun point at Dark White position
(as attach drawing), adjust SUB-BRI Bus
data until :
WINDOW PATTERN SIGNAL
Dark White
4SUB-CONTRAST
(to be done after
screen, white
balance adj,
sub-brightness adj)
(I2C BUS CONTROL)
(1) In Window Pattern Signal condition.
(2) Using Minolta Color Analyzer CA-100, let
the gun point at White position (as attach
drawing), adjust SUB-CON Bus data until :
White
WINDOW PATTERN SIGNAL
5BEAM
CURRENT
CHECK
(1) Receive the "Monoscope Pattern" signal.
(2) Press R/C to set Picture NORMAL condition.
(3) Connect the DC miliammeter between TP 603
(+)&TP602(-)(Full Scale: 3mA Range).
(4) Beam current must be within : 1000 ± 100µA
Service Luminance
mode (cd/m2) Upper limit Lower limit
Enable 4.0 +0.5 -0.5
Disable 4.0 +2.5 -1.0
Tolerance (cd/m2)
Service Luminance
mode (cd/m2) Upper limit Lower limit
Enable 150.0 +10 -10
Disable 150.0 +20 -10
Tolerance (cd/m2)

21S-FX10F/10S/10N/10U
3 – 17
5. PAL CHROMA ADJUSTMENT
6. NTSC CHROMA ADJUSTMENT
NO ADJUSTMENT POINT WAVEFORM OR OTHERS
1SUB COLOUR
(I2C BUS CONTROL)
ADJUSTMENT CONDITION / PROCEDURE
1. Receive the "PAL Split Color Bar" signal.
2. Make the image normal with the remote
controller.
3. Connect the oscilloscope to TP47R (R863)
RED-OUT.
Range : 500mV/Div (AC)
(Use Probe 10:1)
Sweep time : 10µsec/Div
4. Set the sub color adjustment mode with the
remote controller, and vary the sub color data
to make 100% W of the color bar and RED
at the same level for adjustment shown in
Fig. 1-1.
Cy G
W
100% WHITE R
MgYB
Fig 1-1
NO ADJUSTMENT POINT WAVEFORM OR OTHERS
1SUB-TINT
(I2C BUS CONTROL)
(to be done after
sub colour adj)
ADJUSTMENT CONDITION / PROCEDURE
(1) Receive the "NTSC 3.58 Colour Bar" signal
through AV IN from IWATSU SX1006 pattern
generator.
(2) Connect the oscilloscope to TP47B (R865)
BLUE-OUT
Range : 500mV/Div (AC)
(Use Probe 10:1)
Sweep time : 10µsec/Div
(3) Select the "SUB-TINT" item in the
ADJUSTMENT MODE.. Adjust the "SUB-
TINT" data to obtain the waveform shown
as Figure 1.2 (W and Mg same level)
Same Level
Fig 1-2
WY G R BCy Mg
This manual suits for next models
3
Table of contents
Other Sharp TV manuals

Sharp
Sharp 36C230 User manual

Sharp
Sharp 14VT10X1 User manual

Sharp
Sharp 28HW-57E User manual

Sharp
Sharp 28LF-92H User manual

Sharp
Sharp 36U-S610 User manual

Sharp
Sharp LC-40FG5241K User manual

Sharp
Sharp 50DJ1K User manual

Sharp
Sharp 42CL1IA User manual

Sharp
Sharp LD-26SH3U User manual

Sharp
Sharp 21J-FG1GA User manual

Sharp
Sharp 14SL30 User manual

Sharp
Sharp 37EM-33H User manual

Sharp
Sharp 29H-S3P User manual

Sharp
Sharp LC-20B2UA User manual

Sharp
Sharp LC-32CFF6001E User manual

Sharp
Sharp 21H-S3P User manual

Sharp
Sharp 32C230 User manual

Sharp
Sharp LD-26SH1U User manual

Sharp
Sharp AQUOS LC-55N7004U User manual

Sharp
Sharp 29L-FG1L User manual