CONTRAS T 50
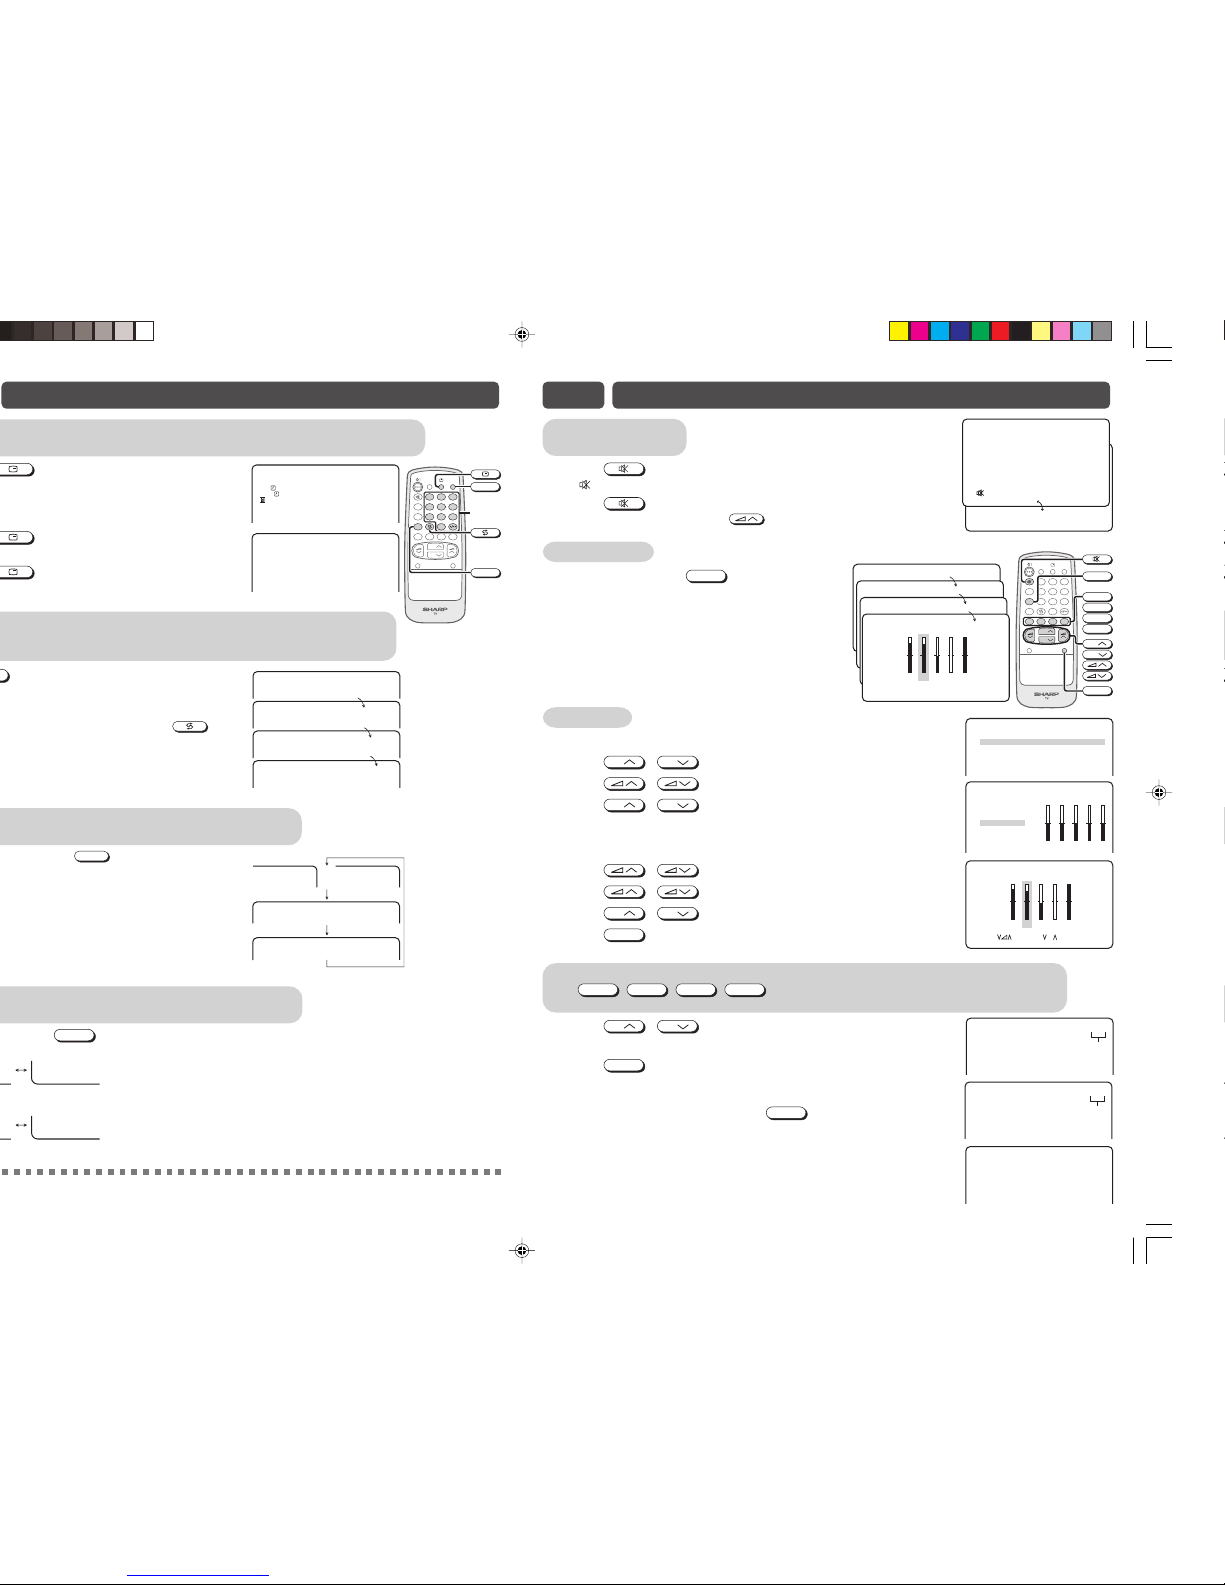
E9 PICTURE OR SOUND ADJUSTMENT
The following table lists the adjustment items shown in the PICTURE/SOUND
menu and how they change as you press / .
PICTURE menu table
•
TINT can only be selected and adjusted when receiving NTSC broadcasts. (AV input)
• Picture Noise Reduction
Noise might be generated on images when playing deteriorated video tapes or
when receiving broadcasts with relatively weak signals. In these cases, set
PICTURE NR to “ON” to reduce the noise. However, when receiving good images
without noise, you can get better image quality by turning OFF this feature.
• WHITE TEMP can only be adjusted on PICTURE menu.
• If any items is adjusted, VIDEO MODE will automatically change to CUSTOM.
POWER
SAVE
TV/VIDEO
SOUND MODE
SURROUND
NORMAL
123
456
78
0
9
MENU
BACD
LANGUAGE
CH
CH
CH
CH
MENU
NORMAL
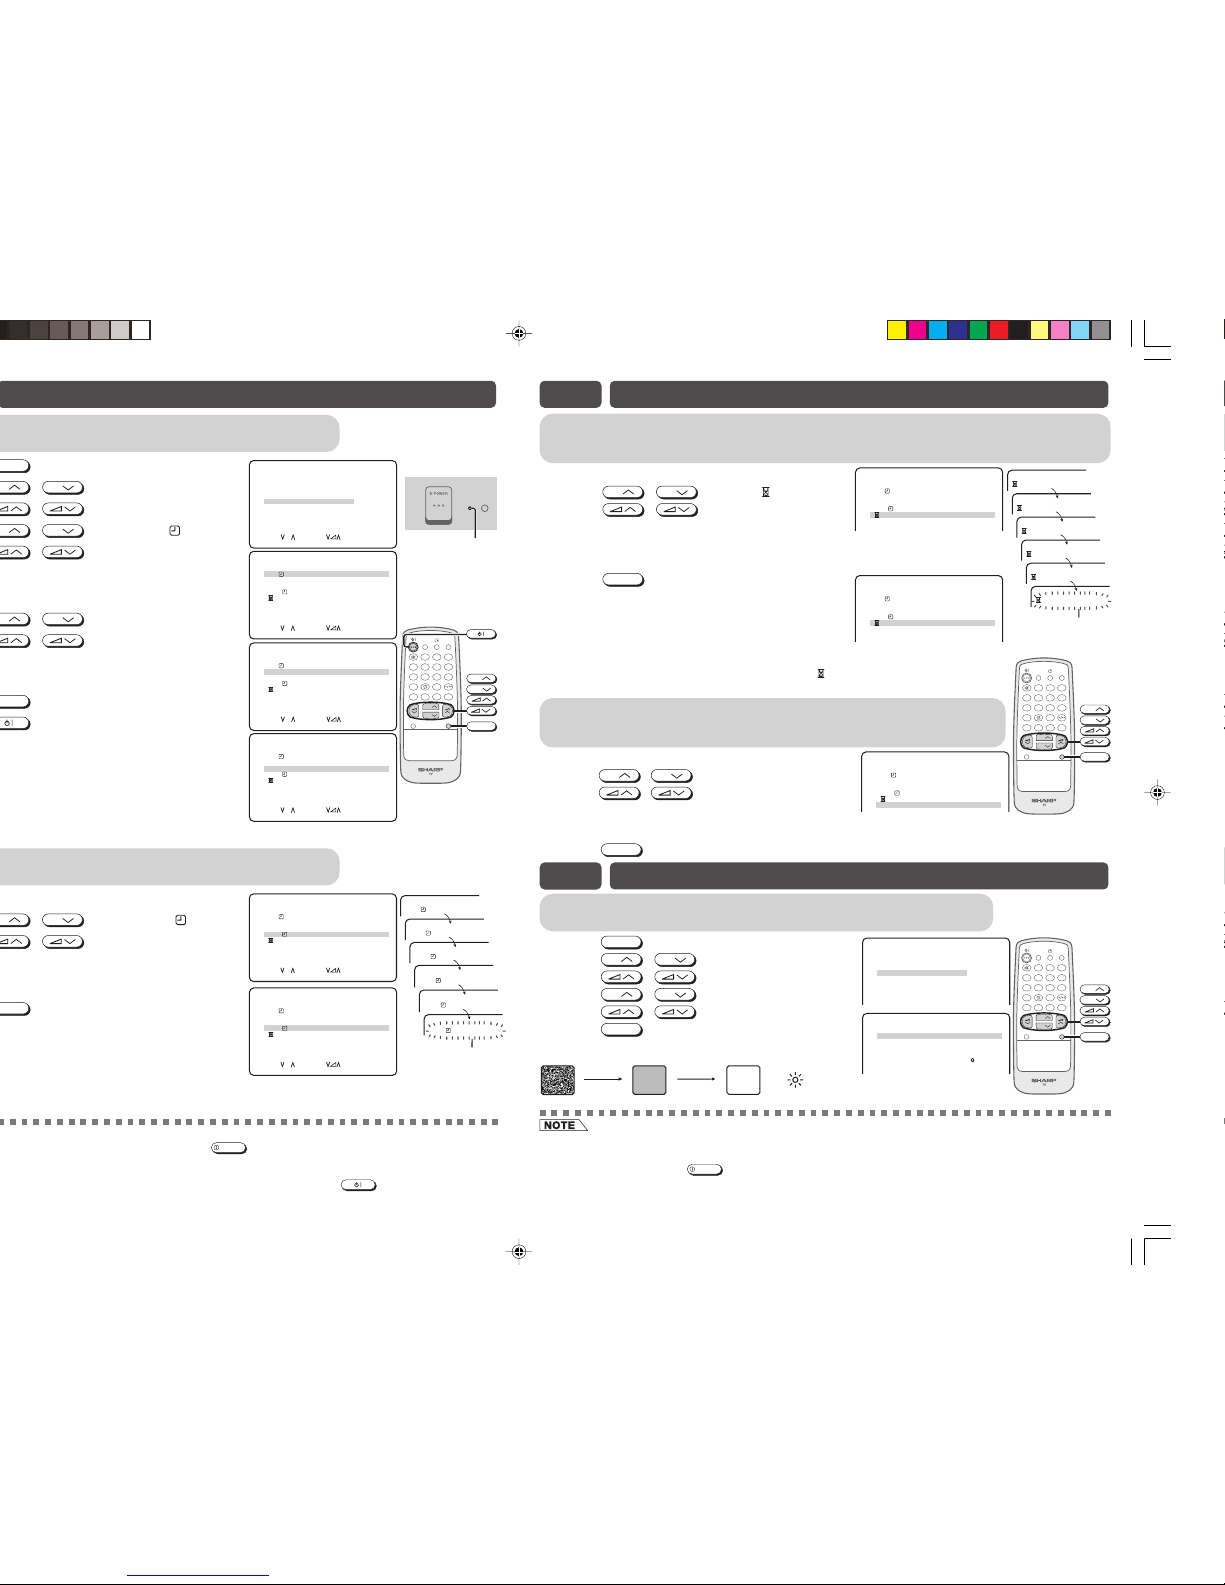
!Press
MENU
to call MENU screen.
@Press
CH
/
CH
to select “PICTURE” or “SOUND”.
#Press / to display PICTURE or SOUND menu.
$Press
CH
/
CH
to select adjustment items.
%Adjust using / .
• Wait for approximately five seconds to return to PICTURE/SOUND menu.
^Repeat steps 4 and 5 above to adjust other items.
&Press
MENU
until normal screen appears.
[ PICTURE menu screen ]
[ SOUND menu screen ]
SOUND menu table
M
ENU
SOUND
PICTURE
FEATURE
TI
M
ER
CH - S ET T I NG
PICTURE
50
–10
CUST
O
M
+25
20
–20
ON
CONTRAS T
COLOUR
VIDEO
M
ODE
BR I GHTNE SS
TINT
SHARPNESS
PICTURE NR
W
HI TE TE
M
P
SELECT : CH ADJUST : RETURN :
M
ENU
M
ENU
SOUND
PICTURE
FEATURE
TI
M
ER
CH - S ET T I NG
BALANCE 15
–+
–+
–+
Selected item Press Press
VIDEO MODE
CONTRAST To decrease contrast To increase contrast
COLOUR For less colour intensity For more colour intensity
BRIGHTNESS For less brightness For more brightness
TINT To move tint toward red To move tint toward green
WHITE TEMP To more reddish To more bluish
background background
SHARPNESS For less sharpness For more sharpness
PICTURE NR (see note below)
ON OFF
DYNAMIC STANDARD SOFT CUSTOM
Selected item Press Press
AVL*
2
The AVL is ON The AVL is OFF
BASS+ The BASS+ is ON The BASS+ is OFF
ON OFF
ON OFF
EQUALIZER (Refer to E12 for details on Equalizer)
SURROUND*
1
(Please see note below)
BALANCE To shift balance To shift balance
toward left toward right
Enables individual channel setting.
!Press
MENU
to call MENU screen.
@Press
CH
/
CH
to select “CH-SETTING”.
If you press
MENU/PRESET
on TV set for more than two
seconds during normal screen, the LANGUAGE
mode screen will appear.
Press
MENU/PRESET
again to display CH-SETTING menu.
• Pressing
MENU/PRESET
changes the screen as shown
below.
#Press / to display CH-SETTING
menu.
$Press
CH
/
CH
to select desired setting.
%Each time you press / , setting
for individual items changes as follows:
• POSITION
The channel position changes to the higher or lower number.
• COLOUR-SYSTEM
AUTO SECAMPAL
• SOUND-SYSTEM
B/G D/KIAUTO
• SKIP
ON OFF
When set “SKIP” to “ON”, the channel number are set to SKIP. To turn off SKIP, press the number
buttons to select the desired channel and then set “SKIP” to “OFF”.
•AUTO
Press / and Auto Channel Tuning is
started. Auto tuning bar will shown during Auto
Search only.
•MANUAL (FINE tuning)
i) Each time / is pressed, the
frequency changes to allow fine tuning and the
colour of channel number changes to yellow to
indicate fine tuning.
ii) Press / for more than 2 seconds,
the "Manual Channel Tuning" will start. If a
signal is found, the Manual Channel Tuning will
stop searching.
^Press
MENU
until normal screen appears.
POWER
SAVE
TV/VIDEO
SOUND MODE
SURROUND
NORMAL
123
456
78
0
9
MENU
BACD
LANGUAGE
CH
CH
CH
CH
MENU
• Switching COLOUR-SYSTEM:
Set the system to “AUTO” for normal TV reception. The AUTO mode automatically detects the receiving signal system
and changes the reception system of the TV set. When the picture is not stable, switching to an appropriate system
may improve the picture quality.
• Switching SOUND-SYSTEM:
Set the system to “AUTO” for normal TV reception. The AUTO mode automatically detects the receiving signal system
and changes the reception system of the TV set. When the sound is not stable, switching to an appropriate system
may improve the sound quality.
• When using FINE, the channel number changes from green to yellow.
M
ENU
SOUND
PICTURE
FEATURE
TI
M
ER
CH - S ET T I NG
SELECT : CH ENTER: RETURN:
M
ENU
AUT O
AUT O
12
OFF
168 . 25
M
Hz
CH - SE TT I NG
COLOUR - SY ST E
M
POS I T I ON
SOUND- S YST E
M
SK I P
AUTO
M
ANUAL
LANGUAGE ENGL I SH
SE LEC T : CH ADJUST : RETURN :
M
ENU
AUTO
AUTO
12
OFF
168 . 25
M
Hz
CH - SE TT I NG
COLOUR - SY ST E
M
POS I T I ON
SOUND- S YST E
M
SK I P
AUTO
M
ANUAL
LANGUAGE ENGL I SH
SE LEC T : CH ADJUST : RETURN :
M
ENU
E8 CHANNEL SETTING
12
OFF
168 . 25
M
Hz
CH - SE TT I NG
COLOUR - SY ST E
M
POS I T I ON
SOUND- S YST E
M
SK I P
AUTO
M
ANUAL
LANGUAGE ENGL I SH
SE LEC T : CH ADJUST : RETURN :
M
ENU
AUTO
AUTO
• Pressing NORMAL while a PICTURE/SOUND selection is displayed, only the selected mode is reset to the standard
(factory-setting) position.
• Pressing NORMAL while the PICTURE/SOUND menu screen is displayed will reset all the items of PICTURE/SOUND
menu to the standard (factory-setting) position.
• Pressing NORMAL will reset all the items of PICTURE menu and SOUND menu to the standard (factory-setting)
position.
SOUND
SURROUND EPS
EQUAL I ZER
BALANCE 15
AVL ON
BASS+ON
SELECT : CH ADJUST : RETURN :
M
ENU
Language CH-Setting Normal screen
MENU/PRESET
CH
CH
[ Behind the door ]
• AVL is advised to be set to “ON” when compact disk (CD) is being playback.
*1: SURROUND mode can be set between
(i) OFF EPS (While receiving signal from antenna)
(ii) OFF ESS (While receiving signal from AV input)
*2: Please see
E15
for details on Definition of Terms.
→
←
→
←
29L-MP1SM_01EN.p65 8/7/06, 1:19 PM4