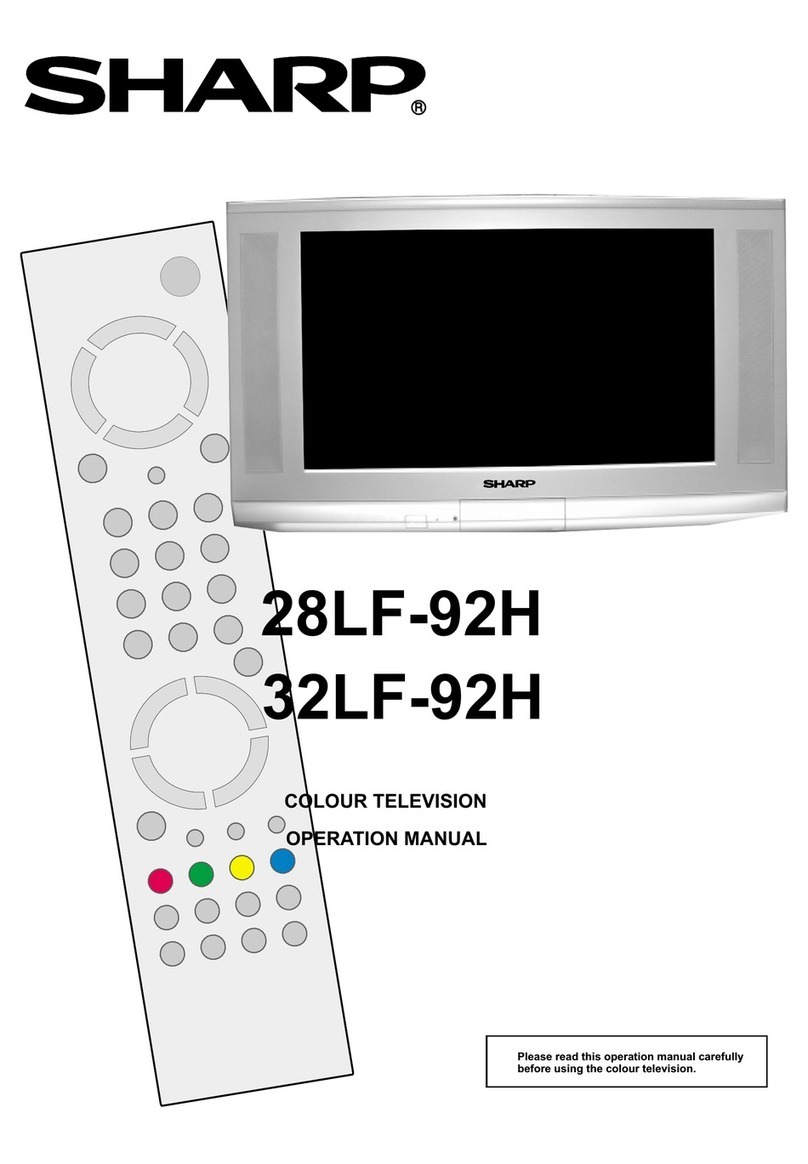
Sharp XM-1446G User manual

|
|
|
|
|
|
|
ull
{
|
|
|
|
|
ES
“NJ
~O
MONITOR
TELEVISION
.
MONITORFERNSEHGERAT
MONITORTELEVISIE
MONITEUR
DE
TELEVISION
MONITOR
TELEVISIVO
OPERATION
MANUAL
BEDIENUNGSANLEITUNG
GEBRUIKSAANWIJZING
MODE
D’EMPLOI
MANUALE
DI
ISTRUZIONI
Model/Modell/Model/Modéle/Modello
XM-1446G
JfO7F4

ENGLISH
Controls
&
Terminals
.......:cccccccccccscceeesssseeecseseeeeseseeeseeseseeeeensnanqsesuesesenesensaaesenrereenenenens
3
Operation
of
Manual
Controls........
Serene
iit
Dac
siusnilas
Pa
aieuieusidsneeg
Meee
naataa
ees
eee
4
How
to
Adjust
the
Channel
Setting
.....-.-.:icscesssesesseeetseeeenesteteenensstesasesaseeennecnenennegy
6
How
to
Operate
the
Remote
Control
Transmitter
\adluda
dueia
ental
Si
upcuded
sate
eX
Guseeaee
actomeeN
memNGENS
7
Audio/Video
In/Out
Terminals
...........::::ccccccccssccesccrceceececeeereerrenssecnseeseeseeeseseesentereesteataes
12
Typical
Connection
(VCR/Dise
and
TV)
to
Audio/Video
Input
Terminals..............++
stile
15
Before
Calling
for
Service
.........c.ccscccceceeeeseeerssssetsenesnesecsssesnesasnensaraesssensneeenesensensetanens
16
Further
Hints
........:cccccceccccccescecseceeceeceeceeceecereeeseeseceesseceseessesnanaenscenereesesnnaneeeesesereenenenens
16
DEUTSCH
Bedienelemente
Und
ANSCHIUSSE
.........
cece
eetesseeeteeeeeneeeeeeeeeasasanneeaanaaaneeecentereceeeene
nae
17
Manuelle
Bedienung
.......-.::ccceccesseceseenteeceeeeeneeerseetseeseneeeneesesessnreenanerneensseseaessseaeeegees
18
KanaleinstelUung........c.cccccsscccessscsscsceneesnserseneerseesssasesauenseenseeersesesiaeenarerseeceaseneeensnenerags
20
Handhabung
des
Fernbedienungsgebe's............:scceseeseeeeetteetteetiseessteeteeesecestrennees
21
Audio/Video-Eingangs/AUsgangSDUCHSen
..........:
cesses
er
eee
etter
tee
rneeeneesteeeneeeeneeeegy
26
AnschluB
(Videorecorder/Disc-Spieler
und
Fernseher)
an
die
Audio/Video-EIngangSbUChSeN
..........ccccceeceeeeteeene
tee
eeteeeeeereseeeeereetneeterneeteecnereeee
sence
29
Vor
Anforderung
eines
Kundendiensttechnikers
............::eceercreeeeenrette
tree
ttresseeeestter
sees
30
Weitere
HINWCISC
..........cccceceeccseeeceeseeececececaeeesceuanereeeeaegeeeeessaeeeeeananeeeeeegas
hic
sate
tocaed
30
NEDERLANDS
Bedieningselementen
en
aansluitingen
..............secceseesen
ee
tetetetse
renee
testeeeneensense
trees
31
Gebruik
van
de
regelaars
voor
handbediening
............::eceseeeeesesteteetieeteetteeeneseneeeeens
32
Instellen
van
de
Kanalen
...........ccccccssseeeseseeeeeeecesaeeeeeeeeeeseeeeeeeenaarseeersseeeeenassenaoaanerseaegeees
34
Gebruik
van
de
afstandsbediening...............cccseeeseeceeeeeeeessenneceeeneseeesseeaseeeeeeensnaaanananaaees
35
Audio/video
in-/uitgangsaansluitingen
...........:::ceeeceeetecceee
cee
eeeeenee
steers
ereeteetasennecnanecsgs
40
Verbindingsvoorbeeld
van
audio/video-ingangsaansluitingen
(videorecorder/videodiscspeler
€N
TV)........s:sssescseseseereeeietetseseetserensstesesssesenrncanenenetes
43
Voordat
u
een
reparateur
te
NUP
rOCPt
..........eeeeeeeeceeeeeeeteeceeeeeseeetteeeenetteseeentsnaeesaeeenans
44
Verdere:
aanwijZingen
..........cccccseeeeseeseceeeceeeeseeneeerseseaeeneensessessenssasnaneasensntansngeeenneanaes
44
FRANCAIS
|
Commandes
et
DOGS
........cccccccccccesneeeeeeteeeeessenseeesensseeeeeneeeeeersnseeesterineeestseeeeenerenenas
45
Réle
des
commandes
manuelles..............::cccceeceeeeereeee
au
nih
vi
aves
wpuanocsatneuasaeuaabo
cee
enaaes
46
Réglage
des
CaMaux
.......ccccceceeseeeeseteeessererecteesenensstecasnenesenssesseracesneesnenenrse
serene
nes
48
Fonctionnement
de
la
telecOMMande
............ccccccccseececeeeeeeeeeeeeeeeteeeeeeeeeeeesseeersennnneeneesaes
49
Bornes
d’entrée
et
de
sortie
audio
et
VIdEO........
2.
rn
er
rrne
sete
54
Raccordement
d’un
magnétoscope
ou
d’un
lecteur
de
disque
vidéo
au
moyen
des
bornes
d’entrée
AUCIO
Ct
VIGGO
«2.2.0...
cece
eee
eeeetee
etree
teereeetereeeeeteeeernnitnnenenneeeees
57
Avant
de
faire
appel
&
UN
teCNNICIEN
...........
cece
e
eter
teeter
eer
ttttee
ett
eet
Peale
citeentieriae
58
Conseils
Supplémentaires
...........ccccceeceeeteereeeee
teste
teseeeeneenaeseeneetestaeeaessereseeseeesseee
segs
58
ITALIANO
Comandi
€
terminalli
..............ccccccscccceeeeeeeeeecseeeeeeeeeeeeseaaeeeeeeeeereesessacauaseseesaeeeeeseraeeeanes
59
Uso
dei
comandi
Manual
.............::cceecccccceeeeeeeeeeeesnnneeeeeersesssssseeseeeessseneceeseanrerereeenes
60
Regolazione
dei
Camalli
............:eccceeeeseeseseeeeeresessseneeenetsseraenerseteraesssserensseeneenegnenannaes
62
TElCCOMANAO
...........:0ccceceeeeesssntenererseeneeenees
oli
ua
dineadesuishde
had
dawtuatdeyseenesbaa
aataiisessavivebag>
63
Terminali
di
entrata
e
USCita
AUGIO/VIGEO
.............ececceeeeceeeeeeeneeteeeeeeteeteeneeeeneannaaaaeesenaneetss
68
Presa
particolare
(VCR/Disc
e
TV)
per
i
terminali
di
ingresso
AUCIO/VIdEO
...........22ceeeree
ewes
71
Guida
all’eliminazione
di
problemi
Minori
.............:ccceeeeeeseeeeteeeseeeeeeneeeeensneeeesentenananents
72
Altri
COMSIQIi............-sccsecsseseeseecsecseeeseeneeeeeeseeeseatancreeesseesessseensesraariceraarseecsesenseeeeesseeees
72

Dear
SHARP
Customer:
“SHARP”
consumer
electronic
products
have
established
a
worldwide
reputation
for
unsurpassed
quality
and
precision
manufacturing
techniques
since
1924,
when
the
famous
SHARP
trademark
first
appeared
on
a
radio
receiver.
Your
new
SHARP
Monitor
TV
uses
the
very
latest
electronic
circuitry
and
engineering
advancements
for
the
best
possible
per-
formance.
Given
proper
care,
your
new
TV
will
provide
many
years
of
entertainment
for
the
entire
family.
Please
read
the
following
instructions
before
operating
this
set.
Sehr
geehrter
SHARP-Kunde,
“SHARP”
elektronische
Produkte
haben
sich
weltweit
einen
Ruf
flr
ausgezeichnete
Qualitat
und
hochprazise
Verarbeitung
erworben.
1924
erschien
das
mittlerweile
weltbekannte
SHARP
Warenzeichen
zum
ersten
Mal
auf
einem
Radiogerat.
In
diesem
SHARP
Monitorfernsehgerat
kommt
der
neueste
Stand
der
elektronischen
Schaltungstechnik
zur
Anwendung,
damit
.
Sie
die
optimale
Empfangsleistung
mit
dem
Gerat
erzielen
konnen.
Bei
richtiger
Behandlung
wird
Ihnen
dieses
Gerat
lange
Jahre
ungetriibter
Fernseh-
freude
schenken.
Vor
Inbetriebsetzen
des
Gerates
bitte
die
fol-
genden
Bedienungshinweise
lesen.
Beste
SHARP
gebruiker:
Reeds
sinds
1924,
het
jaar
dat
het
“SHARP”
handelsmerk
voor
het
eerst
op
een
radio-
toestel
verscheen,
genieten
onze
elek-
tronische
gebruikersprodukten
een
wereldwijde
reputatie
door
hun
ongekende
kwaliteit
en
de
precisie
waarmee
ze
zijn
ver-
vaardigd.
Uw
nieuwe
SHARP
monitortelevisie
levert
optimale
prestaties
dankzij
de
nieuwste
elek-
tronische
circuitschakelingen
en
technieken.
Mits
op
de
juiste
wijze
behandelt,
kunnen
wij
u
garanderen
dat
dit
toestel
een
jareniange
bron
van
kijkvermaak
voor
de
hele
familie
zal
zijn.
Wij
bevelen
u
aan
eerst
deze
gebruiksaan-
wijzing
te
lezen
alvorens
het
toestel
in
gebruik
te
nemen.
Chers
utilisateurs
SHARP:
Les
produits
électroniques
de
consomma-
tion
“SHARP”
ont
acquis
une
réputation
a
l’échelle
mondiale
grace
a
leur
qualité
et
a
leurs
techniques
de
fabrication
inégalables
depuis
1924,
date
de
la
premiére
apparition
de
la
célébre
marque
SHARP
sur
un
récep-
teur
de
radio.
Votre
nouveau
moniteur
de
télévision
SHARP
fait
appel
aux
circuits
électroniques
et
aux
progrés
de
I’ingénierie
les
plus
récents
pour
vous
Offrir
les
meilleures
performances
pos-
sibles.
Votre
nouveau
téléviseur,
correcte-
ment
entretenu,
procurera
de
nombreuses
années
de
distraction
a
toute
la
famille.
Veuillez
lire
les
instructions
suivantes
avant
d'utiliser
cet
appareil.
Introduzione:
|
prodotti
elettronici
di
consumo
SHARP
sono
conosciuti
in
tutto
il
mondo
per
la
loro
qualita
superiore
e
la
loro
precisione
di
fab-
bricazione
sin
dal
lontano
1924,
quando
il
nome
SHARP
apparve
per
la
prima
volta
su
un
apparecchio
radio.
Il
Vostro
nuovo
monitor
TV
racchiude
i
piu
avanzati
circuiti
elettronici
ed
é
stato
costruito
sfruttando
i
pit
recenti
sviluppi
dell’ingegne-
ria
per
assicurarvi
le
migliori
prestazioni.
Sara
sufficiente
trattarlo
con
la
cura
dovuta
affin-
ché
funzioni
per
molti
anni
nel
migliore
dei
modi,
per
il
divertimento
di
tutta
la
famiglia.
Per
questo,
prima
di
metterlo
in
funzione
si
raccomanda
di
leggere
attentamente
il
pre-
sente
manuale
delle
istruzioni.

-—
Controls
&
Terminals
Behind
the
door
XM-1446S
XM-1446G
Front
@)
Red/green
power
indicator
(2)
Mono
indicator
(3)
Sound
wide
indicator
(4)
Remote
control
sensor
Back
()
Video
input
terminal
(6)
Audio
input
terminals
(L/R)
@)
Audio
output
terminals
(U/R)
Antenna
terminal
Behind
the
door
@)
Mono/auto
switch
(V/I-AUTO)
Sound
wide
on/off
switch
(<2)
@)
Brightness
control
(2
Colour
control
(3)
Contrast
control
Band
selector
(5)
Skip
button
Tuning
buttons
(V/A)
(7)
Fast
tuning
button
Channel
selectors
(V/A)
Power
on/off
button
Colour
system
switch
(XM-1446G
only)
HSITON3

Operation
of
Manual
Controls
1.
Power
Supply
‘‘On/Off’’
with
2-
Colour
(Red/Green)
Power
Indicator
When
the
power
cord
is
plugged
in
the
TV
set
will
be
in
standby
mode
with
the
power
indi-
cator
lit
red.
Then,
when
the
power
on/off
but-
ton
behind
the
door
or
on
the
remote
control
-
transmitter
is
pressed,
the
power
indicator
will
turn
green
and
a
picture
will
appear
on
the
screen.
The
channel
programme
number
is
also
displayed
in
the
upper
right
corner
of
the
screen.
Press
the
power
on/off
button
(|)
behind
the
door
or
on
the
remote
control
transmitter
to
return
the
set
to
standby
mode
(the
power
indicator
will
be
illuminated
red).
Notes:
1)
Ifthe
power
cord
is
unplugged
from
the
elec-
trical
outlet
in
the
standby
mode,
the
TV
set
resumes
the
same
mode
when
plugged
back
in.
If
the
power
cord
is
disconnected
while
a
picture
is
displayed
on
the
screen,
the
set
will
resume
displaying
a
picture
when
plugged
back
in.
©
The
channel
selector
(Up/Down
buttons)
can
also
be
used
to
switch
from
the
stand-
by
mode
to
the
picture
mode.
2.
Channel
Selection
When
you
select
a
stored
channel:
When
you
press
the
channel
selector
(/\),
the
channel
programme
number
will
change
as
follows:
1.2.3.
>
38.39.1.2.
-.When
you
press
the
channel
selector
(Vv),
the
channel
programme
number
will
change
as
follows:
39.38.37.
>
2.1.39.38.
>.
Select
the
channel
you
want
by
using
these
buttons.
When
a
channel
that
is
not
stored
is
selected,
it
can
be
stored
as
described
in
‘‘How
to
Ad-
just
the
Channel
Setting”.
Notes:
-
1)
When
either
channel
selector
(A
or
V)
is
held
down,
channel
programme
numbers
will
be
selected
and
displayed
sequential-
ly
at
an
interval
of
0.7
seconds.
When
a
skipped
channel
is
selected
with
the
channel
selectors
on
the
remote
control
transmitter,
a
red
‘‘
##
”’
will
be
displayed
to
the
left
of
the
channel
programme
number
as
illustrated
in
‘“‘How
to
Adjust
the
Chan-
nel
Setting.”
3.
Contrast
(@)
Turn
the
contrast
control
knob
clockwise
(~~)
to
increase
picture
contrast.
Turn
the
knob
counterclockwise
(«~)
to
decrease
it.
Incor-
rectly
adjusted
picture
contrast
may
cause
eyestrain.
4.
Colour
(@
)
Turn
the
colour
control
knob
completely
coun-
terclockwise
(«—~)
to
reduce
the
colour
of
the
picture,
and
then,
clockwise
(~~)
to
get
the
best
“‘natural
colour’’.
If
you
cannot
obtain
the
correct
colour,
readjust
the
preset
tuning
control.
5.
Brightness
(-()-)
Turn
the
brightness
control
knob
clockwise
(—~)
to
increase
the
brightness
of
the
picture.
Turn
the
knob
counterclockwise
(«—~)
to
decrease
it.
For
best
reception,
adjust
the
pic-
ture
brightness
according
to
room
light.
6.
Mono/Auto
switch
(V/I
AUTO)
If
a
stereo
broadcast
suffers
from
annoying
noise
and
the
stereo
indicator
on
the
screen
is
blinking,
turn
the
mono/auto
switch
to
the
mono
position
to
change
the
audio
to
mono
mode
(the
mono
indicator
lights
up).
To
switch
the
mode
back
to
stereo,
turn
this
selector
to
the
auto
position.
Note:
If
you
turn
the
mono/auto
switch
to
the
mono
po-
sition
when
receiving
a
bilingual
programme,
the
audio
channel
is
switched
to
the
main
chan-
nel.
The
‘‘MONO”
indicator
(red)
on
the
TV
set
will
light
and
the
“MAIN”,
‘‘SUB’’,
or
“MAIN
+
SUB”
on
the
screen
will
go
off.
To
switch
the
audio
channel
back
to
the
original
mode,
turn
the
selector
to
the
auto
position.
(The
built-in
stereo
decoder
uses
the
West
Ger-
man
system.)

7.
Sound-Wide
on/off
switch
(CO)
This
feature
is
convenient
when
you
want
to
widen
the
scope
of
the
sound
of
music
pro-
grams,
movies,
etc.
To
widen
the
scope
of
the
sound,
set
the
Sound-Wide
switch
to
the
ON
position.
The
Sound-Wide
indicator
will
light
up
green.
Note:
The
scope
of
both
mono
and
stereo
sound
can
be
widened.
8.
Colour
System
switch
(XM-1446G
only)
AUTO:
The
TV
is
normally
used
in
the
AUTO
mode.
SECAM/PAL:
If
the
colour
flickers
or
if
no
colour
ap-
pears
during
SECAM
or
PAL
signal
reception,
set
the
switch
to
the
SECAM
or
PAL
position.
Note:
To
adjust
the
sound
volume,
sound
tone,
balance,
etc.
refer
to
the
audio
equipment
operation
manual.

How
to
Adjust
the
Channel
Setting
XM-1446S
ego
Lrg
O
XM-1446G
Opening
the
door
To
open
the
door,
press
at
the
location
marked
with
a
“A”.
Setting
and
Storing
Desired
Stations
1.
Set
the
band
selector
according
to
the
desired
channel
to
VHF
or
UHF:
“VL”,
“VH"
or
“U”,
11
rectangles
“
mm”
and
the
channel
programme
number
are
then
displayed
in
the
upper
part
of
the
screen.
2.
Press
the
channel
selector
(A
or
v)
to
set
the
required
channel
programme
number.
3.
Press
the
fast
tuning
button
and
a
tuning
button
(A
or
V)
simultaneously,
and
then
release
for
fast
tuning.
When
the
required
channel
is
nearly
tuned,
press
a
tuning
but-
ton
(A
or
V)
to
stop
fast
tuning,
and
then
continue
to
press
it
until
the
channel
is
fine
tuned.
Notes:
1)
The
fast
tuning
button
is
for
searching
for
the
required
channel
at
a
fast
speed.
This
4.
When
the
tuning
button
(A
or
Vv)
is
released
after
properly
tuning
the
channel,
the
chan-
nel
will
be
stored
in
the
memory.
.
To
skip
unnecessary
channel
pro-
gramme
numbers
and
speed
up
chan-
nel
selection
(when
no
programme
is
broadcast
for
instance),
press
the
skip
button.
When
the
skip
button
is
pressed,
a
red
“
HE”
will
be
displayed
to
the
left
of
the
channel
programme
number
as.
il-
lustrated,
indicating
that
the
channel
skip
setting
has
been
completed.
Press
the
skip
button
once
again
to
cancel
the
skip
mode.
button
must
always
be
pressed
simultane-
ously
with
a
tuning
button
(A
or
v).
)
Even
if
your
fingers
are
released
from
the
fast
tuning
button/Auning
button
(A
or
Vv)
after
pressing
them,
channel
searching
will
continue
until
a
tuning
button
(A
or
V)
is
pressed.
(Please
note
this
is
not
automatic
channel
searching.
A
tuning
button
(A
or
V)
has
to
be
pressed
to
stop
continuous
channel
searching)
The
fast
tuning
button
does
not
work
in-
—
Note:
:
When
the(A)
tuning
button
is
pressed,
the
green
rectangles
“Mi”
displayed
following
the
“VL”,
“VH"
or
“U"
turn
red
from
left
to
right.
Also,
when
the
(Vv)
tuning
button
is
pressed,
the
red
rectangles
“
@™”
turn
green
from
right
to
left.
6.
Repeat
the
above
steps
to
store
all
other
channels.
7.
When
all
channels
are
stored,
switch
the
band
selector.
back
to
the
“NORM”
(Normal)
position.
dependently.

Note:
Note:
It
is
practical
to
begin
this
procedure
with
At
this
stage,
the
on-screen
channel
pro-
channel
programme
number
‘*1”;
this
gramme
number
display
will
turn
yellow
|
procedure
can
be
repeated
up
to
the
from
green
to
indicate
the
AFT
has
been
dis-
maximum
of
“39”.
engaged.
Switching
the
AFT
of
the
Above-
mentioned
Channel
On
Again.
1.
Select
the
required
channel
for
which
the
AFT
is
to
be
switched
on.
2.
Set
the
band
selector
to
the
‘‘VHF”’
or
“UHF”’
position,
then
press
a
tuning
but-
ton
(A
or
V)
momentarily.
3.
Set
the
band
selector
to
the
‘‘NORM”’
po-
Switching
Off
the
AFT
(Automatic
sition
to
switch
on
the
AFT.
Fine
Tuning)
of
a
Channel
After
All
Channels
Have
Been
Preset.
1.
Select
the
required
channel
for
which
the
AFT
is
to
be
switched
off.
2.
Set
the
band
selector
to
the
“NORM”
position,
then
press
a
tuning
button
(A
or
V)to
switch
off
the
AFT.
Fine
tune
the
channel
according
to
your
preference.
When
the
tuning
button
is
released,
the
AFT
will
remain
off.
Fine
Tuning
Set
the
band
selector
to
the
““NORM’’
(Nor-
mal)
position,
then
press
a
tuning
button
(A
or
V)
to
adjust
the
picture
quality
to
an
op-
timum
level
under
weak
signal
conditions,
etc.
This
also
helps
adjust
the
picture
for
more
natural
colour.
How
to
Operate
the
Remote
Control
Transmitter
Inserting
Batteries
einsert
two
batteries
as
illustrated
and
replace
the
cover.
For
models
RM-AV2S
and
RM-AV3S
use
two
“AA”
or
“UM-3”
1.5V
batteries.
For
model
RM-AV1S
use
two
“AAA”
or
“UM-4”
1.5V
batteries.
Notes:
1.
The
infrared
transmitter
requires
3
volts
for
operation.
If
the
transmitter
operating
power
is
insufficient,
replace
the
bat-
teries.
.
Position
the
positive
and
negative
sides
of
the
batteries
properly.
Use
of
batteries
other
than
those
specified
may
make
the
remote
control
transmitter
inoperative.

RM-AV1S__—
Personal
AV
1
Sound
mode
selector
Channel
call
button
—
i
Power
on/off
button
Channel
selectors
TV/Video
selector
Channel
selectors
(V/A)
2
STV-AUDIO
Note:
For
audio
key
operation,
refer
to
the
Personal
AV
1/CD-X100AV
operation
manual.

RM-AV2S_—
Personal
AV
2
Power
on/off
button
Fy
Hd
|
|}
Ce
TVIAUDIO
selector
Channel
selectors
TV/Video
selector
Channel
selectors
(V/A)
AUX
(TV)
button
Sound
mode
selector
Channel
call
button
5
:
OO
0
iH
=
TVEAUDIO:
:
Note:
For
audio
key
operation,
refer
to
the
Personal
AV
2/CD-X200
AV
operation
manual.

RM-AV3S
High-tech
AV
1
Power
on/off
button
ley
“
L
TWAUDIO
selector
Channel
selectors
:
TV/Video
selector
Channel
selectors
(V/A)
Sound
mode
selector
.
AUX
(TV)
button
Channel
call
button
SHARP
TV-AUDIO
Note:
For
audio
key
operation,
refer
to
the
High-tech
AV
1/CD-310H
operation
manual.
10

How
to
Operate
the
Remote
Control
Transmitter
TELEVISION
Mode
Channel
Selector
Channel
to
be
selected
|
Channel
selector
buttons
to
be
pressed.
Channel
1
~
Press
the
Cy
~
cy
buttons.
Channel
10
~
19
Press
the
¢y
button
(‘‘1-”
displayed
for
about
6
seconds),
and
then
the
cy
~
©
button.
Note:
Be
sure
to
press
the
buttons
within
5
seconds
after
the
¢y
button
is
pressed,
because
the
¢4y
button
is
cancelled
in
about
6
seconds.
Channel
20
~
29
Press
the
&
button
(‘'2-"
displayed
for
about
6
seconds),
and
then
the
cy
~
Cc
button.
Note:
Refer
to
the
note
for
Channel
10
~
19.
Press
the
€4
button
(‘'3-”
displayed
for
about
6
seconds
on
the
screen),
and
then
the
&
~
(4
button.
Note:
Refer
to
the
note
for
Channel
10
~
19.
Channel
30
~
39
AUX
(TV)
Button
(RM-AV2S
and
RM-AV3S
only)
Use
this
button
to
select
the
TV
sound
source.
The
button
is
inoperative
in
the
standby
mode.
Procedure:
Press
the
power
ON/OFF
button
to
switch
the
TV
set
to
the
picture
mode.
Press
the
AUX
(TV)
button
to
select
the
TV
sound
source.
TV/Audio
Selector
(RM-AV2S
and
RM-AV3S
only)
When
this
selector
is
set
to
the
TV
position,
the
digit
keys
within
the
[__]
can
be
used
to
select
TV
channels.
Therefore,
make
sure
the
selector
is
set.to
the
TV
position
when
selecting
TV
channels.
-
Sound
Mode
Selector
(
VO,
The
sound
mode
selector
is
used
to
select
the
main,
sub
or
main
+
sub
audio
modes
of
bilingual
broadcasting,
and
to
select
the
stereo
or
mono
mode
while
receiving
stereo
signals.
If
this
button
is
pressed
during
the
main
audio
mode,
reception
switches
over
to
the
sub
audio
mode.
If
it
is
pressed
again,
reception
switches
over
to
the
main
+
sub
audio
mode.
If
it
is
pressed
a
third
time
reception
returns
to
the
main
audio
mode.
When
this
button
is
pressed
while
receiv-
ing
stereo
signals,
the
mono
mode
will
be
selected.
When
this
button
is
pressed
a
second
time,
the
stereo
mode
will
be
selected.
Each
sound
mode
indicator
will
be
displayed
on
the
screen
as
shown
below.
[
Sound
Mode
Main
audio
Sub
audio
Main
+
sub
audio
On
Screen
Display
MAIN
SUB
MAIN
+
SUB
STEREO
TV/Video
Selector
(TV/VIDEO)
In
case
the
playback
picture
does
not
appear
in
the
connection
shown
on
page
15.
Press
the
TV/Video
selector
to
make
the
picture
ap-
pear.
The
“AV”
(Audio/Video
indicator)
will
be
displayed
for
about
3
seconds
in
the
up-
per
corner
of
the
screen.
When
the
TV/Video
selector
is
pressed
again,
the
set
is
switched
to
receive
on-air
TV
broadcasts,
and
the
channel
programme
number
will
be
displayed
for
about
3
se-
conds
in
the
upper
right
corner
of
the
screen.
Channel
Call
Button
¢
When
the
Channel
call
button
is
pressed,
the
channel
programme
number
will
be
displayed
in
the
upper
right
corner
of
the
screen.
¢
The
channel
programme
number
display
can
also
be
erased
by
pressing
this
button
once
again.
11

12
Audio/Video
In/Out
Terminals
Connecting
the
TV
Set
to
Audio
Equipment
Connecting
to
the
Personal
AV
1
(CD-X100
AV)
TV
XM-1446S/G
AUDIO
CD-X100AV

Connecting
to
the
Personal
AV
2
(CD-X200
AV)
TV
XM-1446S/G
AUDIO
CD-X200AV
13

Connecting
to
the
High-tech
AV
1
(CD-310H)
TV
XM-1446S/G
7
AUDIO
CD-310H
14

Typical
Connection
(VCR/Disc
and
TV)
to
Audio/Video
Input
Terminals
a
Be
ON
SI
a
ee
ee]
Please
refer
to
the
operation
manual
of
your
VCR/Disc
for
details.
Example:
Personal
AV
1
—
]
| 3
VIDEO
DISC
ee
chee)
.
SET
OT)
EE
The
same
connections
apply
to
the
Personal
AUDIO
CD-X100AV
AV
2
and
High-tech
AV
1.

16
Before
Calling
for
Service
The
following
conditions
do
not
always
denote
trouble.
Therefore,
perform
the
checks
described
below
before
calling
for
service.
If
the
problem
cannot
be
corrected
by
the
use
of
this
guide,
pull
the
power
plug
out
from
the
electrical
outlet
and
call
for
service.
Problem
Check
point
No
sound,
No
picture
¢
Check
that
the
power
plug
is
fully
plugged
into
the
electrical
outlet.
No
picture
¢
Check
that
the
brightness
control
has
not
been
completely
turned
down.
¢
Check
that
the
antenna
wire
is
not
disconnected
or
short-circuited.
Excessive
noise
in
picture,
Bad
picture
*
Ghosting
is
due
to
waves
reflected
from
moun-
tains,
large
buildings
or
trees
located
nearby.
Therefore,
try
to
change
the
direction
or
height
of
the
antenna.
Ghosting
Spotted
picture
*
Check
if
the
set
is
receiving
noise
produced
by
motor
cars,
tramcars
or
neon
signs.
Install
your
antenna
as
far
as
possible
from
roads
or
neon
signs.
Striped
picture
¢
A
striped
picture
is
due
to
interference
by
other
stations
or
neighboring
television
sets.
The
inter-
ference
can
be
reduced
to
some
extent
by
adjusting
the
direction
or
height
of
the
antenna.
(If
a
twinlead
antenna
cable
is
used,
replace
it
with
a
coaxial
cable.)
Further
Hints
Ventilation
When
setting
up
the
TV,
allow
free
access
of
air
to
the
ventilation
holes
in
the
bottom
and
rear
panel.Do
not
place
the
TV
on
a
pillow-like
surface,
on
sponge
rubber
or
plastic
foam
mats,
or
on
any
simiar
material
which
could
block
the
ventilation
holes.
No
part
of
the
upper
ventillation
grille
of
the
rear
panel
should
be
covered.
Do
not
place
near
a
radiator
or
other
heating
device.
NOTE:
Antenna
Connection
75
OHM
COAXIAL
CABLE:
Connect
the
cable
from
the
antenna
to
the
new
standard
DIN
45325
plug
(IEC
169-2)
and
plug
directly
into
the
socket
at
the
rear
of
the
television.

Bedienelemente
und
Anschltisse
Geratevorderseite
HOSLN3d
Hinter
der
Klappe
XM-1446S
c
2
es
q
te
>
@
XM-1446G
Geratevorderseite
Hinter
der
Klappe
@
Rot/Grun-Einschaltanzeige
(@)
Mono/Auto-Schalter
(V/I-AUTO)
(2
Mono-Anzeige
Klangbreite-Ein/Aus-Schalter
(«2
@)
Klangbreite-Anzeige
@
Helligkeitsregler
(4)
Fernbedienungssensor
@2
Farbregler
@3)
Kontrastregier
Gerateriickseite
Band-Regler
©)
Video-Eingangsbuchse
(5)
Bereichswahlschalter
©
Audio-Eingangsbuchsen
(L/R)
Abstimmtasten
(V/A)
@
Audio-Ausgangsbuchsen
(L/R)
()
Schnellabstimmtaste
Antennenbuchse
Kanalwahler
(V/A)
Ein/Aus-Schalter
Farbsystem-Schalter
(nur
XM-1446G)
17

18
Manuelle
Bedienung
1.
Stromversorgung
“Ein/Aus”
mit
zweifarbiger
Bereitschaftsanzeige
(rot/griin)
Bei
AnschluB
des
Netzkabels
ist
der
Fernse-
her
in
die
Bereitschafts-Betriebsart
einge-
stellt
und
die
Betriebsanzeige
leuchtet
rot
auf.
Wird
danach
die
Ein/Aus-Taste
(()|
)
hin-
ter
der
Klappe
des
Fernsehgerates
oder
am
Fernbedienungsgeber
gedrtickt,
wechselt
die
Bereitschaftsanzeige
auf
griin
und
ein
Bild
erscheint
auf
dem
Bildschirm.
Die
Kanalnummer
wird
jetzt
oben
rechts
auf
dem
Bildschirm
angezeigt.
Durch
erneutes
Drticken
der
Ein/Aus-Taste
hinter
der
Klappe
des
Gerates
oder
am
Fernbedienungsgeber
wird
das
Gerat
wieder
auf
Bereitschaft
ge-
schaltet
(und
die
Bereitschaftsanzeige
wechselt
wieder
zu
‘‘rot’’).
Hinweise:
1)
Falls
das
Netzkabel
von
einem
elektri-
schen
Gerat
in
der
Bereitschafts-
Betriebsart
abgetrennt
wird,
stellt
sich
der
Fernseher
nach
dem
AnschiuB
wieder
auf
die
gleiche
Betriebsart
ein.
Wird
das
Netzkabel
wahend
der
Wieder-
gabe
eines
Bildes
auf
dem
Bildschirm
ab-
getrennt,
stellt
sich
der
Fernseher
nach
dem
AnschluB
wieder
auf
die
Wiedergabe
des
Bildes
ein.
Die
Kanaltasten
(Auf/Ab-Tasten)
kénnen
ebenfalls
zum
Umschalten
von
der
Bereitschafts-Betriebsart
auf
die
Bild-
Betriebsart
verwendet
werden.
2.
Programmwahl
Wahl
eines
gespeicherten
Programms:
Durch
Drucken
des
Programmwahlers
(A)
andern
sich
die
Kanalprogramm-
nummern
in
der
Folge
1,
2, 3,
—
38,
39,
1,
2,
Durch
Drucken
des
Programmwahlers
(VV)
andern
sich
die
Kanale
in
der
Folge
39, 38,
37,
—
2,
1,
39,
38,
—.
Wahlen
Sie
die
gewtinschten
Programm-
nummern
mit
Hilfe
dieser
Tasten.
Zur
Wahl
eines
nicht
gespeicherten
Programms
die
Kanale
zuerst
gemaB
“Kanaleinstellung”
speichern.
Hinweise:
1)
Halt
man
den
Programmwahler
(A
oder
v)
gedriickt,
wird
die
Nummer
jedes
Pro-
gramms
in
einem
Zeitabstand
von
0,7
Se-
kunden
in
oben
beschriebener
Reihenfolge
nacheinander
gewahlt
und
angezeigt.
Wenn
ein
Gbersprungener
Kanal
mit
den
Kanalwahlern
der
Fernbedienung
gewahit
wird,
wird
links
von
der
Kanalprogramm-
nummer
ein
rotes
“
!#!”
angezeigt,
siehe
die
Abbildung
unter
‘‘Kanaleinstellung’’.
3.
Kontrasteinstellung
((p)
Um
den
Bildkontrast
zu
erhdhen,
den
Kontrastregler
im
Uhrzeigersinn
(—s»)
und
zum
Vermindern
der
Kontrastwirkung
gegen
den
Uhrzeigersinn
(«~)
drehen.
Falsche
Eijnstellung
kann
dabei
zu
Uberanstrengung
der
Augen
fihren.
4.
Farbeinstellung
(@
)
Den
Farbregler
zuerst
gegen
den
Uhrzeigersinn
(«~).
drehen,
um.
die
Farbwiedergabe
abzuschwachen,
an-
schlieBend
im
Uhrzeigersinn
(—»)
drehen,
um
eine
mdglichst
natirliche
Farbeinstel-
lung
zu
erhalten.
Falls
eine
optimale
Farbwiedergabe
auf
diese
Weise
nicht
erzielt
werden
kann,
mUssen
eventuell
die
Abstimmtasten
betatigt
werden.
5.
Helligkeit
(-C)-)
Durch
Drehen
des
Helligkeitsreglers
im
Uhrzeigersinn
(~~)
wird
die
Bildhellig
keit
erhoht,
durch
Drehen
des
Knopfes
im
Gegenuhrzeigersinn
(«~)
wird
sie
vermindert.
Die
Helligkeit
des
Bildes
stellt
man
am_
besten
entsprechend
der
Raumbeleuchtung
ein.

6.
Mono/Auto-Schalter
(V/I
AUTO)
Falis
eine
Stereosendung
durch
stérendes
Rauschen
beeintrachtigt
wird
und
die
Stereo-
Anzeige
(auf
dem
Bildschirm/auf
der
Front-
platte)
blinkt,
den
Mono-Schaiter
in
die
Mono-
Betriebsart
drehen
(die
Mono-Anzeige
leuch-
tet
auf).
Zum
Zurtickschalten
auf
Stereo
den
Schalter
auf
die
Auto-Position
stellen.
Hinweis:
Beim
Drehen
des
Mono/Auto-Schalters
in
die
Mono-Position
wahrend
des
Empfangs
eines
zweisprachigen
Programms
schaltet
der
Audio-
kanal
auf
den
Hauptkanal.
Die
‘MONO”-
Anzeige
(rot)
auf
dem
Fernseher
leuchtet
auf
und
die
“MAIN”
‘‘SUB”’
oder
“MAIN
+
SUB”-
Anzeigen
auf
dem
Bildschirm
erléschen.
Zum
Zurtickschalten
auf
die
urspriingliche
Betriebs-
art
den
Schalter
auf
die
Auto-Position
einstel-
len.
(Der
eingebaute
Stereodecoder
verwendet
das
westdeutsche
System.)
7.
Klangbreite-Ein/Aus-Schalter
(CO)
Diese
Funktion
ist
fir
die
Erweiterung
des
Klangbereichs
von
Musikprogrammen,
Fil-
men
usw.
gedacht.
Zur
Erweiterung
des
Klangbereichs
den
Klangbreite-Schalter
auf
die
ON-Position
einstellen,
dann
leuchtet
die
Klangbreite-
Anzeige
griin
auf.
Hinweis:
Sowohl
die
Breite
von
Mono-
als
auch
Stereo-
klang
kain
erweitert
werden.
8.
Farbsystem-Schalter
(nur
XM-1446G)
AUTO:
Der
Fernseher
ist
normalerweise
auf
die
AUTO-Betriebsart
eingestellt.
SECAM/PAL:
Falls
ein
Farbflimmern
erscheint
oder
wahrend
des
SECAM-
oder
PAL-
Signalempfangs
keine
Farbe
wieder-
gegeben
wird,
den
Schalter
auf
die
SECAM-
oder
PAL-Position
einstellen.
Hinweis:
Zur
Einstellung
der
Lautstarke,
des
Klanges,
der
Balance
usw.
siehe
die
Bedienungsanlei-
tung
der
Audiogerate.
19
This manual suits for next models
1
Table of contents
Languages:
Other Sharp TV manuals

Sharp
Sharp AQUOS LC-32CHG6001E User manual

Sharp
Sharp 32K-X2000 User manual

Sharp
Sharp 21LS-90C User manual

Sharp
Sharp LC-32HI5232E User manual

Sharp
Sharp CX34N3 User manual

Sharp
Sharp Aquos LC-65UB30U User manual

Sharp
Sharp Aquos User manual

Sharp
Sharp LC-32LD135E User manual

Sharp
Sharp 29H-FG1S User manual

Sharp
Sharp 25A-K User manual

Sharp
Sharp 32U-S50B User manual

Sharp
Sharp 32JF-76E User manual

Sharp
Sharp 21KF-80S User manual

Sharp
Sharp 27R-S200 User manual

Sharp
Sharp 28LF-94H User manual

Sharp
Sharp 60FW-53E Guide

Sharp
Sharp 29K-FD5RU User manual

Sharp
Sharp 29K-FG1SC User manual

Sharp
Sharp 27SF560 User manual

Sharp
Sharp 54CS-05S User manual