Shimmy Home User manual

User Manual
SHIMMY HOME DISPENSER

Less Waste,
More Love
Every Shimmy Product is Carbon & Plastic Neutral SUBSCRIBE AT GETSHIMMY.COM
Every Shimmy Product is Carbon & Plastic Neutral Every Shimmy Product is Carbon & Plastic Neutral
SUBSCRIBE AT GETSHIMMY.COM

• Shimmy Home dispenser
• Tray (removeable)
• Shimmy Home caridge
• 4 AA baeries
• Custom mounting tape
• User Manual
What’s in the box?
GET STARTED
1. Load baeries into baery pack
2. Remove safety top from caridge
and load (directions on next page)
3. Press on / o buon to turn on
4. WITH NEW CARTRIDGE
Trigger the dispenser around 5 times
to get gel to load
5. Show us your Shimmy!
by tagging @getshimmy

Geing to know your
Shimmy Home
Indicator light
On/Off button
Lid (turn to the left to unlock)
Cartridge (inserts top down)
Battery pack
Faceplate
Touchless dispenser
Tray (optional)

Loading & changing
your caridge
GET YOUR NEW
CARTRIDGE READY
Remove safety top.
Do NOT remove the applicator.
REMOVE OLD
CARTRIDGE
Take lid o of your Shimmy Home,
pull up on caridge, remove, and recycle
in accordance with local regulations.
PUT IN NEW
CARTRIDGE
Turn caridge upside down, inse,
rotate until you feel the two valves
connect, replace top of dispenser.
* Your Shimmy Home should be
used only with Shimmy Home
hand sanitizer caridges.
Loading & changing
your caridge
LOW BATTERY
Red light remains on
LOW LIQUID
Blue light remains on
TURNING ON
Blue light flashes 3 times
TURNING OFF
Red light flashes 3 times
If both the baery and liquid are low, the red light will remain on
until the baeries have been replaced.
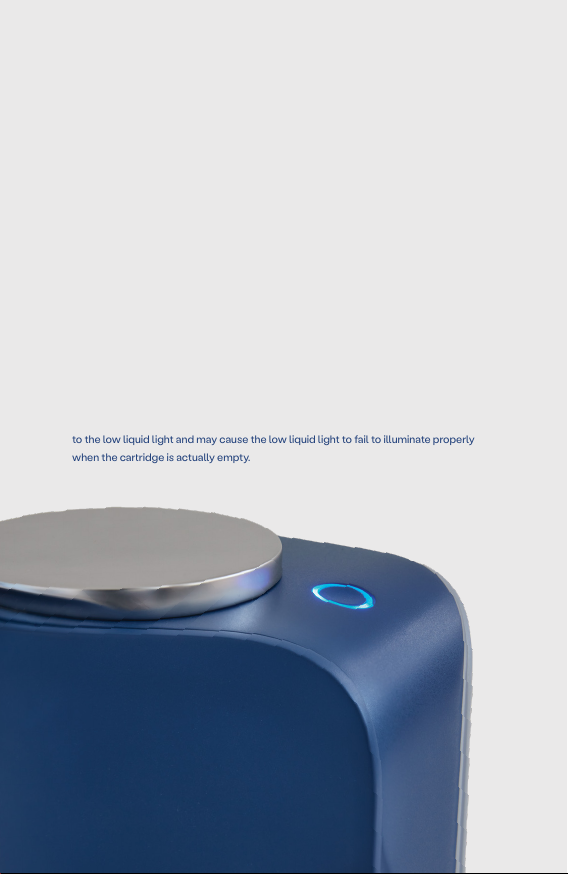
NOTE: Please do not remove your Shimmy Home caridge until it is completely empty.
Removing the Shimmy Home caridge before it is empty will reset the counter connected
to the low liquid light and may cause the low liquid light to fail to illuminate properly
when the caridge is actually empty.
Understanding
the lights
OPTION 1: TAPE
Clean and dry desired mounting
location. Remove one tape liner
and stick to etched mark on the
back of your Shimmy Home or
tray. Remove liner on the other
side of tape. Press and hold in
desired location for 30 seconds.
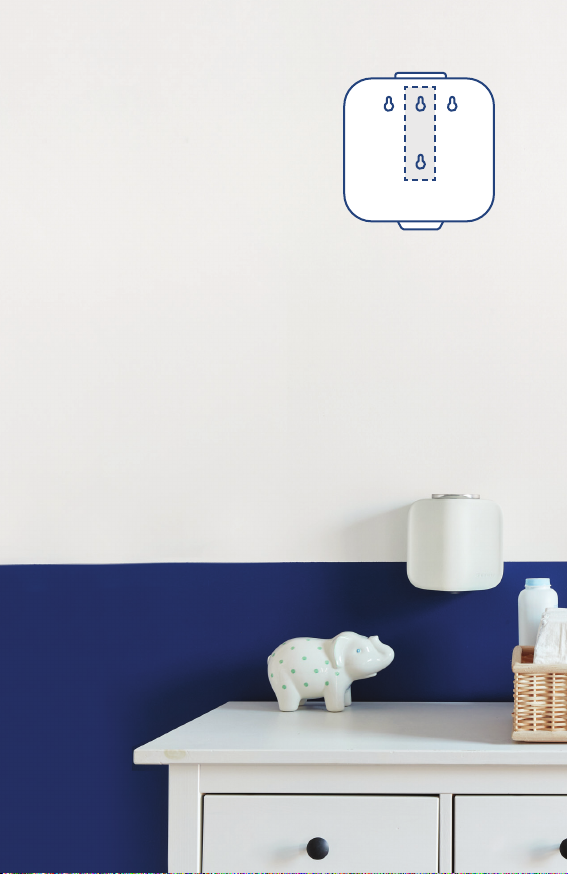
OPTION 2: SCREWS
Remove tray and hold up to your desired location. Mark mounting
holes with a pencil. Install screws of the appropriate size and type
on pencil marks and hang your Shimmy Home.
Mounting
your Shimmy

Removing
the tray
Place your Shimmy
Home on a flat suace.
Gently pull up on the
dispenser while holding
the tray down with your
other hand.
Pull forward on the Shimmy
Home to remove.
To re-install, place the two center holes on the back of
your Shimmy Home on the corresponding pegs of the tray.
Gently press down on the dispenser until it locks in place.

All information and any updates can be found at www.getshimmy.com
In order to ensure your personal safety, use the Shimmy Home only in the directed
manner. Improper use can result in potential electrical shock or re hazards.
1. Shimmy Home is not a toy. Any usage by children should be
supervised by an adult.
2. It is impoant to use, mount and store your Shimmy Home in
a safe, dry place:
• Do NOT immerse in water or expose to rain.
• Do NOT leave on an unstable suace that could cause your Shimmy Home
to fall.
• Do NOT expose your Shimmy Home to re or extreme temperatures.
Exposure to re or temperature above 130°C/265°F may cause explosion.
• Do NOT situate your Shimmy Home near heat sources such as radiators,
heat registers, stoves, or other appliances (including electronic
equipment) that produce heat.
• Do NOT use in the vicinity of anything that might generate sparks.
The sanitizer in your Shimmy Home is formulated with alcohol, which is
flammable and could cause a re if ignited by a spark.
• Care should be taken to prevent liquids and foreign objects from entering
the Shimmy Home dispenser, for example through any openings or vents.
3. Only use Shimmy Home hand sanitizer caridges in your
Shimmy Home. Follow instructions for inseing and changing the
Shimmy Home caridges to prevent spills and poor peormance.
4. Use only a warm damp cloth to clean. Do not use solvents,
abrasives, etc. with your Shimmy Home.
5. Do NOT modify or aempt to repair your Shimmy Home. Do NOT
use any aachments with your Shimmy Home unless they are sold
or recommended by Shimmy for use with the Shimmy Home.
Please contact Shimmy Customer Service at hello@getshimmy.com if your
Shimmy Home is damaged or malfunctioning, for example if:
• Objects have fallen into or liquid has been spilled into the enclosure of your
Shimmy Home
• Your Shimmy Home has been exposed to excessive moisture
• Your Shimmy Home has been dropped or its enclosure is damaged
• Your Shimmy Home exhibits a marked change in peormance or does not
operate normally
6. If you do not plan to use your Shimmy Home for a month or longer,
remove the baeries to prevent potential damage or corrosion.
PLEASE READ THIS INFORMATION BEFORE USING YOUR
SHIMMY HOME AND KEEP IT HANDY FOR REFERENCE

FCC Statement
This device complies with pa 15 of the FCC Rules. Operation is subject to the
following conditions: (1) This device may not cause harmful inteerence, and (2)
this device must accept any inteerence received, including inteerence that may
cause undesired operation.
NOTE:
This equipment has been tested and found to comply with the limits for a Class B
digital device, pursuant to pa 15 of the FCC Rules. These limits are designed to
provide reasonable protection against harmful inteerence in a residential installa-
tion. This equipment generates, uses and can radiate radio frequency energy and,
if not installed and used in accordance with the instructions, may cause harmful
inteerence to radio communications.
However, there is no guarantee that inteerence will not occur in a paicular in-
stallation. If this equipment does cause harmful inteerence to radio or television
reception, which can be determined by turning the equipment o and on, the user
is encouraged to try to correct the inteerence by one or more of the following
measures:
Reorient or relocate the receiving antenna.
Increase the separation between the equipment and receiver.
Connect the equipment into an outlet on a circuit dierent from that to which the
receiver is connected.
Consult the dealer or an experienced radio/TV technician for help.
Distributed By:
Shimmy Products, LLC
101 Federal Street, 19th Floor
Boston, Massachuses 02110
www.getshimmy.com
Questions? Comments?
We’d love to hear from you!
Please email hello@getshimmy.com

SUBSCRIBE AT GETSHIMMY.COM SUBSCRIBE AT GETSHIMMY.COM
100% Shimmy
Guarantee
If you’re not satised with
your purchase, please email us
at hello@getshimmy.com
To learn more about the
organizations we have
panered with to oset
carbon & plastic, please visit
www.getshimmy.com
Table of contents


