Shining 3D Aoralscan 3 User manual
Aoralscan 3
Manual
V1.1

XL/MDR-RD-094
Aoralscan 3_Manual_V1.1 - 1 -
Foreword
General
The manual (hereinafter referred to as "the Manual") introduces the functions, installation,
usage and maintenance of the Aoralscan 3 (hereinafter referred to as "the Scanner").
indicates the item is a medical device.
Safety Instructions
Signal
Meaning
Note:This symbol is used to inform you of the additional information of the
product.
Caution:This symbol is used to inform you of incorrect operations that may
damage the device or result in data loss. Any damages resulting from misuse are
not covered by the warranty.
Warning:This symbol is used to inform you of the potential risks that may result
in serious personal injury and other safety incidents.
Release Date
Release Date
Nov. 21, 2022
About the Manual
Copyright © 2016 Shining3D Corporation. All rights reserved. No part of
this publication may be reproduced, transmitted, transcribed, stored in
a retrieval system or translated into any language or computer language,
in any form or by any means, electronic, mechanical, magnetic, optical,
chemical, manual or otherwise, without the prior written permission of
Shining3D Corporation.
All other logos, products, or company names mentioned in the Manual
may be the registered trademarks or copyrights of their respective

XL/MDR-RD-094
Aoralscan 3_Manual_V1.1 - 2 -
companies, and are used for informational purposes only.
Shining 3D Tech Co., Ltd. makes no representations or warranties, either
expressed or implied, with respect to the contents hereof and
specifically disclaims any warranties, merchantability or fitness for any
particular purpose. Further, Shining3D Corporation reserves the right to
revise this publication and to make changes from time to time in the
contents hereof without obligation of Shining3D Corporation to notify
any person of such revision or changes.
Updates to hardware and/or software components are made regularly;
therefore, some of the instructions, illustrations, and specifications
mentioned in the Manual may differ slightly from your particular
situation.

XL/MDR-RD-094
Aoralscan 3_Manual_V1.1 - 3 -
Table of Contents
Foreword...............................................................................................- 1 -
1. Read This First ....................................................................................- 6 -
Basic Information......................................................................- 6 -
Intended Use............................................................................- 9 -
Contraindications....................................................................- 10 -
Warnings................................................................................- 10 -
Waste Electrical and Electronic Equipment................................- 11 -
Disposal .................................................................................- 12 -
Warranty................................................................................- 12 -
2. Safety Information ............................................................................- 13 -
Precautions ............................................................................- 13 -
Labels and Symbols .................................................................- 14 -
Compliance ............................................................................- 16 -
FCC Compliance Statement ......................................................- 16 -
Electrical Safety ......................................................................- 16 -
Electrical ......................................................................- 16 -
Classification.................................................................- 17 -
EMC Notice...................................................................- 18 -
Biological Safety......................................................................- 24 -
Laser Protection......................................................................- 24 -
3. Unpack the Package ..........................................................................- 25 -
4. Scanner............................................................................................- 27 -
Overview................................................................................- 27 -
Hardware Overview ................................................................- 27 -
Scanner Tip and Scanner Body........................................- 27 -
Scanner Cradle..............................................................- 28 -
USB 3.0 Repeater ..........................................................- 29 -
XL/MDR-RD-094
Aoralscan 3_Manual_V1.1 - 4 -
Main Cables..................................................................- 30 -
Software Overview..................................................................- 30 -
System Requirements....................................................- 31 -
Install the Software .......................................................- 31 -
5. Set the Scanner ................................................................................- 33 -
Connect the Scanner ...............................................................- 33 -
Calibrate the Scanner ..............................................................- 34 -
Disconnect the Scanner ...........................................................- 36 -
6. Scanning Preparations.......................................................................- 37 -
Intraoral Environment .............................................................- 37 -
Scanner Preparation................................................................- 37 -
Scanning Position and Path ......................................................- 37 -
Heat the Scanner Tip ...............................................................- 38 -
7. Clinical Case Quick Guide...................................................................- 40 -
Connect the Scanner ...............................................................- 40 -
Activate the Scanner ...............................................................- 40 -
Calibration .............................................................................- 40 -
Register Account.....................................................................- 40 -
Create Orders.........................................................................- 40 -
Scan Upper Jaw.......................................................................- 41 -
Scan Lower Jaw.......................................................................- 42 -
Scan Total Jaws.......................................................................- 42 -
View Result Data.....................................................................- 44 -
View Upper/Lower Jaw..................................................- 44 -
View Occlusal Effect ......................................................- 45 -
Pre-Design............................................................................- 45 -
View Data Storage Path .........................................................- 45 -
Upload Order........................................................................- 45 -

XL/MDR-RD-094
Aoralscan 3_Manual_V1.1 - 5 -
8. Care and Maintenance ......................................................................- 46 -
Pre-cleaning, Disinfection, and Sterilization ...............................- 46 -
Scanner Body and Cradle Care..................................................- 47 -
Scanner Tip ............................................................................- 48 -
Cleaning and High-level Disinfection ...............................- 49 -
Cleaning and Steam Sterilization.....................................- 50 -
Attach the Scanner Tip...................................................- 51 -
Scanner Storage......................................................................- 52 -
Storage for Transport ....................................................- 53 -
Daily and Long-term Storage ..........................................- 53 -
9. Hardware Specification......................................................................- 54 -
Specifications .........................................................................- 54 -
Environmental Requirements...................................................- 55 -

XL/MDR-RD-094
Aoralscan 3_Manual_V1.1 - 6 -
1. Read This First
The Manual provides important procedures and information on how to operate the scanner
and configure the IntraoralScan software correctly and safely. Before attempting to operate the
product, read the Manual and strictly observe all warnings and cautions. Pay extra attention to
the information from Safety information in chapter 2.
Basic Information
I. Product name, model
Product name: Intraoral scanner
Model: Aoralscan 3
II. Name, residence, contact information and after-sales service of the manufacturer
Manufacturer name: Shining 3D Tech Co., Ltd.
Production Address: No. 1398, Xiangbin Road, Wenyan, Xiaoshan, Hangzhou, Zhejiang, China,
311258
III. Contact Information
Manufacturer
Shining 3D Tech Co., Ltd.
No.1398, Xiangbin Road, Wenyan, Xiaoshan, Hangzhou, Zhejiang, China
www.shining3ddental.com
Customer Support
Email: dental_support@shining3d.com
Shining 3D’s Representative
Lotus NL B.V.
Address: Koningin Julianaplein 10, 1e Verd, 2595AA, The Hague, Netherlands.
Telephone: +31644168999
Email: peter@lotusnl.com
IV. Product performance, main structural composition
Product performance
- Appearance and structure
The appearance should be: Smooth, no cracks, no stains, no obvious deformation. Flexible

XL/MDR-RD-094
Aoralscan 3_Manual_V1.1 - 7 -
and reliable for operation.
- Function control and display
Function control: After pressing the scanning button, determine whether the front end of the
scanner flashes normally.
Display: Under normal working conditions, when the scanner is opened for scanning, the two-
dimensional and three-dimensional imaging of the scanned object (such as teeth) can be seen on
the display respectively.
3D image processing: After the 3D stereo image is generated, the 3D image can be cropped
as needed by using the relevant buttons on the top, bottom and right side.
- Software features
1. Wizard type scanning operation process with backward function.
2. Establishing demand information, which may include: jaw position information, tooth
position information, and treatment modality information.
3. Scanning the teeth according to the demand information.
4. Editing function of the scanned result data, including: hole repair, data selection.
5. scanner with undercut, occlusion, texture and smoothing functions (optional).
6. scanner with orthodontic simulation function (optional).
7. scanner with model making (Accu Design) function (optional).
8. scanner with report examination function (optional).
- Performance
Dental scan imaging: The scanner scans the teeth and gingiva to form a 3D digital model.
Accuracy: Under normal conditions, the scanner is used to scan against a standard (e.g., a
plaster standard known to be similar in size to a tooth), obtain its three-dimensional stereoscopic
data, and measure key dimensions to obtain measured values.
Heating of the entrance part of the scanner tip: Under normal working conditions, the
intraoral scanner should have heating and anti-fogging function when entering the mouth under
working condition.
- Data interface
USB 3.0, data storage format shall include 3D digital model format .stl, .ply and .obj.
Main structural composition
The Scanner consists of Scanner body, scanner tip, USB 3.0 repeater, power adapter, cradle,
USB cable, calibrator(optional), software, and encryption module. The software carrier is USB

XL/MDR-RD-094
Aoralscan 3_Manual_V1.1 - 8 -
flash drive, and the software release version is 1.
Caution
It is recommended that users copy the software from the USB flash drive to the
computer hard disk before installing the driver.
Use NVIDIA graphics cards to get the best scanning efficiency.
Do not insert wireless USB network card in the computer. USB wireless network card
will cause USB bandwidth occupation, limiting camera performance.
V. Product maintenance and care methods, special storage/transportation conditions,
operating conditions.
1) Do not connect the scanner to power if not used, keep it in dry environment.
2) Use dust cap when you leave the scanner unworking.
3) After using scanner tip, use alcohol to wipe and then use autoclave to sterilize it. (121°C,
102.9kPa for 30 minutes; 134°C, 205.8kPa for 4 minutes). Use alcohol to wipe the scanner body.
Use dust-proof cloth to wipe the scanning window to ensure the window keeps dry.
4) special storage/transportation conditions, operating conditions :For more details, see
9.2.
Note
The temperature and humidity and atmospheric pressure conditions for
storage/transportation are mentioned on the outer packaging.
VI. Production date and lifecycle
The production date is shown on the product label. Lifecycle: 8 years.
VII. The list of accessories, including accessories, wear and tear replacement cycle and
instructions on how to replace.
Scanner tip as a wear and tear products can be recycled up to 100 times, after which it needs
to be replaced.
(1) Disconnect the scanner power, hold the scanner tip firmly with thumb and index finger
on both sides, and then gently slide the scanner tip out of the scanner as shown in the figure.

XL/MDR-RD-094
Aoralscan 3_Manual_V1.1 - 9 -
(2) Hold the scanner tip firmly with your thumb and index finger on both sides and gently
attach the scanner tip to the scanner with the tip facing down.
Caution
Do not place your fingers on the lens of the scanner tip when removing and attaching the
scanner tip, because this might cause damage to the lenses.
(3) Try to gently shake the scanner tip to ensure that it locks into place and is stable.
Caution
The Aoralscan 3 intraoral scanner should not be used in close proximity or stacked with
other equipment, and if it must be used in close proximity or stacked, observe to verify
proper operation in the configuration in which it is used.
Using cables or accessories other than those specified for use with the scanner might
result in increased emissions or decreased immunity of the device.
Interruptions during electrostatic testing can be recovered within 5s without affecting
basic performance.
Intended Use
This is an intraoral scanner that works with the supplied software programs. By performing
intraoral scanning directly and digitally acquiring and saving the 2D/3D color images of teeth and
gingiva, the Scanner is available for patients with needs of orthodontic, implant, and restoration.
Note
Benefits to be achieved: As a device that applies a probing optical scanner tip, this
scanner can directly scan inside the patient's mouth to obtain three-dimensional
morphology and color texture information of soft and hard tissue surfaces such as
teeth, gums, and mucous membranes in the oral cavity, facilitating comfortable data
capturing for patients, reducing stress for medical care, and improving efficiency for
following processing.
The scanner satisfies related requirements.

XL/MDR-RD-094
Aoralscan 3_Manual_V1.1 - 10 -
Warning
Do not use the scanner for purposes other than those intended and expressly stated
above.
This product is designed and intended for use by persons with professions of dentistry
and dental laboratory technology. The product cannot be operated by the patients themselves.
The user is solely responsible for determining whether the scanner is appropriate for a particular
patient case.
Do not misuse the scanner, and do not use or operate the software programs incorrectly.
The clinical environments where the scanner and the software programs can be used
include dental clinics, dental hospitals, and dental laboratories.
Only trained medical personnel may use the scanner and the supplied software
programs. When under an adverse event, inform the relevant notified authorities and competent
authorities.
Installation, use, and operation of the scanner are subject to the law in the jurisdictions
in which it is used. Install, use, and operate the scanner only in such ways that do not conflict with
applicable laws or regulations, which have the force of law. Use of the scanner for purposes other
than those intended and expressly stated here, as well as incorrect use or operation, may relieve
us or our agents from all or some responsibilities for resultant noncompliance, damage, or injury.
The users of this scanner and software are responsible for image quality and diagnosis.
They should ensure that the inspection data is being used for the analysis and diagnosis only, and
furthermore the data is sufficient both spatially and temporally for the measurement approach
being used.
The images acquired by the scanner must be interpreted by a qualified medical
professional. The software in no way interprets these images or provides a medical diagnosis of
the patient being examined.
Contraindications
No known contraindications (or side effects).
Warnings
Before using the Aoralscan 3, read warnings and Safety information on chapter 2.
Do not attempt to disassemble, repair, or modify the scanner and software.

XL/MDR-RD-094
Aoralscan 3_Manual_V1.1 - 11 -
There are no user serviceable parts inside the scanner. Necessary modifications must be
made only by the manufacturer or its designated agents.
Do not allow foreign objects (including all types of liquids) to enter the scanner and its
cradle. Water, moisture, etc. may cause a short circuit in the electronic components and lead to
malfunction.
If the scanner tip is accidentally dropped to the ground, check to make sure the lens is
not loose before using it.
If the scanner is inadvertently dropped on the ground or impacted, it must be calibrated
before use. If there are still accuracy problems or scanning abnormalities after calibration, please
consult technical support.
Do not drop or apply shock/vibration to this scanner and its cradle. Strong impacts may
damage the components inside.
Do not cut, bend, modify, place heavy objects, or step on the cables. Otherwise, the
external insulation may be damaged and result in short circuit or fire.
To avoid electrical shock, use only supplied power adapter and connect it only to
properly grounded wall outlets.
The device should not be used adjacent to or stacked with other equipment. If adjacent
or stacked use is necessary, the device should be observed to verify normal operation in the
configuration in which it will be used.
Waste Electrical and Electronic Equipment
Disposal of Waste Electrical and Electronic Equipment and by users in private households in
the European Union.
This symbol on the product or on the packaging indicates that this cannot be disposed of as
household waste. You must dispose of your waste equipment by handling it over to the applicable
take-back scheme for the recycling of electrical and electronic equipment and/or battery. For
more information about recycling of this equipment, contact your city office, the shop where you
purchased the equipment or your household waste disposal service. The recycling of materials will
help to conserve natural resources and ensure that it is recycled in a manner that protects human
health and environment.
XL/MDR-RD-094
Aoralscan 3_Manual_V1.1 - 12 -
Disposal
The scanner must be reprocessed prior to disposal in order to prevent cross-contamination.
All electrical and electronic devices must be disposed of separately from your other
household waste in order to promote reuse, recycling and other forms of recovery, to prevent any
potential adverse effects of hazardous substances on the environment and human health, and
also to reduce the amount of waste in landfill. This includes accessories such as power adapters,
power cords, etc. Do safely dispose of the device and its accessories in accordance with applicable
laws and regulations.
For specific information on disposal of your device and the packaging, contact your local
distributor or service provider.
Warranty
The warranty is void if unauthorized personnel perform service or maintenance on the set of
Aoralscan 3. To ensure correct product performance and to obtain warranty service, contact
technical support.

XL/MDR-RD-094
Aoralscan 3_Manual_V1.1 - 13 -
2. Safety Information
Precautions
Failure to observe the instructions or disregard the warnings may result in damages to the
product, personal injury, or even death of the user or the patient.
Do not use the hardware and software for any application until you have read,
understood, and known all the safety information, safety procedures, and emergency procedures
contained in the chapter. Operating the hardware and software without a proper awareness of
safe use could lead to fatal damage to the hardware or permanent data loss.
Ensure that the connection is performed correctly. See 5.1 Connect the Scanner.
Use only medical grade devices with the scanner in the patient environment.
The hardware and software should only be used in a medical facility under the
supervision of trained personnel.
Only authorized service labs should perform maintenance. It is expressly prohibited to
open the scanner with tools.
The hardware and software have been fully adjusted and tested prior to shipment from
the factory. Unauthorized modifications will void your warranty.
If the hardware or software is modified, appropriate inspection and testing must be
conducted to ensure continued safe use.
Check the scanner and components for sharp edges.
Before use, check the device for damage, loose parts, wear and tear, and other cosmetic
problems. In case of such problems, please contact after-sales service.
During use, always pay attention to abnormal conditions of the scanner and the patient.
In case of abnormal conditions, you need to stop using it immediately. Consult technical support
staff promptly.
To ensure the performance and safety of the scanner, use only the original accessories
provided with the scanner (or accessories specified by Shining 3D, consult technical support for
details) and software.
Use only supplied accessories and approved software with the scanner in order to
achieve the designed performance.
Do not use a power adapter other than the one supplied with the package.
Connecting the scanner to an unknown power adapter is very dangerous and may lead

XL/MDR-RD-094
Aoralscan 3_Manual_V1.1 - 14 -
to fire or explosion.
Using cables or accessories other than those specified for use with the scanner might
result in increased emissions or decreased immunity of the device.
The supplied medical grade power adapter should only be connected to a grounded
power socket.
Reasonably arrange communication cables, power lines and other types of cables to
prevent users or patients from tripping over the wires. Do not forcibly pull or bend cables of any
kind.
The scanner is not intended for use in environments with high concentrations of
flammable liquids, gases, or atmospheric oxygen.
There is a risk of explosion when the scanner is used around flammable anesthetics.
Do not connect USB peripherals with an extended USB cable. Extended connection may
cause unexpected usage fault.
Always handle the scanner with care and avoid hitting or scratching the surfaces as it
contains fragile components. Dropping the scanner on the floor may cause permanent damage. If
you accidentally drop the scanner, you MUST dispose the scanner tip immediately and do not use
the same tip again. The mirror in the tip might shatter into small pieces, and using it again poses
the highest risk of causing serious injury to the user and patient.
The scanner might heat up to above the normal body temperature, yet this short- term
exposure and contact with small areas will not pose a health or safety hazard to the patient.
The scanner may interfere with pacemakers and ICDs, and use of the scanner onpatients
with pacemakers and ICDs is prohibited.
Never place any objects or load on the scanner and its cradle.
Do not dispose the scanner as unsorted municipal waste. The scanner must be collected
separately and disposed of in accordance with the local laws and regulations. For proper disposal
of this scanner, contact your local representative of Shining3D Corporation.
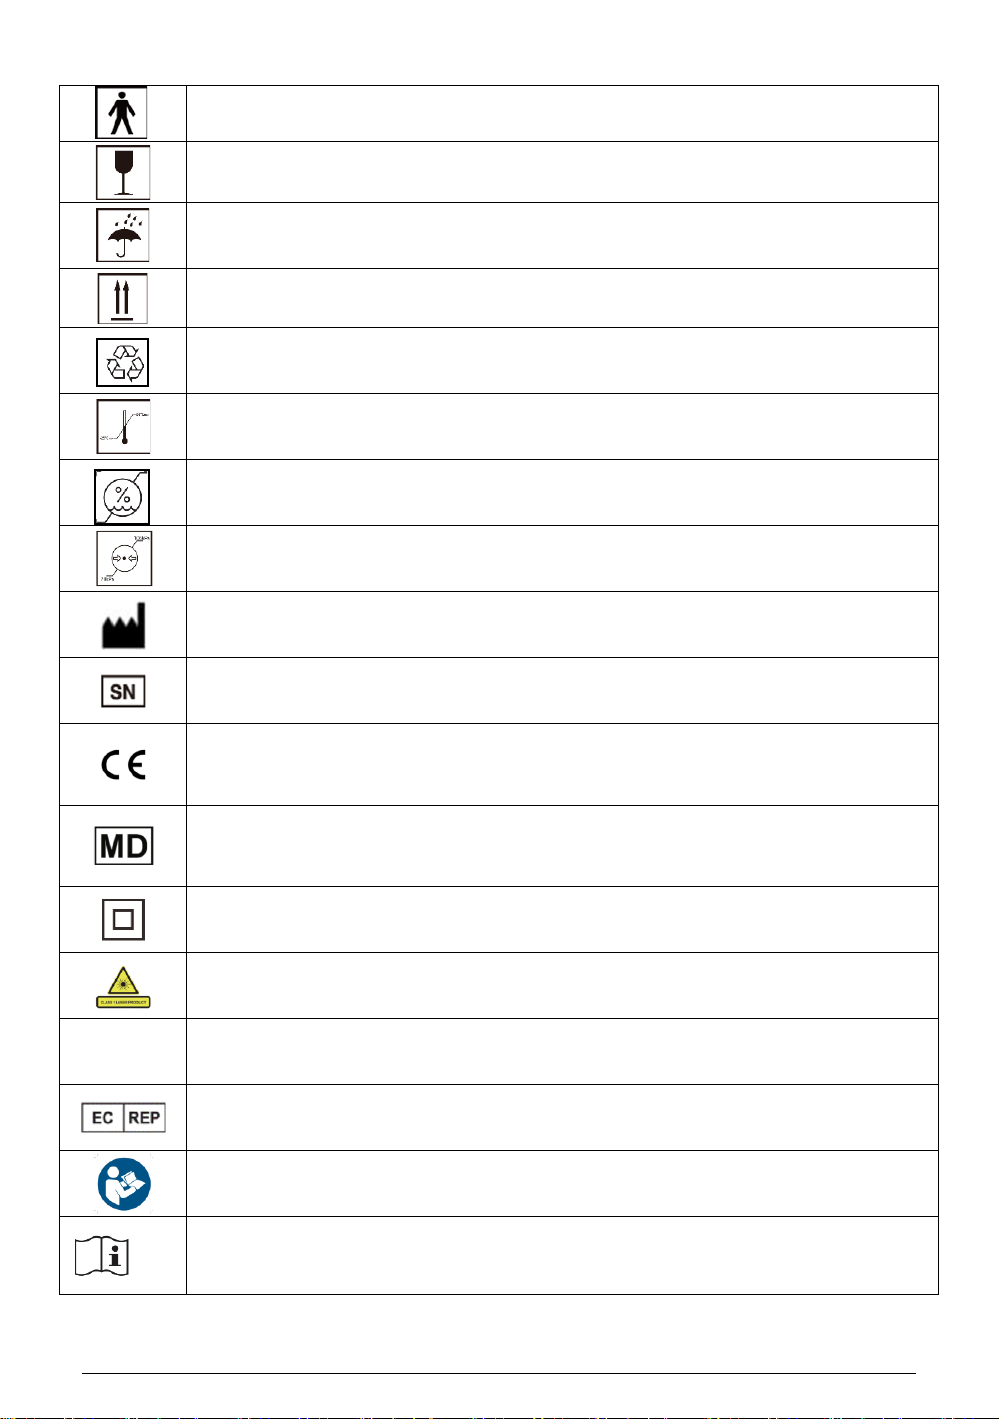
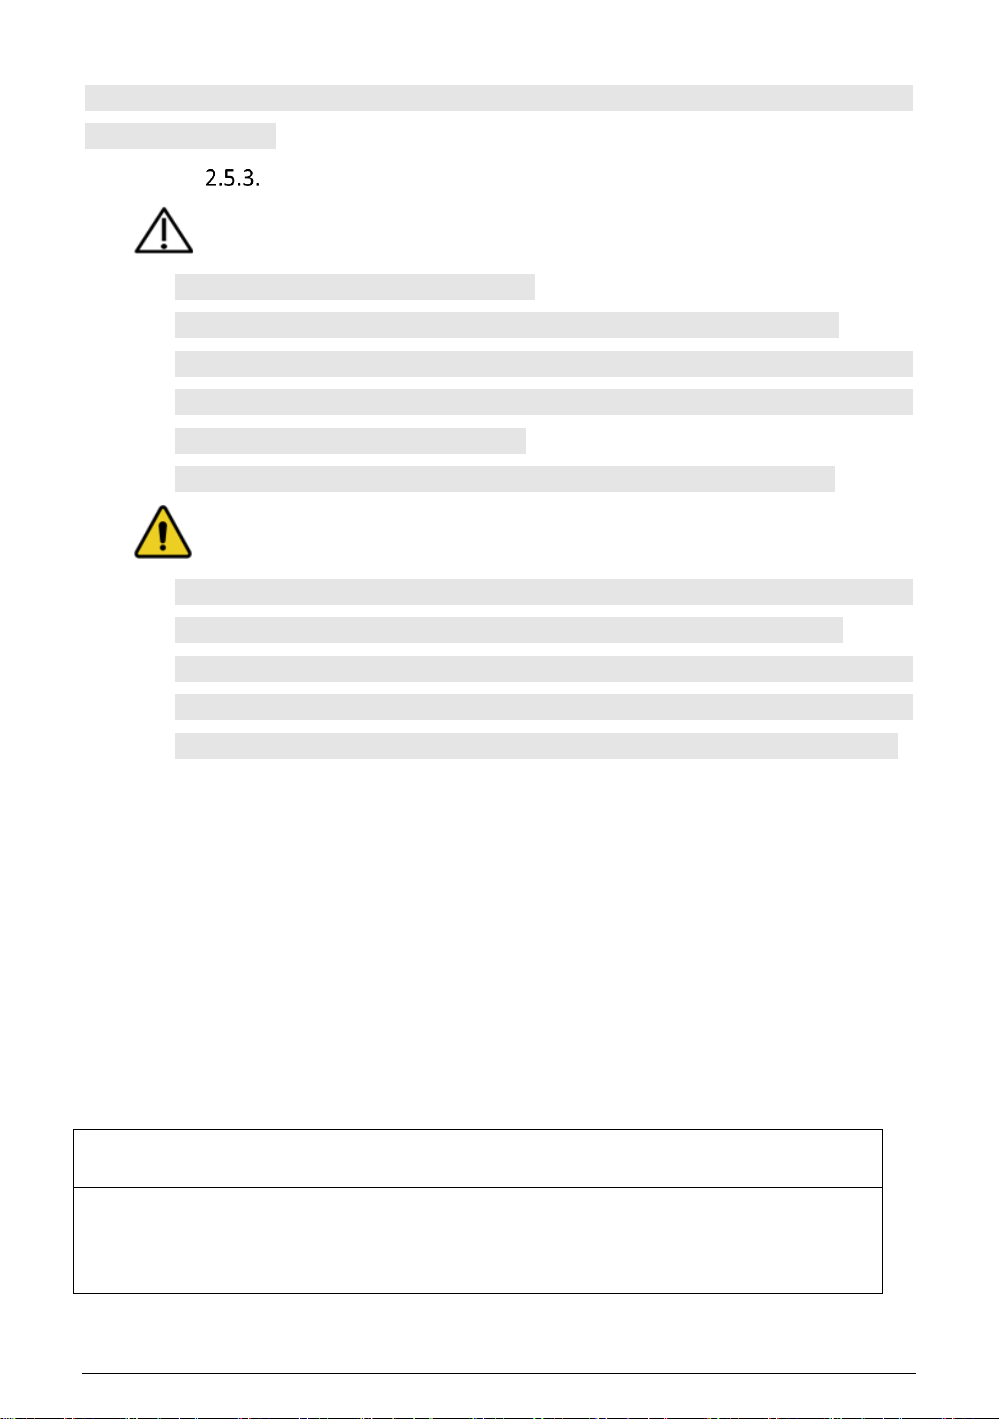
Labels and Symbols
Labels and symbols on the scanner/carry box/package
Symbol
Explanation
To indicate that caution is necessary when operating the device or control close to
where the symbol is placed, or to indicate that the current situation needs operator
awareness or operator action in order to avoid undesirable consequences.
XL/MDR-RD-094
Aoralscan 3_Manual_V1.1 - 15 -
Type BF applied part. To identify a type BF applied part complying with IEC 60601-1.
Indicate that the contents of the transport package are fragile and the package shall
be handled with care.
Indicate that the transport package shall be kept away from rain and in dry
conditions.
Indicate correct upright position of the transport package
Indicate that the marked item or its material is part of a recovery or recycling process.
Indicate the maximum and minimum temperature limits at which the item shall be
stored, transported or used.
Indicate the acceptable upper and lower limits of relative humidity for transport and
storage.
Indicate the acceptable upper and lower limits of atmospheric pressure
Indicates the medical device manufacturer.
Indicates the manufacturer's serial number so that a specific medical device can be
identified.
Device fulfills the requirements of the European Regulation 2017/745 given on the EU
Declaration of Conformity.
Indicate the item is a medical device.
Class II equipment.
Class 1 laser product.
RoHs
Restriction of Hazardous Substances in Electrical and Electronic Equipment. Meets the
requirements of Directive 2011/65/EU.
Indicates the authorized representative in the European Community/ European Union.
Signify that the instruction manual/booklet must be read.
Indicates the need for the user to consult the instructions for use.

XL/MDR-RD-094
Aoralscan 3_Manual_V1.1 - 16 -
Indicate the unique device identifier information.
Note:
The symbols meet the requirements of ISO 15223-1 2021"Medical devices - Symbols to be
used with information to be supplied by the manufacturer Part1 General requirements".
Compliance
Anyone creating or changing a medical electrical system through a combination with other
devices in accordance with standard IEC 60601-1:2005+AMD1:2012 Medical electrical equipment
–Part 1: General requirements for basic safety and essential performance is responsible for
ensuring that the requirements of these standards are met to the full extent to ensure the safety
of patients, operators and the environment.
FCC Compliance Statement
This device complies with part 15 of the FCC Rules. Operation is subject to the following two
conditions:
(1) This device may not cause harmful interference;
(2) This device must accept any interference received, including interference that may cause
undesired operation.
Electrical Safety
Only trained medical personnel should operate this scanner. The product complies with the
following standards.
Electrical
IEC 60601-1:2005+AMD1:2012 Medical electrical equipment –Part 1: General
requirements for basic safety and essential performance
IEC 60601-1-2:2014 Medical electrical equipment Part 1-2: General requirements for
basic safety and essential performance-Collateral Standard: Electromagnetic disturbances–
Requirements and tests
IEC 60601-1-6:2010+AMD1:2013 Medical electrical equipment –Part 1-6: General
requirements for basic safety and essential performance –Collateral standard: Usability
IEC 60601-1-9:2007+AMD1:2013 Medical electrical equipment–Part 1-9: General

XL/MDR-RD-094
Aoralscan 3_Manual_V1.1 - 17 -
requirements for basic safety and essential performance–Collateral Standard: Requirements for
environmentally conscious design
IEC 62366 2007+AMD1:2014 Medical devices–Part 1: Application of usability
engineering to medical devices
Classification
Type of protection against electric shock: Class II
The degree of protection against electric shock: Type BF applied part
Enclosure protection: IPX0
Degree of protection against incoming liquids: Common device.
Level of safety when used with flammable anesthetic gas mixed with air or flammable
anesthetic gas mixed with oxygen or nitrous oxide: Non-AP/APG equipment.
The mode of operation: Continuous operation
Pollution degree 2
Warning
Shock hazards exist if the power adapter is damaged or is not properly grounded. Use
only the supplied medical grade power adapter.
To meet waterproof requirements, the sockets should not be placed on the ground.
Do not use grounding type plugs for other purposes.
Only authorized service labs can make internal replacements of the scanner and modify
the software.
Do not use the scanner if its tip or cable is damaged. Contact technical support for
replacement of the damaged equipment (see Contact information on chapter 1).
To avoid risk of electrical shock hazards, always inspect the scanner and cable
connections before use.
Check the cable housing before use. Do not use the scanner if the housing is damaged
or the cable is abraded.
Scanning with the device in a 40℃environment (for 1-10 minutes), the temperature of
the scanning tip or the surface of the device may exceed 41°C but will be maintained below 48°
C.
All devices connected to the Aoralscan 3 shall comply with IEC 60601-1 and IEC 60950.
The radiation characteristics of the scanner is suitable for use in all locations ,including
XL/MDR-RD-094
Aoralscan 3_Manual_V1.1 - 18 -
domestic and direct connection to the residential public low-voltage supply grid for domestic
use.(CISPR 11 Class B).
EMC Notice
Caution
Aoralscan 3 meets the EMC requirements.
Users should install and use the EMC information provided in the random file.
Aoralscan 3 might affect the performance of a portable or mobile RF communication
device. Avoid strong ELECTROMAGNETIC interference when using a scanner, such as
near a mobile phone or microwave oven.
The guidance and manufacturer's statement are shown in the attached table.
Warning
Aoralscan 3 should not be used in proximity to or on top of other devices. If it must be,
observe to verify that it works properly in the configuration in which it is used.
With the exception of cables sold by the manufacturer of Aoralscan 3 as spare parts for
internal components, the use of accessories and cables other than those specified may
result in an increase in transmission power or a decrease in immunity of Aoralscan 3.
Electromagnetic Emissions
Medical electrical equipment such as the Aoralscan 3 requires special precautions regarding
electromagnetic compatibility, and must be installed and put into service according to the
following electromagnetic tables.
The Aoralscan 3 is intended for use in the electromagnetic environment specified below. The
customer or user of the Aoralscan 3 should assure that it is used in such an environment.
Guidance and manufacturer’s declaration–electromagnetic emissions
Guidance and Manufacturer's Statement - Electromagnetic emission
Aoralscan 3 is intended to be used in the following electromagnetic environment. The
purchaser or user of Aoralscan 3 should ensure that it is used in this electromagnetic
environment:
XL/MDR-RD-094
Aoralscan 3_Manual_V1.1 - 19 -
Emission Measurement
Conformity
RF emissions CISPR 11
Group 1
RF emissions CISPR 11
Class B
Harmonic emissions IEC
61000-3-2
Class A
Voltage fluctuations/flicker according to
IEC 61000-3-3
Applicable
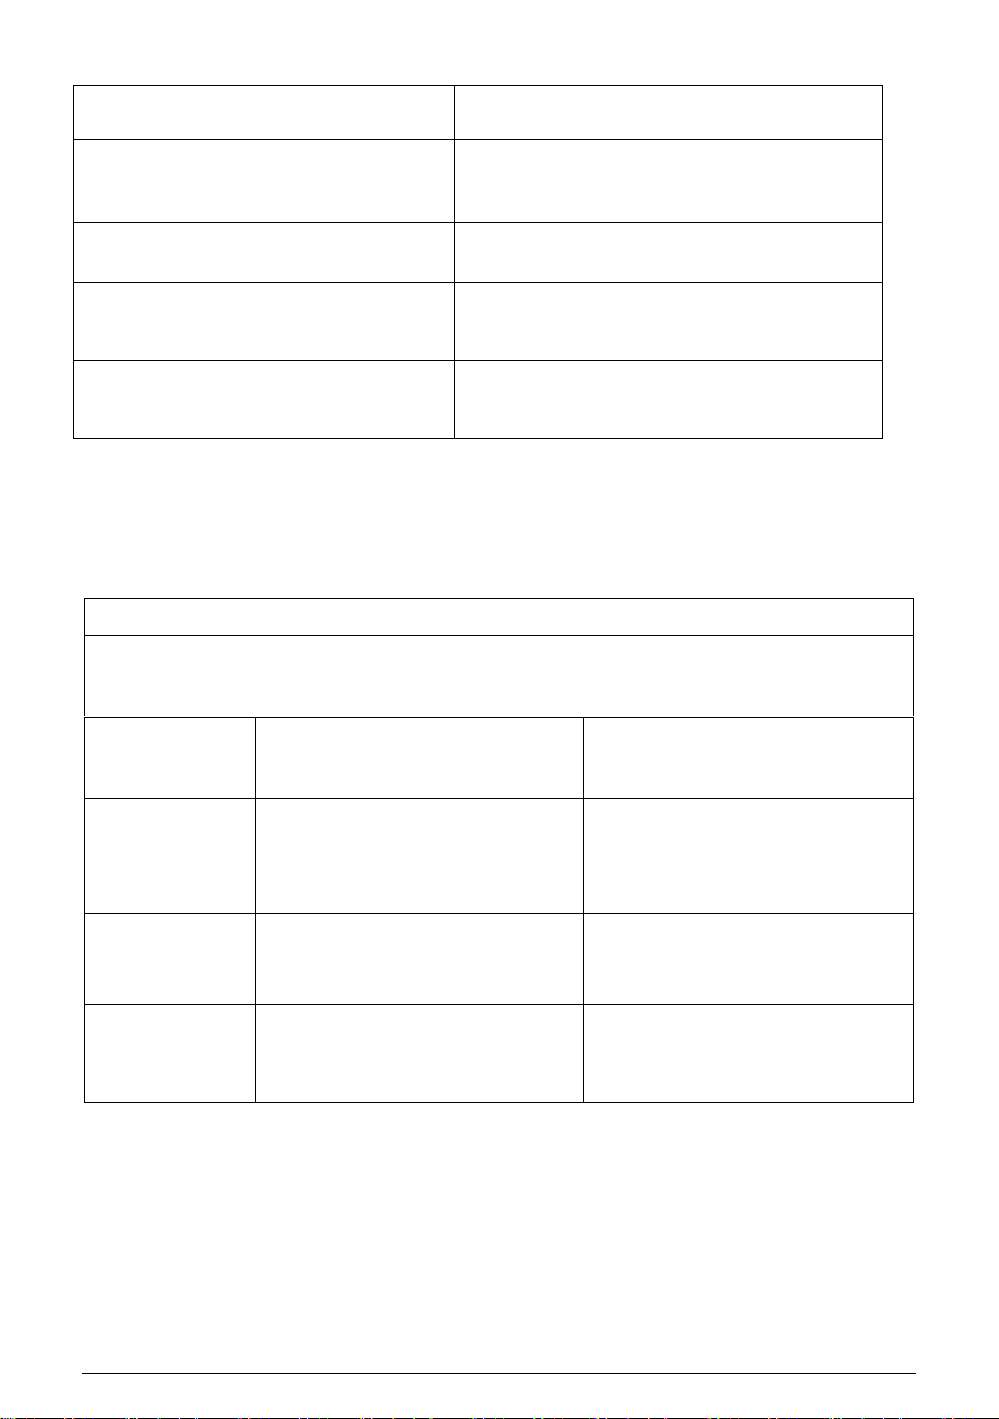
Interference immunity
The Aoralscan 3 is intended for use in the electromagnetic environment specified below. The
customer or user of the Aoralscan 3 should assure that it is used in such an environment.
Guidance and Manufacturer's Statement - Electromagnetic emission
Aoralscan 3 is intended to be used in the following electromagnetic environment. The
purchaser or user of Aoralscan 3 should ensure that it is used in this electromagnetic
environment:
Immunity test
IEC 60601 test levels
Compliance level
Electrostatic
discharge (ESD)
IEC 61000-4-2
±8 kV contact
±2,±4,±8,±15 kV air
±8 kV contact
±2,±4,±8,±15 kV air
Electrical fast
transient/burst
IEC 61000-4-4
±2 kV for power supply lines
±2 kV for power supply lines
Surge
IEC 61000-4-5
±0.5, ±1 kV line(s)
to line(s)
±0.5, ±1kV line(s) to line(s)
Other manuals for Aoralscan 3
1
Table of contents
Other Shining 3D Dental Equipment manuals


Popular Dental Equipment manuals by other brands


Carestream DENTAL
Carestream DENTAL CS 3700 User's installation guide

Coltene
Coltene CanalPro CL2 user guide

Waterpik
Waterpik WaterFlosser quick start guide

ARIBEX
ARIBEX Nomad Dental Operator's manual

Sendoline
Sendoline S1-E operating instructions

Miele professional
Miele professional G 7881 Installation and In-Service Manual

Miele
Miele PG 8581 operating instructions

Renfert
Renfert SYMPRO manual

Robots and Design
Robots and Design Maxx DS200 Series user guide

DentalEZ
DentalEZ StarDental 430 SWL Flex instruction manual

Medidenta
Medidenta Freestyle Pro instruction manual

Ivoclar Vivadent
Ivoclar Vivadent Wieland Zenotec Select Hybrid Cleaning instructions