DE
Sehr geehrte Kundin, sehr geehrter Kunde
Vielen Dank, dass Sie sich für ein Qualitätsprodukt aus dem Hause
Dentaurum entschieden haben.
Damit Sie dieses Produkt sicher und einfach zum größtmöglichen Nutzen
für sich und die Patienten einsetzen können, muss diese Gebrauchsan-
weisung sorgfältig gelesen und beachtet werden.
In einer Gebrauchsanweisung können nicht alle Gegebenheiten einer
möglichen Anwendung beschrieben werden.Bei Fragen undAnregungen
können Sie sich gerne an unsere Hotline (+49 7231/803-555) wenden.
Aufgrund der ständigen Weiterentwicklung unserer Produkte empfehlen
wir Ihnen auch bei häufiger Verwendung des gleichen Produktes
immer wieder das aufmerksame Durchlesen der jeweils aktuell
beiliegenden bzw. im Internet unter www.dentaurum.com hinterlegten
Gebrauchsanweisung.
1. Hersteller
Dentaurum GmbH & Co. KG
Turnstr. 31 I 75228 Ispringen I Germany
2. Allgemeine Produktbeschreibung /Anwendungsgebiet
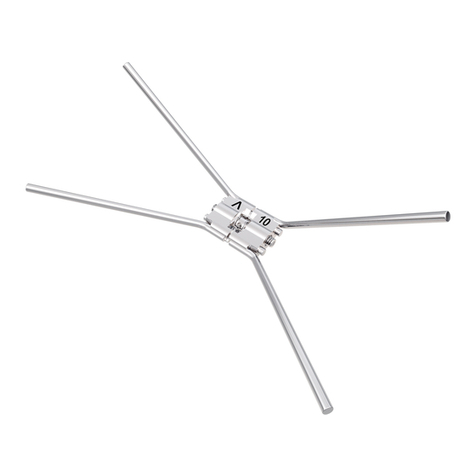
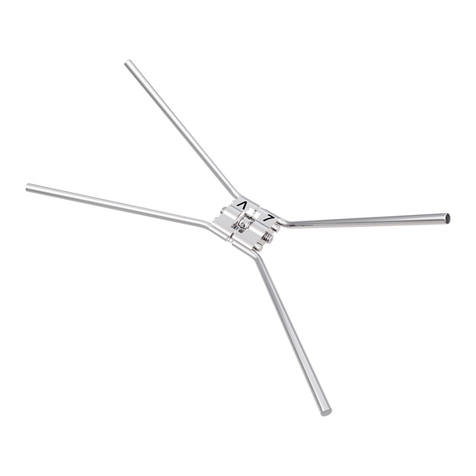
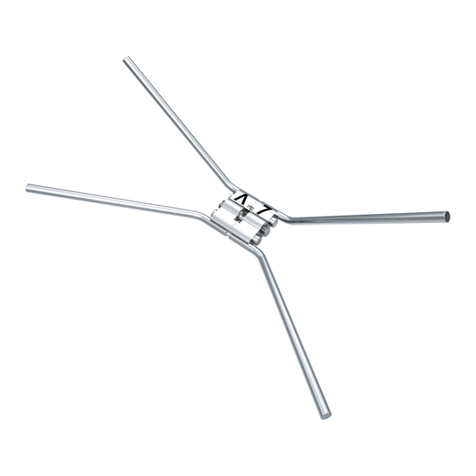
Die hyrax®Schraube (Hygienic Rapid Expansion Screw) ist eine
Spezialdehnschraube für die schnelle Gaumennahterweiterung. Diese
GNE-Schraube wird mittels ihrer Retentionsarme an vorgeformte Bänder
oder an sogenannte Kappenschienen aus Metall geschweißt. Alternativ
können sie auch in Kunststoffschienen einpolymerisiert werden. Die
Bänder oder Schienen werden in üblicher Weise zementiert.
3. Anwendungsgebiet
Für die schnelle Gaumennahterweiterung mit Hilfe einer festsitzenden
Apparatur.
4. Herstellung der hyrax®Apparatur am Beispiel vorgeformter
Bänder
Die OK 1. Prämolaren, rechts und links, sowie die 1. Molaren, rechts
und links, werden mit vorgeformten Bändern versehen. Diese Bänder
werden mittels einer Abformung auf das Hartgipsmodell übertragen
bzw. auf dem Hartgipsmodell angepasst. Die Retentionsarme der hyrax®
Schraube werden so gebogen, dass sie an den vier angepassten Bändern
angeschweißt werden können (Fig. 1).
Zum einfachen und schonenden Biegen der Arme empfehlen wir den
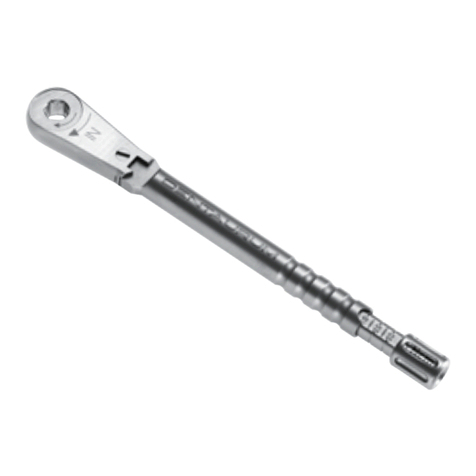
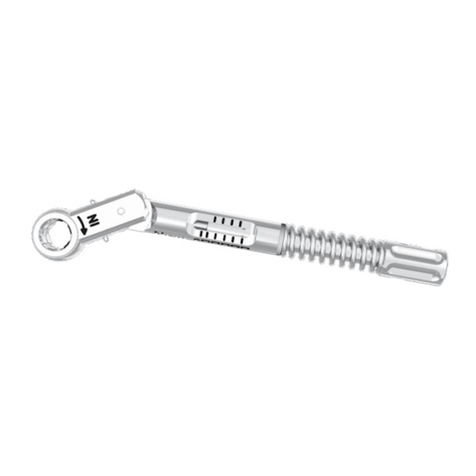
Universal-Biegeschlüssel (REF 611-122-00, vgl. Fig. 4). Liegt dieser nicht
vor, müssen die Retentionsarme beim Biegen am Dehnschraubenkörper
mit einer stabilen Flachzange gegengehalten werden, um einer Bruch-
gefahr der Retentionsarme vorzubeugen (vgl. Fig. 5).
Die hyrax®Schraube soll „freischwebend“ mindestens 1-2 mm über
dem Gaumendach/ der Gingiva liegen (vgl. Fig. 2), ihre hintere Seite
soll mit den mesio-palatinalen Höckern der 1. Molaren eine Linie bilden.
Um Hebelwirkungen zu vermeiden, ist auf eine parallele Lage zur Okklu-
sionsebene zu achten.
5. Verarbeitungstipps für hyrax®Schrauben
Zur Verstärkung können die Bänder palatinal und bukkal mit einem
remaloy®Draht ø 1,0 mm (REF 528-100-00) verbunden werden. Diese
Verstärkungsdrähte oberhalb der Retentionsarme laserschweißen.
Die palatinalen Verstärkungsdrähte sollen etwas über die Bänder
herausragen und sich an den Nachbarzähnen abstützen, um die
Dehnkräfte besser verteilen zu können.
Leichtes, problemloses Biegen der Retentionsarme der hyrax®Schrauben
mit dem Universal-Biegeschlüssel (REF 611-122-00) ohne Verwendung
zusätzlicher Zangen (Hebelgesetz).
Beim Biegen der Retentionsarme müssen diese am Dehnschrau-
benkörper mit einer stabilen Zange, z.B. Kramponzange Maxi
(REF 013-522-00) gegengehalten werden, um einer Bruchgefahr der
Retentionsarme vorzubeugen.
Bei Anwendung der Löttechnik bitte den Schraubenkörper vor zu
großer Hitze schützen, z.B. mit Hitzeschutz (REF 380-070-00).
6. Angaben zur Zusammensetzung
Die Zusammensetzung entnehmen Sie bitte der Werkstoffliste, siehe
Katalog bzw. www.dentaurum.com.
7. Sicherheitshinweise
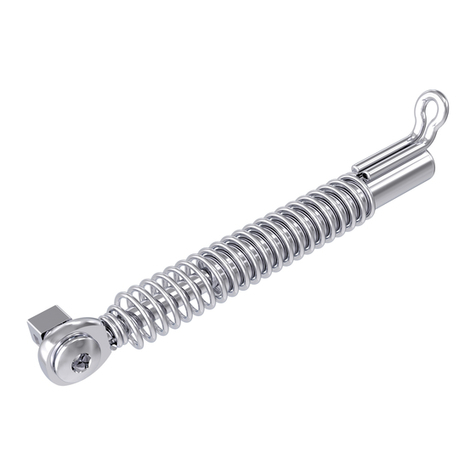
Immer nur den mitgelieferten blauen Sicherheitsschlüssel verwenden, um
ein Verschlucken zu verhindern!
Sollten auf einen oder mehrere der Inhaltsstoffe allergische Reaktionen
bekannt sein, darf das Produkt nicht angewendet werden.
8. Hinweise für Produkte zum einmaligen Gebrauch
Das Produkt ist nur zur einmaligen Verwendung vorgesehen. Die
Wiederaufbereitung eines einmal benutzten Produktes (Recycling) sowie
dessen erneute Anwendung am Patienten ist nicht zulässig.
9. Lieferprogramm
Bezeichnung gerade Arme abgewinkelte
Arme Menge
hyrax®Mini - 7
(Dehnweg 7 mm)
602-800-10
602-800-30
602-800-50
602-801-10
602-801-30
602-801-50
1 Stück
10 Stück
50 Stück
hyrax®Medium - 10
(Dehnweg 10 mm)
602-808-10
602-808-30
602-808-50
602-840-10
602-840-30
602-840-50
1 Stück
10 Stück
50 Stück
hyrax®Maxi - 12
(Dehnweg 12 mm)
602-811-10
602-811-30
602-811-50
602-812-10
602-812-30
602-812-50
1 Stück
10 Stück
50 Stück
Packungen (1 Stück / 50 Stück) mit 1 Sicherheitsschlüssel
Packungen (10 Stück) mit 10 Sicherheitsschlüsseln
Sicherheitsschlüssel 611-120-01 10 Stück
Universal-Biegeschlüssel 611-122-00 1 Stück
10. Qualitätshinweise
Dentaurum versichert dem Anwender eine einwandfreie Qualität der
Produkte. Der Inhalt dieser Gebrauchsanweisung beruht auf eigener
Erfahrung. Der Anwender ist für die Verarbeitung der Produkte selbst
verantwortlich. In Ermangelung einer Einflussnahme von Dentaurum auf
die Verarbeitung besteht keine Haftung für fehlerhafte Ergebnisse.
11. Erklärung der verwendeten Etikettensymbole
Etikett beachten. Zusätzliche Hinweise finden Sie im Internet
unter www.dentaurum.com (Erklärung der Etikettensymbole
REF989-313-00).
Hinweise für den Behandler/ Patienten
Vor dem Einzementieren der hyrax®Apparatur ist die Spindel (Schraube)
2-3 Vierteldrehungen in Pfeilrichtung zu öffnen,um die Funktion zu testen,
und wieder in Ausgangsstellung zurück zu drehen.
Die hyrax®Schraube ist nur in Pfeilrichtung zu aktivieren. Ein mehrmaliges
Auf- und Zudrehen der Schraube während der Behandlung kann dazu
führen, dass diese zu leichtgängig wird und ihre Funktion verliert.
Die fertige hyrax®Apparatur wird in gewohnter Weise einzementiert.
Danach wird die Schraube mit dem mitgelieferten Sicherheitsschlüssel
viermal um 90° gedreht. Eine Spindelumdrehung = 0,8 mm Dehnung.
Der Patient dreht nach Ihren Anweisungen morgens und abends die
Schraube selbst je zweimal um 90° weiter, bis die von Ihnen gewünschte
Dehnung erreicht ist.
Achtung: Immer nur den mitgelieferten blauen Sicherheitsschlüssel
verwenden, um ein Verschlucken zu verhindern!
Der Sicherheitsschlüssel ist für Kräfte bis max. 35 N
≙
3,5 kg
ausgelegt. Trotzdem ist darauf zu achten, dass die auf den Draht des
Sicherheitsschlüssels ausgeübte Kraft stets auf die geschlossene Seite der
Drahtklammer wirkt, so dass sich die Klammer nicht von derAchse lösen
kann. Bei einer unsachgemäßen Anwendung ist eine Überbelastung
möglich. Ein daraus resultierendes Versagen des Sicherheitsschlüssels
kann zum Ausschluss von Gewährleistung und Haftung führen.
Regelmäßige Kontrollbesuche sind zu empfehlen.
Die hyrax®Apparatur wird nach Erreichen der gewünschten
Dehnung durch eine Ligatur oder Verblocken mit Kunststoff gegen
unbeabsichtigtes Zurückdrehen gesichert und noch ca. 2-3 Monate zur
Stabilisierung im Mund belassen.
Nach Entfernung derselben wird eine Retentionsplatte getragen.
Sollten auf einen oder mehrere der Inhaltsstoffe allergische
Reaktionen bekannt sein, darf das Produkt nicht angewendet
werden.
EN
Dear customer
Thank you for choosing a quality product from Dentaurum.
It is essential to read these instructions carefully and adhere to them
to ensure safe, efficient use and ensure that you and your patients gain
full benefit.
Instructions for use cannot describe every eventuality and possible
application. In case of questions or ideas, please contact your local
representative.
As our products are regularly upgraded, we recommend that you always
carefully read the current instructions for use supplied with the product
and stored in the internet at www.dentaurum.com, even though you
frequently use the same product.
1. Manufacturer
Dentaurum GmbH & Co. KG
Turnstr. 31 I 75228 Ispringen I Germany
2. General product description/area of application
The hyrax®screw (Hygienic Rapid Expansion Screw) is a special screw for
rapid palatal expansion.The retention legs of the palatal expansion screw
are welded onto preformed metal bands or cap splints.Alternatively, they
can be polymerized into acrylic splints.The bands or splints are cemented
in the usual way.
3. Area of application
Used for rapid palatal expansion with a fixed appliance.
4. Fabricating a hyrax®appliance using the example of
preformed bands
Preformed bands are fitted on the maxillary left and right 1st bicuspids
and left and right 1st molars. These bands are transferred to a dental
stone model using an impression or fitted to a dental stone model. The
legs of the hyrax®screw are then bent to fit the bands so that they can
be welded into place (Fig. 1).
To prevent the legs from breaking during bending, we recommend
using our universal bending tool (REF 611-122-00, Fig. 4). If one is not
available, hold the legs against the body of the expansion screw, using
strong flat pliers (Fig. 5).
The hyrax®screw should „float“ freely at least 1-2 mm above the palate
roof/ gingiva (Fig. 2). Its posterior side should form a straight line with
the mesio palatal cusps of the 1st molars.To avoid any leverage effect, it
should be ensured that the occlusal level is parallel.
5. Information on use of hyrax®screws
To increase strength, the bands can be joined on the buccal
and/or lingual side with a piece of 1.0 mm remaloy®wire
(REF 528-100-00). Laser weld these wires above the legs. The palatal
strengthening wire should project slightly beyond the bands and be
supported by the adjacent teeth to allow better distribution of expansion
forces.
Easy, problem-free bending of the retention legs of hyrax®screws
with the universal bending tool (REF 611-122-00), without the use of
additional pliers (leverage principle).
To prevent the legs from breaking during bending, they should be
held against the body of the expansion screw using strong flat pliers e.g.
Maxi wire-bending pliers (REF 013-522-00).
When using the soldering technique please protect the body
of the screw against excessive heat, e.g. with heat screen
(REF 380-070-00).
6. Information about the composition
Information about the composition is included in the material list, see
catalog or www.dentaurum.com.
7. Safety instructions
Always use the blue safety key supplied to prevent swallowing!
The product should not be used, if there is a known allergic reaction to
one or more of the material components.
8. Information for single use products
The product is intended for single use only. Reconditioning of a product
that has already been used (recycling) and its reuse on a patient is not
permitted.
9. Availability
Description straight legs bent legs Quantity
hyrax®Mini - 7
(Expansion 7 mm)
602-800-10
602-800-30
602-800-50
602-801-10
602-801-30
602-801-50
1 piece
10 pieces
50 pieces
hyrax®Medium - 10
(Expansion 10 mm)
602-808-10
602-808-30
602-808-50
602-840-10
602-840-30
602-840-50
1 piece
10 pieces
50 pieces
hyrax®Maxi - 12
(Expansion 12 mm)
602-811-10
602-811-30
602-811-50
602-812-10
602-812-30
602-812-50
1 piece
10 pieces
50 pieces
Packs (1 piece / 50 pieces) with one safety key
Pack (10 pieces) with 10 safety keys
Safety key 611-120-01 10 piece
Universal bending key 611-122-00 1 piece
10. Quality information
Dentaurum guarantees the perfect quality of its products. These
recommendations are based upon Dentaurum´s own experiences.
The user is solely responsible for the processing of the products.
Responsibility for failures cannot be taken, as we have no influence on
the processing on site.
11. Explanation of symbols used on the label
Please refer to the label. Additional information can be found at
www.dentaurum.com (Explanation of symbols REF989-313-00).
Information for the doctor/ patient
Before the hyrax®appliance is cemented into position, turn the
spindle (screw) slightly 2-3 quarter turns in the direction of the
arrow to test its function. Then turn back to the original position.
Turn the hyrax®screw only in the direction of the arrow. Opening
and closing the screw several times during the treatment can cause it to
become too loose and to lose its function.
The finished hyrax®appliance is cemented into position in the usual
manner.
Following this, the screw is turned four times by 90° using the key
supplied for this purpose. One full 360° turn of the spindle = 0.8 mm
expansion.
The patient should turn the screw two times 90° both in the morning
and evening (according to your instructions) until the desired expansion
is achieved.
Note: Use only the blue safety key supplied, as this cannot
accidentally be swallowed.
The safety key is designed to hold a maximum force of 35 N
≙
3.5 kg. Please note that the force exerted on the safety key
wire should always be exerted on the closed side of the wire
clamp so that the clamp cannot loosen from the axis. Improper
use may lead to overload and consequently to failure thus
potentially excluding any guarantee and liability.
Regular visits are recommended to monitor progress.
The hyrax®appliance is secured against unwanted reversing, after
the desired degree of expansion is achieved, by fitting a ligature
or blocking with acrylic. For stabilization the appliance should remain
in the mouth for approximately 2-3 months.
A retainer should be worn following removal of the hyrax®appliance.
The product should not be used, if there is a known allergic
reaction to one or more of the material components.
#
Fig. 1
Fig. 2
Fig. 4
Fig. 3
Fig. 5
# #
FR
Chère Cliente, cher Client,
Nous vous remercions d‘avoir choisi un produit de la qualité Dentaurum.
Pour une utilisation sûre et pour que vous et vos patients puissiez profiter
pleinement des divers champs d‘utilisation que couvre ce produit, nous
vous conseillons de lire très attentivement son mode d‘emploi et d‘en
respecter toutes les instructions.
Un mode d‘emploi ne peut décrire de manière exhaustive tous les
aspects liés à l‘utilisation d‘un produit. Si vous avez des questions, votre
représentant sur place est à votre service pour y répondre et prendre note
de vos suggestions.
En raison du développement constant de nos produits, nous vous
recommandons, malgré l‘utilisation fréquente du même produit, la
relecture attentive du mode d‘emploi actualisé ci joint (cf. également sur
Internet sous www.dentaurum.com).
1. Fabricant
Dentaurum GmbH & Co.
Turnstr. 31 I 75228 Ispringen I Allemagne
2. Description générale du produit/domaine d‘utilisation
L’écarteur hyrax®(Hygienic Rapid Expansion Screw) est un écarteur
spécial pour l’expansion palatine rapide. Cet écarteur pour disjonction
médio-palatine rapide.Cet écarteur est à souder par ses bras de rétention
sur des bagues préformées ou sur des gouttières métalliques. Ils peuvent
aussi être intégrés dans des gouttières en résine. Les bagues ou les
gouttières sont usuellement scellées à l’aide de ciment.
3. Domaine d’utilisation
Pour la disjonction médio-palatine rapide au moyen d’un appareil fixe.
4. Fabrication de l’apparaillage hyrax®par l’exemple de bagues
préformées
L’on commence par poser des bagues sur les premières molaires
supérieures,gauches et droites. Ces bagues sont transférées ou adaptées
sur le modèle en plâtre dur au moyen d’une empreinte. Les bras de
rétention de la vis hyrax®sont recourbés de façon à pouvoir soudés sur
les quatre bagues (Fig. 1).
Pour recourber facilement les bras de rétention sans les abîmer, nous
recommandons d’utiliser la clé de flexion universelle (REF 611-122-00,
Fig. 4). En l’absence de cette dernière, les bras de rétention doivent être
maintenus le long du corps de la vis d’extension à l’aide d’une pince
plate stable, lors de l’opération de cintrage, et ce afin de prévenir tout
risque de rupture desdits bras (Fig. 5).
La vis d’extension hyrax®doit „flotter“ sur la voûte du palais/la gencive
(au moins 1 ou 2 mm, Fig. 2), sa partie postérieure devant former une
ligne avec les protubérances mésio-palatines des premières molaires.
Pour éviter tout effet de levier, il faut veiller à ce que le niveau d’occlusion
reste bien parallèle.
5. Conseils d’utilisation des vis hyrax®
Les bagues peuvent être renforcées, du côté palatin et buccal, à l’aide
d’un fil remaloy®de ø 1,0 mm de section (REF 528-100-00). Souder par
laser ces fils au-dessus des bras de rétention. Les fils de renfort palatins
doivent dépasser légèrement les bagues et s’appuyer sur les dents
voisines afin de mieux pouvoir répartir les forces d’écartement.Cintrage
facile et des bras de rétention des vis hyrax®avec la clé de flexion
universelle (REF 611-122-00) sans utilisation de pinces supplémentaires
(effet de levier).
Lors de la flexion des bras de rétention, ceux-ci doivent être maintenus
fermement en place contre le corps de l’écarteur, à l’aide d’une pince
stable, telle la pince à crampons forte (REF 013-522-00), afin d’éviter
tout risque de rupture des bras.
Dans le cadre de la technique de brasage, veiller à protéger le
corps de la vis contre les risques thermiques, par ex. avec la pâte
(REF 380-070-00).
6. Indications concernant la composition
Pour plus de détails sur la composition, veuillez consulter la liste des
matériaux (catalogue ou www.dentaurum.com).
7. Consignes de sécurité
Utiliser uniquement la clé de sûreté bleue fournie afin d’éviter toute
ingurgitation !
Si des réactions allergiques à l’un ou à l’autre des composants ont été
signalées, il ne faut plus utiliser le produit.
8. Indications concernant les produits à usage unique
Le produit est exclusivement destiné à un usage unique. La remise en
état d’un produit déjà utilisé (recyclage) ainsi que sa réutilisation chez un
patient ne sont pas autorisées.
9. Gamme disponible
Désignation Rétentions
droites Rétentions
recourbées Quantité
hyrax®Mini - 7
(Extension 7 mm)
602-800-10
602-800-30
602-800-50
602-801-10
602-801-30
602-801-50
1 pièce
10 pièces
50 pièces
hyrax®Medium - 10
(Extension 10 mm)
602-808-10
602-808-30
602-808-50
602-840-10
602-840-30
602-840-50
1 pièce
10 pièces
50 pièces
hyrax®Maxi - 12
(Extension 12 mm)
602-811-10
602-811-30
602-811-50
602-812-10
602-812-30
602-812-50
1 pièce
10 pièces
50 pièces
Paquet (1 pièce / 50 pièces) avec 1 clé de sûreté
Paquet (10 pièces) avec 10 clés de sûreté
Clé de sûreté 611-120-01 10 pièces
Clé de cintrage universelle 611-122-00 1 pièce
10. Remarques au sujet de la qualité
Dentaurum garantit à l‘utilisateur une qualité irréprochable des produits.
Le contenu du présent mode d‘emploi repose sur notre propre expérience.
L‘utilisateur est personnellement responsable de la mise en œuvre des
produits. N‘ayant aucune influence sur leur manipulation par ce dernier,
Dentaurum ne peut être tenue pour responsable de résultats inexacts.
11. Explication des symboles utilisés sur l’étiquette
Référez-vous à l‘étiquette. Pour des renseignements
supplémentaires, rendez-vous sur notre site Internet
www.dentaurum.com (Explication des symboles utilisés sur
l‘étiquette REF989-313-00).
Recommandations pour l’utilisateur / le patient
Avant le scellement de l‘appareillage hyrax®, dévissez légèrement la vis
en effectuant 2 à 3 quarts de tour dans le sens de la flèche, afin de tester
la fonction ; revissez-la ensuite dans sa position initiale.
N‘activez la vis hyrax®que dans le sens de la flèche.Le fait d‘ouvrir et de
fermer la vis à plusieurs reprises lors du traitement peut entraver le bon
fonctionnement de cette dernière.
Ensuite, l’on fait tourner la vis de 90°, ce à quatre reprises à l’aide de
la clé de sécurité fournie. Un tour de broche correspond à 0,8 mm
d’extension.
Chaque matin et chaque soir, le patient fait, selon vos instructions,
lui-même tourner la vis de 90° à deux reprises, jusqu’à obtention de
l’extension souhaitée.
Attention : Utiliser uniquement la clé de sécurité fournie (bleue), qui
du fait de sa taille, ne peut en aucun cas être avalée par inadvertance.
La clé de sécurité est prévue pour supporter une force maximale de
35 N
≙
3,5 kg. Veillez cependant à ce que les forces qui s‘exercent sur
le fil métallique de la clé de sécurité s‘exercent toujours sur le côté fermé
du crochet afin que celui-ci ne se détache pas de l‘axe.Toute défaillance
résultant d‘une éventuelle surcharge lors d‘une utilisation non conforme
peut entraîner une exclusion de garantie et de responsabilité.
Nous recommandons des visites de contrôle régulières.
Pour plus de stabilité et pour éviter que le vérin ne se dévisse
involontairement, l’appareil hyrax®est sécurisé par une ligature ou bien
un maintien plastique, une fois l’expansion souhaitée obtenue. Il restera
en place pendant environ 2 à 3 mois supplémentaires.
Après avoir été enlevée, elle est remplacée par une plaque de rétention.
Si des réactions allergiques à l’un ou plusieurs des composants
ont été signalées, il faut renoncer à l’emploi du produit.
