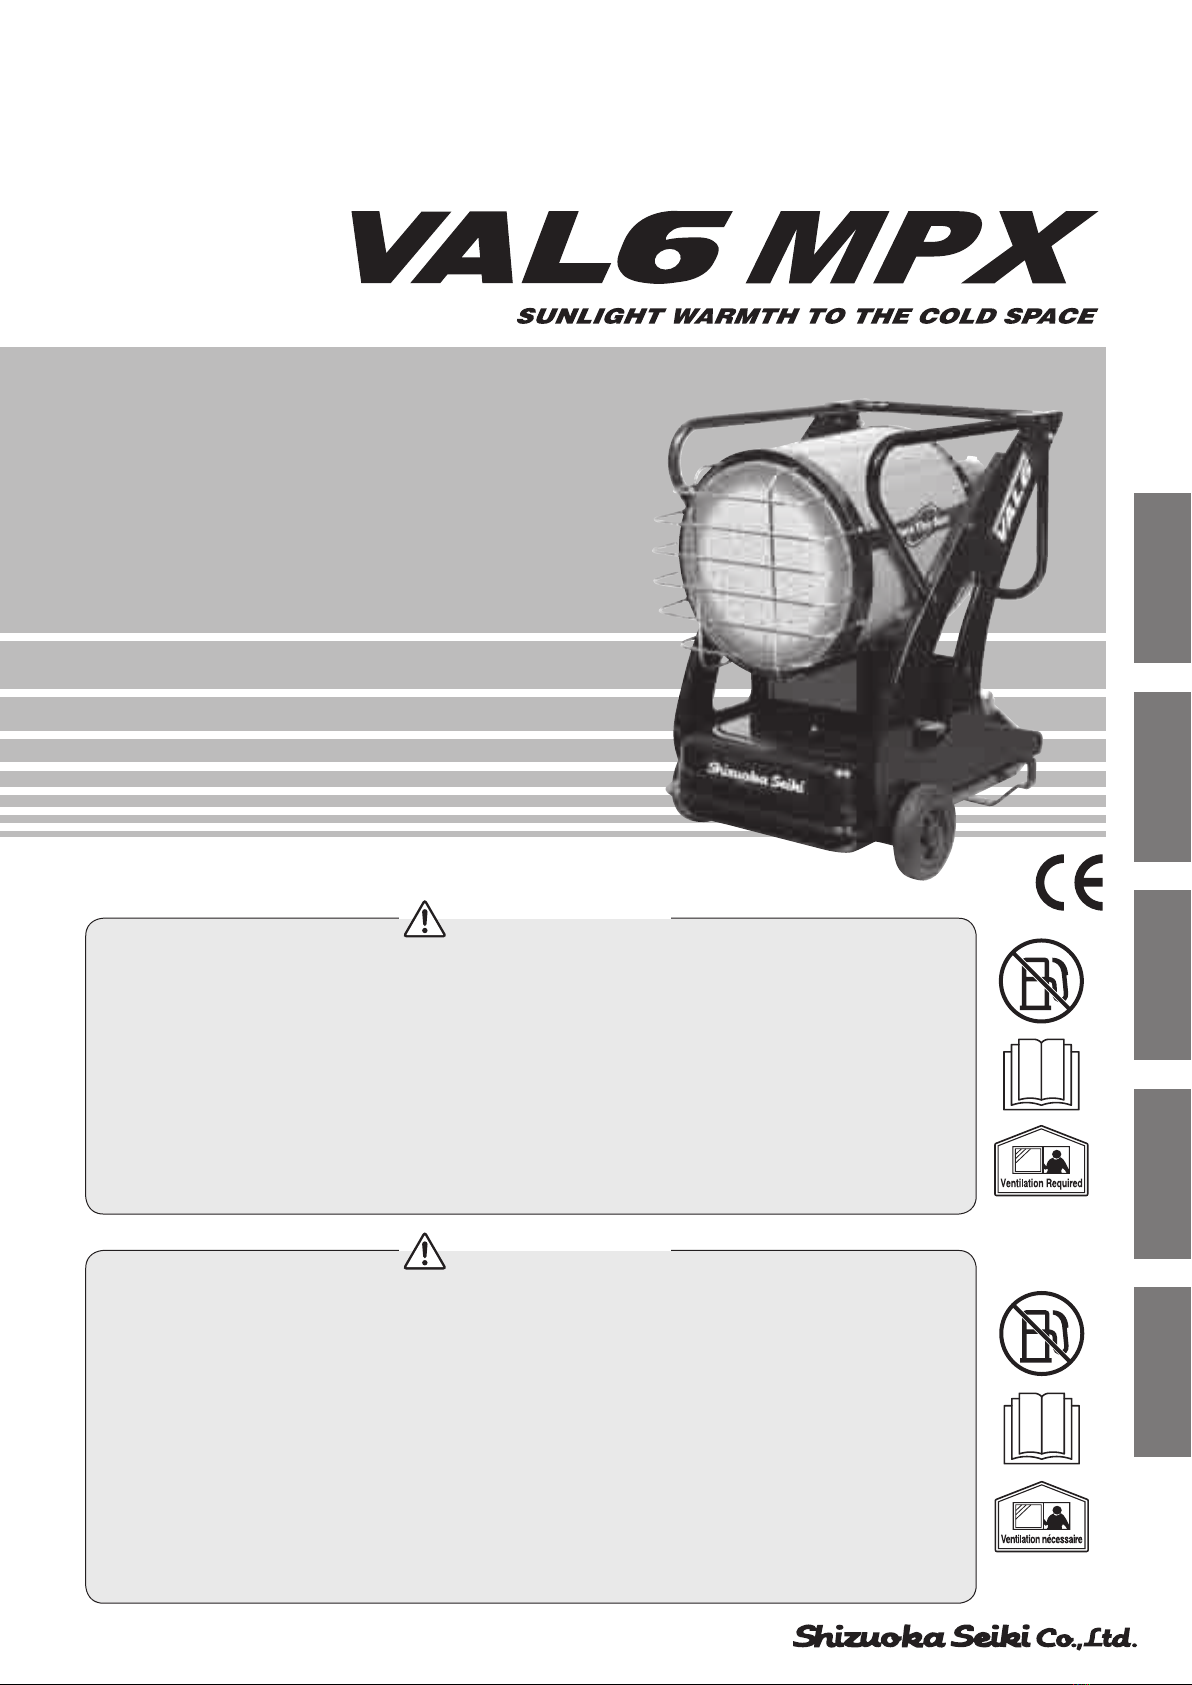
Shizuoka Seiki VAL6 MPX Series User manual
Français English
Owner’s Manual
Manuel d’utilisation
Betriebsanleitung
Handleiding
Manual del usuario
INFRA-RED OIL HEATER
CHAUFFAGE INFRAROUGE AU FIOUL
INFRAROT-ÖLHEIZER
OLIEGESTOOKTE INFRAROODVERWARMING
CALEFACTOR DE PETRÓLEO POR INFRARROJOS
• ThisOwner’sManualprovidesimportantinformationonproperhandling,operation,andmaintenance.FAILURETOFOLLOW
THEINSTRUCTIONS,PRECAUTIONS,ORSAFETYTIPSINTHISMANUALAUTOMATICALLYVOIDSALL
WARRANTIES,EXPRESSORIMPLIED.
• FAILURETOCOMPLYWITHTHEINSTRUCTIONS,PRECAUTIONS,ANDSAFETYTIPSINTHISMANUALCAN
RESULTINDEATH,SERIOUSBODILYINJURYANDPROPERTYLOSSORDAMAGEFROMHAZARDSOFFIRE,
EXPLOSION,BURN,ASPHYXIATION,CARBONMONOXIDEPOISONING,AND/ORELECTRICALSHOCK.
• ReadandthoroughlyunderstandthisOwner’sManualbeforeusingtheheaterinanyway,includingunpacking,assembling,
fueling,inspecting,lighting,operating,adjusting,turningoff,coolingdown,moving,orstoringtheheater.
• PleasekeepthisManualfortheuser’sneedandreference.
• DonotallowanyonewhohasnotreadandunderstoodthisOwner’sManualtoassemble,inspect,light,operate,adjust,turnoff,
cooldown,refuel,move,orstoretheheater.
• Therequirementsoflocalauthoritieshavingjurisdictionshallbefollowed.
• Theinstallationoftheunitshallbeinaccordancewiththeregulationsoftheauthoritieshavingjurisdiction.
IMPORTANT
• Cemoded’emploicontientdesinformationsimportantessurlesfaçonsadéquatesdemanipuler,defairefonctionneretd’entretenir
l’appareil.TOUTEINOBSERVATIONDESINSTRUCTIONS,AVERTISSEMENTSOUCONSEILSDESÉCURITÉFOURNIS
DANSCEGUIDEENTRAÎNEAUTOMATIQUEMENTL’ANNULATIONDETOUTEGARANTIE,EXPRESSEOUIMPLI-
CITE.
• L’INOBSERVATIONDESINSTRUCTIONS,AVERTISSEMENTSETCONSEILSDESÉCURITÉDECEMODED’EMPLOI
PEUTENTRAÎNERLAMORT,DESATTEINTESCORPORELLESGRAVES,DESDÉGÂTSMATÉRIELSDUSAUX
RISQUESD’INCENDIE,D’EXPLOSION,DEBRÛLURE,D’ASPHYXIE,D’EMPOISONNEMENTAUMONOXYDEDE
CARBONEET/OUDEDÉCHARGEÉLECTRIQUE.
• Vousdevezlireetcomprendre intégralement cemoded’emploiavant decommenceràutiliser le radiateuretnotammentde le
déballer,delemonter,del’alimenterencarburant,del’inspecter,del’allumer,delefairefonctionner,delerégler,del’éteindre,de
lelaisserrefroidir,deledéplaceroudelestocker.
• Veillezàconservercemoded’emploienlieusûrpourqu’ilsoitdisponibleencasdebesoin.
• Nelaissezpersonnen’ayantpasluetcompriscemoded’emploimonter,inspecter,allumer,fairefonctionner,régler,éteindre,lais-
serrefroidir,remplir,déplaceroustockerleradiateur.
• Respectezlaréglementationenvigueurpourcetyped’appareil.
• Enparticulier,l’installationdel’appareildoitêtreeffectuéedanslerespectdelaréglementationenvigueur.
IMPORTANT
50348 − 200001
14003 C
Printed in Japan
Manufacturer
4-1 Yamana-cho, Fukuroi 437-0042 Japan
Tel +81-538-23-3990 Fax +81-538-23-3192
USER REGISTRATION
Please enter the following temporary ID & Password and complete the user registration form on our
website. By completing your registration, you will obtain your own ID & Password.
This allows you to download the owner's manual and/or parts list from our website.
Enregistrement de l'utilisateur
Veuillez entrer l’identifiant et le mot de passe temporaires suivants et remplir le formulaire
d’enregistrement de l’utilisateur sur notre site Web. En Faisant cela, vous pourrez obtenir un identiant et
un mot de passer personnalisé.
Cela vous permettra de télécharger le mode d’emploi et/ou la liste des pièces détachées à partir du site Web.
BENUTZERREGISTRIERUNG
Bitte geben Sie auf unserer Website die folgende vorübergehende ID/Passwort-Kombination ein und
füllen Sie das Benutzerregistrierungsformular aus. Durch Vervollständigen der Registrierung erhalten Sie
dann ihre eigene ID/Passwort-Kombination.
Danach können Sie Bedienungsanleitungen und Teilelisten von unserer Website herunterladen.
GEBRUIKERSREGISTRATIE
Gebruikt u alstublieft de volgende combinatie van tijdelijk ID en wachtwoord om het formulier voor de
gebruikersregistratie op onze website in te vullen. Door de registratie op deze manier uit te voeren, kunt
u uw eigen ID en wachtwoord krijgen.
Op deze manier kunt u dan de handleiding of de onderdelenlijst downloaden van onze website.
REGISTRO DE USUARIO
Introduzca el nombre y la contraseña de identificación temporal y complete el formulario de registro
de usuario en nuestro sitio Web. Después de haber completado el registro, obtendrá su nombre y
contraseña de identicación personales.
De este modo, podrá descargar el manual de instrucciones y la lista de piezas desde nuestro sitio Web.
l ID: VAL6
l Password: shizuoka
l http://www.shizuoka-seiki.co.jp/eg.html
背 4mm
Deutsch
Español
Nederlands
VAL6_MPX_Multi_cover.indd 1 14/04/01 10:50
• Dezehandleidingbevatbelangrijkeinformatieoverhoeumethettoestelmoetomgaan,overdebedieningenhetonderhoud.NIET
OPVOLGENVA N DE INSTRUCTIES,VOORZORGSMAATREGELEN,OFVEILIGHEIDSTIPS INDEZEHANDLEIDING
MAAKTAUTOMATISCHELKEGARANTIE,EXPLICIETOFIMPLICIET,ONGELDIG.
• NIETOPVOLGENVAN DEINSTRUCTIES,VOORZORGENENVEILIGHEIDSTIPSINDEZEHANDLEIDINGKANRE-
SULTERENINOVERLIJDEN,ENRSTIGLICHAMELIJKLETSELENVERLIESVAN EIGENDOMMENOFSCHADEALS
GEVOLGVAN BRAND,ONTPLOFFING,VERBRANDING,VERSTIKKING,KOOLMONOXIDEVERGIFTIGING EN/OF
ELEKTRISCHESCHOKKEN.
• Zorgervoordatudezehandleidingheeftgelezenendatudeinstructiesgoedbegrijptvooru,opwatvoormanierdanook,het
verwarmingstoestelgaatgebruiken,inclusiefhetuitpakken,inelkaarzetten,tanken,inspecteren,ontsteken,bedienen,instellen,uit
zetten,latenafkoelen,verplaatsenofopslaanvanhetverwarmingstoestel.
• Bewaardezehandleidingzodatuerlaternogeensietsinopkuntzoeken.
• Laatniemanddiedezehandleidingnietgelezenenbegrepenheefthetverwarmingstoestelinelkaarzetten,inspecteren,ontsteken,
bedienen,instellen,uitzetten,latenafkoelen,tanken,verplaatsen,ofopslaan.
• Volgderelevanteregelgevingvandeplaatselijkeautoriteitenstiptop.
• Deinstallatievanhettoesteldienttegeschiedenovereenkomstigderelevanteregelgevingvandeplaatselijkeautoriteiten.
BELANGRIJK
• Estemanualdelpropietarioincluyeinformaciónimportantesobrelamanipulación,operaciónymantenimientocorrectos.SINO
SESIGUENLASINSTRUCCIONES,PRECAUCIONES,OSUGERENCIASDESEGURIDADDEESTEMANUAL,SEANU-
LARÁNTODASLASGARANTÍAS,EXPRESASOIMPLÍCITAS.
• SINOSESIGUENLASINSTRUCCIONES,LASPRECAUCIONES,YLASSUGERENCIASDESEGURIDADDEESTE
MANUALSECORRERÁELPELIGRODEMUERTE,DESERIASLESIONESPERSONALESYDEPÉRDIDASODAÑOS
MATERIALESDEBIDOSAINCENDIOS,EXPLOSIONES,QUEMADURAS,ASFIXIA,ENVENENAMIENTOCONMO-
NÓXIDODECARBONO,Y/ODESCARGASELÉCTRICAS.
• Leaycomprendatodoestemanualdelpropietarioantesdeutilizarelcalefactordecualquiermanera,incluyendoeldesembalaje,
montaje,repostado,inspección,operación,ajuste,desconexión,enfriamiento,desplazamiento,oalmacenamientodelcalefactor.
• Conserveestemanualparaqueelusuariopuedaconsultarlocuandoseanecesario.
• Nopermiteanadiequenohayaleídoycomprendidoestemanualdelpropietarioquemonte,inspeccione,encienda,opere,ajuste,
apague,enfría,reposte,desplace,oalmaceneelcalefactor.
• Deberánseguirselosrequisitosdelasautoridadesdelajurisdicciónpertinente.
• Lainstalacióndelaunidaddeberállevarseacabodeacuerdoconlasregulacionesdelasautoridadesdelajurisdicciónpertinente.
IMPORTANTE
• DieseBedienungsanleitungenthältwichtigeInformationenfürvorschriftsmäßigeHandhabung,BetriebsweiseundWartung.
NICHTBEACHTUNGDERANWEISUNGEN,VORSICHTSMASSREGELNUNDSICHERHEITSTIPPSINDIESERANLEI-
TUNGLÄSSTAUTOMATISCHDIEGARANTIE,SOWOHLDIEVERTRAGLICHEALSAUCHDIEGESETZLICHE;NICH-
TIGWERDEN.
• DIENICHTBEACHTUNGDERANWEISUNGEN;VORSICHTSMASSREGELNUNDSICHERHEITSTIPPSINDIESER
ANLEITUNGKANNDENTOD,SCHWEREVERLETZUNGENUNDVERMÖGENS-ODERSACHSCHÄDENDURCH
FEUER,EXPLOSION,VERBRENNUNG,ERSTICKEN,KOHLENMONOXIDVERGIFTUNG,UND/ODERELEKTRISCHEN
SCHLAGNACHSICHZIEHEN.
• LesenundverstehenSiedieseBedienungsanleitungvordemGebrauchdesHeizers.DerGebrauchschließthierbeidasAuspacken,
Zusammenbauen,Betanken,Überprüfen,Feuern,Betreiben,Einstellen,Ausschalten,Abkühlen,UmstellenundLagerndesHeizers
mitein.
• BittebewahrenSiedieseAnleitungfürdenBenutzersowieauchzumspäterenNachlesengriffbereitauf.
• Auspacken,Zusammenbauen,Betanken,Überprüfen,Feuern,Betreiben,Einstellen,Ausschalten,Abkühlen,UmstellenundLagern
desHeizersdarfnurvonPersonendurchgeführtwerden,diedieseBedienungsanleitunggelesenundverstandenhaben.
• AlleAuagenundVorschriftenörtlicherBehördenmüsseneingehaltenundbefolgtwerden.
• DieAufstellungbzw.InstallationdesGerätsmussunterBeachtungderörtlichgeltendenbehördlichenAuagenundVorschriften
erfolgen.
WICHTIG
VAL6_MPX_Multi_cover.indd 2 14/04/01 10:50

Contents
Sommaire
Inhoud
Inhalt
Índice
1. Special precautions............................................ 2
2. Names of components ....................................... 6
3. How to use........................................................... 7
3-1. Preparation for operation............................ 7
3-2. Operating procedures ................................. 9
3-3. How to connect the Control Device ......... 10
3-4. Use of the Heat Shielding Mat ...................11
3-5. Operation with Portable Generator...........11
4. Inspection...........................................................11
4-1. Daily inspection ......................................... 12
4-2. Periodic inspection.................................... 13
5. How to replace the Nozzle & Fuse................... 13
6. How to store the heater.................................... 14
7. Troubleshooting................................................ 15
8. Specications.................................................... 16
9. Safety Labels..................................................... 17
1. Précautions particulières................................. 18
2. Nomenclature.................................................... 22
3. Utilisation........................................................... 23
3-1. Préparation à l’utilisation.......................... 23
3-2. Procédures principales............................. 25
3-3. Connexion du dispositif de commande... 26
3-4.
Utilisation du tapis de protection thermique
... 27
3-5. Fonctionnement sur générateur............... 27
4. Inspection.......................................................... 27
4-1. Inspection quotidienne ............................. 28
4-2. Inspection périodique ............................... 29
5. Remplacement du gicleur et du fusible.......... 29
6. Stockage du chauffage..................................... 30
7. Dépannage......................................................... 31
8. Caractéristiques techniques............................ 32
9. Étiquettes de sécurité....................................... 33
1. Besondere Vorsichtsmaßregeln...................... 34
2. Bezeichnungen der Bauteile............................ 38
3. Gebrauch ........................................................... 39
3-1. Betriebsvorbereitungen ............................ 39
3-2. Betrieb ........................................................ 41
3-3. Anschließen der Steuervorrichtung......... 42
3-4. Gebrauch der Hitzeschutzmatte............... 43
3-5.
Betrieb mit einem tragbaren Stromerzeuger
... 43
4. Inspektion.......................................................... 43
4-1. Täglich zu kontrollierende Punkte ........... 44
4-2. Regelmäßige Wartung............................... 45
5. Austauschen der Düse und Sicherung........... 45
6. Lagerung des Heizers....................................... 46
7. Störungssuche.................................................. 47
8. Technische Daten ............................................. 48
9. Sicherheitsschilder........................................... 49
1. Speciale voorzorgen......................................... 50
2. Namen van de onderdelen ............................... 54
3. Gebruiksaanwijzing .......................................... 55
3-1. Voorbereidingen voor gebruik.................. 55
3-2. Bedieningsprocedures.............................. 57
3-3. Aansluiten van het bedieningsapparaat ... 58
3-4. Gebruiken van de hitteschildmat ............. 59
3-5.
Bediening met een verplaatsbare generator
... 59
4. Inspectie ............................................................ 59
4-1. Dagelijkse inspectie .................................. 60
4-2. Periodieke inspectie.................................. 61
5. Vervangen van mondstuk & zekering ............. 61
6. Opslaan van het verwarmingstoestel ............. 62
7. Oplossen van problemen................................. 63
8. Technische gegevens....................................... 64
9. Veiligheidslabels............................................... 65
1. Precauciones especiales ................................. 66
2. Nomenclatura de los componentes ................ 70
3. Modo de utilización........................................... 71
3-1. Preparativos para la operación ................ 71
3-2. Procedimientos de operación .................. 73
3-3. Cómo conectar el dispositivo de control... 74
3-4. Empleo de la esterilla termoaislante........ 75
3-5. Operación con un generador portátil ...... 75
4. Inspección ......................................................... 75
4-1. Daily inspection ......................................... 76
4-2. Inspección periódica................................. 77
5. Cómo reemplazar la boquilla y el fusible ....... 77
6. Cómo guardar el calefactor ............................. 78
7. Solución de problemas .................................... 79
8. Especicaciones............................................... 80
9. Etiquetas de seguridad .................................... 81
VAL6_MPX_Multi.indb 1 14/04/01 10:52

2
1Special precautions
Thank you for having bought our Infrared Oil Heater “VAL6”.
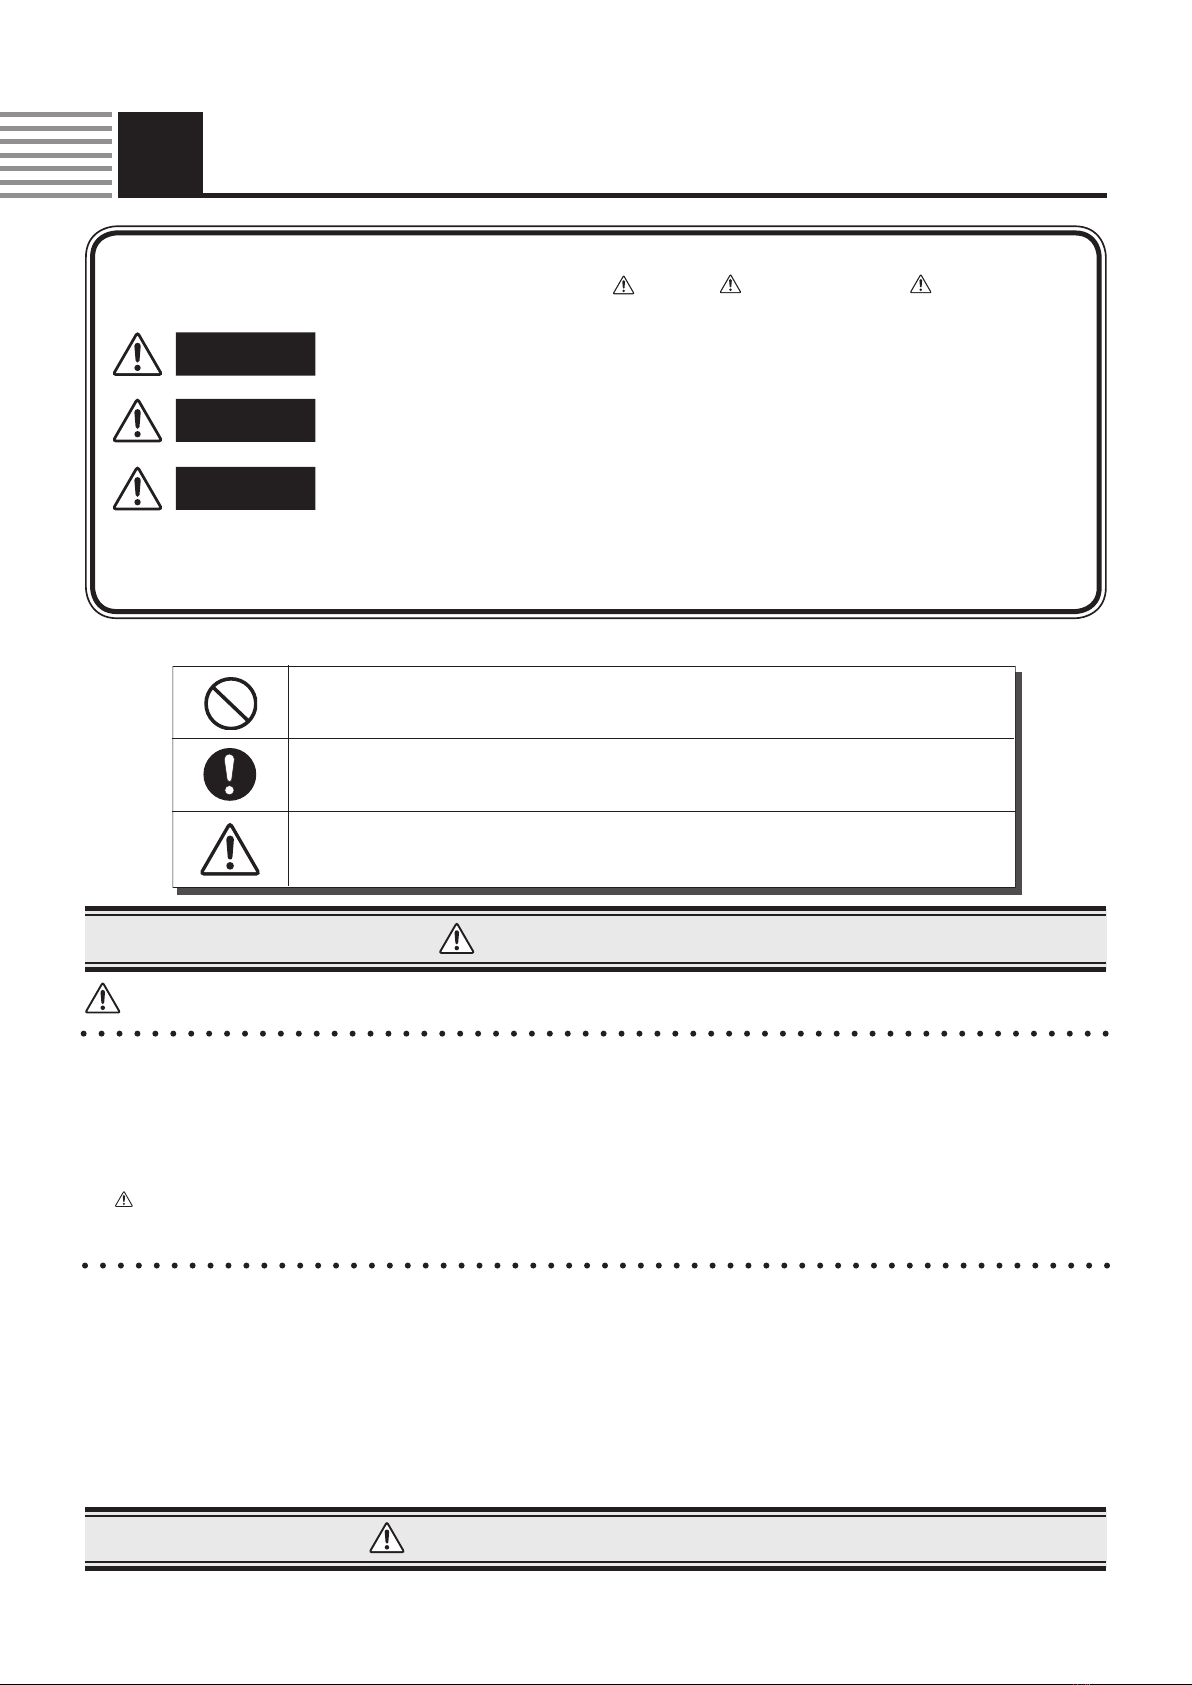
■Following signs, used throughout this Manual, are dened as follows:
Important Notice
◆This Manual explains necessary precautions that must be strictly followed for proper and safe op-
eration. Precautions are divided into 3 categories Danger, Warning, and Caution. Please read
and understand well the details and meanings of each category.
* Depending upon the circumstances, even the category of “CAUTION” can lead to grave damage to persons and/or
property. Caution and recommendation listed in each category are equally important for safe operation, so be sure to
follow the precautions in all 3 categories.
WARNING
●When operating or servicing this heater, please follow all instructions described in this Manual.
●When replacing parts, use only the genuine parts made or approved by the manufacturer of the heater. Please note that we shall not be held
responsible or liable for any damage or accident that results from using any unapproved or non-genuine parts.
●We shall not be held liable or responsible for any damage or accident that results from disobeying or not properly carrying out any instruc-
tions in this Manual, or from the improper modication or operation of the heater.
●The State of California requires the following warning:
WARNING: COMBUSTION BY-PRODUCTS PRODUCED WHEN USING THIS PRODUCT CONTAIN CARBON MONOXIDE, A CHEMI-
CAL KNOWN TO THE STATE OF CALIFORNIA TO CAUSE CANCER AND BIRTH DEFECTS (OR OTHER REPRODUCTIVE HARM).
1.
As we cannot predict every possible situation of danger while operating this heater, the contents described in this Manual could not fully
foresee a whole range of possible dangers. So, when operating or doing daily inspection (to this heater), please pay full attention not only to
the contents of this Manual and the Labels on the heater itself, and also be constantly alert for factors that might affect the safe operation of
the heater. Do not hesitate to stop operation and contact your dealer if you have any questions about any matter not discussed in this Manual.
2. If you have any question or want to know more detailed information about the heater, please contact your dealer.
3. If any irregular or missing page(s) is found in this Manual, please contact your dealer and we will exchange it with a new one.
4. Please keep the set of Standard Parts supplied with the heater.
5. The operator of the heater is responsible for warning anyone who works around the heater or comes near the heater of the dangers of the
heater and the safety precautions that must thereby be taken pursuant to this Manual.
“DANGER” means that failure to follow the given precaution (s) may lead
to death, serious injury and/or major re.
“WARNING” means that failure to follow the given precaution (s) may
likely result in death, serious injury, re and/or possible explosion.
“CAUTION” means that failure to follow the given precaution (s) may re-
sult in serious injury and/or property damage.
DANGER
WARNING
CAUTION
Prohibited
(This indicates “actions that are strictly forbidden”.)
Mandatory
(This indicates “actions or instructions” that must be carried out.)
Caution
(This indicates “actions” that require careful attention)
Purpose of this Owner’s Manual
This Manual aims to supply the user with detailed information on how to properly use, operate and service this VAL6 Heater.
VAL6_MPX_Multi.indb 2 14/04/01 10:52
3
English
* It is important that the safety precautions listed below are understood and followed prior to rst
operation of the heater. These precautions must also be followed thereafter.
To Help Ensure Safe Operation, Comply with the Following Precautions
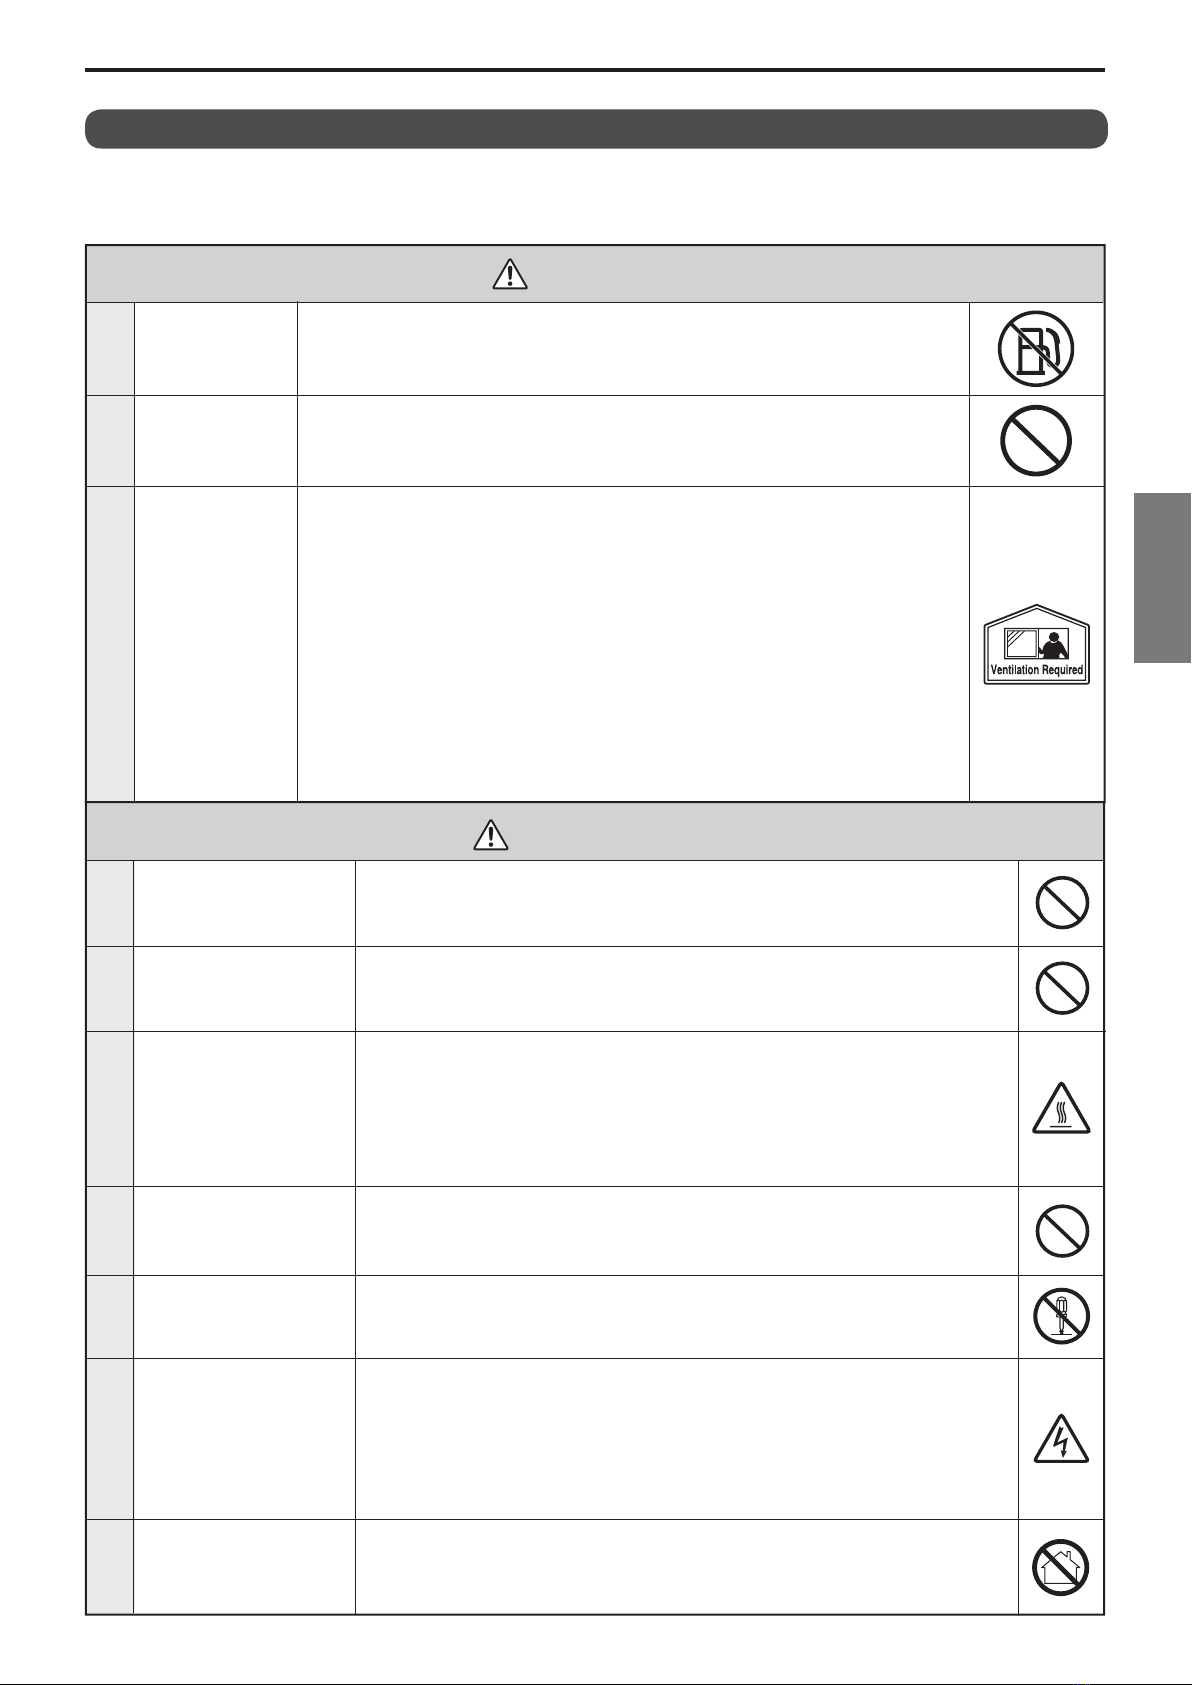
DANGER
1Use of gasoline
prohibited
Never use gasoline, for any purpose, for example, for cleaning or as fuel, in
connection with, or around, operation or storage of the heater, as a re and/or
explosion may result.
2Use of amma-
bles prohibited
Never use or store the heater where thinner, gasoline, liquid propane gas, or
other highly ammable vapors, etc., are present, because these may lead to ex-
plosion or re.
3Ventilation
required
Never use the heater in poorly ventilated areas. Poor ventilation allows a build-
up of carbon monoxide produced by the heater, especially if there is also inad-
equate combustion. CARBON MONOXIDE is a colorless and odorless poison-
ous gas that may lead to death or other injury. Always provide a fresh supply
of outside or circulating air whenever the heater is used. Some people are more
affected by carbon monoxide than others, including pregnant women, persons
with heart disease, lung disease, anemia, and/or under the inuence of alcohol.
High altitude also creates a higher danger of susceptibility to carbon monoxide.
Danger signs that a person may be suffering from carbon monoxide poisoning
include, headache, dizziness, burning eyes and nose, nausea, and dry mouth or
sore throat. If any of these symptoms occur, immediately seek medical atten-
tion, ventilate the area, and turn the heater off. This heater requires approxi-
mately at least 2,800 cm2(3.06 ft2) opening per unit when it is used indoor.
1
2
3
5
6
WARNING
Keep aerosol contain-
ers away from the
heater
Never place sealed, pressurized containers (such as aerosol cans) near the heat-
er as exposure to heat from the heater may build up pressure in the container
and cause it to explode with deadly force.
Never use the heater
where ammable
dusts are present
Never operate the heater where highly ammable dusts (of wood, paper, tex-
tile, etc.) are present. Dusts, after sucked and heated by the heater, will be
blown out “sparked” and cause a re.
Be careful of hot sur-
faces on and around
the heater
Portions of the heater (both while the heater is in operation and for 30 minutes
or more after the heater is turned off), are hot to the touch and may burn the
skin and/or ignite clothing and other combustible materials. Avoid touching
the burner and nearby areas while the heater is in operation and for at least 30
minutes after it is turned off. Also do not move or service the heater while it is
operating or hot.
Modication of the
heater prohibited
Never modify the heater by any means. Any modication may increase the
chance of burns, res, explosions, or other problems before, during, and after
operation of the heater.
Be careful of electri-
cal shock
To avoid electrical shock, never use the heater where exposed to rain, snow
or high humidity. If the heater or any part of it becomes immersed in water,
immediately contact a qualied service agency to inspect the heater and de-
termine if anything needs to be replaced prior to further operation. Make sure
the power plug is disconnected from the electrical outlet, before starting daily
inspection and maintenance.
4Do not service the
heater while burning
Do not service or handle the heater while burning, in operation, hot or
plugged-in to avoid any injury and/or trouble.
7Never use the heater
for any residential
application
This heater is for industrial use only. Never use the heater for any residential
application at all time. Wrong use of this heater can result in potential death,
serious injury, re and/or possible explosion.
VAL6_MPX_Multi.indb 3 14/04/01 10:52
4
To Help Ensure Safe Operation, Comply with the Following Precautions
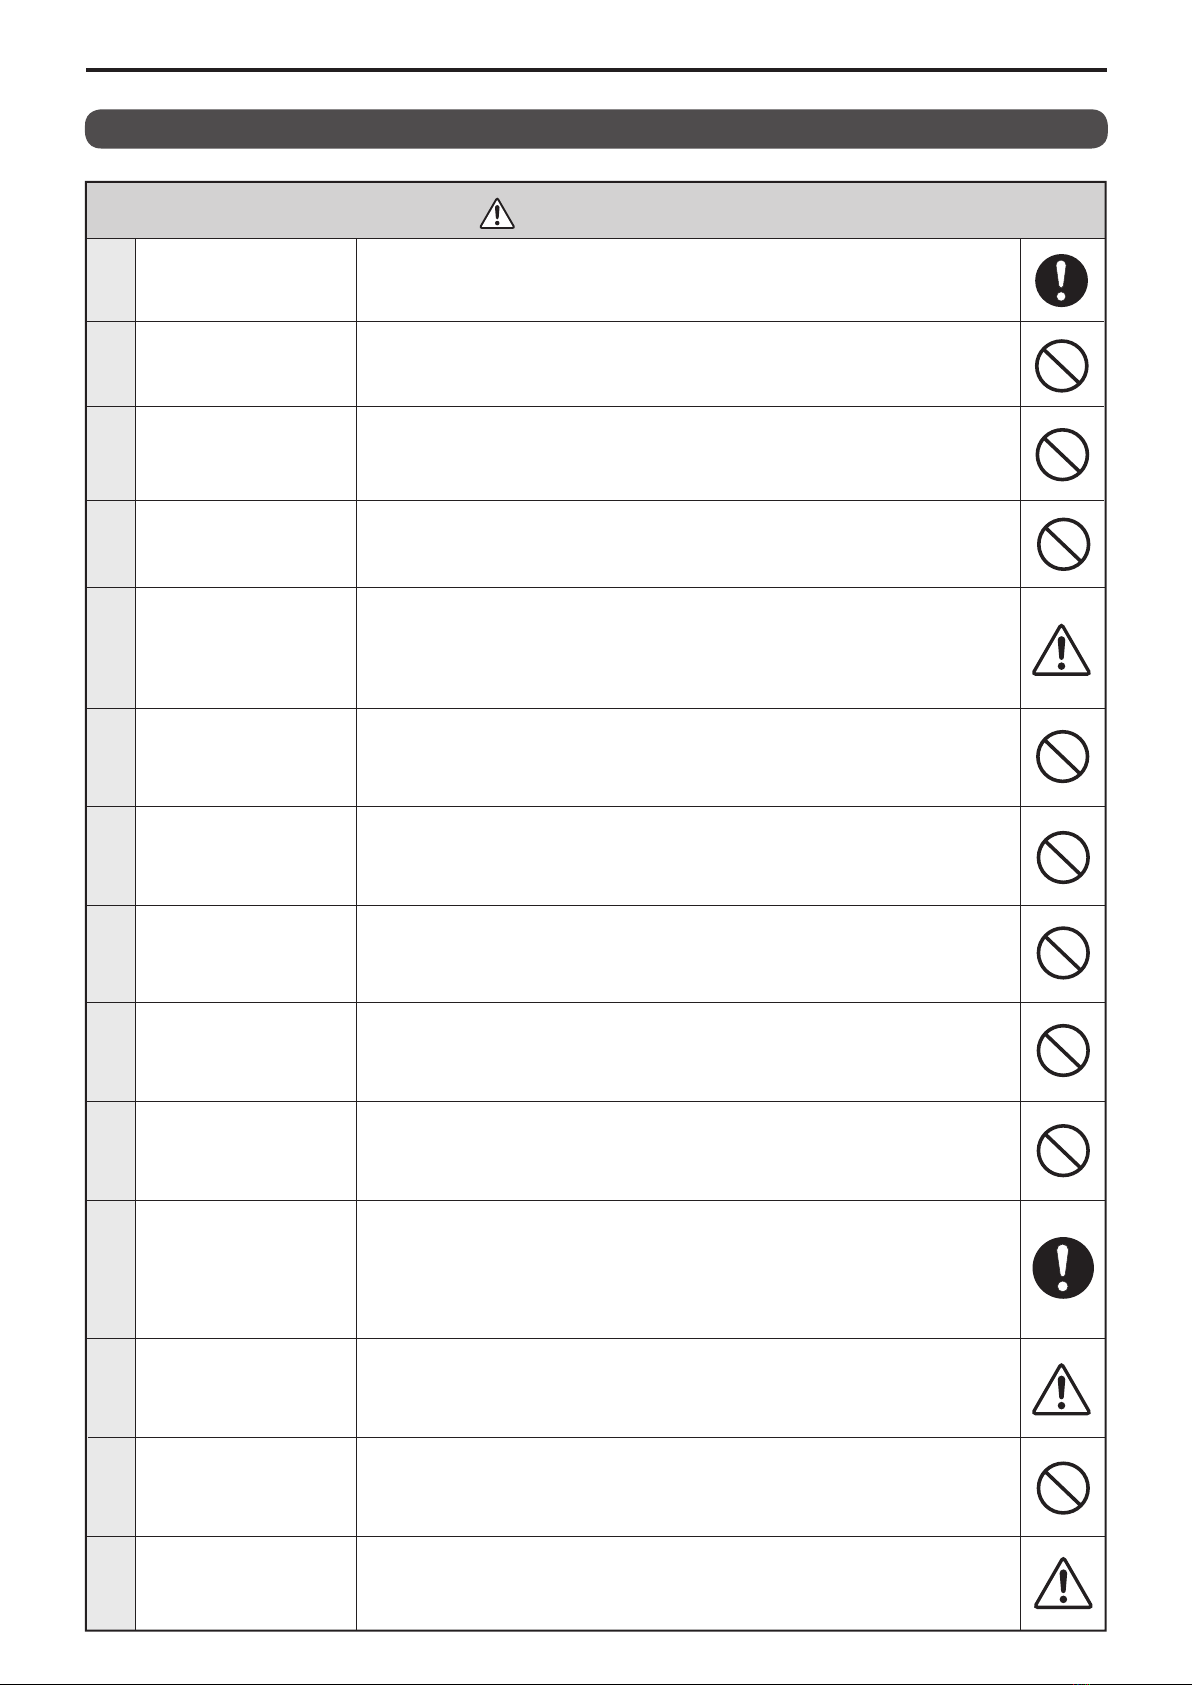
CAUTION
2
3
Do not block the
heater
To avoid a re, never place any object within one (1) meter (3.28 feet) from (the
front of) the radiation disk.
Do not try to ignite
the heater more than
3 times in a row
If the heater does not ignite the rst time, do not try to ignite more than two more times
in a row thereafter because a re may result. If the heater does not ignite after the third
attempt, stop trying and consult your dealer prior to further operation of the heater.
1Keep flammable ma-
terials away from the
heater
To avoid a re, please keep all ammables more than 2.5m (8.2ft.) away from
the front of the radiation disk, and more than 2m (6.56ft.) away from all sides
(left/right and top/rear) of the heater.
5
Placing the heater on
combustible matter or
ooring is prohibited
The heater is for use on non combustible matter or ooring only unless the
shielding mat, part #503002-05001 is used.
Materials of shielding mat : glass cloth and aluminum lm
Dimension of shielding mat : 1200 x 1200 x (3.5) mm (L x W x H)
6
7
8
9
10
Operation of the heater
when either the heater or the
operator is wet is prohibited
Do not use the heater where it is exposed to water, e.g, rain or snow, and do
not operate the heater with wet hands or if it becomes wet. Water contact may
cause an electric shock or other danger or malfunction.
Do not use the heater
in high altitudes
When the heater is used in an altitude higher than 1000m (3000 ft) above sea
level, some adjustments will be required. Please contact your dealer about the
adjustments. The heater, if not duly adjusted, may cause a re.
Stop using the heater
when anything ir-
regular is found
If a burning smell or smoke occurs during operation of the heater, immediately
turn off the heater and consult your dealer. Further operation may result in a
re or other hazard.
Do not move the heater
while in operation
Moving the heater while it is on or otherwise in operation is prohibited. Move-
ment may result in a re, especially if the heater is overturned or unbalanced.
Turn the heater off by
operation switch
Be sure to shut off the heater by switching off. Do not stop the heater by un-
plugging. Doing so may cause trouble in the heater.
11 Turn off while refuel-
ing
Never rell the fuel tank when the heater is on or it is still hot. Refueling while the
heater is still operating or hot may cause a “ash back” of ames to the fuel container
or other hazard, causing serious injury and/or property damage. For the same reason,
refueling should only be done outdoors and away from any open ame. In addition,
spilling fuel on a carpet while refueling or otherwise creates an additional re hazard.
4Do not leave the heater unattended while it is in operation or cooling down so
that unexpected problems, such as re, can be dealt with immediately.
12
13
14
Use only the correct
voltage
Only electrical voltage and frequency specied on the model plate must be
used, to avoid a re, electrical shock and/or damage.
Ground the heater
before operation
Do not pull out the
power plug by pulling
on the power cord
When disconnecting the power cord, always pull out the plug, never the cord,
to unplug the cord. To pull out the cord may damage the cord itself and result
in re through electrical shock or short circuit.
Prior to operation, conrm that the heater is properly connected to a grounded
power cord and outlet. Attempting to use or operating the heater without prop-
er grounding may result in dangerous electrical shock.
Do not operate the
heater unattended
VAL6_MPX_Multi.indb 4 14/04/01 10:52

5
English
CAUTION
20
21
Do not operate in ex-
treme temperatures
Make sure that the heater operates at temperatures between –20oand 40oC (–4o
and 104oF). If the heater operates at more than 40oC (104oF), the heater will
overheat and result in re.
Provide the Owner’s
Manual to the new
owner
If the heater is sold or given to a new owner, make sure that this Owner’s
Manual is transferred to the new owner along with the heater.
22 Do not use fuel of low
quality Do not use fuel of low quality such as discarded oil or fuel mixed with water.
23 Be careful when
moving or storing the
heater
When the heater is moved or stored, it must be in a level position to avoid a
leakage of fuel.
15 Do not damage the
power cord
Do not place excessive force on the cord by bending, pulling, twisting, pinch-
ing or remodeling. Also, do not place any heavy objects on the heater, etc. that
may damage it, to avoid a re and electric shock.
16 Use gloves When cleaning the heater, use gloves, to avoid any injury to hand or ngers.
Use of gloves while operating and moving the heater is also recommended.
17
18
19
Make sure the flame
is extinguished and
the power off before
leaving the heater un-
attended
After shutting off the heater, make sure that the ame is extinguished and the
power disconnected before leaving the heater unattended. It is also not safe
to leave the heater unattended while it is cooling off or to leave it in any area
where children are present or may come upon it.
Do not dispose of the
heater illegally
When you dispose of the heater, please do not dispose of it illegally and con-
sult your local authorities or specialists on how to properly dispose of it.
Do not use the heater
in the following places
or conditions
To prevent accident or injury, do not use the heater in the following places or
under the following conditions:
• On vibrating, trembling, or unstable ooring
• On ladders, scaffolds, or sawhorses
• On any oor that is slanted, sloped, or not level
• On stairs or anywhere where it might block access to emergency exits
• Near unstable or stacked materials
•
In windy, humid, or dusty areas, and areas where metal particles are present
• In areas where the ow of people or vehicles is impeded or obstructed
Always use caution in determining where to place the heater for use or storage
and take into account both present and potential future dangers.
24 Keep away from chil-
dren
The heater should not be used, cooled, or stored where children could have ac-
cess to it. The heater must not be ignited, operated, maintained, attended to, or
otherwise used in any way by children.
25 Children or the hand-
icapped are not to
operate this heater
This heater is not to be operated by children or physically handicapped or
person without proper knowledge and experience unless they have been given
proper supervision or instruction.
26 Never look directly
straight into the ra-
diation disk
While the heater is in operation, avoid looking straight into the radiation disk.
It may cause eye injury.
To Help Ensure Safe Operation, Comply with the Following Precautions
VAL6_MPX_Multi.indb 5 14/04/01 10:52
6
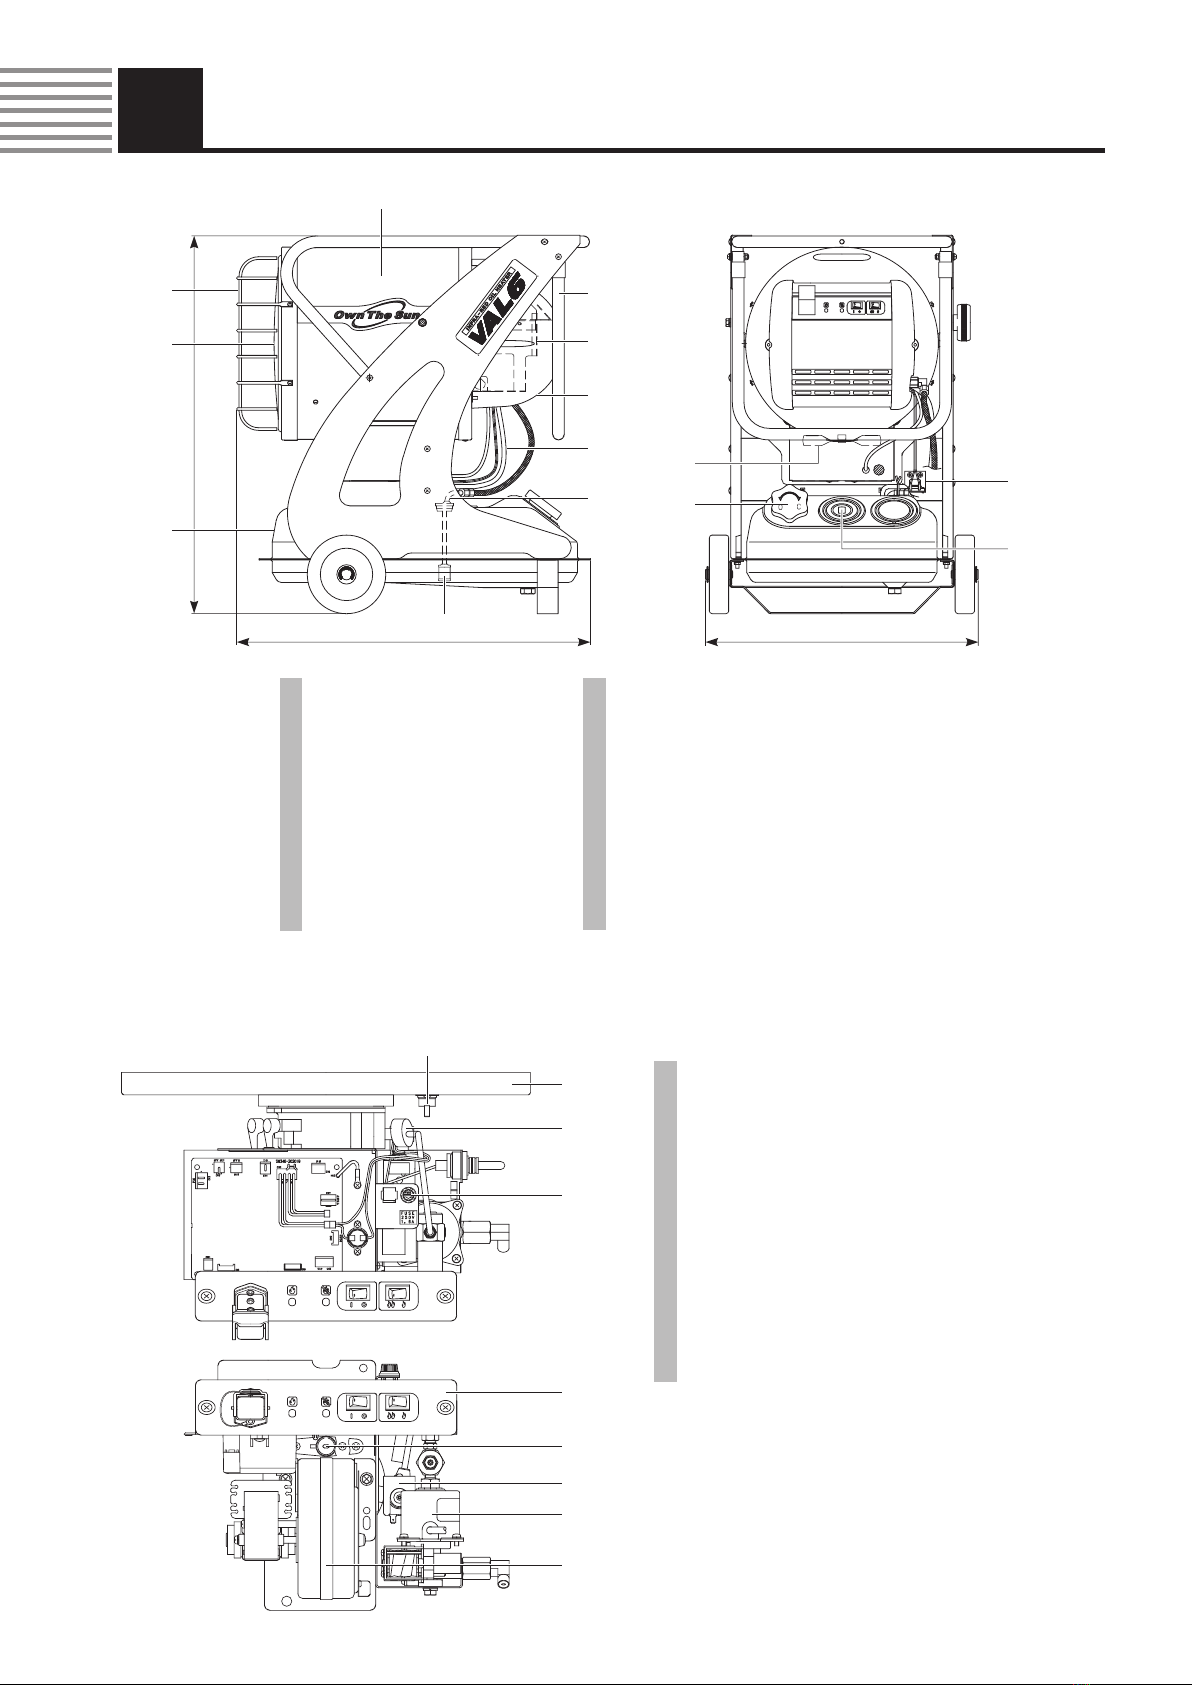
2Names of components
721.6
677.6 521.8
r
w
q
y
o
!3
t
!1
!4
i
!0
e
u
!2
!5 Insulating Board
!6 Overheat Prevention System
!7 Fuse
!8 Flame Monitor
!9 Fan Motor
@0 Switch Section
@1 Fuel Pump
@2 Fuel Preheater
@3 Solenoid Valve
◆Burner Section
iFuel Gauge
oFuel Tank Cap
!0 Suction Pipe
!1 Return Line
!2 Filter Element
!3 Burner Section
!4 Tip-over Switch
qRadiation disk
wCasing
eHandle
rGuard
tBurner Cover
yBlower
uFuel Tank
!5
!6
!7
!9
@2
@1
@3
@0
!8
VAL6_MPX_Multi.indb 6 14/04/01 10:52

7
English
◆Switch Section
•
Never use highly ammable fuel like gasoline, to avoid re.
•
Never contaminate or mix fuels. For example, never contaminate kerosene with gasoline by
using a gasoline container to carry kerosene. Even a small amount of gasoline, or other vol-
atile fuels, in kerosene is hazardous. Store kerosene only in containers specically labeled
and approved for kerosene and do not use the container for any other fuels or chemicals.
DANGER
3How to use
3-1. Preparation for operation
@3
@5@7 @6
@4 @3 Operating Switch
This ignites or extinguishes the ame. (Refer to pages 9.)
@4 Change-over Switch
This chages over combustion in two step.
@5 Operating Lamp
This is lit while (the heater is) operating and cooling
down.
@6 Misre Lamp
This is lit when the ame is extinguished irregularly.
@7 External Thermostat Connector
When the ame is extinguished, turn “OFF” the operating switch. Then turn “ON” the operating switch again after the cause
of misre is solved.
Description of Safety Devices
!4 Tip-over Switch Automatically extinguishes the ame when motion or an impact is detected during operation.
Operating condition : The misfire lamp lights and if the heater is operating, the fan will cool
down the heater for about 3 minutes (hereafter referred to as post purge).
!6 Overheat Preven-
tion System
Automatically extinguishes the ame should the heater overheat.
Operating condition : The misfire lamp lights and if the heater is operating, the fan will cool
down the heater for about 3 minutes (hereafter referred to as post purge).
!7 Electrical System
Protection (Fuse)
Cuts off power to the heater should an electrical surge pass through the circuit caused by
damage to the heater, etc.
Operating condition : The whole operation stops.
!8 Flame Monitor
This automatically extinguishes the ame when ignition fails or ame goes out during the
operation. This monitor, when it detects any irregularity before ignition, automatically extin-
guishes the ame.
Operating condition : The misfire lamp lights and if the heater is operating, the fan will cool
down the heater for about 3 minutes (hereafter referred to as post purge).
@2 Fuel Preheater This fuel preheater warms the fuel up to prevent its viscosity from rising. This starts to oper-
ate at the time of plugged-in if the ambient temperature is below 5℃ (41℉).
Anomaly detection
system for fan motor
This automatically extinguishes the ame when some errors are detected in fan motor such
as cable disconnection.
VAL6_MPX_Multi.indb 7 14/04/01 10:52
8
■Refueling
Observations
• Please use “kerosene” or “Fuel-Oil no heavier than No.2 (Diesel)” and do not use poor quality or foul fuel, to help avoid
ignition, operating, and other problems.
1 Remove the fuel cap and insert a handy
suction pump into the fuel tank.
1 Make sure that the operating switch is
“OFF”, then plug the power plug into the AC
power outlet.
2 Watch the fuel gauge while refueling.
When the gauge reaches the maximum
level, stop refueling.
2 Make sure a grounded power pin or
connection is used.
3 Wipe off any fuel that has spilled onto the
fuel tank or elsewhere.
Replace the fuel cap and tighten it securely.
Do not operate the heater with a loose fuel
cap or without a fuel cap.
• Please refuel only while the heater is turned off and completely extinguished.
• Use only the electric power (voltage and frequency) specied on the model plate of the
heater to operate the heater. Using electrical power different from the specications
may result in re, electrical shock, and/or damage.
• Please conrm the ground/earth cable is properly connected, to prevent electrical shock.
• When disconnecting the electric power cord, be sure to always pull the plug out by it-
self. Do not pull out the plug by pulling on the power cord. Also, do not allow or cause
excessive force to be exerted on the cord at any time to avoid damaging it and causing
a re or shock hazard. The heater should not be operated with the power cord in a taut
or tightened position to further avoid damage to the cord, accidental unplugging of the
electricity, and re and/or shock.
CAUTION
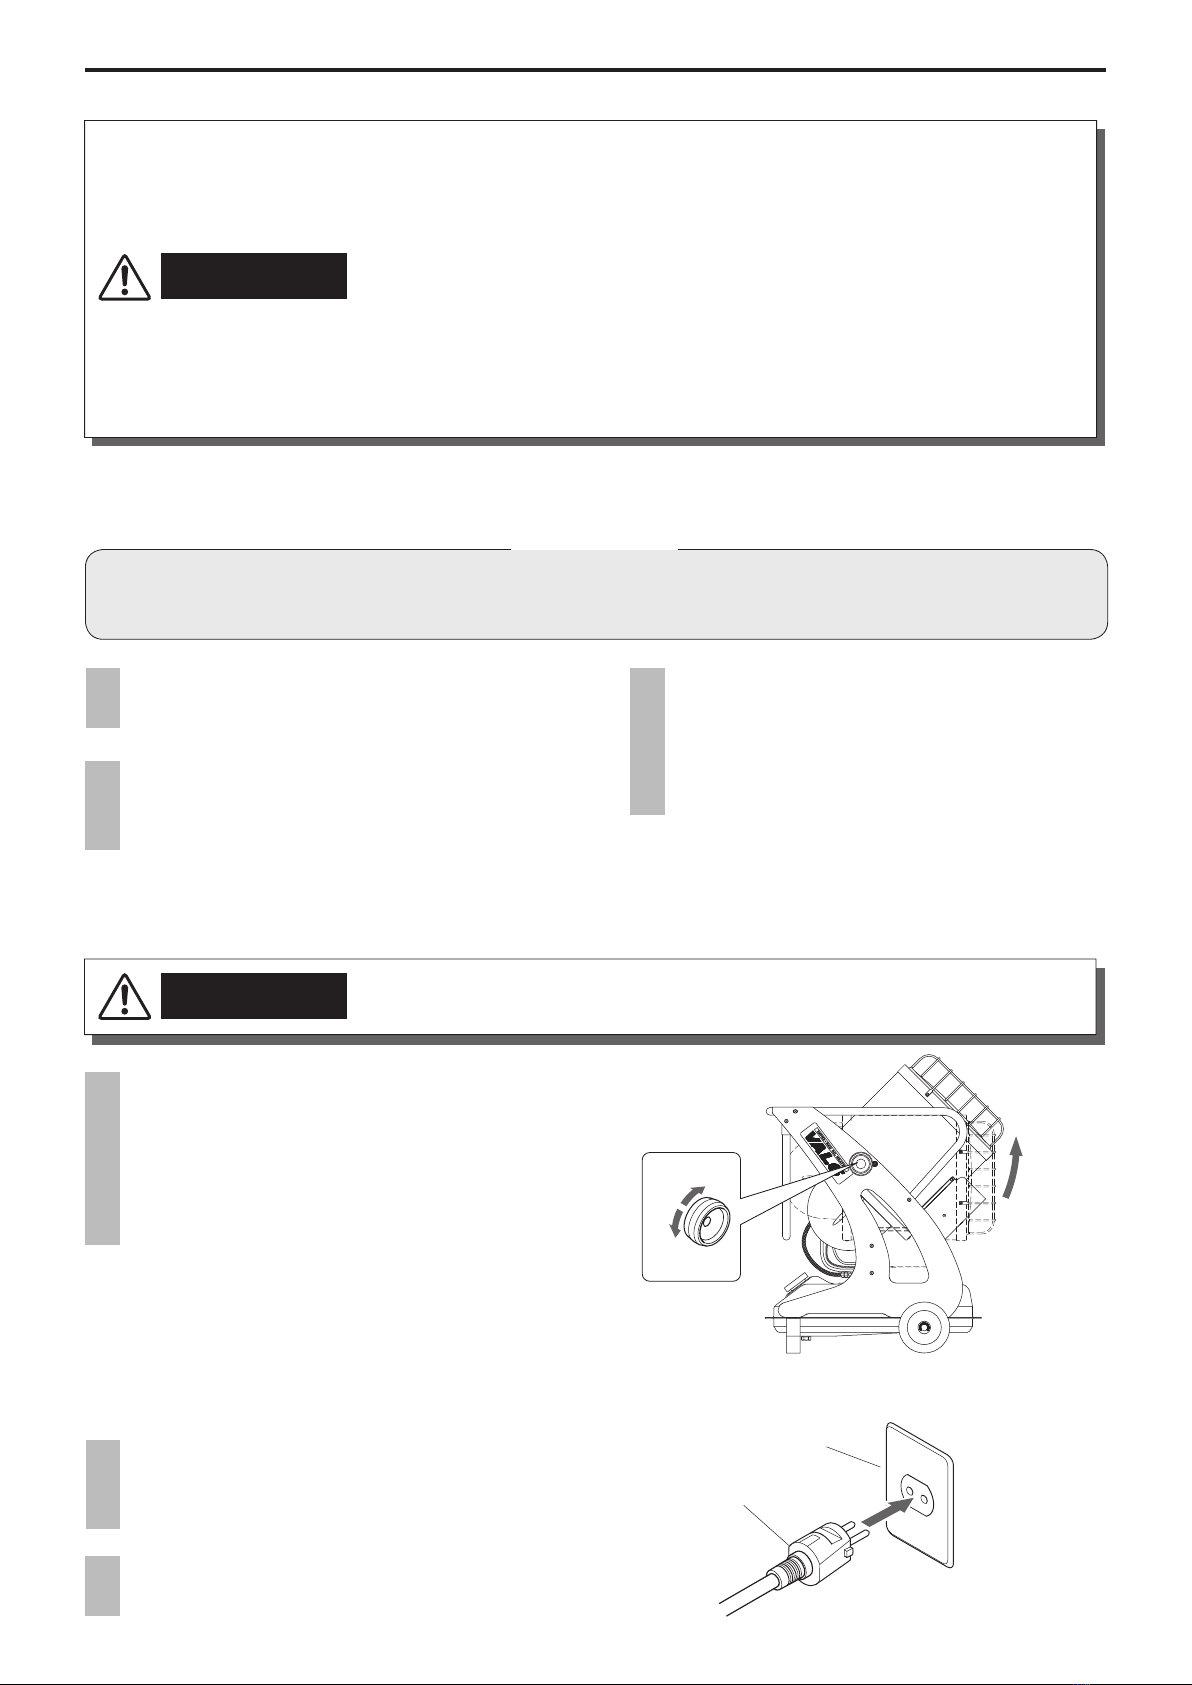
■ Adjust the angle of the main unit
• Do not adjust the angle of the main unit while the heater is plugged in, operating, or hot
to avoid severe burns and electric shock.
CAUTION
Prior to operation, loosen the knob bolt to
move and set the main heater unit at the
desired angle, and tighten the knob bolt
rmly.
The vertical angle of the radiation disk is
adjustable up to 45 degrees.
Tighten 45 degrees
Loosen
AC Outlet
Power Plug Connect
■ Connecting the power supply
VAL6_MPX_Multi.indb 8 14/04/01 10:52
9
English
3-2. Operating procedures
•
If you detect smoke or a burning smell coming from the heater, turn the heater off immediate-
ly to help prevent a re, contact your dealer and the heater inspected before further operation.
• More than three consecutive attempts to ignite the heater may cause a re. If the heater
does not ignite after three consecutive attempts, stop trying and contact your dealer for
an inspection of the heater.
•
When using the heater, be careful so that the oor surface (in front of it ) may not get overheated.
• Do not operate the heater, while fuel tank is dirty and foul, to prevent poor ignition or
improper burning.
CAUTION
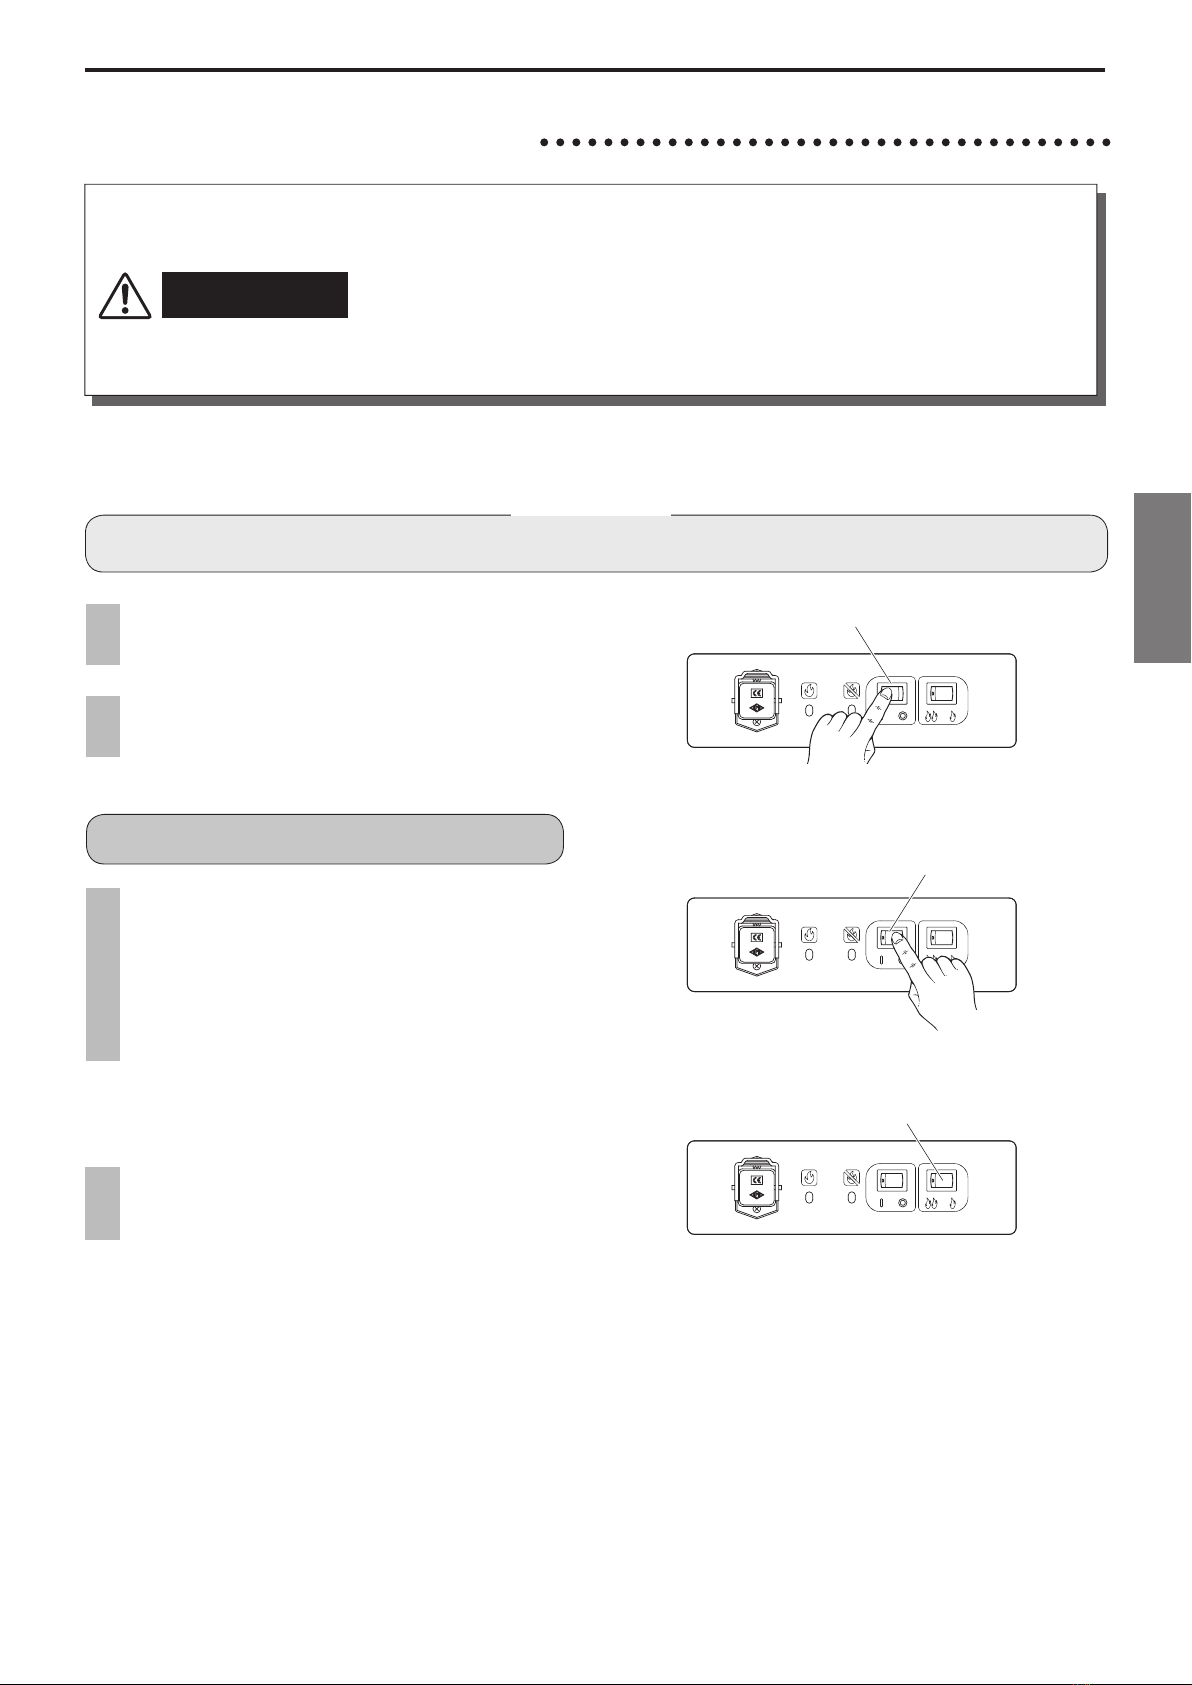
■ Ignition Procedures
Observations
• When switching on the heater, please make sure that the heater is ignited properly and its combustion is stable.
1 Use the fuel gauge to check if the fuel is
sufciently lled up in the tank.
2 Turn “ON” the operating switch, and the
heater will ignite in about 5 seconds.
If ignition fails, try again as follows
Stop the operation completely. Wait for the
operating lamp to turn off. After the operat-
ing lamp has turned off, try step 2 above
again. DO NOT TRY TO IGNITE THE
HEATER MORE THAN THREE TIMES IN A
ROW AS FIRE MAY RESULT.
■
Changing combustion speed
The heater has two-step combustion and it
can be changed by change-over switch.
Operating Switch “ON”
Operating Switch “OFF”
Change-over Switch
VAL6_MPX_Multi.indb 9 14/04/01 10:52
10
3-3. How to connect the Control Device
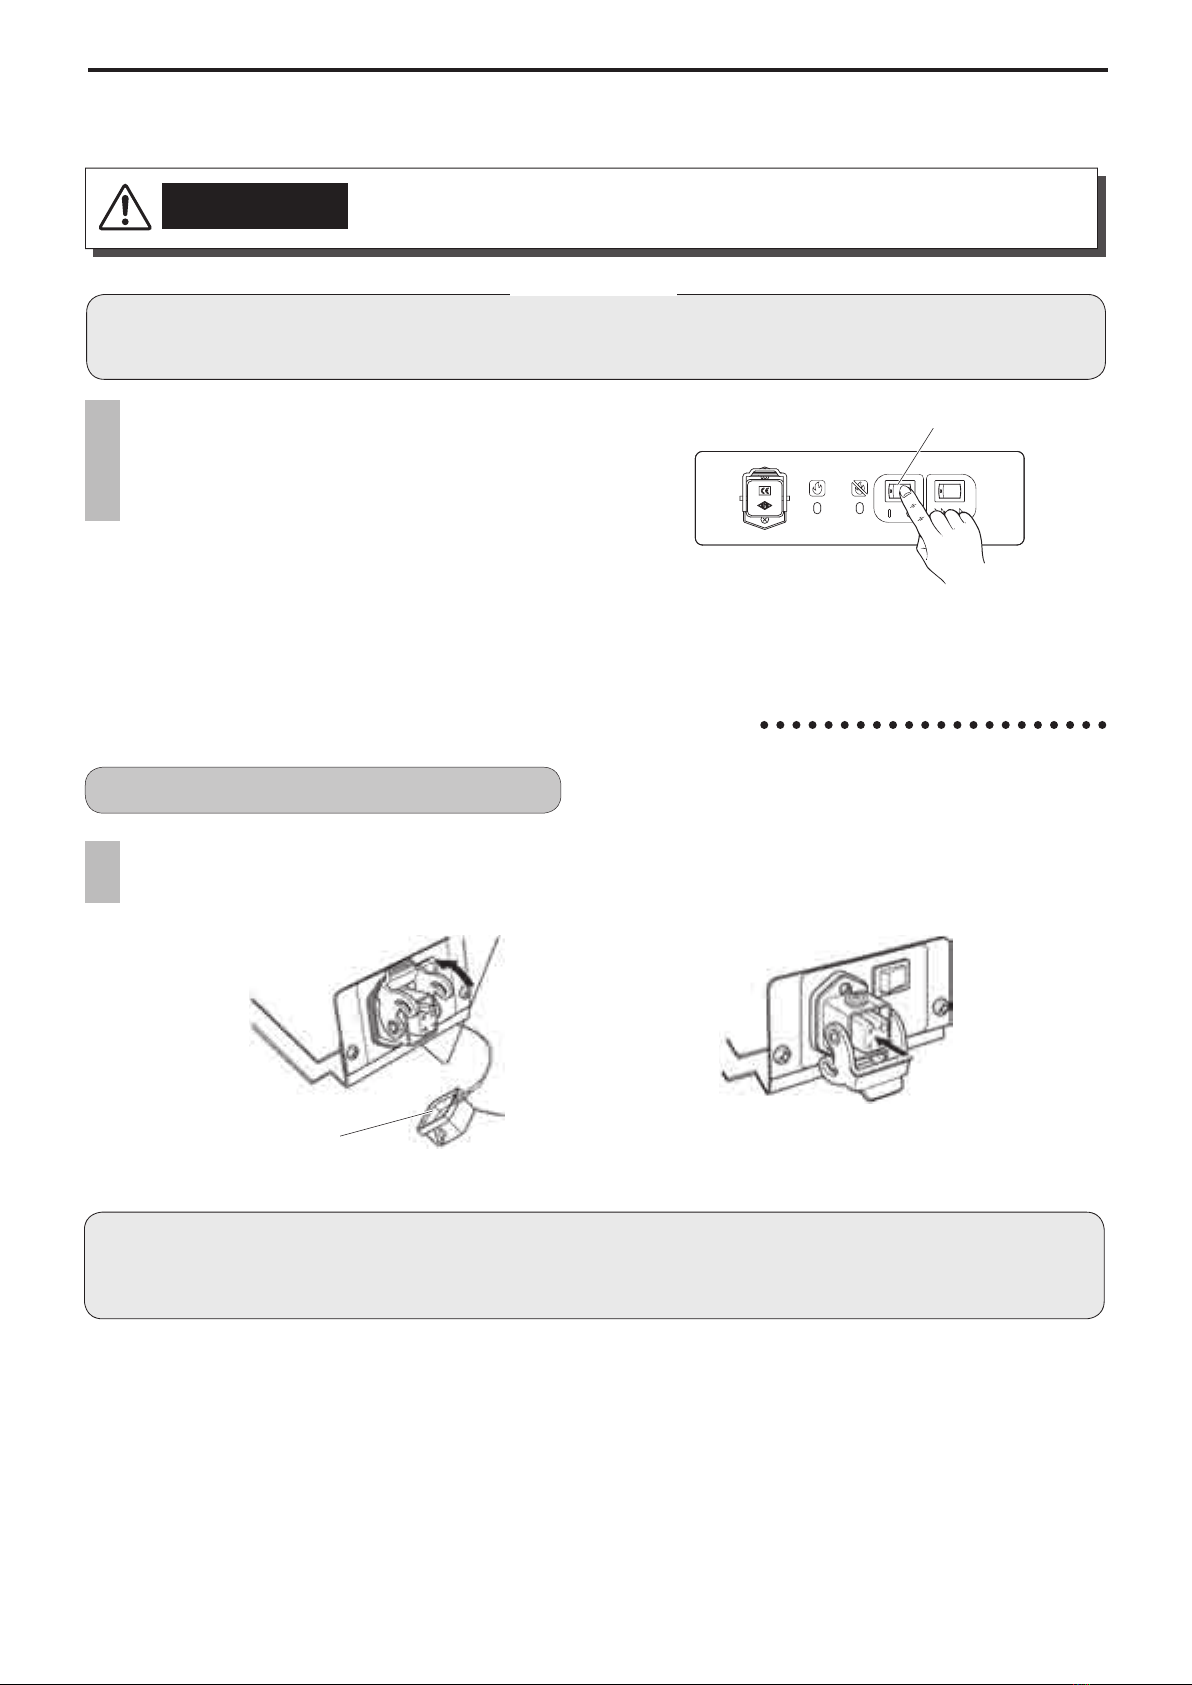
■ Shut-Down Operation
CAUTION • After the operation is shut down, please make sure that the ame is completely extin-
guished before leaving the heater unattended or moving or storing it.
Turn “OFF” the operating switch, and the
heater ame will be extinguished, then the
cooling operation will also automatically
stop after about three (3) minutes.
● If the heater is used for only a short period of time
after refueling, air inside of the fuel pipe may cause
the ame to icker when the heater shutting down.
This is not abnormal.
Observations
• Before you disconnect the power plug from the AC outlet, please make sure that the fan motor is stopped.
• Never disconnect the power plug while the heater is operating (cooling operation), it will cause nozzle to be clogged.
Operating Switch “OFF”
To connect the thermostat
Take the cap off and hook up thermostat
plug (No need to rewire)
Cap
Thermostat
Direct-coupling pin
Don’t forget to put the cap back unless the thermostat is connected to heater. Without the cap, heater won’t
operate at all with all circuit cut off. Therefore, there is the direct-coupling pin inside the cap and it must
be used.
VAL6_MPX_Multi.indb 10 14/04/01 10:52
11
English
• When the heater is controlled by another device (such as a thermostat or a timer), the
heater could turn itself on at any time.
• When the heater is controlled by another device, extra care must be taken to ensure that
the heater is not accidentally turned on without someone nearby who can immediately
attend to any problems when the heater is ignited, operating, and cooling off.
CAUTION
3-5. Operation with Portable Generator
• Before operating the heater from a portable generator, please conrm that the genera-
tor has been properly connected to the ground earth. To operate the generator without
proper grounding may result in electrical shock. Please refer to the owner’s manual
supplied by the generator’s manufacturer.
WARNING
4Inspection
• Before starting any inspection or service, to avoid electric shock, please make sure the
heater is shut down and that the power cord is disconnected.
• When cleaning the heater, please wear gloves to prevent possible injury.
CAUTION
Observations
• Prior to each operation check the heater for signs of damage. Do not operate a damaged heater. Have it inspected and
repaired by a qualied service agency.
• Prior to each operation check the heater for signs of fuel leakage. Do not operate a heater with fuel leakage. Have it in-
spected and repaired by a qualied service agency.
The heater operates within the voltage
range of 207 Volts to 253 Volts. Before plug-
ging the heater into the generator, the out-
put voltage of generator should be veried.
If the voltage does not measure in this
range, the heater should not be plugged
into the generator.
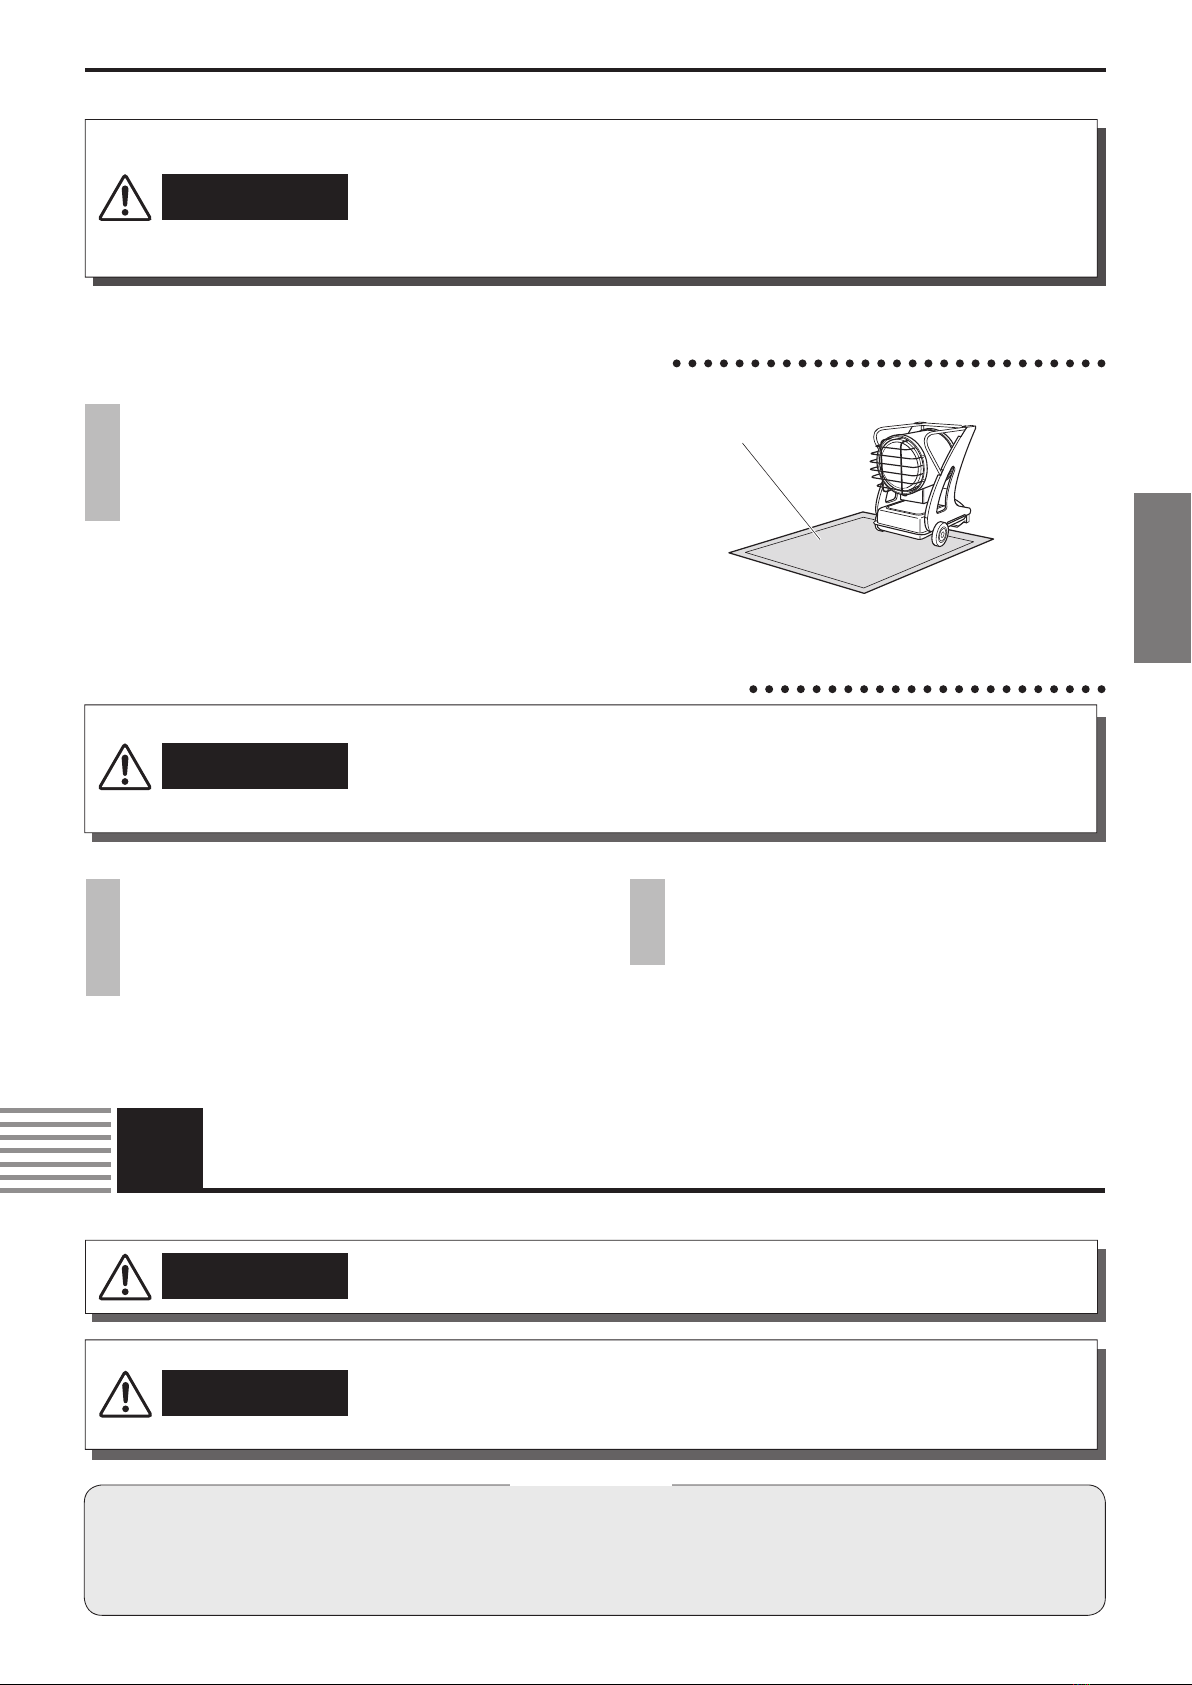
3-4. Use of the Heat Shielding Mat
To avoid unexpected re or trouble, NEVER
use the heater on combustible ooring un-
less the heat shielding mat, which is avail-
able as an option, is used.
Heat shielding mat
WARNING • Never inspect or service the heater while it is burning, in operation, hot or plugged-in
to avoid any injury and/or trouble.
VAL6_MPX_Multi.indb 11 14/04/01 10:52
12
4-1. Daily inspection
Drainage of water from the fuel tank
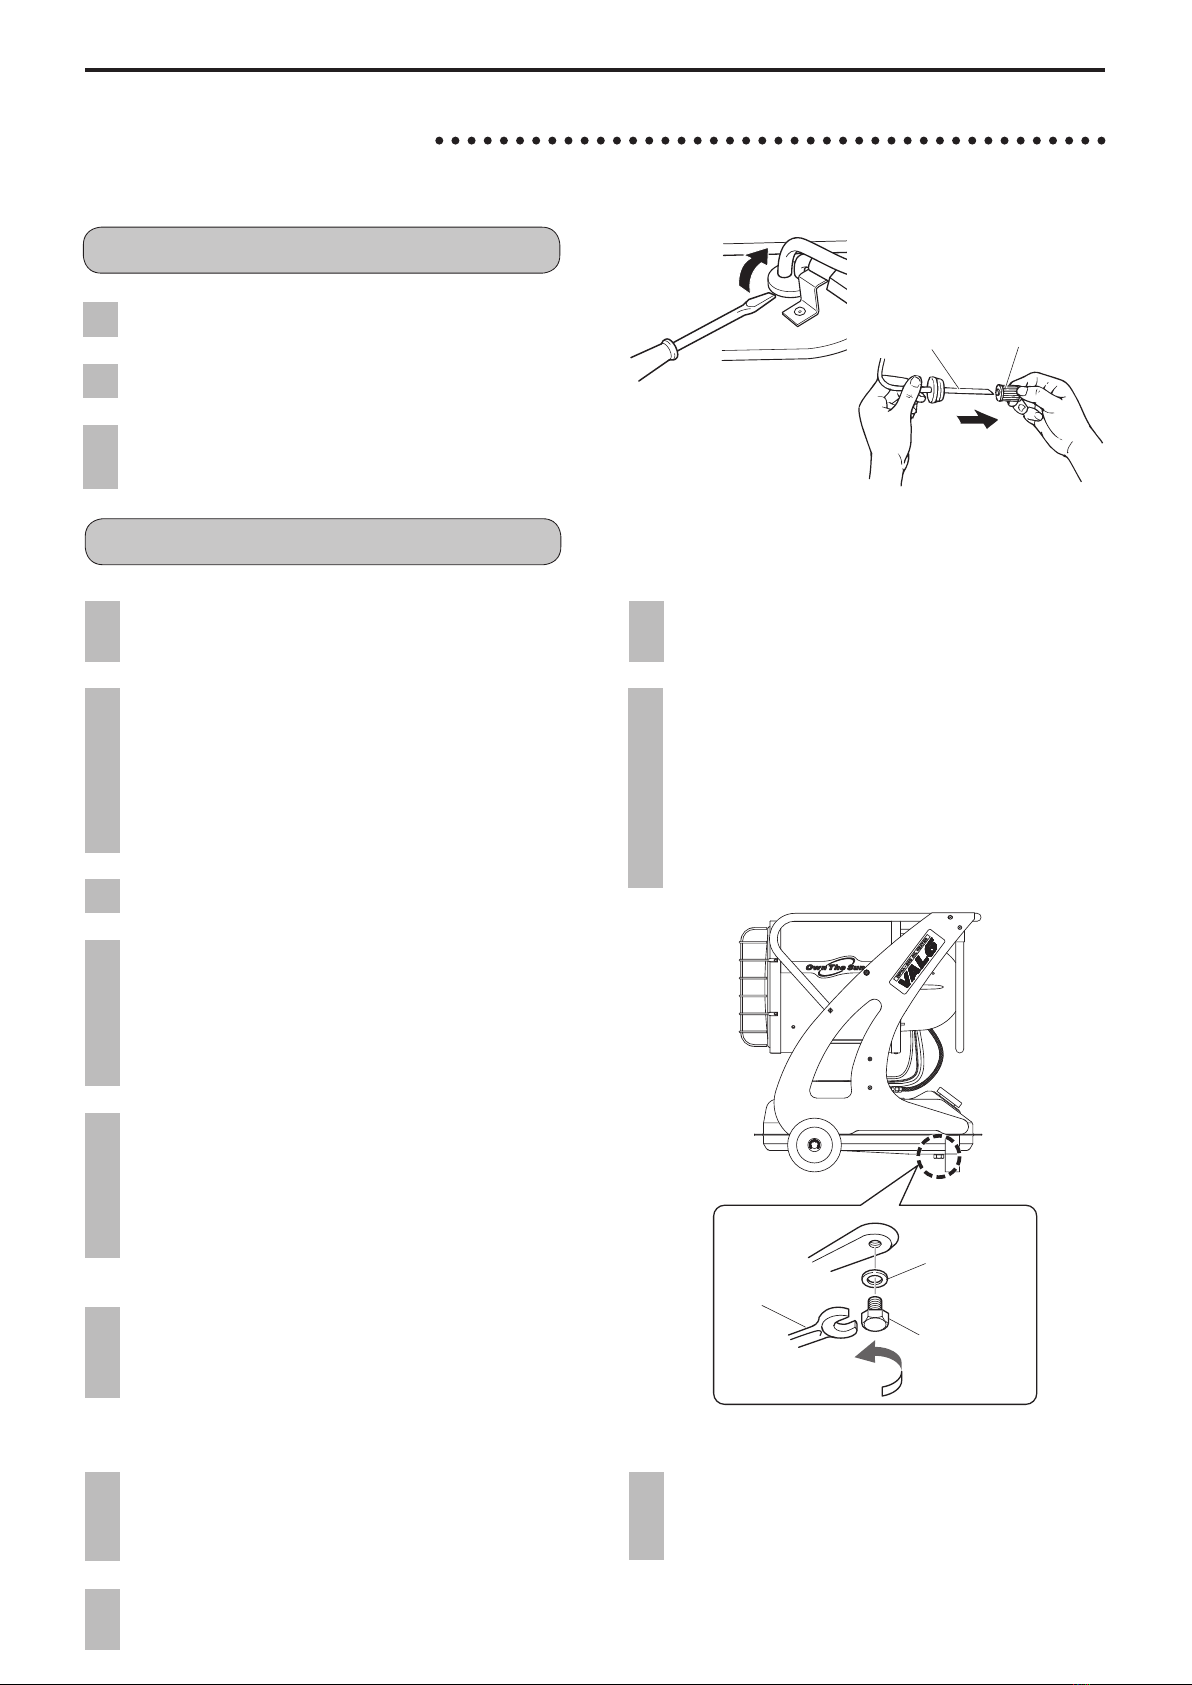
■ Inspecting the tip-over switch
1 While the heater is operating, grasp the
handle and shake the heater up and down,
and from side to side.
2 Check if the tip-over switch has automati-
cally extinguished the ame.
3 If the tip-over switch did not activate, shut
down the heater and contact the dealer
from whom you purchased the heater.
■ Inspection of the lter and drainage of water from the fuel tank
1 Remove the suction pipe from the fuel tank.
Checking the lter element
2 If the lter is dirty, replace it with a new one.
3 Return the suction pipe to the fuel tank and
rmly secure.
Filter
Suction Pipe
Pull off
Pull up
1 Remove the fuel cap and insert a suction
pump into the tank.
2 Remove as much fuel as possible (with the
suction pump). Be sure that the fuel being
removed is put only into a can or other con-
tainer approved in your area for holding
flammable liquids such as kerosene and
No.1 Fuel Oil.
Wrench
(24mm)
Loosen
Drain bolt
packing
Drain bolt
8 Be sure to dispose of in a safe manner as
approved in your local area the kerosene,
etc, placed in the empty container and the
materials used to clean up any spilled kero-
sene, etc. Safely clean and/or dispose of
the empty container as also approved in
your local area.
7 Wipe off kerosene or water spilled over the
tank and the surrounding area.
3 Tighten the fuel cap rmly.
4 Prepare an empty container of about 3 liters
(0.7gallons) capacity: to hold kerosene and
water remaining in the fuel tank, place the
container under the drain bolt (of the fuel
tank).
5 Next, use a 24mm wrench to remove the
drain bolt and tilt the fuel tank until the fuel is
completely drained out of the tank. (At the
same time, be careful not to lose the drain
bolt packing.)
6
Restore the drain bolt packing and tighten the
drain bolt rmly so that fuel can not leak out
(of the fuel tank).
VAL6_MPX_Multi.indb 12 14/04/01 10:52

13
English
■ Inspection of “dirt/dust” on the main unit
1 Check whether or not dirt/dust is on and
around the heater.
2
If dirt or dust is found, remove it with a vacu-
um cleaner or a soft, non-abrasive, cloth. Do
not use any cleansers of any type, especially
spray cleansers, as they may leave a resi-
due or inltrate the operating mechanism of
the heater and cause a re or clog or other-
wise damage the heater.
4-2. Periodic inspection
The heater must be checked periodically, and especially after periods of sustained or heavy use,
for safe and proper operation, and for service maintenance. Have your dealer inspect the heater no
less than twice a year.
5How to replace the Nozzle & Fuse
WARNING • Never service the heater while it is burning, in operation, hot or plugged-in to avoid
any injury and/ or trouble.
• Before starting any service to avoid electric shock, please make sure the heater is shut
down and that the power cord is disconnected.
• When servicing the heater, please wear gloves to prevent possible injury.
CAUTION
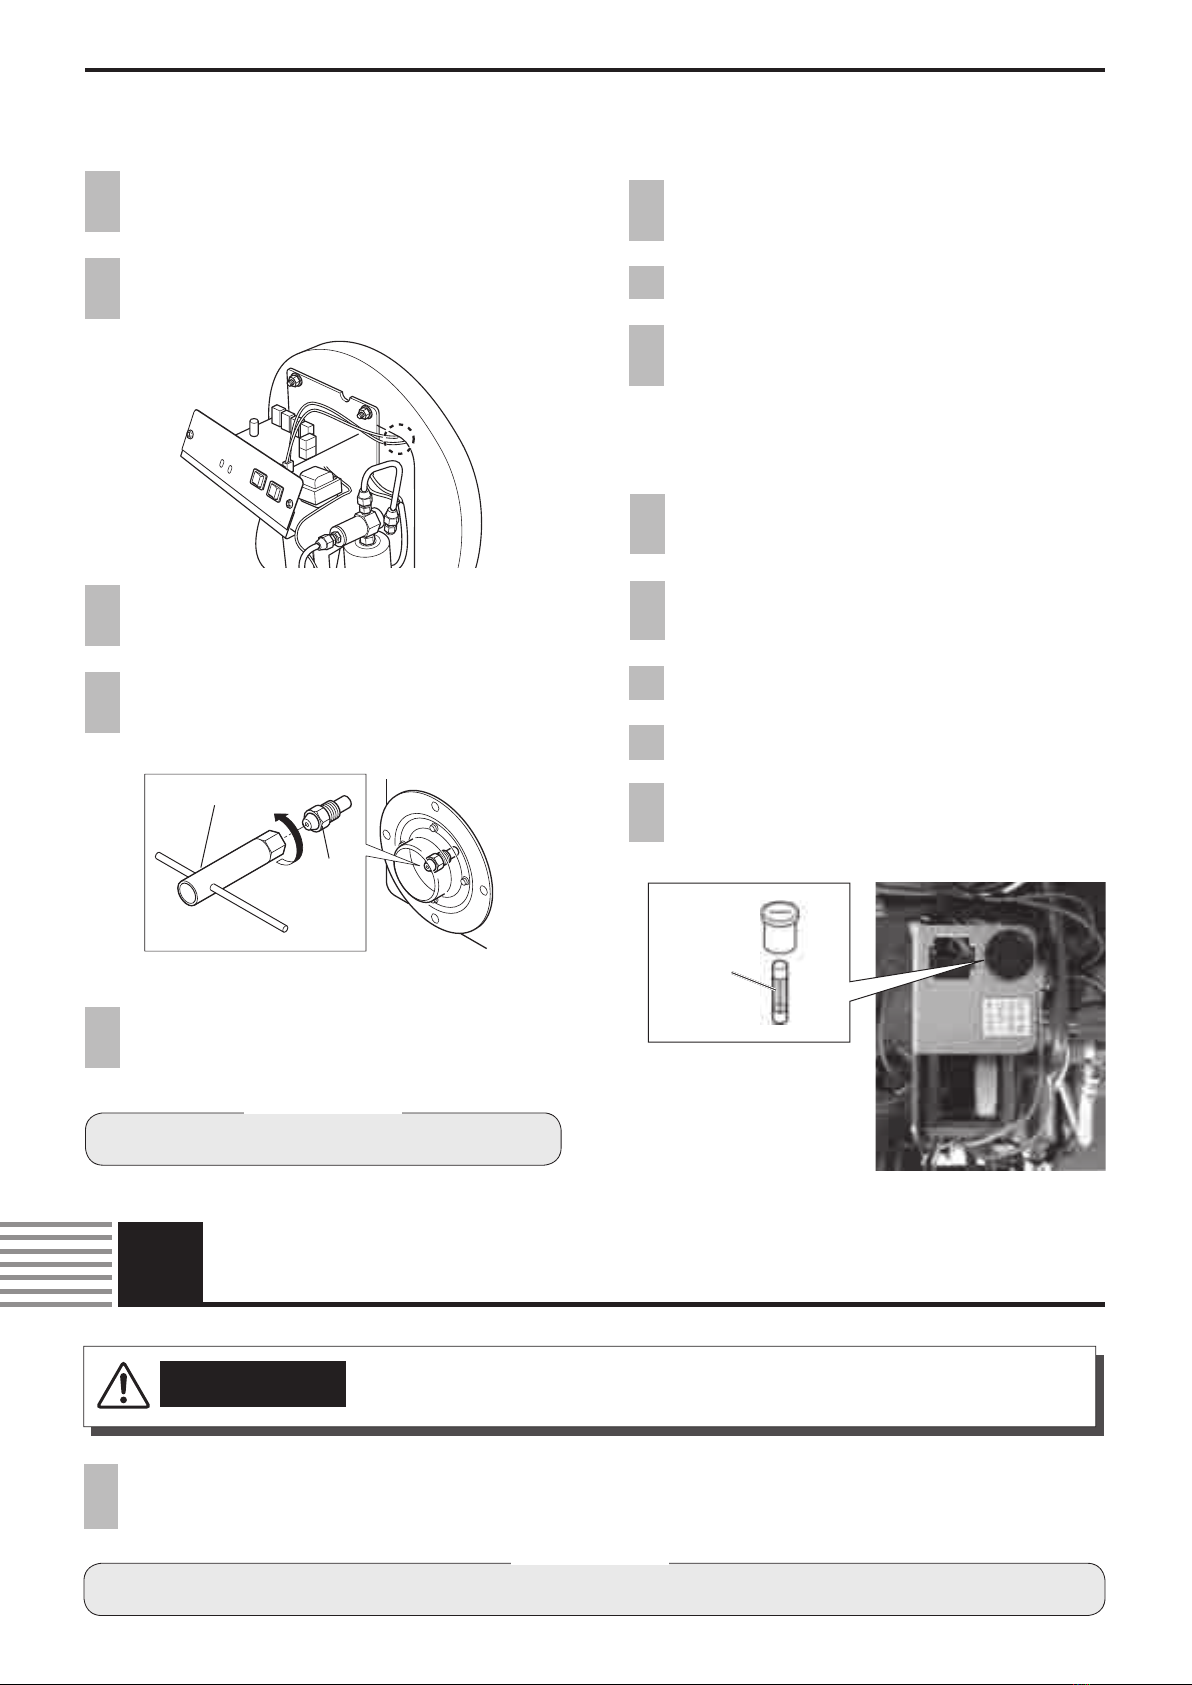
1 Remove the burner cover and pull out the
ame monitor, and check whether or not its
lens is dirty/foul.
2 If the lens is dirty/foul, clean the surface of
the lens with a soft cotton swab or cloth until
it is clear. Do not use any cleansers of any
type, e. g., glass cleaner, to clean the lens.
3 Replace the ame monitor. Then securely
replace the burner cover using the provided
screws.
■ Inspection and cleaning of the ame monitor
Lens
Cotton Swab
Soft Cloth
Flame Monitor
Observations
• When removing the ame monitor, hold it by its main assembly; do not pull out the cord.
Flame Monitor
Pull out
VAL6_MPX_Multi.indb 13 14/04/01 10:52
14
Observations
• Be careful not to touch electrodes
5 Tighten the nozzle using the nozzle wrench
until the nozzle is xed.
6 Put the burner unit back with three nuts re-
moved.
7 Put the red wire back.
8 Put the burner cover back with two screws
removed.
3 Unscrew three nuts and pull out the burner
unit.
4 Replace with a new nozzle by using the
provided nozzle wrench.
Nozzle
Nozzle Wrench
2 Disconnect the red wire of overheat protec-
tion at the back of the burner base.
6How to store the heater
CAUTION • If the heater is stored or not used for an extended period of time, empty the fuel tank to
help prevent fuel leakage and other possible re dangers.
When you store the heater, please disconnect the power plug from the extension cord and/or the
AC outlet and store the heater indoors where it is less humid.
Observations
• Do not store the fuel over summer months for use during next heater season. Using old fuel could damage the heater.
■ Replacing a nozzle
1 Unscrew two screws of the burner cover
and take the burner cover off.
■ Replacing a fuse
1 Unscrew two screws of burner cover and re-
move the burner cover.
2 Unscrew the screw cap of fuse holder and
take out the fuse.
3 Replace with a new one.
4 Put the screw cap back into fuse holder.
5 Put the burner cover back with two screws
removed.
Open a screw cap and
take out a fuse.
Check whether the fuse
is blown out.
Fuse
VAL6_MPX_Multi.indb 14 14/04/01 10:52

15
English
7Troubleshooting
■ When you face problems with your heater, please refer to this check-
list before consulting with your dealer.
In case satisfactory results do not result by referring to the table, or you have problems not described in
this table, please contact your dealer. While consulting with him, please describe the problem you have,
together with model name and serial number of your heater.
(For nding the heater’s serial number, please refer to page 17.)
If the following phenomenon takes place, it is usually not a sign of trouble. Please check
again before consulting with your dealer.
Phenomenon Possible Cause Remedy
The heater does not start.
(The lamp does not light
up.)
Power cord is not connected with an
AC outlet. Power supply is cut off.
Please connect the power cord with an AC outlet, and
check the power supply.
Blown fuse Replace fuse with a new one. (Please refer to page 14.)
The heater does not start.
(The lamp is lit.) Safety devices are working.
Please confirm if “Flame Monitor” is exposed to any
type of light (sunlight or electric lamp, etc.), and move
the heater to prevent the radiation disk from detecting
any type of light directly.
The heater does not ignite.
No fuel in the fuel tank. Please pour fuel into the tank.
There is water in the fuel tank. Please clean up the tank and ll it with fresh/clean fuel.
Fuel lter element is clogged. Check the lter element and replace it with a new one.
Nozzle is clogged Replace nozzle with a new one. (Please refer to page 14.)
The flame goes out during
the operation.
Wrong or foul fuel is used. Please clean up the fuel tank and ll it with fresh/new
fuel.
Flame monitor is dirty. Please clean up the Flame Monitor
(Please refer to page 13).
Fuel lter element is clogged. Please check the lter element and replace it with a new
one.
Phenomenon Explanation
When used for the first time, smoke or
smell comes out of the heater.
Because fuel is burning together with dusts, etc. This phenomenon will
disappear after a short while.
At the time of ignition or shut-down of the
heater, noise comes from the burner section.
Noise is caused by expansion or shrinkage of the burner section due to
temperature’s up and down. This is not irregular.
VAL6_MPX_Multi.indb 15 14/04/01 10:52

16
Wiring Diagram
8Specications
Trans-
former
Solenoid
Pump
Power
Plug
Igniter Circulation
Motor
Changeover Lamp
Ext .
thermo
Fuse
pre-heater unit
Overheat
Sensor
Tip-over
Sensor
Solenoid
Valve
Operation
Switch
Photo
Cell
Fan
Motor
Model Type VAL6MPX1 Power Consumption When igniting : 100 W
Type Radiated / Direct-red When burning : 112 W
Ignition System High intensity discharge Electric Fuse 1.6A
Fuel #1 DIESEL (KEROSENE) Operating Noise Level High : 59.4 dB
Low : 57.8 dB
Fuel Consumption High : 1.8 l/h, 1.55kg/h Airow 110 CFM
Low : 1.6 l/h, 1.38kg/h
Safety Systems
• Tip-over Switch
Heat Output High : 15,800 kcal/h, 18kW • Flame Monitor
Low : 14,000 kcal/h, 16kW • Electrical System Protection
Tank Capacity 25 liter • Overheat Prevention
Continuous Operating Time
High : 13.7 hours • Anomaly detection system
for fan motor
Low : 15.7 hours
Dimensions (mm) 720 (H) × 520 (W) × 675 (D)
Accessory
• Nozzle
Weight (w/empty tank) 70.5 Lbs , 32 Kg • Filter Element
Power Supply AC 230V (50Hz) • Nozzle Wrench
VAL6_MPX_Multi.indb 16 14/04/01 10:52
17
English
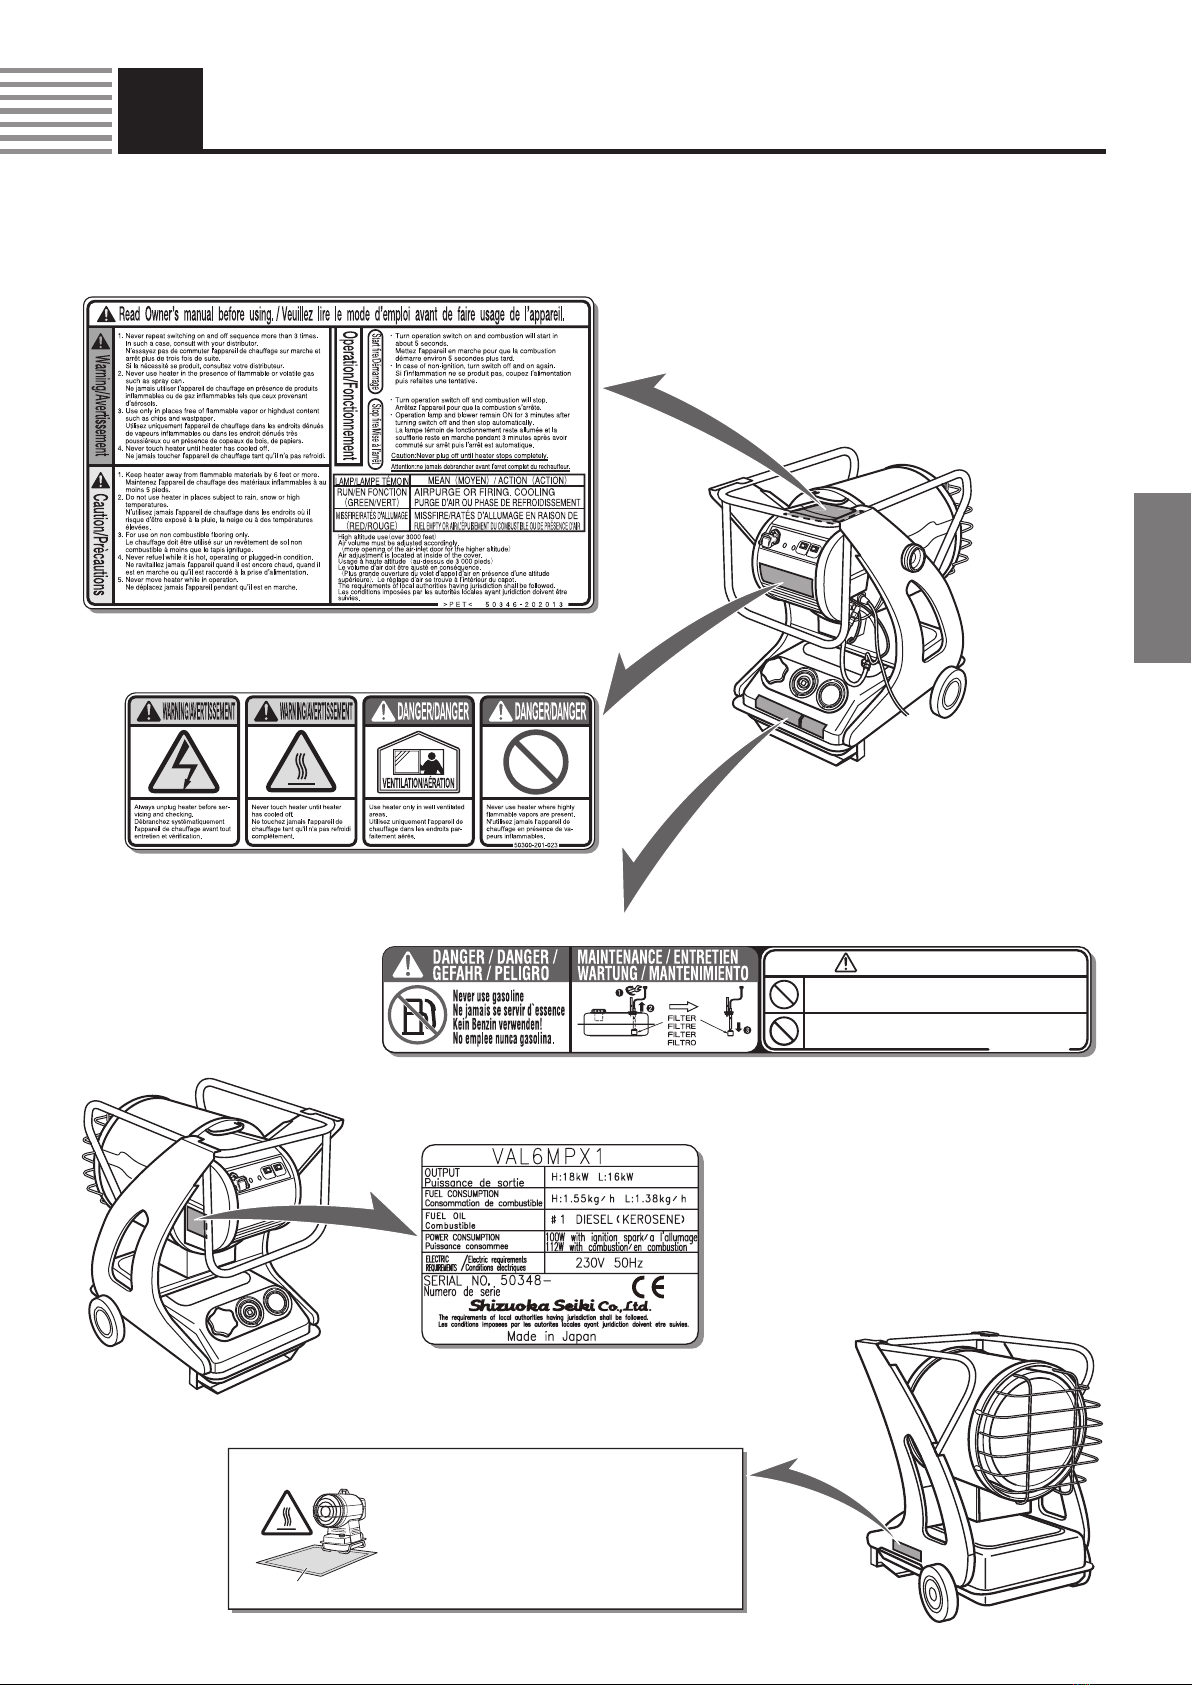
Danger Label
Caution Label
Caution on Refueling Label / Maintenance Label
Floor Temperature Caution Label
Use the heater with a heat shielding mat on the
combustible or heat sensitive floor.
Heat shielding mat [Part# 50300-205001 (1,200 x 1,200 x 3.5mm)] to be placed
under the radiation disk to prevent from discoloring or burning the floor.
Utilisez le radiateur avec une protection thermique placée sur
le sol, s'il est en matière inflammable ou sensible à la chaleur.
Protection thermique [Part# 50300-205001 (1,200 x 1,200 x 3.5mm)] à placer
sous la zone de rayonnement pour éviter que le sol ne soit décoloré ou brûlé.
WARNING
AVERTISSEMENT
Heat shielding mat
Tapis de protection thermique
Specifications Label
>PET< 50346−203016
DANGER/DANGER
Never plug off until heater tops completely
Ne jamais debrancher avant l'arret complet de rechauffeur
Commercial-industrial occupancies only
Occupation à titre commercial ou industriel uniquement
9Safety Labels
● Safety labels provide important information for safe use of the heater. So, please do not remove or soil them.
●
If any of the labels is unreadable or removed, please ask your dealer for a new one and replace with the new one.
VAL6_MPX_Multi.indb 17 14/04/01 10:52
18
1Précautions particulières
Merci d’avoir acquis notre Chauffage infrarouge au fioul «VAL6».
Notice importante
◆
Ce mode d’emploi indique les précautions à respecter strictement pour une utilisation correcte et sûre de
l’appareil. Ces précautions se divisent en 3 catégories Danger, Avertissement, et Attention. Veil-
lez à bien lire et comprendre la signication et les détails relatifs à chaque catégorie.
* Selon les circonstances, même les précautions non observées de la catégorie « ATTENTION » peuvent entraîner des
atteintes graves aux personnes et/ou aux biens. Les recommandations relevant de chaque catégorie sont aussi impor-
tantes les unes que les autres ; vous devez donc veillez à respecter les précautions des 3 catégories.
AVERTISSEMENT
●Lorsque vous utilisez ce chauffage ou lorsque vous intervenez sur lui, veuillez suivre toutes les instructions de ce mode d’emploi.
●Lorsque vous remplacez une pièce, n’utilisez que des pièces d’origine fabriquées ou agréées par le fabricant du chauffage. Veuillez noter
que nous ne pouvons être tenus pour responsables des dommages ou accidents résultant de l’utilisation de pièces non agréées.
●Nous ne pouvons être tenus pour responsable des dommages ou accidents résultant de la non-observation des instructions de ce mode
d’emploi ou d’une modication ou utilisation non adéquate de l’appareil.
●L’État de Californie exige de préciser l’avertissement suivant:
AVERTISSEMENT : Les résidus de combustion produits lors de l’utilisation de cet appareil contiennent du monoxyde de carbone, un
élément dont l’État de Californie a toutes raisons de juger qu’il est à l’origine de cancers ou d’anomalies congénitales (ou encore d’autres
problèmes congénitaux).
1. Étant donné que nous ne pouvons prévoir toutes les situations de danger possibles lors de l’utilisation de cet appareil, le contenu de ce mode d’emploi
ne peut prétendre prévoir la totalité de tous ces dangers possibles. Par conséquent, lors de l’utilisation ou de l’inspection quotidienne (de ce chauffage),
tout en gardant à l’esprit le contenu de ce mode d’emploi et en tenant compte des avertissements indiqués sur les étiquettes apposées sur l’appareil, soyez
pleinement attentif aux circonstances et facteurs qui pourraient affecter la sécurité de fonctionnement du chauffage. N’hésitez pas à arrêter l’appareil et à
contacter votre revendeur si vous avez la moindre question relative à un point non abordé dans ce mode d’emploi.
2.
Si vous vous posez une ou plusieurs questions ou si vous souhaitez obtenir des informations plus détaillées sur l’appareil, veuillez contacter votre revendeur.
3. Si ce mode d’emploi contient des pages mal imprimées ou s’il lui manque des pages, veuillez contacter votre revendeur pour qu’il vous l’échange.
4. Veillez à conserver le jeu de pièces standard fourni avec l’appareil.
5. L’opérateur du chauffage est responsable de l’information de toute personne travaillant à proximité de l’appareil ou qui s’en approcherait quant aux dan-
ger qu’il présente et aux précautions qu’il est par conséquent nécessaire de prendre et qui sont indiquées dans ce mode d’emploi.
« DANGER » signie que l’inobservation des précautions indiquées peut entraî-
ner la mort, des blessures graves et/ou un incendie sérieux.
« AVERTISSEMENT » signifie que l’inobservation des précautions indiquées peut
éventuellement entraîner la mort, des blessures graves, un incendie et/ou une explosion.
« ATTENTION » signifie que l’inobservation des précautions indiquées peut
entraîner des blessures graves et/ou des dégâts matériels.
DANGER
AVERTISSEMENT
ATTENTION
Interdit
(Ce symbole signale « les actions strictement interdites ».)
Obligatoire
(Ce symbole signale les « actions ou instructions » qui doivent être suivies.)
Attention
(Ce symbole signale les « actions » qui réclament une attention soutenue.)
■ Les symboles utilisés tout au long de ce mode d’emploi ont la signication suivante :
Objet de ce mode d’emploi
Ce mode d’emploi vise à fournir à l’utilisateur des informations détaillées sur la façon correcte d’utiliser, de faire fonctionner
et d’intervenir sur ce Chauffage VAL6.
VAL6_MPX_Multi.indb 18 14/04/01 10:52
This manual suits for next models
1
Table of contents
Languages:
Other Shizuoka Seiki Heater manuals

Shizuoka Seiki
Shizuoka Seiki VAL6 User manual

Shizuoka Seiki
Shizuoka Seiki VAL6 MPX User manual

Shizuoka Seiki
Shizuoka Seiki VAL6 KBE5S User manual

Shizuoka Seiki
Shizuoka Seiki VAL6 User manual

Shizuoka Seiki
Shizuoka Seiki VAL6 KBE1S User manual

Shizuoka Seiki
Shizuoka Seiki VAL6 EP8JA User manual

Shizuoka Seiki
Shizuoka Seiki VAL6 MPX5 User manual

Shizuoka Seiki
Shizuoka Seiki VAL6 EPX User manual

Shizuoka Seiki
Shizuoka Seiki VAL6 User manual

Shizuoka Seiki
Shizuoka Seiki VAL6 EPX1 User manual


