SKF EAZ User manual

SKF EAZ
SKF EAZ CC
Instructions for use

2 EN
Safety recommendations................................................................................................................. 3
EC Declaration of conformity ........................................................................................................... 3
1. Scope of delivery ...................................................................................................................... 4
2. Introduction.............................................................................................................................. 4
2.1 Principle of operation...................................................................................................................................5
3. Technical data........................................................................................................................... 6
4. Installation ............................................................................................................................... 7
4.1 Single output cabinet (EAZ CC…)................................................................................................................8
4.2 Double output cabinet (EAZ CCD…) ...........................................................................................................9
4.3 Transformer adjustment to power supply voltage................................................................................ 10
5. Instructions before use ........................................................................................................... 11
6. Operating instructions ............................................................................................................ 12
6.1 Dismounting............................................................................................................................................... 12
6.2 Mounting .................................................................................................................................................... 14
7. Determination of heating settings ........................................................................................... 15
8. Safety features ....................................................................................................................... 15
9. Maintenance ........................................................................................................................... 16
Table of contents
Original instructions

3EN
Safety recommendations
• There is a risk of electric hazard. Only qualified
and adequately trained personnel must be
allowed to operate the equipment.
• Due to the magnetic field, during the heating
process observe a safety distance of 1,5 m
(4.9 ft) with the induction heater. People
wearing cardiac pacemakers or having implants
must observe a safety distance of at least
5 meters (16 ft) from the induction heater
during operation. Electronic equipment, such as
wristwatches, mobile phones; but also magnetic
cards or industrial electrical equipment may
also be affected.
• Use proper handling equipment when lifting
heavy workpieces. Secure the workpiece with
appropriate lifting and handling equipment
while heating.
• Avoid contact with hot surfaces.
Always use heat resistant gloves.
• Never modify the heater. All repair work should
be carried out by an SKF repair shop.
• Make sure the supply voltage is correct.
Connecting the induction heater to the wrong
voltage supply will void the warranty and
probably damage the heater.
• Always make sure the heater is securely
connected to earth.
• Do not expose electronic components to high
humidity or water.
• Never introduce body parts into the bore of the
heater during operation.
• Do not use the equipment in case of damage
or heavy wear is detected on the heating coil.
Also, cracked rings must not be heated with the
electrical induction heater.
• The heater should not be used in areas where
there is a risk for explosion.
• Follow the operating instructions at all times.
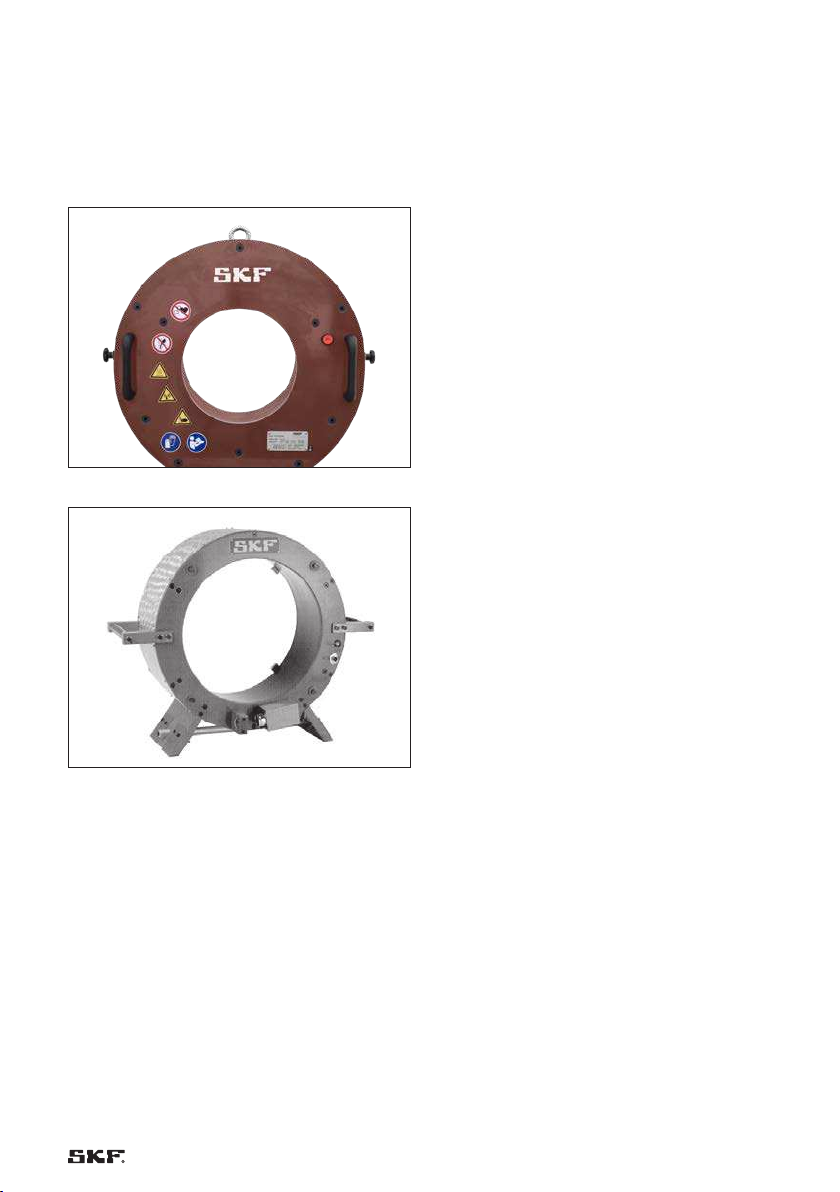
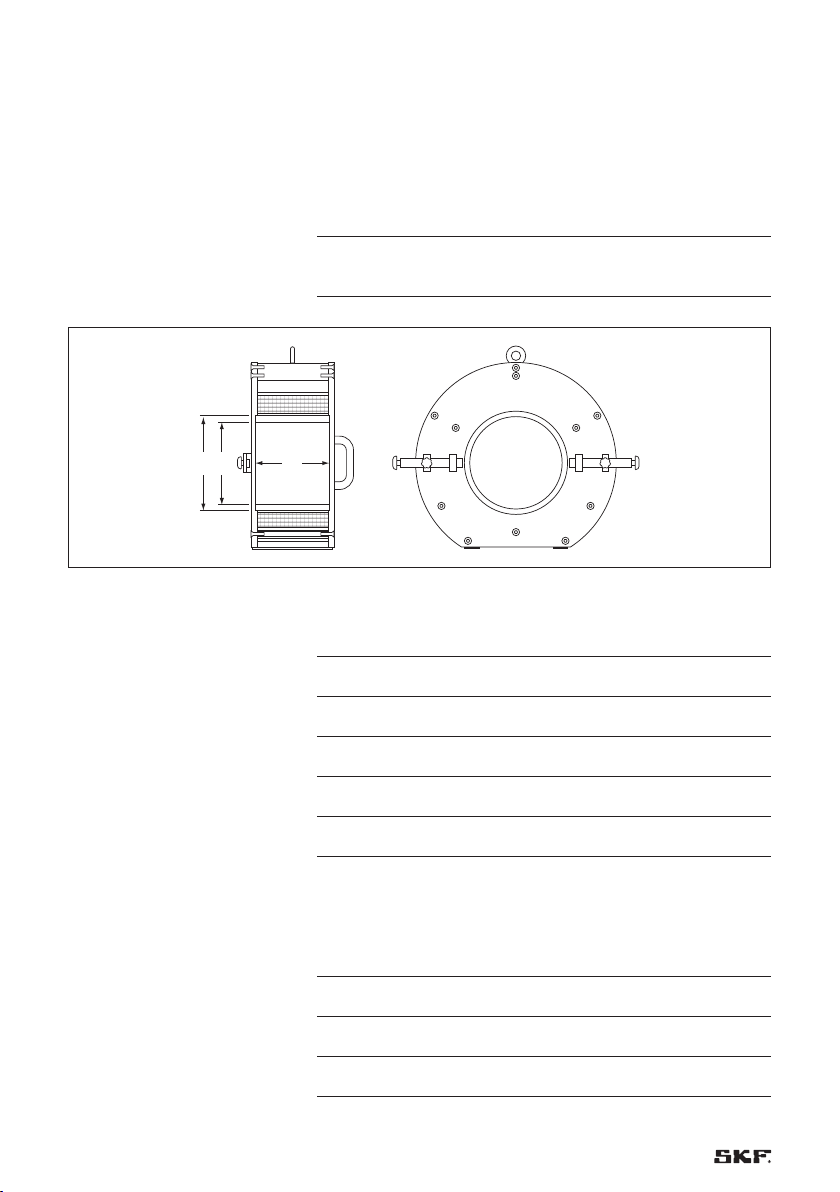
• The EAZ and EAZ CC are solely intended to heat
up bearing rings, mill rolls and labyrinth rings. It
is not intended to heat up any other component.
• The heater needs to be operated by
professionally trained people.
Do not leave the heater unattended.
Especially when using time mode.
• In case of fire, do not use water nor powder-
based extinguisher. This will damage the
electronics. A CO2based extinguisher is
recommended, if available.
• Be aware that fumes coming from the heated
element might occur.
EC Declaration of conformity
We, SKF Maintenance Products, Meidoornkade 14,
3992 AE Houten, The Netherlands herewith declare
that the products described in these instructions
for use, are in accordance with the conditions of the
following directive:
EMC DIRECTIVE 2014/30/EU and are in conformity
with the following standards:
EN61000-6-1:2007
EN61000-6-3:2007 / A1:2011 / AC:2012
EN61000-3-2:2014
EN61000-3-2:2013
EN61000-4-2
EN61000-4-3
EN61000-4-4
EN61000-4-5
EN61000-4-6
EN61000-4-8
EN61000-4-11
EUROPEAN LOW VOLTAGE DIRECTIVE 2014/35/EU
EUROPEAN ROHS DIRECTIVE 2011/65/EU
Houten, The Netherlands, February 2019
Sébastien David
Manager Product Development and Quality

4 EN
1. Scope of delivery
The EAZ coil is delivered with:
• EAZ coil
• Heat resistant gloves TMBA G11H
The EAZ Control Cabinet is delivered with:
• EAZ control cabinet
• Support legs
• Grounding cable with magnetic clamp
EAZ CC-GRC
• Control cable EAZ CC-LC
• Temperature probe cable EAZ CC-TPC
• Temperature probe TMBH 1-3
Fig.1 – EAZ control cabinet
Fig.3 – Grounding cable with
magnetic clamp EAZ CC-GRC
Fig.4 – Control cable EAZ CC-LC
and temperature probe cable
EAZ CC-TPC
Fig.5 – Temperature probe TMBH 1-3
2. Introduction
The fixed induction heaters are used for mounting
and dismounting of:
• Inner rings of cylindrical roller bearings,
• Roll groove rings of cold reducing machines and
• Roll body side labyrinth rings of bearing
arrangements.
They are used where large number of bearings
of the same design are used or where large
bearings with tight fit are frequently mounted and
dismounted. They are intended for one particular
bearing and one particular application.
Fig.2 – Support legs

5EN
2.1 Principle of operation
The fixed induction heaters consist of a cylindrical
induction coil made of copper wire permanently
mounted in a housing serving as mechanical
extractor. Depending on the size of the heater, two
different executions exist as per †fig. 6 and †fig. 7.
Fig.6 – Standard execution for rings up to 380 mm
Fig.7 – Special execution for odd and large component
When the heater is switched on, electric current
runs through the coil, generating a fluctuating
magnetic field, but no heat on the EAZ coil itself.
However, once you set an iron or stainless-steel
component on inside of the EAZ coil, the magnetic
field induces many smaller electric currents (Eddy
currents) in the component metal. Because iron is
a poor conductor of electricity, when all these small
currents run through the iron, much of the energy
is converted into heat. This heat will cause the ring
to expand.
After a pre-determined heating time or
temperature, the ring can be withdrawn from the
shaft or mounted into it.

6 EN
3. Technical data
Because every heater is a custom-made unit, the
user can fill in the following fields by himself looking
at the specifications and drawings delivered with
the unit.
Product designation :
Recommended
control cabinet
:
B
dF
Heater dimensions
- Width :
- Housing height :
- Inner diameter :
- Housing width :
- Cable length :
- Weight :
Component dimensions
- Bearing designation or
drawing number :
- Inner diameter (d) :
- Outer diameter (F) :
- Width (B) :

7EN
Application
- Drawing number :
- Neck diameter :
- Interference fit :
4. Installation
The EAZ coil is meant to work only with SKF EAZ
control cabinet and vice versa. This is the only way
we can ensure the right performance of the tool.
The power supply needs to be 3 phases+ neutral +
ground. We will only use 2 phases out of the 3 of
them and the ground. We won’t use the neutral.
The cable to connect the mains and the control
cabinet is not delivered with the product. It is for the
user to arrange the right cable. A qualified electrician
should install this.
IMPORTANT:
The EAZ Control Cabinet and EAZ coil might create
some disturbance in other electrical equipment
connected to the same power supply line. To avoid
this, the EAZ Control Cabinet and EAZ coil need to
be connected to a dedicated power line.

8 EN
4.1 Single output cabinet (EAZ CC…)
Power supply
EAZ coil

9EN
4.2 Double output cabinet (EAZ CCD…)
EAZ coil A
Power supply
EAZ coil B

10 EN
4.3 Transformer adjustment to power
supply voltage
The cabinets include a transformer for generate
230V for the inside electronics. This must be
adjusted properly to make sure that the output of
this transformer is well within the acceptable range
for the parts connected to it. This operation must be
done by an electrician.
IMPORTANT:
Be aware that this adjustment is not changing the
specifications range of the cabinet.
A cabinet meant to work at 400V/50Hz can only be
set at 380 or 420V/50Hz.
A cabinet meant to work at 440-480V/60Hz can
only work at 440, 460 and 480V/60Hz, but not at
400V (for example).
As we can see in the below picture, the transformer
has 6 connection points at the bottom. We must
read the connections table on the transformer:
NOTE:
In this case the table is as per below, but this can be
different in the one you have, so always follow the
transformer table and not the table in this manual:
Voltage Independent
connections
Short circuited
connections
380V 0-1
400V 0-5 1-4
420V 0-4 5-2
440V 0-2
460V 0-5 2-4
480V 0-4 3-5
In the picture below, for 480V we can see that
connections 0 and 4 are connected.
Also 3 and 5 are connected through a cable which
short circuits them.

11EN
5. Instructions before use
A. Make sure the control panel type EAZ CC is
connected to the three-phase mains by an
authorized electrician. Use only SKF control
cabinets to avoid damage in the EAZ induction
heater.
B. Make sure that the cabinet is placed on a solid
base and it is stable.
C. To obtain the full heating capacity of the coil
assure that the cable is connected without
loops.
D. Check for damages before use, specially the
sleeve and the power cables. The cables may
get damaged due to the compression or to the
high temperatures.
E. Connect the cable for the overheating protection
of the heater to the control cabinet. Do the
same with the temperature probe extension
cable and the temperature probe itself.
Fig.8 – Adjust the length of the temperature probe cable
to the minimum possible to avoid damages on the
probe itself
F. With the door of the control panel closed, the
safety locks can now be pushed in with the key.
G. The device is ready for use. The main switch can
now be turned to the on position. This will start
the Graphic User Interface, but it won’t power
the EAZ coil.
H. In case that the door of the panel is open, the
main switch cannot be turned on and therefore
no current can pass by. Do not force the main
switch stud with the door open.
I. Let the EAZ acclimate when there is a
temperature change. Use only inside of
buildings.

12 EN
6. Operating instructions
Before proceeding with mounting or dismount rings,
please take the following into consideration:
• Cracked rings must not be heated with the
electrical induction heater.
• The tool must not be switched on without the
steel ring in the bore! Otherwise the current
consumption increases considerably, and the
coil is heated too rapidly.
• Additional safety is provided by an automatic
cutoff interrupting the current as soon as
the temperature of the induction coil winding
exceeds 120 °C (248 °F). This situation may
also occur after several operations in a row. In
this case, it is recommended to cool down the
device with compressed air or a fan. To prevent
this from happening, remove the hot rings as
quick as possible from the inside of the heater.
This will significantly increase the duty cycle of
the heater.
• During dismounting, the roll neck must be
connected to earth, for example by means of a
single core cable with magnetic clamp or via de
support.
• Do not leave the heater unattended, especially
in Time Mode. The temperature needs to be
monitored to avoid damages.
Fig.10 – The heater is being positioned over the ring
6.1 Dismounting
A. Place the electrical induction heater over the
ring to be withdrawn. The transportation can
be done just by crane or hoist and with hemp
ropes. Do not use steel ropes!
Fig.9 – Do not use steel rope to lift the heater
B. Connect the roll neck to earth with the magnetic
grounding cable supplied or by other authorized
means.

13EN
C. If the abutting parts are provided with recesses,
push the withdrawal bars towards the inside
by loosening the locking screws and hence
positively engaging the ring. If there are no
recesses behind the ring, slightly displace the
inner ring axially after the heating process
by means of crowbars until the withdrawing
bars can enter in the gap resulting from the
displacement.
Fig.11 – Withdrawal bar behind the coil
D. If using the two coils cabinet, first choose which
coil is going to be used. This is very important to
avoid powering the wrong coil.
E. Choose the Dismounting Mode in the GUI
(Graphic User Interface).
Fig.12 – Dismounting Mode symbol
F. Choose the right Mode. Choose in between time
and temperature.
Fig.13 – Time and Temperature Mode symbols
Use the Temperature Mode if the magnetic
temperature probe is available and connected
to the cabinet properly. Used the Time Mode if
no temperature probe is available, deffect or the
heating time is known.
Fig.14 – Use the gap on the coil to place the
temperature probe
G. Select the right heating time or temperature.
H. Once the heating of the ring is finished, the
control cabinet will automatically demagnetize
the ring and an audio signal will alert the user.
I. Now the ring can be withdrawn. Remove the
temperature probe and place it somewhere safe
on the EAZ coil. Then evenly pull the handles of
the induction heater.
Fig.15 – Place the magnetic probe on a metallic surface,
such as a bolt on the EAZ
IMPORTANT:
Remove the EAZ coil and ring as soon as the
heating is finished so that as little heat as possible
will flow from the hot inner ring into the roll neck.
Directly remove the inner ring from the EAZ coil to

14 EN
avoid damages in the inner surface of the EAZ coil.
Be aware of the hot surfaces and use the supplied
protection gloves.
J. Once the ring is withdrawn from the roll neck,
the heated ring must be immediately removed
from the induction heater. By doing this, the
risk of damaging the coil sleeve is reduced
and the duty cycle of the heater is significantly
increased.
K. If for any reason the circuit is to be interrupted
before the pre-determined heating setting is
over, press the STOP button on the GUI screen
or the OFF button on the induction heater. Only
in case of emergency you can switch off the
cabinet by using the main switch handle. Be
aware that in the last case the ring won’t be
demagnetized.
L. If the ring cannot be withdrawn due to tilting
during the withdrawal, remove the EAZ coil
from over the ring and use a soft hammer to
correct the ring position and try to pull the ring
out again. Do not use metallic hammers or bars
as this might damage the bearing!
M. If the dismounting is anyhow unsuccessful,
remove the EAZ coil from over the ring and
wait until the ring and the roll neck has cooled
down before making another attempt. This will
ensure that the temperature difference between
neck and ring needed for dismounting can be
obtained. Compressed air or a fan may be used
to speed up the cooling process.
6.2 Mounting
A. Electrical induction heaters can also be used
for heating the rings during mounting. For this
purpose, place the ring in the bore of the heater.
B. Select the Mounting Mode on the User Interface
screen of the control cabinet.
Fig.16 – Mounting mode symbol
C. Place the temperature probe on the ring. Set
the right temperature on the cabinet settings
if Temperature Mode is to be used or the right
heating time if Time Mode is to be used.
D. Once the right settings have been selected,
push the START button.
E. The ring and the EAZ coil should be at a close
distance from the roll neck where the ring will
be mounted. A short distance means a short
time to mount and therefore less time for the
hot ring to cool down.
F. Once the cabinet has reached the heating
settings, the ring will be automatically
demagnetized.
An audible signal will indicate that the user can
collect the hot ring to mount it.
G. Remove the temperature probe if used and
locate it on a safe surface on the EAZ coil. It is
very important to use heat resistant gloves for
this.
H. Mounting the hot ring on a cold roll neck
requires some practice. It is very important that
the hot ring is perfectly aligned with the roll
neck shaft, so it does not get stuck halfway. If
this happens, correcting the ring position with a
plastic hammer is a good option. Do not use a
steel hammer as this might damage the bearing
ring.

15
7. Determination of heating settings
Prior to any heating operation, the correct heating
time or temperature must be established. In case
that this is not already specified or known, please
proceed as follows:
A. Push the heater over the ring to be withdrawn
or mounted and proceed according to chapter
6.1 or 6.2 to start the heating process.
B. Measure the temperature of the ring. For
this you can use the temperature probe of
the cabinet or a fast responding contact
thermometer such as the TKTL 30 or a
TKDT 10.
C. For a first attempt you can record the time
required to reach 120 °C (248 °F). If you use
the Temperature Mode of the SKF control
cabinet, this time will be displayed at the end of
the heating cycle.
D. Dismount or mount the ring. If it is successful,
you can keep this temperature and time as
the right settings for future jobs of the same
workpiece. If it is not successful, increase the
temperature by 10 °C (50 °F), and try again.
8. Safety features
The heater is equipped with the following safety
features:
• Automatic demagnetization:
Having been heated with an EAZ heater
and an EAZ control cabinet, the rings will be
automatically demagnetized. Demagnetization
of the rings is important to avoid that for
example steel particles will stick to the bearing
during operation.
• Automatic overheating protection:
This protects the copper windings inside of
the coil to get permanently damaged due to
overheating.
Fig.17 – Too hot coil warning symbol
Fig.18 – Emergency STOP button at the front of the coil
IMPORTANT:
The overheating protection is only to avoid damages
of the copper coils, not of the protecting sleeve.
Make sure that the temperature of the rings do not
exceed 200 °C (392 °F) to avoid damages on the
sleeve.

16 EN
• Overcurrent protection:
The control cabinet is equipped with a
circuit breaker to prevent a too high current
withdrawal from the power supply.
• Emergency stop button:
Located on the front of the coil, it is intended
to be used in case that something goes
wrong. If pushed, the heater will automatically
demagnetize the ring and STOP. It is not
intended to be used as a normal stop button.
• Too slow heating prevention:
If a too slow heating is detected by the
temperature probe, error E05 will be displayed
and the cabinet will stop the heating process.
This is important in the case that the
temperature probe falls down during heating to
avoid permanent damages of the bearing ring
and heater.
• Faulty temperature probe:
If the temperature probe is damaged, the error
E06 will be displayed and the cabinet will stop
the heating process.
Replace temperature probe or use time mode.
9. Maintenance
We advise you to follow some steps for preventive
maintenance and to avoid some risks:
• Keep the heater always clean. Removing all
kind of dust, grease, oil, etc. that is deposited
on the coil and cabinet is the first step to avoid
damages. It can be cleaned by clean dry cloth.
• Do not expose the heater inner sleeve to high
temperatures. The sleeve is 200°C (392 °F)
temperature resistant for a short time. If
exposed to higher temperatures or for a long
time, the sleeve will be damaged.
• If the sleeve is damaged (burnt parts, bubbles
or even cracks) the user must replace it. If there
is a crack in the sleeve, there is a high risk of
short circuit and due to the high current going
through the coil, it is very important to avoid
this.
• Keep the User Interface screen clean from
grease and treat it with care. It is a sensitive
part of the product and it must be treated
carefully. Do not use sharp components nor
apply high forces to operate it.
• Make sure that the temperature probe is in
good shape and clean. If not, it could give wrong
temperature readings and lead to damages
in both the heater and the bearing ring. If
damaged, please replace it.

17EN

18 EN

19EN

skf.com | mapro.skf.com | skf.com/mount
® SKF is a registered trademark of the SKF Group.
© SKF Group 2019
The contents of this publication are the copyright of the publisher and may not be reproduced (even
extracts) unless prior written permission is granted. Every care has been taken to ensure the accuracy
of the information contained in this publication but no liability can be accepted for any loss or damage
whether direct, indirect or consequential arising out of the use of the information contained herein.
MP5482 EN · 2019/09
Other manuals for EAZ
2
This manual suits for next models
1
Table of contents
Other SKF Heater manuals
Popular Heater manuals by other brands

HydroQuip
HydroQuip CS6000 YE-5 Series Operation manual

Pro Breeze
Pro Breeze PB-H07 instruction manual

VOGEL&NOOT
VOGEL&NOOT BAWA Assembly and operating manual

SunStar
SunStar STARGLO SG3-N5B Installation and operation instructions

Pro Breeze
Pro Breeze PB-H12 instruction manual

MO-EL
MO-EL HOT-TOP 9815 Use and maintenance