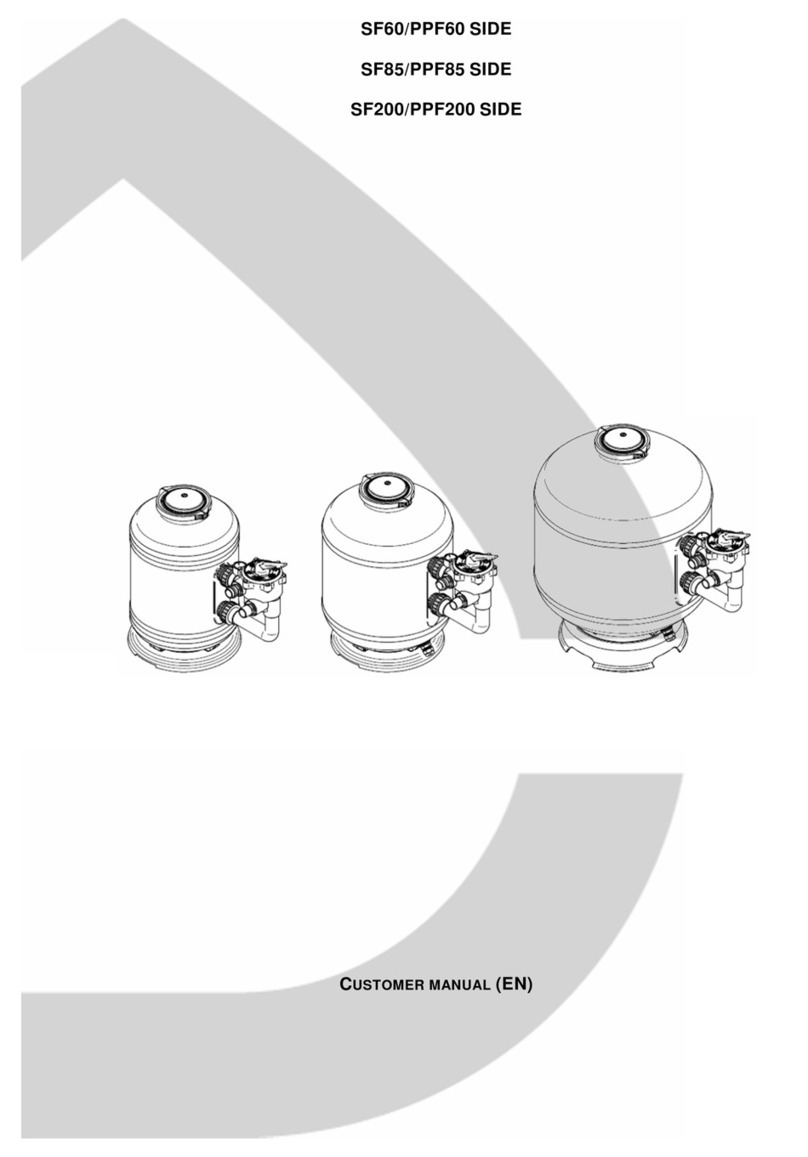
Shott SF38 User manual

SF15/PPF15
SF25/PPF25
SF30/PPF30
SF38/PPF38
SF45/PPF45
SF60/PPF60
SF65/PPF65
SF85/PPF85
SF200/PPF200
C
USTOMER MANUAL
(EN
)

Nome file:
File name:
7540028EN - CUSTOMER MANUAL SF15_200 TOP EN.docx Rev. 1 12/06/2017
2-28

I N D E X
Nome file:
File name:
7540028EN - CUSTOMER MANUAL SF15_200 TOP EN.docx Rev. 1 12/06/2017
3-28
EN
1
Content organisation and consultation methods.................................................................................... 4
2
General warnings and user information................................................................................................. 6
3
Product presentation. ............................................................................................................................ 8
4
Technical specifications and features.................................................................................................... 9
5
Installation. .......................................................................................................................................... 10
6
Operations and use............................................................................................................................. 19
7
User instructions.................................................................................................................................. 20
8
Routine, scheduled and extraordinary maintenance. .......................................................................... 22
9
Troubleshooting................................................................................................................................... 24
10
Retail and spare parts and relevant documentation......................................................................... 26

E N
Nome file:
File name:
7540028EN - CUSTOMER MANUAL SF15_200 TOP EN.docx Rev. 1 12/06/2017
4-28
1 Content organisation and consultation methods.
1.1 Symbols.
Indicates hazardous situations and warnings. Carefully read the parts of the user manual marked with
this symbol.
Indicates that work must not be performed on live electrical devices. This work may only begin after all
suitable safety measures required by current international and/or national regulations are taken.
1.2 Notes on graphics.
Used the following printing types:
•glossary of terms: italic;
•the words "product", "customer manual" and "installation manual" highlighted.
1.3 Glossary.
1. Pump: electromechanical device used to move water (Fig. 1).
Fig. 1
2. Inlet: product input (Fig. 2, IN).
Fig. 2
3. Outlet: the product’s exit (Fig. 3, OUT).
Fig. 3
4. Flowrate: the amount of fluid (water) that crosses a section in a unit of time.
5. Head: this is the maximum distance that a pump can lift water for.
6. Flooded: if the pump is positioned at a level below the water level to be sucked.
7. Dry operation: means the product’s operation without water.
8. Residual Current Device: (RCD) also called fuse, it is an electro-technical device able to cut off the
circuit in the event of fault.
9. Hydraulic parts: components used to create the system where the product is used (pipes, valves,
couplings, hose connections, etc.).
10.Pool: artificial tank filled with water general intended for swimming or other aquatic activities.
11.Filter: a device where the water flowing in order to retain and/or eliminate the solid particles
suspended.
12.Filter media: filtering material, contained in the filter, responsible for filtering.
13.Skimmer: a filter that keeps the swimming pool surface clean.
14.Power plug: mechanical connector that can be inserted in a complementary electrical socket
(power outlet).
15.Maximum working pressure: maximum pressure the product is able to sustain during operations.
16.Multifunctional valve: device used to regulate the water flow (Fig. 4, # 1).

E N
Nome file:
File name:
7540028EN - CUSTOMER MANUAL SF15_200 TOP EN.docx Rev. 1 12/06/2017
5-28
Fig. 4

E N
Nome file:
File name:
7540028EN - CUSTOMER MANUAL SF15_200 TOP EN.docx Rev. 1 12/06/2017
6-28
2 General warnings and user information.
2.1 Returns.
In the event of defects, faults and malfunctions, the product must be returned to the deal with the
completed claim report, where applicable.
2.2 General and safety warnings.
General warnings.
2.2.1
SHOTT International srl continuously strives to improve its products. We trust the user will understand
the technical modifications SHOTT International srl reserves the right.
SHOTT International srl is not liable for any damages due to improper product use.
Carefully read and keep the user manual.
In order to increase energy savings, only use the product when necessary.
The following paragraphs include all the instructions necessary to best use the product according to
your needs and to independently perform the cleaning and maintenance operations that this type of
product requires. The references (#) in parentheses correspond to the parts indicated in the diagram (see
Fig. 5, Fig. 6).
Fig. 5
Fig. 6
Upon product receipt and/or purchase, check packaging integrity. The product must be accompanied by
the user manual. The user manual must be complete.
In the event of malfunctions, consult the user manual and, if necessary, contact specialised technicians.
Failure to observe the instructions in this user manual immediately null and voids the warranty.
Follow carefully what is reported next so that you will use the product respecting the most common
safety rules and remember that it is necessary to have a proper pool pump to be able to use the product.
Respect current regulations regarding accident prevention.
Due to the complex nature of the cases treated, the installation, user and maintenance instructions
contained in this customer manual do not seek to examine all possible and imaginable cases of service
and maintenance. Should your require additional instruction or have specific problems, please do not
hesitate to contact the distributor or the product manufacturer directly.
Safety warnings.
2.2.2
The product is not suited for people (even children) who suffer from physical, sensorial or mental
handicaps or people who do not have sufficient experience or training unless instructed on product use
and assisted by a person in charge of their safety. Supervise children to ensure they do not play with the
device.

E N
Nome file:
File name:
7540028EN - CUSTOMER MANUAL SF15_200 TOP EN.docx Rev. 1 12/06/2017
7-28
Never put your hands in the water if the product (pump) is in operation.
The product (pump) must never be operated in the swimming pool when people are present.
Do not submerge the product in water.
Be sure to disconnect the power plug from the power outlet before operating on the product (pump).
Attention to the inlet/outlet points because they can trap parts of the body and/or hair and cause serious
personal injuries and even death.
It is compulsory to check that the inlet ends are not blocked.
Pumps, filters, and other equipment/components of a pool filtration system can operate under pressure.
If not correctly installed they can cause serious personal injuries and even death.
Packaging materials are not children’s toys. Films can be hazardous and cause suffocation.
Do not drink alcoholic beverages before, after and while swimming. Alcohol consumption may cause
drowsiness, loss of consciousness and consequent drowning.
If taking drugs that induce drowsiness (i.e.: tranquillizers, antihistamines or anticoagulants), avoid
swimming in heated pools.
Prolonged immersion in hot water may cause hyperthermia
1,
while immersion in cold water may cause
hypothermia
2
, with symptoms such as: Dizziness, fainting, drowsiness, lethargy
3
. Consequences of
hyperthermia and hypothermia may be: Unawareness of imminent danger, lack of heat or cold perception,
failure to recognise the need to exit the pool, physical inability to exit the pool, damages to foetus for
pregnant women, unconsciousness with consequent drowning risks.
Do not use the pool if the product (filter/pump) cannot be used.
In order to protect the users’ health do not use the pool immediately after treating the water, wait for a
length of time compliant with the current health regulations.
1
Increase in body temperature over physiological limits, maximum limit 37 [°C].
2
Decrease in body temperature over physiological limits, minimum limit 35 [°C].
3
State of inactivity or lack of reactivity that nears unconsciousness.

E N
Nome file:
File name:
7540028EN - CUSTOMER MANUAL SF15_200 TOP EN.docx Rev. 1 12/06/2017
8-28
2.3 Contacts and useful addresses.
Information at:
•Shott International srl +39 049 9401150.
•www.shott.it.
3 Product presentation.
3.1 Product scope.
These filters (product) are the most reliable nowadays in the market for the cleaning and the maintenance
of your domestic swimming pool. They find their application from children to professional’s aboveground
pools. Each model is provided of a multifunctional multifunctional valve that allows the application of the
product in many different ways. In particular the filters do not need special maintenance operations
because working directly on the multifunctional valve they allow their deep cleaning with no need of long
and exhausting operations.
3.2 Composition.
See Fig. 7.
# #
1 Multifunctional valve 5 Drain Tap
2 Soft O-ring for the sealing between the
multifunctional valve and the tank 6 Tank
3 Closing flange 7 Tube with body diffuser
4 Funnel 8 Finger
Tab. 1
Fig. 7

E N
Nome file:
File name:
7540028EN - CUSTOMER MANUAL SF15_200 TOP EN.docx Rev. 1 12/06/2017
9-28
4 Technical specifications and features.
See Tab. 2.
The hydraulic parts used for the building of the system which shall include the product modify the
performance (head and flowrate) of the pump.
SF15
PPF15
SF25
PPF25
SF30
PPF30
SF38
PPF38
SF45
PPF45
SF60
PPF60
SF65
PPF65
SF85
PPF85
SF200
PPF200
15 25 30 38 45 60 65 85 200
[mm]
389 380 500 520 430 599 530 650 780
[mm]
252 334 306 334 396 396 476 476 646
[m
2
] 0.04 0.07 0.07 0.07 0.12 0.12 0.17 0.17 0.36
Ø
[mm]
0.4 – 0.8
13-17 18-25 20-25 20-25 25-30 40-50 50-60 75-80 150-160
EN 12904 (Type 2)
TBR
4
93% 90% 87% 90% 81% 90% 68% 92% 87%
dp20
5
[g] 58 58 91 93 89 93 75 225 235
[m³] <20 20-30 20-35 25-45 35-45 45-55 45-55 60-70 80-100
[l/h] 4000 4000 5500 4000 6000 6000 8500 12000 18000
[m
3
/h]
4 4 5.5 4 6 6 8.5 12 18
[l/min]
66.7 66.7 91.7 66.7 100 100 141.7 200 300
MOP
[m] 10 10 20 10 20 20 20 20 20
[bar] 1 1 2 1 2 2 2 2 2
[kPa] 100 100 200 100 200 200 200 200 200
filter
[m] 2 - 4 2 - 4 5 - 8 5 - 6 5 - 8 5 - 8 6 - 8 8 - 10 7 - 10
[bar]
0.2-0.4 0.2-0.4 0.5-0.8 0.5-0.6 0.5-0.8 0.5-0.8 0.6-0.8 0.8-1.0 0.7-1.0
back
wash
[m] 4 - 5 4 - 5 8 - 10 7 - 11 8 - 10 8 - 12 8 - 12 10 - 13 11 - 15
[bar]
0.4-0.5 0.4-0.5 0.8-1.0 0.7-1.10
0.8-1.0 0.8-1.2 0.8-1.2 1.0-1.3 1.1-1.5
IN/OUT
Tab. 2
4
Turbidity reduction efficiency
5
Retained mass
32
O
38
O
38
O38
O

E N
Nome file:
File name:
7540028EN - CUSTOMER MANUAL SF15_200 TOP EN.docx Rev. 1 12/06/2017
10-28
5 Installation.
5.1 Necessary tools.
See Fig. 8.
Fig. 8
5.2 Storage features and conditions.
The product must be stored in a dry place, protected from weather.
5.3 Transport.
Handle the product with care to avoid damages.
5.4 Handling.
Be really careful when moving the product (full of filter media, sand) because it is very heavy.
5.5 Positioning.
The product must be positioned under head.
The product must be placed in an area not subject to flooding.
The product cannot be used on the water surface.
The product must always be located at least 3.5 [m] from the edge of the swimming pool from which
water is drawn (Fig. 9).
Fig. 9
It is advisable to take the following into account:
•Dimensions and position of hydraulic parts.
•Necessary clearance.
•Supply cord position (pump).
•Location of the power supply (power outlet).
•Support and its location.
•The product must be accessible after installation.
OUTIN
WASTE
23
1
3 2
3.5[m]
OUTIN
WASTE
2 3
1
3 2
3.5[m]
V4
V6
4
4
4
4
OUT
IN
WASTE
2 3
1
32
V7
4
4
3.5[m]

E N
Nome file:
File name:
7540028EN - CUSTOMER MANUAL SF15_200 TOP EN.docx Rev. 1 12/06/2017
11-28
Please remember that water must be conveyed to the product through an appropriate pump (Fig. 10).
Fig. 10
Make sure the product is positioned in a place where noise generated during normal operations does not
create disturbances.
The product must run in a horizontal position. Make sure its position is not altered once it is correctly
placed.
The product must be positioned in a shady and aerated place.
5.6 Connections and start-up.
The product must be installed and operated by individuals with appropriate training.
Drain Tap assembling.
5.6.1
Before mounting the product assemble the special water drain tap. (Fig. 11).
The components that form the drain tap are:
9. Tap Body.
10. Tap’s O-Ring couple. One is to be
applied internally and the other one
externally.
11. Closing Ring.
12. Lid’s O-Ring.
13. Lid.
Fig. 11
Filter assembling.
5.6.2
Once the drain tap is mounted on the tank paying attention that all the o-ring are well applied you can
proceed with the Filter assembling.
1. Insert diagonally the tube with the diffuser body inside the filter as shown in the Fig. 12 and
subsequently mount the plugs on the diffuser body.
Fig. 12
2. Place the diffuser complete with the tube underneath the tank. Refill the tank with water until the
first line you can see on the tank (Fig. 13). This procedure give stability to the diffuser.

E N
Nome file:
File name:
7540028EN - CUSTOMER MANUAL SF15_200 TOP EN.docx Rev. 1 12/06/2017
12-28
Fig. 13
3. Place the special funnel (Fig. 14, #4) on the tank’s mouth, paying attention to cover properly the
tube, and start to pour the filter media (quartz sand not supplied into the tank, Fig. 15).
Fig. 14
Fig. 15
Once you refilled the tank with filter media until the higher line (around 2/3 of the tank’s height) remove
the funnel.
4. Take now the special multifunctional valve supplied and insert it applying it under the soft o-ring
(Fig. 16).
Fig. 16

E N
Nome file:
File name:
7540028EN - CUSTOMER MANUAL SF15_200 TOP EN.docx Rev. 1 12/06/2017
13-28
5. Clean really carefully the tank’s neck, place the multifunctional valve taking care that the tube enter
in the central hole (Fig. 17).
Fig. 17
Insert the pipe into the central hole, taking care not to move the O-ring from its housing.
6. Now fix the multifunctional valve to the tank through the supplied flange (Fig. 18). Work with a
screwdriver to tight the screws.
Fig. 18
7. Take off the multifunction white multifunctional valve cap, apply some supplied teflon around the
manometer (optional for SF15, 25) thread and then screw the manometer with a key using no strength
on the plastic box (Fig. 19).
Fig. 19
Now your filter is at your disposal.
Pressure connection with compression fittings (optional).
5.6.3
See Fig. 20.

E N
Nome file:
File name:
7540028EN - CUSTOMER MANUAL SF15_200 TOP EN.docx Rev. 1 12/06/2017
14-28
Fig. 20
Position the O-rings on the hosetail (Fig. 21).
Fig. 21
Proceed as follows:
1. Screw the two hosetail (Fig. 22).
Fig. 22
2. Insert onto the hose: ring nut, split ring (Fig. 23)
Fig. 23
3. Insert the hose all the way in until it goes no further (Fig. 24)
Fig. 24
4. Move all the components forward.
5. Tighten the nut (Fig. 25).

E N
Nome file:
File name:
7540028EN - CUSTOMER MANUAL SF15_200 TOP EN.docx Rev. 1 12/06/2017
15-28
Fig. 25
Connection to the skimmer and to the pump.
5.6.4
Apply some supplied teflon around the hose connector (hydraulic parts) to guarantee a safe sealing.
Position the O-rings on the hosetail (Fig. 26).
Fig. 26
1. Pressure connection (Fig. 30, # 1): join the filter pump (outlet Fig. 27, OUT) to the multifunction
valve (PUMP), using the corrugated pipes or the rigid connection (Fig. 28).
Fig. 27
Fig. 28
2. Skimmer tube (Fig. 30, # 2): join the skimmer connection to the frontal connection of the filter
pump (inlet Fig. 29, IN).
Fig. 29
3. Return-tube (Fig. 30, # 3): join the connection on the 4 or 6 ways multifunctional valve marked with
RETURN/POOL to the entrance mouth connection of the swimming pool. Tight with special hose
clamps the tubes on the connections (hydraulic parts).

E N
Nome file:
File name:
7540028EN - CUSTOMER MANUAL SF15_200 TOP EN.docx Rev. 1 12/06/2017
16-28
4. Backwash-tube (Fig. 30, # 4): to be used when we apply the BACKWASH function to drain the
dirty water in a discharge area. For the connection use proper rubber tubes and proper hose clamps
(hydraulic parts).
Fig. 30
Refilling the swimming pool.
5.6.5
If you have already connected everything properly you can now start to refill the swimming pool. The water
level must reach at least the middle of the skimmer’s suction mouth.
Starting the product.
5.6.6
Before starting the application of the filter make sure this one is well positioned out of the swimming
pool under the water level (flooded). Check that all the tubes and joints are fixed tightly. The swimming
pool has to be refilled with water until half of the skimmer height. The water must arrive to the pump by
natural flow (flooded).
1. Change the 4 or 6 ways multifunctional valve lever to the BACKWASH position.
Make sure that on the joint WASTE (Fig. 31, # 4) a tube that make the water drain is connected. Start
the filter only after this moment.
OUTIN
WASTE
23
1
3 2
3.5[m]
OUTIN
WASTE
2 3
1
3 2
3.5[m]
V4
V6
4
4
4
4
OUT
IN
WASTE
2 3
1
32
V7
4
4
3.5[m]

E N
Nome file:
File name:
7540028EN - CUSTOMER MANUAL SF15_200 TOP EN.docx Rev. 1 12/06/2017
17-28
Fig. 31
2. Start the pump and make a BACKWASH of about 2÷3 minutes.
3. Right after this stop the pump and change the multifunctional valve lever position on RINSE.
4. Re-start the pump and rinse for about 30 seconds.
5. Stop the pump once again and change the multifunctional valve lever position on FILTER.
6. Start again the pump.
The product is now doing its normal job.
5.7 Reinstallation and reuse.
Clean the product and the moving parts accurately before stopping the product for a while, such as, for
instance, during the winter months. Do not lubricate and/or use detergents and chemical cleaning
products.
If there is the risk of freezing, the product must be carefully emptied from the liquids in its hydraulic
circuit. It is advisable to empty all the hydraulic parts.
Remove the cap to empty the product (Fig. 32, # 13), when included.
Fig. 32
OUTIN
WASTE
23
1
3 2
3.5[m]
OUTIN
WASTE
2 3
1
3 2
3.5[m]
V4
V6
4
4
4
4
OUT
IN
WASTE
2 3
1
32
V7
4
4
3.5[m]

E N
Nome file:
File name:
7540028EN - CUSTOMER MANUAL SF15_200 TOP EN.docx Rev. 1 12/06/2017
18-28
5.8 Demolition and disposal.
Collecting recyclable material, both those used for packaging (cardboard, nylon, etc.) and those replaced
during routine and extraordinary maintenance is recommended. Suitable collection of waste material for
recycling, processing and environmentally compatible disposal contributes in avoiding possible negative
effects on the environment and health and promote the reuse and/or recycling of product materials.
Illicit product disposal by the user may be punishable by current international and/or national laws.

E N
Nome file:
File name:
7540028EN - CUSTOMER MANUAL SF15_200 TOP EN.docx Rev. 1 12/06/2017
19-28
6 Operations and use.
Do not use glues, sealers or other chemical products on threads or other parts of the product.
6.1 Description of operation.
The product you have purchased carries out the mechanical purification of the water that, passing through
the filter media (sand), is cleaned of all undissolved substances held back by the filter media.
6.2 Application range.
The product cannot be used to purify water for human consumption.
The product was designed and constructed to operate in above-ground fresh swimming pool, located
outdoors.
6.3 Use.
The product cannot be used to purify water for human consumption.
6.4 Operating limits and environmental limits.
•Maximum water temperature: 35 [°C].
•Minimum water temperature: 4 [°C].

E N
Nome file:
File name:
7540028EN - CUSTOMER MANUAL SF15_200 TOP EN.docx Rev. 1 12/06/2017
20-28
7 User instructions.
7.1 Foreseen use and adjustments.
We suggest to start the filter twice a day for 4 or 5 hours.
Regularly check if backwash is necessary, please see Tab. 2.
Use and functioning of the multifunctional valve.
7.1.1
Always switch off the pump when operating on the multifunctional valve’s lever.
It is recommended to install valves in the inlet and outlet pipelines (hydraulic parts).
V4
V6
V7
FILTRATION.
The water in the pool enters the multifunctional valve
from
the PUMP connector (Fig. 33, # 1), travels through the
filter
media (from top to bottom), exits from the POOL
connector
(Fig. 33, # 3) and returns clean to the pool.
BACKWASH
.
The water in the pool enters the multifunctional valve
from
the PUMP connector (Fig. 33, # 1), travels through the
filter
media
(from bottom to top) stirring it, exits from the
WASTE connector (Fig. 33
, # 4) getting rid of the impurities
held back by the
filter media.
RINSE
.
The water in the pool enters the multifunctional valve
from
the PUMP connector (Fig. 33, # 1), travels through the
filter
media
(from top to bottom) compacting it, exits from the
WASTE connector (Fig. 33
, # 4) getting rid of the impurities
held back by the
filter media.
VALVE CLOSED (only on 6-way multifunctional valve).
The water in the pool does not cross the filter. The PUMP
connector (Fig. 33, # 1) is closed.
-
WASTE (only on 6-way multifunctional valve).
The water in the pool enters the multifunctional valve
from
the PUMP connector (Fig. 33
, # 1), exits straight from the
WASTE connector (Fig. 33
, # 4) without going through the
filter media.
-
CIRCULATION (only on 6-way multifunctional valve).
The water in the pool enters the multifunctional valve
from
the PUMP connector (Fig. 33
, # 1) and exits from the
POOL connector (Fig. 33, # 3) going back to the
pool
without crossing the filter media.
-
WINTER.
Rest position of the multifunctional valve
to protect the
internal components of the multifunctional valve itself
.
Position suitable for storage.
Tab. 3
This manual suits for next models
19
Other Shott Water Filtration System manuals
Popular Water Filtration System manuals by other brands
PuriTeam
PuriTeam Purity UC-12 manual
Culligan
Culligan RVF-10 Installation and operation instructions

Pelican
Pelican WF4 owner's manual
DEKA Controls
DEKA Controls TOH Series installation manual
OMEGA AIR
OMEGA AIR WOSm Series Installation and operating manual
Petsafe
Petsafe DRINKWELL HY-DRATE PFD17-12899 instructions

Grizzly
Grizzly T33150 owner's manual
Premier
Premier ZRO-4 Installation, operation and maintenance manual
BWT
BWT MINISTIL 1iD Installation and operating manual

Monarch Water
Monarch Water WELLBEING GEMINI install guide
InSinkErator
InSinkErator F-201R installation instructions
Pentair
Pentair AQUATIC ECO-SYSTEMS ARIAS 6000 Installation and user guide


