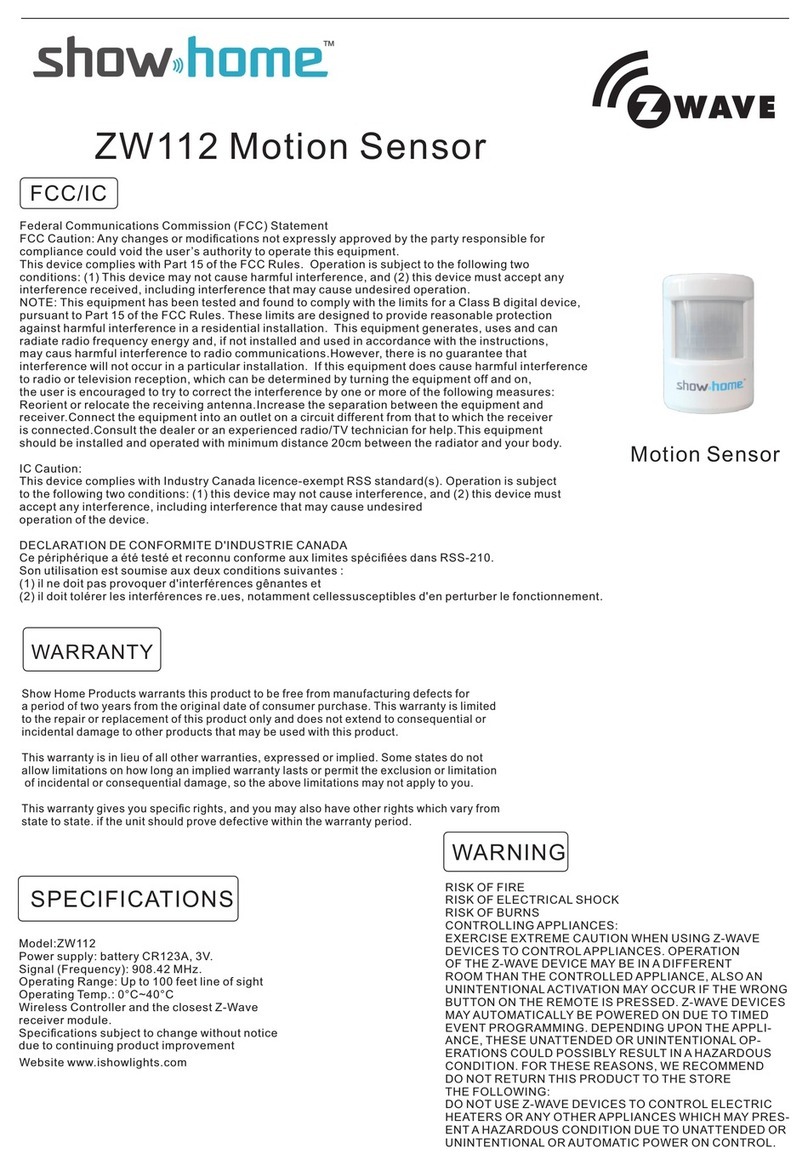
showhome ZW112 User manual

FCC/IC
Federal CommunicationsCommission (FCC)Statement
FCC Caution: Anychangesormodi cationsnot expresslyapproved bythe partyresponsible for
compliancecould void the user’sauthoritytooperatethisequipment.
ThisdevicecomplieswithPart 15 of the FCC Rules.
Operation issubject tothe following two
conditions: (1)Thisdevicemaynot causeharmful interference, and (2)thisdevicemust accept any
interferencereceived, including interferencethat maycauseundesired operation.
NOTE: Thisequipment hasbeen tested and found tocomplywiththe limitsforaClass Bdigital device,
pursuant toPart 15 of the FCC Rules. Theselimitsaredesigned toprovide reasonable protection
against harmful interferencein aresidential installation.
Thisequipment generates, usesand can
radiateradio frequencyenergyand, if not installed and used in accordancewiththe instructions,
maycausharmful interferencetoradio communications.However, thereisno guarantee that
interferencewill not occurin aparticularinstallation.
If thisequipment doescauseharmful interference
toradio ortelevision reception, whichcan be determined byturning the equipment off and on,
the userisencouraged totrytocorrect the interferencebyone ormoreof the following measures:
Reorient orrelocatethe receiving antenna.Increasethe separation between the equipment and
receiver.Connect the equipment intoan outlet on acircuit different fromthat towhichthe receiver
isconnected.Consult the dealeroran experienced radio/TVtechnician forhelp.Thisequipment
should be installed and operated withminimumdistance20cmbetween the radiatorand yourbody.
ICCaution:
Doorwindow sensor
ThisdevicecomplieswithIndustryCanada licence-exempt RSS standard(s). Operation issubject
tothe following two conditions: (1)thisdevicemaynot causeinterference, and (2)thisdevicemust
accept anyinterference, including interferencethat maycauseundesired
operation of the device.
DECLARATIONDECONFORMITED'INDUSTRIECANADA
Ce périphérique a ététestéet reconnu conformeauxlimitesspéci éesdansRSS-210.
Son utilisation est soumiseauxdeuxconditionssuivantes:
(1)il ne doit pasprovoquerd'interférencesgênanteset
(2)il doit tolérerlesinterférencesre.ues, notamment cellessusceptiblesd'en perturberle fonctionnement.
Show HomeProductswarrantsthisproduct tobe free frommanufacturing defectsfor
W112 Motion Sensor
Motion Sensor
WARRANTY
Show HomeProductswarrantsthisproduct tobe free frommanufacturing defectsfor
aperiod of two years fromthe original dateof consumerpurchase. Thiswarrantyislimited
tothe repairorreplacement of thisproduct onlyand doesnot extend toconsequential or
incidental damage tootherproductsthat maybe used withthisproduct.
Thiswarrantyisin lieu of all otherwarranties, expressed orimplied. Somestatesdo not
allow limitationson how long an implied warrantylastsorpermit the exclusion orlimitation RISK OF FIRE
of incidental orconsequential damage, sothe abovelimitationsmaynot applytoyou. RISK OF ELECTRICALSHOCK
RISK OF BURNS
Thiswarrantygivesyou speci
crights, and you mayalsohaveotherrightswhichvaryfrom
CONTROLLING APPLIANCES:
statetostate. if the unit should provedefectivewithin the warrantyperiod. EXERCISE EXTREMECAUTIONWHENUSING Z-WAVE
DEVICES TO CONTROLAPPLIANCES. OPERATION
OF THEZ-WAVE DEVICEMAY BE INADIFFERENT
ROOMTHANTHECONTROLLEDAPPLIANCE, ALSO AN
UNINTENTIONALACTIVATIONMAY OCCUR IF THEWRONG
BUTTONONTHEREMOTEISPRESSED. Z-WAVE DEVICES
Model:ZW112 MAY AUTOMATICALLYBE POWEREDONDUETO TIMED
Powersupply: batteryCR123A, 3V. EVENTPROGRAMMING. DEPENDING UPONTHEAPPLI-
Signal (Frequency): 908.42 MHz. ANCE, THESE UNATTENDEDORUNINTENTIONALOP-
Operating Range: Up to100 feet line of sight
ERATIONSCOULD POSSIBLYRESULTINAHAZARDOUS
Operating Temp.: -15°C~60°C(5°F ~140°F) CONDITION. FORTHESE REASONS, WERECOMMEND
Wireless Controllerand the closest Z-Wave DO NOTRETURN THISPRODUCTTO THESTORE
receivermodule. THEFOLLOWING:
Speci cationssubject tochange without notice DO NOTUSE Z-WAVE DEVICES TO CONTROLELECTRIC
due tocontinuing product improvement HEATERSORANYOTHERAPPLIANCES WHICH MAY PRESENT
Website www.ishowlights.com AHAZARDOUSCONDITIONDUETO UNATTENDEDOR
UNINTENTIONALORAUTOMATICPOWERONCONTROL.
1.Do not attempt to disassemble the Motion Sensor,unless described in the user’s manual. There are no user serviceable parts.
2.Handle with Care –Avoid striking or shaking.Improper use or storage could damage the Motion Sensor. Modifying or tampering
the device or its internal components can cause a malfunction and void the Motion Sensor’s warranty.
3.Ifyou feel the Motion Sensor or anypart ofthe Choice Alert systemis not operating correctlyor as described, please contact us.
SPECIFICATIONS
WARNING
Importantsafeguards

The Motion Sensor is designed to be used indoor or outdoor. When mounted properlyit can monitor large or open areas such as
entrances, living rooms, familyrooms, driveways, backyards, walkways, workshops,etc. When the Sensor detects motion, it
will transmit a signal to the controller. The zone selection and setting on the Controller determine ifan alarmor an
alert sounds.
Preparing the Motion Sensor for Installation
1.The Motion Sensor consists of2 parts –The Sensor(Transmitter) and the wall mount. Before installing,remove the screwfrom
the batterydoor on the back ofthe Sensor. You’ll need to attach the batteryleads to CR123A 3V battery;Take care to note the
polaritymarkings. Replace the batterycover and secure screw.
2.Use the ball-head mount to mount the Sensor. The minimumspacing recommended is 5-6 ft, depending on where you want to
mount the Motion Sensor. Once the location is selected, before mounting you should performa manual test to con rmthe
Motion Sensor is within range ofController. Mount the ball-head joint to the location with screws provided. Once the ball-head
joint is mounted to the wall, slide the back ofthe sensor onto the ball-head joint. The mounting angle can be adjusted.
3.Erasing the Sensor froma Zone
Ifyou need to remove the Sensor froma Zone, the systemwill erase the entire Zone, so anyother Sensors will need to be put
back into that particular Zone.Step 1 - To erase a Zone, press and hold the Learn button on the Control Center. The unit will
beep once.Step 2 - While holding the Learn button, press and hold the Zone button to be erased. After ve seconds the Control
Center will sound two beeps and the Zone LED indicator will flash twice.Step 3 - Release all buttons. The Zone has been erased.
and delaytime for next Trigger : 35 sec.
Note:
The Motion Sensor cannot be erased if: The sensor has been triggered for an Alert or alarm.
The Sensor must be reset when loss ofsignal fromthe Sensor to the Controller (such as lowbattery, or out ofrange).
The lowbatterystatus will be checked each hour and reported.
TO return your device to factory default:
Use certificated controller to remove device fromnetwork will reset it to factorydefault.
Please use this procedure onlyin the event that the network primarycontroller is missing or otherwise inoperable.
Adding to -Wave network
1) Install the battery. Visual indicator showstatus (blue flashing - device readyfor adding, LED off - device added),
2) Make sure the device is located within direct range ofthe Z-Wave controller.
3) Followthe instructions ofcertified controller to include a device fromdifferent manufactures into the Z-Wave network.
4) Once the controller is readyto include your device, triple click Tamper switch.
5) Motion Sensor will be detected and added in the Z-Wave network.
Removing from -Wave network
1) Followthe instructions for your Z-Wave certified controller to exclude a device fromthe Z-Wave network.
2) Once the controller is readyto Exclude your device,triple click Tamper switch to exclude it fromZ-Wave network.
Note:
Instruction
Note:
1. The association group supports five nodes and lifeline function.
2. This product can be operated in anyZ-Wave network with other Z-Wave certified devices from
other manufacturers. All non-batteryoperated nodes within the network will act as repeaters
regardless ofvendor to increase reliabilityofthe network.
Motion Sensor with
mounting bracket - 1pcs
Screw- 2pcs
Plastic anchors - 2pcs Top view
Ball-head joint - 1pcs
Detection pattern:
100 degree 10x10Mat 25°C
Side View
Packagecontent:
Table of contents
Other showhome Security Sensor manuals
Popular Security Sensor manuals by other brands
STEINEL PROFESSIONAL
STEINEL PROFESSIONAL iHF 3D manual

Plastic Safety Systems, Inc.
Plastic Safety Systems, Inc. SafetyRail Assembly instructions
Joy-it
Joy-it BUMP-SENSOR manual

AltumView
AltumView AVG20WF5 user manual

PCB Piezotronics
PCB Piezotronics 4115K-11A Installation and operating manual
Gammon
Gammon AQUA-GLO V SERIES operating manual
