manuals.online logo
Brands
  1. Home
  2. •
  3. Brands
  4. •
  5. teko
  6. •
  7. Security Sensor
  8. •
  9. teko Astra-3221 User manual

teko Astra-3221 User manual

Astra-3221
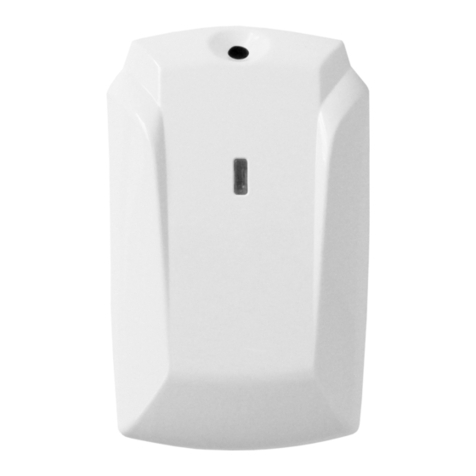
Wireless panic button
User Guide
Manufacturer:
TEKO-TD
Prospekt Pobedy str. 19
420138 Kazan, Russia
+7(843) 528-03-69
[email protected]
www.teko.biz
Made in Russia
Rev. 3221-v4_2_instr_en
1 FUNCTION
Wireless Electro-Contact Panic Button is in-
tended for manual activation and transmitting an
alarm signal to the Security Hub.
2 SPECIFICATIONS
Wireless coverage range*, m .......................100
Power supply voltage, V..............from 2.3 to 3.0
Overall dimensions, mm.................86 × 40 × 20
Operating Conditions
Temperature range, °С........... from - 10 to + 50
Relative air humidity, %.........up to 98 at + 40 °С
withoutmoisture condensation
3 DELIVERY SET
Delivery set includes: screw –2 pcs., clip –1
pc., battery (СR2430, 3.0V) - 2 pcs. (installed),
user guide –1 copy, label –2 pcs.
* The maximum wireless coverage range parameters
are ensured when the best installation conditions for
the detector and radio receiver are met and an external
antenna is used in the radio receiver.
4INDICATION
Indication
Detector LED
Standby mode (with
radio supervision)
1-time
flash at least 10 sec
after turning on the
power
Standby mode (without
radio supervision)
2-time
flash at least 10 sec
after turning on the
power
Norm (with radio su-
pervision)
Off
Norm (without radio
supervision)
Off
Alarm (Panic)
1-time flash by push-
ing the panic button
Power failure (with
radio supervision)
3-time flashes by
pushing the panic
button (when the
voltage is lower than
2.3 V)
Note - When the message "Power failure"
appears, the battery must be replaced within
one week.
5 OPERATION MODES
Attention! Setting operation mode of the detec-
tor, as well as LED indication of notifications are
possible within no more than 10 minutes after
battery insertion!
5.1 RF supervision/ No RF supervision
Panic button supports two operation modes:
- With RF supervision (when using the panic
button as a stationary device),
- Without RF supervision (when using the
panic button as a mobile (wearable) device).
Sequencing:
1) Remove the base of the detector (see p.6)
2) Activate battery by pulling out the insulator
3) By the LED indication check the mode:
- 1-time flash –with RF supervision,
- 2-time flash –without RF supervision.
4) To change the mode, wait for 10 sec., press
the panic button and hold it for at least 10 sec.
until the LED flashes, 1-time or 2-time, depend-
ing on the set mode.
5.2 Radio mode selection
The radio mode of the detector is configured by
closing the metallized contacts on the PCB.
Sequencing:
1) If after activating the
battery more than 10
minutes have passed:
reset the battery, wait at
least 10 sec.
2) Close the metallized
Rmod contact until the
indication appears (at
least 10 sec).
3) After turning on the LED, determine the set
radio mode:
- 1-time flash –mode 1,
- 2-time flash –mode 2 (compatible with Secu-
rity Hub).
4) Close the metalized Lit contact until the LED
indication appears (not less than 10 sec).
5) After turning on the LED, determine the set
mode:
- 1-time flash –frequency mode 1 (compatible
with Security Hub),
- 3-time flash –frequency mode 3.
When changing modes on a registered de-
tector it is necessary to re-register the de-
tector!
6ADDING PROCEDURE
1) De-assemble the panic button.
2) Select mode with or without RF supervision
(p. 5.1) if it is necessary (no need for Security
Hub).
3) Set radio mode and frequency mode (p. 5.2)
if it is necessary (no need for Security hub).
4) Start registration on the Security Hub mobile
app. Registration starts for 45-60 sec.
5) Activate or re-activate the battery.
6) Check the adding in the Security Hub mobile
App.
7) In case of successful adding activate the
second battery and assemble the panic button.
7 INSTALLATION PROCEDURE
As a stationary device with RF supervi-
sion:
- remove the base;
- remove the PCB;
- fix the base of the detector in the chosen
place;
- install the cover with the PCB fixed on it into
the base.
As a mobile device without RF supervi-
sion: attach to clothes with a clip or use a cord
(cord is supplied separately).
8 WARRANTY
The operation warranty period is 1 year from the
date of operation start, but no longer than 1 year
6 months from the date of manufacturing subject
to the requirements of User guide.
Other teko Security Sensor manuals

teko Astra-5131 User manual

teko

teko Astra-5131 User manual

teko Astra-431 User manual

teko

teko Astra-431 User manual

teko Astra-612 User manual

teko

teko Astra-612 User manual

teko Astra-517 User manual

teko

teko Astra-517 User manual

teko Astra-361 Installation instructions

teko

teko Astra-361 Installation instructions

teko Astra-6131 User manual

teko

teko Astra-6131 User manual

teko Astra-8 User manual

teko

teko Astra-8 User manual

teko Astra-9 User manual

teko

teko Astra-9 User manual

teko Astra-5131 User manual

teko

teko Astra-5131 User manual

teko Astra-531 User manual

teko

teko Astra-531 User manual

teko Astra-R TRC User manual

teko

teko Astra-R TRC User manual

teko Astra-531 Ver.PIR User manual

teko

teko Astra-531 Ver.PIR User manual

teko Astra-551 User manual

teko

teko Astra-551 User manual

teko Astra-531 DC Installation instructions

teko

teko Astra-531 DC Installation instructions

teko Astra-361 User manual

teko

teko Astra-361 User manual

teko Astra-8 User manual

teko

teko Astra-8 User manual

teko Astra-GB User manual

teko

teko Astra-GB User manual

teko Astra-621 User manual

teko

teko Astra-621 User manual

teko Astra-43A User manual

teko

teko Astra-43A User manual

teko Astra-MA User manual

teko

teko Astra-MA User manual

teko Astra-517 ver.P User manual

teko

teko Astra-517 ver.P User manual

teko Astra-A ILS User manual

teko

teko Astra-A ILS User manual

teko Astra-621 User manual

teko

teko Astra-621 User manual

teko Astra-Z-3645 User manual

teko

teko Astra-Z-3645 User manual

Popular Security Sensor manuals by other brands

Wavetronix SmartSensor V user guide

Wavetronix

Wavetronix SmartSensor V user guide

ALERTON MS/TP Microset II Installation and operation guide

ALERTON

ALERTON MS/TP Microset II Installation and operation guide

EVERSPRING HSM01 Installation and operating instructions

EVERSPRING

EVERSPRING HSM01 Installation and operating instructions

Satel A D-200 Series manual

Satel

Satel A D-200 Series manual

BUCKINGHAM MFG 355TQ2 Instructions & warnings

BUCKINGHAM MFG

BUCKINGHAM MFG 355TQ2 Instructions & warnings

TSI Quest SD-200 quick start guide

TSI Quest

TSI Quest SD-200 quick start guide

BEA IXIO-S CAN user guide

BEA

BEA IXIO-S CAN user guide

Sontay OC-C-M quick start guide

Sontay

Sontay OC-C-M quick start guide

Powerfix Profi IAN 40111 Operation and safety notes

Powerfix Profi

Powerfix Profi IAN 40111 Operation and safety notes

bureau veritas EcotestVIP operating manual

bureau veritas

bureau veritas EcotestVIP operating manual

Honeywell Miller RACDTA-5K6/6FT User instruction manual

Honeywell

Honeywell Miller RACDTA-5K6/6FT User instruction manual

Rielta FOTON-SH installation guide

Rielta

Rielta FOTON-SH installation guide

Visonic SPY 1 installation instructions

Visonic

Visonic SPY 1 installation instructions

JB INDUSTRIES LD-6000IR Operator's manual

JB INDUSTRIES

JB INDUSTRIES LD-6000IR Operator's manual

Optex AIR-SLIDE T manual

Optex

Optex AIR-SLIDE T manual

Lithonia Lighting LVS 120/277 ELN CW Installation instruction supplement

Lithonia Lighting

Lithonia Lighting LVS 120/277 ELN CW Installation instruction supplement

TrolMaster WD-1 manual

TrolMaster

TrolMaster WD-1 manual

Safe Signal WFDNFT Installation and maintenance instructions

Safe Signal

Safe Signal WFDNFT Installation and maintenance instructions

manuals.online logo
manuals.online logoBrands
  • About & Mission
  • Contact us
  • Privacy Policy
  • Terms and Conditions

Copyright 2025 Manuals.Online. All Rights Reserved.