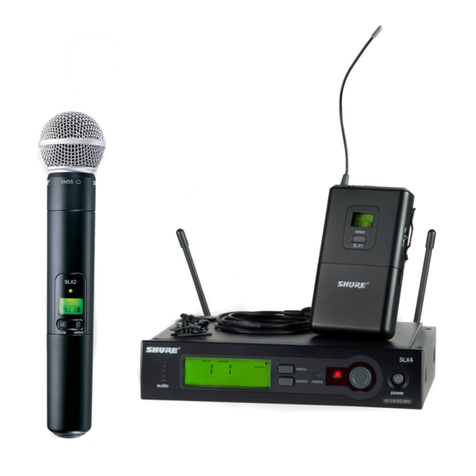
Shure LX Wireless System User manual

Shure Brothers Incorporated
222 Hartrey Avenue
Evanston IL 60202-3696 U.S.A.
www.shure.com
27B8654(SC)
E1999,ShureBrothersIncorporated
LX Wireless System
User Guide

LX Wireless
2
THANK YOU...
...for selecting the Shure LX Wireless Microphone System
This guide is intended to help you get the most out of your LX wireless microphone
system. If you have questions about your system that are not answered in this guide,
please contact Shure Customer Service at 847-866-2553, Monday through Friday,
8:00 am - 4:30 pm CST.
In Europe, please call Shure GmbH in Germany at 49-7131-72140. Other interna-
tional users please call Shure Brothers Inc. in the U.S.A. at 847-866-2200.

LX Wireless
3
READ ME FIRST!
To get your system up and running in just a few minutes, follow the simple in-
structions on this page. For more detailed information, refer to the sections of
this guide that apply to your system.
Receiver Connections
1. Attach the antennas to the receiver antenna connectors.
2. Connect the ac power adapter to the receiver power connector; then plug it into an
ac electrical outlet.
3. Connect the receiver audio output to the sound system, using either a low- or high-
impedance audio cable.
Transmitter Connections
1. Open the transmitter battery compartment and insert a fresh 9-volt alkaline
battery. Observe proper battery polarity ( “+/–”).
2. If you are using a body-pack transmitter, connect the microphone or WA302 instru-
ment cable to the 4-pin connector on the transmitter.
Operating the System
1. Press the receiver POWER switch. The green POWER light on the receiver will
glow.
2. SetthetransmitterPWR/OFFswitchtoPWRandtheON/MUTEswitchtoON.One
of the three lights on the transmitter will glow, indicating both that the transmitter is
on and the amount of battery life remaining. Two sets of five RF level lights on the
receiverwillalsoglowtoindicatethestrengthofthereceivedsignal.Themorelights
that glow, the stronger the signal.
3. Have someone talk or sing into the microphone, or play the musical instrument con-
nected to the transmitter. The audio level will be indicated as follows:
-Green lights (3) glowing indicates normal operation.
-Amber light glowing indicates approaching audio overload (should only occur
during loud signals).
-Red light glowing steadily indicates audio overload. If this happens, reduce the
transmittergainuntilitflickersonlyduringtheloudestsignals.RefertotheTrans-
mitter Audio Gain Adjustment section of this guide.
4. Adjust the receiver LEVEL control until the output level is compatible with the mixer
or amplifier input. In most cases, this control should be set fully clockwise.
YOU ARE NOW READY TO PERFORM!
IMPORTANT:
Every wireless microphone installation is a unique situation, and can
present a variety of problems. Never attempt a live performance without first conduct-
ing a “walkthrough” test of the system in the performing area. If major changes (addi-
tional wireless systems or intercoms, relocation of scenery, etc.) have been made
sincethe last walk–throughtest, check thewireless system again—asclose to perfor-
mance time as possible.

LX Wireless
4
TABLE OF CONTENTS
SYSTEM COMPONENTS 5. . . . . . . . . . . . . . . . . . . . . . . . . . . . . . . . . . . . . . . . . . . . . . . .
SYSTEM FEATURES 6. . . . . . . . . . . . . . . . . . . . . . . . . . . . . . . . . . . . . . . . . . . . . . . . . . . .
LX1 BODY-PACK TRANSMITTER FEATURES, CONTROLS & INDICATORS 7. . .
LX2 HAND-HELD TRANSMITTER FEATURES, CONTROLS & INDICATORS 8. . .
LX3 RECEIVER FEATURES, CONTROLS & INDICATORS 9. . . . . . . . . . . . . . . . . . .
LX4 DIVERSITY RECEIVER FEATURES, CONTROLS & INDICATORS 10. . . . . . .
RECEIVER MOUNTING 11. . . . . . . . . . . . . . . . . . . . . . . . . . . . . . . . . . . . . . . . . . . . . . . .
Single Rack Mounted Receiver 11. . . . . . . . . . . . . . . . . . . . . . . . . . . . . . . . . . . . . .
Double Rack Mounted Receivers 11. . . . . . . . . . . . . . . . . . . . . . . . . . . . . . . . . . . .
RECEIVER CONNECTIONS 12. . . . . . . . . . . . . . . . . . . . . . . . . . . . . . . . . . . . . . . . . . . . .
TRANSMITTER SETUP 13. . . . . . . . . . . . . . . . . . . . . . . . . . . . . . . . . . . . . . . . . . . . . . . . .
LX1 Body–Pack Transmitter Battery Installation 13. . . . . . . . . . . . . . . . . . . . . . . . .
LX2 Hand–Held Microphone–Transmitter Battery Installation 13. . . . . . . . . . . . .
Checking the Transmitter Battery 14. . . . . . . . . . . . . . . . . . . . . . . . . . . . . . . . . . . . .
Connecting a Lavalier Microphone or Instrument Cable to the LX1 14. . . . . . . .
Attaching the LX1 to a Belt or Guitar Strap 15. . . . . . . . . . . . . . . . . . . . . . . . . . . . .
Installing the WA555 Grip/Switch Cover Accessory on the LX2 15. . . . . . . . . . . .
OPERATING LX1 BODY–PACK SYSTEMS 16. . . . . . . . . . . . . . . . . . . . . . . . . . . . . . . .
OPERATING THE LX2 HAND–HELD SYSTEM 17. . . . . . . . . . . . . . . . . . . . . . . . . . . . .
GAIN AND SQUELCH ADJUSTMENT 18. . . . . . . . . . . . . . . . . . . . . . . . . . . . . . . . . . . .
Adjusting the Transmitter Audio Gain Level 18. . . . . . . . . . . . . . . . . . . . . . . . . . . .
Adjusting the Receiver Squelch Control 19. . . . . . . . . . . . . . . . . . . . . . . . . . . . . . . .
TIPS FOR ACHIEVING OPTIMUM PERFORMANCE 19. . . . . . . . . . . . . . . . . . . . . . .
TROUBLESHOOTING 20. . . . . . . . . . . . . . . . . . . . . . . . . . . . . . . . . . . . . . . . . . . . . . . . . .
SPECIFICATIONS 21. . . . . . . . . . . . . . . . . . . . . . . . . . . . . . . . . . . . . . . . . . . . . . . . . . . . . .
FURNISHED ACCESSORIES 22. . . . . . . . . . . . . . . . . . . . . . . . . . . . . . . . . . . . . . . . . . .
OPTIONAL ACCESSORIES 22. . . . . . . . . . . . . . . . . . . . . . . . . . . . . . . . . . . . . . . . . . . . .
REPLACEMENT PARTS 23. . . . . . . . . . . . . . . . . . . . . . . . . . . . . . . . . . . . . . . . . . . . . . . .
LICENSING INFORMATION 23. . . . . . . . . . . . . . . . . . . . . . . . . . . . . . . . . . . . . . . . . . . . .

LX Wireless
5
SYSTEM COMPONENTS (FIGURE 1)
LX1
LEVEL POWER
LX4
RF A RF B AUDIO SQUELCH DIVERSITY
MARCAD
LX2
RECEIVER
RF AUDIO SQUELCH LEVEL POWER
LX3
WIRELESS
LX WIRELESS MICROPHONE SYSTEM COMPONENTS
FIGURE 1
Your LX Wireless Microphone System features a MARCADfixed frequency diver-
sity receiver operating in the VHF band between 169 and 240 MHz. Up to 12 LX wire-
less systems can be operated simultaneously in a single installation. Each LX system
contains a combination of the following items:
•One of the following transmitters:
LX1 Body-Pack Transmitter, with your choice of instrument cable or microphone,
or
LX2Hand-HeldMicrophone-Transmitterwithyourchoiceofinterchangeablemicro-
phone heads:
-SM58 cardioid dynamic microphone
-BETA 58supercardioid premium dynamic microphone
-SM87 supercardioid condenser microphone
-BETA 87supercardioid premium condenser microphone
•One of the following half-rack size receivers:
LX3 Receiver
or
LX4 Diversity Receiver
•Both single and dual rack-mounting hardware
•One antenna (LX3 systems) or two antennas (LX4 systems)
•One of the following ac power adapters: PS40,PS40E, or PS40UK.

LX Wireless
6
SYSTEM FEATURES
Shure LX Wireless Systems offer a number of exceptional features, including:
•Exclusive Shure MARCADCircuitry (LX4). MARCAD (MAximum Ratio Combin-
ingAudioDiversity)circuitryconstantlymonitorssignalsfrombothreceiversections
andcombinesthemtocreateasingleoutputsignal.Theresultisimprovedreception
and exceptional freedom from dropouts.
•Half-Rack Receiver Size. The LX3 and LX4 receivers interface with the HR (half-
rack) format, and are supplied with both single and dual rack-mount hardware. An
optional WA503 accessory kit lets you front-mount antennas.
•Power/Battery Fuel Gauge. The LX1 and LX2 transmitters include a three-light
gaugethatindicatesboth“poweron”andtheamountofbatteryliferemaining.(Refer
to the
Checking the Transmitter Battery
section.)
•Dual RF Level Meters (LX4). Instead of a conventional single RF meter, the LX4
receiver has two meters, one for each antenna. The dual meters indicate received
signal strength at each antenna, and make it easier to identify and troubleshoot RF
“dead spots.”
•Audio Metering. A five-light audio meter helps to optimize transmitter gain setting
and lets you monitor audio level during operation.
•True Guitar Sound. Guitar players demanding the highest degree of sound quality
and reliability will appreciate the low noise and uncolored sound of the LX Wireless
System.
•Noise Squelch. This circuit analyzes signal
quality
instead of signal
strength
. This
virtually eliminates the possibility of annoying noise bursts coming through your re-
ceiver.
•Body-Pack Transmitter Belt Clip. The belt clip has a wider contact surface for a
better grip, and firmly holds thinner, more slippery materials. It can be removed or
inverted for special positioning.
•Grip/Switch Cover Accessory. The unbreakable WA555 grip/switch cover acces-
sory,supplied with all LX2hand-held microphone-transmitters, prevents accidental
movement of the power and mute switches and provides a “grip” feel.
•Compact Power Adapter. The supplied ac power adapter incorporates small, in-
line transformers that save space on ac power strips. It also has mounting tabs so
it can be secured to any surface, as well as locking dc power connectors to prevent
accidental disconnection from the receiver.

LX Wireless
7
LX1 BODY-PACK TRANSMITTER
FEATURES, CONTROLS, & INDICATORS (FIGURE 2)
ON
MUTE BAT OFF PWR
12
3
45
678
LX1 BODY-PACK TRANSMITTER FEATURES, CONTROLS & INDICATORS
FIGURE 2
1. Antenna. A flexible wire antenna is permanently attached to the bottom of the LX1
body-pack transmitter.
For best operation, the antenna must hang in the vertical
position, and should not be coiled or bundled.
2. BatteryCompartment.Hingedcoveronbottomsurfaceexposesthebattery.Refer
to the
Body-Pack Transmitter Battery Installation
section.
3. Audio Gain Control. Allows audio level adjustment to accommodate various
sound sources (e.g., singing, speaking, or playing an instrument). A small screw-
driver is supplied to make adjustments (see the
Setting Audio Level
section).
4. Input Jack. This is a Tini Q-Gconnector that provides connection with a variety
of lavalier and headset microphone cables, and the Shure WA302 instrument
adapter cable.
5. Power/BatteryFuelGauge.WhenthePowerswitchisturnedtothePWRposition,
oneortwoofthethreelightsonthetransmitterwillglow,indicatingpowertotheunit.
Thecoloroftheglowinglight(s)indicatestheamountofbatteryliferemaining.Refer
to the
Checking the Transmitter Battery
section.
6. Belt Clip. Allows the transmitter to be easily worn on a belt, waistband or guitar
strap.
7. MicOn/MuteSwitch.“Mutes”thetransmittertopreventunwantedsoundsfrombe-
ing picked up by the receiver
without
turning the transmitter off.
8. Power Switch. Turns transmitter power on and off.

LX Wireless
8
LX2 HANDHELD MICROPHONE-TRANSMITTER
FEATURES, CONTROLS, & INDICATORS (FIGURE 3)
BAT
MUTE
1
2
3
4
5
6
LX2/BETA 58
LX2 MICROPHONE–TRANSMITTER FEATURES, CONTROLS, & INDICATORS
FIGURE 3
1. Grille. Protects the microphone cartridge and helps reduce breath sounds and wind
noise. The grilles for the various microphone heads differ in appearance.
2. Power Switch. Turns transmitter power on and off.
3. Power/BatteryFuelGauge.WhenthePowerswitchisturnedtothePWRposition,
one or two of the three lights on the transmitter will glow. The color of the glowing
light(s) indicates the amount of battery life remaining. Refer to the
Checking the
Transmitter Battery
section.
4. MicOn/MuteSwitch.“Mutes”thetransmittertopreventunwantedsoundsfrombe-
ing picked up by the receiver
without
turning the transmitter off.
5. Audio Gain Control. Provides audio level adjustment to accommodate different
sound sources. Refer to the
Setting Transmitter Audio Level
section.
6. Battery Cover. Removable cup hides battery and audio gain control.

LX Wireless
9
LX3 RECEIVER
CONTROLS, FEATURES & INDICATORS (FIGURE 4)
WIRELESS
RECEIVER
RF AUDIOSQUELCH LEVEL POWER
ANT
OUTPUT
HI Z POWER
12.5 – 18.9 VDC
123
456
789
REAR
FRONT
LX3 RECEIVER CONTROLS, FEATURES, & INDICATORS
FIGURE 4
1. RF Presence Indicators. Glows amber when the antenna is receiving usable RF (ra-
dio frequency) signals.
2. Audio Level Indicators. Five lights glow to indicate audio signal strength. Green
lights indicate normal operation. An amber light indicates approaching overload
condition. A red light indicates excessive audio levels.
3. Squelch Control. Sets the point at which the receiver “mutes” when the transmitter
signal becomes noisy, weak or fails. This control is factory-set at the 12 o’clock position
to provide optimal operation in most applications.
4. Audio Output Level Control. Lets you adjust output level to match the input level
requirements of a mixer or amplifier. In most situations, this control should be set
fully clockwise.
5. Power On Indicator. This green light glows to indicate that the Power switch is on
and power is applied to the receiver.
6. Power On/Off Button. Turns the receiver on and off.
7. Output Connector. Quarter-inch phone jack provides unbalanced auxiliary level
(high-impedance) output.
8. Power Jack: Accepts power from the supplied ac adapter, or from any filtered 15
to 18 Vdc (400 mA minimum) supply. It will also accept the dc power cord from a
Shure WA405 Antenna Power/Distribution System.
9. Antenna Connector. UHF-type connector provides connection to the supplied
1/4-wave antenna or to coax cable used with a remote antenna. They also provide
connection to the optional Shure WA421 remote antenna cable kit used with optional
WA380 telescoping and WA490 cable-type 1/2-wave antennas.

LX Wireless
10
LX4 DIVERSITY RECEIVER
CONTROLS, FEATURES & INDICATORS (FIGURE 5)
12.5 – 18.9 VDC
POWER
MARCAD
DIVERSITY
RF A RF B AUDIO SQUELCH LEVEL
ANTANT OUTPUTS
HI Z BAL
MIC LINE
POWER
AB
LX4 DIVERSITY RECEIVER CONTROLS, FEATURES, & INDICATORS
FIGURE 5
FRONT
REAR
1234567
89109118
1. Diversity Signal Indicators for A and B Antennas. These lights glow amber when
A, B, or both antennas are receiving usable RF (radio frequency) signals.
2. RF Level Indicators. Five lights per antenna glow to indicate RF signal strength.
The more lights that glow, the stronger the received signal. If none of these lights
glows, no signal is being received.
3. Audio Level Indicators. Five lights glow to indicate audio signal strength. Green
lights indicate normal operation. An amber light indicates approaching overload
condition. A red light indicates excessive audio levels.
4. Squelch Control. Sets the point at which the receiver “mutes” when the transmitter
signal becomes noisy, weak or fails. This control is factory-set at the 12 o’clock position
to provide optimal operation in most applications.
5. Audio Output Level Control. Lets you adjust output level to match the input level
requirements of a mixer or amplifier. In most situations, this control should be set
fully clockwise.
6. Power On Indicator. This green light glows to indicate that the Power switch is on
and power is applied to the receiver.
7. Power On/Off Button. Turns the receiver on and off.
8. Antenna Connectors. UHF-type connectors provide connection to the supplied
1/4-wave antennas or to coax cable used with remote antennas. They also provide
connection to the optional Shure WA421 remote antenna cable kit used with optional
WA380 telescoping and WA490 cable–type 1/2-wave antennas.
9. Output Connectors. XLR connector provides balanced low-impedance mic level
or line-level output. Quarter-inch phone jack provides unbalanced auxiliary level
(high-impedance) output.
10.Mic/Line Slide Switch: Controls output of balanced XLR connector. It can be set
for microphone (-20 dBV maximum) or line-level (+0 dBV maximum).
11.Power Jack: Accepts power from the supplied ac adapter, or from any filtered 15
to 18 Vdc (400 mA minimum) supply. It will also accept the dc power cord from a
Shure WA405 Antenna Power/Distribution System.

LX Wireless
11
RECEIVER MOUNTING
Single Rack–Mounted Receiver (Figure 6)
If the receiver is to be located on a table or other horizontal surface, attach the four
adhesivebumperstothebottomcornersofthereceiver.Ifthereceiveristobemounted
inan audioequipmentrack, identifytherack-mountkits suppliedwithyour systemand
follow the appropriate assembly directions below.
1. Remove two screws from each side of the receiver.
2. Positionthelargemountingbracketsovertheholesonthe sidesofthe receiverand
secure them to the receiver with the screws removed in Step 1.
3. If you are not going to front mount the antennas with a Shure WA503 Front Mount
Conversion Kit, insert the plastic plugs into the holes in the brackets.
4. Secure the assembly to a standard audio equipment rack with four screws.
SINGLE RACK–MOUNTED RECEIVER
FIGURE 6
Double Rack–Mounted Receivers (Figure 7)
1. Remove the two screws on the
outer side
of each receiver.
2. Positionthesmallmountingbracketsovertheholesontheoutersideofeachreceiv-
er, and secure them with the screws removed in Step 1.
3. Remove the screws on the
inner side
of each receiver.
4. Position two link bars over the holes and secure them with the screws removed in
Step 3. For the receiver on the
left
, the link bar should be positioned so that its
threaded hole is toward the
front
of the receiver. For the receiver on the
right
, the
linkbarshouldbepositionedsothatitsthreadedholeistowardthe
rear
ofthereceiv-
er.
5. Placethetworeceiversnexttoeachothersothatthethreadedholesinthelinkbars
line up, one on top of the other.
6. Fasten the receivers together by inserting a small screw from the
top
into the threaded
hole at the
front
of the link bar. Then insert the other screw from the
bottom
into the
threaded hole at the
rear
of the link bar.
7. Secure the assembly to a standard audio equipment rack, using four screws.
DOUBLE RACK–MOUNTED RECEIVERS
FIGURE 7
LINK BARS

LX Wireless
12
RECEIVER CONNECTIONS (FIGURE 8)
1. Attachthesuppliedquarter-waveantenna(s)tothe antennaconnector(s) onthereceiv-
er back panel. For best performance, the LX4 receiver antennas should be oriented
withthetipspointing away fromeachother at a 45°anglefrom vertical. The LX3 receiv-
er antenna should be vertical.
2. Connect the receiver output to the mixer or amplifier input, using a standard audio
cable with a female 3-pin XLR connector or 1/4-inch phone plug.
3. Connect the ac adapter to the POWER jack on the rear panel of the receiver.
4. Plug the ac adapter into an appropriate ac power source.
LX4
45°45°
LX4 WIRELES
S
RECEIVER
1
RF AUDIO SQUELCH LEVEL POWER
34256
ANT
OUTPUT
HI Z POWER
12.5 – 18.9 VDC
LX3
LX3
AUDIO MIXER
AUDIO MIXER
RECEIVER CONNECTIONS
FIGURE 8
NOTE:Ifthereceiverisrack-mounted,theantenna(s)must extendabovetherackcabinet
or be remotely located.
Improved LX4 diversity performance may be obtained by installing one or both anten-
na(s) at a remote location and separating them by 1.5 meters (60 inches) or more.
ShureWA380telescopingorWA490cable-type1/2-waveantennasarerecommended
forremotelocation,andtheyshouldbeconnectedtothereceiverviaWA421Extension
Cable Kit(s) or other suitable low-loss cable.

LX Wireless
13
TRANSMITTER SETUP
LX1 Body-Pack Transmitter Battery Installation (Figure 9)
1. With the transmitter POWER PWR/OFF switch in the OFF position, press down on the
OPEN side of the battery compartment cover, slide it back and flip it open.
2. Insert a new 9V alkaline battery in the compartment (DURACELL MN1604 recom-
mended). Observe proper battery polarity (“+/–”).
-+
FIGURE 9
LX1 BODY–PACK TRANSMITTER BATTERY INSTALLATION
IMPORTANT: A fresh 9V alkaline battery should provide 18 to 20 hours of
operation. However, an 8.4V nickel-cadmium (nicad)battery will only pro-
vide3hoursofoperation.Carbon-zincand zinc-chloridebatterieswill not
provide sufficient power, and are not recommended.
LX2 Hand-Held Microphone-Transmitter Battery Installation (Figure 10)
1. WiththetransmitterPWR/OFFswitchintheOFFposition,holdtheupperpartofthe
transmitter and unscrew the battery cover.
2. Installafresh9Valkalinebattery(DURACELLMN1604recommended).Makesure
the battery terminals match the terminals in the transmitter.
3. Screw the battery cover back into place.
LX2 MICROPHONE-TRANSMITTER BATTERY INSTALLATION
FIGURE 10

LX Wireless
14
Checking the Transmitter Battery
Turn the transmitter PWR/OFF switch to the PWR position and observe that one or
two of the three lights on the transmitter glows. The amount of battery life remaining will
be indicated by the color of the light(s), as shown in the following table.
Battery Life Indicators Remaining Transmitter
Operating Time*
Green 6 to 20 hours
Green and Amber 4 to 6 hours
Amber 2 to 4 hours
Red 1 hour or less
* Estimated operating time assumes the use of a fresh 9 V alkaline battery (Duracell MN1604).
NOTE: A rechargeable 8.4V nicad battery will cause the indicators to change more
quicklythanifa9Valkalinebatteryisused.Actualtimesdependonthetypeandbrand
of battery used.
Connecting a Microphone or Instrument Cable to the LX1
(Figure 11)
1. Connect the microphone cable or instrument cable to the transmitter input jack.
2. Install the microphone by attaching it to the user’s tie, shirt or collar (lavalier mic),
placing it over the user’s head (headset mic) or affixing it to an acoustic musical in-
strument (instrument mic).
3. If an instrument adapter cable is used, attach the other end of the instrument cable
to the instrument output connector.
MICROPHONE CABLE OR
WA302 INSTRUMENT ADAPTER
CABLE
LX1 BODY-PACK TRANSMITTER CABLE CONNECTION
FIGURE 11

LX Wireless
15
Attaching the LX1 to a Belt or Guitar Strap (Figure 12)
Attach the LX1 body-pack transmitter clip to a belt, waistband or guitar strap by de-
pressingthetabmarked PRESS and slipping the belt orstrapbetweenthetransmitter
body and the belt clip, as shown in Figure 11. The clip holds tighter if the material is
drawn to the clip’s top wire (especially thinner guitar straps).
BELT OR GUITAR STRAP
ATTACHING THE LX1 TO A BELT OR GUITAR STRAP
FIGURE 12
Installing the WA555 Grip/Switch Cover Accessory
on the LX2 (Figure 13)
TheLX2transmitterissuppliedwithanexternalsleeveaccessory(WA555)thatpre-
vents accidental movement of the microphone controls, without affecting RF perfor-
mance.Italsoprovides the microphone with a “grip” feel. Toinstallthe grip/switch cov-
er, proceed as follows:
WA555 GRIP/SWITCH
COVER
INSTALLING THE OPTIONAL LX2 GRIP/SWITCH COVER ACCESSORY
FIGURE 13
123
1. Unscrew the battery cover.
2. Slide the cover over the microphone handle, “lip” end downward. The cover fits
snugly and requires additional pressure for the last inch of travel.
3. Reinstall the battery cover.

LX Wireless
16
LX1 BODY–PACK SYSTEM SETUP AND OPERATION
FIGURE 14
RECEIVER
LAVALIER
MIC
WA302 INSTRUMENT
ADAPTER CABLE
WM98 MIC
& A98KCS
HORN MOUNT
WH20
HEADSET
Á
Á
OPERATING LX1 BODY–PACK SYSTEMS (FIGURE 14)
1. Clip the LX1 body pack transmitter to your belt, waistband, or guitar strap.
2. Connect the lavalier microphone, headset or instrument adapter cable to the body–
pack transmitter.
3. If you are using a lavalier microphone, clip the mic to your tie, lapel, or other gar-
ment.Ifyouareusingaheadset,puttheheadseton.IfyouareusingaShureWM98
microphone, insert it into an A98KCS horn mount and clamp it to your horn. If you
are using an instrument adapter cable, plug the cable into the instrument.
4. Slide the transmitter PWR/OFF switch to the PWR position. One of the three lights
on the transmitter will glow.
5. PressthePOWERbuttononthereceiver.Thegreen“poweron”lightonthereceiver
and the RF light(s) will glow.
6. Slide the transmitter ON/MUTE switch to the ON position and begin speaking or
playing your instrument.
NOTE: Ifthe redPEAKlight onthereceiver doesnotflicker duringtheloudest sounds,
the transmitter gain may need to be increased. Refer to the
Adjusting the Transmitter
AudioGainLevel
section
.
Then,ifthesystemis still not operating properly,consultthe
Troubleshooting table.
7. During the performance or presentation, slide the ON/MUTE switch to the MUTE
position when the system is not being used.
8. When the performance or presentation is over, slide the transmitter PWR/OFF
switch to the OFF position to conserve battery power.

LX Wireless
17
OPERATING THE LX2 HAND-HELD SYSTEM (FIGURE 15)
LX2
TRANSMITTER
RECEIVER
LX2 HAND–HELD MICROPHONE SYSTEM OPERATION
FIGURE 15
1. Slide the transmitter PWR/OFF switch to the PWR position. One of the three lights
on the transmitter will glow.
2. Pressthe POWERbuttononthereceiver.Thegreenpoweronindicator andtheRF
light(s) will glow.
3. Slide the transmitter ON/MUTE switch to the ON position and begin speaking or
playing your instrument.
NOTE: Ifthe redPEAKlight onthereceiver doesnotflicker duringtheloudest sounds,
the transmitter gain may need to be increased. Refer to the
Adjusting the Transmitter
AudioGainLevel
section
.
Then,ifthesystemis still not operating properly,consultthe
Troubleshooting table.
4. During the performance or presentation, slide the ON/MUTE switch to the MUTE
position when the system is not being used.
5. When the performance or presentation is over, slide the transmitter PWR/OFF
switch to the OFF position to conserve battery power.

LX Wireless
18
GAIN AND SQUELCH ADJUSTMENT
Adjusting the Transmitter Audio Gain Level (Figure 16)
Thetransmitteraudiogainlevelhasbeenfactorypre-settoprovidesatisfactoryout-
putinmostapplications.However,forloudsingersorhigh-outputmusicalinstruments,
the preset level may be too high, as indicated by constant glow of the red light on the
receiveraudio levelmeter.Soft-spokentalkers or singers mayfindthatthe factory set-
ting is too low, as indicated by the failure of the amber audio level light to light at all.
To adjust the audio gain, locate the transmitter audio gain control and use the sup-
plied screwdriver to adjust the control.
•For
high
sound pressure level applications, such as loud singing, decrease the au-
diogainlevelbyrotatingthegaincontrolcounterclockwise(whilethevocalistissing-
ing or the musical instrument is being played) until the red audio level light on the re-
ceiver flickers occasionally.
•For
low
sound pressure level applications, such as soft–spoken talkers, increase
theaudio gain level byrotating the gain controlclockwise (while the vocalistis sing-
ing or the musical instrument is being played) until the red audio level light on the
receiver flickers occasionally.
NOTE:IfyouareusingtheWH20TQGheadset,youwillneedtoincreasethegainlevel
to the full clockwise position. Then, if necessary, rotate the control back slightly.
FIGURE 16
LX1
INCREASE GAIN
DECREASE
GAIN
LX2
INCREASE
GAIN
DECREASE GAIN
TRANSMITTER AUDIO GAIN LEVEL ADJUSTMENT

LX Wireless
19
Adjusting the Receiver Squelch Control (Figure 17)
Thereceiversquelchcontrolisfactorypresetatthe12o’clockpositionforop-
timum performance. No further adjustment is normally required.
However, it is
possible to adjust the squelch control to emphasize either
signal quality
or
system
range
.
•To raise the squelch threshold, rotate the control clockwise. This causes the receiver
todemandahigherqualitysignal(lessnoisebeforemuting),butit
reduces
theoperating
range.
•To lower the squelch threshold, rotate the control counterclockwise. This allows a
lowerqualitysignalthrough(morenoisebeforemuting),butit
exten
d
s
theoperating
range.
DECREASE
SQUELCH INCREASE
SQUELCH
WIRELESS
RECEIVER
RF AUDIO
SQUELCH LEVEL POWER
LX4 LX3 DECREASE
SQUELCH INCREASE
SQUELCH
RECEIVER SQUELCH CONTROL ADJUSTMENT
FIGURE 17
TIPS FOR ACHIEVING OPTIMUM PERFORMANCE
•Maintain a line-of-sight between the transmitter and receiver antennas, if possible.
Avoid placing transmitter and receiver where metal or other dense materials may
be present.
•Avoid placing the receiver near computers or other RF generating equipment.
•Avoid placing the receiver in the bottom of an equipment rack unless the antennas
are remotely located.
•Usetheproperreceiverantenna(s).A1/4-waveantennacanbeusedifitismounted
directly on the receiver; 1/2-wave or other ground-plane-dependent antennas must
be used if antennas are remotely located. Use the Shure WA503 Front-Mount An-
tenna Conversion Kit to mount antennas on the front of the receiver.
•Mount 1/4-wave antennas with the antenna tips pointed away from each other at a
45°angle, and away from large metal objects.
•Use the proper antenna cable when remotely locating receiver antennas. For best per-
formance, use the Shure WA421 50ΩRG-58 coaxial antenna cable, and the minimum
length necessary. For cable runs greater than 12.2 meters (40 feet), use RG–8 coaxial
cable.
•Mountdiversityantennasatleast1/4-waveapart(42cm(17inches)forVHFsystems,
although a 1.5 m (60 inches) spacing is preferred). For multiple system installations,
usethe ShureWA405 Antenna/PowerDistributionKitor theWA470PassiveAntenna
Splitter to minimize the number of antennas and reduce interference.
•UsetheShureWA302InstrumentCablewhenusingtheLX1transmitterwithamusi-
cal instrument.
•Ifmultiplewirelesssystemsareused,maintainadistanceofatleast3meters(10 ft.)
between the transmitter and the closest receiving antenna.

LX Wireless
20
TROUBLESHOOTING
Some common problems and their solutions are identified in the table below. If you
are unable to solve a problem, contact your dealer or the Shure Service Department at
847-866-5733 (7:30 am to 4:00 pm CST). In Europe, call 49-7131-72140; other interna-
tional users call Shure in the U.S.A. at 847-866-2200.
Problem Solution
No sound; receiver RF light(s) and
AUDIO lights not glowing. MakesurePOWERswitchesontransmitter
and receiver are on.
Check transmitter Power/Battery Fuel
Gauge to ensure that battery is providing
power. Replace battery if necessary.
Check receiver squelch setting.
Check receiver antenna connection(s).
Makesureatleastoneantennaisintheline
of sight of the transmitter. If necessary, re-
duce the distance between transmitter and
receiver.
Noreceiversound;RFandAudioLevelme-
ter lights glowing. Turn up the receiver audio output LEVEL con-
trol.
Check for proper connection between re-
ceiver and microphone mixer.
Talk into the microphone and observe the
receiver audio level lights. If they glow, the
problem is elsewhere in the sound system.
Received signal is noisy or contains
extraneous sounds with transmitter on. Check Power/Battery Fuel Gauge and re-
place battery if power is low.
Remove local sources of RF interference,
such as lighting equipment .
If using a guitar or other instrument, make
sureit is connected to theLX1with a Shure
WA302 adapter cable.
Two transmitters may be operating on the
same frequency. Locate and turn one off.
Signal may be too weak. Reposition anten-
nas. If possible, move them closer to the
transmitter.
Adjust receiver squelch control.
Noise from receiver with transmitter off. Adjust receiver squelch control.
Remove local sources of RF interference,
such as lighting equipment.
Reposition the receiver or antennas.
Momentary loss of sound as transmitter is
moved around performing area. Reposition receiver and perform another
“walkthrough”testandobservetheRFlevel
or Diversity signal indicators. If audio drop-
outspersist, mark these“dead spots” inthe
performing area and avoid them during the
performance.
Other manuals for LX Wireless System
1
Table of contents
Other Shure Microphone System manuals

Shure
Shure PSM 900 User manual

Shure
Shure VP User manual

Shure
Shure PGXD User manual

Shure
Shure PGX Wireless System User manual

Shure
Shure ULX-D User manual

Shure
Shure QLXD4E P51 User manual

Shure
Shure T series User manual

Shure
Shure PSM 200 User manual

Shure
Shure A412B User manual

Shure
Shure ULXD8 User manual

Shure
Shure UHF-R Wireless User manual

Shure
Shure GLX-D User manual
Shure
Shure PSM 900 User manual

Shure
Shure AMS4000 User manual

Shure
Shure ConferenceONEs User manual

Shure
Shure AXU Series User manual

Shure
Shure ULXD14 User manual

Shure
Shure ULX Wireless System User manual

Shure
Shure MICROFLEX MXW User manual

Shure
Shure ULX-D User manual