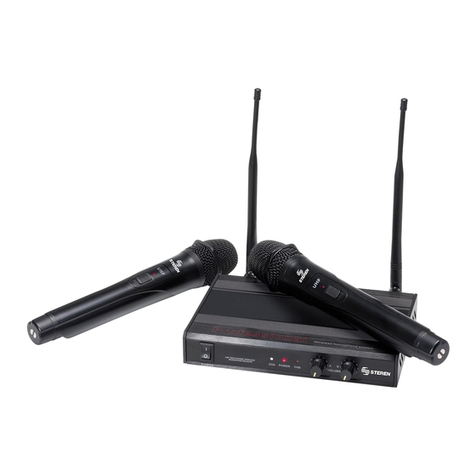
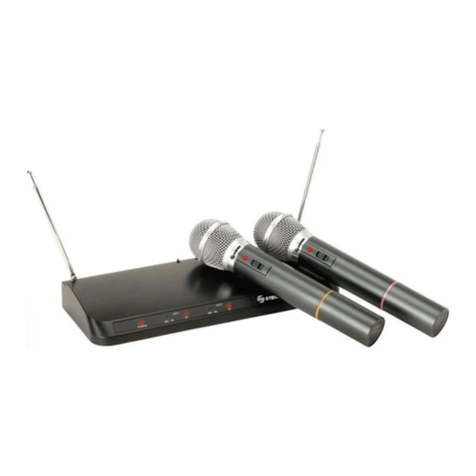
Steren WR-801UHF User manual


ENGLISH
ENGLISH-02
Before using your new Dual UHF microphone system, please read
this instruction manual to prevent any damage. Put it away in a
safe place for future references.
IMPORTANT
Do not use or store the equipment near wet places.
Clean only with a soft, dry cloth.
Do not bump or drop the microphone
Do not use the microphone if it is exposed to direct sun light,
extreme heat, dust or moisture.
CONSIDERATIONS
If you need to purchase more than two UHF wireless microphone
systems and want to use them simultaneously, select microphones with
different frequencies. If the microphones have the same frequency, they
need to be operated at least 150 m apart. If they are not separated, the
microphones will interfere with each other.
SAFETY INSTRUCTIONS
CAUTION
RISK OF SHOCK
CAUTION: To reduce the risk of
electric shock, do not remove cover
(or back). No user serviceable
parts inside. Only refer servicing to
qualified service personnel.
•
•
•
•
B
efore usin
g
y
our new Dual UHF microphone s
y
stem, please read
thi
s
i
nstruct
i
on manua
l
to prevent an
y
d
ama
g
e.
P
ut
i
t awa
y
i
n a
s
afe place for future references
.

ENGLISH
ENGLISH-03
Explanation of Graphical Symbols
The lightning flash & arrowhead symbol, within an
equilateral triangle, is intended to alert you to the
presence of danger.
The exclamation point within an equilateral triangle is
intended to alert you to the presence of important
operating and servicing instructions
WARNING
To reduce the risk of fire or electric shock, do not expose this unit
to rain or moisture.
1. Read Instructions - All the safety and operating instructions should be
read before the appliance is operated.
2. Retain Instructions - The safety and operating instructions should be
retained for future reference.
3. Heed Warnings - All warnings on the appliance and in the operating
instructions should be adhered to.
4. Follow Instructions - All operating and use instructions should be
followed.
WARNIN
G
T
o reduce the risk of fire or electric shock, do not expose this unit
t
o ra
i
n or mo
i
sture
.

ENGLISH
ENGLISH-04
5. Attachments - Do not use attachments not recommended by the
product manufacturer as they may cause hazards.
6. Water and Moisture - Do not use this unit near water. For example,
near a bathtub or in a wet basement and the like.
7. Carts and Stands - The appliance should be used only with a cart or
stand that is recommended by the manufacturer.
7 A. An appliance and cart combination should be
moved with care. Quick stops, excessive force, and
uneven surfaces may cause an overturn.
8. Ventilation - The appliance should be situated so its location does not
interfere with its proper ventilation. For example, the appliance should
not be situated on a bed, sofa, rug, or similar surface that may block the
ventilation slots.
9. Heat - The appliance should be situated away from heat sources
such as radiators, heat registers, stoves, or other appliances (including
amplifiers) that produce heat.
10. Power Sources - The appliance should be connected to a power
supply only of the type described in the operating instructions or as
marked on the appliance.

ENGLISH
ENGLISH-05
11. Grounding or Polarization - Precautions should be taken so that the
grounding or polarization means of an appliance is not defeated.
12. Power-Cord Protection - Power-supply cords should be routed so
that they are not likely to be walked on or pinched by items placed upon
or against them, paying particular attention to cords at plugs,
convenience receptacles, and the point where they exit from the
appliance.
13. Cleaning - Unplug this unit from the wall outlet before cleaning.
Do not use liquid cleaners or aerosol cleaners. Use a damp cloth for
cleaning.
14. Nonuse Periods - The power cord of the appliance should be
unplugged from the outlet when left unused for a long period of time.
15. Object and Liquid Entry - Care should be taken so that objects do
not fall and liquids are not spilled into the enclosure through openings.
16. Damage Requiring Service - The appliance should be serviced by
qualified service personnel when:
A. The power supply cord or plug has been damaged
B. Objects have fallen into the appliance
C. The appliance has been exposed to rain
D. The appliance does not appear to operate normally or exhibits a
marked change in performance
E. The appliance has been dropped, or the enclosure damaged.

ENGLISH
ENGLISH-06
18. Servicing - The user should not attempt to service the appliance
beyond that described in the operating instructions. All other servicing
should be referred to qualified service personnel.
LISTENING FOR A LIFETIME
Selecting fine audio equipment such as the unit you’ve just purchased is
only the start of your musical enjoyment. Now it’s time to consider how
you can maximize the fun and excitement your equipment offers.
Sound can be deceiving. Over time your hearing “comfort level” adapts
to a higher volume of sound. So what sounds “normal” can actually be
loud and harmful to your hearing.
Guard against this by setting your equipment at a safe level BEFORE
your hearing adapts.
To establish a safe level:
1.- Start your volume control at a low setting.
2.- Slowly increase the sound until you can hear it comfortably and
clearly, and without distortion.
Once you have established a comfortable sound level:
1.- Set the dial and leave it there.
2.- Pay attention to the different levels in various recordings.
Taking a minute to do this now will help to prevent hearing damage or
loss in the future.

ENGLISH
ENGLISH-07
Used wisely, your new sound equipment will provide a lifetime of fun
and enjoyment. Since hearing damage from loud noise is often
undetectable until it is too late, Steren recommend you avoid prolonged
exposure to excessive noise. This list of sound levels is included for
your protection.
Some common decibel ranges:
The following noises can be dangerous under constant exposure:
Level Exam
p
le
30 Quiet library, soft whispers
40 Living room, refrigerator, bedroom away from traffic
50 Light traffic, normal conversation
60 Air conditioner at 20ft, sewing machine
70 Vacuum cleaner, hair dryer, noisy restaurant
80 Average city traffic, garbage disposals, alarm clock at 2ft
Level Exam
p
le
90 Subway, motorcycle, truck traffic, lawn mower
100 Garbage truck, chainsaw, pneumatics drill
120 Rock band concert in front of speakers
140 Gunshot blast, jet plane
180 Rocket launchin
g
pad

ENGLISH
ENGLISH-08
FEATURES
Wide range of response
Low battery indicator
LED indicator: Energy, Reception, Transmission
Antenna with 22,5cm of length for a better reception
Volume control
Frequency modulation
Storage case
GETTING STARTED
Before starting any installation procedures, it is recommend that you
completely unpack all the package contents.
The original packaging should be kept in the event that re-shipping is
needed.
Upon unpacking the appliance, you should have received the following
items:
2 handheld microphones
Two holders
1 receiver
1 AC power adapter
1 audio cable
•
•
•
•
•
•
•
•
•
•
•
•

ENGLISH
ENGLISH-09
FRONT PANEL DESCRIPTION
1.- On / Off switch
2.- In-use microphone 1
3.- In-use indicator
4.- I n-use microphone 2
5.- Signal indicators
6.- Volume control microphone 1
7.- Volume control microphone 2
1
2
3 4 5 6 7

ENGLISH
ENGLISH-10
REAR PANEL DESCRIPTION
1.- Antennas
2.- Unbalanced output connector (1/4”)
3.- Squelch control channel 2
4.- XLR A output connector (balanced)
5.- XLR B output connector (balanced)
6.- Squelch control channel 1
7.- AC input jack
1
2 3 4 5 6 7
1

ENGLISH
ENGLISH-11
MICROPHONE DESCRIPTION
1.- Grill
Protects the microphone cartridge and helps
reduce “breathy” and wind noise pick-up.
2.- Power switch
Used to turn the microphone power ON and OFF.
The mic power is ON when the switch is in the ON
position and the power is OFF when the switch is
in the OFF position.
3.- On / Mute
Use it to mute the sound
4.- Battery compartment
Removable lid hides and protects the microphone battery.
5.- Gain control
Use it to set the volume level
1
2
3
4
5

ENGLISH
ENGLISH-12
HANDHELD MICROPHONE BATTERY INSTALLATION
1. To remove the cap, twist counterclockwise until it comes off.
2. Insert 1 fresh 9-Volt battery. Make sure the battery is facing the
correct direction with the +/- end facing towards the grill of the mic.
3. Close the battery compartment lid by twisting it clockwise until it is
secure.

ENGLISH
ENGLISH-13
MOUNTING THE WR-801UHF
This receiver includes a pair of brackets to install it in a rack. Remember
that you must use other receiver with the same specifications to install
them into a 10” standard rack. If you want, you can install the receiver
over a flat surface.
Depending on your rack case design, it may be necessary to allow
for sufficient space for the antennas.
CONNECTIONS
1.- Connect the AC power adapter to the receiver’s DC INPUT
connector, then plug the adapter into a compatible AC electrical outlet.
2.- Connect the receiver to a sound system, mixer or amplifier’s
microphone input(s) with balanced or unbalanced output jacks.
3.- Use Squelch controls to diminish noise levels.
4.- Use volume control to set the volume level.
MICROPHONE BASICS
Microphone Position
The WR-801UHF is ideal for close-up vocals and can be held in the
hand or mounted on a mic stand. The most common applications and
placement techniques are listed below. Keep in mind that microphone
technique is largely a matter of personal taste, and there is no one
“correct” microphone position.
D
ependin
g
on
y
our rack case desi
g
n, it ma
y
be necessar
y
to allow
f
or sufficient s
p
ace for the antennas
.

ENGLISH
ENGLISH-14
Proximity Effect
When the sound source is less than ¼” from the microphone, the
microphone boosts bass Frequencies (by 6 to 10 dB at 100 Hz),
creating a warmer and richer bass sound than when farther away.
Feedback
Feedback occurs when the amplified sound from any loudspeaker
reenters the sound system through any open microphone and is
repeatedly amplified. Most commonly, feedback is caused by the
following conditions:
placing loudspeakers too close to microphones, having too many open
active microphones, boosting tone controls indiscriminately (mainly
treble) and performing in areas with high ratios of room surfaces that
have hard and reflective surfaces such as glass, marble and wood.
What to do if feedback occurs before the sound system is loud
enough?
Request that the talker speak louder into the microphone.
Reduce the distance from the talker to the microphone.
Reduce the number of open microphones.
Move the loudspeaker farther away from the microphone.
Move the loudspeaker closer to the listener.
•
•
•
•
•

ENGLISH
ENGLISH-15
OPERATIONS
1.- Press the power button on the receiver’s front panel. The power LED
on the receiver will be on.
2.- Adjust the receiver’s volume controls to minimum.
3.- Switch the microphone’s power buttons to the ON positions.
4.- Place the antennas in a position where they can receive the signal
from the microphones.
5.- Talk or sing into the microphones. During normal operation, the MIC
ON signal LED’s will light on when a microphone is being use, theAF
LED will light on too.
6.- Adjust the squelch sensitive control to diminish interference noises.
If you want to mute the microphone, place the right switch in Mute
position. To resume, place the switch at ON position.
I
f
y
ou want to mute the microphone, place the ri
g
ht switch in Mute
p
osition. To resume,
p
lace the switch at ON
p
osition
.

ENGLISH
ENGLISH-16
TROUBLESHOOTING
Problem Solution
Make sure POWER switches in transmitters and
receiver are set to ON
p
ositions
Check microphone battery to ensure they are providing
p
ower
Re
p
lace the batter
y
if necessar
y
Check receiver's AC
p
ower connection
Make sure antennas are in the microphones' line of
si
g
ht
If necessary, reduce the disance between the
micro
p
hones and receiver
Turn u
p
the receiver's volume level controls
Check the proper connection between receiver and
exernal am
p
lifier / mixer
Check microphone batteries or replace if power is low
Remove local sources of RF interference, such as
li
g
htin
g
e
q
ui
p
ment.
Use s
q
uelch control to reduce the interference
Momentary loss of sound as transmitter is
moved around performing area
Reposition receiver and perform a "walkthrough" test
and observe the signal strengths. If audio droppouts
persist, mark these "dead spots" in the performing
areas and avoid them durin
g
the
p
erformance.
No sound; receiver AF light and mic not lit
No sound but the AF lights are glowing
Received signal is noisy or contains
interference with transmitter on

ENGLISH
ENGLISH-17
SPECIFICATIONS
Microphone
Input: 9V (rounded rectangular
prism)
Frequency response: 40Hz – 15kHz
Harmonic distortion (THD): 0,5%
Receiver
Input: 12V 300mA
Impedance: 600 ohms
Converter
Input: 120V ~ 60Hz 8W
Output: 12V 300mA
Product design and specifications are subject to change without
previous notice
Product desi
g
n and specifications are sub
j
ect to chan
g
e without
p
revious notic
e

WARRANTY
This Steren product is warranted under normal usage against defects in workmanship and
materials to the original purchaser for one year from the date of purchase.
CONDITIONS
1.- This warranty card with all the required information, invoice or purchase ticket, product
box or package, and product, must be presented when warranty service is required.
2.- If the product stills on the warranty time, the company will repair it free of charge.
3.- The repairing time will not exceed 30 natural days, from the day the claim was received.
4.- Steren sell parts, components, consumables and accessories to customer, as well as
warranty service, at any of the addresses mentioned later.
THIS WARRANTY IS VOID IN THE NEXT CASES:
If the product has been damaged by an accident, acts of God, mishandling, leaky batteries,
failure to follow enclosed instructions, improper repair by unauthorized personnel, improper
safe keeping, among others.
a) The consumer can also claim the warranty service in the purchase establishment.
b) If you lose the warranty card, we can reissue it, if you show the invoice or purchase ticket.
Product: Dual UHF microphone system
Part number:WR-801UHF
Brand: Steren

RETAILER INFORMATION
Name of the retailer
Address
Product
Brand
Part number
Serial number
Date of delivery
In case your product fails or have questions, please contact your nearest dealer. If
you are in Mexico, please give a call to our Call Center.
Call Center
01 800 500 9000

Table of contents
Languages:
Other Steren Microphone System manuals
Steren
Steren WR-058 User manual

Steren
Steren WR-809 UHF User manual

Steren
Steren WR-202 User manual

Steren
Steren WR-057 User manual

Steren
Steren WR-240 User manual

Steren
Steren WR-055 User manual

Steren
Steren WR-804UHF User manual

Steren
Steren WR-810 UHF User manual

Steren
Steren WR-040 User manual
Steren
Steren WR-807 User manual
Popular Microphone System manuals by other brands

ASO Safety Solutions
ASO Safety Solutions ELMON Inductive 71-242 operating manual

Shure
Shure R2 User guide supplement

Paul Wegener
Paul Wegener PWBlogg operating manual

Pacific Sun
Pacific Sun Kore 7th Network Setup

Beyerdynamic
Beyerdynamic Opus 910 operating instructions

Neumann
Neumann RSM 191 operating instructions