manuals.online logo
Brands
  1. Home
  2. •
  3. Brands
  4. •
  5. Chiayo
  6. •
  7. Microphone System
  8. •
  9. Chiayo R-1001 User manual

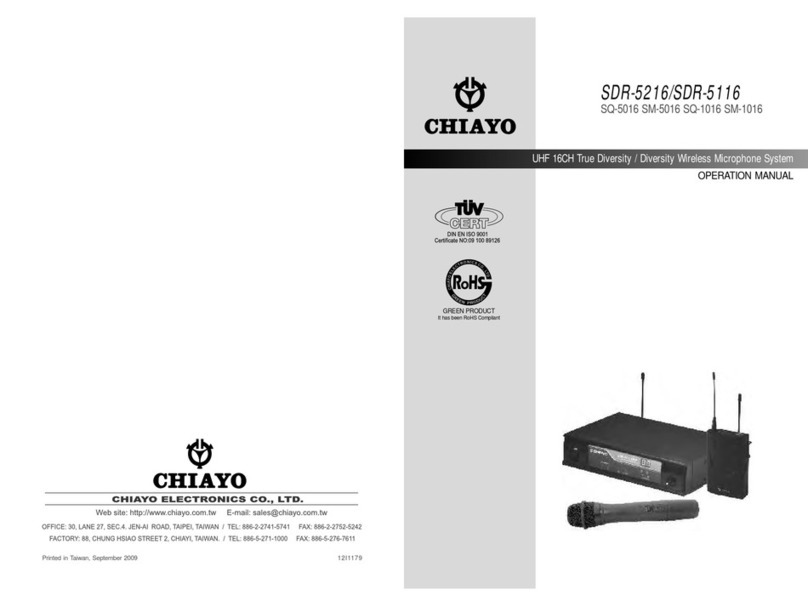
Chiayo R-1001 User manual

Printed in Taiwan, SEP 2005
12I444
CHIAYO ELECTRONICS CO., LTD.
http://www.chiayo.com.tw E-mail: [email protected]
OFFICE: 30, LANE 27, SEC.4. JEN-AL ROAD, TAIPEI, TAIWAN / TEL: 886-2-2741-5741 FAX: 886-2-2752-5242
FACTORY: 88, CHUNG HSIAO STREET 2, CHIAYI, TAIWAN. / TEL: 886-5-271-1000 FAX: 886-5-276-7611
R-1001/R-2001
VHF WIRELESS MICROPHONE SYSTEM
Operating Manual
Q - 1 0 0 1 / Q - 1 0 0 2 / M - 1 0 0 1 / M - 1 0 0 2
CHI AYO E LE CTR ON ICS C O . , LT D .
R-1001 / R-2001 is a VHF high-band non-diversity system with quartz controlled
fixed frequency design. The receiver must be combined with Chiayo's Q- and M-
series of wireless microphone.
1. MATCHING WIRELESS MICROPHONE: Q- and M- series such as Q-1001 &
M-1001
1. MAIN FRAME: R-1001 / R-2001
2. ACCESSORIES:1)AC adapter 2)antenna X 1(R-1001) /antenna X 2(R-2001)
3)Output cable / PHONE 4)Operating manual
OUTLINE
GENERAL
SYSTEM COMBINATION
COMPOSITION
2 3
AF OUT SQ ANT.BANT.A
AF OUT SQ
ANT
DUAL CHANNEL RECEIVER
R-2001
PWR
CH 1 VO L. RF AF CH 2 VO L.
RF AF
REAR PANEL
58
6
FRONT PANEL
CONTROLS AND FUNCTIONS
R-1001
1
2
4
3
R-2001
7 810 11
1
3 49 4
76
1.POWER SWITCH AND VOLUME CONTROL
Turn the knob clockwise until it clicks to switch on the power. Further turning will incre-
ase the volume.
2.POWER ON INDICATOR
When power is switched on,the power on LED will light up.
3.RF SIGNAL INDICATOR
Indicates RF signal received. As soon as signal is emitted from the microphone, the
LED of the indicator will light up.
4.AF SIGNAL INDICATOR
Indicates the audio signal. When sound is applied to microphone,LED will light up.
5.ANTENNA INPUT JACK(R-1001)
For direct mounting of antenna or antenna extension cable.
6.UNBALANCED AUDIO OUTPUT JACK
7.SQ CONTROL
muting level can be adjusted by SQ control.
8.DC POWER SUPPLY INPUT SOCKET
A 12-15V external DC power supply or an AC adapter could be connected to this socket
while the negative is grounded.
9.CH2 VOLUME CONTROL(R-2001)
.ANTENNA 1 INPUT JACK (R-2001)
.ANTENNA 2 INPUT JACK (R-2001)
CONTROLS AND FUNCTIONS
1
2
4
3
5
8
6
7
10
9
11
6
1
Parts & Functions
This uniquely designed belt clip allows 360 rotation. Select the best position
to achieve optimum wearing comfort.
Fig.2
M-1002 uses 1 piece of 9V battery. To install new or replace the old battery, first
open the battery compartment cover, then insert the new battery according to its
correct polarity as indicated. For longer operation hour, Alkaline battery is
recommended!
Battery Installation
Belt Clip
Fig.3
Fig.4 Fig.5
360 rotate able
belt clip.
Mike clip
Lavalier microphone
Belt clip
( hidden behind )
Battery
compartment
Fig.1
Battery compartment
cover
Power switch
Battery status
indicator.
MIC cable
MIC IN socket
Belt-Pack Transmitter(M-1002)
2
5
(Q-1001)
HAND-HELD Microphone
Fig. 1.
Fig. 2.
Fig. 3
Fig. 4
Fig. 6
Caution: The audio cable serves as antenna for this VHF system. Please stretch the
cable to its maximum to get the most efficient transmission power.
6
Fig. 7
Fig. 8
Fig. 9
7.
Switch off the power then the
microphone is not in use, mean-
while, remove the battery out
of the microphone if it is not to
be used for an extended period.
As soon as the switch is on, the battery-status indicator will give a flash to indicate
a normal operation. If there is no flash, it indicates either power supply is not
available or battery is installed wrongly.
After switching on, the Therefore signal indicator LED(s) of matching transmitter
will light up to indicate the transmission of the microphone signal is in normal
operation.
Switch off the power when the microphone is not in use, meanwhile, remove the
battery out of the microphone if it is not to be used for an extended period.
4.Sliding the power switch on the transmitter control panel to
"ON" position, as shown in Fig.7, the battery status indicator
gives a flash to indicate a normal operation. If there is no flash,
it indicates either power supply is not available or battery is
installed wrongly. If the indicator keeps lighting , it indicates
that battery is weak , a replacement is necessary.
5.The pin arrangement of the transmitter's connector jack is
shown in Fig.6. A unique feature of the M-1001 is its separate
high/low impedance and bias with the same jack for ECM
input. You could properly match the high impedance input
signals such as electric guitar or low impedance input signals
such as dynamic microphone, then choose the proper input
connecting cable and plug correctly, as shown in Fig.7,8,9.
2.To access the battery ,pull out the battery cover as shown in Fig.2.
Belt-Pack Transmitter(M-1001)
3.Insert a 9V battery with correct polarity into the battery compartment and put back
the compartment cover, as shown in Fig.3.4.
1.The Belt-Pack transmitter is shown in Fig.1.
Fig.1
Fig.2
Fig.3 Fig.4
(Q-1002)
HAND-HELD Microphone
Battery status
LED indicator
Metal grille
( Capsule module inside )
Handheld Microphone
Parts and Functions
Power switch
Battery compartment
cover
Press
Fig.1
Fig.2
Battery Installation
Fig.3
4
3
Female connector
Headset microphone
Battery status indicator
Mike clip
Lavalier microphone
As soon as the switch is on, the battery-status indicator will give a flash to indicate
a normal operation. If there is no flash, it indicates either power supply is not
available or battery is installed wrongly.
After switching on, the Therefore signal indicator LED(s) of matching transmitter
will light up to indicate the transmission of the microphone signal is in normal
operation.
Switch off the power when the microphone is not in use, meanwhile, remove the
battery out of the microphone if it is not to be used for an extended period.
Q-1002 uses 1 piece of 9V battery. To install new or replace the old battery, First unscrew the battery
cap from the battery compartment, then insert the new battery according to its correct polarity as
indicated. For longer Operation hour, Alkaline battery is recommended!

Other Chiayo Microphone System manuals
Chiayo Artist User manual

Chiayo

Chiayo Artist User manual

Chiayo UDR-500 User manual

Chiayo

Chiayo UDR-500 User manual

Chiayo DWR-5420 User manual

Chiayo

Chiayo DWR-5420 User manual

Chiayo QR-4000N User manual

Chiayo

Chiayo QR-4000N User manual

Chiayo IWM-202 User manual

Chiayo

Chiayo IWM-202 User manual

Chiayo QR-2000N User manual

Chiayo

Chiayo QR-2000N User manual

Chiayo RRS-2000 User manual

Chiayo

Chiayo RRS-2000 User manual

Chiayo Q-200 User manual

Chiayo

Chiayo Q-200 User manual

Chiayo SDR-5100 IrDA User manual

Chiayo

Chiayo SDR-5100 IrDA User manual

Chiayo SDR-6200 IrDA User manual

Chiayo

Chiayo SDR-6200 IrDA User manual

Chiayo COACH PRO User manual

Chiayo

Chiayo COACH PRO User manual

Chiayo R-1010 User manual

Chiayo

Chiayo R-1010 User manual

Chiayo SDR-6200 IrDA User manual

Chiayo

Chiayo SDR-6200 IrDA User manual

Chiayo NDR-3100 User manual

Chiayo

Chiayo NDR-3100 User manual

Chiayo SQ-6100 IrDAR User manual

Chiayo

Chiayo SQ-6100 IrDAR User manual

Chiayo IrDA-9000 User manual

Chiayo

Chiayo IrDA-9000 User manual

Chiayo IWR-320 User manual

Chiayo

Chiayo IWR-320 User manual

Chiayo SDR-8200 User manual

Chiayo

Chiayo SDR-8200 User manual

Chiayo DH2400 User manual

Chiayo

Chiayo DH2400 User manual

Chiayo Stage-100 Series User manual

Chiayo

Chiayo Stage-100 Series User manual
Chiayo Q-818 User manual

Chiayo

Chiayo Q-818 User manual

Chiayo RR-2000 User manual

Chiayo

Chiayo RR-2000 User manual

Chiayo IRX2 User manual

Chiayo

Chiayo IRX2 User manual

Chiayo SDR-5216 User manual

Chiayo

Chiayo SDR-5216 User manual
Popular Microphone System manuals by other brands

ETS SMI17 instructions

ETS

ETS SMI17 instructions

Telex FMR-150 specification

Telex

Telex FMR-150 specification

Teradek Vidiu Go quick start guide

Teradek

Teradek Vidiu Go quick start guide

Gemini UHF UX-1600 instruction manual

Gemini

Gemini UHF UX-1600 instruction manual

Fohhn Easy Port Series User instructions

Fohhn

Fohhn Easy Port Series User instructions

Sony UWP-C1 operating instructions

Sony

Sony UWP-C1 operating instructions

Sennheiser EW 352 G2 operating instructions

Sennheiser

Sennheiser EW 352 G2 operating instructions

RCS WR-016 operating instructions

RCS

RCS WR-016 operating instructions

Lectrosonics PRO 4 CHANNEL Operating instructions and troubleshooting guide

Lectrosonics

Lectrosonics PRO 4 CHANNEL Operating instructions and troubleshooting guide

Omnitronic VHF-250 user manual

Omnitronic

Omnitronic VHF-250 user manual

TeachLogic Maxim IMA-540 quick start guide

TeachLogic

TeachLogic Maxim IMA-540 quick start guide

Shure GLX-D user guide

Shure

Shure GLX-D user guide

AKG WMS 4000 User instructions

AKG

AKG WMS 4000 User instructions

Nady Systems MGT-16 owner's manual

Nady Systems

Nady Systems MGT-16 owner's manual

Saramonic Blink900 user manual

Saramonic

Saramonic Blink900 user manual

Catchbox Catchbox Plus user manual

Catchbox

Catchbox Catchbox Plus user manual

Shure PSM 900 manual

Shure

Shure PSM 900 manual

Shure UA844 user guide

Shure

Shure UA844 user guide

manuals.online logo
manuals.online logoBrands
  • About & Mission
  • Contact us
  • Privacy Policy
  • Terms and Conditions

Copyright 2025 Manuals.Online. All Rights Reserved.