manuals.online logo
Brands
  1. Home
  2. •
  3. Brands
  4. •
  5. Shuttle
  6. •
  7. Desktop
  8. •
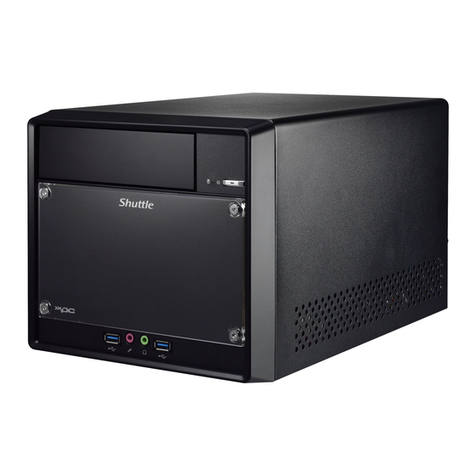
  9. Shuttle DS50U User manual

Shuttle DS50U User manual

Incorrectly replacing the battery may damage this computer. Replace only with the same or equivalent as recommended by Shuttle.
Dispose of used batteries in accordance with the laws of your country.
󲤤󲘋󵤫󲺐󲟩󲄿󵕟󴳔󱘟󴌭󲤳󲘽󱬎󲥜󵤫󴎖󱄕󱗺󲅅󳢬󳐶󳋨󰆍󳊛󳊭󲑆󱎦󱄆󱖡󵣚󰆎
󱋵󴌭󱇍󳢴󲄪󴶠󱄕󳤨󱘼󲑆󱘼󳵹󳢴󵤫󲺐󲤤󲘋󰆎󴳻󲩩󲜊󲋘󲑰󱥘󱤻󱷦󱥠󱕰󳢴󲼅󲆻󴮿󱷊󴢅󳘶󲄒󵤫󲺐󰆎
Das unkorrekte Austauschen der Batterie kann diesen Computer beschädigen. Ersetzen Sie die Batterie nur durch den gleichen Typ oder ein

Ne pas replacer correctement la pile peut endommager l'ordinateur. Remplacez-la uniquement par un modèle identique ou un équivalent
comme recommandé par Shuttle. Éliminez les piles usagées conformément à la législation en vigueur dans votre pays.


󰉎󰉁󰉄󰉨󰈖󵟃󵊅󰇧󰇪󰈹󰉁󰉆󰇝󰈏󰇬󰆍󰇗󰇲󰈱󰉱󰉒󰉣󰉺󰈽󰇐󲘽󱋧󰇝󰈏󱗏󱤐󰇬󰇮󰈎󰈂󰇝󰆎󱃔󲘋󰇝󰈏󵣋󰇳󰆍󰇐󲗘󱮘󰇝󰈏󰉎󰉁󰉄󰉨󰇬󱘼󰇜󰈆󰇲󰈂󰇣󰇳
󱘼󳵹󰇲󰈆󰇲󰇤󰇕󰈖󱆯󳝘󰇝󰈏󰈌󰇊󰇯󰇛󰇪󰇓󰇤󰇙󰇈󰆎󱆯󳝘󳀸󰈃󰇲󰉎󰉁󰉄󰉨󰉺󰇳󰆍󰇎󱅿󰈃󰇲󱤭󰇲󲼅󲆻󰇯󲇃󰇧󰇪󱐖󱐶󰇛󰇪󰇓󰇤󰇙󰇈󰆎


󲤤󲖒󳝥󲺐󲟩󲄿󵝉󴸟󱘟󴌭󱅊󲖏󱥿󲥜󳝥󴍁󰆎󱃵󴌭󱇍󳢴󲄪󴷞󱄕󳤨󱘼󲑆󱘼󳵹󳢴󳝥󲺐󲤤󲖒󰆎󴸧󲩩󲖞󲋘󲑰󱥘󱤭󱷦󱥠󱕪󳢴󲼅󲆻󴯴󱷊󱬴󳘶󲃏󳝥󲺐󰆎

that the power cord is disconnected
before opening the case.
LThe product’s colour and specifications may vary from the actually shipped product.
A. Begin Installation
!
Hardware Installation 󳪜󵴄󶛙󶻃
󰉍󰉺󰉇󰈤󰈥󰈠󰇲󰈢󰉱󰈷󰉆󰉺󰉩󳪜󱄦󶛙󴫵
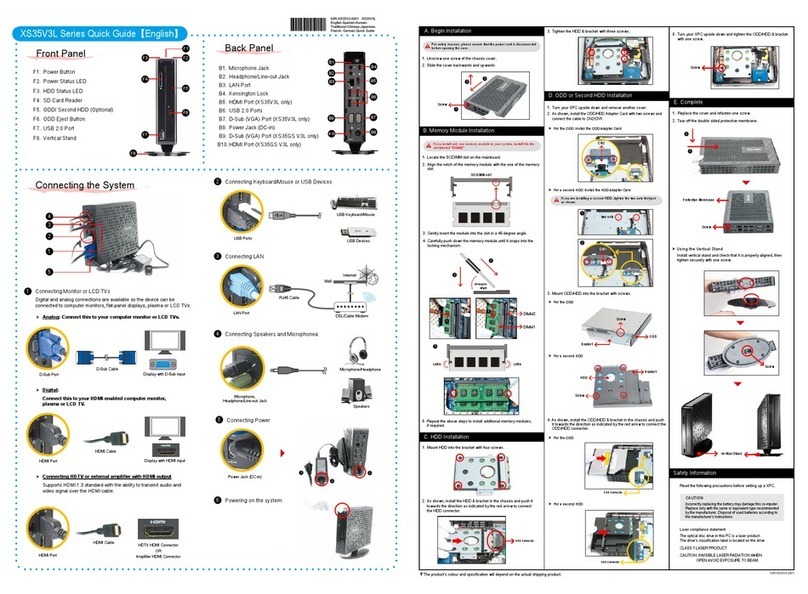
1. USB 3.2 Gen 2 Ports
2. USB 3.2 Gen 1 Ports


5. Power Button

7. Headphones

9. DisplayPort


11. USB 2.0 Ports






18. Kensington®

of the chassis cover and remove the
cover.

B. HDD or SSD Installation


!
E. Complete
1. Please replace and affix the case
cover with four screws. Turn your
DS50U upside down.
2. Connect the power cord.
3. Complete.


!


󲤤󱭊󲥜󳝒󱛱󴻷󶻽󰦉󶽋󴛎󴐘󰦗



󲥜󶻍󱛱󰇲󶼩󶰌󰇮󲋵󶙷󰇯󰇨󰇈󰇪󰇳󰆍󲵑󰇲󰈌󰈎󶭉󶼲󵨲󰇕󰈂󰇝󰆎


󲤤󱭊󲥜󱃗󱛱󶖆󲊟󰦉󴸧󴷯󵠞󰦗
SERIES
Product Overview 󳝒󱛱󶚗󶻵󶻍󱛱󶤮󴮱󱃗󱛱󶚗󴯲
DS50U Series Quick Guide 󲈛󷀗󶛙󶻃󲔷󱖇󰆌󰆌󰆌󰆌󰈭󰈢󰉁󰈭󰈪󰈢󰉇󰆌󰆌󲈛󷀗󶛙󴫵󲔷󱖇
53R-DS50U3-2001
4 61 2
3 5 7
c
a
17
1510
b
Safety Information
󶛙󶇰󴻷󶻽
󶛙󶇰󰇯󵟒󰇝󰈏󲋵󶙷󶛙󶇰󶖆󲊟
!


This device meets the requirements for the EU conformity in accordance to the currently valid EU directives.

Ce produit répond aux exigences de la conformité UE suivant les directives européennes actuellement en vigueur.
󲼘󶟞 󶖼󴷨󱃗󱛱󱆯󳝘󳢴󶣟󷆫󳗟󶚃󳁙󶝲󱁪󰆎
󲼘󶟞 󱃵󷀆󳝘󱂾󱥘󷄵󳌝󲁖󲹄󱉉󲦑󱄦󱀻󶛙󶇰󱆯󳝘
󱥘󳌝󲁖󲹄󱉉󲦑󱄦󱀻󱆯󳝘󲠦󱘟󶳬󲤹󶛙󶇰󵣀󲋓󰆎
󲼘󶟞 󱃵󷀆󳝘󱂾󶦵󲔄󱄕󱀻󶛙󶇰󱆯󳝘
󱥘󶦵󲔄󱄕󱀺󱆯󳝘󲠦󱘟󶳬󲤹󶛙󶇰󵣀󲋓󰆎

󵤫󳃀󰈯󰉺󰉔󰉩󳵹󰆍󰇝󰇽󰇪󰇲󱄈󱺎󱛱󰇳󲥜󶥍󱄕󶚗󰇫󰇳󰇘󱆯󳝘󰇯󰇮󰈐󰈂󰇟󰈗󰆎
2000m
THIS PRODUCT CONTAINS A BUTTON BATTERY
WARNING
If swallowed,a lithium button battery can cause severe or fatal
injuries within 2 hours.
Keep batteries out of reach of children.
If you think batteries may have been swallowed or placed
inside any part of the body, seek immediate medical attention.


effectively reduce its temperature.

45-degree
angle
3. Gently insert the module into the slot
in a 45-degree angle.





4. Align the notch of the memory module with
the one of the relevant memory slot.
a
b
5. Carefully push down the memory module
until it snaps into the locking mechanism
and put the mylar back in place.
6. Install the 2nd memory module into the


Notch
Cutout
 




with the screw.
1.





!

with four screws.
3. Connect the Serial ATA and power cable to the HDD or SSD.
4. Install the HDD or SSD & bracket in the chassis.
a
b
Slope angle

can effectively reduce its temperature.
!
b
a
c
d
e
f
DC-IN
a
b
b
c
cd
d
d
Serial ATA and
power cable
2.5 inch

2
9
121118 18
16
13 14
16
a
8
CN3


CN2



cord is disconnected before opening the case.
󱨪󶢢󶛙󶇰󶲳󵏿󳰫󵞻󶥍󶥺󲡲󶽋󱍸󲔄󵢔󵤫󳃀󶱉󰆎

Gerät vor dem Öffnen vom Stromnetz getrennt wird.

que le cordon d’alimentation est débranché avant
d’ouvrir le boîtier.


󶽋󶠰󶓺󱘼󲡲󱞏󱔅󷀞󱎕󷁄󵨵󶼌󶛡󵄹󱎕󶣟󱆣󶢈󶳬󳢴󶼌󶛡󱉬󰆎
󲛽󱆌󶡺󶢇󶢡󲄿󱆯󳝘󶝬󷁛󲝟󲛀󲧦󲑆󲡟󱤪󶛡󲧦󶢇󶲖󰆎


Appuyez sur la touche “Suppr” lors du démarrage pour entrer dans le BIOS. Chargez-y les paramètres optimisés



󳝫󵦒󰇯󱎕󰈏󰇣󰈅󰆍󶾹󱔅󱁝󰇯󰈫󰉺󰈖󲓬󰇛󰇪󰇓󰇤󰇙󰇈󰆎󶼌󶛡󳝫󵦒󰇐󶚲󰈂󰈎󰈂󰇝󰆎
󲛽󱆌󶕳󶲖󱄈󱺎󰇲󴿣󷁛󱐶󰈆󰇛󰇓󰇳󰉜󰈤󰉱󰉆󰈖󱆯󳝘󰇛󰇪󱀻󰇙󰇈󰆎


󴸧󶠰󵝞󱘼󲠦󱙟󱓘󵈋󱎕󵈹󵪩󴷮󶛡󱓐󵆭󶣟󱆣󶢈󶳬󳢴󴷮󶛡󱉬󰆎
󲛽󱆌󲙶󶢇󶢡󲄿󴸧󱆯󳝘󶝬󷁛󲝟󲛁󲧦󲑆󲡟󱤪󶛡󲧦󶢇󶲖󰆎

󶉥󶜐󶩏󱪺󳻈󴻬󱥘󱀺󱘟󲤹󶢈󷃯󶕴󳃛󶝲󰆎



󱓩󲧌󳢴󰇮󳁙󶝲󵄭󳁋󰇲󰇣󰈅󰆍󰇼󰈳󰉺󰉜󰉩󰉏󰉁󰉇󰈖󴻬󰈎󱄈󰇕󰈂󰇝󰆎

󱸶󱸬󳌝󱧛󳻈󴽤󱥘󱀺󱘟󲤹󶢈󷃯󶕴󳁙󶝲󰆎
A. 󵞻󱯻󱶹󴬍
󱘆󰈎󱄈󰇕󰇲󵞻󱯻󲄰󱯻󱶹󴫵
1.
cover and remove the cover.
󱮲󱥆󲑰󳭪󵴶󵞻󱤋󵩶󱤪󱷊󴧪󳾢󱸷󲲏󲷬󱭆󴛻󳰫󵢔
Entfernen Sie die vier Schrauben vom Gehäuse-

Desserrez et retirez les quatre vis du boîtier et
retirez le couvercle.
Retire los cuatro tornillos de la tapa de la carcasa y

󱤣󰇲󰈌󰇊󰇯󰈵󰉡󰉺󰈵󰈩󰉎󰉺󰈖󲶒󰈅󰇪󰇈󰈏󰉋󰈶󱈻󰈖
󱭆󰇛󰆍󰈩󰉎󰉺󰈖󱘆󰈎󱭆󰇛󰈂󰇝󰆎


󱮲󱤮󲑰󳭪󲦮󲄰󱤋󵫇󱤪󱷊󴧪󱁍󱸶󲥪󱬣󱭆󳤆󳰫󵢔󰆎
!
󱶹󴬍󳪜󳫏

󰇲󱘆󰈎󱄈󰇕󱶹󴫵󳪜󳤈
The product's colour and specifications may vary from the actually
shipped product.
󱐪󴻘󶥍󳱞󷅒󴒢󶘓󴮿󲩬󷁦󶖥󱄕󶜄󵣋󱐪󴻘󶥍󳱞󳋪󶧦󰆎
Die tatsächliche Farbe des gelieferten Produktes kann von diesen
Abbildungen abweichen.

󴬍󴆞󱶹󴬍

󰇡󰇲󱄆󰈱󰉱󰉛󰉺󰉋󰉱󰉆󰇲󱘆󰈎󱄈󰇕󴫵󴆞󱶹󴫵
Product Overview 󳝒󱛱󶚗󶻵
󶻍󱛱󶤮󴮱󱃗󱛱󶚗󴯲
Hardware Installation
󳪜󵴄󶛙󶻃
󰉍󰉺󰉇󰈤󰈥󰈠󰇲󰈢󰉱󰈷󰉆󰉺󰉩󳪜󱄦󶛙󴫵

󲒮󶗙󱁫󶥍󲦯󱀺󳢴󲘂󲰭󰆎



󰉜󰈴󰉺󰉚󰉺󰉇󰇯󰇆󰈏󰈷󰉫󰉁󰉆󱘆󰈎󱄈󰇕󶕳󶲖󰈖󶭉󶼲󰇛󰈂󰇝󰆎

󲒮󶗙󱁫󲥪󲦯󱀺󳢴󲘂󲰭󰆎
󳽴󴬍󱶼󲑀
󱶼󱂶󴃴󴫵󱶼󲑀
1. Please replace and affix the case cover with four screws. Turn your DS50U upside down.
󶻃󱤎󱀺󶸇󱁖󷂼󱀺󶺍󶰧󶉥󲥜󶥍󴈫󵅹󶴮󱘖󱀰󵦒󲥍󱀺󰆎
Schrauben Sie den Gehäusedeckel wieder mit vier Schrauben fest und drehen Sie DS50U herum.
Remettez en place le couvercle et resserrez les quatre vis. Retournez le DS50U.

󰈯󰉺󰈷󰈩󰉎󰉺󰇯󰉋󰈶󰦑󱈻󰈖󱘆󰈎󱄈󰇕󰇣󰈍󰆍󰈖󰇶󰇧󰇓󰈎󶿷󰇛󰈂󰇝󰆎

󴫵󱤎󱀺󳤆󲂦󵜱󱀺󶺍󱁍󱸶󲥜󲥪󴈫󵆜󶴮󱘖󱀰󵦒󲥍󱀺󰆎
!
1. USB 3.2 Gen 2 Ports
󷀛󶡀󱨐

Prises USB 3.2 Gen 2
Puertos USB 3.2 Gen 2
󰉛󰉺󰉆

󶮷󱘓
10. 
󷀛󶡀󱨐



󰉛󰉺󰉆

󶮷󱘓
18. Kensington®
Kensington®󲱉󶧦󷃬󳤌󷂼󱶄
Kensington®
Encoche de sécurité Kensington®
Conector de seguridad Kensington®
󰈯󰉱󰈶󰉱󰉆󰉱󰉫󰉁󰈭󳝘󰉙󰉺󰉩
®
Kensington®󲨷󶗏󷃬󳤇󵜱󱶄
6.
󷈏󱍻󷅜󲘂󱶄

Prise micro

󰉜󰈢󰈭

󶃖󱍻󵫾󲘂󱶄
4.
󳪜󳫏󲔷󳭪󳏸

Indicateur disque dur

󰉍󰉺󰉇󰉅󰈡󰈷󰈭󰉇󰉧󰈢󰉔

󳪜󳤈󲔷󳭪󳊟
12.
󳿢󵀟󵉓󲗕󱨐



󰈬󰈪󰉑󰉁󰉆󰉛󰉺󰉆

󵈎󲗕󳴟󱘓


󶻍󱛱󰇲󴒢󶘓󰇷󰈷󰉘󰉁󰈭󰇳󰆍󱷏󵣋󰇬󳞠󰇮󰈏󱩤󱘸󰇐󰇘󰇚󰇈󰈂󰇝󰆎


󱐪󴽗󲥪󳯽󵫌󴒢󶘓󴯴󲩬󷁦󱬷󱄕󱷎󵡵󱐪󴽗󲥪󳯽󱁪󶗏󰆎
󷀛󶡀󵤫󳃀󰆎
󵤫󳃀󰇯󶡀󳿊󰇛󰈂󰇝󰆎󵈎󶡀󳝥󳃀󰆎
󶛛󲑀󰆎󶛛󱂶󰇫󰇝󰆎󶛛󲑀󰆎
L
17.
󱭆󵌘󵤫󳃀󱗺



󱭆󵌘󵤫󳃀󰈷󰈢󰉁󰈿󰇬󰈭󰉨󰈠

󱭆󵌘󳝥󳃀󱗺
8.
󵉓󲗕󱨐



󰉛󰉺󰉆

󳴟󱘓
7. Headphones
󴉣󶥍󱶄
Kopfhörer-Ausgang
Prise casque
Auriculares
󰈢󰉢󰉙󰉱

󴉣󲥪󱶄
15. 
󷀛󶡀󱨐󶇣󷀼󳝘󶢢󷁄󷁦



󰉛󰉺󰉆󰇲󰈃󰈨󰉕󰈵󰉥󰉱

󶮷󱘓󱃵󷀆󳝘󱂾󱘟󵈹
11. USB 2.0 Ports
󷀛󶡀󱨐

Prises USB 2.0
Puertos USB 2.0
󰉛󰉺󰉆

󶮷󱘓
3.
󵤫󳃀󲔷󳭪󳏸

Indicateur alimentation

󵤫󳃀

󳝥󳃀󲔷󳭪󳊟
5. Power Button
󵤫󳃀󶠰󵑅

Bouton d'alimentation

󵤫󳃀󰈷󰈡󰉁󰈿

󳝥󳃀󶠰󵛞
14. 
󵤫󳃀󷀛󶡀󱨐
DC-Stromanschluss
Prise alimentation DC

󵤫󳃀󰉛󰉺󰉆

󳝥󳃀󲘂󱶄󶬝󶦯󳝥󵇃󱎕

󶩃󶱉󶰺󵀟󶈶󶱉󷀛󶡀󶈡

Connexions pour antennes Wi-Fi

󰈠󰉱󰉄󰉈󳝘󰈱󰉋󰈭󰈽

󲠐󴃯󴆁󵀟󶈶󴃯󵈎󶡀󶈡
9. DisplayPort
󵉓󲗕󱨐
DisplayPort-Anschluss
Prise DisplayPort
DisplayPort
󰉅󰈡󰈷󰉕󰉪󰈢󰉛󰉺󰉆
DisplayPort
󳴟󱘓

󶉥󶻃󶲖󲘂󱎕󲘂󲰭󱁖󷂼󱀺󱤪󶛡󶺍󶰧󰆎



󰈷󰉫󰉁󰉆󰇯󱸮󲈌󰉅󰉎󰈢󰈷󰈖󲕯󱎕󰇛󰆍󰉋󰈶󰇫󰇛󰇧󰇏󰈎󰇬󶱌󰈅󰇪󱀻󰇙󰇈󰆎

󱸶󴫵󶲖󲘂󱎕󲘂󲰭󲂦󵜱󱀺󱤪󶛡󶺍󱁍󰆎
!
!
󱶹󴬍󴱈󲏦󵴄󲱑󳽴

󰉟󰉠󰉨󰉺󰇲󱘆󰈎󱄈󰇕󱶹󴫵󱎵󱶈󲱑󱦇

󲘂󲰭󲼘󶟞󱂻󵨵󰦗󳞦󶺸󶼌󶖥󱆄󳝘󲡲󶇣󲝟󲔱󱃻󵦒󰆎


avec un module SATA.

󰈷󰉫󰉁󰉆󰇯󰇨󰇈󰇪󲼘󶟞󰇓󰇤󰇙󰇈󰦗󰇯󶥍󶈡󰇐󱘆󰈎󱄈󰇕󰈍󰈐󰇪󰇈󰈏󱩤󱘸󰆍󰇳󶡀󳿊󰇲󰈃󲤹󱓩󰇫󰇝󰆎

󲘂󲰭󲼘󶟞󱂻󵪩󰦗󲆃󶺸󴷮󱬷󱖐󳝘󲠦󱃵󲝟󲔱󶡀󱘓󰆎
!

󱋵󲝟󲔱󱀰󴱝󱋉󰆎



DS50U
󰇼󲲏󱢘󰇲󱘆󰈎󱄈󰇕󰇯󰇨󰇈󰇪󰇳󰆍󰦎󰇨󰇲󰈃󱸮󲈌󱘟󴌭󰇫󰇝󰆎

󱃵󲝟󲔱󱀰󴷮󱬷󰆎
2. USB 3.2 Gen 1 Ports
󷀛󶡀󱨐

Prises USB 3.2 Gen 1
Puertos USB 3.2 Gen 1
󰉛󰉺󰉆

󶮷󱘓

󳿢󵀟󵉓󲗕󱨐



󰈬󰈪󰉑󰉁󰉆󰉛󰉺󰉆

󵈎󲗕󳴟󱘓
3. Connect the Serial ATA and power cable to the
HDD or SSD.
󶛙󶻃󱋣󵅨󶱉󶘓󵤫󳃀󶱉󶢢󳪜󳫏󲘂󲰭󰆎

Festplatte oder der SSD.

sur le disque dur ou SSD.
Conecte el cable SATA y el cable de corriente con el
disco duro o la SSD.
󰇯󰈵󰉨󰈠󰉩󰈯󰉺󰉔󰉩󰇬󵤫󳃀󰈯󰉺󰉔󰉩󰈖
󶡀󳿊󰇛󰈂󰇝󰆎

󶛙󴫵󱅐󵇃󴃯󶕎󳝥󳃀󴃯󱂾󳪜󳤈󲘂󲰭󰆎
4. Install the HDD or SSD & bracket in the chassis.
󶉥󳪜󳫏󷀛󱘼󲝟󲧦󶛙󶻃󱎕󶯰󶰦󶥍󶥺󱎗󰆎


Instale el soporte del disco duro en la caja.
󰈆󰇛󰇓󰇳󰇬󰉔󰉧󰈯󰉁󰉆󰈖󰈵󰉡󰉺󰈵󰇯󱘆󰈎󱄈󰇕󰈂󰇝󰆎


󱸶󳪜󳤈󵈎󱘼󲝟󲧦󱶹󴫵󱎕󳼫󴄏󲥪󱬣󱎵󰆎

󱮲󱥆󶠖󳭪󶉥󳪜󳫏󲝟󲧦󱖨󵢔󰆎

Retirez le rack.

󱤣󰇲󰈌󰇊󰇯󰉧󰉁󰈭󰈖󱘆󰈎󶚗󰇛󰈂󰇝󰆎

󱮲󱤮󶠖󳭪󱸶󳪜󳤈󲝟󲧦󱖨󵢔󰆎

four screws.
󶉥󳪜󳫏󶛙󶻃󱎕󲝟󲧦󱎗󷂼󱀺󶙜󵩶󶺍󶰧󱤪󶛡󰆎
Befestigen Sie die Festplatte oder die SSD
mit vier Schrauben in der Halterung.
Fixez le disque dur ou SSD dans son berceau
à l'aide de quatre vis.
Sujete el disco duro o la SSD con 4 tornillos
en el soporte.
󰈖󰉔󰉧󰈯󰉁󰉆󰇯󱘆󰈎󱄈󰇕󰉋󰈶󰈖󱀻󱤣
󰇲󷀔󰈎󶱌󰈅󰈂󰇝󰆎


󱸶󳪜󳤈󶛙󴫵󱎕󲝟󲧦󱎵󵜱󱀺󶙜󵫇󶺍󱁍󱤪󶛡󰆎


effectively reduce its temperature.
󲒮󶗙󱁫󶥍󲦯󱀺󳢴󲘂󲰭󶉥󶜐󶩏󱪺
󳻈󴻬󱥘󱁫󶥍󲦯󱀺󱘟󲤹󶢈󷃯󶕴󳃛󶝲󰆎






significativement diminuée.



󶩏󱸮󳶆󰇬󰇛󰇪󰈳󰉺󰉜󰉩󰉏󰉁󰉇󰈖󰉜󰈴󰉺󰉚󰉺󰉇󱀺󰇲
󶕳󶲖󰇯󴻬󰈎󱄈󰇕󰈂󰇝󰆎



󲒮󶗙󱁫󲦯󱀺󳢴󲘂󲰭󱸶󱸬󳌝󱧛
󳻈󴽤󱥘󱁫󲦯󱀺󱘟󲤹󶢈󷃯󶕴󳁙󶝲󰆎

󶉥󶮼󱀰󱈻󶼅󶟿󵴄󶥇󶰕󶛙󶻃󶢢󲘂󲰭󱎗󰆎
Installieren Sie das erste Speichermodul in den



󲧊󳤞󰇲󰉟󰉠󰉨󰉺󰉠󰈶󰉣󰉺󰉩󰇳󰆍󰈷󰉫󰉁󰉆󰇼
󲀞󰇛󵇬󰈃󰈂󰇝󰆎

󱸶󶮼󱀰󱁚󱎵󱶈󶥇󱦇󶛙󴫵󱂾󲘂󲰭󱎵󰆎
3. Align the notch of the memory module with the one
of the relevant memory slot.
󶉥󶼅󶟿󵴄󶲏󱘓󱸽󶧦󲘂󲰭󱀺󳢴󱐩󲰭
󱁖󶛙󲘂󶢢󲘂󲰭󱀺󶭉󶼲󶢡󱙁󲡟󱙖󲤹󶼼󰆎
Richten Sie die Kerbe des Speichermoduls nach
der Nase im Speichersockel aus.
Alignez l'encoche du module mémoire sur celle



󱀻󱤣󰇲󷀔󰈎󰆍󶗖󰈎󲵐󰇕󰇯󱘸󰈓󰇟󰈂󰇝󰆎


󱸶󱎵󱶈󶲏󱘓󱸩󶗏󲘂󲰭󱀺󳢴󱐩󲰭󰆎
󱸶󱎵󱶈󶛙󲘂󱂾󲘂󲰭󱀺󲂦󳪞󴷔󶢡󱙁󲡟󱙖󲤹󴸟󰆎
4.
Gently insert the module into the slot in a 45-degree angle.
󶉥󶼅󶟿󵴄󱄕󶝲󴰂󵅅󵅅󲘂󱎕󲘂󲰭󱎗󰆎

45-Grad-Winkel in den Steckplatz.
Insérez le module mémoire délicatement dans
l'encoche avec un angle de 45 degrés.




󰉟󰉠󰉨󰉺󰈖󰇲󴰂󶝲󰇏󰈍󲕯󰇛󱎕󰈐󰈂󰇝󰆎

󱸶󱎵󱶈󱄕󶝲󴰂󵆫󵆫󲘂󱎕󲘂󲰭󱎵󰆎
5. Carefully push down the memory module until it
snaps into the locking mechanism.
󶉥󶼅󶟿󵴄󲆰󱀻󶈴󶴮󱎙󱊤󱖑󲯛󶛛󶇰󶛡󶕳󰆎

einrastet.
Appuyez sur le module vers le bas jusqu'à
enclenchement dans le mécanisme d'attache.

que encaje.
󲕯󰇛󱎕󰈐󰇣󶞱󰇯󰆍󰉟󰉠󰉨󰉺󰈖󶖎󰇝󰈌󰇊󰇯󲓬󰇛󵇬󰈄󰇬
󰉫󰉁󰈭󰇐󰇏󰇏󰈎󰈂󰇝󰆎


󱸶󱎵󱶈󲆰󱀻󱖻󶴮󱁔󱇗󱖑󲯛󶛛󶇰󶛡󶕳󰆎



󶛙󶻃󶮼󱂼󱈻󶼅󶟿󵴄󶥇󶰕󶢢󲘂󲰭󱎗󶘑󳎗󶥮󷆢
󱁖󳻈󴻬󶜐󶩏󱪺󱮲󱥆󶠖󳭪󰆎
Installieren Sie das zweite Speichermodul in den

Das Wärmeleit-Pad wird wie gezeigt aufgeklebt.
Installez le second module mémoire dans le slot




almohadilla térmica como se muestra.
󲧊󳤞󰇲󰉟󰉠󰉨󰉺󰉠󰈶󰉣󰉺󰉩󰈖󰈷󰉫󰉁󰉆󰇼󲀞
󰇛󵇬󰈃󰦅󰈷󰉄󰉁󰉕󰆨󰦆󰆍󰈳󰉺󰉜󰉩󰉏󰉁󰉇󰈖󱤣
󰇲󷀔󰈎󴻬󰈎󱄈󰇕󰈂󰇝󰆎



󶛙󴫵󶮼󱂼󱁚󱎵󱶈󶥇󱦇󱂾󲘂󲰭󱎵󱗲󳎗󶥮󵳔
󲂦󳻈󴽤󱸬󳌝󱧛󱮲󱤮󶠖󳭪󰆎


󲥜󱁫󶥍󲦯󶇣󲝟󲘤󶼅󶟿󵴄󶥇󶰕󰆎


Carte mère compatible uniquement avec des modules



󰇗󰇲󰉟󰈢󰉱󰉚󰉺󰉇󰇳󰇲󰉟󰉠󰉨󰉺󰉠󰈶󰉣󰉺󰉩
󰇲󰈃󱸮󲈌󰇛󰇪󰇈󰈂󰇝󰆎


󲥜󱁫󲥪󲦯󱃵󲝟󲘤󱎵󱶈󶥇󱦇󰆎


󶛙󶇰󰇲󰇣󰈅󰇯󰆍󰈯󰉺󰈷󰈖󵞻󰇕󰈏󱑽󰇯󵤫󳃀󰈱󰉺󰉇󰈖󶚗
󰇛󰇪󰇈󰈏󰇗󰇬󰈖󶭉󶼲󰇛󰇪󰇓󰇤󰇙󰇈󰆎



󱨪󱂾󶛙󶇰󶲳󴢁󳰫󲄰󲥪󱬣󲠦󴸧󱍸󲔄󵢔󳝥󳃀󴃯󰆎
Motherboard Illustration
01. USB 3.2 Gen 2 Ports
USB 3.2 Gen 2 連接埠
USB 3.2 Gen 2-Anschlüsse
Prises USB 3.2 Gen 2
Puertos USB 3.2 Gen 2
USB 3.2 Gen 2 ポート
USB 3.2 Gen 2 порты
USB 3.2 Gen 2 端口
02. USB 3.2 Gen 1 Ports
USB 3.2 Gen 1 連接埠
USB 3.2 Gen 1-Anschlüsse
Prises USB 3.2 Gen 1
Puertos USB 3.2 Gen 1
USB 3.2 Gen 1 ポート
USB 3.2 Gen 1 порты
USB 3.2 Gen 1 端口
03. Power LED
電源指示燈
Betriebsanzeige-LED
Indicateur alimentation
LED de encendido
電源 LED
LED-индикатор питания
电源指示灯
04. Hard Disk Drive LED
硬碟指示燈
Festplatten-LED
Indicateur disque dur
Diodo LED del disco duro
ハードディスクドライブ LED
LED-индикатор жесткого диска
硬盘指示灯
05. Power Button
電源按鈕
Ein-/Aus-Button
Bouton d'alimentation
Botón de encendido
電源スィッチ
Кнопка питания
电源按钮
06. MIC-in
麥克風插孔
Mikrofon-Eingang
Prise micro
Micrófono
マイク
Гнездо для микрофона
麦克风插孔
Jumper 設定 \ Jumper-Einstellungen \ Réglages des cavaliers \ Con󰘰guración de los puentes \ ジャンパー設定 \ Настройки преключателя \ Jumper 设定
Jumper Settings
J3
J1
J2
J4
07. Headphones
耳機孔
Kopfhörer-Ausgang
Prise casque
Auriculares
イヤホン
Гнездо для наушников
耳机孔
2 4
1 3
COM 2 Port \ COM 2 插座
COM 2-Ausgang \ Port COM 2
Puerto 2 COM \ COM 2 ヘッダ
COM 2-порт \ COM 2 接头
SW2
Pin Signal Name Pin Signal Name
1PWR_SW_N 2 +5V
3 GND 4 RTC_RST_N
External Power SW & Clear CMOS
外部電源及 Clear CMOS
Anschluss für externe Buttons: Ein/Aus und Clear CMOS
Connecteurs pour boutons d'alimentation et Clear CMOS déportés
Conexión para botones externos: On/Off y Clear CMOS
外部電源スイッチとCMOSクリア
Сброс CMOS и Внешняя кнопка питания
外部电源及 Clear CMOS
主機板說明 \ Mainboard-Abbildung \ Illustration de la carte mère \ Ilustración de la placa base \ メインボード図 \ Материнская плата Иллюстрация \ 主机板说明
2 4 6 8 10
13579
Connector for SD Card Reader Daughter Board (CR005)
SD 讀卡機子板連接埠 (CR005)
Anschluss für die SD-Cardreader-Tochterplatine (CR005)
Connecteur pour l'adaptateur de lecteur de carte SD (CR005)
Conexión para la extensión del lector de tarjetas SD (CR005)
SDカードリーダのドーターボード(CR005)用コネクター
Разъем для дочерней платы устройства чтения
SD карт памяти (CR005)
SD 卡片阅读机子板端口 (CR005)
AC Back Auto Power ON
回電自動開啟
Automatisches Einschalten bei Spannungsversorgung
Démarrage automatique à la mise sous tension
Encendido automático con suministro de corriente
AC自動電源オン
Восстановление питания AC Авто включение
回电自动开启
COM 1 & COM 2 Power Switch
COM 1 & COM 2 電源開關
Konfiguration von COM 1 & COM 2
Gestion de l’alimentation des COM 1 & COM 2
COM 1 & COM 2 Enchufe Interruptor
COM 1 & COM 2 電源 スイッチ
Переключатель питания COM 1 & COM 2
COM 1 & COM 2 电源开关
2
4
6
8
10
1
3
5
7
9
VGA connector \ VGA 插座
VGA-Anschluss \ Connecteur VGA
Conector del VGA \ VGA コネクター
VGA разъем \ VGA 接头
J5
JP2
COM1 (pin9) COM2 (pin9)
Short Pin Function Short Pin Function
1-2 (Default) RI1 3-4 (Default) RI2
5-7 +5V 6-8 +5V
7-9 +12V 8-10 +12V
COM PORT Pin 9 "Ring Indicator" (RI) configuration:
J6
SD1
Pin Signal Name
1 +3.3VS
2 +3.3VS
3 GND
4USB_D-
5USB_D+
6 GND
JP1
Pin Signal Name
1AUTO_PWR_ON
2 GND
Open
(enabled)
Short
(disabled)
18. COM Port
COM 插座
COM-Anschluss
Prise COM
Puerto COM
COM ヘッダ
COM порт
COM 接头
03 020402 01060702 020501 06 07
14 1513
J3 J6
15
J5
1716 18
09
08
J2
J4
11
12
10
J1
2119 20
14. Battery Connector
電池插座
Anschluss für die Batterie
Connecteur de pile
Conector de batería
バッテリー コネクター
Разъем для батареи
电池插座
08. DDR5 SO-DIMM Slots
DDR5 SO-DIMM 插槽
DDR5 SO-DIMM Steckplätze
Slot mémoire SO-DIMM DDR5
Zócalo de DDR5 SO-DIMM
DDR5 SO-DIMM スロット
Слот памяти DDR5 SO-DIMM
DDR5 SO-DIMM 插槽
09. Processor
處理器
Prozessor
Processeur
Procesador
プロセッサ
Процессор
处理器
11. M.2 2280 M key slot
(for PCIE or WWN04/PCIe Gen4x4)
M.2 2280 M key 插槽
M.2-2280 (M) Steckplatz
Emplacement M.2 2280 M
Ranura M.2 2280 M
M.2 2280 M キースロット
Слот M.2 2280 M ключ
M.2 2280 M key 插槽
10. SATA 3.0 6Gb/s connector
SATA 3.0 6Gb/s 插槽
SATA 3.0-Anschlüsse (6 Gb/s)
Connecteurs SATA 3.0 6Gb/s
Base de conexiones SATA 3.0 6Gb/s
SATA 3.0 6Gb/s コネクタ
Разъем SATA 3.0 6 Гбит/с
SATA 3.0 6Gb/s 接口
13. M.2 2230 E Key Slot
M.2 2230 E key 插槽
M.2-2230 (E) Steckplatz
Emplacement M.2 2230 E
Ranura M.2 2230 E
M.2 2230 E キースロット
Слот M.2 2230 E ключ
M.2 2230 E key 插槽
12. M.2 2280 M key slot
(for PCIE or SATA SSD/PCIe Gen4x4)
M.2 2280 M key 插槽
M.2-2280 (M) Steckplatz
Emplacement M.2 2280 M
Ranura M.2 2280 M
M.2 2280 M キースロット
Слот M.2 2280 M ключ
M.2 2280 M key 插槽
16. DisplayPort
DisplayPort 連接埠
DisplayPort-Anschluss
Prise DisplayPort
DisplayPort
ディスプレイポート
DisplayPort
DisplayPort 端口
15. USB 2.0 Ports
USB 2.0 連接埠
USB 2.0-Anschlüsse
Prises USB 2.0
Puertos USB 2.0
USB 2.0 ポート
USB 2.0 порты
USB 2.0 端口
17. HDMI Port
HDMI 連接埠
HDMI-Anschluss
Prise HDMI
Puerto HDMI
HDMI ポート
HDMI порт
HDMI 端口
19. Giga LAN Port
Giga 網路連接埠
Gigabit LAN Port
Port LAN Gigabit
Puerto LAN Gigabit
ギガビットLANポート
Giga LAN порт локальной сети
Giga LAN 连接端口
20. 2.5Giga LAN Port \ 2.5Giga 網路連接埠 \ 2.5G LAN Port
Port LAN 2.5 Gigabit \ Puerto LAN 2,5G \ 2.5ギガビットLANポート
RU 2,5-гигабитный сетевой порт \ 2.5Giga LAN 连接端口
21. Power jack (DC IN) \ DC 電源連接埠 \ DC-Stromanschluss
Prise alimentation DC \ Conexión de la fuente de alimentación (CC)
DC電源 ポート \ Гнездо для подключе ния питания (DC IN)
电源插孔 (直流电输入)
2
1
2
1
COM2 (RS232)
Pin Signal Name
1 DCD
2RXD
3TXD
4DTR
5 GND
6DSR
7RTS
8CTS
9RI
10 NULL
VGA1
Pin Signal Name Pin Signal Name Pin Signal Name Pin Signal Name
1 GND 2 GND 3 SCL 4 GND
5 SDA 6 GND 7 GND 8 GND
9 VSYNC 10 GND 11 HSYNC 12 GND
13 GND 14 GND 15 BOUT 16 +5V
17 GOUT 18 +5V 19 ROUT 20 +5V
2
1
20
19
VGA1
JP2
SW2
COM2
1
SD1

Other manuals for DS50U

1

Other Shuttle Desktop manuals

Shuttle Barebone XS 35V2 User manual

Shuttle

Shuttle Barebone XS 35V2 User manual

Shuttle DH110 Series User manual

Shuttle

Shuttle DH110 Series User manual

Shuttle SH310R4 User manual

Shuttle

Shuttle SH310R4 User manual

Shuttle XPC SD30 User manual

Shuttle

Shuttle XPC SD30 User manual

Shuttle XPC SD11G5 User manual

Shuttle

Shuttle XPC SD11G5 User manual

Shuttle XS35 User manual

Shuttle

Shuttle XS35 User manual

Shuttle SH370R6 User manual

Shuttle

Shuttle SH370R6 User manual

Shuttle DS68U Series User manual

Shuttle

Shuttle DS68U Series User manual

Shuttle SG45H7 User manual

Shuttle

Shuttle SG45H7 User manual

Shuttle XPC slim User manual

Shuttle

Shuttle XPC slim User manual

Shuttle XPC SD39P2 User manual

Shuttle

Shuttle XPC SD39P2 User manual

Shuttle SZ170R8 User manual

Shuttle

Shuttle SZ170R8 User manual

Shuttle DH32U Series User manual

Shuttle

Shuttle DH32U Series User manual

Shuttle DS77U Series User manual

Shuttle

Shuttle DS77U Series User manual

Shuttle XS35GS V2 User manual

Shuttle

Shuttle XS35GS V2 User manual

Shuttle Slim-PC Barebone XH61V Owner's manual

Shuttle

Shuttle Slim-PC Barebone XH61V Owner's manual

Shuttle X50V9 Series User manual

Shuttle

Shuttle X50V9 Series User manual

Shuttle XC60J User manual

Shuttle

Shuttle XC60J User manual

Shuttle SH61R4 Owner's manual

Shuttle

Shuttle SH61R4 Owner's manual

Shuttle P51U User manual

Shuttle

Shuttle P51U User manual

Shuttle XPC SN21G5 User manual

Shuttle

Shuttle XPC SN21G5 User manual

Shuttle X50V3L Series User manual

Shuttle

Shuttle X50V3L Series User manual

Shuttle DH470 User manual

Shuttle

Shuttle DH470 User manual

Shuttle SX79R5 User manual

Shuttle

Shuttle SX79R5 User manual

Popular Desktop manuals by other brands

3M Dynapro ET 3200 Series Field wiring guide

3M

3M Dynapro ET 3200 Series Field wiring guide

on stage WSC7500 manual

on stage

on stage WSC7500 manual

Sony VAIO PCV-RSM22 Hardware guide

Sony

Sony VAIO PCV-RSM22 Hardware guide

Touch Screens Ellipsis user guide

Touch Screens

Touch Screens Ellipsis user guide

Lenovo 7052C9U user guide

Lenovo

Lenovo 7052C9U user guide

Compaq Presario SR1500 - Desktop PC Support guide

Compaq

Compaq Presario SR1500 - Desktop PC Support guide

HP Media Center Start here

HP

HP Media Center Start here

Zotac ZBOX Magnus EN1080K user manual

Zotac

Zotac ZBOX Magnus EN1080K user manual

Sony VGN-BZ1 user guide

Sony

Sony VGN-BZ1 user guide

Dell OptiPlex GX200 Service manual

Dell

Dell OptiPlex GX200 Service manual

Dell Inspiron One 2020 quick start guide

Dell

Dell Inspiron One 2020 quick start guide

Sony VAIO VGC-M1 Series Hardware guide

Sony

Sony VAIO VGC-M1 Series Hardware guide

Ohio Scientific Superboard II Assembly instructions

Ohio Scientific

Ohio Scientific Superboard II Assembly instructions

Lenovo IdeaCentre AIO 5 24IMB05 Hardware Maintenance Manual

Lenovo

Lenovo IdeaCentre AIO 5 24IMB05 Hardware Maintenance Manual

Sony VPCJ111FX user guide

Sony

Sony VPCJ111FX user guide

Lenovo ThinkCentre A30 Rýchly prehľad

Lenovo

Lenovo ThinkCentre A30 Rýchly prehľad

NComputing L300 Evaluation guide

NComputing

NComputing L300 Evaluation guide

IBM PC 300GL Types 6275 Software guide

IBM

IBM PC 300GL Types 6275 Software guide

manuals.online logo
manuals.online logoBrands
  • About & Mission
  • Contact us
  • Privacy Policy
  • Terms and Conditions

Copyright 2025 Manuals.Online. All Rights Reserved.