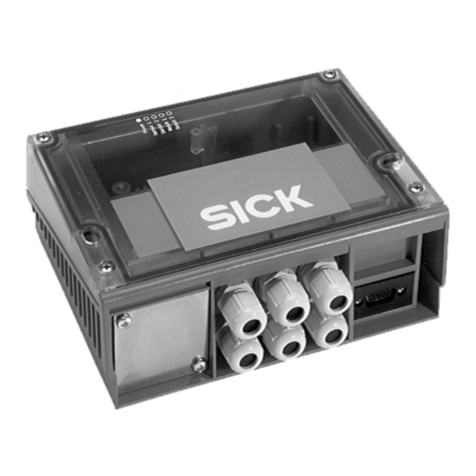
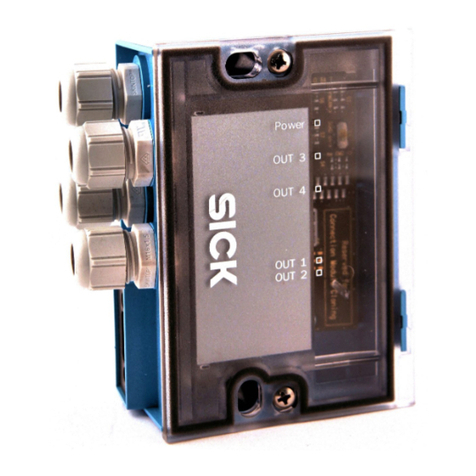
SICK CDM420-0001 User manual

1 # 48013110/UC97/2010-06 © SICK AG · Germany · All rights reserved · Subject to change without notice · Irrtümer und Änderungen vorbehalten
1. Produkteigenschaften
■Schnittstellenwandler-Modul zur Anbindung eines SICK 1D/2D-
Scanners an eine Datenschnittstelle in CL20-mA-Ausführung
■Einsetzbar im Anschlussmodul CDM420-0001
■Unterstützt die Barcodescanner der Produktfamilien CLV4xx und
CLV6xx sowie die 1D/2D-Image Code Reader der Produktfamilien
ICR84x-2 und ICR85x-2
■Wandelt die RS-422-Ausführung der seriellen Host-Schnittstelle
des Scanners in eine CL20-mA-Schnittstelle
■Ausprägung der Schnittstelle (Stromquelle/Stromsenke) für
Sender und Empfänger auf den Kommunikationspartner (Host)
einstellbar
■Versorgungsspannung DC 24 V ± 20 % über das Anschlussmodul
2. Voraussetzungen zur Installation
■Anschlussmodul CDM420-0001 mit Betriebsanleitung
Nr. 8010004
■PC mit Konfigurationssoftware CLV-Setup bzw. SOPAS-ET
(CLV6xx) zum Aktivieren der RS-422-Schnittstelle im Scanner
■RS-232-Datenleitung (3-adrig, Nullmodem) zum Anschluss des
PC an den Stecker AUX im Anschlussmodul
3. Elektrische Installation
■Elektroinstallation nur durch Fachpersonal durchführen.
■Elektrische Verbindungen nur im spannungsfreien Zustand
herstellen oder lösen.
Schnittstellenwandler RS-422/CL20mA
für Anschlussmodul CDM420-0001
Montageanleitung Fitting Instructions
RS 422 to CL20mA interface converter
for CDM420-0001 Connection Module
HINWEIS
Beschädigungsgefahr durch elektrostatische Aufladung!
Vor Entnahme des Schnittstellenmoduls aus dem ESD-Beutel
Potenzialausgleich zwischen Körper, Arbeitsunterlage, An-
schlussmodul und Werkzeug durchführen.
Während des Einbaus ein Erdungsarmband am Handgelenk
tragen.
1. Sicherstellen, dass die zuführende Versorgungspannung
(DC 24 V oder AC 230 V bei Verwendung des Power-Supply-
Moduls CMP400) für das Anschlussmodul ausgeschaltet ist.
DIe Verwendung nur des Schalters S1 im Anschlussmodul ist
nicht ausreichend!
1. Features
■Interface converter module for connecting a SICK 1D/2D
scanner to a CL20 mA data interface
■Applicable in the CDM420-0001 Connection Module
■Supported devices: bar code scanners of the CLV4xx and CLV6xx
families as well as the 1D/2D Image Code Readers of the
ICR84x-2 and ICR85x-2 families
■Converts the RS 422 type of the scanner’s serial host interface
to a CL20 mA type
■Characteristics of the interface (current source/current sink) for
each the transmitter and receiver adaptable to the host
■Power supply 24 V DC ± 20 % via connection module
2. Installation Requirements
■CDM420-0001 Connection Module with operating instructions
no. 8010004
■PC with configuration software CLV-Setup respectively SOPAS-ET
(CLV6xx) for enabling the RS 422 interface in the scanner
■RS 232 data cable (3-core, null modem) for connecting the PC to
the AUX plug inside the connection module
3. Electrical Installation
■Electrical installation should only be carried out by qualified staff.
■Connect or disconnect current linkages only under de-energised
conditions.
NOTICE
Risk of damage by electro-static discharge!
Before taking the interface converter out of the ESD bag,
equipotential bonding must be provided between the body of the
operator, table covering, connection module, and tool.
During assembly, wear grounding wrist straps to avoid ESD
damage.
1. Ensure that the incoming power supply voltage (24 V DC, or
230 V AC when using CMP400 Power Supply) for the connection
module is switched off.
Using only the switch S1 inside the connection module is not
sufficient!
2 # 4 8013110/UC97/2010-06© SICK AG · Germany · All rights reserved · Subject to change without notice · Irrtümer und Änderungen vorbehalten
Cloning-Modul CMC400*)
CMC400 Cloning Module*)
Basisleiterkarte
Main board
Abb. 1: Einbauort des Schnittstellenwandlers (Artikel-Nr. 2049276) im Anschlussmodul CDM420-0001
Fig. 1: Installation location of the interface converter (part no. 2049276) in the CDM420-0001 Connection Module
*) optional
Schnittstellenwandler
Interface converter
Anschluss CL 20 mA
CL 20 mA connection
Steckbrücken für
Konfiguration
Jumpers for
configuration
Schnittstellenwandler Basisleiterkarte
Interface converter Mother board
Signal Aderfarbe Aderstärke Klemme
Wire colour Wire cross-section Terminal
DC 24 V rot/red mittel/medium 1
0V schwarz/black mittel/medium 2
T+ (RS-422) orange dünn/thin 24
R+ (RS-422) gelb/yellow dünn/thin 25
T– (RS-422) weiß/white dünn/thin 34
R– (RS-422) schwarz/black dünn/thin 35
DC 24V* rot/red dick/thick 29
Tab. 1: Herzustellende Verbindungen (von Schnittstellenwandler zu Basisleiterkarte)
Tab. 1: Connections to be performed (from interface converter to mother board)
Bohrung für Führungsstift
Hole for alignment pin
Power-Supply-
Modul CMP400*)
Top
2. Im geöffneten Anschlussmodul (Abb. 1) das Schnittstellenwand-
ler-Modul links auf die beiden runden Abstandshalter aufsetzen
(runden Führungstift beachten!) und mit den beiliegenden zwei
Schrauben befestigen.
3. Die 7 Leitungen des Schnittstellenwandlers mit offenen Enden
gemäß Tab. 1 an die Klemmen des Anschlussmoduls anschlie-
ßen. Die beiden Adern mit Aderendhülsen an den Schraub-
klemmen auflegen. Die Isolation am freien Ende alle anderen
Adern ist bereits teilgelöst. Diese Adern verdrillen und an den
Federkraftklemmen auflegen.
Der Schnittstellenwandler ist nun elektrisch mit der Basisleiter-
karte des Anschlussmoduls verbunden und betriebsbereit.
WICHTIG: Der Schalter S1 trennt den Schnittstellenwandler nicht
von der Versorgungsspannung!
4. CL20-mA-Schnittstelle des Kommunikationspartners spannungs-
frei an den entspechenden Klemmenblock (Abb. 1 links oben)
auf dem Schnittstellenwandler anschließen.
5. Den Schnittstellenwandler mit Hilfe der 6 roten Steckbrücken an
die Ausprägung der Schnittstelle des Kommunikationspartners
anpassen (Abb. 2). Hierzu eine Elektroniker-Pinzette verwenden.
Grundeinstellung: Anschlussmodul passiv (Sender u. Empfänger)
6. Scanner mit der 15-pol. D-Sub-HD-Buchse auf der Vorderseite
des Anschlussmoduls verbinden.
2. Inside the connection module (Fig. 1) attach the interface
converter module to the two round spacer on the left side (when
doing so, observe the round leading pin!) and tighten the module
using the provided screws.
3. Connect the 7 wires (open ends) of the interface converter to the
terminals of the connection module according to Tab. 1. Connect
the two wires equipped with ferrules to the screw terminals. The
isolation on the open ends of all other wires is already partly
dismantled. Twist each of these wires and connect the wires to
the spring terminals.
The interface converter is now electrically connected to the
mother board of the connection module and ready for operation.
IMPORTANT: the switch S1 does not separate the interface con-
verter from power supply voltage!
4. Connect the CL20 mA interface of the host to the corresponding
terminal block (Fig. 1, left side on top) on the interface converter.
5. Use the 6 red jumpers to adapt the interface converter to the
characteristics of the host interface (Fig. 2). To do so, tweezers
are a useful tool for removing the jumpers.
Default settings: connection module passive (transmitter and
receiver)
6. Connect the scanner to the 15-pin D Sub HD socket on the front
side of the connection module.

3 # 48013110/UC97/2010-06 © SICK AG · Germany · All rights reserved · Subject to change without notice · Irrtümer und Änderungen vorbehalten
Abb. 2: Konfiguration des Schnittstellenwandlers mit Steckbrücken
Fig. 2: Configuring the interface converter with jumpers
CL 20 mA active
Transmit active
Receive active
CL 20 mA
Transmit passive
Receive active
CL 20 mA
Transmit active
Receive passive
Anschlussmodul
Connection module
Anschlussprinzip CL 20 mA (aktiv auf passiv):
Connection diagram CL 20 mA (active to passive):
HOST
passive
HOST
Receive active
Transmit passive
Anschlussprinzip CL 20 mA (passiv/aktiv gemischt):
Connection diagram CL 20 mA (active/passive mixed):
T+
T–
R–
R+
Anschlussmodul
Connection module T+
R+
T– R–
Anschlussprinzip CL 20 mA (passiv auf aktiv):
Connection diagram CL 20 mA (passive to active):
T+
T–
R–
R+
Anschlussmodul
Connection module T+
R+
T– R– HOST
active
CL 20 mA passive
Transmit passive
Receive passive
Stellung der Steckbrücken:
Position of jumpers:
T+
T–
R–
R+
T+
R+
T– R–
Anschlussprinzip CL 20 mA (passiv/aktiv gemischt):
Connection diagram CL 20 mA (passive/ active mixed):
T–
R–
T+
R+
Anschlussmodul
Connection module
HOST
Receive passive
Transmit active
T+ R+
T– R–
Top
Top
Top
Top
Receive Transmit
Receive Transmit
Receive Transmit
Receive Transmit
Grundeinstellung
Default settings
7. Abschließende Verdrahtungskontrolle des Schnittstellenwandlers
durchführen.
8. Versorgungspannung für das Anschlussmodul einschalten.
Die Versorgungsspannung liegt am Schnittstellenwandler und
dem Scanner an.
RS-422-Schnittstelle des Scanners aktivieren
Mit CLV-Setup bzw. SOPAS-ET den Treiber für die RS-422-
Ausführung der Host-Schnittstelle im Scanner aktivieren.
Hierzu PC mit RS-232-Datenleitung an den 9-pol. D-Sub-Stecker
AUX im Anschlussmodul anschließen (siehe auch Betriebsanlei-
tung des Scanners).
7. Check carefully the wiring of the interface converter after
finishing the elecrical installation.
8. Switch on the power supply voltage for the connection module.
The interface converter and the scanner are now energized.
Activating the RS 422 interface of the scanner
Use the CLV-Setup/SOPAS-ET software to enable the driver for
the RS 422 interface type in the scanner (host interface).
To do so, connect the PC to the 9-pin D Sub plug AUX inside the
connection module using a 3-core RS 232 data cable (see also
the operating instructions of the scanner).

SICK AG | Waldkirch | Germany | www.sick.com
8013110/UC97/2010-06 ∙ 5M/TEO <PM6.5/PDF> ∙ A4swint35
Australia
Phone +61 3 9497 4100
1800 33 48 02 – tollfree
E-Mail [email protected]
Belgium/Luxembourg
Phone +32 (0)2 466 55 66
E-Mail inf[email protected]
Brasil
Phone +55 11 3215-4900
E-Mail sac@sick.com.br
Ceská Republika
Phone +420 2 57 91 18 50
E-Mail [email protected]
China
Phone +852-2763 6966
E-Mail [email protected]
Danmark
Phone +45 45 82 64 00
E-Mail [email protected]
Deutschland
Phone +49 211 5301-301
E-Mail [email protected]
España
Phone +34 93 480 31 00
E-Mail inf[email protected]
France
Phone +33 1 64 62 35 00
E-Mail inf[email protected]
Great Britain
Phone +44 (0)1727 831121
E-Mail inf[email protected]
India
Phone +91–22–4033 8333
E-Mail [email protected]
Israel
Phone +972-4-999-0590
E-Mail inf[email protected]
Italia
Phone +39 02 27 43 41
E-Mail inf[email protected]
Japan
Phone +81 (0)3 3358 1341
E-Mail suppor[email protected]
Nederlands
Phone +31 (0)30 229 25 44
E-Mail inf[email protected]
Norge
Phone +47 67 81 50 00
E-Mail aust[email protected]
Österreich
Phone +43 (0)22 36 62 28 8-0
E-Mail [email protected]
Polska
Phone +48 22 837 40 50
E-Mail inf[email protected]
Republic of Korea
Phone +82-2 786 6321/4
E-Mail info@sickkorea.net
Republika Slovenija
Phone +386 (0)1-47 69 990
E-Mail [email protected]
România
Phone +40 356 171 120
E-Mail [email protected]
Russia
Phone +7 495 775 05 34
E-Mail info@sick-automation.ru
Schweiz
Phone +41 41 619 29 39
E-Mail [email protected]h
Singapore
Phone +65 6744 3732
E-Mail [email protected]
Suomi
Phone +358-9-25 15 800
E-Mail sic[email protected]
Sverige
Phone +46 10 110 10 00
E-Mail inf[email protected]
Taiwan
Phone +886 2 2375-6288
E-Mail sales@sick.com.tw
Türkiye
Phone +90 216 587 74 00
E-Mail inf[email protected]
United Arab Emirates
Phone +971 4 8865 878
E-Mail inf[email protected]
USA/Canada/México
Phone +1(952) 941-6780
1 800-325-7425 – tollfree
E-Mail inf[email protected]
More representatives and agencies
in all major industrial nations at
www.sick.com
Other SICK Control Unit manuals

SICK
SICK UE10-3OS User manual

SICK
SICK Flexi IO XTDO1 User manual

SICK
SICK CDM420-0004 User manual

SICK
SICK CDB730-001 User manual

SICK
SICK CDB620 User manual

SICK
SICK CDM420-0006 User manual

SICK
SICK CDB650 User manual

SICK
SICK CDF600-2200 User manual

SICK
SICK IOLG2PN-03208R01-PROFINET User manual

SICK
SICK CDB730-001 User manual
Popular Control Unit manuals by other brands

Pentair
Pentair SIATA V132 SFE-EV VIRIDION user guide

API
API Weinschel 420 Series manual

Econex
Econex MPV Series Installation and Maintenance

Burkert
Burkert 8835 operating instructions

DUNIWAY Stockroom
DUNIWAY Stockroom Terranova 907 instruction manual

Keeson Technology
Keeson Technology MC120 Function instruction manual