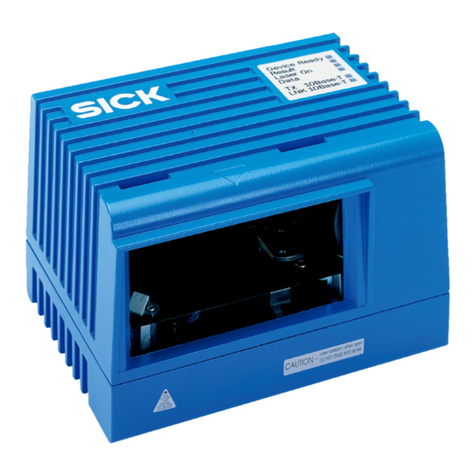
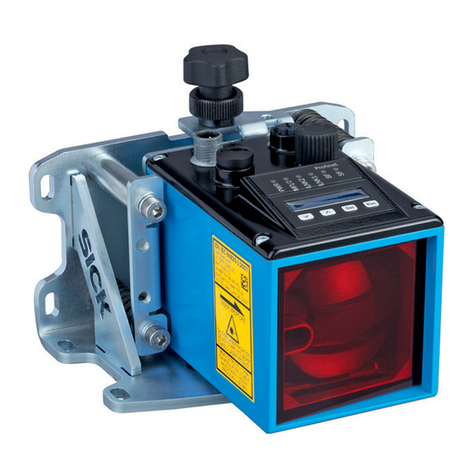
SICK S100 Standard User manual

OPERATING INSTRUCTIONS
S100
Laser scanner
EN

Fehler! Unbek
S100
2© SICK AG • Subject to change without notice 8012238/YY30/2015-02-20
This document is protected by the law of copyright, whereby all rights established therein remain with the
company SICK AG. Reproduction of this document or parts of this document is only permissible within the limits
of the legal determination of Copyright Law. Alteration or abridgement of the document is not permitted without
the explicit written approval of the company SICK AG.

Operating instructions
S100
8012238/YY30/2015-02-20 © SICK AG • Subject to change without notice 3
Contents
Contents
1Important safety notes .....................................................................................................6
2About this document.........................................................................................................7
2.1 Function of this document....................................................................................7
2.2 Target group ..........................................................................................................7
2.3 Scope .....................................................................................................................7
2.4 Depth of information.............................................................................................7
2.5 Abbreviations......................................................................................................... 8
2.6 Symbols used ........................................................................................................8
3On safety.............................................................................................................................9
3.1 Correct use ............................................................................................................9
3.2Authorised personnel............................................................................................9
3.2.1 Mounting and maintenance ............................................................... 9
3.2.2 Electrical installation and replacement .............................................9
3.2.3 Commissioning, operation and configuration ...................................9
3.3 Applications of the device.....................................................................................9
3.4General safety notes and protective measures ................................................10
3.5 Environmental protection ...................................................................................11
3.5.1 Disposal .............................................................................................11
3.5.2 Separation of materials ....................................................................11
4Product description .........................................................................................................12
4.1 Device components ............................................................................................12
4.2 Special features ..................................................................................................12
4.3 Function ...............................................................................................................13
4.3.1 Principles of operation ......................................................................14
4.3.2 Field set and switching fields ...........................................................15
4.3.3 Monitoring cases...............................................................................16
4.4 Applications .........................................................................................................16
4.4.1 Warehouse bay checking..................................................................16
4.4.2 Collision protection ...........................................................................17
4.4.3 Protection of the area behind a vehicle...........................................17
4.4.4 Collision protection ...........................................................................18
4.5 Configurable functions........................................................................................18
4.5.1 Naming applications and laser scanners ........................................18
4.5.2 Switching fields .................................................................................18
4.5.3 Resolution..........................................................................................20
4.5.4 Application diagnostic output “error/contamination”.....................20
4.5.5 Restart ...............................................................................................20
4.5.6 Multiple sampling..............................................................................21
4.5.7 Dazzle suppression ...........................................................................21
4.5.8 Monitoring cases on the S100 Professional ...................................21
4.5.9 Stand-by mode ..................................................................................21
4.5.10 Static control inputs on the S100 Professional ..............................22
4.5.11 CANopen ............................................................................................23
4.6 Status indicators .................................................................................................24

Fehler! Unbekannter Name für Dokument-Eigenschaft.
S100
4© SICK AG • Subject to change without notice 8012238/YY30/2015-02-20
Contents
5Mounting.......................................................................................................................... 25
5.1 Definition of the size of the switching field for mobile applications ................ 26
5.2 Mounting steps ................................................................................................... 26
5.2.1 Direct mounting ................................................................................ 27
5.2.2 Mounting with mounting kit 1a or 1b .............................................. 27
5.2.3 Mounting with mounting kit 2 and 3 ............................................... 29
5.2.4 Using multiple S100 laser scanners ............................................... 29
6Electrical installation ..................................................................................................... 32
6.1 System connection ............................................................................................. 32
6.2 System plug assembly........................................................................................ 34
6.2.1 Cable glands ..................................................................................... 34
6.2.2 Wire cross-sections........................................................................... 35
6.3 Pre-assembled system plugs ............................................................................. 35
7Application examples and connection diagrams ........................................................ 36
7.1 Applications with the S100 Standard................................................................ 36
7.2 Applications with the S100 Professional .......................................................... 37
8Configuration................................................................................................................... 38
8.1 Default delivery status........................................................................................ 38
8.2 Preparation of the configuration........................................................................ 38
8.3 Configuration of the CANopen master............................................................... 39
9Commissioning................................................................................................................ 42
9.1 Initial commissioning.......................................................................................... 42
9.2 Re-commissioning .............................................................................................. 43
10 Care and maintenance ................................................................................................... 44
10.1 Cleaning optics cover ......................................................................................... 44
10.2 Replacing optics cover ....................................................................................... 44
11 Diagnostics ...................................................................................................................... 46
11.1 SICK support ....................................................................................................... 46
11.2 Error and status indications on the LEDs.......................................................... 46
11.3 Error and status indications on the 7segment display.................................... 48
11.4 Extended diagnostics ......................................................................................... 51
12 Technical specifications ................................................................................................ 52
12.1 Characteristics .................................................................................................... 52
12.2 Response times .................................................................................................. 53
12.3 Data sheet........................................................................................................... 54
12.4 Dimensional drawings ........................................................................................ 60
12.4.1 S100.................................................................................................. 60
12.4.2 Mounting kits .................................................................................... 60
12.4.3 Scan plane origin .............................................................................. 62
13 Ordering information ...................................................................................................... 63
13.1 Delivery S100 ..................................................................................................... 63
13.2 Available systems ............................................................................................... 63
13.3 Accessories/spare parts .................................................................................... 63
13.3.1 Mounting kits .................................................................................... 63
13.3.2 System plug S100 ............................................................................ 64
13.3.3 Service cable..................................................................................... 64
13.3.4 Self assembly connecting cables .................................................... 64
13.3.5 Documentation ................................................................................. 64
13.3.6 Other.................................................................................................. 65
Operating instructions
S100
8012238/YY30/2015-02-20 © SICK AG • Subject to change without notice 5
Contents
14 Annex ................................................................................................................................66
14.1 EC declaration of conformity ..............................................................................66
14.2 Glossary ...............................................................................................................67
14.3 List of tables........................................................................................................68
14.4 List of illustrations...............................................................................................69

Chapter 1Operating instructions
S100
6© SICK AG • Subject to change without notice 8012238/YY30/2015-02-20
Important safety notes
1Important safety notes
For use in NFPA79 applications only.
Use with an isolated source.
Protect cable with listed over-current protection rated: min. 32 V, max. 5 A
UL-listed adapters providing field wiring leads are available.
Refer to the product information. → See “www.sick.com/en“ > Search S100“ >
Downloads > Documetation

Operating instructions Chapter 2
S100
8012238/YY30/2015-02-20 © SICK AG • Subject to change without notice 7
About this document
2About this document
Please read this chapter carefully before working with this documentation and the S100.
2.1 Function of this document
These operating instructions are designed to address the technical personnel of the
machine manufacturer or the machine operator in regards to correct mounting, electrical
installation, commissioning, operation and maintenance of the S100 laser scanner.
These operating instructions do not provide instructions for operating the machine, the
system or the vehicle on which the laser scanner is, or will be, integrated. Information on
this is to be found in the appropriate operating instructions for the machine, the system or
the vehicle.
2.2 Target group
These operating instructions are aimed at the planning engineers, machine designers and
operators plants and systems on which one or more S100 laser scanners are to be
operated. They also address people who integrate the S100 into a machine, a system or a
vehicle, initialise its use, or who are in charge of servicing and maintaining the device.
2.3 Scope
These operating instructions are only applicable to the S100 laser scanner with the
following entry on the type label in the field Operating Instructions:8012236
This document is part of SICK part number 8012236 (operating instructions “S100 Laser
Scanner” in all available languages).
For the configuration and diagnostics of these devices you require CDS-S100 version 1.00
or higher. To determine the version of your software version, select the Module-Info...
option in the ?menu.
2.4 Depth of information
These operating instructions contain information on the S100 laser scanner. They have
the following parts:
mounting
electrical installation
commissioning and configuration
care and maintenance
fault diagnosis and troubleshooting
part numbers
accessories
conformity and approval
Planning and using laser scanners such as the S100 also require specific technical skills
which are not detailed in this documentation.
When operating the S100, the national, local and statutory rules and regulations must be
observed.
We also refer you to the SICK AG homepage on the Internet at
www.sick.com
Here you will find information on:
application examples
these operating instructions in different languages for viewing and printing
Note

Chapter 2Operating instructions
S100
8© SICK AG • Subject to change without notice 8012238/YY30/2015-02-20
About this document
2.5 Abbreviations
American National Standards Institute
Automated Guided Vehicle
American Wire Gauge = standardisation and classification of wires and cables by type,
diameter etc.
Controller Area Network
open protocol standard for CAN in automation engineering.
SICK Configuration & Diagnostic Software — S100 = software for configuration and
diagnostics on the S100
CAN in Automation = CAN user’s and manufacturer’s association
electromagnetic compatibility
CANopen emergency messages = error messages over CANopen
electrical overhead conveyor
Electrostatic discharge
2.6 Symbols used
Recommendations are designed to give you some assistance in your decision-making
process with respect to a certain function or a technical measure.
Refer to notes for special features of the device.
Display indicators show the status of the 7segment display on the S100:
Constant indication of characters, e.g. 8
Flashing indication of characters, e.g. 8
Alternating indication of characters, e.g. L and 2
The depiction of numbers on the 7segment display can be rotated by 180° with the aid of
the CDS-S100. In this document the depiction of the numbers on the 7segment display is
however always in the normal, non-rotated position.
LED symbols describe the status of an LED:
The “switching output in the OFF state” LED is illuminated continuously.
The “error/contamination” LED is flashing.
The LED is deactivated.
Instructions for taking action are shown by an arrow. Read carefully and follow the
instructions for action.
Warning!
A warning indicates an actual or potential risk or health hazard. Observation and
implementation of the warning will protect you from accidents.
Read carefully and follow the warning notices!
Information is displayed in the software indicating to you which settings you can make in
the CDS-S100 (Configuration & Diagnostic Software — S100).
ANSI
AGV
AWG
CAN
CANopen
CDS-S100
CiA
EMC
EMCY
EOC
ESD
Recommendation
Note
,
,
Take action …
WARNING

Operating instructions Chapter 3
S100
8012238/YY30/2015-02-20 © SICK AG • Subject to change without notice 9
On safety
3On safety
This chapter deals with your own safety and the safety of the equipment operators.
Please read this chapter carefully before working with the S100.
3.1 Correct use
The S100 laser scanner must be used only as defined in section 3.3 “Applications of the
device” on page 9. It must be used only by qualified personnel on the machine where it
has been installed and initialised by authorised personnel in accordance with these
operating instructions.
Observe the requirements according to chapter 1 „Important safety notes“.
If the device is used for any other purposes or modified in any way — also during mounting
and installation — any warranty claim against SICK AG shall become void.
3.2 Authorised personnel
The S100 must only be installed, commissioned and serviced by adequately qualified
personnel. The following qualifications are necessary for the various tasks:
3.2.1 Mounting and maintenance
basic technical training
knowledge of the current safety regulations in the workplace
3.2.2 Electrical installation and replacement
practical electrical training
knowledge of current electrical safety regulations
knowledge on the use and operation of devices in the related application
3.2.3 Commissioning, operation and configuration
knowledge on the use and operation of devices in the related application
knowledge on the software and hardware environment in the related application
basic knowledge of the Windows operating system used
3.3 Applications of the device
The S100 laser scanner is used for protecting plant. It is intended to be used indoors. The
S100 is not intended to be used outdoors.
The S100 is not a safety laser scanner and is therefore not allowed to be used for tasks
related to the protection of people!
The S100 complies with the requirements in the standard on the radiated emissions as
defined for class A (industrial application); the S100 is therefore only suitable for use in an
industrial environment.
Note
Note

Chapter 3Operating instructions
S100
10 © SICK AG • Subject to change without notice 8012238/YY30/2015-02-20
On safety
Among other tasks, the S100 is suitable for
collision monitoring
distance monitoring
storage space check
checking for projections
object detection
collision protection
3.4 General safety notes and protective measures
Pay attention to the safety notes!
Please observe the following items in order to ensure the correct use of the S100 laser
scanner.
This device meets the norms: CDRH 21 CFR 1040.10 and 1040.11 as well as
IEC 608251 edition 1.2:200706. There the following note is required: “Caution — if
devices for operation or adjustment different to those given here are used or other
procedures are employed, hazardous exposure to radiation may occur!”
During the mounting, installation and usage of the S100, observe the standards and
directives applicable in your country.
Manufacturers and operators of the machine on which the S100 is used are
responsible for obtaining and observing applicable regulations and rules.
The notes, in particular the test notes (see chapter 9 “Commissioning” on page 42) in
these operating instructions (e.g. on use, mounting, installation or integration into the
machine controller) must be observed.
Changes to the configuration of the devices can degrade the function. After every
change to the configuration you must therefore check the effectiveness of the device.
When making configuration changes, please always use the password hierarchy
provided by SICK to ensure that only authorised persons make changes to the
configuration. The SICK service team is available to provide assistance if required.
The operating instructions must be made available to the operator of the machine
where the S100 is used.
The external voltage supply of the devices should be capable of buffering brief mains
voltage failures of 20 ms as specified in EN 60204. Suitable power supplies are
available as accessories from SICK (see section 13.3 “Accessories/spare parts” on
page 65).
WARNING

Operating instructions Chapter 3
S100
8012238/YY30/2015-02-20 © SICK AG • Subject to change without notice 11
On safety
3.5 Environmental protection
The S100 laser scanner is constructed in such a way that it adversely affects the
environment as little as possible and uses only a minimum of power and natural
resources.
At work, always act in an environmentally responsible manner.
3.5.1 Disposal
Unusable or irreparable devices should always be disposed as per the applicable national
regulations on waste disposal (e.g. European waste code 16 02 14).
We would be pleased to be of assistance on the disposal of this device. Contact us.
Information on the individual materials in the S100 is given in chapter 12 “Technical
specifications” on page 54.
3.5.2 Separation of materials
Only authorised personnel are allowed to separate materials!
Caution is required when dismantling devices. There is a risk of injuries.
Before you send the devices for appropriate recycling, it is necessary to separate the
different materials in the S100.
Separate the housing from the rest of the parts (in particular the circuit boards).
Send the separated parts for recycling as appropriate (see Tab. 1).
Components Disposal
Product
Housing Metal recycling (aluminium)
Motor bracket Metal recycling (cast zinc)
Optics cover Plastic recycling
Circuit boards, cables, connectors and
electrical connecting pieces
Electronic recycling
Packaging
Cardboard, paper Paper/cardboard recycling
Polyethylene packaging Plastic recycling
Notes
WARNING
Tab. 1: Overview on disposal
by components

Chapter 4Operating instructions
S100
12 © SICK AG • Subject to change without notice 8012238/YY30/2015-02-20
Product description
4Product description
This chapter provides information on the special features and properties of the S100 laser
scanner. It describes the construction and the operating principle of the device.
Please read this chapter before mounting, installing and commissioning the device.
4.1 Device components
The S100 laser scanner comprises three components:
the sensor with the opto-electronic acquisition system, the LEDs and the 7segment
display
the optics cover with the window for the light output
the system plug with the configuration memory (the system plug contains all electrical
connections)
4.2 Special features
270° scanning angle
0.5° angular resolution
switching fields up to 10 m can be configured
CANopen integrated
status display with LEDs and 7segment display
minimum response time 40 ms
configuration using PC or notebook with SICK Configuration & Diagnostic Software —
S100
Configuration memory in the system plug. In case of device replacement, the existing
configuration is automatically transferred to the S100 newly connected. In this way
downtimes can be significantly reduced.
Optimal immunity to external light and dust due to dazzle and particle algorithms that
can be configured as required.
Fig. 1: Device components
Optics cover
System plug
Sensor
LEDs and
7segment
display
Window for light
output

Operating instructions Chapter 4
S100
8012238/YY30/2015-02-20 © SICK AG • Subject to change without notice 13
Product description
S100 variants
To cover different applications, two S100 variants are available.
Functions Standard Professional
Maximum switching field range [m] 10 10
Object resolution [mm] Maximum/
30/40/
50/70/150
Maximum/
30/40/
50/70/150
Switching fields
at 0.5° angular resolution 2 8
at 1.0° angular resolution 2 16
Programmable monitoring cases 1 16
Switching output 1 “allocated switching field free”
Switching output 2 “allocated switching field free”
Maximum source switching current on the switching
outputs 1 and 2 [mA] 250 250
Application diagnostic output 1 “allocated switching
field interrupted”
Application diagnostic output 2 “allocated switching
field interrupted”
Application diagnostic output “error/contamination”
Control inputs for switching between the monitoring
cases. – 4
Stand-by mode
CANopen
Configuration memory in the system plug
4.3 Function
The S100 laser scanner can only operate correctly if the following conditions are met:
The control of the machine, system or vehicle must be electrical.
The S100 must be mounted and configured such that it detects objects as they enter
the monitored area (see chapter 5 “Mounting” on page 25 and chapter 9
“Commissioning” on page 42).
Tab. 2: Functions of the
S100 variants

Chapter 4Operating instructions
S100
14 © SICK AG • Subject to change without notice 8012238/YY30/2015-02-20
Product description
4.3.1 Principles of operation
The S100 is an optical sensor that scans its surroundings in two dimensions using infrared
laser beams. It is used for protecting machines or vehicles.
The S100 works on the principle of time of flight measurement. It sends out very short
pulses of light (S). At the same time an “electronic stopwatch” is started. When the light
hits an object, it is reflected and received by the laser scanner (E). From the time between
sending and reception (∆t) the S100 calculates the distance to the object.
In the S100 there is also a mirror rotating at constant speed that deflects the light pulses
such that they cover an arc of 270° . In this way an object can be detected in the
switching field within 270°. The first beam of a scan starts at –45° relative to the back
of the laser scanner.
The S100 emits its pulse of light with an angular resolution of 0.5° (on the S100
Professional it is possible to switch to an angular resolution of 1° to be able to configure
more than eight switching fields) .
Fig. 2: Principle of operation,
time of flight measurement
by the S100
Fig. 3: Principle of operation,
rotation of the S100
∆
t
S
Receive pulse
Send pulse
S100
E

Operating instructions Chapter 4
S100
8012238/YY30/2015-02-20 © SICK AG • Subject to change without notice 15
Product description
Due to its active scanning principle, the S100 does not require receivers or reflectors. This
has the following advantages:
Your installation effort is lower.
You can easily adapt the monitored area to the monitored area on a machine.
In comparison with contact sensors, electro-sensitive scanning is nearly wear-free.
4.3.2 Field set and switching fields
The S100 monitors areas on a machine or vehicle with its switching fields and . As
soon as the laser scanner detects an object in the switching field, it switches the allocated
output 1 or 2 to the OFF state.
You can, for example, define one of the two switching fields such that the laser scanner
detects an object before the actual monitored area is reached, e.g. for triggering a warning
signal.
The maximum distance at which the laser scanner can detect an object is defined by the
distance measuring range .
The two switching fields form a pair, the so-called field set. Depending on the variant used
(see section 4.2 under “S100 variants” on page 13), you can define up to 16 field sets
and save these in the laser scanner. In this way you can switch the S100 Professional
laser scanner to a different field set in case of a change in the monitoring situation (see
section 4.3.3 “Monitoring cases” on page 16).
You can configure and transfer these field sets to the S100 with the aid of the CDS-S100.
If the area to be monitored changes, then you can re-configure the S100 in software
without additional mounting effort.
Fig. 4: Switching field 1
and 2 as well as distance
measuring range

Chapter 4Operating instructions
S100
16 © SICK AG • Subject to change without notice 8012238/YY30/2015-02-20
Product description
4.3.3 Monitoring cases
Depending on the variant used (see section 4.2 under “S100 variants” on page 13) up to
16 monitoring cases can be defined and selected during operation using static control
inputs.
Monitoring case 1 (loading) with two small
switching fields
Monitoring case 2 (transport) with two
switching fields in the direction of movement
With the aid of a monitoring case you can define …
which switching fields are used for a field set.
which multiple sampling is applied to the related switching field.
the field conditions (control signals) for switching to the related field set.
4.4 Applications
4.4.1 Warehouse bay checking
By using two switching fields of different lengths at the same time, a signal can be sent to
a control indicating whether a warehouse bay is free and and if so, to what depth.
Fig. 5: Two S100 each with
two monitoring cases on a
carriage
Fig. 6: Example warehouse
bay checking
Switching field 1
Switching field 2

Operating instructions Chapter 4
S100
8012238/YY30/2015-02-20 © SICK AG • Subject to change without notice 17
Product description
4.4.2 Collision protection
The S100 is used for collision protection between vehicles on an electrical overhead
conveyor. The laser scanner is, for example, integrated into the control such that the
interruption of switching field 1 slows down the vehicle, the interruption of switching field 2
stops the vehicle.
4.4.3 Protection of the area behind a vehicle
The S100 supports the driver when reversing. Switching field 2 switches on a warning
signal, switching field 1 reduces the vehicle speed to creep speed.
Fig. 7: Example collision
protection
Fig. 8: Example protection of
the area behind a vehicle
Switching field 1
Switching field 2
Switching field 2
Switching field 1

Chapter 4Operating instructions
S100
18 © SICK AG • Subject to change without notice 8012238/YY30/2015-02-20
Product description
4.4.4 Collision protection
The S100 prevents the collision of AGV. Switching field 2 slows down the movement of the
vehicle, switching field 1 stops the vehicle. The switching fields in the example are at an
angle upward, so that, for example, hanging objects can be detected.
4.5 Configurable functions
4.5.1 Naming applications and laser scanners
A name can be assigned to the application configured and to the laser scanner(s). The
names are saved in the devices after the configuration is transferred. The name chosen
may be, for example, the identifier for the vehicle, system or the machine.
You enter the application name and the name of the laser scanner used in the CDS-S100.
4.5.2 Switching fields
You configure the shape and size of each switching field in the CDS-S100. You can realise
any field shape required.
The area to be monitored is scanned radially by the S100. The S100 cannot see through
objects during this process. The area behind objects that are in the area to be monitored
(pillars, grilles, etc.) can thus not be monitored.
The switching fields can cover an angle of up to 270°.
On the S100 Standard you can configure two switching fields.
On the S100 Professional you can …
–configure 8 switching fields with an angular resolution of 0.5°.
–configure 16 switching fields with an angular resolution of 1.0°.
Two switching fields are always combined in one field set. These switching fields each
switch the switching output 1 or 2.
Fig. 9: Example collision
protection
Note
Switching field 2
Switching field 1

Operating instructions Chapter 4
S100
8012238/YY30/2015-02-20 © SICK AG • Subject to change without notice 19
Product description
Switching fields suggested by the laser scanner
The CDS-S100 can suggest the switching fields. The laser scanner scans the visible room
contour several times. From the data obtained the CDS-S100 suggests the contour and
size of the field.
In those places at which the room contour is smaller than the maximum switching field
range (e.g. at ), the switching field corresponds to the room contour.
A general error tolerance of 100 mm is subtracted radially from the switching field contour.
As a result the switching field is slightly smaller than the surface covered .
In the area where the room contour is larger than the switching field range , the
switching field corresponds to the switching field range (see Tab. 3 on page 20).
Before commissioning, thoroughly check whether the size of the suggested switching fields
matches the switching field size necessary for your application.
You can display a suggestion for a switching field in the field set editor in the CDS-S100.
Fig. 10: Reading switching
fields
Note
Switching field

Chapter 4Operating instructions
S100
20 © SICK AG • Subject to change without notice 8012238/YY30/2015-02-20
Product description
4.5.3 Resolution
With its standard resolution, the S100 achieves a scanning range of up to 10 m.
Due to its radial beam path (see Fig. 3 on page 14) the object resolution of the laser
scanner is highest in the near range. This resolution reduces with increasing distance from
the laser scanner. The detection capability of the S100 is dependent on the remission
value of the object to be detected and its distance from the laser scanner. The resolution
is therefore defined by the object diameter, by the remission value and the distance to the
laser scanner.
For information on the diameter and remission necessary for an object to be detected,
refer to Fig. 30 on page 52.
In addition to the standard resolution, with the aid of the CDS-S100 you can configure the
resolution for varying object diameters to be detected. Then only objects with a diameter
≥than the resolution set are reliably detected.
If a fixed object resolution is selected, the possible switching field radius for this resolution
is reduced to the following scanning ranges:
Resolution Scanning range for the resolution
30 mm 1.30 m
40 mm 1.70 m
50 mm 2.10 m
70 mm 3.00 m
150 mm 6.60 m
The switching fields that you configure in the field set editor can be larger than the
scanning range stated. However, the resolution can only be guaranteed up to the distance
given.
4.5.4 Application diagnostic output “error/contamination”
The S100 has a configurable application diagnostic output. The following configuration
features are available in the CDS-S100:
window for light output contaminated
error
window for light output contaminated or error
inactive
4.5.5 Restart
On the S100 you can configure a restart delay of 0 to 60 seconds for the Switching
outputs 1 and 2. The related switching output on the S100 changes to the ON state if
there is no object in the switching field for the period defined.
You can configure the type of restart in the CDS-S100.
Tab. 3: Scanning ranges for
the fixed resolutions that can
be set
Note
This manual suits for next models
5
Table of contents
Other SICK Measuring Instrument manuals

SICK
SICK VMS410 User manual

SICK
SICK SIM1004 User manual

SICK
SICK MARSIC300 Guide

SICK
SICK WebChecker MLG-2 User manual

SICK
SICK MCS100E User manual

SICK
SICK OD1000 User manual

SICK
SICK GM32 EX Owner's manual

SICK
SICK NAV-LOC User manual

SICK
SICK DUSTHUNTER SP100 Ex-3K User manual

SICK
SICK deTec2 Core User manual
Popular Measuring Instrument manuals by other brands

Laserworld
Laserworld Ecoline EL-200G KeyTEX manual

Endress+Hauser
Endress+Hauser Liquiline System CA80AM Brief operating instructions

Gill Instruments
Gill Instruments WindObserver II user manual

Renishaw
Renishaw SP600 Installation and user guide

Secure
Secure APEX 100 user manual

Mictrack
Mictrack MT950 user manual