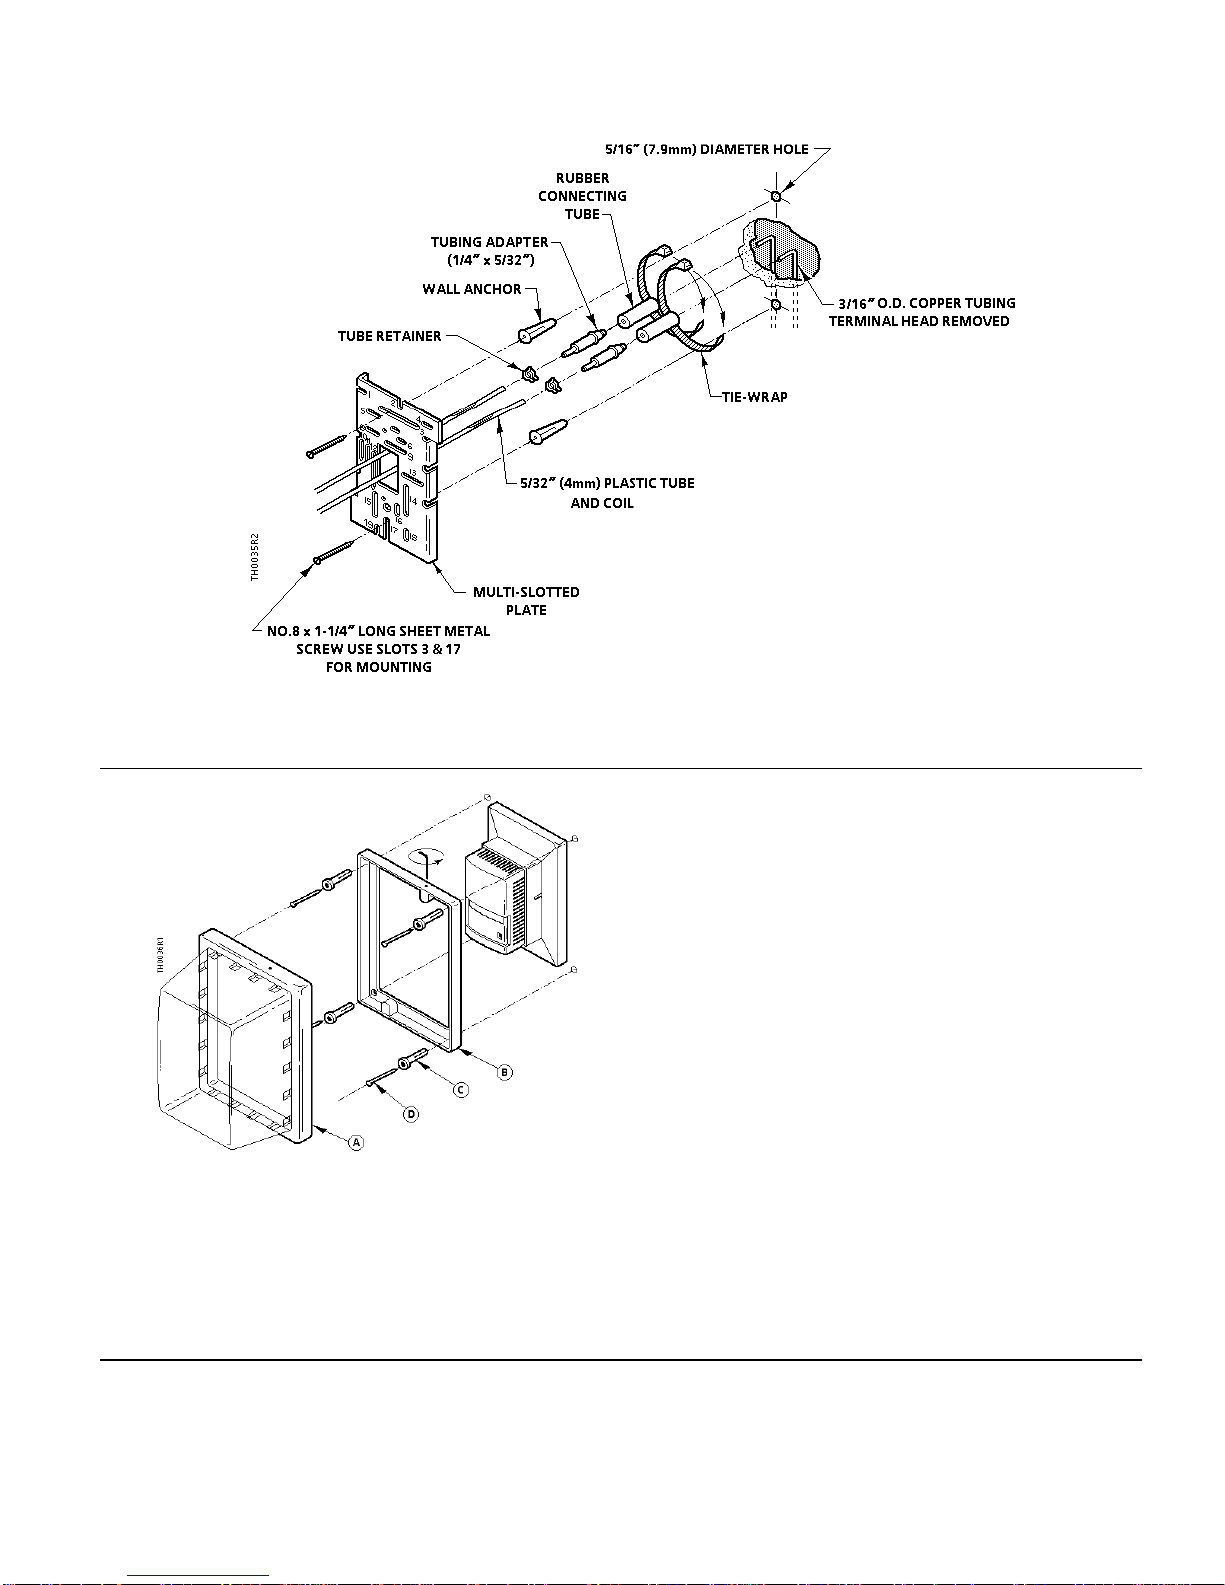
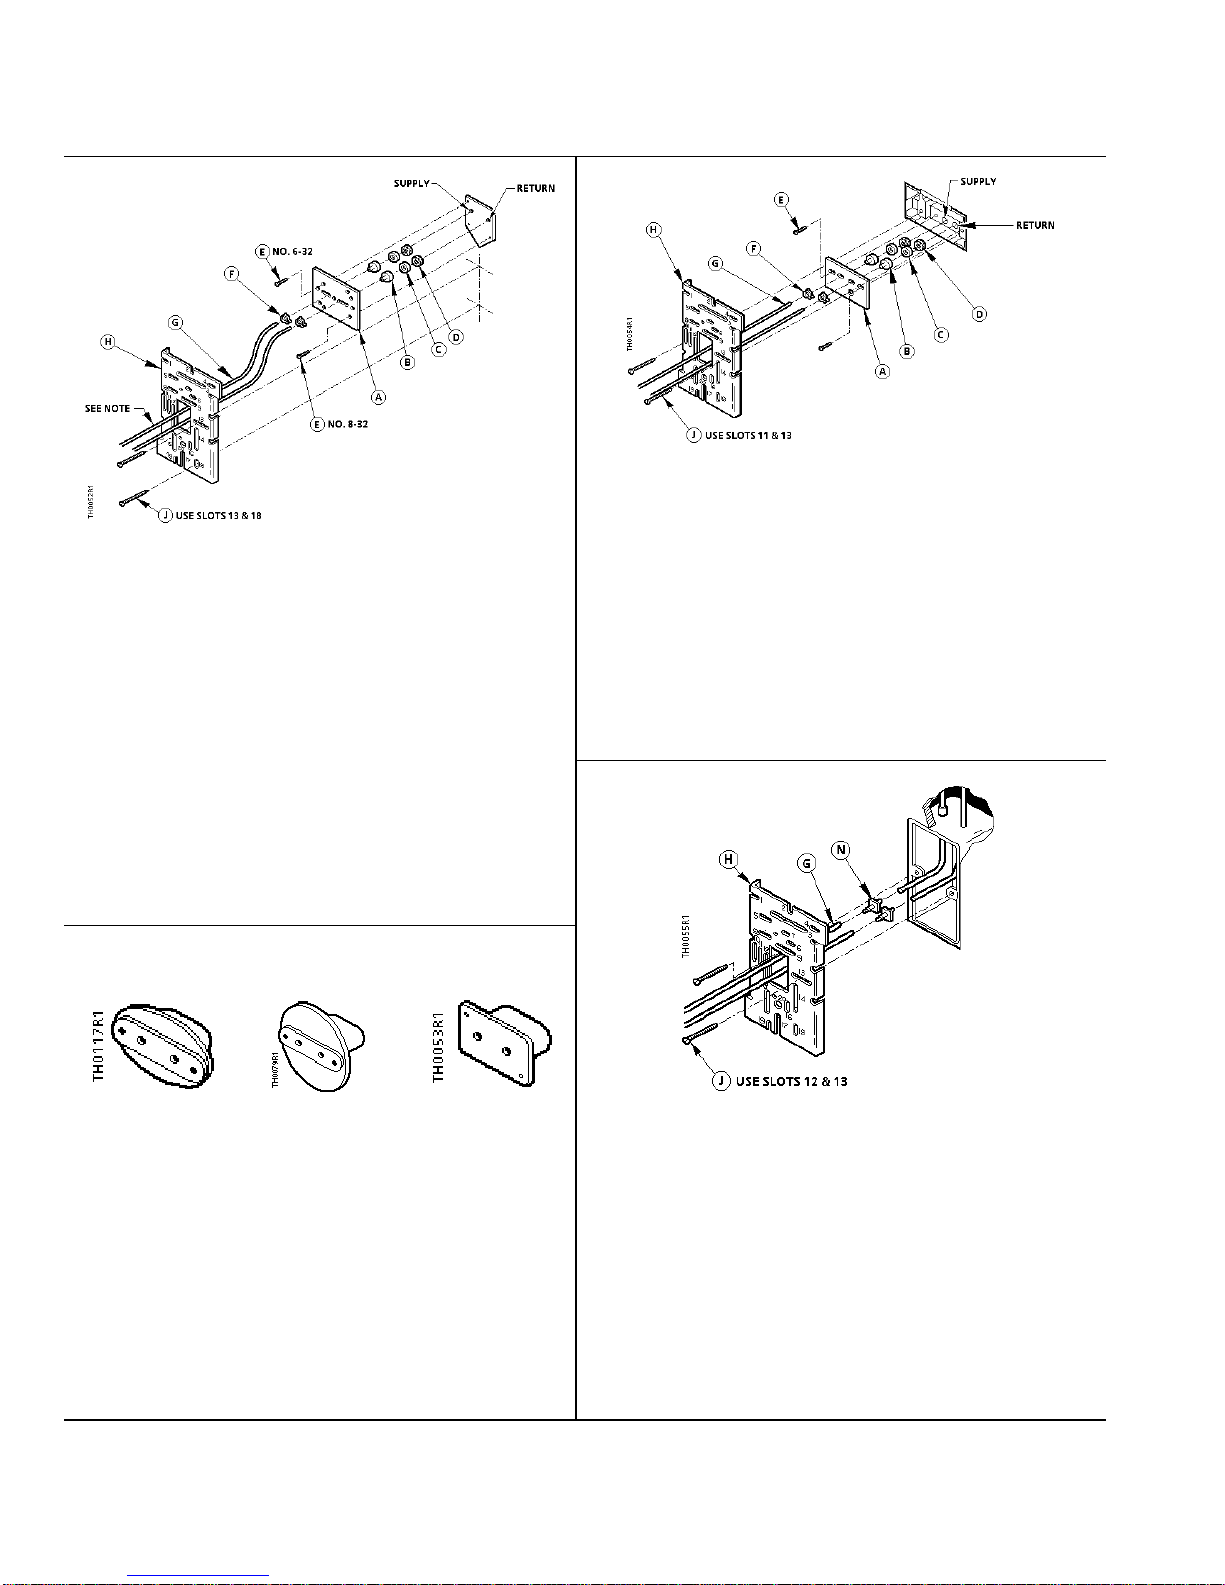
Siemens Retroline TH 192 Service manual
Other Siemens Adapter manuals

Siemens
Siemens Gigaset 108 User manual

Siemens
Siemens Gigaset 300 User manual

Siemens
Siemens SIMATIC NET CP 5511 User manual

Siemens
Siemens 7XV5450 0BA00 User manual

Siemens
Siemens NK8000 MP4.40 Series Quick guide

Siemens
Siemens SIMATIC TS Adapter IE User manual

Siemens
Siemens SINAMICS Smart Adapter Compact User manual

Siemens
Siemens 8US1213-4AP03 User manual

Siemens
Siemens XLS-MSE3-ADPT User manual

Siemens
Siemens AEW310.2 User manual

Siemens
Siemens TCM2 User manual

Siemens
Siemens PA-3 User manual

Siemens
Siemens SIMATIC 6ES7 972-0CB20-0XA0 User manual

Siemens
Siemens SpeedStream User manual

Siemens
Siemens Gigaset 300 User manual

Siemens
Siemens Gigaset HomePlug AV 200 User manual

Siemens
Siemens DX791 User manual

Siemens
Siemens 3RQ301 0AA0 Series User manual

Siemens
Siemens 7XV5450-0 A00 Series User manual

Siemens
Siemens Gigaset 300 User manual