manuals.online logo
Brands
  1. Home
  2. •
  3. Brands
  4. •
  5. Siemens
  6. •
  7. Gateway
  8. •
  9. Siemens DESIGO RXC User manual

Siemens DESIGO RXC User manual

CM2N1661en_02
23 Sep 2011 Building Technologies
s
1661
1661P01, 1661P02
DESIGO™ RXC
Gateway
EnOcean/LonWorks
RXZ95.1/LON
For use with:
– DESIGO RXC
– Devices / systems with LONWORKS® communication
Wireless receiver with LONWORKS® interface FTT10A
Evaluation of up to 9 EnOcean room units
Operating voltage AC / DC 24 V
2 / 20
Siemens RXZ95.1/LON – Gateway EnOcean/LonWorks CM2N1661en_02
Building Technologies Use 23 Sep 2011
Use
With the RXC room controllers, wireless room units can be used in place of the
QAX3x standard room units. One of the wireless technologies used is EnOcean.
Here, the room unit is powered by a solar cell. A battery is only needed If light
conditions are poor.
The gateway requires a separate AC / DC 24 V supply
(not in the scope of delivery).
Integration ot the EnOcean room units (QAX9x.x) into the system is made via the
RXZ95.1/LON EnOcean/LONWORKS gateway. It handles up to 9 EnOcean room
units. The telegrams received via radio are converted to LONWORKS standard
network variables (SNVT).
Type summary
Product number Stock number Designation
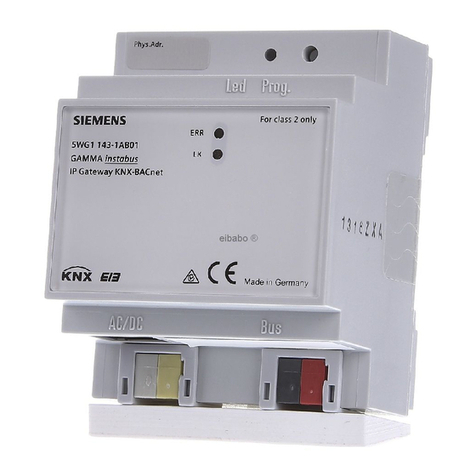
RXZ95.1/LON S55842-Z100 Gateway EnOcean/LONWORKS
An external antenna is included in the delivery.
Ordering
When ordering, please give quantity, designation, product number and stock number.
When ordering, please give, Product number and Stock number.
Example:
10 Gateways EnOcean/LONWORKS, RXZ95.1/LON, S55842-Z100
Equipment combinations
Product number Stock number Designation
QAX95.1 S55623-H100 Wireless and battery-less room unit with
EnOcean interface (temperature sensor)
QAX96.1 S55623-H101 Wireless and battery-less room unit with
EnOcean interface (temperature sensor
with setpoint adjuster)
QAX95.4 S55623-H104 Wireless and battery-less room unit with
EnOcean interface (temperature sensor)
QAX96.4 S55623-H105 Wireless and battery-less room unit with
EnOcean interface (temperature sensor
with setpoint adjuster)
QAX97.4 S55623-H106 Wireless and battery-less room unit with
EnOcean interface (temperature sensor
with setpoint adjuster, freely programmable
button and 2-stage switch)
QAX98.4 S55623-H108 Wireless and battery-less room unit with
EnOcean interface (temperature sensor
with setpoint adjuster, freely programmable
button and 5-stage switch)
The RXZ95.1/LON can be used in all systems with LONWORKS communication
EnOcean room units
Note
3 / 20
Siemens RXZ95.1/LON – Gateway EnOcean/LonWorks CM2N1661en_02
Building Technologies Topology 23 Sep 2011
Topology
Integration
Desigo Insight
RXC RXC RXC
PXX-L.. PXC00...D
Room unit 1
Temperature, setpoint
Room unit 2
Temperature
Room unit 3
Temperature, setpoint,
fan speed, presence
Total max.
9 room units
Integration of EnOcean room units into DESIGO RXC
Mechanical design
LED "Power"
LED "EnOcean-
communications"
Bus A
Bus B
Gnd
24 V
1661Z07
Screw terminals
Service pin
Service LED
for commissioning
Connector for antenna
4 / 20
Siemens RXZ95.1/LON – Gateway EnOcean/LonWorks CM2N1661en_02
Building Technologies System requirements 23 Sep 2011
System requirements
SRC04-FTT plug-in (template: Thermokon srcn_9_1_02)
Functions:
Monitoring and configuration gateway / room units
For use with RXT10 tool or standard LNS tool
The device resource files contain information about supplier-specific configuration
parameters and network variables (UNVTs and UCTPs).
Prerequisite for installation is LONMARK® resource files version 13.00 or,
alternatively, LonMARK resource file API version 2.3 (bothersome installation).
srcn_9_1_02.APB; .NXE; .XFB; .XIF; .PDF (if SRC-FTT plug-in is not used)
LNS plug-in, device resource files, LONWORKS application:
Download from the DESIGO RX intranet:https://intranet10.sbt.siemens.com/
https://intra.industry.siemens.com/bt/global/en/business/building_comfort/systems/
desigo/ra/Pages/des-ra-units.aspx?TabcardNo=6
LONMARK resource files version 13.00:
Download from http://www.lonmark.org/technical_resources/resource_files/
Environment for engineering tool
Integration of QAX95.x/QAX96.x: The RXT10 tool or a standard LNS tool can be
used.
Integration of QAX97.x/QAX98.x: A standard LNS tool must be used.
Limitations
With a DESIGO system, it is not possible to integrate additional EnOcean
products, such as buttons, presence detectors, etc., via the RXZ95.1/LON
gateway with the RXT10 tool.
Reason: In the gateway, temperature and setpoint adjustment are
available as static network variables. However, additional
functions are configured dynamically, and the RXT10 does not
support dynamic network interfaces.
RXT10 does not support the multifunctional button of the QAX97.4 und QAX98.4
room units.
For technological reasons, the control performance of an RXC… room controller
in connection with an EnOcean room unit is inferior to that with a standard
QAX3x room unit
Software LNS PlugIn
Device resource files:
Thermokon_DRF22.exe
LONWORKS application
Software source /
documentation
5 / 20
Siemens RXZ95.1/LON – Gateway EnOcean/LonWorks CM2N1661en_02
Building Technologies Workflow with RXT10 and LNS plug-in 23 Sep 2011
Workflow with RXT10 and LNS plug-in
Basis: PC with DESIGO infrastructure
RXT10 version 4 or higher
Note: The following components must be installed in the order indicated.
Step 1: Installation of LONMARK resource files version 13.00 or higher
Source: http://www.lonmark.org/technical_resources/resource_files/
Step 2: Installation of device resource files:
Source: Download from the DESIGO RX intranet:
https://intra.industry.siemens.com/bt/global/en/business/building_comfort/systems/
desigo/ra/Pages/des-ra-units.aspx?TabcardNo=6
Step 3: Installation of SRC04-FTT plug-in
Source: Download from the DESIGO RX intranet:
https://intra.industry.siemens.com/bt/global/en/business/building_comfort/systems/
desigo/ra/Pages/des-ra-units.aspx?TabcardNo=6
Set up the gateway with the RXT10 tool by following the standard procedure for
integration of third-party devices (for details, refer to User Manual RXT10,
CM110669).
Step Procedure
1 Device > Add
Select tab Device Type.
From menu Device Type, select PLG: Plug In Support.
On the "Device" list, highlight PlugInDevice.
2 Select tab Overview and enter the location.
Confirm by clicking OK.
Infrastructure
Engineering with
RXT10 and
LNS plug-in
6 / 20
Siemens RXZ95.1/LON – Gateway EnOcean/LonWorks CM2N1661en_02
Building Technologies Workflow with RXT10 and LNS plug-in 23 Sep 2011
Step Procedure
3 RXT: Select <no networkinterface>
Network > Connect (Attached offnet)
4 Device > Configure > Thermokon_SRC-FTT > OK
Confirm message by selecting YES.
Select function “Thermokon SRC-FTT“ > Click OK.
Confirm message by selecting YES.
7 / 20
Siemens RXZ95.1/LON – Gateway EnOcean/LonWorks CM2N1661en_02
Building Technologies Workflow with RXT10 and LNS plug-in 23 Sep 2011
Step Procedure
5a Configure the gateway:
Select tab General settings:
Function not available with the RXT10
Receive time: For monitoring the RF link to the room unit
(optional)
Sending interval: Recommendation: Same as RXC Default
2700 [s] (45 min)
5b Configure the gateway:
select tab Switch settings:
Functions not available with the RXT10
8 / 20
Siemens RXZ95.1/LON – Gateway EnOcean/LonWorks CM2N1661en_02
Building Technologies Workflow with RXT10 and LNS plug-in 23 Sep 2011
Step Procedure
5c Configure the gateway:
select tab Sensor 1...9:
Function not available with the RXT10.
Device: For room units QAX95.1, QAX96.1, select
setting 7
SensorID: For offline engineering, the EnOcean ID of
the room unit can be entered here, if desired.
Normally, it is learned-in online (with
connection to the network, see step 10).
SCPTmaxSendTime: Heartbeat room unit
Recommendation: Same as RXC Default
2700 [s] (45 min)
Note relating to SCPTmaxSendTime:
With the default setting of 0.0 s (OFF) and in the event the RF link
breaks down (faults, no light, etc.), the temperature value in the RXC
will change to ”invalid” when the heartbeat has elapsed. When using a
setting greater than 0.0 s, the temperature value received last will be
transmitted.
6 > Apply
(Question ”...transmit to device?“: Answer with YES)
Network >Disconnect (Attached offnet)
7 Make RXT10 bindings:
Datapoint Gateway RXC
Room Temperature: nvoHVACTemp_x nviSpaceTemp
Setpoint Offnet: nvoSetpoint_x nviSetpointOffset
8 Network > Connect (online)
9 Assign devices and install
9 / 20
Siemens RXZ95.1/LON – Gateway EnOcean/LonWorks CM2N1661en_02
Building Technologies Workflow with RXT10 and LNS plug-in 23 Sep 2011
Step Procedure
10 Learn-in the room units:
Open Plug-in (Device > Configure > Thermokon SRC-FTT > OK >
YES
Click button next to SensorID
> Learn-in > Press button on the room unit
11 Function check gateway / room unit:
10 / 20
Siemens RXZ95.1/LON – Gateway EnOcean/LonWorks CM2N1661en_02
Building Technologies Workflow with RXT10 and SBT generic plug-in 23 Sep 2011
Workflow with RXT10 and SBT generic plug-in
Basis: PC with DESIGO infrastructure
RXT10 version 4 or higher
Step: Download:
EasySens_Empfaenger_Receiver_SRC04FTT_SRC65FTT_160108_156.zip
Extract and save LON application:
srcn_9_1_01 (.apb; .nxe; .xfb; .xif) / optional: srcn_12_1_01
Source: Download from the DESIGO RX intranet:https://intranet10.sbt.siemens.com/
business/building_comfort/systems/desigo/ra/_des_ra_qax/_des_ra_qax95.htm
Set up the gateway with the RXT10 tool by following the standard procedure for
integration of third-party devices (for details, refer to User Manual RXT10,
CM110669).
Step Procedure
1 Device > Add
Select tab Device Type.
From selection menu Device Type, select PLG: Plug In Support.
On the "Device" list, highlight PlugInDevice.
2 Select tab Overview to enter the location. Confirm by clicking OK.
3 RXT: Select <no networkinterface>
Network > Connect (Attached offnet)
Infrastructure
Engineering with
RXT10 and XIF-Import
11 / 20
Siemens RXZ95.1/LON – Gateway EnOcean/LonWorks CM2N1661en_02
Building Technologies Workflow with RXT10 and SBT generic plug-in 23 Sep 2011
Step Procedure
4 Device > Configure > SBT Generic Plug In > OK
Select function Import XIF > OK
> Read XIF File > Select path for srcn_9_1_02.xif > OK
> Select Plug-in > Close
5 Device > Configure > OK (depending on plug-in: Configure Device)
12 / 20
Siemens RXZ95.1/LON – Gateway EnOcean/LonWorks CM2N1661en_02
Building Technologies Workflow with RXT10 and SBT generic plug-in 23 Sep 2011
Step Procedure
6 Configure the gateway:
Select Node Object
SCPTmaxSendTime: Sending interval LONWORKS
Recommendation: Same as RXC 
Default 2700 [s] (45 min)
UCPTenoceanRcvTm:Receive time
For monitoring the RF link to the room unit
(optional)
UCPTspMax/MinValue:Setpoint Offset (3 K, default)
13 / 20
Siemens RXZ95.1/LON – Gateway EnOcean/LonWorks CM2N1661en_02
Building Technologies Workflow with RXT10 and SBT generic plug-in 23 Sep 2011
Step Procedure
7 Configure the gateway:
Select Sensor Object [0...8]
…SCPTmax/minRnge: Measuring range of temperature sensor
[0...40 C, default]
SCPTmaxSendTime: Sending interval LONWORKS
Recommendation: Same as RXC 
Default 2700 [s] (45min)
8 > Close > Active Plug-in finish
Network >Disconnect (Attached offnet)
9 Make RXT10 bindings:
Datapoint Gateway RXC
Room Temperature: nvoHVACTemp_x nviSpaceTemp
Setpoint Offnet: nvoSetpoint_x nviSetpointOffset
10 Netwok > Connect (online)
11 Assign devices and install
12 Device > Configure > OK
14 / 20
Siemens RXZ95.1/LON – Gateway EnOcean/LonWorks CM2N1661en_02
Building Technologies Workflow with RXT10 and SBT generic plug-in 23 Sep 2011
Step Procedure
13 Learn-in the room unit:
Select Sensor Object [0...8]
Double click nviLearn
> Set Bit [0] = 1 to learn-in Sensor [0]
> Press button on the room unit
When the learn telegram is received, bit [0] is automatically reset.
Additional room units: Repeat procedure
set bit [1] = 1 to learn-in Sensor [1]
set bit [2] = 1 to learn-in Sensor [2]
etc.
15 / 20
Siemens RXZ95.1/LON – Gateway EnOcean/LonWorks CM2N1661en_02
Building Technologies Workflow with RXT10 and SBT generic plug-in 23 Sep 2011
Step Procedure
14 Function check gateway / room unit:
nvoHVACTemp_1: Receive room temperature from room unit
nvoSetpoint_1: Receive setpoint offset from room unit
16 / 20
Siemens RXZ95.1/LON – Gateway EnOcean/LonWorks CM2N1661en_02
Building Technologies Sources of errors 23 Sep 2011
Sources of errors
Possible causes:
Room unit exhausted poor light conditions
Check documentation on room unit
RF link faulty distance, interference emitters
Check documentation on room unit
Room unit not / incorrectly learned-in in the gateway (SensorID)
Room unit faulty
Impact on the system:
When UCPTenoceanRcvTm has elapsed, nvoAlarmSensor is set (evaluation
optional).
T0 --
T1 Last valid value from T0; otherwise 0.0 C
T2 With SCPTmaxSendTime T1
Without SCPTmaxSendTime invalid (327.7 C) after RXC heartbeat
has elapsed (60 min)
T3 Ditto; if 0.0 C frost alarm
Possible causes:
Gateway has no power (power_fail)
Bus interruption
Error in configuration of gateway
Gateway faulty
Impact on the system:
T0 --
T1 --
T2 Invalid (327.7 C) after RXC heartbeat has elapsed (60 min)
power_fail gateway:
nvo_temp_p = 0.0 C until room unit sends again (up to approx. 20 min.)
Ohne SCPTmaxSendTime T2 = last valid T2
SCPTmaxSendTime < approx. 20 min T2 = 0.0 C (frost alarm)
SCPTmaxSendTime > approx. 30 min T2 = last valid T2
T3 Ditto; at 0.0 C frost alarm
F1:
Gateway receives no
telegrams from the
room unit
F2:
RXC receives no
LONWORKS telegrams
from the gateway
17 / 20
Siemens RXZ95.1/LON – Gateway EnOcean/LonWorks CM2N1661en_02
Building Technologies Sources of errors 23 Sep 2011
Impact on the system:
T0 --
T1 All temperatures = 0.0 C after Power_fail / Power_up.
Room unit sends current temperature after about 20 to 30 minutes.
T2 RXC polls the gateway (0.0 C) and sends value to the system.
T3 Frost alarm (0.0 C). This state continues until all EnOcean room units
have transmitted a valid temperature. This takes about 20 to 30 min, but
may take longer than an hour should short breakdowns occur.
If a room unit does not send (e.g. exhausted), frost alarm is maintained until
that room unit sends as well.
With each simultaneous power failure of the RXC and the gateway, the
system triggers frost alarm for 20 to 30 minutes. The same applies to
power-up.
F10:
Power_up / Power_fail
system
18 / 20
Siemens RXZ95.1/LON – Gateway EnOcean/LonWorks CM2N1661en_02
Building Technologies Mounting 23 Sep 2011
Mounting
The devices are supplied in an operational status.
Installation is made by means of anchors and screws (not included) to the smooth
wall surface, or by means of screws to an installation socket .
For operation a separate external 868 MHz receiving antenna is required (included
in delivery).
The antenna with magnet foot should be mounted on the center of a 180 mm x
180 mm metal plate (galvanized sheet steel).
In rooms the antenna should be mounted 1 m below the ceiling.
The antenna should be vertically aligned downwards.
Minimal distance to the wall: 90 mm.
Distance to other transmitters (e.g. GSM / DECT/ wireless LAN / EnOcean etc.):
min. 2 m.
The antenna cable shall be routed in an electric conduit.
Avoid crushing of the antenna cable.
The minimal bend radius of the cable is 50mm.
As for the cable installation, avoid the use of an active pull-up device, otherwise
the sheathing or on the connectors may damaged.
For details on positioning of the EnOcean room units, refer to data sheet
CM2N1660.
Commissioning
Wireless room units are sending time or event controlled telegrams to the gateway.
The gateway verifies the incoming telegrams and outputs them directly via its
LONWORKS interface.
Each telegram allows a precise allocation and consists of the format: type of the
telegram, data, sender ID (32bit).
In order to assure a correct evaluation of the measuring values by the gateway, it is
necessary to have the devices learned-in by the gateway. This is done automati-
cally by means of a “learn button” at the room unit (or manually by input of the 32bit
sensor ID) and a special “learning” procedure between room unit and gateway.
For details, refer to the data sheet of the EnOcean room units, CM2N1660.
In order to press the service pin, the lid must be opened.
Disposal
The device is classified as waste electronic equipment in terms of the European
Directive 2002/96/EC (WEEE) and should not be disposed of as unsorted
municipal waste.
The relevant national legal rules are to be adhered to.
Regarding disposal, use the systems setup for collecting electronic waste.
Observe all local and applicable laws.
Notes for the radio
reception
EnOcean connection
LonWorks
commissioning
19 / 20
Siemens RXZ95.1/LON – Gateway EnOcean/LonWorks CM2N1661en_02
Building Technologies Technical data 23 Sep 2011
Technical data
General device data Operating voltage DC 15...24 V
AC 24 V +/- 10%
Power consumption 0.5W / 0.82VA
Interface LONWORKS Transceiver FTT, free topology
Antenna connector FME female
Antenna (included in delivery) External antenna with magnetic stand
Terminals Screw terminals max. 1,5 mm²
Cable entry M20 for 1 cable max. D = 8 mm
or 2 cables max. D = 7 mm
Mounting Wall mounting
Housing protection Protection IP42 to EN60529
Ambient conditions Temperature
Humidity
-20...60 °C
max. 70 % r.h. non-condensing
CE conformity Electromagnetic Compatibility 89/336/EEC
Radio and Telecommunications
Terminal Equipment Directive
R&TTE 1999/5/EC
Reduction of hazardous
substances
2002/95/EC
Standards Electromagnetic compatibility
Emission
Immunity
EN 61000-6-2
EN 61000-6-3
Telecommunications ETSI EN 301 4893 V.1.4.1
Home and building electronic systems
(HBES)
EN 50090-2-2
Registration for radio operation EC countries and CH
Enclosure Material ABS
Color white, similar to RAL9010
Weight Without / with packaging 173 g / 248 g
Connection terminals
Bus A
Bus B
Gnd
24 V
1661Z09
Supply
LonWorks bus
Connector for antenna
20 / 20
Siemens RXZ95.1/LON – Gateway EnOcean/LonWorks CM2N1661en_02
Building Technologies Dimensions 23 Sep 2011
Dimensions
78
58
58
47
45.5
42.5
78
50
1661M09
34 2500
100
1661M10
Dimensions in mm
2008 Siemens Schweiz AG Änderun
g
en vorbehalten2008 - 2011 Siemens Switzerland Ltd. Sub
j
ect to chan
g
e

This manual suits for next models

1

Other Siemens Gateway manuals

Siemens WTT563 Series User manual

Siemens

Siemens WTT563 Series User manual

Siemens WTT568 Series User manual

Siemens

Siemens WTT568 Series User manual

Siemens FDCW221 User manual

Siemens

Siemens FDCW221 User manual

Siemens SIMATIC RTLS Series User manual

Siemens

Siemens SIMATIC RTLS Series User manual

Siemens SpeedStream 6500 Series User manual

Siemens

Siemens SpeedStream 6500 Series User manual

Siemens IE/PB LINK PN IO User manual

Siemens

Siemens IE/PB LINK PN IO User manual

Siemens GW-23 User manual

Siemens

Siemens GW-23 User manual

Siemens Gigaset SE567 User manual

Siemens

Siemens Gigaset SE567 User manual

Siemens SIMATIC FDE Gateway V1.1 Technical Document

Siemens

Siemens SIMATIC FDE Gateway V1.1 Technical Document

Siemens SIRIUS 3RK3141 Series User manual

Siemens

Siemens SIRIUS 3RK3141 Series User manual

Siemens SIMATIC IOT2050 User manual

Siemens

Siemens SIMATIC IOT2050 User manual

Siemens SCALANCE X-200 User manual

Siemens

Siemens SCALANCE X-200 User manual

Siemens HiPath HG 1500 User manual

Siemens

Siemens HiPath HG 1500 User manual

Siemens SpeedStream 6500 Series User manual

Siemens

Siemens SpeedStream 6500 Series User manual

Siemens NK8237 MP4.81-02 Quick guide

Siemens

Siemens NK8237 MP4.81-02 Quick guide

Siemens SIMATIC IOT2050 User manual

Siemens

Siemens SIMATIC IOT2050 User manual

Siemens SpeedStream 6500 Series User manual

Siemens

Siemens SpeedStream 6500 Series User manual

Siemens SIMATIC PN/J1939 LINK User manual

Siemens

Siemens SIMATIC PN/J1939 LINK User manual

Siemens SIMATIC FDE Technical Document

Siemens

Siemens SIMATIC FDE Technical Document

Siemens HG 3500 V4 User manual

Siemens

Siemens HG 3500 V4 User manual

Siemens VersiComm VC1COMMA User manual
Siemens

Siemens VersiComm VC1COMMA User manual

Siemens SIMATIC NET S7-CPs User manual

Siemens

Siemens SIMATIC NET S7-CPs User manual

Siemens MindConnect Nano User manual

Siemens

Siemens MindConnect Nano User manual
Siemens FDCW221 User manual

Siemens

Siemens FDCW221 User manual
Popular Gateway manuals by other brands

Cleverio SG100 user guide

Cleverio

Cleverio SG100 user guide

MicroNet SP5050 user manual

MicroNet

MicroNet SP5050 user manual

esera ECO 110 PRO quick guide

esera

esera ECO 110 PRO quick guide

NETGEAR CG3300CMR user manual

NETGEAR

NETGEAR CG3300CMR user manual

Nomadix Access Gateways user guide

Nomadix

Nomadix Access Gateways user guide

Libelium Meshlium Xtreme Technical guide

Libelium

Libelium Meshlium Xtreme Technical guide

Dinstar DAG1000-4S4O Quick installation guide

Dinstar

Dinstar DAG1000-4S4O Quick installation guide

2N stargate user manual

2N

2N stargate user manual

Inseego Skyus 100 Series quick start guide

Inseego

Inseego Skyus 100 Series quick start guide

RTA 460ETCMS-NNA1 Product user guide

RTA

RTA 460ETCMS-NNA1 Product user guide

wibutler Pro WG2001 user manual

wibutler

wibutler Pro WG2001 user manual

Dension 500S BT Installation and user manual

Dension

Dension 500S BT Installation and user manual

ProSoft Technology ProLinx-HART Driver manual

ProSoft Technology

ProSoft Technology ProLinx-HART Driver manual

ZyXEL Communications P-660HNT1 manual

ZyXEL Communications

ZyXEL Communications P-660HNT1 manual

IMC Networks AccessLinX installation guide

IMC Networks

IMC Networks AccessLinX installation guide

Enterasys ANG-1100 Series Release notes

Enterasys

Enterasys ANG-1100 Series Release notes

Lantronix FOX3-2G Series quick start

Lantronix

Lantronix FOX3-2G Series quick start

Eaton EG2-NA installation guide

Eaton

Eaton EG2-NA installation guide

manuals.online logo
manuals.online logoBrands
  • About & Mission
  • Contact us
  • Privacy Policy
  • Terms and Conditions

Copyright 2025 Manuals.Online. All Rights Reserved.