Siemens Gigaset USB Stick 108 User manual

Gigaset USB Stick 108 / englisch / A31008-M1038-R101-1-7619 / cover_front.fm / 02.06.2005
Schablone 2004_12_27

1
Contents
Gigaset USB Stick 108 / englisch / A31008-M1038-R101-1-7619 / USB_Stick_108IVZ.fm / 02.06.2005
Schablone 2004_12_27
Contents
Safety precautions . . . . . . . . . . . . . . . . . . . . . . . . . . . 3
Notes on secure operation . . . . . . . . . . . . . . . . . . . . 3
The Gigaset USB Stick 108 . . . . . . . . . . . . . . . . . . . . . 4
Wireless LAN basics . . . . . . . . . . . . . . . . . . . . . . . . . . . . . . . . . . . . . . . . . . . . . . . . . . . . 4
Local Area Network (LAN) . . . . . . . . . . . . . . . . . . . . . . . . . . . . . . . . . . . . . . . . . . . . 4
Ad-hoc network . . . . . . . . . . . . . . . . . . . . . . . . . . . . . . . . . . . . . . . . . . . . . . . . . . . . 5
Infrastructure network . . . . . . . . . . . . . . . . . . . . . . . . . . . . . . . . . . . . . . . . . . . . . . . 5
Security in wireless networks: encryption . . . . . . . . . . . . . . . . . . . . . . . . . . . . . . . . . . . 5
WEP encryption . . . . . . . . . . . . . . . . . . . . . . . . . . . . . . . . . . . . . . . . . . . . . . . . . . . . 6
WPA encryption . . . . . . . . . . . . . . . . . . . . . . . . . . . . . . . . . . . . . . . . . . . . . . . . . . . . 6
Range of wireless communication via a WLAN . . . . . . . . . . . . . . . . . . . . . . . . . . . . . . . 6
Installing the Gigaset USB Stick 108 . . . . . . . . . . . . 7
System requirements . . . . . . . . . . . . . . . . . . . . . . . . . . . . . . . . . . . . . . . . . . . . . . . . . . . 7
Contents . . . . . . . . . . . . . . . . . . . . . . . . . . . . . . . . . . . . . . . . . . . . . . . . . . . . . . . . . . . . .7
Notes on positioning the network adapter . . . . . . . . . . . . . . . . . . . . . . . . . . . . . . . . . . 7
Status display . . . . . . . . . . . . . . . . . . . . . . . . . . . . . . . . . . . . . . . . . . . . . . . . . . . . . . . . . 7
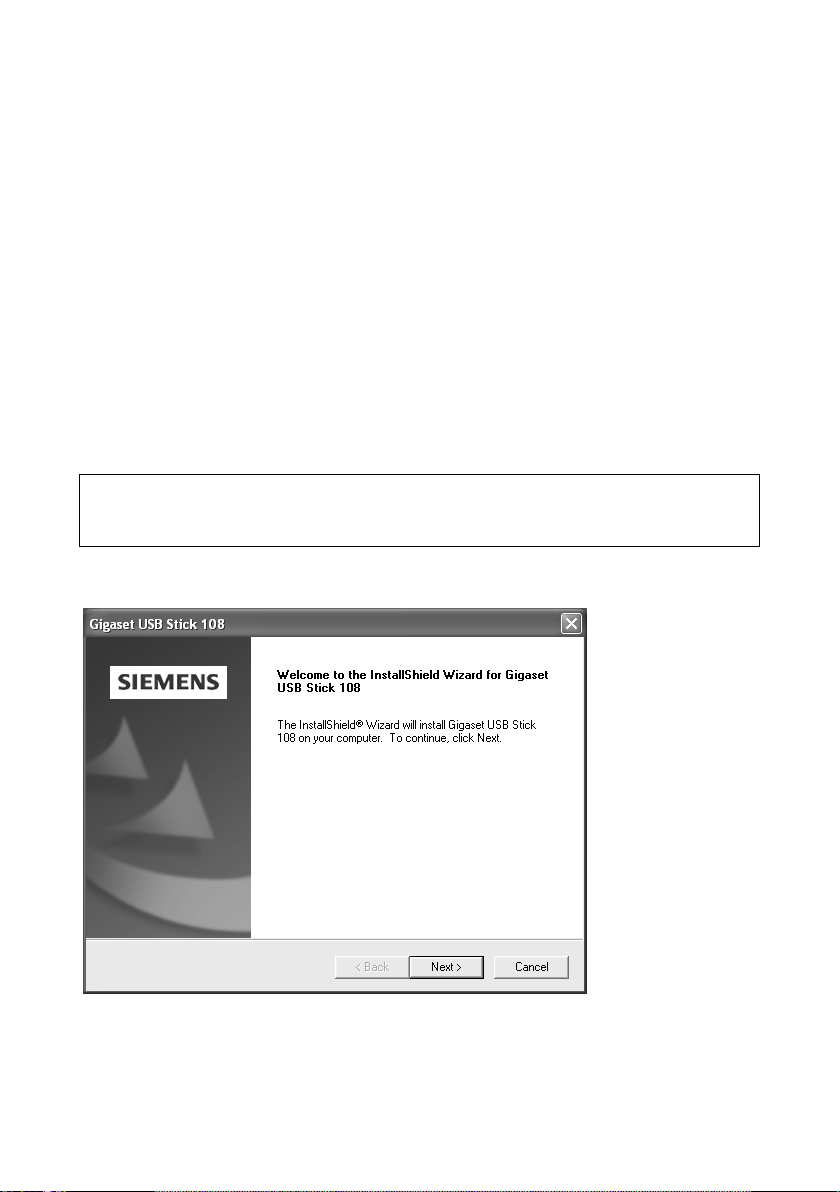
Installing the software . . . . . . . . . . . . . . . . . . . . . . . . . . . . . . . . . . . . . . . . . . . . . . . . . . 8
Connecting the Gigaset USB Stick 108 . . . . . . . . . . . . . . . . . . . . . . . . . . . . . . . . . . . . 10
Installing driver software . . . . . . . . . . . . . . . . . . . . . . . . . . . . . . . . . . . . . . . . . . . . . . . 11
Checking installation . . . . . . . . . . . . . . . . . . . . . . . . . . . . . . . . . . . . . . . . . . . . . . . . . . 12
Checking connection quality . . . . . . . . . . . . . . . . . . . . . . . . . . . . . . . . . . . . . . . . . 13
Configuring the Gigaset USB Stick 108 . . . . . . . . . 14
The Gigaset WLAN Adapter Monitor . . . . . . . . . . . . . . . . . . . . . . . . . . . . . . . . . . . . . . 14
Opening the monitor . . . . . . . . . . . . . . . . . . . . . . . . . . . . . . . . . . . . . . . . . . . . . . . 14
Deactivating Autostart . . . . . . . . . . . . . . . . . . . . . . . . . . . . . . . . . . . . . . . . . . . . . . 15
Operating Gigaset WLAN Adapter Monitor . . . . . . . . . . . . . . . . . . . . . . . . . . . . . . 15
Closing the monitor . . . . . . . . . . . . . . . . . . . . . . . . . . . . . . . . . . . . . . . . . . . . . . . . 16
Configuration . . . . . . . . . . . . . . . . . . . . . . . . . . . . . . . . . . . . . . . . . . . . . . . . . . . . . . . . 17
Configuration – General . . . . . . . . . . . . . . . . . . . . . . . . . . . . . . . . . . . . . . . . . . . . 17
Configuration – Security . . . . . . . . . . . . . . . . . . . . . . . . . . . . . . . . . . . . . . . . . . . . 21
Configuration – Profile . . . . . . . . . . . . . . . . . . . . . . . . . . . . . . . . . . . . . . . . . . . . . . 26
Status . . . . . . . . . . . . . . . . . . . . . . . . . . . . . . . . . . . . . . . . . . . . . . . . . . . . . . . . . . . . . .28
IP settings . . . . . . . . . . . . . . . . . . . . . . . . . . . . . . . . . . . . . . . . . . . . . . . . . . . . . . . . . . .30
Site Monitor . . . . . . . . . . . . . . . . . . . . . . . . . . . . . . . . . . . . . . . . . . . . . . . . . . . . . . . . . 32
Info . . . . . . . . . . . . . . . . . . . . . . . . . . . . . . . . . . . . . . . . . . . . . . . . . . . . . . . . . . . . . . . . 34
Deinstalling the Gigaset USB Stick 108 . . . . . . . . . 35
Deinstalling the software . . . . . . . . . . . . . . . . . . . . . . . . . . . . . . . . . . . . . . . . . . . . . . 35
Completing deinstallation . . . . . . . . . . . . . . . . . . . . . . . . . . . . . . . . . . . . . . . . . . . . . . 35

2
Contents
Gigaset USB Stick 108 / englisch / A31008-M1038-R101-1-7619 / USB_Stick_108IVZ.fm / 02.06.2005
Schablone 2004_12_27
Updating device drivers . . . . . . . . . . . . . . . . . . . . . 36
Glossary . . . . . . . . . . . . . . . . . . . . . . . . . . . . . . . . . . 37
Appendix . . . . . . . . . . . . . . . . . . . . . . . . . . . . . . . . . . 44
Troubleshooting . . . . . . . . . . . . . . . . . . . . . . . . . . . . . . . . . . . . . . . . . . . . . . . . . . . . . . 44
Specifications . . . . . . . . . . . . . . . . . . . . . . . . . . . . . . . . . . . . . . . . . . . . . . . . . . . . . . . . 48
Software . . . . . . . . . . . . . . . . . . . . . . . . . . . . . . . . . . . . . . . . . . . . . . . . . . . . . . . . . 48
Hardware . . . . . . . . . . . . . . . . . . . . . . . . . . . . . . . . . . . . . . . . . . . . . . . . . . . . . . . . 48
Authorisation . . . . . . . . . . . . . . . . . . . . . . . . . . . . . . . . . . . . . . . . . . . . . . . . . . . . . . . . 49
Disposal . . . . . . . . . . . . . . . . . . . . . . . . . . . . . . . . . . . . . . . . . . . . . . . . . . . . . . . . . . . .49
Customer service (Customer Care) . . . . . . . . . . . . . . . . . . . . . . . . . . . . . . . . . . . . . . . 50
Guarantee certificate (United Kingdom) . . . . . . . . . . . . . . . . . . . . . . . . . . . . . . . . . . . 51
Guarantee certificate (Ireland) . . . . . . . . . . . . . . . . . . . . . . . . . . . . . . . . . . . . . . . . . . 52
Index . . . . . . . . . . . . . . . . . . . . . . . . . . . . . . . . . . . . . 54

3
Safety precautions
Gigaset USB Stick 108 / englisch / A31008-M1038-R101-1-7619 / security.fm / 02.06.2005
Schablone 2004_12_27
Safety precautions
uThe Gigaset USB Stick 108 can affect medical equipment. Therefore, you should pay
attention to the technical conditions of the corresponding environment.
uMake sure you include the user guide and the CD-ROM when you pass on your
Gigaset USB Stick 108 to somebody else.
uUnder no circumstances try to use a damaged device. If in doubt, please contact our
service department, see the chapter "Customer service (Customer Care)" on
page 50.
Notes on secure operation
When you have installed and configured the Gigaset USB Stick 108 on your PC, you
should perform security settings on the wireless network:
uChange the SSID for all of the wireless devices within your network
(see "SSID (Service Set Identifier)" on page 18).
uEncrypt the communication over your wireless network
(see "Configuration – Security" on page 21).
Trademarks
Microsoft,Windows98SE,WindowsME,Windows2000,WindowsXPandInternet
Explorer are registered trademarks of the Microsoft Corporation.
Super G is a registered trademark of Atheros Communications, Inc.
Note:
Trademarks and trade names used in these instructions are intended only to describe
the operating steps and this use does not imply that they are freely available.
Trademarks and trade names are the property of the corresponding holder of the
rights.

4
The Gigaset USB Stick 108
Gigaset USB Stick 108 / englisch / A31008-M1038-R101-1-7619 / introduction.fm / 02.06.2005
Schablone 2004_12_27
The Gigaset USB Stick 108
The Gigaset USB Stick 108 is a WLAN network adapter which can be connected to your
PC or Notebook by means of a USB (Universal Serial Bus). You can use Gigaset data
products to set up a wireless local network (WLAN = Wireless Local Area Network) very
simply without having to lay cables.
Your Gigaset USB Stick 108 can be used to connect your PC to other PCs equipped with
wireless network adapters (ad-hoc mode).
You can also connect your PC to a wireless router, e.g. to the Gigaset SE551 WLAN dsl/
cable, for Internet access (infrastructure mode).
Since the PCs communicate with each other via radio, it does not matter where they are
located, as long as they are within range of the wireless network. Mobile PCs, such as
Notebooks, can even connect to the WLAN from varying locations. This enables you to
use all the files and printers on the network. The Gigaset USB Stick 108 works to the
IEEE 802.11g transmission standard and is downwardly compatible with the older
standard IEEE 802.11b. The Gigaset USB Stick 108 also supports Super G technology.
By using channel bundling, this can increase the transmission rate to up to 108 Mbps
on the network. For network security, wireless transmission can be encrypted using the
WPA standard or 64-/128-bit WEP.
This user guide contains important information on how to set up a WLAN and to
configure your Gigaset USB Stick 108.
Wireless LAN basics
This section provides basic information on wireless LANs to show the role of the
Gigaset USB Stick 108 in setting up a wireless network
Local Area Network (LAN)
A LAN is a network that exists in a limited area. A network is two or more PCs which are
connected with one another in order to share files as well as peripheral devices,
e.g. a printer.
Using the Gigaset USB Stick 108 you can communicate with other PCs without having
to route network cable. Thus you can take your computer to another place and still
remain connected to the network.
You can use the Gigaset USB Stick 108 in two different ways. On the one hand, you can
establish a direct connection to one or more PCs equipped with wireless network
adapters. This is an ad-hoc network. On the other hand, you can establish a connection
to an Access Point, which is used to obtain access to an already existing wired LAN
(infrastructure network).

5
The Gigaset USB Stick 108
Gigaset USB Stick 108 / englisch / A31008-M1038-R101-1-7619 / introduction.fm / 02.06.2005
Schablone 2004_12_27
Ad-hoc network
In an ad-hoc network, PCs communicate with each other via wireless peer-to-peer
connections. An ad-hoc network is set up by participants as and when required. All the
PCs must have a wireless network adapter, e.g. a Gigaset USB Stick 108, a Gigaset USB
Adapter 108 or a Gigaset PC Card 108. Ad-hoc networks are used wherever
communications networks have to be set up quickly and without any existing network
infrastructure and where the participants are on the move.
Infrastructure network
In an infrastructure network, connections between network participants are set up via
an Access Point (or several Access Points). The Access Point provides the basis for the
wireless network. It controls the connections between the participants and can also
establish the connection from the mobile stations of a wireless network to a wired LAN
(Ethernet) or the Internet.
Roaming
Several Access Points can be installed to extend the range of a wireless network.
Participants in the wireless network can move freely between the various Access Points
without losing contact to the network. As soon as there is a risk of losing contact, the
PC automatically looks for another Access Point with a stronger signal. All Access Points
and wireless network adapters must have the same SSID. All Access Points must be
connected to the same Ethernet network.
Security in wireless networks: encryption
Any network, be it wired or wireless, is exposed to the risk of eavesdropping.
Connecting your local network to the public network exposes your data and applications
to not inconsiderable risks. As with an individual connection, you should always protect
your network PCs against external attacks, e.g. via emails, with a virus scanner.
These virus scanners, however, do not provide any protection against unauthorised
access from outside (hackers). To counter this risk, Gigaset data products offer various
encryption procedures that largely rule out unauthorised access (hacking) to your
wireless network.

6
The Gigaset USB Stick 108
Gigaset USB Stick 108 / englisch / A31008-M1038-R101-1-7619 / introduction.fm / 02.06.2005
Schablone 2004_12_27
WEP encryption
WEP encryption (Wired Equivalent Privacy) encodes data for sending using a key that
you have defined. Once they reach the recipient, who uses the same key, the data are
restored to the state before you sent them. Recipients who do not know this key cannot
read the content of this data stream or only after a great deal of effort.
There are two security levels for calculating the encryption key:
u64-bit mode
u128-bit mode
WPA encryption
WPA is a new standard-conformant solution for greater security in wireless networks.
WPA is meant to replace the existing WEP standard (Wired Equivalent Privacy) and offers
more reliable encryption and authentication methods.
With your Gigaset USB Stick 108, you can use WPA encryption regardless of the
operating system used. WPA encryption is particularly recommended where the highest
security is required.
Range of wireless communication via a WLAN
The range is up to 300 m in the open. In buildings, the maximum range is up to 30 m.
The operating environment, the nature of the rooms and building may reduce the range
considerably. You can boost the range of your wireless network by placing a repeater,
e.g. a Gigaset WLAN Repeater, at the limit of its range. The device also supports the
XR technology (eXtended Range). This can be used to increase the range. Conversion to
the XR mode is performed automatically at a respectively weak signal and when the
partner station is also XR capable.

7
Installing the Gigaset USB Stick 108
Gigaset USB Stick 108 / englisch / A31008-M1038-R101-1-7619 / installation.fm / 02.06.2005
Schablone 2004_12_27
Installing the Gigaset USB Stick 108
System requirements
For operation, you will require:
ua PC with at least 466 MHz and one of the following operating systems:
Windows 98SE, Windows ME, Windows 2000 or Windows XP
u64 MB RAM, more working memory is recommended
uat least 30 MB free hard disk space
ua free USB port
ua CD-ROM drive or a DVD drive
Contents
The package contains the following components:
ua Gigaset USB Stick 108,
ua CD-ROM containing installation and configuration software, detailed user guide,
Adobe Reader to read the user guide and the document "Gigaset WLAN. Tips for
use",
ua Quick Installation Guide.
Notes on positioning the network adapter
Choose the location of the PC where the Gigaset USB Stick 108 will be connected so
that there are the fewest possible obstacles to the radio waves. Protect the Gigaset USB
Stick 108 from dampness.
The PC with the Gigaset USB Stick 108 should not be placed in the immediate vicinity of
other electronic equipment. Items of electrical equipment can mutually affect each
other, the radio waves may impair the function of other devices.
If your PC with the Gigaset USB Stick 108 is located under a desk or in a housing, the
range of the wireless network can be affected. For the best possible range, we
recommend placing the PC centrally in an open location so that the USB is facing its
connection partner or is at a right angle to it.
Status display
The Gigaset USB Stick 108 has an LED display for connection to the network:
LED is off The Gigaset USB Stick 108 does not have a connection to a wireless
network.
LED is on
continuously
The Gigaset USB Stick 108 does have a connection to a wireless network
and is ready to transfer data.
LED flashes The Gigaset USB Stick 108 is sending or receiving data.

8
Installing the Gigaset USB Stick 108
Gigaset USB Stick 108 / englisch / A31008-M1038-R101-1-7619 / installation.fm / 02.06.2005
Schablone 2004_12_27
Installing the software
First, the software included in the scope of delivery must be installed. This software not
only includes the driver software for the USB device, it can also be used as a
configuration and monitoring tool, the Gigaset WLAN Adapter Monitor.
Only this software has been written especially for the Gigaset USB Stick 108. There are
similar drivers available in the Windows driver databases, but, as a rule, such drivers do
not fully cover all the features or they function in a completely different manner.
Do not connect the Gigaset USB Stick 108 to your PC until prompted to do so by the
installation program. If you connect the Gigaset USB Stick 108 to your PC before
installing the software, Windows will automatically recognise the device and show the
dialog box prompting selection of the appropriate driver. Click on Cancel to close the
dialog box. Remove the Gigaset USB Stick 108 from the PC and install the software first.
Running installation
ìClose all running programs.
ìInsert the CD-ROM supplied into the CD-ROM drive of your PC and wait until the
welcome screen appears. If this screen does not appear automatically, start
installation manually:
– Open Windows Explorer.
– Select the CD-ROM drive.
– Double-click start.exe.
The language selection screen appears
ìSelect the language.
You will now see a screen showing the contents of the CD-ROM.
Please remember:
Do not insert the Gigaset USB Stick 108 into a spare USB port on your PC until the
installation software prompts you to do so.
Please remember:
You may require administrator rights on your PC for the installation process.
Information for users with Windows 98SE/ME:
If you are prompted to restart your computer during installation, click on Restart.
After restarting, installation continues automatically. You should now follow the
instructions and installation steps shown below.
Have your Windows Installation CD to hand. You may be prompted to insert it.

9
Installing the Gigaset USB Stick 108
Gigaset USB Stick 108 / englisch / A31008-M1038-R101-1-7619 / installation.fm / 02.06.2005
Schablone 2004_12_27
ìClick on Installation.
The InstallShield Wizard appears.
Installation Install the software for your Gigaset USB Stick 108.
User guide This opens the detailed user guide on the CD-ROM.
If you cannot open the detailed user guide on the
CD-ROM, you will have to install the free Adobe
Reader.
Practical Tips and Configuration
Examples
Here you will find solutions to various problems.
Install Adobe Reader Install Adobe Reader, Version 6.
Browse CD If you are looking for a particular file on the
CD-ROM, you can display the CD-ROM contents
in an Explorer window.
Back The program returns to the language selection
screen.
Exit This closes the program.
Note:
The screens for the various operating systems differ only marginally. Installation is
largely automatic, apart from a few mouse clicks and restarts.

10
Installing the Gigaset USB Stick 108
Gigaset USB Stick 108 / englisch / A31008-M1038-R101-1-7619 / installation.fm / 02.06.2005
Schablone 2004_12_27
ìClick on Next to continue installation.
The licence agreement screen now appears.
ìIf you wish to accept the terms of the licence agreement, click on Yes.
In the next screen, choose the directory for the installation.
ìClick on Browse, if you want to select another directory. Click on Next to continue
installation.
During installation, the InstallShield Wizard uses the screen Setup progress to show
which action is being carried out, and the progress is also displayed.
After this stage of installation is completed, a message appears prompting you to
connect the Gigaset USB Stick 108 to your PC.
Connecting the Gigaset USB Stick 108
ìRemove the cap from your Gigaset USB Stick 108 and insert it in a free USB port on
your PC.
Note:
The Gigaset USB Stick 108 complies with USB Version 2.0.
If your PC still has the older USB Version 1.1, you may see an error message to that
effect during installation. You can ignore this message. The Gigaset USB Stick 108
also works with USB Version 1.1. However, the transmission rate under USB V1.1 is
lower.

11
Installing the Gigaset USB Stick 108
Gigaset USB Stick 108 / englisch / A31008-M1038-R101-1-7619 / installation.fm / 02.06.2005
Schablone 2004_12_27
Installing driver software
Once the Gigaset USB Stick 108 has been plugged in, installation continues
automatically. The operating system's automatic hardware recognition opens to install
the drivers for the Gigaset USB Stick 108.
ìDepending on the other settings of your PC, a dialog box may appear. Select the
Install software automatically option, and click on Next.
If the window does not appear, the installation step described here is automatically
carried out by the system.
After installation, depending on your operating system, one or two windows will appear
prompting you to complete installation.
ìClick on Finish.
The installation is finished and your PC will be restarted.
Note:
If your PC is equipped with the Windows XP operating system Service Pack 2,
the Wizard for looking for new hardware window appears. Select the
No, not at this time option, and click on Next.
Notes:
uWindows 2000 / XP: If you see the warning Digital signature not found, ignore
this message and continue with automatic registration.
uWindows 98SE / ME: You may be prompted to insert your Windows Installation CD
to continue driver installation. Therefore you should have this CD handy or enter
the path name where the Windows installation files are stored on your PC.
uRestart your PC if you are prompted to do so.
uIf your PC already contains more recent files, answer the question whether you
want to keep them with YES.
Note:
In Windows XP, you may be informed that a patch for the USB controller is missing.
This is automatically included as part of installation. Follow the instructions in the
windows if necessary.

12
Installing the Gigaset USB Stick 108
Gigaset USB Stick 108 / englisch / A31008-M1038-R101-1-7619 / installation.fm / 02.06.2005
Schablone 2004_12_27
Checking installation
If installation was successful, you can now use the Gigaset WLAN Adapter Monitor.
With the Gigaset WLAN Adapter Monitor you can configure your Gigaset USB Stick 108
and create a connection to other network adapters or an Access Point.
The Gigaset WLAN Adapter Monitor is represented by an icon in the status area of the
taskbar, this icon shows you if there is a connection to a connection partner and the
quality of the connection. In a wireless network using only Siemens Gigaset products
and where the standard settings were used (e. g. no encryption), the connection to an
Access Point is established automatically during installation.
The following may be displayed in the status area of the taskbar:
You are advised to read the chapter "Notes on secure operation" on page 3.
ü
The Gigaset WLAN Adapter Monitor icon is not displayed.
ìFirst try to open the Gigaset WLAN Adapter Monitor
manually, see the chapter "Opening the monitor" on
page 14.
If this fails, then something went wrong during installation.
ìDeinstall the software, see the chapter "Deinstalling the
software" on page 35.
ìThen install the software again, see the chapter
"Running installation" on page 8.
The icon is displayed in the taskbar with a red ball above the
icon:
The Gigaset WLAN Adapter Monitor is installed;
the Gigaset USB Stick 108 has not been inserted or has
been inserted wrongly.
ìCheck the USB connection.
The icon is displayed in the taskbar, with a red cross above
the icon:
The Gigaset WLAN Adapter Monitor is installed and active;
there is no connection to the local network.
ìTurn to the chapter "Configuring the Gigaset USB Stick
108" on page 14.
The icon is displayed in the taskbar, with a green ball above
the icon:
The Gigaset WLAN Adapter Monitor is installed and active;
there is already a connection to the local network. The
number of bars displayed in the icon shows the connection
quality.

13
Installing the Gigaset USB Stick 108
Gigaset USB Stick 108 / englisch / A31008-M1038-R101-1-7619 / installation.fm / 02.06.2005
Schablone 2004_12_27
Displaying QuickInfo for the connection
If you point the mouse over the icon in the taskbar, you will see a small window that
displays the connection properties.
The following properties are shown:
uSSID (Service Set Identifier) in the Connection line
uthe transmission rate (in Mbps) in the Speed line
uthe transmission quality (in %) in the Link Quality line
If there is no connection, you will see a red cross over the icon and in QuickInfo,
Disconnected is displayed.
Checking connection quality
The Adapter Monitor icon changes gradually depending on the current connection
quality. The better the connection quality, the higher the transmission speed.
With reasonable to poor connection:
ìIf possible, move your PC closer to the connection partner for greater field strength.
No WLAN available (red cross over bar)
There is no WLAN within range of your Gigaset USB Stick 108 that
you could connect to.
ìCheck the configuration of the Access Point and adjust the
Gigaset USB Stick 108 settings accordingly.
Or
ìChange your location to reduce the distance to a connection
partner.

14
Configuring the Gigaset USB Stick 108
Gigaset USB Stick 108 / englisch / A31008-M1038-R101-1-7619 / configuration.fm / 02.06.2005
Schablone 2004_12_27
Configuring the Gigaset USB Stick 108
The Gigaset WLAN Adapter Monitor
You can use the Gigaset WLAN Adapter Monitor to configure and monitor your
Gigaset USB Stick 108.
Opening the monitor
In the standard setting, the Gigaset WLAN Adapter Monitor is opened automatically in
the background when you launch your PC. The Gigaset WLAN Adapter Monitor icon is
displayed in the status area of the task bar.
ìDouble-click on the Gigaset WLAN Adapter Monitor icon in the status area of the
taskbar to open the monitor user interface.
Or
ìRight-click on the Gigaset WLAN Adapter Monitoricon in the status area of the
taskbar.
In the pop-up menu, you will see the available tabs and the Exit option.
ìIn the pop-up menu, click on the appropriate tab to open the monitor user interface
and display this tab directly.
Use the Exit option to close the Gigaset WLAN Adapter Monitor.
If you do not see the Gigaset WLAN Adapter Monitor icon in the status area of the
taskbar, you will have to run the program first:
ìIn the start menu, click on Start – Programs – Gigaset USB Stick 108 –
Gigaset WLAN Adapter Monitor.
This launches the program. The Gigaset WLAN Adapter Monitor icon is displayed in
the status area of the task bar.

15
Configuring the Gigaset USB Stick 108
Gigaset USB Stick 108 / englisch / A31008-M1038-R101-1-7619 / configuration.fm / 02.06.2005
Schablone 2004_12_27
Deactivating Autostart
The Gigaset WLAN Adapter Monitor is opened automatically every time you launch your
PC. If you do not need the monitor all the time, you can deactivate Autostart.
ìSelect Start – Programs – Autostart.
ìRight-click the Gigaset WLAN Adapter Monitor entry.
ìSelect Delete to remove the link to Gigaset WLAN Adapter Monitor from Autostart.
Now that the monitor is no longer opened automatically when you launch your PC, you
will have to open it manually when you need it.
Operating Gigaset WLAN Adapter Monitor
In the Gigaset WLAN Adapter Monitor user interface, you will find various settings and
status displays for your network adapter in various tabs, which will be described in detail
in the following.

16
Configuring the Gigaset USB Stick 108
Gigaset USB Stick 108 / englisch / A31008-M1038-R101-1-7619 / configuration.fm / 02.06.2005
Schablone 2004_12_27
Buttons
With the buttons under each tab you can use one of the following options:
Closing the monitor
Hiding the monitor
ìClick on Hide in the monitor user interface.
This closes the user interface. The icon in the status area of the taskbar shows that
the Gigaset WLAN Adapter Monitor is still active in the background.
Closing the program
ìRight-click on the Gigaset WLAN Adapter Monitor icon in the status area of the
taskbar.
This opens the pop-up menu.
ìSelect Exit to close the program.
The Gigaset WLAN Adapter Monitor is closed. The icon disappears from the status
area in the taskbar.
The wireless operation of the network adapter is activated
(green icon). The PC is available on the network.
ìClick on Radio On to deactivate the wireless operation of the
network adapter.
Radio Off is now displayed. The PC is no longer available on
the network.
The wireless operation of the network adapter is deactivated
(red icon). The PC is not available on the network.
ìClick on Radio Off to activate the wireless operation of the
network adapter.
Radio On is now displayed. The PC is available on the network.
Use the Help button to open the Gigaset WLAN Adapter Monitor
help file.
Use the Hide button to close the user interface of the
Gigaset WLAN Adapter Monitor.
The icon in the status area of the task bar shows that the monitor
is still active in the background.
ìDouble-click this icon if you want to open the Gigaset WLAN
Adapter Monitor user interface again.

17
Configuring the Gigaset USB Stick 108
Gigaset USB Stick 108 / englisch / A31008-M1038-R101-1-7619 / configuration.fm / 02.06.2005
Schablone 2004_12_27
Configuration
In the Configuration tab, you can choose the general basic settings and the security
options for operating the Gigaset USB Stick 108. The Configuration tab is divided into
the sections described below.
Configuration – General
Successful communication in a WLAN depends on all the PCs using the same ID (SSID)
and the same radio channel. In addition, the connected PCs must coordinate their
transmission rates for successful data transfer.
You can choose the basic settings for each profile in the Common section of the
Configuration tab.
Please remember:
For security reasons, installation should be followed by changing the SSID of your
WLAN, as the default SSID may also be known to unauthorised persons.

18
Configuring the Gigaset USB Stick 108
Gigaset USB Stick 108 / englisch / A31008-M1038-R101-1-7619 / configuration.fm / 02.06.2005
Schablone 2004_12_27
SSID (Service Set Identifier)
The SSID is the ID used for the unique identification of a wireless network (WLAN) so
that this network can be distinguished from a parallel network, for example. Within a
WLAN, all the network adapters must have the same SSID.
ìIn the SSID field, select the ID of the partner you want to connect your PC to.
The default setting is ConnectionPoint.
The order for defining the SSID depends on the Network Mode of the WLAN:
uInfrastructure:
The SSID must be defined on the Access Point first. This SSID is then assigned
automatically to every network adapter registering with it.
uAd Hoc:
It is important that all the network adapters use the same SSID. The order of entry is
irrelevant.
Operating mode
ìEnter the Network Mode for the network environment:
–Infrastructure:
There are wireless (WLAN) and (wired) (LAN) PCs in the network environment.
The connection between WLAN and LAN is set up via an Access Point.
–Ad Hoc:
The network environment does not have a fixed structure, but is set up between
the available wireless network adapters as and when required. No Access Point is
required.
The default operating mode is infrastructure.
You will find a detailed description of the operating modes in the chapter "Wireless LAN
basics" on page 4.
Note:
In Ad Hoc mode, the device always will work in 802.11b transmission mode, i.e. with
a maximum transmission rate of 11 Mbps. You should therefore set up an Access
Point so that you can transfer large volumes of data quickly.

19
Configuring the Gigaset USB Stick 108
Gigaset USB Stick 108 / englisch / A31008-M1038-R101-1-7619 / configuration.fm / 02.06.2005
Schablone 2004_12_27
Transmission rate
Transmission rate is the term used to describe the data volume sent between two PCs
per second. The transmission rate is measured in Mbps (Megabits per second).
ìSelect the Transmission Rate:
–WiththeAuto setting, the network adapter checks the connection quality for
each data transmission and automatically selects the most suitable transmission
rate. The default transmission rate setting is Auto.
uYou can set another value in the selection menu if necessary. By doing this you are
specifying the maximum value for transmission rates. If you select 24 Mbps for
example, the network adapter tries to use this rate for every transmission. The
setting prevents a faster transmission rate. If the connection quality falls, the
network adapter will select the next lower transmission rate:
Channel
The Channel field shows the radio channel used to set up communication with the
connection partners. The options are radio channels 1 to 13.
In the Infrastructure mode, the radio channel is set by the Access Point for all WLAN
participants and can only be changed there. In this case, the Channel field shows the
channel being used.
For Ad Hoc mode, you set the network adapter channel manually.
ìSelect the channel used by the desired connection partners in the ad-hoc network.
Power saving
The Gigaset USB Stick 108 can be used in power saving mode. Your PC remains available
on the network, but the network adapter's energy consumption is reduced to a
minimum.
ìSelect Enabled to use the network adapter in power saving mode.
Note:
In wireless networks, the maximum achievable Transmission Rate depends on the
transmission power and the connection quality of the connected network adapters.
The transmission power in turn depends on other factors; for example it falls rapidly
as the distance between the network adapters increases.
The Auto setting for the Transmission Rate is particularly recommended where the
operating conditions fluctuate.
Other manuals for Gigaset USB Stick 108
2
Table of contents
Other Siemens Storage manuals