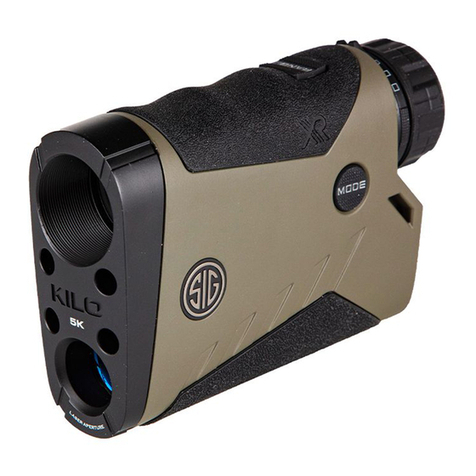
Sig Sauer Kilo2000 User manual

OWNERS MANUAL
ELECTRO-OPTICS
KILO2000™ 7x25mm DIGITAL LASER RANGEFINDER
KILO

2
TABLE OF CONTENTS
This manual is available in the following languages: French, Spanish, German, Italian, Portuguese,
Russian, Afrikaans, Swedish, and Norwegian. Please visit sigoptics.com for Owners Manual downloads.
Introduction..............................................3
Contents ................................................4
Key Features .............................................5
Product Identification ......................................6
Operation ..............................................13
Display Information .......................................17
Changing Modes of Operation ..............................18
Programming Sequence ...................................19
Frequently Asked Questions (FAQs) ..........................22
Specifications ...........................................24
SIG SAUER®Electro-Optics Infinite Guarantee™ ................28

3
sigoptics.com
INTRODUCTION
Congratulations on the purchase of your SIG SAUER®KILO2000™ Laser Rangefinder. The KILO2000 is the
most advanced, yet simple to use rangefinder on the market. The KILO2000 features the fastest, digital
signal processing engine while streamlining the user interface for a no hassle, out of the box experience.
Scan mode refreshes at ultra-
fast 4x/second
Multi-position twist-up eyecup
for individualized custom fit
Compact form factor easily fits
in pocket
Rear-loading CR2 Battery

4
CONTENTS:
• KILO2000™ 7x25mm Digital Laser Rangefinder
• CR2 Battery (1)
• Premium Padded Ballistic Nylon Case
• Lanyard

5
sigoptics.com
KEY FEATURES:
• 7x25mm monocular with SpectraCoat™ anti-reflection coatings for superior light transmission and
optical clarity.
• Revolutionary Lightwave™ DSP Technology for the fastest and longest distance rangefinder engine.
• HyperScan provides 4 range updates per second in scan mode while RangeLock reports the last range
result when ranging distant targets.
• Features line of sight or angle modified range. Units in yards or meters to tenth Y/M resolution.
• Projected, segmented organic light emitting diode (OLED) display for daytime and low light use.
• Lumatic™ Display automatically calibrates display brightness to changing ambient light conditions.
• Compact, magnesium housing with binocular style eyecup and diopter adjustment.
• Simplified user interface with RANGE and MODE buttons only.
• Sleek design for one handed operation and lanyard attachment point.

6
A
C
B
PRODUCT IDENTIFICATION:
A- Power/Range Button
B- Diopter Focus Adjustment
C- Eyecup
D- Mode Button
E- Battery Compartment
A B
C
D
E

7
sigoptics.com
LIGHTWAVE™ DSP TECHNOLOGY
SIG SAUER’s proprietary Lightwave DSP engine leverages HyperScan – an advanced power management
technique that provides the fastest refresh rate in scan mode (4 times per second) even at distances
over a mile. Our DSP engine uses the latest generation field programmable gate array (FPGA) running
sophisticated signal processing algorithms to reduce false positives while finding weak or distant targets.
RANGING ACCURACY, RESOLUTION AND MAXIMUM RANGES
The KILO2000 provides line of sight or angle modified range information accurate to ±0.5 yards or meters
out to 500 yards; ±1 yard from 500 - 1000 yards and ±2 yards beyond 1000 yards. Range is displayed in
0.1 yard or meter resolution.
The KILO2000 can range past 2000 yards / meters on reflective or semi-reflective targets such as houses,
rock faces or other bright objects. Ranging performances in HyperScan mode are as follows: Reflective up
to 2 miles, trees up to 1,500 yards and deer up to 1,200 yards. Actual range performance will vary based
on changes in ambient light, temperature and haze.

8
LINE OF SIGHT (LOS) AND ANGLE MODIFIED RANGE (AMR™)
The KILO2000 provides 2 simple modes of operation. Line of sight is the range to the target independent
of angle. It is comparable to the “hypotenuse” of a triangle. When ranging in LOS mode, the distance is
displayed in addition to the angle of incline. This method is preferred for those long range shooters and
hunters wanting to use the LOS range and angle of incline to calculate a very precise holdover using a
ballistic calculator smartphone application and/or wind measurement device.
Angle modified range is the equivalent horizontal range to the target and is comparable to the “horizontal
leg” of a triangle. AMR is also known as “rifleman’s rule” and uses the LOS range and angle of incline to
calculate the horizontal distance the projectile travels between shooter and target. AMR is very accurate
for most shooters and archers and should be used in most situations.
In this example, if the rangefinder is in LOS mode the line of sight range of 500 yards would be displayed
and toggle back and forth displaying “500.0 y” (yards) and “-30.0” (degrees decline). Use LOS in
combination with a ballistic calculator to calculate an exact holdover in minutes of angle or milliradians.
If the rangefinder is in AMR mode the angle modified range of 433.0 yards would be displayed. This is the
equivalent horizontal range and can be used in combination with a ballistic / holdover reticle or with the
SIG Ballistic Turret SBT™ dial.

9
sigoptics.com
Line Of Sight (LOS) range of 500 yards at 30º decline
Angle Modified Range (AMR) is 433 yards
ANGLE MODIFIED RANGE
Example:
LOS range of 500 yards 30° decline
equals to an AMR of 433 yards.
ANGLE MODIFIED RANGE

10
LUMATIC™ OLED DISPLAY
The KILO2000 has the most advanced display on the market. Our OLED display has the largest dynamic
range providing for high brightness in bright sunlight or snow conditions, yet will dim down to near night
vision levels at dusk and dawn. No other display offers this adaptive ability to prevent your pupil from
constricting in low light causing you to no longer be able to see your target. A small, ambient light sensor
(ALS) is located in the objective of the rangefinder and samples the ambient light condition of the target
image. The ALS samples and updates the brightness instantaneously to always provide the right amount
of contrast against your target image.
888.8 Y
Display in Bright Light Display in Low Light
888.888.
88
YY

11
sigoptics.com
A- Circle center aiming feature – this is your aiming feature or reticle to determine range
B- 5 Character alphanumeric digits for range and angle display
C- Battery Status indicator
D- M and Y unit of measure selection
E- LOS and AMR selection
F- LAST target selection
888.8.8
LOS AMR
LAST
M
Y
A
B
C
D
E
F

12
Safety and Operation Procedures
The KILO2000 is classified as a Class 3R product. There are a few precautions that are important to
remember:
• Do not depress the RANGE button while aiming at the human eye or while looking into the transmitting
optics on the objective side
• Do not leave the KILO2000 within reach of small children
• Do not take the product apart or modify the product in any way to expose internal electronics that
might cause damage or electric shock
• Do not use any other power source other than a CR2 battery or equivalent.
WWARNING

13
sigoptics.com
OPERATION
The KILO2000 was designed to get you up and running without the typical complexity of buried menus
and programming modes. The rangefinder comes out of box in the following configuration:
(a) Best Target (rangefinder returns the best or most likely target, not the first or last)
(b) Automatic Brightness control (auto adjusts to ambient lighting conditions)
(c) Angle Modified Range (equivalent horizontal range)
(d) Units of Measure in Yards

14
SET UP
Installing the Battery
Remove the battery cap by turning the cap in a counter-clockwise direction. Insert (1) CR2 Primary
Lithium battery (+) terminal side first. The (-) terminal should be facing out. Place the cap onto the (-)
battery terminal and reinstall the battery cap by turning the cap in the clockwise direction.
CAUTION - Be careful to not cross-thread the cap.

15
sigoptics.com
----
AMR
Y
After installation of the battery and depressing the RANGE button, the status of the KILO2000 is displayed:
Installing the Lanyard
Install the lanyard loop through the lanyard attachment point.
Pass the lanyard back through the loop for secure attachment.

16
Diopter Adjustment
The diopter or focus adjustment is located just inside of the
eyecup. The focus adjustment is used to bring the OLED display
into sharp focus along with the target image. The diopter
adjustment can turn clockwise or counter-clockwise depending
upon the user’s prescription.
Eyecup Adjustment
The eyecup adjustment allows the user to adjust the eye relief for
use with or without glasses. The eyecup rotates approximately
90 degrees counterclockwise allowing the user to adjust the eye
relief by approximately 6 mm.

17
sigoptics.com
DISPLAY INFORMATION
The OLED display shows you the center aiming circle, the unit of measure (Y), Angle Modified Range
mode (AMR) and the remaining battery status. The display will remain active for up to 10 seconds. You
can then press the RANGE button to determine range to target.
If you press the RANGE button while the rangefinder is off and continue to hold the RANGE button down,
the rangefinder will automatically switch into SCAN mode within 1 second.
After determining the distance to the target, the rangefinder will continue to display the center aiming
circle and range data for 10 seconds – and only the range data. All other information is not shown after
initial wakeup to prevent clutter in the field of view.
Center aiming circle
Range data
388.2
----
AMR
Y
Display at initial wakeup Display when ranging

18
HyperScan MODE
While the KILO2000 supports single button push ranging operation, it is highly recommended that you
push and hold the RANGE button down to activate HyperScan mode. This mode allows you to scan
targets at 4X/second which significantly improves ranging performance at extreme distances. As the
ranging distances are updated very quickly in HyperScan mode, once you release the RANGE button the
last acquired distance will be displayed. When in HyperScan mode ranging distant targets, the display
may update between no result and a distant range - by using RangeLock technology the rangefinder will
report the last range result when the RANGE button is released.
CHANGING MODES OF OPERATION
The KILO2000 ships with the most common modes already configured. However, you can access and
change the following features:
• Best or Last Target
• OLED Brightness – 10 different modes – 3 LOW, 3 MED, 3 HIGH and AUTO (20 levels)
• Line of Sight (LOS) or Angle Modified Range (AMR)
• Units of Measure (Y or M)

19
sigoptics.com
PROGRAMMING SEQUENCE
The sequence of the programming steps has been calibrated to reflect the frequency of potential setting
changes, for example it is more likely that you would change from BEST to LAST target so it is the first
programming step, whereas Unit of Measure (Y or M) is the last programming step as you will likely set
that once and leave it in that setting.
1. BEST or LAST Target
To enter programming mode, press and release the RANGE button to wakeup the rangefinder. After
wakeup, press and hold the MODE button for 2 seconds, then release the MODE button and the
current selection will be flashing (BEST is default). You can toggle between BEST and LAST by pressing
the RANGE button. Your selection will be flashing BEST of LAST. You can confirm your selection by
pressing and releasing the MODE button – which will cause the Target Mode to stop flashing and save
your selection. The rangefinder will then index to the next programming mode which is OLED Display
Brightness. If you do not press and release the MODE button the rangefinder will save your displayed
setting (BEST or LAST) and turn off. BEST Target Mode can be used in most settings, however when
hunting through foliage or in high grass the LAST Target Mode is recommended.

20
2. OLED Display Brightness
After selecting and saving BEST or LAST Target, the rangefinder will then index to the next programming
mode which is OLED Display Brightness. Your current selection will be flashing (AUTO is default). You
can toggle between LO1, LO2, LO3, MED1, MED2, MED3, HI1, HI2, HI3 or AUTO by pressing the RANGE
button. You can confirm your selection by pressing and releasing the MODE button - which will cause
the Display Mode to stop flashing and save your selection. The rangefinder will then index to the next
programming mode which is Line of Sight (LOS) or Angle Modified Range (AMR). If you do not press and
release the MODE button the rangefinder will save your displayed setting (Brightness Level Selected or
AUTO) and turn off. AUTO is the preferred OLED Display Brightness mode as it activates the proprietary
Lumatic™ display which utilizes the on-board ambient light sensor and twenty (20) possible display
intensity settings to automatically calibrate the display brightness relative to the ambient lighting
conditions. In bright conditions the display will be calibrated to power-on at max brightness, while in
dim conditions the display will be calibrated to power-on at the dimmest setting to protect your eye from
bright light in twilight or dark ambient lighting conditions.
3. Line of Sight (LOS) or Angle Modified Range (AMR)
After selecting and saving OLED Display Brightness, the rangefinder will then index to the next
programming mode which is LOS or AMR. Your current selection will be flashing (AMR is default). You
can toggle between LOS and AMR by pressing the RANGE button. You can confirm your selection by
pressing and releasing the MODE button – which will cause LOS or AMR to stop flashing and confirm your
selection. The rangefinder will then index to the next programming mode which is Unit of Measure. If
Table of contents
Other Sig Sauer Measuring Instrument manuals
Popular Measuring Instrument manuals by other brands
Norsonic
Norsonic nor103 quick guide
Neptune
Neptune L900 Installation and maintenance guide

Ametek
Ametek HAG Installation and maintenance guide

Dewetron
Dewetron DEWE-3010-IPC Technical reference manual
VDO
VDO VIEWLINE SPEEDOMETER Product information
Vitec Multimedia
Vitec Multimedia FOCUS FS-H70 Frequently asked questions
