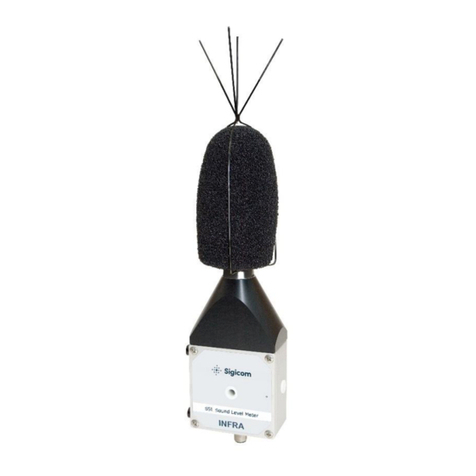
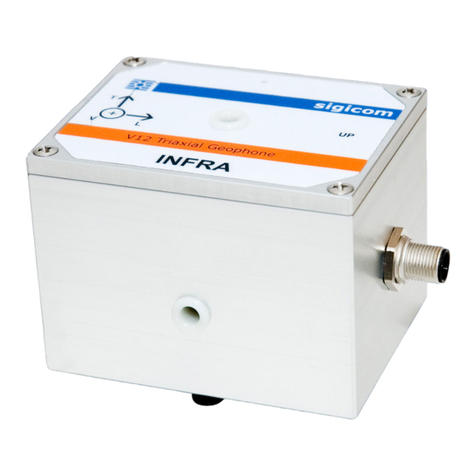
Sigicom INFRA Point User manual

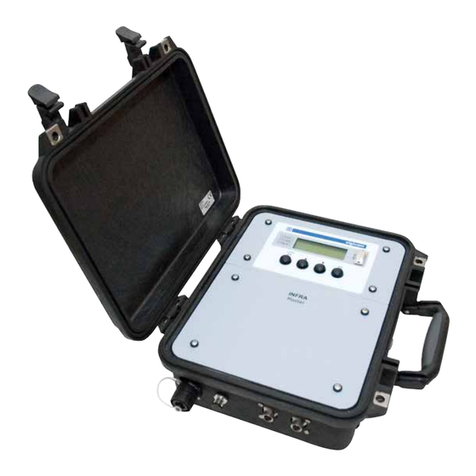
Manual
Copyright © Sigicom AB 2021 Art.no. ML089-05000-0En
INFRA Point
Vertical/Triaxial Vibration System
Data logger: art no. 080-05000-0
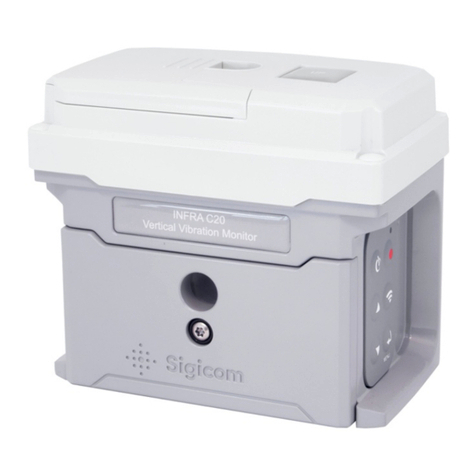
Vertical sensor: art no. 080-05110-0
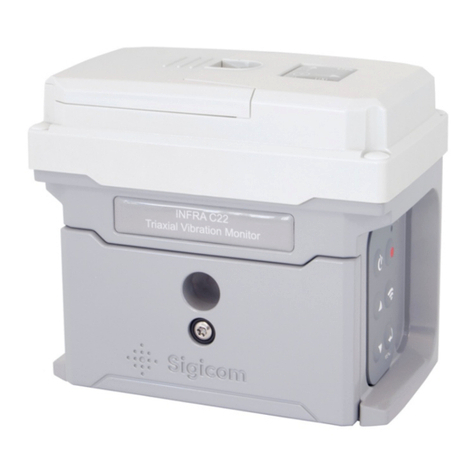
Triaxial sensor: art no. 080-05112-0
Manual ver. H
Valid for firmware 2.5.1

Copyright © Sigicom AB 2021
2
IMPORTANT SAFETY INSTRUCTIONS
–read this before use
Operating conditions and limitations:
•The C22 shall not be submerged.
•Safe operating temperature range is -30 to +50 ºC
(-22 to +122 ºF).
•This instrument includes built-in radio transmitters and antennas.
It should be installed away from the operator or third-party
persons to be safe; a recommended minimum distance is
1 m (3 ft.).
•Before installing the instrument, make sure there are no
restrictions of the use of radio transmitters at the intended site.
•Do not use the instrument in presence of flammable fumes or
gases, or in explosive atmospheres.
Li-Ion batteries:
•Only use batteries and power supplies provided or recommended by
Sigicom, see chapter 8Accessories.
•Do not use C22 batteries in other products than applicable Sigicom
products.
•A power source connected to the C22 must not be able to supply more
than 20V and 3A. A solar panel with maximum 25W power and with an
open-circuit voltage of 22V is allowed.
•Replacement and other handling of the batteries shall only be executed
by persons who have carefully read the instructions in this manual.
•Never keep the batteries at temperatures above 50ºC (122ºF).
•Transportation of Li-Ion batteries by aircraft is regulated by UN and
IATA. See Appendix B - Appendix D.
•Transportation by road or railway is exempt from dangerous goods
transportation regulations. Care should still be taken with handling and
packaging to avoid severe injury.
•If damaged, the batteries should be individually embedded into sand in a
sturdy plastic drum container during transport. It is also recommended to
affix a “Lithium Ion” label with an additional text: ‘Damaged batteries’
on the package.
A worn-out battery, a battery with cracks or with signs of swelling or
leakage, shall be replaced immediately.
Note! Damaged or worn-out batteries are prohibited in air freight.

Copyright © Sigicom AB 2021
3
•Never incinerate, disassemble or expose the batteries in water.
•If the terminals of the battery are shorted, the battery may become very
hot and permanently damaged.
•Prepare your warehouse and charging sites according to Appendix C and
Appendix D.
•Use stand-alone chargers in a well-ventilated room, well away from
flammable material, open fire and electric sparks.
•If the battery case is penetrated, it may burn with open flame.
This equipment falls under the Waste Electrical and Electronic Equipment
Directive (WEEE directive) 2012/19/EU, category 9: monitoring and
control instruments:
•Scrapped equipment should be sent back to the manufacturer of
the equipment (Sigicom AB) for proper handling according to the
WEEE directive.
•Sigicom uses a certified local partner for recycling of scrapped
equipment.
The batteries used in this equipment falls under the Battery Directive
2006/66/EC:
•When the equipment is sold to customers in the European Union
(EU), except Sweden, the customer is the importer of the battery.
The customer must follow the rules and regulations as ratified by
each individual European Union member state; or send the
battery/equipment back to the manufacturer of the equipment
(Sigicom AB) for proper disposal.
•Swedish customers can recycle the battery in the national battery
collection system.
•Users outside the EU may send the batteries back to the
manufacturer of the equipment (Sigicom AB) for proper disposal.

Copyright © Sigicom AB 2021
4
Table of Contents
1. Introduction ........................................................................................7
1.1. INFRA System..........................................................................7
1.2. INFRA Point Vibration System ................................................7
1.3. INFRA Point Enclosure ............................................................8
1.3.1. Data logger ...........................................................................8
1.3.2. Sensor...................................................................................8
1.4. Unpacking and Parts Identification...........................................9
2. Product Description..........................................................................10
2.1. Data logger..............................................................................10
2.1.1. Keypad................................................................................11
2.1.2. Display................................................................................12
2.1.3. Batteries..............................................................................13
2.1.4. Antenna...............................................................................13
2.1.5. External Power Connector..................................................13
2.1.6. USB Connector (Mini-B Type) ..........................................14
2.1.7. SIM Cards...........................................................................16
2.1.8. Memory Card......................................................................17
2.2. Sensors....................................................................................18
2.3. Cables......................................................................................18
3. Measuring Parts................................................................................19
3.1. Measuring Hardware...............................................................19
3.1.1. Vibration Sensors ...............................................................19
3.1.2. Data logger .........................................................................19
3.2. Measuring Logic.....................................................................20
3.2.1. Measurement Standards......................................................20
3.2.2. Interval Measurements........................................................20
3.2.3. Transient Recording ...........................................................21
3.2.4. Overload Handling .............................................................21
3.3. Data Storage............................................................................22
3.3.1. Transient Data.....................................................................22
3.4. Additional Hardware...............................................................22
3.4.1. Humidity Sensor.................................................................22
3.4.2. GPS Receiver......................................................................22
4. Configuration and Installation..........................................................23
4.1. Configurations and Settings....................................................23
4.1.1. INFRA Net Communication Schedule ...............................23
4.1.2. Flight Mode ........................................................................23

Copyright © Sigicom AB 2021
5
4.1.3. Configuration Menu ...........................................................23
4.1.4. INFRA Net Messages.........................................................23
4.1.5. Factory Default Settings.....................................................24
4.2. Installation ..............................................................................24
4.2.1. Data logger .........................................................................24
4.2.2. Sensor.................................................................................25
4.3. Site Startup Check...................................................................25
5. Operation..........................................................................................26
5.1. Startup.....................................................................................26
5.2. Start Monitoring......................................................................26
5.2.1. Sensor Test .........................................................................27
5.3. Stop Monitoring......................................................................27
5.4. INFRA Net Communication ...................................................28
5.4.1. Automatic INFRA Net Communication.............................28
5.4.2. Manual INFRA Net Communication..................................28
5.4.3. More Communication Information.....................................29
5.5. Power Off................................................................................29
5.6. Power Lost ..............................................................................29
5.7. Removal and replacement of Li-Ion batteries:........................30
5.8. GUI Menu...............................................................................31
5.8.1. Monitoring config...............................................................31
5.8.2. Communication Mode ........................................................32
5.8.3. Clock Set ............................................................................33
5.8.4. Clock format.......................................................................33
5.8.5. USB Memory Interface Mode ............................................34
5.8.6. Firmware Upgrade..............................................................35
5.8.7. Errors and Warnings...........................................................38
5.8.8. Power Off and Reboot........................................................39
5.9. GUI Passcode..........................................................................40
5.10. INFRA Net Remote Control ...................................................41
5.10.1. Remote Firmware Upgrade.................................................42
5.10.2. Remote Reboot...................................................................42
5.10.3. Remote Shut Down.............................................................43
5.10.4. Remote Update GPS Position.............................................43
6. Other Functions ................................................................................44
6.1. Disable Communication..........................................................44
6.2. GPS position ...........................................................................44
6.3. GPS time synchronization.......................................................45

Copyright © Sigicom AB 2021
6
6.4. Time Synchronization through Internet ..................................45
6.5. Daylight Saving Time.............................................................46
7. Technical Specifications...................................................................47
7.1. General INFRA Point System.................................................47
7.2. Data logger..............................................................................48
7.3. Sensors....................................................................................48
8. Accessories.......................................................................................49
8.1. External Antennas...................................................................50
9. Maintenance and Calibration............................................................51
10. Contact and Support.........................................................................52
Appendix A. Battery Level Limits ..........................................................53
Appendix B. Li-Ion Battery Transport....................................................54
Appendix C. Safe Handling of Li-Ion Batteries......................................55
Appendix D. In Case of Li-Ion Battery Fire............................................56
Appendix E. Errors and Warnings ..........................................................57
Appendix F. Measurement Standards.....................................................58
Appendix G. Configure APN ..................................................................62
Appendix H. Enter SIM PIN code...........................................................63
Appendix I. Configure PPP authentication ............................................65
Developed and manufactured by:
Sigicom AB
Glasfibergatan 8
SE –124 45 Älvsjö, Sweden
Support: support@sigicom.com

Copyright © Sigicom AB 2021
7
1. Introduction
1.1. INFRA System
The INFRA field measurement system consists of rugged sensors which
sends data and status to INFRA Net, where it is processed, stored and
presented through a web interface. There are sensors which monitor
several important quantities at construction sites and infrastructure
projects, such as vibration, noise and dust etcetera.
All data is sent to INFRA Net, using the built-in cellular modem, at
various occasions:
•Monitoring is started or stopped.
•A trigger event has occurred.
•Another event has occurred, e.g. low battery warning.
•Manual communication is performed by the operator.
•At scheduled communication.
1.2. INFRA Point Vibration System
The INFRA Point unit is a data logger with one vibration sensor attached
by cable. The sensor can either be a single-axis type measuring in vertical
direction, or a triaxial type. The triaxial sensor is measuring in three
directions: vertical, longitudinal and transverse. The cable lengths can be
2, 5 or 15 meters (see section 8 Accessories). The data logger is polling
the sensor at initial startup and each measuring start to check for any
possible node loss.
The INFRA Point sensors contain the vibration sensor elements. The data
logger consists of analog measuring electronics, analog-digital converters,
an embedded microcontroller/DSP for digital signal processing etcetera, a
small color display, six-button keypad, memory card, cellular modem,
antennas and batteries. See section 3.1 for more details.
The INFRA Point unit requires INFRA Net for full remote-control
capability, data presentation, alarms/alerts configuration and setup, and

Copyright © Sigicom AB 2021
8
instrumentation settings. However, most instrument settings can be
handled directly at the unit using the keypad/display.
1.3. INFRA Point Enclosure
1.3.1. Data logger
INFRA Point data logger is built in a Peli™ case, which is extremely
robust and tough, and has a Gore-Tex membrane, pressure-equalizing vent
to keep the inside dry. This vent is waterproof even if the case is
completely submerged. When the case is opened, the front panel is also
waterproofed using O-rings and IPx6 specified keyboard buttons etc.
Data logger is further described in section 2.1.
1.3.2. Sensor
The enclosure is made of aluminum and includes:
•A horizontal hole for wall-mounting (M6 or ¼” bolt).
•A vertical hole for floor-mounting (M6 or ¼” bolt).
•Contains a digital id chip for calibration and traceability data.
The sensor is all molded, giving the following advantages:
•Reduced risk of sensor element (geophone) getting loose. Sensor
will be more robust.
•Built-in damping in the molding compound gives protection from
shock and high-frequency vibrations.
•Total volume and weight are reduced.
•Better sealing gives better moisture protection.
Sensor is further described in section 2.2.
Note! INFRA Point instruments are not intended to be submerged in
water.

Copyright © Sigicom AB 2021
9
1.4. Unpacking and Parts Identification
The INFRA Point system has been shipped in protective packaging.
Please keep this and use it when transporting your equipment.
Verify the package content with the following list:
•INFRA Point data logger.
•INFRA Point sensor (vertical or triaxial).
•Foam (protection during transportation) for both data logger and
sensor.
•Two (2) batteries.
Note! Because of shipping regulations, batteries are charged
below 30% state of charge at delivery.
•Calibration documents for both data logger and sensor.
Any damage or omission should be reported immediately to Sigicom.
Keep record of the instrument’s serial number. You will be asked to give
this number in any INFRA Point related communication you may have
with Sigicom.

Copyright © Sigicom AB 2021
10
2. Product Description
2.1. Data logger
Figure 1 Data logger
Note! Make sure that protecting plastic caps are attached to
connectors when not in use.
Antenna connector
Display
Battery
cover
Keypad
External power connector
USB connector
Sensor connector
Operator-panel

Copyright © Sigicom AB 2021
11
2.1.1. Keypad
A six-button keypad is placed on the right-hand side of the operator-panel.
Display ON / Exit / Cancel / Display OFF
Up / Increase
Down / Decrease
Monitoring start/stop
Communication status
Menu / Enter / Acknowledge / Activate
For more information about operation of the keypad and graphical user
interface, see chapter 5 Operation.
Note! The LED indicator (the white circle in the picture above) is only
used at firmware upgrade.

Copyright © Sigicom AB 2021
12
2.1.2. Display
A color display is used to show data and status. The start screen below
presents product type, serial number and firmware version.
Press any key, or wait for a few seconds, to proceed to the main screen:
The main screen is divided in five sections:
1. STATUS: FW-files available; Date and time; GPS time sync
enabled; external power; battery status and charging.
2. DATA: Measurement standard. Vibration data; interval (INTV)
or transient (EVT) value(s). Live value(s) = maximum over the
last three seconds.
3. MONITORING status.
4. GPS and COMMUNICATION status.
5. ERRORS and WARNINGS

Copyright © Sigicom AB 2021
13
See chapter 5 for more information about this.
2.1.3. Batteries
The power supply of the INFRA Point data logger has two Li-Ion batteries
and uses the battery with the highest voltage. The switch-over between the
batteries is automatic.
If the unit is firmly mounted, the batteries can be replaced one at the time
during normal operation without interrupting the measurement See the
safety section at the beginning of this manual for how to replace the
batteries. Voltage, current, temperature and a digital identity of both
batteries are monitored to ensure safe use and charging.
Note! Make sure that both batteries are inserted.
2.1.4. Antenna
INFRA Point normally uses a ½ wave antenna attached to its TNC
connector. The antenna connector is placed on the upper side of the data
logger, see
Figure 1.
2.1.5. External Power Connector
Input for a 12V power supply is supported. When the battery level is low,
the external power will charge the batteries
1
. For a complete charge, the
batteries must be removed from the instrument and charged separately.
The external power connector is located to the left on the bottom side of
the data logger, see
Figure 1.
Note! Use the plastic cap to protect the external power connector
when not in use.
1
Only charge up to 60% to extend battery life.

Copyright © Sigicom AB 2021
14
2.1.6. USB Connector (Mini-B Type)
The data logger has a Mini-USB connector, mainly used for maintenance.
INFRA Point is never powered through the USB interface. Do never
monitor vibrations with the USB connected.
The Mini-USB connector is located at the center on the bottom side of the
data logger, see
Figure 1.
When set through the graphical user interface, the memory card can be
accessible as a Windows drive via the USB interface. See section 5.8.5.
Firmware upgrade is normally performed remotely via INFRA Net but
may also be done via the USB interface. See section 5.8.6.
Note! Use the plastic cap to protect the USB connector when not in
use.

Copyright © Sigicom AB 2021
15
Figure 2 Position of memory card, SIM card and backup battery.
Insert with the cut corner first and to the right.
Note! The backup battery shall only be replaced by Sigicom
technician or agent.

Copyright © Sigicom AB 2021
16
2.1.7. SIM Cards
If activated when ordering, the embedded SIM card is used. This is pre-
configured for the customer.
If the customer needs to use their own SIM card, a mini-SIM card can be
inserted. The mini-SIM card must have an active “data plan”. The inserted
mini-SIM card will then be used instead of the embedded SIM card.
Figure 2 on page 15 shows where the SIM card is positioned.
Note! The PIN-code lock of the removable mini-SIM card must be
deactivated before use in INFRA Point. Contact your network provider
for pin-code lock deactivation.
When inserted, make sure that the SIM card is correctly positioned. Push
the card gently until it is fixed in place.
To loosen the card, push it slightly and it will pop out a bit. Then grasp it
with your fingers, a pair of tweezers or similar.
For activation or deactivation of the embedded SIM card, please contact
Sigicom support.
Note! The SIM card needs normally not be accessed manually.

Copyright © Sigicom AB 2021
17
2.1.8. Memory Card
The INFRA Point data logger uses a microSD memory card. It is used to
store recorded data, system logs and various status files to be
communicated to INFRA Net. No configuration data is saved on the
memory card. Figure 2 on page 15 shows where the memory card is
positioned.
File formats on the memory card are only compatible with the INFRA Net
server and are not described in this manual.
The memory card can be accessible as a removable drive via the USB
connector, see section 5.8.5.
If the memory card is unintentionally missing (or corrupt), an error
message will be displayed at start-up, see Appendix E.
When inserted, make sure that the memory card is correctly positioned.
Push the card gently until it is fixed in place.
To loosen the card, push it slightly and it will pop out a bit. Then grasp it
with your fingers, a pair of tweezers or similar.
Please contact Sigicom support for guidance regarding memory card
formatting or other memory card issues.
Note! Only use a memory card approved by Sigicom.

Copyright © Sigicom AB 2021
18
2.2. Sensors
The INFRA Point system can either be equipped with a vertical or a
triaxial sensor. The triaxial sensor is measuring in three directions:
vertical, longitudinal and transverse.
Figure 5 Triaxial sensor Figure 6 Vertical sensor
The sensors have no batteries inside. Only calibration parameters are
stored in the sensors’ memory. All other settings are stored in the data
logger.
Note! Only INFRA Point sensors may be used.
2.3. Cables
INFRA Point sensors may be attached with INFRA Point cables of
lengths 2, 5 or 15 meters, see section 8 Accessories. Several cables can be
joined to a maximum length of 30 meters.
Note! Only use specified INFRA Point cables.

Copyright © Sigicom AB 2021
19
3. Measuring Parts
3.1. Measuring Hardware
3.1.1. Vibration Sensors
The INFRA Point sensors uses geophones with a low frequency response
down to 4.5 Hz. The low frequency resonance of the geophones is
electrically dampened, and their characteristics are measured during
calibration and saved in the sensor’s calibration memory. This data is later
used as input for the digital frequency compensation used in some
measurement standards.
The analog geophone signal is then passed to the data logger through the
INFRA Point cable.
3.1.2. Data logger
Analog Electronics
An adjustable amplifier enhances the geophone signal according to the
selected measurement standard. The signal is then low pass filtered with
an analog filter to avoid aliasing. Then the signal passes through an
analog-digital converter and all subsequent signal processing is digital.
Analog-Digital Conversion
All sampling is performed at 4096 Hz. The analog-digital converter has a
16 bits resolution which, at measurements up to 250 mm/s (10 in/s) in the
largest range, provides a minimum resolution of 0.01 mm/s (0.0004 in/s).
In the display, the resolution of interval values is set to 0.05 mm/s (0.002
in/s) in this range.
Digital Signal Processing
The main processor of the INFRA Point data logger is a combined general
processor and a digital signal processor (DSP). The DSP part of the
processor filters, compensates and detects the signals according to the
selected measurement standard

Copyright © Sigicom AB 2021
20
Note! Some calibration parameters are stored in dedicated data logger
memory.
3.2. Measuring Logic
3.2.1. Measurement Standards
INFRA Point contains several pre-configured measurement standards,
used in different countries and for different types of measurements. More
standards may be added in future FW versions. Selection of appropriate
standard is done through INFRA Net or the graphical user interface.
Note! Remember to review all measurement settings after a change of
standard.
A more thorough description of the available measurement standards is
given in Appendix F.
3.2.2. Interval Measurements
INFRA Point processes the vibration signal through the filters and
detectors of the selected measurement standard. The interval value is the
maximum value of the processed signal within a selected interval time.
When the interval end time is reached, the maximum value is saved, and a
new interval is started. The timestamp of the interval is set to the interval
end time.
The interval time can be set to a value between 5 seconds and 20 minutes.
It is set through INFRA Net or the graphical user interface.
Other manuals for INFRA Point
1
Table of contents
Other Sigicom Measuring Instrument manuals
