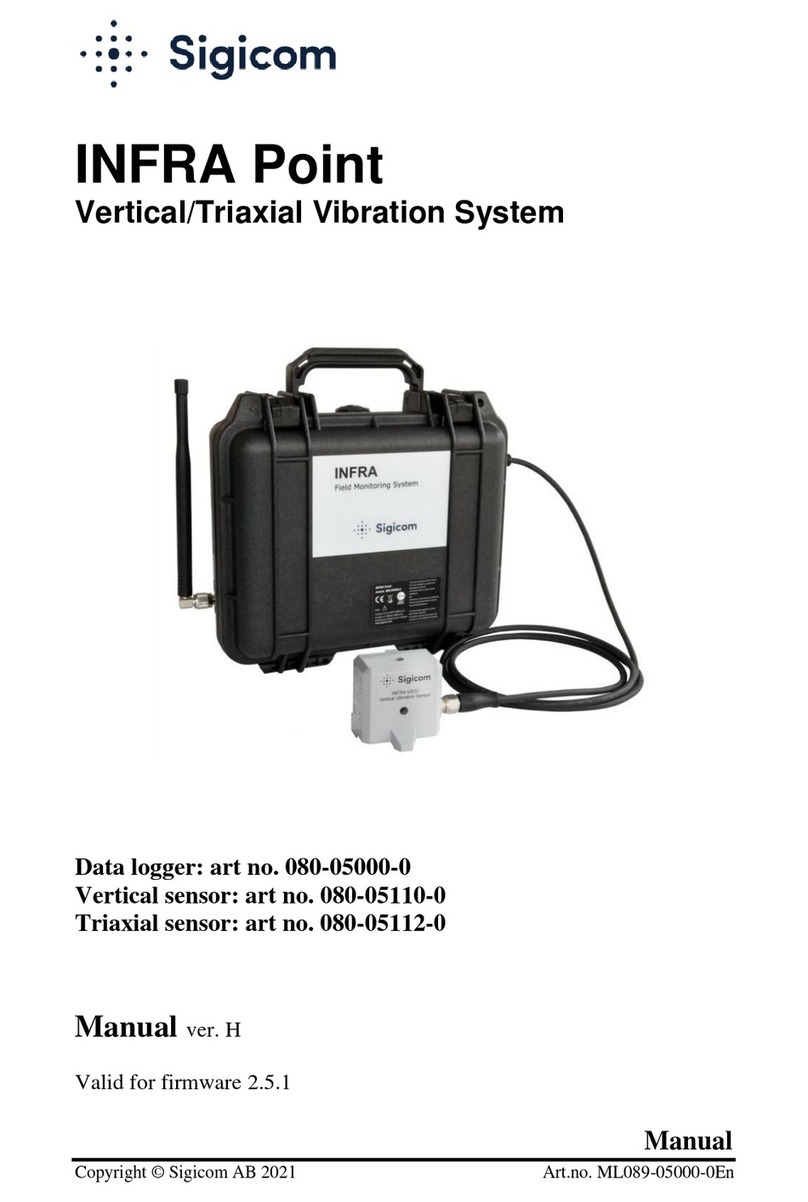
Sigicom INFRA V10 User manual

Manual
Copyright ©Sigicom AB Art.no ML089-0311x-0En
INFRA V10, V11 and
V12
Geophone
Art no. 080-03110-0,
080-03111-0 and
080-03112-0
Manual ver. I Valid for firmware version 2.2

Copyright ©Sigicom AB
1
Developed and manufactured by:
Sigicom AB
Alfred Nobels Allé 214
SE –146 48 Tullinge, Sweden
IMPORTANT SAFETY INSTRUCTIONS –read this before use.
US customers:
This device complies with Part 15 of the FCC Rules. Operation is
subject to the following two conditions:
(1) this device may not cause harmful interference, and
(2) this device must accept any interference received, including
interference that may cause undesired operation.
Canadian customers:
This Class B digital apparatus complies with Canadian ICES-003.
Cet appareil numérique de la classe B est conforme à la norme NMB-
003 du Canada.
EU customers:
This equipment complies with directives: EMC 2004/108/EC and
LVD 2006/95/EC.

2 Copyright ©Sigicom AB
Read instructions on electrical equipment waste before operating this
product.
This equipment falls under the Waste Electrical and Electronic
Equipment Directive (WEEE directive) 2002/96/EC with its last
update 2009, category 9: monitoring and control instruments:
Scrapped equipment should be sent back to the manufacturer of
the equipment (Sigicom) for proper handling according to the
WEEE directive.
Sigicom’s partner for recycling of scrapped equipment is Hans
Andersson Recycling Stockholm AB, with transport certificate
no. 562-1372-2012 (Länsstyrelsen i Stockholms län).

Copyright ©Sigicom AB
3
Table of Contents
1 Introduction.................................................................................................. 4
1.1 About this manual ......................................................................... 5
1.2 Features ......................................................................................... 6
1.3 Unpacking and parts identification................................................ 7
2General description................................................................................. 8
3Design features ....................................................................................... 9
3.1 Measurement standards................................................................. 9
3.2 Measurement Data......................................................................... 9
3.3 Display device............................................................................. 12
4Configuration and operation ................................................................. 13
4.1 Mounting..................................................................................... 13
4.2 Parameters................................................................................... 14
4.3 Quick Start V10 and V11 ............................................................ 22
4.4 Quick start V12 ........................................................................... 23
4.5 The LED...................................................................................... 24
5Consider this ......................................................................................... 25
6Post-processing of data ......................................................................... 26
7Maintenance and calibration................................................................. 26
8Accessories ........................................................................................... 27
8.1 Specific accessories: ............................................................................... 27
8.2 Other accessories: ................................................................................... 28
9Contact and support .............................................................................. 29
Appendix A Specifications ........................................................................... 30
A.1 Reference conditions (factory calibration)............................................. 30
A.2 Accuracy................................................................................................ 30
A.3 Overload handling.................................................................................. 31
A.4 Power consumption................................................................................ 31
A.5 Mechanical data ..................................................................................... 32
A.6 Approvals............................................................................................... 32
Appendix B Glossary.................................................................................... 33
Appendix C Standards .................................................................................. 34
Appendix D Example of using a weighting standard.................................... 43
Appendix E Removed standards................................................................... 47

4 Copyright ©Sigicom AB
1 Introduction
Welcome to INFRA V10, V11 and V12, Sigicom’s Geophones, built
for easy integration with the INFRA Field Monitoring System.
V10 measures vertically
V11 measures horizontally
V12 and V12R
1
measures in all three dimensions.
V1x will be used as the common term for all geophones V10, V11 and
V12/V12R.
The figure below shows an example of the INFRA Field Monitoring
System setup:
one V12 geophone
one Air blast microphone
one Sound level meter
one Datalogger (INFRA Master, Mini or Micro) which
stores and communicates data.
Example of a setup of the INFRA Field Monitoring System
1
V12 and V12R are equivalent, except that V12R shall be mounted on the ceiling. In this
manual the term V12 refers to both V12 and V12R.

Copyright ©Sigicom AB
5
There are a large number of available sensor types, and up to 16 nodes
can be connected to one Datalogger.
Note! V12 consists of three nodes. Maximum 16 nodes can be
connected to each Datalogger, however to ensure smooth operations it
is recommended not to exceed nine nodes per Datalogger. Therefore a
maximum of three V12s may be connected per Datalogger.
INFRA Net is used to post-process and analyze all measured data. For
a comprehensive description of the INFRA Monitoring System, please
consult:
INFRA Master User manual
INFRA Datalogger Reference manual
1.1 About this manual
This manual covers the following topics:
Chapter 1 –Introduction: Overview of V1x’s measurements
capabilities and some introductory information.
Chapter2 –General description: An overview of V1x and the
INFRA Field Monitoring System.
Chapter 3 –Design features: Description of standards,
parameter settings and measurement data files.
Chapter 4 –Configuration and operation: Mounting
description, and detailed description of V1x’s standards and
parameter settings. It also includes a Quick start guide and
how periodical testing is performed.
Chapter 5 –Consider this: Important information about
different environmental aspects.
Chapter 6 –Post-processing of data: How data is transferred
and processed in the INFRA Field Monitoring System.
Chapter 7 –Maintenance and calibration: Information about
calibration interval etc.
Chapter 8 –Accessories: Lists the accessories for V1x, and
V1x-related accessories for the INFRA Field Monitoring
System.
Chapter 9 –Contact and support: Contains contact
information to Sigicom AB.

6 Copyright ©Sigicom AB
1.2 Features
INFRA V1x Geophones measure vibration level in one or three
directions. They offer the following features:
Measures up to 250 mm/s (10 in/s).
Easy wall, floor or ceiling mounting.
Full integration with INFRA Field Monitoring System that
makes it possible to combine the geophone(s) with sound
level meter and a numerous of other sensor types.
Interval and transient data are recorded in the Datalogger and
can be automatically sent to the database via GPRS.
Selectable time interval of the interval data.
A trigger level for recording a transient of up to 40 seconds
duration, plus pre-trig (the one second prior to the trigger).
Possibility in post processing to apply frequency analysis of
transients.
Numerous of measurement standards are pre-programmed
into the sensor and can be selected as needed.
A LED indicates transient recording, overload and special
settings.

Copyright ©Sigicom AB
7
1.3 Unpacking and parts identification
Your INFRA V1x Geophone has been shipped in protective
packaging. Please keep the protective packaging for shipping your
device back to Sigicom when calibration is due.
Verify the package content with the following list:
V1x Geophone.
Foam (which protects your V1x from shock during
transportation).
Calibration Document.
Immediately report any damage or omissions to Sigicom.
Keep record of your instrument’s serial number. You will be asked to
give this number in any V1x related communication you may have
with Sigicom. Note! The V12 Geophone has three serial numbers, one
for each direction.

8 Copyright ©Sigicom AB
2General description
The V1x Geophone is a precision sensor to be integrated with INFRA
Field Monitoring System. It measures vibration level in the
dimensions:
V10 measures vertically
V11 measures horizontally
V12 measures in all three dimensions.
The V1x Geophone is to be connected to the INFRA Field Monitoring
System by any of the available INFRA Sensor Cables, which supplies
your V1x Geophone with both electrical power and all necessary
communication.
Within INFRA Field Monitoring System it is possible to measure a
number of parameters simultaneously in addition to the vibration level
measurements, for example:
noise level
air blast
dust (particle concentration)
wind speed and wind direction
rain intensity
air temperature
air humidity
atmospheric pressure
etc.

Copyright ©Sigicom AB
9
3Design features
3.1 Measurement standards
The V1x Geophone contains a number of pre-defined measurement
standards. Each of them filters the frequency curve according to the
selected standard. The standard also decides the level range. See
section 4.2.1 for a complete list of the standards that can be selected.
3.2 Measurement Data
Interval and transient data are recorded simultaneously within your
V1x Geophone, and will be stored by your connected Datalogger in
interval files and transient files, respectively. For traceability of the
registered data, all data files have an extensive header where all
necessary meta-data is saved, for example serial number and
calibration date, selected standard, threshold level etc.
3.2.1 Interval data
Interval data is normally the maximum vibration level over each time
interval and is sent to the Datalogger which saves it in an interval file.
The interval data are filtered according to the selected standard.
Instead of taking the maximum level of the measured values, some
standards calculate RMS value before extracting the maximum.
Attached to the saved data in the interval file, there is information
about overload, invalid data and registration status changes.

10 Copyright ©Sigicom AB
3.2.2 Transient data
The V1x Geophone records transient data after a trigger event. The
trigger event happens when any of the following is valid:
The vibration level becomes larger than the threshold level
(threshold must be active).
Another sensor connected to the same Datalogger triggers.
The operator of the Datalogger triggers manually.
The transient data is anti-alias filtered, but not further filtered
digitally. Instead, it is possible to apply any of the available standards
on the recorded transient in INFRA Net. Pre-trig is always 1 second,
and recording post-trig length is adjustable between 1 and 40 seconds.
Recording limitations:
The transient memory in V1x has a length of 42 seconds. If
the recording length is set longer than 20 seconds, each
recorded transient must be transferred to the Datalogger
before a new transient can be recorded. When the recording
length is maximum 20 s, the transient memory is split into
two or more transient files. This enables more than one
transient file to be recorded, without latency, before the V1x-
memory becomes temporarily full.
Transfer capabilities to the Datalogger are set to enable long
cables and low power consumption. Approximately 0.3 - 0.6
s of vibration level data are transferred per second. This
means for example that if you have set transient files to 40
seconds, there must be at least 70 seconds between the
transients for V10 and V11, and 3.5 minutes between the
transients for V12. Otherwise cannot transients be recorded
because the memory is occupied by the previous transient
(which is being transferred to the Datalogger).
NOTE! The transfer times above is per sensor which means
that you must multiply the times with the number of sensors
connected to the same Datalogger. A solution to this
limitation is to use more than one Datalogger.

Copyright ©Sigicom AB
11
3.2.3 Frequency detection and weighting
Certain standards have a second channel of interval data containing
the frequency of the maximal vibration level during the interval time.
Which standards having this second channel are written in the table of
International standards in section 4.2. These standards may also
include a number of frequency weighting models, which re-calculates
interval data according to the weighting algorithm:
1. Detect all zero crossings in the vibration level signal
2. For each zero crossing, calculate the frequency based on the
number of samples since last zero crossing
3. Depending of weighting model, recalculate the maximum
vibration level value within the half period
4. Check if the new weighted value is larger than last saved
maximum in the interval
Each weighting model recalculates the vibration level signal as stated
in its standard.
More facts about standards with weighting model:
Transient files are not affected by the weighting.
The trigger system uses weighted data, see a descriptive
example in Appendix D.
Note! The trigger event is delayed to the zero crossing after
the signal maximum.
Direct SMS messages from the Datalogger send weighted
vibration level values.
X85 Alarm Beacon uses weighted vibration level values for
the decision when to trigger an alarm.
LIVE, LAST and EVENT data
2
in the Datalogger display
shows weighted vibration level values.
Live mode in INFRA Net shows weighted vibration level
values.
The log file still contains the unweighted vibration level, and
considers only post-trig data.
2
LIVE (=current value), LAST (= last interval data) and EVENT (= transient data)

12 Copyright ©Sigicom AB
Description of how to select weighting model is described in section
4.2.5.
Note! The Vibration level / Frequency interval diagram in INFRA Net
is plotted with unweighted vibration level. This implies that the
vibration level values are “anti-weighted”, based on the frequency and
used weighting model before they are plotted.
3.3 Display device
Data is presented and post-processed by the web application
INFRA Net.

Copyright ©Sigicom AB
13
4Configuration and operation
4.1 Mounting
The V1x Geophone shall be mounted according to:
V10 shall be mounted either on the wall or on the floor, and
have the label parallel with the wall (readable from the side)
V11 shall be mounted either on the wall or on the floor, and
have the label parallel with the floor (readable from above)
V12 shall be mounted either on the wall or on the floor, and
have the label parallel with the floor (readable from above)
V12R shall be mounted in the ceiling and have the label
parallel with the ceiling (readable from below)
Note! For correct measuring results, the mounting angle of the V1x
Geophone must not exceed 5º relative to the reference plane.
Note! To facilitate proper communication in electrically harsh
environments, the metallic enclosure must not be in contact with any
kind of conductive surfaces (the sensor feet are isolated). All cable
junctions touching any metal or the ground shall be protected by
vulcanized tape.
Example of V10 and V12 Geophone mounting.

14 Copyright ©Sigicom AB
4.2 Parameters
4.2.1 International standard selection
The table below contains all available measurement standards included. As
new countries with their local measurement standards (blasting, human
comfort and sensitive equipment) are added, some standards exist on only
one of the defined sales regions:
NO: Nordic countries
EU: European countries (except the Nordic countries)
IN: All countries outside Europe
This is due for V12, from firmware version 2.0. V10 and V11 will
have the same standards as V12 for the Nordic countries (NO).
Explanations for the table below:
Frequency: Tells whether the standard has a second interval channel/file
with frequency values. 0.5Hz resolution.
Weighting: Standard can be set, or is permanently set, to use frequency
weighting of interval values and trigger levels. This is implemented in
different ways for the various standards.
Note! All filters mentioned below are implemented as time continuous digital
filters, calculated in real-time on each sample (4096Hz).
1. “No”
No extra filtering in the pass-band between the frequency limits stated
in the standard definition. Geophone compensation filters may exist
when the standard is stated to have its low frequency limit below the
natural resonance frequency of the geophone.
2. “ISO2631-2 type”
Used in human comfort standards only. Implemented by inserting a
high-pass filter (single pole at 5.6 Hz) prior to the RMS detector.
3. “Norwegian type”
Used in some Norwegian standards. Implemented by more complex

Copyright ©Sigicom AB
15
skewing filters prior to the peak/trigger detectors, as described in the
specific Norwegian standards (NS8141:2012 and NS8141:2013).
4. “Discrete frequency type”
These weighting characteristics needs to be implemented in another way
compared to the ones above, and are instead calculated using the
frequency and unweighted peak value, calculated after every zero
crossing.
Stan-
dard
Name
Fre-
quency
Weigh-
ting
Level
range
Frequency
range
Sales
region
S01
SS 4604866
Spräng
No
No
250
mm/s
5 –300 Hz
NO
S02
SS 4604866
Spräng
No
No
25 mm/s
5 –300 Hz
NO
S03
SS 025211
Schakt
No
No
25 mm/s
5 –150 Hz
NO
S05
SS 025211
Schakt
No
No
25 mm/s
2 –150 Hz
NO
S06
ISO 8569
Accel
No
No
25 m/s2
5 –300 Hz
All3
S07
SS 4604861
Komfort
RMS 1s
No
ISO2631-2
type
20 mm/s
1 –80 Hz
NO
S08
SS 4604861
Komfort
RMS 1s
No
ISO2631-2
type
700
mm/s2
1 –80 Hz
NO
S09
DIN 4150-2 KB
RMS 125ms
No
ISO2631-2
type
20 mm/s
1 –80 Hz
All
S11
DIN 4150-3
Anlage
No
No
250
mm/s
1 –315 Hz
NO
S12
DIN 4150-3
Anlage
No
No
25 mm/s
1 –315 Hz
NO
S15
ÖNORM S
9012
RMS 1s
No
ISO2631-2
type
700
mm/s2
1 –80 Hz
EU
3
All = NO + EU + IN

16 Copyright ©Sigicom AB
S16
ISO 8569
Accel
No
No
125 m/s2
5 –300 Hz
All
S17
ISO 10816-2
RMS 1 s
No
No
200
mm/s
5 –500 Hz
All
S18
DIN 4150-3
Anlage
Yes
Discrete
frequency
type
250
mm/s
1 –315 Hz
All
S19
DIN 4150-3
Anlage
Yes
Discrete
frequency
type
25 mm/s
1 –315 Hz
All
S20
NS8141
Byggverk
No
No
250
mm/s
5 –300 Hz
NO
S21
NS8141
Byggverk
No
No
25 mm/s
5 –300 Hz
NO
S22
NS8176
Komfort
RMS 1s
No
No
20 mm/s
1 –80 Hz
NO
S25
NS8141: 2013
No
Norwegian
type
250
mm/s
3 –400 Hz
NO
S26
NS8141: 2013
No
Norwegian
type
25 mm/s
3 –400 Hz
NO
S27
ISO2631-2
RMS 1s
No
ISO2631-2
type
20 mm/s
1 –80 Hz
All
S28
SN640 312a
Yes
Discrete
frequency
type
250
mm/s
5 –150 Hz
EU
S29
SN640 312a
Yes
Discrete
frequency
type
25 mm/s
5 –150 Hz
EU
S30
BS 7385
No
No
250
mm/s
1 –300 Hz
EU
S31
ISEE
Seismograph
Yes
No
10 in/s
2 –250 Hz
IN
S32
ISEE
Seismograph
Yes
No
1 in/s
2 –250 Hz
IN
S33
ANSI S2.71
RMS 1s
No
ISO2631-2
type
0.8 in/s
1 –80 Hz
IN
S35
AS 2187.2-2006
No
No
250
mm/s
2 –250 Hz
IN
S38
ÖNORM S
9020
No
No
250
mm/s
1 –315 Hz
EU

Copyright ©Sigicom AB
17
S39
ÖNORM S
9020
No
No
25 mm/s
1 –315 Hz
EU
S40
Arrêté du 1994
Yes
Discrete
frequency
type
250
mm/s
1 –150 Hz
EU
S41
ICPE-Circ86
Yes
Discrete
frequency
type
25 mm/s
1 –150 Hz
EU
S42
IN1226
Yes
Discrete
frequency
type
250
mm/s
1 –150 Hz
EU
S43
IN1226
Yes
Discrete
frequency
type
25 mm/s
1 –150 Hz
EU
S50
DIN4150-3
Anlage
No
No
5000
µm/s
1 –80 Hz
All
S53
Geophone
No
No
250
mm/s
5 –500 Hz
All
S54
Geophone
No
No
5000
µm/s
5 –500 Hz
All
The desired standard is selected using either:
Datalogger.
INFRA Net –Remote control.
Note! Each standard has its own unique parameter setting
Interval time
Threshold
Recording time
Customer string
meaning that they are set individually for each standard. When another
standard is selected, these parameters need to be reviewed.
Additional and updated standards may be added later through software
upgrades. For upgrade of software, the V1x Geophone must be sent to
Sigicom or other authorized agent. Some standards have been
removed, see Appendix E Removed standards.

18 Copyright ©Sigicom AB
4.2.2 Interval time
The interval time is the parameter that decides how often the
maximum value
4
is stored. The maximum value of each interval is
saved to an interval file. The interval time can be selected to any of the
values:
5, 6, 10, 15, 20, 30 seconds
1, 2, 4, 5, 6, 10, 15, 20 minutes
The default value of the interval time is 2 minutes.
4.2.3 Threshold
If the measured vibration level becomes larger than the
threshold level, a Trigger event happens, implying that the
measured signal is recorded in a transient file.
5
The threshold can be set to OFF, which means that the
threshold level has no effect on the system.
Even if threshold is set to OFF, other sensors within the same
INFRA system may trigger a recording on all sensors in its
INFRA system.
4.2.4 Record time
This is the length of the recorded transient file described in section
3.2. It can be selected to any of the values:
1, 2, 3, 4, 5, 6, 8, 10, 16, 20, 25, 30, 40 seconds
The default value is 2 seconds.
4
Velocity or acceleration
5
All sensor nodes connected to the same Datalogger will simultaneously start a
transient recording. This feature called bus trigger can be disabled.

Copyright ©Sigicom AB
19
4.2.5 Customer string
The Customer string is a four character string that can be changed.
The default string is “GEO “. The intention is here that you can use
this as a description of your measurement.
For some standards the last two characters in the Customer string are
used to set a weighting model of that standard, see the tables below.
The first two characters are free to use as you wish (marked with ** in
the tables).
Note! If the customer string is set to something else, no weighting is
performed. This is not due for Standard 40 (Arrêté du 1994), for
which weighting always is active.
Stan-
dard
Standard
name
Variant
Reference
frequency
Reference
level
Customer
string
S18,
S19
DIN 4150-3
Anlage
Zeile 1
<10 Hz
20 mm/s
**Z1
S18,
S19
DIN 4150-3
Anlage
Zeile 2
<10 Hz
5 mm/s
**Z2
S18,
S19
DIN 4150-3
Anlage
Zeile 3
<10 Hz
3 mm/s
**Z3
Stan-
dard
Standard
name
Variant
Reference
frequency
Reference
level
Customer
string
S28,
S29
SN640 3122a
Gele-
gentlich
<30 Hz
15 mm/s
**X1
S28,
S29
SN640 3122a
Häufig
<30 Hz
6 mm/s
**X2
S28,
S29
SN640 3122a
Perma-
nent
<30 Hz
3 mm/s
**X3
This manual suits for next models
2
Table of contents
Other Sigicom Measuring Instrument manuals
