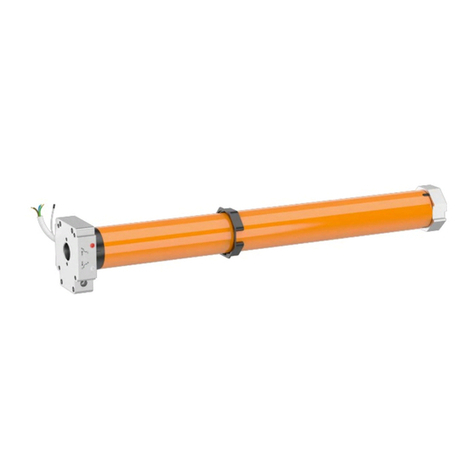
Silent Gliss 9060 Operation manual

User Information
Silent Gliss 9060 Motor –System 5600

Specifications
Motor
Operating temperature
range
0°C … + 60°C Unrestricted operation of rated data
-20°C …+ 70°C Storage
Protection class
IP40 Operation in dry rooms
Nominal voltage
100 … 250 VAC / 50 … 60 Hz
Max. Current
0.5 A @ 240V, 1.3 Amp @ 110V
Max. speed
160 min-1
Max. track lenght
25 m
Max. torque
2.4 Nm
Overview Connection and control elements
Low Voltage Switch Connections
Pin-outs
1
Common / +24V
2
Open - single
3
Close - single
4
Open - simultaneous
5
Close - simultaneous
6
GND
24V output –used for switching by volt-free / dry contact switching –refer to DIP switches below for
motor setting.
(Green)
(Yellow)

DIP-Switch settings
Key : 1 = on, 0 = off
Example : Standard default setting
1 -1 -1
| | |__Revolution 160 min-1 - On
| |_____ Touch & Go and Manual Override on
|_________ Latching - On
DIP-
Switch-
Position
Operation mode
1–X –X
latching
2
0–X –X
non latching
3
X –1–X
Touch & Go and Manual Override on
4
X –0–X
Touch & Go and Manual Override off
5
X –X –1
Revolution 160min-1
6
X –X –0
Revolution 120min-1
7
1–1–1
default setting
Integrated with Radio module SG 9063
9063 receiver module fitted

Limit Setting
If the 5600 you have ordered has been supplied in a single piece the end limits will
already be set, here if you need to adjust the limits follow the manual end stop
programming instructions.
If the 5600 you have received has been supplied in two or more parts then the limits
must be set.
Before the limits are set the follow the instructions for assembling the overlap arms
and fitting the connection bridge (see Installation and User Manual –section 9)
connecting the profile has been completed (refer to the installation and user manual),
here either method of setting the limits can be used.
The 5600 can have the limit / end stop positions can be set using one of two
methods –
1) Manual limit setting (end stop programming)
2) Automatic limit setting (end stop programming)
Procedures for these limit setting methods are listed on the following pages.

Overview of Connection and Control Elements on the 9060
motor
(View of the bottom of the motor)
Use White programming button M (manual) on overview above for manual limit
setting
Use green programming button A (automatic) on overview above for automatic
limit setting
(Green Button)
(White Button)
(Green)
(Yellow)

1. Manual Limit setting (White M button)
Using 0997 setting lead
(The yellow LED will light when a direction button
is pressed).
1. Push and hold button in the first direction until
desired end position is reached –then release.
(Minimum movement in first direction must
exceed 500 mm)
1
2
3
4
Plug in power
lead
5
Press white button for 1 second

2. Push and hold button for the opposite direction
until the second end position is reached- then
release.
3. Now push button in first direction and hold
until the movement stops automatically –then
release.
The yellow LED will now go out.
The motor is now ready for use.
Limits can also be set using the same procedure
with:
Standard mains test lead
Standard radio wall switch
Dry contacts
Hand held transmitter
8
7
6

2. Automatic limit setting (green A button)
1
2
3
4
5
6
7
3
Press green button for 1 second, the
green LED will flash
The motor will now set the
end limits automatically –
each limit set in sequence.
The motor is ready for use
when the green LED stops
flashing
Permanent
Power
10725 used
to enlarge
the stack
Remove
10725 card

The System is now ready for use if being switched from an external switch
If the motor has been supplied with a radio receiver this can now be assigned to the handset provided
–refer to the 9060 manual supplied.
Radio Control
Addressing 9940 Radio Control
Programming the transmitter –Quick guide
(Refer to transmitter device user manual for full programming details)
Requirement
The motor is installed on the track permanent power is applied as per wiring diagram E303.
Stand in front of the motor to be programmed for the addressing.
(It is recommended to set the motor limits at this stage.)
Step 1. With systems which have motors already been pre-installed,
turn the power off to the motor, and on again after 10 seconds.
The receiver is now in programming mode for approx. 5 minutes.
Step 2. Press the programming button P on the back of the transmitter / wall switch device briefly
(approx. 1 second) until the status display lights for a short time.
The overlap arm on the track will move open and close continuously (approx. 30 cm of movement in
each direction) for two minutes,
Step 3. Press the OPEN button immediately as the overlap arm starts moving in the Open direction
(within 1 second at the most). If captured the movement will pause briefly and then continue moving
again in the open direction.
Step 4. Press the CLOSE button immediately (within maximum 1 second) after starting close
direction, the overlap arm movement will now stop. The transmitter channel is programmed.
Step 5.Press stop button only for 6 seconds
Note
If the track does not stop its movement, it must be programmed again.
It is good practice here to perform a clear channel signal at this point by Pressing and holding the P
button and STOP button simultaneously for 6 seconds until the LED light around the stop button
flashed RED (this will clear any partially stored information).
Repeat the process above from Step 1 to address the channel to the motor.
(With the handset now in control of the motor, limits can be adjusted using the handset by
following the limit setting instructions for manual setting as per the fitting instructions)

Addressing 0450 Radio Control
Programming transmitters - Quick guide
Requirement
The motor is installed on the track and permanent power as per wiring diagram E303.
Stand in front of the motor to be programmed for the addressing.
A) Single Channel Wall Plate or Handset (refer to user manual for full instructions)
Step 1.
Set address on DIL switches in controller
Step 2. Place magnet (supplied with motor) in position over magnet sticker on receiver on the bottom
of the motor.
.
Step 3. When the magnet is placed in the correct position you will hear a continuous tone –leave in
place for 10 seconds until the tone pulses –remove magnet.
The receiver is now in programming mode for approx. 5 minutes.

Step 4.
LED flashes to confirm address signal sent
Press and hold both button for 5 seconds
Handset is now addressed
B) 8 Channel Wall plate (refer to user manual for full instructions)
Step 1.
Set address on DIL switches in controller
Step 2. Place magnet (supplied with motor) in position over magnet sticker on receiver on the bottom
of the motor
.

.
Step 3. When the magnet is placed in the correct position you will hear a continuous tone –leave in
place for 10 seconds until the tone pulses –remove magnet.
The receiver is now in programming mode for approx 5 minutes.
Step 4. Set by pressing Open
2nd press
Select channel 1st press
Channel is now addressed to the Motor
To reverse the direction of the motor –repeat the process above however in Step 4 - 2nd press
is close
C) 0939 Multi room / Multi channel handset –refer to manual 0939 Manual
Table of contents
Other Silent Gliss Engine manuals
