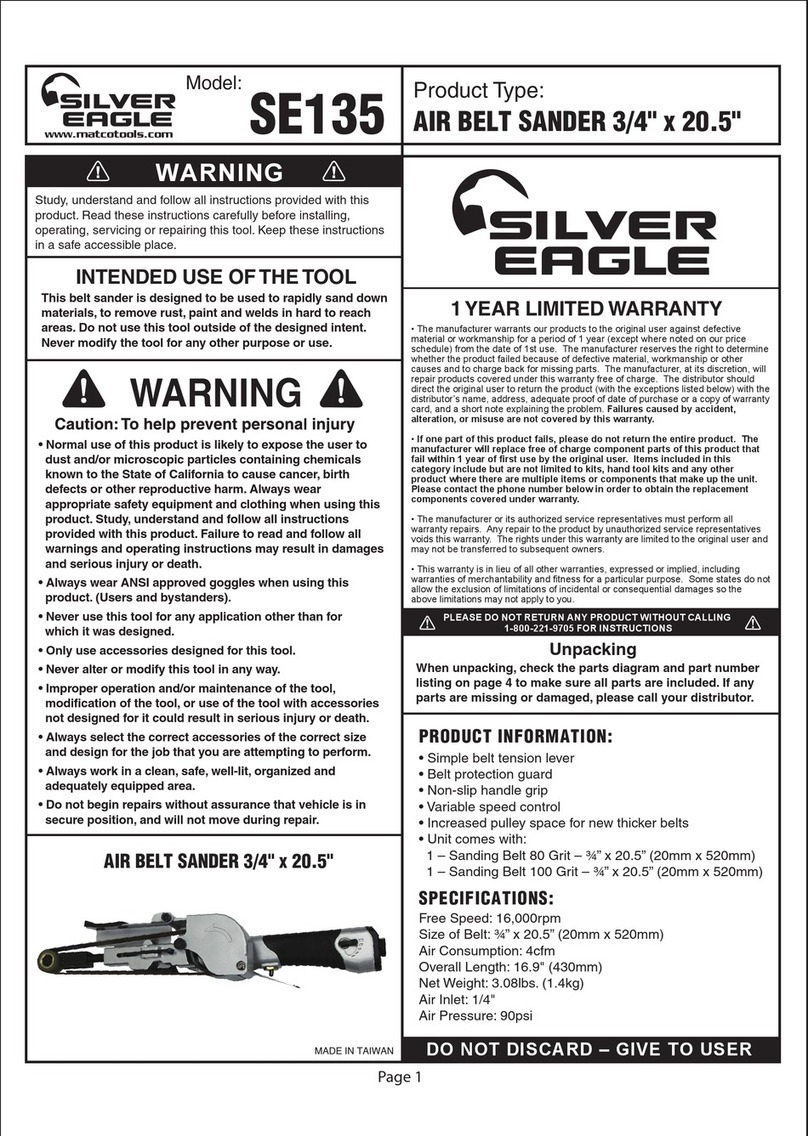
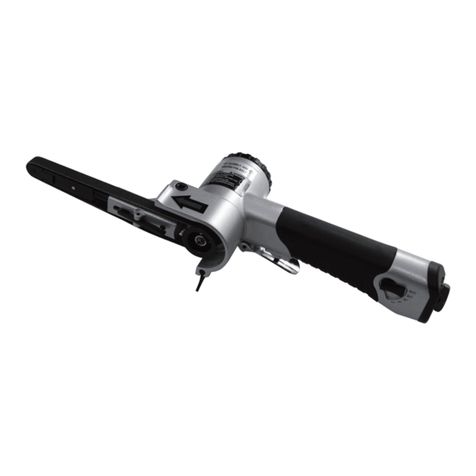
Silver Eagle SE240 User manual

DO NOT DISCARD – GIVE TO USER
WARNING
Page 1
www.matcotools.com
ProductType:
When unpacking, check the parts diagram and part number
listing on page 7 to make sure all parts are included. If any
parts are missing or damaged, please call your distributor.
UNPACKING
INTENDED USE OF THE TOOL
Caution: To help prevent personal injury
•Use of this product can expose you to chemicals including
ethylene glycol, gasoline vapors and engine exhaust, which
are known to the State of California to cause cancer, birth
defects, or reproductive harm. For more information, visit
www.P65Warnings.ca.gov. Always wear ANSI approved
safety equipment, safety glasses and clothing when using
this product. Study, understand, and follow all instructions
provided with this product. Failure to read and follow all
warnings and operating instructions may result in damages
and serious injury or death.
• Always wear ANSI approved goggles when using this
product. (Users and bystanders).
• Never use this tool for any application other than for
which it was designed.
• Only use accessories designed for this tool.
• Never alter or modify this tool in any way.
•Improper operation and/or maintenance of the tool,
modification of the tool, or use of the tool with accessories
not designed for it could result in serious injury or death.
• Always select the correct accessories of the correct size and
design for the job that you are attempting to perform.
• Always work in a clean, safe, well-lit, organized and
adequately equipped area.
•Do not begin repairs without assurance that vehicle is in
secure position and will not move during repair.
WARNING
PRODUCT INFORMATION
SPECIFICATIONS:
MADE IN TAIWAN
Model: SE240 AIR BELT SANDER 1/2" x 18"
AIR BELT SANDER 1/2" x 18"
• The manufacturer warrants products to the original owner
against defective material or workmanship for a period of 1
year (except where noted on our price schedule) from the
date of 1st use. The manufacturer reserves the right to
determine whether the product failed because of defective
material, workmanship or other causes and to charge back
for missing parts. The manufacturer, at its discretion, will
repair products covered under this warranty free of charge.
The distributor should direct the original owner to return the
product (with the exceptions listed below) with the
distributor’s name, address, adequate proof of date of
purchase or a copy of warranty card, and a short note
explaining the problem. Failures caused by accident,
alteration or misuse are not covered by this warranty.
• The manufacturer or its authorized service representatives
must perform all warranty repairs. Any repair to the product
by unauthorized service representatives voids this warranty.
The rights under this warranty are limited to the original
owner and may not be transferred to subsequent owners.
• This warranty is in lieu of all other warranties, expressed or
implied, including warranties of merchantability and fitness
for a particular purpose. Some states do not allow the
exclusion of limitations of incidental or consequential
damages so the above limitations may not apply to you.
1 YEAR LIMITED WARRANTY
1809269-14
Study, understand and follow all instructions provided
with this product. Read these instructions carefully
before installing, operating, servicing or repairing this
tool. Keep these instructions in a safe accessible place.
This belt sander is designed to rapidly sand down materi-
als and remove rust, paint and welds in hard to reach
areas. Do not use this tool outside of the designed intent.
Never modify the tool for any other purpose or use.
• Wide rubber coated roller drastically improves sanding belt life
without losing aggressiveness
• Simple belt tension lever
• Variable speed control
• Angle offset handle allows for accessing difficult to reach
spot-welds comfortably.
• Included in the kit:
1 - 36 Grit 1/2" x 18" (SE140-36B)
1 - 40 Grit 1/2" x 18" (SE140-40B)
1 - 60 Grit 1/2" x 18" (SE140-60B)
• Non-wearing steel roller assembly available (3037PAS)
Free Speed: 17,000RPM
Size of Belt: 1/2" x 18"
Air Consumption: 4.5cfm
Overall Length: 15.15" (385mm)
Net Weight: 1.87 lbs. (0.85kg)
Air Inlet: 1/4"
Air Pressure: 90psi

WARNING
MAINTENANCE INSTRUCTION:
1. The tool shall not be used in potentially explosive
atmospheres.
2. Disconnect the air hose before changing or adjusting
any inserted tools.
3. Before using tool, please confirm all couplings and
plugs are fixed securely. An air hose that is under
pressure may lash out when disconnected and could
lead to serious injuries.
4. Prevent loose clothes, long hair or any other
personal accessories from coming close to moving
parts to reduce the risk of being caught, trapped or
drawn into the rotating spindle.
5. Excessive high air pressure that exceeds the
maximum pressure may cause injuries to operator.
6. Exposure to strong vibration for extended time may
cause harm to operator.
7. Be aware of the rotation direction before starting the
tool to reduce hazardous situations due to
unexpected rotation direction.
8. WATCHYOUR STEP! Leaving excess hose
unattended near working area or walk path could
result in injury or death.
9. Wearing eye/face protection could reduce the danger
to operator from high speed splinters being emitted
from the tool or work surface.
10. Wearing correct breathing protection will help avoid
inhaling dust or debris from work process that can
be harmful to your health.
11. High sound levels can cause permanent hearing loss.
Use hearing protection while operating tool.
12. Due to the material being processed, there may be a
risk of explosion or fire. Be aware of work surface
dangers prior to beginning work.
13.There is a risk of being cut due to high speed
rotation. Do not touch high speed rotating belt.
14. This power tool is not insulated. If contact is made
with an electric current, injury may occur.
15. Dust created by sanding, sawing, grinding, drilling
and other related activities may expose the user to
dust and/or microscopic particles that may contain
chemicals known to the State of California to cause
cancer, birth defects or other reproductive harm.
Page 2
www.matcotools.com
ProductType:Model: SE240 AIR BELT SANDER 1/2" x 18"
1809269-14
1) LUBRICATION:
Before connection of the hose, apply 4 to 5 drops
of a good quality air tool oil at the air inlet. After 3
to 4 hours of operation, oiling may be necessary
again.
2) TIGHTNESS OF PARTS:
Regularly check whether all connection parts are
fastened securely. Follow this procedure daily
before beginning work.
3) STORAGE:
Avoid storing the tool in a location subject to high
humidity. If the tool is left unused, the residual
moisture inside the tool can cause rust. Before
storing and after operation, oil the tool at the air
inlet with a good quality air tool oil and run it for a
short period.
4) DISPOSAL:
Follow national legislation of waste disposal.
5) ORDERING SERVICE PART:
For further operational and handling information or
for replacement of parts and components, contact
the sales agent from where you purchased the tool
or the service division of our company.
* When ordering parts and components, give each
part number, name and quantities.
SANDING BELT REPLACEMENT INSTRUCTIONS:
WARNING
Always keep hands away from pulleys and disconnect air supply
before servicing this tool to prevent serious injury.
If the sanding belt is off center of the #1 idle pulley
during operation, an adjustment should be made for
safety and to prevent premature wear of the belt and
other tool parts. If the belt is running off center away
from the #20 shoe and #65 pulley assembly, turn
the #6 screw clockwise or counter-clockwise to adjust
the left/right alignment of the belt until it is centered
with the #65 pulley and not rubbing on guards.
1) Disconnect air supply from sander.
2) Push #65 idle pulley in the direction shown
in the photo below until tension bar automatically
locks into place.
3) Remove old belt, install new belt.
4) Push #23 lock lever in to unlock #8 tension bar and
the #65 idle pulley will automatically apply tension
to the belt.
SANDING BELT ALIGNMENT INSTRUCTIONS:

WARNING
The oil and water extractor should not be mounted on
or near the air compressor.
The temperature of air is greatly increased during
compression. As the air cools down to room
temperature, in the air line, on its way to the Air Power
Tool, the moisture contained in it condenses.
Thus, for maximum effectiveness, the oil and water
extractor should be mounted at some point in the air
SUGGESTED AIR LINE CONNECTION
Pitch pipe back toward air receiver
Compressor unit
Drain
Daily 25 FEET OR MORE
Oil and Water Extractor should be at least 25 ft. from the compressor. Further if possible.
Drain
Daily
Drain
Daily
Oil and Water
Extractor
Install drain at
each low point
PIPE SIZE, I.D. (Inches)
Air Flow
CFM
Length of Pipe (feet)
10
20
30
40
50
70
50
1/2"
3/4"
3/4"
1"
1"
1"
100
3/4"
3/4"
3/4"
1"
1"
1"
150
3/4"
3/4"
1"
1"
1"
1-1/4"
200
3/4"
1"
1"
1"
1-1/4"
1. This tool is intended for polishing and sanding
with a rotary movement using abrasive products of
appropriate material compositions and grits. Any
other use is forbidden.
2. Only use the polishing and sanding belts as
recommended by the belt manufacturer.
3. Ensure the maximum operating speed of the belt
is higher than the rated speed of the power tool.
4. Always wear ANSI approved ear protection and
safety glasses when using this tool. Gloves and
protective clothing are recommended.
5. Personal protection and dust collection devices
shall be chosen according to the material being
worked upon. Please consult provider of such
devices.
6. Release the start/stop lever in the case of air
supply loss.
7. Only use the lubricant recommended by the
manufacturer.
CAUTIONS FOR USE:
Users of this tool should review the chemical
composition of the work surface and any products
used in conjunction with this tool for any such
chemicals prior to engaging in any activity that
creates dust and/or microscopic particles.
Users should obtain the Material Safety Data Sheets
for all identified chemicals, whether from the
manufacturer or their employer, and proceed to study,
understand and follow all instructions and warning for
exposure to such chemicals.
Some examples of these chemicals are: lead from
lead-based paints; crystalline silica from bricks,
cement and other masonry products; and arsenic and
chromium from chemically treated lumber. A list of
the chemicals can be obtained at www.oehha.ca.gov
under Proposition 65.
In order to reduce their exposure to such chemicals
users should always:
- Work in well-ventilated areas.
- Wear appropriate safety equipment and clothes that
are specifically designed to filter our microscopic
particles.
Page 3
www.matcotools.com
ProductType:Model: SE240 AIR BELT SANDER 1/2" x 18"
1809269-14
supply system where the temperature of the compressed
air in the line is likely to be lowest. Air lines must be
properly drained daily. Each low point in an air line acts
as a water trap. Such points should be fitted with an
easily accessible drain. See diagram below. Pitch all air
lines back towards the compressor so that condensed
moisture will flow back into the air receiver where it can
be drained off. Drain daily.

• El uso de este producto puede exponerlo a productos
químicos queincluyen etilenglicol, vapores de gasolina y
gases de escape del motor, que en el estado de California
son causantes de cáncer, defectos de nacimiento o daños
reproductivos. Para obtener más información, visite
www.P65Warnings.ca.gov. Siempre use equipo de
seguridad aprobado por ANSI, gafas de seguridad y ropa
cuando use este producto. Estudie, comprenda y siga todas
las instruccio nes proporcionadas con este producto. Si no
lee y sigue todas las advertencias e instrucciones de
funcionamiento puede ocasionar daños y lesiones graves o
la muerte.
• Siempre use guantes del tipo aprobado por la ANSI para
trabajar con esta herramienta. (tanto usuarios como
espectadores).
• Nunca utilice esta herramienta para cualquier otra cosa
que no sean las aplicaciones para lo que fue diseñada.
• Sólo utilice los accesorios diseñados para esta herramienta.
• No modifique o altere esta herramienta de ninguna manera.
• El funcionamiento y/o mantenimiento inadecuado de la
herramienta, la modificación, o la utilización de la
herramienta con accesorios inadecuados podrían causar
lesiones graves o la muerte.
• Siempre usar los correctos accesorios para el trabajo que
Ud. está realizando.
• Trabaje siempre en un área limpia, segura, bien iluminada,
organizada y equipada adecuadamente.
• NUNCA empiece reparaciones sin estar seguro de que el
vehículo esté en posición segura y que no se mueva
durante la reparación.
Cuando desempaque el producto, revise el diagrama y la lista
de piezas en página 7 para verificar que se hayan enviado
todas las piezas. De perder piezas o tener piezas dañadas,
favor llamar a su distribuidor inmediatamente.
DESEMPACADO
ESPECIFICACIONES:
INFORMACIÓN DEL PRODUCTO
• El fabricante, Garantiza su producto solo al usuario original contra
materiales o mano de obra defectuosos por 1 año a partir de la
fecha del 1ra de uso. El fabricante se reserva el derecho a determi-
nar si el producto falló a causa de material defectivo, mano de
obra u otras causas y de vuelta a cargo de las piezas que faltan. El
fabricante a su discreción, sera reparar los productos cubiertos
bajo esta garantía de forma gratuita. El distribuidor debe dirigir el
usuario original para devolver el product (con las excepciones que
se enumeran a continuación) con el nombre del distribuidor,
dirección, una prueba de la fecha de compra o una copia de la
tarjeta de garantía, y una breve nota explicando el problema. Fallas
causadas por accidentes, alteración, o uso indebido no están
cubiertos por esta garantía.
• El fabricante o de sus representantes de servicio autorizado debe
realizer todas las reparaciones bajo garantía. Cualquier reparación
que el producto no autorizado por los representantes de servicio
los huecos de esta garantía. Los derechos bajo esta garantía están
limitados al usuario original y no podrán ransferirse a los propi-
etarios posteriores.
• Esta garantía es en lugar de cualquier otra garantía, expresa o
implícita, incluidas las garantías de comerciabilidad y adecuación
para un propósito en particular. Algunos estados no permiten la
exclusión de las limitaciones de daños incidentales o consecuen-
tes por lo que las limitaciones no pueden aplicarse a usted.
NO LO DESCARTE O DESECHE, ENTREGESELO AL USUARIO
ADVERTENCIA
Page 4
www.matcotools.com
Tipo de Producto:
APLICACIÓN DE LA HERRAMIENTA
Precaución: Para ayudar a evitar lesiones a las personas
ADVERTENCIA
HECHO IN TAIWAN
Modelo:
SE240 LIJADORA NEUMÁTICA
DE BANDA 1/2" x 18"
LIJADORA DE AIRE DE BANDA
MINI 3/8" x 13"
GARANTÍA A LIMITADA DE UN AÑO
1809269-14
Estudie, entienda y siga todas las instrucciones que se proveen
con este producto. Lea las instrucciones detenidamente antes
de instalar, operar, dar servicio o reparar esta herramienta.
Guarde estas instrucciones en un lugar seguro y accesible.
Esta lijadora de banda está diseñada para lijar materiales
rápidamente, eliminar el óxido, pintura y soldaduras en zonas
de difícil acceso. No utilice esta herramienta fuera de la
intención de su diseño. Nunca modifique la herramienta para
ningún otro propósito o uso.
• Nuevo rodillo recubierto de goma y más ancho que
mejora drásticamente la vida de la correa lijadora sin perder
su agresividad.
• Potente .5 HP motor
• Palanca simple de tensión de la banda
• Control de velocidad variable
• Espacio aumentado para las nuevas bandas de lijar más gruesas
• La unidad viene con:
1 - Banda lijadora de grano 36 - 1/2" x 18" (SE140A-36)
1 - Banda lijadora de grano 40 - 1/2" x 18" (SE140A-40)
1 - Banda lijadora de grano 60 - 1/2" x 18" (SE140A-60)
• Llantas de acero de larga duración disponibles (3037PAS)
Velocidad Libre: 17,000 RPM
Tamaño de la correa: 1/2" x 18"
Consumo Promedio de Aire: 4.5cfm
Longitud Total: 15.15" (385mm)
Peso Neto: 1.87 lbs. (0.85kgs)
Rosca de Entrada de Aire NPT: 1/4"
Presión de Aire: 90psi

INSTRUCCIONES DE MANTENIMIENTO:
1. La herramienta no serán utilizados en atmósferas
potencialmente explosivas.
2. Desconecte la manguera de aire antes de cambiar o
ajustar cualquier inserta herramientas.
3. Antes de utilizar la herramienta, por favor, confirmar
todos los acoplamientos y los tapones sefijan
firmemente. Manguera de aire que está bajo presión
puede atar a cabo cuando desconectado y podría dar a
lesiones graves.
4. Prevenir ropa suelta, pelo largo o cualquier otro personal
accesorios cercano a las piezas móviles para reducir el
riesgo de ser atrapados, atrapados o arrastrados a huso
de rotación.
5. El exceso de aire de alta presión, que supera el máximo
de presión puede causar daños al operador.
6. La exposición a vibracion fuerte para ampliar el tiempo
puede causar daños al operador.
7. Asegúrese de que la rotación de dirección antes de iniciar
la herramienta para reducir las situaciones peligrosas
debido a la inesperada dirección de rotación.
8. De deslizamiento/Viaje/Otoño es una de las principales
causas de lesiones graves o la muerte. Cuidado con el
exceso de manguera quetarse en el caminar o superficie
de trabajo.
9. Uso los ojos/la cara protector podría reducir el peligro
para la persona a partir de astillas de alta velocidad que
se emitirá a través de la herramienta o superficie de
trabajo.
10. Uso correcto de respiración de protección ayudará a
evitar la inhalación de polvo o manejo desechos de
proceso de trabajo que pueden ser perjudiciales para su
salud.
11. Alto nivel de sonido puede causar pérdida de audición
permanente. Utilice protección auditiva durante el
funcionamiento del instrumento.
12. Debido al material que se esté trabajando, puede haber
un riesgo de explosión o incendio. Ser conscientes de los
peligros superficie de trabajo antes de comenzar el
trabajo.
13. Existe el riesgo de ser cortada debido a la alta velocidad
de rotación. No toque de alta velocidad de rotación del
disco.
14. Esta herramienta de la potencia no es aislado. Si el
contacto es hecho con una corriente eléctrica, las lesiones
pueden ocurrir.
15. El polvo creado por el lijado, aserrado, trituración,
perforación y otras actividades conexas pueden exponer
al usuario a polvo y/o partículas microscópicas que
pueden contener productos químicos conocidos en el
Estado de California que causan cáncer, defectos de
nacimiento u otros daños reproductivos.
ADVERTENCIA
LIJADORA NEUMÁTICA
DE BANDA 1/2" x 18"
Page 5
www.matcotools.com
ProductType:Model: SE240
1809269-14
1) LUBRICACIÓN:
Antes conexión de la manguera, se aplican de 4 a 5 gotas de
una buena calidad del aire herramienta de petróleo en la
entrada de aire. Después de 3 a 4 horas de funcionamiento,
engrasar puede ser necesario otra vez.
2) LAS PIEZAS APRETADO:
Comprobar regularmente si todas las piezas de las conexión se
ata firmemente. Siga este procedimiento diariamente antes de
empezar a trabajar.
3) ALMACENAMIENTO:
Evite almacenar la herramienta en un lugar expuesto a alta
humedad. Si la herramienta no se utiliza es, la humedad
residual en el interior de la herramienta puede causar la roya.
Antes de guardar y después de la operación, el petróleo la
herramienta en la entrada de aire con una buena calidad de
aire aceite herramienta , y ejecutarlo para poco tiempo.
4) ELIMINACIÓN:
Siga la legislación nacional de eliminación de residuos.
5) ORDEN SERVICIO PIEZA:
Para más operativa y manejo la información o para la
sustitución de piezas y componentes, póngase en contacto con
el agente de ventas de donde adquirió la herramienta, o la
división de servicios de nuestra empresa.
* Al ordenar piezas y componentes, dar a cada
pieza del número, nombre, y las cantidades.
Polea
Palanca de tensión
ADVERTENCIA
Mantenga siempre las manos lejos de las poleas y desconecte el suministro
de aire antes de reparar esta herramienta para evitar lesiones graves.
INSTRUCCIONES PARA LA ALINEACIÓN DE
LAS LIJADORAS DE BANDA:
Si la correa de lijado no está centrada a la polea suelta
(o floja) #1 durante el funcionamiento, se debe hacer un
ajuste de seguridad para evitar el desgaste prematuro de la
correa y otras piezas de la herramienta. Si la correa está
funcionando fuera del centro de la zapata #20 y del ensamble
de la polea # 65, gire el tornillo #6 en sentido de las
manecillas del reloj o al contrario (como sea necesario) para
ajustar la alineación hacia la izquierda o la derecha de la
correa hasta que esté centrada con la polea # 65y no rozando
las orillas.
INSTRUCCIONES PARA LA SUSTITUCIÓN DE LA
CORREA O PAPEL LIJADOR
1) Desconecte el suministro de aire de la lijadora.
2) Presione la polea loca #65 en la dirección mostrada en
la foto de abajo hasta que la barra de tensión se atore
automáticamente en su lugar.
3) Quite la correa vieja e instale la nueva correa.
4) Empuje la palanca de bloqueo #23 para desbloquear la
barra de tensión #8 esto hara que automáticamente se
ajuste la tensión de la correa floja #65.

Los usuarios de esta herramienta debe examinar la
composición química de la superficie de trabajo y cualquiera
de los productos utilizados en conjunción con esta herra-
mienta para cualquiera de esos productos químicos antes de
dedicarse a cualquier actividad que crea el polvo y / o
partículas microscópicas.
Los usuarios deben obtener la Fichas de datos de seguridad
para todos los productos químicos identificados, ya sea del
fabricante o de su empleador, y proceder a estudiar,
entender y seguir todas las instrucciones y advertencias
para la exposición a esos productos químicos.
Algunos ejemplos de estos productos químicos son: el
plomo de las pinturas basadas en plomo; la sílice cristalina
de ladrillos, cemento y otros productos de albañilería, y
arsénico y cromo de madera tratada químicamente. Una
lista de los productos químicos pueden ser obtenidos en
www.oehha.ca.gov, virtud de Propositon 65.
Con el fin de reducir su exposición a esos productos quími-
cos los usuarios deben siempre:
- El trabajo en lugares de bien ventilados.
- Use equipo de seguridad y ropa que están específicamente
diseñados para filtrar fuera partículas microscópicas.
Diapasón cañería hacia el receptor de aire
Compresor unidad
25 PIES O MÁS
El aceite y el agua extractor debe ser de al menos 25ft. desde el compresor.
Además, si es posible.
Escurra diario
El aceite y el
agua extractor
Instalación de
desagüe en
cada punto bajo
TAMAÑO DE LA CAÑERÍA, I.D. (PULGADAS)
Flujo de
Aire
CFM
Longitud de la tubería (pies)
10
20
30
40
50
70
50
1/2"
3/4"
3/4"
1"
1"
1"
100
3/4"
3/4"
3/4"
1"
1"
1"
150
3/4"
3/4"
1"
1"
1"
1-1/4"
200
3/4"
1"
1"
1"
1-1/4"
Escurra diario
Escurra diario
1. Esta herramienta se destina vaivén de lijado y pulido con
todos los tipos de movimiento, por ejemplo rotativo,
orbital y alternati vos, utilizando productos abrasivos
revestidos y capós de los diversos materiales blandos y
un sinfín de cinturones. Cualquier otro uso está prohi-
bido.
2. Sólo se debe usar el pulido y lijado las pastillas según lo
recomendado por el fabricante de la cinturón.
3. Asegúrese de que el máx. velocidad de funcionamiento
de la cinturón es superior a la velocidad nominal de la
herramienta eléctrica.
4. Siempre use ANSI aprobado protección para los oídos y
la seguridad dlasses cuando se utiliza esta herramienta.
Guantes y ropa de protección, se recomienda.
5. Personal de protección y dispositivos de recolección de
polvo serán elegidos de acuerdo con el material a ser
trabajado. Por favor, consulte con el proveedor de dichos
dispositivo.
6. Suelte el inicio y el dispositivo de parada en caso de fallo
del suministro de energía.
7. Sólo se debe usar el lubricante recomendado por el
fabricante.
ADVERTENCIA
LIJADORA NEUMÁTICA
DE BANDA 1/2" x 18"
SUGIRIÓ CONEXIÓN DE LA LÍNEA AÉREA
PRECAUCIONES EN USO:
Page 6
www.matcotools.com
ProductType:Model: SE240
1809269-14
probable que sea el más bajo. Air Lines debe ser un sistema
adecuado de desagüe díario. Cada punto bajo en una línea
de aire actúa como una trampa de agua. Esos puntos
deberían estar provistos de un fácil de desagüe accesible.
Vea el diagrama abajo. Terreno de juego todas las líneas de
aire hacia el compresor para que la humedad condensada
fluya de vuelta en el receptor aire, donde él puede agotarse
fuera. Escurra diario.
El petróleo y el extractor de agua no debe ser montado en
o cerca del compresor de aire. La temperatura del aire se
aumenta enormemente durante la compresión. Como el aire
se enfría a temperatura ambiente, en la línea aérea, en su
camino al aire La herramienta con motor, la humedad
contenida en él se condensa. Por lo tanto, para lograr la
máxima eficacia, el aceite y el agua extractor debe montarse
en algún indicando el suministro de aire sistema en el que la
temperatura del aire comprimido en la línea es

PARTS BREAKDOWN
Page 7
www.matcotools.com
ProductType:Model: SE240 AIR BELT SANDER 1/2" x 18"
1809269-14
Parts List
3037-01
3037-02
3037-03
3037-04B
3037-05
3037-06
3037-07
3037-08
3037-09
3037-10
3037-12
3037-13
3037-14
3037-15
3037-16
SE240-17
3037-18
3037-19
3037-20
3037-21
3037-22
3037-23
1
2
1
1
1
1
1
1
1
2
1
1
1
1
1
1
1
1
1
1
1
1
3037-46
3037-47
3037-48
SE240-49
3037-50
3037-51
3037-52
SE240-53
SE240-54
SE140-36B
SE140-40B
SE140-60B
3037-61
3037-62
3037-63
3037-64
46
47
48
49
50
51
52
53
54
56
57
58
61
62
63
64
3037-24
3037-25
3037-26
3037-27
SE240-28
3037-29
3037-30
SE240-31
SE240-32
SE240-33
SE240-34
SE240-35
SE240-36
3037-37
3037-38
SE240-39
SE240-40
3037-41
3037-42
3037-43
3037-44
3037-45
24
25
26
27
28
29
30
31
32
33
34
35
36
37
38
39
40
41
42
43
44
45
1
1
1
1
1
1
1
1
1
1
5
1
1
1
1
1
1
1
1
1
1
1
Index Parts No. Description Qty Index Part No. Description Qty Index Part No. Description Qty
1
1
1
1
2
1
1
1
1
1
1
1
1
1
1
1
1
2
3
4
5
6
7
8
9
10
12
13
14
15
16
17
18
19
20
21
22
23
Idle Pulley
Ball Bearing (684zz)
Idle Pulley Screw
Bracket 12.5
Set Screw(M3x5)
Hexagon Socket Headless Set Screw
Spring
Tension Bar
Spring Pin ( 3×10)
Spring Pin ( 3×12)
Tension Spindle
Dead Hadle
Stopper Pin
Guard Bushing
Tension Spring
Guard Body
Head Cap Screw (M5×15)
Dust Cover
Shoe 12
Hexagon Socket Headless Set Screw
Stopper Spring
Stopper
Spring Pin ( 2.5×10)
Hexagon Nut (M6)
Washer (M6)
Drive Pulley
Housing
Ball Bearing(6000ZZ)
Front End Plate
Spacer
Rotor
Parallel Key Both Ends Round 4×4×9.5
Rotor Blade
Cylinder
Rear End Plate
Ball Bearing (608zz)
O-Ring(S38)
Cap
Throttle Lever
Spring Pin ( 3×20)
Valve Body
O-Ring (S011.2)
O-Ring(ID8.8x1.9)
O-Ring (ID3x1)
Valve Stem
O-Ring (P3)
Valve Spring
Air Regulator
O-Ring (P7)
Snap Ring
Muffler
Exhaust Diffuser
Inlet Bushing
Belt 12x18"(#36)
Belt 12x18"(#40)
Belt 12x18"(#60)
Washer
Hex. Wrench
Hex. Wrench
Pulley Cover
33
34 32
31
30
39
38
29
37
36
35
18
51
50
53
48
49
47
46
45
44
43
42
41
22 27
26
25
19
24
23
21
17
16
15
14
13
20
12
10
8
9
7
56
10
50
3
54
40
1
4
2
2
52
64
61
56, 57, 58
62
63 28
Table of contents
Languages:
Other Silver Eagle Sander manuals

Silver Eagle
Silver Eagle SE1100 User manual

Silver Eagle
Silver Eagle SE135 User manual

Silver Eagle
Silver Eagle SE240 User manual

Silver Eagle
Silver Eagle SE140A User manual

Silver Eagle
Silver Eagle SE230 User manual

Silver Eagle
Silver Eagle SE440 User manual

Silver Eagle
Silver Eagle SE730 User manual

Silver Eagle
Silver Eagle SE425 User manual

Silver Eagle
Silver Eagle SE130 User manual

Silver Eagle
Silver Eagle SE405 User manual