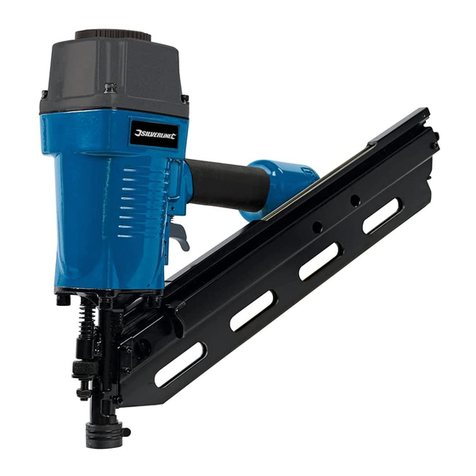
Silverline 955431 User manual

www.silverlinetools.com
955431
Air Finishing Nailer 64mm
16 Gauge
AIR
S
I
L
V
E
R
L
I
N
E
R
A
N
G
E
Air Finishing Nailer 64mm
Cloueuse pneumatique de
finition 64 mm
Druckluft-Stauchkopfnagler, 64 mm
Clavadora neumática 64 mm
Chiodatrice di rifinitura pneumatica, 64mm
Pneumatische spijkermachine, 64 mm
955431_Z1MANPRO1.indd 3 28/08/2013 09:51

2
Air Finishing Nailer 64mm
1
3
6
7
11
5
2
4
8
9
10
955431_Z1MANPRO1.indd 2 28/08/2013 09:51

www.silverlinetools.com 3
English .................. 4
Français ................ 10
Deutsch................. 16
Español ................. 22
Italiano .................. 28
Nederlands............ 34
®
Air Finishing Nailer 64mm
16 Gauge
AIR
S
I
L
V
E
R
L
I
N
E
R
A
N
G
E
955431_Z1MANPRO1.indd 3 28/08/2013 09:51

4
GB
Specification
Working pressure.......................5 - 7.5bar (72 - 108psi)
Maximum pressure....................7.5bar (108psi)
Air inlet......................................1⁄4" quick connector
Nail size.....................................16 Gauge, 25 – 64mm
Nail capacity.............................. 100pce
Weight....................................... 1.85kg
Sound and vibration information:
Sound pressure LPA.................... 87.0dB(A)
Sound power LWA ....................... 100.0dB(A)
Uncertainty K.............................2.5dB
Weighted vibration ah.................6.5m/s2
Uncertainty K.............................2m/s2
As part of our ongoing product development, specifications of
Silverline products may alter without notice.
The sound intensity level for the operator may exceed 85dB(A) and
sound protection measures are necessary.
Description of Symbols
The rating plate on your tool may show symbols. These represent important
information about the product or instructions on its use.
Wear hearing protection
Wear eye protection
Wear breathing protection
Wear head protection
Wear hand protection
Read instruction manual
Caution!
DO NOT use on scaffolding or ladders!
Important safety devices! Ensure correct function, maintain in
accordance with instructions and DO NOT disable!
DO NOT use with compressed gas cylinders!
Conforms to relevant legislation and safety standards
Environmental Protection
Air tools should not be disposed of with household waste. They
contain traces of oil and other lubricants. Please recycle where
facilities exist. Check with your local authority or retailer for
recycling advice.
- 25mm(1")
- 32mm(1-1⁄4")
- 35mm(1-3⁄8")
- 38mm(1-1⁄2")
- 45mm(1-3⁄4")
- 50mm(2")
- 57mm(2-1⁄4")
- 64mm(2-1⁄2")
Head: 3mm (0.118")
1.6mm x 1.4mm
(0.063") (0.055")
Gauge:16
Nail
Specification
955431_Z1MANPRO1.indd 4 28/08/2013 09:51

www.silverlinetools.com 5
955431 Air Finishing Nailer 64mm
WARNING: Always wear ear protection where the sound level exceeds
85dB(A) and limit the time of exposure if necessary. If sound levels are
uncomfortable, even with ear protection, stop using the tool immediately
and check the ear protection is correctly fitted and provides the correct level
of sound attenuation for the level of sound produced by your tool.
WARNING: User exposure to tool vibration can result in loss of sense of
touch, numbness, tingling and reduced ability to grip. Long term exposure
can lead to a chronic condition. If necessary, limit the length of time
exposed to vibration and use anti-vibration gloves. Do not operate the tool
with hands below a normal comfortable temperature, as vibration will have
a greater effect. Use the figures provided in the specification relating to
vibration to calculate the duration and frequency of operating the tool.
Sound and vibration levels in the specification are determined according
to EN60745 or similar international standards. The figures represent
normal use for the tool in normal working conditions. A poorly maintained,
incorrectly assembled, or misused tool, may produce increased levels of
noise and vibration. www.osha.europa.eu provides information on sound
and vibration levels in the workplace that may be useful to domestic users
who use tools for long periods of time.
General Safety
WARNING Read all safety warnings and all instructions. Failure to
follow the warnings and instructions may result in electric shock, fire and/
or serious injury.
WARNING: This appliance is not intended for use by persons (including
children) with reduced, physical or mental capabilities or lack of experience
or knowledge unless they have been given supervision or instruction
concerning use of the appliance by a person responsible for their safety.
Children must be supervised to ensure that they do not play with the
appliance.
Save all warnings and instructions for future reference.
1) Work Area Safety
a) Keep work area clean and well lit. Cluttered or dark areas invite
accidents.
b) Do not operate tools in explosive atmospheres, such as in the
presence of flammable liquids, gases or dust.
c) Keep children and bystanders away while operating a powered
tool. Distractions can cause you to lose control.
2) Personal Safety
a) Stay alert, watch what you are doing and use common sense when
operating a powered tool. Do not use a powered tool while you
are tired or under the influence of drugs, alcohol or medication.
A moment of inattention while operating a powered tool may result in
serious personal injury.
b) Use personal protective equipment. Always wear eye protection.
Protective equipment such as dust mask, non-skid safety shoes, hard
hat, or hearing protection used for appropriate conditions will reduce
personal injuries.
c) Prevent unintentional starting. Ensure the switch is in the off-position
when not operating the tool and make use of other safety features
which prevent unintentional starting.
d) Remove any adjusting key or wrench before turning the powered
tool on. A wrench or a key left attached to a rotating part of the tool
may result in personal injury.
e) Do not overreach. Keep proper footing and balance at all times.
This enables better control of the tool in unexpected situations.
f) Dress properly. Do not wear loose clothing or jewelry. Keep your
hair, clothing and gloves away from moving parts. Loose clothes,
jewelry or long hair can be caught in moving parts.
g) If devices are provided for the connection of dust extraction and
collection facilities, ensure these are connected and properly used.
Use of dust collection can reduce dust-related hazards.
WARNING: User exposure to tool vibration can result in loss of sense of
touch, numbness, tingling and reduced ability to grip. Long term exposure
can lead to a chronic condition. If necessary limit the length of time exposed
to vibration. Use the figures provided in the specification relating to vibration
if provided to calculate the duration and frequency of operating the tool.
The 2002/44/EC directive relating to vibration in the workplace may provide
useful information even for domestic use of tools. In the first instance of
feeling uncomfortable due to vibration STOP using the tool immediately.
WARNING: Always wear ear protection where the sound level exceeds
85dB(A) and limit the time of exposure if necessary. If sound levels are
uncomfortable even with ear protection stop using the tool immediately and
check the ear protection is correctly fitted and provides the right level of
sound attenuation for the level of sound produced by your tool.
3) Tool use and care
a) Maintain tools. Check for misalignment or binding of moving parts,
breakage of parts and any other condition that may affect the
tool’s operation. If damaged, have the tool repaired before use.
Many accidents are caused by poorly maintained tools.
b) Keep cutting tools sharp and clean. Properly maintained cutting tools
with sharp cutting edges are less likely to bind and are easier to control.
c) Use the tool’s accessories and tool bits etc. in accordance with
these instructions, taking into account the working conditions and
the work to be performed. Use of the tool for operations different from
those intended could result in a hazardous situation.
4) Service
a) Have your tool serviced by a qualified repair person using only
identical replacement parts. This will ensure that the safety of the tool
is maintained.
955431_Z1MANPRO1.indd 5 28/08/2013 09:51
6
GB
1Trigger
2Air Inlet / ¼" BSP Quick Connector
3Air Tool Oil
4Magazine Release Catch
5Magazine Cover
6Magazine Spring Mechanism
7Safety Catch
8Jam Removal Lever
9Depth Adjuster
10 Exhaust Direction Dial
11 Hex Keys
Product FamiliarisationAir Tool Safety
Protect your eyes
• Always wear safety goggles or safety glasses
Protect your hearing
• Always wear ear protection
Protection from vibration
• Hand-held air tools may produce vibration and should not be used for
long periods without a break. Vibration can cause ill health. Gloves may
help to maintain good blood circulation in the fingers.
Protective clothing
• Always wear appropriate protective equipment including but not limited
to overalls, gloves, face mask etc
• It is the user’s responsibility to ensure that other persons in the vicinity
of the work area are also equipped with the appropriate protective
equipment
Use the correct air hose
• Use lightweight hose to connect the tool to the air compressor
• Most air tools should be fitted with a coil hose.
Always disconnect
• Ensure that your air tool has completely stopped functioning before
putting it down
• Disconnect an air tool from the air supply before performing any
servicing, or changing any blades, discs, or other attachments
• Ensure blades, discs or attachments are correctly fitted before
reconnecting to air supply
• Ensure the air tool is switched OFF before connecting to air supply. Be
aware that air tools may hold residual pressure after use. Always bleed
air pressure from the tool after shutting off air supply
Do not abuse the machine
• Do not overload the machine. Allowing the machine to work at its
optimum speed is more efficient and prolongs its service life
• Do not increase air pressure above the recommended level; excessive
pressure leads to wear of moving parts, possible failure and may cause
the machine casing to split
• Do not attempt to modify air tools. Any attempt to modify this air tool
could result in serious injury to you or others, and will invalidate its
warranty
• Do not aim the nailer away from the workpiece when connected to an
air supply
Never operate the tool with the safety mechanism disabled
• Never aim the tool towards other people in the work area or towards the
main reservoir tank of the air compressor
Do not operate the nailer when using ladders or scaffolding
• Never connect this tool to canisters or bottles containing combustible
gases or portable compressed air canisters or cartridges. It is designed to
be used with an air compressor
955431_Z1MANPRO1.indd 6 28/08/2013 09:51

www.silverlinetools.com 7
Air Finishing Nailer 64mm955431
Unpacking Your Tool
Carefully unpack and inspect your tool. Familiarise yourself with all its
features and functions.
Ensure that all parts of the tool are present and in good condition. If any
parts are missing or damaged, have such parts replaced before attempting
to use this tool.
Before Use
Installing the quick connector
• Fit the Quick Connector (2) to the nailer.The connector is a screw fit
into the Air Inlet. Applying PTFE tape to the screw threads will help to
maintain an air tight seal. Air lines fitted with matching ¼" connectors
will now be a push fit
Recommended air supply
• This tool should be connected to a clean air supply with an in-line oiler
and water separator
• DO NOT allow supply pressure to exceed the maximum stated in the
specification
• Always select the lowest supply pressure suitable for the task. This will
reduce sound and vibration for the operator. It will also decrease wear
of the tool and the chance of tool failure
• Always use an air filter with the machine. Without an air filter, air is
likely to have a higher water content that will rapidly corrode the
internal working parts of this machine and will shorten its working life
significantly. Water collects in the compressor tank and will cause serious
corrosion. The tank must be drained on a daily basis to prevent water
build-up in the air supply
• Ensure all parts of the system (hoses, couplers, etc.) are correctly rated
for the air pressure to be used
• If an automatic oiler (as per diagram below) is not used, pour two drops
of air tool oil into the air inlet of the quick connector before each use
CAUTION: Only use oil formulated for air or pneumatic tools. Never
substitute other oils which may damage this tool and the compressor or are
not suitable for contact with the operator of the tool. DO NOT use 2-stroke
or automotive oil.
Checking the safety catch
WARNING: Always disconnect the tool from the air supply before any
adjustment or maintenance is carried out.
• Ensure that there are no fasteners in the magazine
• The Safety Catch (7) should move in and out with no obstruction
• Test the safety catch is operating correctly as follows:
1. Connect the tool to the air supply
2. Push the Safety Catch (7) against a piece of wood without pulling the
Trigger (1). The tool should not fire. If the tool fires, it must be repaired
before further use
3. Hold the tool away from the piece of wood. The Safety Catch (7) should
return to the original position
4. Pull the Trigger (1). The tool should not fire. If the tool fires, it must be
repaired before any further use
5. Push the Safety Catch (7) against the piece of wood, but this time pull
the Trigger (1). The tool should fire. This indicates normal operation
Loading the magazine
WARNING: Always disconnect the tool from the air supply before any
loading, adjustment, or maintenance is carried out.
1. Pull back the Magazine Spring Mechanism (6) so it locks by operating
the Magazine Release Catch (4)
2. Insert the strip of nails into the nail loading slot
3. Hold the magazine spring mechanism and operate the magazine
release catch to allow the spring mechanism to move back securing
the nails ready to be fired. Do not allow the spring mechanism to
instantly spring back but control the movement
TO YOUR
AIR TOOL
LEADER HOSE
NIPPLE
QUICK COUPLER
WATER SEPARATION
OILER
NIPPLE
REGULATOR
DRAIN DAILY
AIR SUPPLY
RECOIL HOSE
955431_Z1MANPRO1.indd 7 28/08/2013 09:51

8
GB
Operation
WARNING: Ensure your compressed air supply operates within the
pressure range stated in “Specifications”.
Firing trigger
• To operate the nailer, press the Safety Catch (7) against the material.
Holding the nailer firmly by its handle, squeeze the Trigger (1) to fire the
nail into the material
WARNING: Rapidly pressing the firing trigger could cause internal
damage and may invalidate the guarantee.
Exhaust
• Rotate the Exhaust Direction Dial (10) to direct the exhaust air away
from the operator
Nail depth adjustment
IMPORTANT: Always test the fastener will penetrate by the correct
amount.
1. Fire a test nail into a piece of scrap material and examine the
penetration depth of the nail
2. Minor adjustment is made using the Depth Adjuster (9) to adjust for
different size nails and different materials with finer control
3. Major adjustment of the nail depth is made by changing the air
supply pressure. Reducing the air supply pressure will reduce the
depth that the nail penetrates.
WARNING: Always ensure the air pressure is within the range stated in
the ‘Specifications’ section.
Clearing jams
WARNING: Always disconnect the tool from the air supply before any
adjustment or maintenance is carried out.
Fastener jammed in magazine
1. Pull back the Magazine Spring Mechanism (6) so it locks by the
Magazine Release Catch (4)
2. Remove the obstruction using pliers
3. Reload the magazine and close securely
Fastener jammed in plate area
1. Open the Jam Removal Lever (8) and open the nail plate.
2. Remove the obstruction using pliers
3. Close the plate and jam removal lever and check the operation of the
safety lever before using the tool
Maintenance
WARNING: Always disconnect the machine from the air supply before
carrying out any maintenance or cleaning.
Note: Two Hex Keys (11) are provided with this air nailer that are suitable
for partial disassembly of this unit. These may be useful for cleaning,
unjamming and replacing parts. Such disassembly is not covered by this
manual.
WARNING: Never use third party spares with this product. Only use spares
supplied by Silverline or an authorised Silverline stockist or repair centre.
• Keep your machine clean at all times. Dirt and dust will cause internal
parts to wear quickly, and could reduce its service life
• Clean the body of your machine with a soft brush, or dry cloth
• After each use, pour approximately 1.5ml of Air Tool Oil (3) into the Air
Inlet (2)
• If the tool stops working or only works intermittently, pour approximately
1.5ml of lubricating oil into the Air Inlet (2), and connect to air supply.
Operate the tool in short bursts. If this does not free the tool mechanism,
have the tool serviced at an authorised Silverline service centre
Storage
• Store this tool carefully in a secure, dry place out of the reach of children
Disposal
• As with other power tools, air tools should not be disposed of with
household waste
• Air tools may contain traces of tool oil and other lubricants and so must
be recycled accordingly
• Contact your local waste disposal authority for information on the correct
way to dispose of power tools
955431_Z1MANPRO1.indd 8 28/08/2013 09:51

www.silverlinetools.com 9
Air Finishing Nailer 64mm955431
CE Declaration of Conformity
The undersigned: Mr Darrell Morris
as authorised by: Silverline Tools
Declares that the
Identification code: 955431
Description: Air Finishing Nailer 64mm
Conforms to the following Directives:
• Machinery Directive 2006/42/EC
• EN 792-13:2000+A1:2008
Notified body: Intertek Testing Services, Shanghai, China
The technical documentation is kept by: Silverline Tools
Date: 13/08/13
Signed by:
Director
Name and address of the manufacturer:
Powerbox Ltd., Boundary Way, Lufton Trading Estate, Yeovil, Somerset,
BA22 8HZ, United Kingdom
Terms & Conditions
Silverline Tools Guarantee
This Silverline product comes with a 3 year guarantee
Register this product at www.silverlinetools.com within 30 days of purchase
in order to qualify for the 3 year guarantee. Guarantee period begins
according to the date of purchase on your sales receipt.
Registering your purchase
Registration is made at silverlinetools.com by selecting the Guarantee
Registration button. You will need to enter:-
• Your personal details
• Details of the product and purchase information
Once this information is entered your guarantee certificate will be created in
PDF format for you to print out and keep with your purchase.
Guarantee period becomes effective from the date of retail purchase as
detailed on your sales receipt.
PLEASE KEEP YOUR SALES RECEIPT
If this product develops a fault within 30 days of purchase, return it to the
stockist where it was purchased, with your receipt, stating details of the fault.
You will receive a replacement or refund.
If this product develops a fault after the 30 day period, return it to:
Silverline Tools Service Centre
PO Box 2988
Yeovil
BA21 1WU, UK
The guarantee claim must be submitted during the guarantee period.
You must provide the original sales receipt indicating the purchase date, your
name, address and place of purchase before any work can be
carried out.
You must provide precise details of the fault requiring correction.
Claims made within the guarantee period will be verified by Silverline Tools
to establish if the deficiencies are related to material or manufacturing of
the product.
Carriage will not be refunded. Items for return must be in a suitably clean and
safe state for repair, and should be packaged carefully to prevent damage or
injury during transportation. We may reject unsuitable or
unsafe deliveries.
All work will be carried out by Silverline Tools or its authorized
repair agents.
The repair or replacement of the product will not extend the period
of guarantee
Defects recognised by us as being covered by the guarantee shall be
corrected by means of repair of the tool, free of charge (excluding carriage
charges) or by replacement with a tool in perfect working order.
Retained tools, or parts, for which a replacement has been issued, will
become the property of Silverline Tools.
The repair or replacement of your product under guarantee provides benefits
which are additional to and do not affect your statutory rights as a consumer.
What is covered:
The repair of the product, if it can be verified to the satisfaction of Silverline
Tools that the deficiencies were due to faulty materials or workmanship
within the guarantee period.
If any part is no longer available or out of manufacture, Silverline Tools will
replace it with a functional replacement part.
Use of this product in the EU.
What is not covered:
Silverline Tools does not guarantee repairs required as a result of:
Normal wear and tear caused by use in accordance with the operating
instructions eg blades, brushes, belts, bulbs, batteries etc.
The replacement of any provided accessories drill bits, blades, sanding
sheets, cutting discs and other related items.
Accidental damage, faults caused by negligent use or care, misuse, neglect,
careless operation or handling of the product.
Use of the product for anything other than normal domestic purposes.
Change or modification of the product in any way.
Use of parts and accessories which are not genuine Silverline Tools
components.
Faulty installation (except installed by Silverline Tools).
Repairs or alterations carried out by parties other than Silverline Tools or its
authorized repair agents.
Claims other than the right to correction of faults on the tool named in these
guarantee conditions are not covered by the guarantee.
955431_Z1MANPRO1.indd 9 28/08/2013 09:51

10
F
Description des symboles
La plaque signalétique figurant sur votre outil peut présenter des symboles.
Ces symboles constituent des informations importantes relatives au produit
ou des instructions concernant son utilisation.
Port de protection auditive
Port de lunettes de sécurité
Port du masque respiratoire
Port du casque
Port de gants
Lire le manuel d’instructions
Attention!
Ne pas utiliser sur une échelle ou un échafaudage
Important : dispositif de sécurité ! Vérifier son bon
fonctionnement et bon état en accordance avec les
instructions, et NE PAS le désactiver
Ne pas utiliser avec des bouteilles à air comprimé
Conforme à la règlementation et aux normes européennes de
sécurité pertinentes
Protection de l’environnement
Les produits à air comprimé usagés ne doivent pas être jetés
avec les ordures ménagères. Veuillez les recycler dans les
centres prévus à cet effet. Pour de plus amples informations,
veuillez contacter votre municipalité ou point de vente.
Caractéristiques techniques
Pression de fonctionnement :..... 5 – 7,5 bar
Pression maximale :...................7,5 bar
Arrivée d’air :............................. raccord rapide 1⁄4"
Clous :....................................... Calibre 16 25 – 64 mm
Capacité : ..................................100 clous
Poids : ....................................... 1,85kg
Informations sur le niveau d’intensité sonore et
vibratoire :
Pression acoustique LPA :............87,0 dB(A)
Puissance acoustique LWA :.........100,0 dB(A)
Incertitude K : ............................ 2,5 dB
Vibration pondérée ah :............... 6,5 m/s2
Incertitude K : ............................ 2 m/s2
Du fait de l’évolution constante de notre développement produit,
les caractéristiques des produits Silverline peuvent changer sans
notification préalable.
L’intensité sonore peut dépasser 85 dB(A) et il est nécessaire que
l’utilisateur prenne des mesures de protection auditive.
- 25 mm (1")
- 32 mm (1-1⁄4")
- 35 mm (1-3⁄8")
- 38 mm (1-1⁄2")
- 45 mm (1-3⁄4")
- 50 mm (2")
- 57 mm (2-1⁄4")
- 64 mm (2-1⁄2")
Head: 3 mm (0.118")
1.6 mm x 1.4 mm
(0.063") (0.055")
Gauge:16
Caractéristiques
des fixations
955431_Z1MANPRO1.indd 10 28/08/2013 09:51

www.silverlinetools.com 11
955431 Cloueuse pneumatique de finition 64 mm
ATTENTION : Toujours porter des protections sonores lorsque le niveau
d’intensité est supérieur à 85 dB(A) et limiter le temps d’exposition si
nécessaire. Si l’intensité sonore devient inconfortable, même avec les
protections, arrêter immédiatement d’utiliser l’appareil, vérifier que les
protections soient bien mises et qu’elles soient adéquates avec le niveau
sonore produit par l’appareil.
ATTENTION : L’exposition de l’utilisateur aux vibrations peut engendrer une
perte du toucher, des engourdissements, des picotements et ainsi réduire
la capacité de préhension. De longues expositions peuvent également
provoquer ces symptômes de façon chronique. Si nécessaire, limiter le
temps d’exposition aux vibrations, et porter des gants anti-vibrations. Ne
pas utilisez cet appareil avec vos mains sous des conditions en dessous de
températures normales, car l’effet vibratoire en est accentué. Se référer au
cas de figures des caractéristiques relatives aux vibrations pour calculer le
temps et fréquence d’utilisation de l’appareil.
Les niveaux sonores et vibratoires des caractéristiques techniques
sont déterminés en fonction de la norme EN60745 ou autres normes
internationales. Ces données correspondent à un usage normale de
l’appareil, et ce dans des conditions de travail normales. Un appareil mal
entretenu, mal assemblé ou mal utilisé peut augmenter les niveaux sonores
et vibratoires. Pour plus d’informations sur la directive des émissions
sonores et vibratoires, visitez le site http://osha.europa.eu/fr.
Consignes générales de sécurité
AVERTISSEMENT Veuillez lire l’intégralité des consignes de sécurité et des
instructions. Le non-respect de ces consignes et instructions peut entraîner un
risque de choc électrique, d’incendie et/ou se traduire par des blessures graves.
ATTENTION : Cet appareil n’est pas conçu pour être utilisé par des
personnes (enfants compris) ayant des capacités physiques ou mentales
réduites, ou n’ayant pas la connaissance ou l’expérience requise, à moins
d’être sous la supervision d’une personne responsable de leur sécurité
ou d’avoir reçu les instructions nécessaires. Les enfants ne doivent pas
s’approcher et jouer avec cet appareil.
Veuillez conserver ces instructions et consignes de sécurité pour
référence ultérieure.
1) Sécurité sur la zone de travail
a) Maintenir une zone de travail propre et bien éclairée. Des zones
encombrées et mal éclairées sont sources d’accidents.
b) Ne pas utiliser d’outils dans des environnements explosifs, tels
qu’à proximité de liquides, de gaz ou de poussières inflammables.
c) Eloigner les enfants et les passants pendant l’utilisation d’un
appareil électrique. Ceux-ci peuvent provoquer une perte d’attention
et faire perdre la maîtrise de l’appareil.
2) Sécurité des personnes
a) Rester vigilent et faire preuve de bon sens lors de la manipulation
de l’appareil. Ne pas utiliser un appareil électrique lorsque l’on
se trouve dans un état de fatigue, ou sous l’influence de drogues,
d’alcool ou de médicaments. Un moment d’inattention pendant
l’utilisation d’un outil électrique peut se traduire par des blessures
graves.
b) Porter un équipement de protection approprié. Toujours porter
une protection oculaire. Le port de masque à poussières, chaussures
de sécurité antidérapantes, casque de sécurité et protections antibruit
adaptés aux différentes conditions de travail réduit le risque de
blessures corporelles.
c) Eviter tout démarrage accidentel ou intempestif. S’assurer que
l’interrupteur marche-arrêt soit en position d’arrêt lorsque l’appareil
n’est utilisé.
d) Enlever toute clé et tout instrument de réglage avant de mettre
l’appareil en marche. Une clé ou un instrument de réglage laissé fixé
à un élément en rotation de l’appareil électrique peut entraîner des
blessures physiques
e) Ne pas essayer d’atteindre une zone hors de portée. Se tenir
toujours en position stable permettant de conserver l’équilibre.
Cela permet de mieux contrôler l’appareil électrique dans des situations
inattendues.
f) Porter des vêtements appropriés. Ne pas porter de vêtements
amples ou des bijoux pendants. Eloigner cheveux, vêtements et
gants des pièces en mouvement. Les vêtements amples, les bijoux
pendants et cheveux longs peuvent être happés par les pièces en
rotation
g) Si l’appareil est pourvu de dispositifs destinés au raccord
d’équipements d’extraction et de récupération de la poussière/
sciure, s’assurer qu’ils soient bien fixés et utilisés correctement.
L’utilisation de ces dispositifs peut réduire les risques dus à la
poussière.
ATTENTION : L’exposition de l’utilisateur aux vibrations d’un outil peut
engendrer la perte de sens du toucher, des engourdissements, picotements
et réduire la préhension de l’appareil. Des expositions prolongées peuvent
engendrer l’apparition chronique de ces symptômes. Si nécessaire,
réduisez le temps d’utilisation de l’outil. Utilisez les cas de figure avec
les caractéristiques relatives aux vibrations, si données, pour calculer la
durée et la fréquence de l’utilisation de l’appareil. Les normes directives
2002/44/CE relatives aux vibrations sur le lieu de travail peuvent fournir
des informations pratiques même pour un usage domestique. Si dans
un premier temps vous commencez à sentir inconfortable à cause des
vibrations, ARRÊTER immédiatement l’utilisation de l’appareil.
ATTENTION : Toujours porter des protections auditives lorsque le niveau
sonore excède 85 dB(A) et limiter le temps d’exposition. Si les niveaux
sonores ne sont pas assez atténués avec un casque anti-bruit arrêter
l’utilisation de l’appareil, et vérifiez bien que la protection sonore soit bien
appropriée par rapport au niveau sonore.
3) Utilisation et entretien des appareils
a) Entretien des appareils. Vérifier que les éléments rotatifs
soient bien alignés et non grippés. S’assurer de l’absence de
pièces cassées ou endommagées susceptibles de nuire au bon
fonctionnement de l'appareil. Si l’appareil est endommagé, le faire
réparer avant toute utilisation. De nombreux accidents sont dus à un
mauvais entretien d’un outil.
b) Veiller à ce que les outils de coupe soient tenus affûtés et propres.
Des outils de coupe bien entretenus, aux tranchants bien affûtés, sont
moins susceptibles de se gripper et sont plus faciles à contrôler.
c) Utiliser l’appareil, les accessoires et outils à monter conformément
à ces instructions, en tenant compte des conditions de travail et de
la tâche à réaliser. Toute utilisation d’un appareil autre que celle pour
laquelle il a été conçu peut entraîner des situations à risque.
4) Révision
a) Ne faire réparer votre appareil électrique que par un réparateur qualifié
utilisant uniquement des pièces de rechange identiques.
955431_Z1MANPRO1.indd 11 28/08/2013 09:51

12
F
1Gâchette
2Arrivée d’air, raccord rapide BSP ¼"
3Réservoir d’huile pour appareil à air comprimé
4Ouverture/fermeture du magasin
5Couvercle du magasin
6Mécanisme à ressort du magasin
7Système de sécurité
8Levier anti-bourrage
9Molette de réglage de la profondeur
10 Sortie d’air orientable
11 Clés à six pans
Se familiariser avec le produitConsignes de sécurité relatives
aux outils pneumatiques
Protégez vos yeux
• Portez toujours des lunettes de sécurité.
Protégez votre ouïe
• Portez toujours des protections auditives.
Protégez-vous des vibrations
• Les outils électriques portatifs produisent des vibrations et ne doivent pas
être utilisés pendant de longues périodes sans marquer de pause. Les
vibrations peuvent provoquer des maladies. En conservant la chaleur, des
gants portés par l’utilisateur peuvent permettre de maintenir une bonne
circulation sanguine dans les doigts.
Portez un équipement de protection
• Portez toujours un équipement de protection adapté, comprenant entre
autres une combinaison de travail, des gants, un masque, etc.
• Il est de la responsabilité de l’utilisateur de s’assurer que toute personne
se trouvant à proximité de la zone de travail soit également pourvue d’un
équipement de sécurité approprié.
Utilisez un tuyau flexible d’air comprimé adapté
• Utilisez des tuyaux flexibles légers pour raccorder l’outil au compresseur
d’air.
• La plupart des outils pneumatiques demandent l’utilisation d’un flexible
serpentin ; les flexibles droits ne doivent être employés qu’avec les
pistolets pulvérisateurs.
Débranchez l’outil avant tout changement
• Assurez-vous toujours que votre outil pneumatique se soit complètement
arrêté de fonctionner avant de le déposer.
• Débranchez toujours l’outil de l’alimentation en air comprimé avant tout
travail d’entretien, de réparation ou avant de changer lames, disques et
autres accessoires.
• Assurez-vous que les lames, les disques ou les accessoires soient
correctement installés avant de rebrancher l’appareil à l’alimentation en
air comprimé.
• Assurez-vous toujours que votre outil pneumatique soit en position
éteinte avant de le brancher à l’alimentation en air comprimé. Sachez
que les outils pneumatiques peuvent conserver une pression résiduelle
après utilisation. Purgez toujours la pression d’air de l’outil après avoir
fermé l’alimentation en air comprimé.
Ménagez l’appareil
• Ne surchargez pas l’appareil. En laissant l’appareil fonctionner à sa
vitesse optimale, vous prolongerez sa durée utile et bénéficierez d’un
meilleur rendement.
• N’employez pas une pression d’air comprimé supérieure au niveau
recommandé. Une pression excessive peut entraîner une usure précoce
des pièces en rotation et favoriser les dysfonctionnements. Elle peut
également conduire à une fissure du carter.
• Ne tentez pas de modifier un outil pneumatique. Toute tentative de
modification de votre outil pourrait entraîner des blessures graves sur
vous-même ou les personnes se trouvant autour de vous et annulera
sa garantie.
• Ne dirigez pas l’appareil que vers la pièce de travail, lorsqu’il est branché
sur sa source d’air comprimé.
N’utilisez pas l’appareil si le système de sécurité est désactivé
• Ne dirigez jamais l’appareil vers d’autres personnes aux alentours de la
surface de travail ou vers le réservoir d’air comprimé.
N’utilisez pas l’appareil lorsque vous êtes sur une échelle ou un
échafaudage.
• N’utilisez jamais cet appareil avec des réservoirs contenant des gaz
combustibles, ou des réservoirs et cartouche d’air comprimée. Cet
appareil est iniquement conçu pour être utilisé avec un compresseur.
955431_Z1MANPRO1.indd 12 28/08/2013 09:51

www.silverlinetools.com 13
955431 Cloueuse pneumatique de finition 64 mm
COUPLEUR OUTIL
PNEUMATIQUE
TUYAU DE
RACCORDEMENT
RACCORD
RACCORD RAPIDE
SÉPARATION DE L’EAU
GRAISSEUR
MAMELON
RÉGULATEUR
A PURGER
QUOTIDIENNEMENT
ALIMENTATION EN
AIR COMPRIMÉ
FLEXIBLE SERPENTIN
Déballage
Déballez le produit avec soin. Veillez à retirer tout le matériau d’emballage
et familiarisez-vous avec toutes les caractéristiques du produit.
Si des pièces sont endommagées ou manquantes, faites-les réparer ou
remplacer avant d’utiliser l’appareil.
Avant utilisation
Installer le connecteur rapide
• Branchez le raccord rapide (2) sur la cloueuse en le vissant sur l’arrivée
d’air . Appliquez une bande de PTFE sur le filetage pour conserver une
meilleure étanchéité. La ligne d’air se fixe en l’enfilant sur le raccord ¼’’.
Branchement de l’alimentation en air comprimé
• Cet outil doit être branché à une alimentation en air comprimé propre et
sec, pourvue d’un graisseur en ligne et d’un séparateur d’eau.
• Ne laissez pas la pression d’alimentation dépasser la pression maximale
spécifiée. (Voir caractéristiques techniques).
• Choisissez toujours la pression d’air la plus basse adéquate à votre
tâche. Cela permet de réduire l’intensité sonore et les vibrations pour
l’utilisateur, ainsi que de réduire l’usure de l’outil.
• Utilisez toujours un filtre à air. Sans filtre à air, l’air humide et impropre
corrodera les éléments internes de l’outil et réduira considérablement
leur durée de vie. De l’eau s’accumule dans le réservoir du compresseur
et par conséquent ceci présente un grand risque de corrosion. Le
réservoir doit être purgé quotidiennement pour éviter une accumulation
d’eau dans l’air.
• Veillez à ce que toutes les parties du système (conduites souples,
raccords, etc.) soient d’une catégorie adaptée à la pression d’air utilisée.
• Si le graisseur automatique n’est pas utilisé (voir le schéma ci-dessous),
versez deux gouttes d’huile d’appareil pneumatique dans l’évent du
connecteur rapide avant chaque usage.
ATTENTION : Utilisez uniquement une huile pour outils à air comprimé.
Utiliser des huiles différentes peut endommager l’appareil et le
compresseur et peut être dangereux pour l’utilisateur. N’UTILISEZ PAS
d’huile 2 temps ou de l’huile automobile.
Vérification du système de sécurité
ATTENTION: avant de régler ou d’entretenir l’outil, débranchez-le toujours
de l’alimentation en air comprime.
• Assurez-vous qu’il n’y a aucun consommable dans la recharge.
• Le système de sécurité (7) devrait pouvoir entrer et sortir librement sans
aucune obstruction
• Pour tester le fonctionnement correct du système de sécurité :
1. Branchez l’outil à l’alimentation en air comprimé
2. Appuyez le système de sécurité (7) sur un morceau de bois sans
appuyer sur la gâchette (1). L’outil ne doit pas tirer pour enfoncer un
consommable. Si l’outil tire, il faut le faire réparer avant de l’utiliser
à nouveau
3. Soulevez l’outil du morceau de bois. Le système de sécurité (7) devrait
revenir dans sa position initiale
4. Appuyez sur la gâchette (1). L’outil ne doit pas tirer pour enfoncer de
consommable. Si l’outil tire, il faut le faire réparer avant de l’utiliser
à nouveau
5. Appuyez le système de sécurité (7) sur un morceau de bois, mais cette
fois appuyez sur la gâchette (1). L’outil devrait tirer pour enfoncer un
consommable. Ceci indique un fonctionnement normal.
Remplir le magasin
ATTENTION: Toujours débrancher l’appareil de sa source d’alimentation en
air avant de remplir le magasin
1. Tirez sur le mécanisme à ressort du magasin pour verrouiller le loquet
de verrouillage/déverrouillage du magasin.
2. Insérer la bande de clous dans la fente prévue à cet effet
3. Maintenez le mécanisme à ressort du magasin et activez le loquet (4)
pour permettre au mécanisme à ressort de revenir vers l’arrière tout
en sécurisant les clous pour être tirés. Ne laissez pas le mécanisme à
ressort revenir d’un seul coup, mais contrôlez son mouvement.
955431_Z1MANPRO1.indd 13 28/08/2013 09:51

14
F
Instructions d’utilisations
ATTENTION : Assurez-vous que votre alimentation en air comprimé
fonctionne avec la pression requise pour cet appareil. Voir les
caractéristiques techniques.
Tirer sur la gâchette
• Pour utiliser la cloueuse, appliquez le système de sécurité (7) contre le
matériau. Maintenez la cloueuse fermement par la poignée, et appuyez
bien sur la gâchette (1) pour tirer le clou et qu’il s’enfonce dans le
matériau.
ATTENTION : Appuyer rapidement et brièvement sur la gâchette peut
entrainer un endommagement interne et invalider la garantie.
Echappement de l’air comprimé
• En tournant l'ouverture de sortie d’air (10), l'air d'échappement peut
être orienté dans la direction de sorte que l’air ne représente aucun
danger pour l’utilisateur.
Régler la profondeur de clouage
IMPORTANT : Toujours vérifier que le clou soit enfoncé à la bonne
profondeur.
1. Faites un test sur une chute de matériau et vérifiez la profondeur
d’enfoncement.
2. Utilisez la molette de réglage de la profondeur (9) pour un léger
réglage en fonction de la taille du clou et du matériau
3. Pour un réglage plus important, réglez la pression de l’air comprimé
pour changer la profondeur : réduire la pression réduit la profondeur
d’enfoncement.
ATTENTION : Assurez-vous toujours que la pression d’air fournie soit
compatible avec celle indiquée dans les ‘caractéristiques techniques’.
Pointes coincées dans le magasin
ATTENTION : Toujours déconnecter l’outil de l’approvisionnement en air
avant ajustement ou maintenance de l’appareil.
Système de sécurité réservoir
1. Tirez sur le mécanisme à ressort du magasin jusqu’ à ce qu’il
verrouille le loquet de ouverture/fermeture du magasin (4).
2. Enlevez les obstructions avec une pince.
3. Rechargez le magasin et bien le refermer.
Pointes coincées dans le mécanisme de clouage
1. Activez le levier anti-bourrage (8) et ouvrez la plaque
2. Enlevez les obstructions avec une pince.
3. Refermez la plaque et le levier et vérifiez que le système de sécurité
fonctionne bien.
Entretien
ATTENTION : Débranchez toujours l’appareil de sa source en air comprimé
avant d’effectuer l’entretien ou le nettoyage de la cloueuse.
Remarque : 2 Clés à 6 pans (11) sont fournies avec la cloueuse pour
permettre de la démonter partiellement afin de faciliter le nettoyage,
enlever un bourrage ou changer des pièces. Le démontage de l’appareil
n’est pas traité dans ce manuel.
ATTENTION : N’utilisez jamais des pièces de rechanges de fournisseurs
tiers. N’utilisez uniquement les pièces de rechanges fournies par Silverline,
un revendeur Silverline ou un centre de réparation agrée.
• Gardez l’appareil toujours propre. La poussière et la saleté provoque
l’usure prématurée des pièces internes et peut réduire la durabilité de
l’appareil
• Utilisez une brosse souple ou un chiffon sec pour le nettoyage.
• Après chaque utilisation versez quelques gouttes d’huile (1,5 ml) du
réservoir d’huile pour appareil à air comprimé (3) par l’arrivée d’air (2).
• Si l’appareil ne marche plus ou marche par intermittence, versez
quelques gouttes d’huile (1,5 ml) par l’arrivée d’air (2) et branchez
l’appareil sur le compresseur. Faites marcher l’appareil par à coup. Si
cela n’enclenche pas le mécanisme de l’appareil, il doit être réparé par
un centre de réparation agrée.
Rangement
• Ranger cet outil dans un endroit sûr, sec et hors portée des enfants
Recyclage
• Comme tous les autres outils électroportatifs, les outils à air comprimé
ne doivent pas être jetés avec les ordures ménagères.
• Les outils à air comprimé contiennent de l’huile et lubrifiants et doivent
donc être recyclés en conséquence.
• Contactez les autorités locales compétentes en matière de gestion des
déchets pour vous informer de la procédure à suivre pour recycler les
outils électriques et à air comprimé
955431_Z1MANPRO1.indd 14 28/08/2013 09:51

www.silverlinetools.com 15
955431 Cloueuse pneumatique de finition 64 mm
Conditions de garantie des outils Silverline
Garantie Silverline
Ce produit Silverline bénéficie d’une garantie de
3 ans
Enregistrez ce produit sur le site silverlinetools.com dans les 30 jours
suivant l’achat afin de bénéficier de la garantie de 3 ans. La période de
garantie commence à partir de la date d’achat figurant sur votre facture
d’achat.
Enregistrement de votre achat
Visitez silverlinetools.com, sélectionnez le bouton d’enregistrement et
saisissez :
• Vos informations personnelles
• Les informations concernant le produit et l’achat
Vous recevrez le certificat de garantie en format PDF. Veuillez l’imprimer et
le conserver avec votre achat.
La période de garantie prend effet à compter de la date de l’achat en
magasin, comme indiqué sur votre facture d’achat.
VEUILLEZ CONSERVER VOTRE FACTURE D’ACHAT.
Si ce produit est défectueux pendant les 30 jours qui suivent l’achat,
retournez-le au magasin où vous l’avez acheté, avec votre facture, en
expliquant en détail le problème. Le produit sera remplacé ou vous serez
remboursé(e).
Si ce produit est défectueux après cette période de 30 jours,
retournez-le à :
Silverline Tools Service Centre
PO Box 2988
Yeovil
BA21 1WU, Royaume Uni
Toute demande de service sous garantie doit être soumise pendant la
période de garantie.
Avant toute intervention sous garantie, vous devez présenter la facture
d’achat originale sur laquelle doivent figurer la date d’achat, votre nom, votre
adresse et le lieu d’achat.
Vous devez expliquer en détail la défaillance nécessitant réparation.
Les demandes de service sous garantie faites pendant la période de garantie
seront vérifiées par Silverline Tools pour établir si la défaillance du produit est
liée à un vice de matériau ou de fabrication.
Les frais de port ne seront pas remboursés. Les articles retournés doivent
être convenablement propres et sûrs pour être réparés et devraient être
emballés soigneusement pour éviter tout dommage ou toute blessure
pendant le transport. Nous pouvons refuser les livraisons qui ne sont pas
convenables ou sûres.
Toute intervention sera effectuée par Silverline Tools ou ses agents de
réparation agréés.
La réparation ou le remplacement du produit ne dépassera pas la période
de garantie.
Les anomalies que nous reconnaissons être couvertes par la garantie seront
rectifiées par la réparation de l’outil, sans frais (hormis les frais de port) ou
par son remplacement par un outil en parfait état de fonctionnement.
Les pièces ou les outils remplacés deviendront la propriété de Silverline
Tools.
La réparation ou le remplacement de votre produit sous garantie vous
apporte des avantages ; ces avantages s’ajoutent à vos droits statutaires en
tant que consommateur sans les affecter aucunement.
La présente garantie couvre:
La réparation du produit, s’il peut être vérifié, à la satisfaction de Silverline
Tools, que les défaillances du produit ont été provoquées par un vice de
matériau ou de fabrication au cours de la période de garantie.
Si une pièce n’est plus disponible ou n’est plus fabriquée, Silverline Tools la
remplacera par une pièce de rechange opérationnelle.
Utilisation de ce produit dans l’UE.
La présente garantie ne couvre pas:
Silverline Tools ne garantit pas les réparations nécessaires du produit
engendrées par :
L’usure normale provoquée par l’utilisation conforme aux instructions
d’utilisation, par exemple les lames, les charbons, les courroies, les
ampoules, les batteries, etc.
Le remplacement de tout accessoire fourni tel que les forêts, les lames, les
feuilles abrasives, les outils de coupes et les autres articles associés.
Les dommages et les défaillances accidentels causés par une utilisation ou
un entretien négligent, une mauvaise utilisation, un manque d’entretien ou
une utilisation ou une manipulation imprudente du produit.
L’utilisation du produit à des fins autres que son utilisation domestique
normale.
Le moindre changement ou la moindre modification du produit.
L’utilisation de pièces et d’accessoires qui ne sont pas des composants
véritables de Silverline Tools.
Une installation défectueuse (sauf si l’installation a été réalisée par Silverline
Tools).
Les réparations ou les modifications réalisées par des tiers autres que
Silverline Tools ou ses agents de réparation agréés.
Les demandes de service autres que le droit de rectifier les défaillances de
l’outil indiquées dans ces conditions de garantie ne sont pas couvertes par
cette garantie.
Déclaration de conformité CE
Le soussigné : Mr Darrell Morris
Autorisé par : Silverline Tools
Déclare que le produit :
Code d’identification : 955431
Description : Cloueuse pneumatique de finition 64 mm
Est conforme aux directives suivantes :
• Directive sur les machines 2006/42/CE
• EN 792-13:2000+A1:2008
Organisme notifié : Intertek Testing Services, Shanghai, Chine
La documentation technique est conservée par : Silverline Tools
Date : 13/08/13
Signature :
Directeur général
Nom et adresse du fabricant ou de son représentant agréé :
Powerbox International Ltd, Boundary Way, Lufton Trading Estate, Yeovil,
Somerset, BA22 8HZ Royaume-Uni
955431_Z1MANPRO1.indd 15 28/08/2013 09:51

16
D
Beschreibung der Symbole
Auf dem Typenschild des Werkzeugs sind möglicherweise Symbole
abgebildet. Sie vermitteln wichtige Informationen über das Produkt oder
dienen als Gebrauchsanweisung.
Gehörschutz benutzen
Augenschutz benutzen
Atemschutz benutzen
Kopfschutz benutzen
Schutzhandschuhe benutzen
Bedienungsanleitung sorgfältig lesen
Achtung, Gefahr!
NICHT auf Leitern oder Gerüsten verwenden!
Wichtige Schutzvorrichtungen! Ordnungsgemäße Funktion
sicherstellen und gemäß Anleitung pflegen. NICHT deaktivieren!
NICHT mit Druckgasflaschen betreiben!
Erfüllt die einschlägigen Rechtsvorschriften und
Sicherheitsnormen
Umweltschutz
Druckluftwerkzeuge dürfen nicht über den Haushaltsmüll
entsorgt werden. Geräte enthalten Spuren von Öl und anderen
Schmiermitteln. Nach Möglichkeit bitte über entsprechende
Einrichtungen entsorgen. Lassen Sie sich bezüglich der
sachgemäßen Entsorgung von Druckluftwerkzeugen von der
zuständigen Behörde oder dem Händler beraten.
Technische Daten
Empfohlener Arbeitsdruck..........5–7,5 bar (72–108 psi)
Max. Arbeitsdruck...................... 7,5 bar (108 psi)
Druckluftanschluss ....................1⁄4-Zoll-Schnellkupplung
Nagelkaliber und -länge............. 16 Ga., 25–64 mm
Magazinkapazität.......................100 Stck.
Gewicht .....................................1,85 kg
Geräusch- und Vibrationsinformationen
Schalldruckpegel LPA.................. 87,0 dB(A)
Schallleistung LWA ......................100,0 dB(A)
Unsicherheit K ........................... 2,5 dB
Hand-Arm-Vibration ah............... 6,5 m/s2
Unsicherheit K ........................... 2m/s2
Aufgrund der fortlaufenden Weiterentwicklung unserer Produkte
können sich die technischen Daten von Silverline-Produkten ohne
vorherige Ankündigung ändern.
Der Schallintensitätspegel kann für den Bediener 85 dB(A)
übersteigen und Lärmschutzmaßnahmen sind notwendig.
- 25 mm(1")
- 32 mm(1-1⁄4")
- 35 mm(1-3⁄8")
- 38 mm(1-1⁄2")
- 45 mm(1-3⁄4")
- 50 mm(2")
- 57 mm(2-1⁄4")
- 64 mm(2-1⁄2")
3.0 mm (0.118")
1.6 x 1.4 mm
(0.063") (0.055")
16 Ga.
Befestigungsmittel
955431_Z1MANPRO1.indd 16 28/08/2013 09:51

www.silverlinetools.com 17
955431 Druckluft-Stauchkopfnagler, 64 mm
WARNUNG: Tragen Sie in Bereichen, wo der Lärmpegel 85 dB(A)
überschreitet, unbedingt angemessenen Gehörschutz und begrenzen Sie
nach Möglichkeit die Belastungsdauer. Sollte trotz Gehörschutz Unbehagen
irgendeiner Art auftreten, beenden Sie die Arbeit unverzüglich und
überprüfen Sie den Gehörschutz auf korrekten Sitz und Funktion und stellen
Sie sicher, dass dieser einen angemessenen Schutz für den Lärmpegel
bietet, der von den verwendeten Werkzeugen ausgeht.
WARNUNG: Bei der Benutzung mancher Werkzeuge wird der Benutzer
Vibrationen ausgesetzt, welche zum Verlust des Tastsinns, zu Taubheitsgefühl,
Kribbeln und zu einer Verminderung der Handgreifkraft führen können.
Langfristige Belastung kann zu chronischen Beschwerden führen. Begrenzen
Sie, falls nötig, die Exposition zu Vibrationen und tragen Sie vibrationsmindernde
Handschuhe.Verwenden Sie dieses Werkzeug nicht mit kalten Händen,
da Vibrationen bei Temperaturen unter dem individuellen Komfortbereich
eine stärkere Wirkung zeigen. Beurteilen Sie die Vibrationsbelastung unter
Zuhilfenahme der Technischen Daten des jeweiligen Werkzeuges und
bestimmen Sie die zulässige Belastungsdauer und -häufigkeit.
Die in den Technischen Daten angegebenen Geräusch- und
Vibrationsinformationen werden nach EN 60745 bzw. vergleichbaren
internationalen Standards bestimmt. Die angegebenen Werte beziehen
sich auf eine normale Benutzung des Werkzeuges unter normalen
Arbeitsbedingungen. Schlecht gewartete, inkorrekt montierte und
unsachgemäß verwendete Werkzeuge können erhöhte Schallpegel und
Vibrationswerte aufweisen. Weitere Informationen zur EU-Vibrationsrichtlinie
und zu Schall- sowie Vibrationsbelastungen, die auch für Heimanwender
relevant sein können, finden Sie auf den Seiten der Europäischen Agentur für
Sicherheit und Gesundheitsschutz am Arbeitsplatz: www.osha.europa.eu.
Allgemeine Sicherheitshinweise
WARNUNG! Lesen Sie alle Sicherheitshinweise und Anweisungen.
Versäumnisse bei der Einhaltung der Sicherheitshinweise und Anweisungen
können elektrischen Schlag, Brand und/oder schwere Verletzungen
verursachen.
WARNUNG! Dieses Gerät darf nicht von Personen (wie z.B. Kindern) mit
eingeschränkten körperlichen oder geistigen Fähigkeiten oder von Personen
ohne Erfahrung im Umgang mit einem solchen Gerät betrieben werden,
außer wenn sie von einer für ihre persönliche Sicherheit verantwortlichen
Person in der Benutzung unterwiesen worden sind und dabei beaufsichtigt
werden. Kinder müssen beaufsichtigt werden, um sicherzustellen, dass sie
das Gerät nicht als Spielzeug verwenden.
Bewahren Sie alle Sicherheitshinweise und Anweisungen für die
Zukunft auf.
1) Arbeitsplatzsicherheit
a) Halten Sie Ihren Arbeitsbereich sauber und gut beleuchtet.
Unordnung oder unbeleuchtete Arbeitsbereiche können zu Unfällen führen
b) Arbeiten Sie mit dem Elektrowerkzeug nicht in
explosionsgefährdeter Umgebung, in der sich brennbare
Flüssigkeiten, Gase oder Stäube befinden. Elektrowerkzeuge
erzeugen Funken, die den Staub oder die Dämpfe entzünden können.
c) Halten Sie Kinder und andere Personen während der Benutzung
des Elektrowerkzeugs fern. Bei Ablenkung können Sie die Kontrolle
über das Gerät verlieren.
2) Sicherheit von Personen
a) Seien Sie aufmerksam, achten Sie darauf, was Sie tun, und
gehen Sie mit Vernunft an die Arbeit mit einem Elektrowerkzeug.
Benutzen Sie kein Elektrowerkzeug, wenn Sie müde sind oder
unter dem Einfluss von Drogen, Alkohol oder Medikamenten
stehen. Ein Moment der Unachtsamkeit beim Gebrauch des
Elektrowerkzeuges kann zu ernsthaften Verletzungen führen.
b) Tragen Sie persönliche Schutzausrüstung und immer eine
Schutzbrille. Das Tragen persönlicher Schutzausrüstung, wie
Staubmaske, rutschfeste Sicherheitsschuhe, Schutzhelm oder
Gehörschutz, je nach Art und Einsatz des Elektrowerkzeuges, verringert
das Risiko von Verletzungen.
c) Vermeiden Sie eine unbeabsichtigte Inbetriebnahme.
Vergewissern Sie sich, dass das Elektrowerkzeug ausgeschaltet
ist, bevor Sie es an die Stromversorgung und/oder den Akku
anschließen, es aufnehmen oder tragen. Wenn Sie beim Tragen
des Elektrowerkzeuges den Finger am Schalter haben oder das Gerät
eingeschaltet an die Stromversorgung anschließen, kann dies zu
Unfällen führen.
d) Entfernen Sie Einstellwerkzeuge oder Schraubenschlüssel, bevor
Sie das Elektrowerkzeug einschalten. Ein Werkzeug oder Schlüssel,
der sich in einem drehenden Geräteteil befindet, kann zu Verletzungen
führen.
e) Vermeiden Sie eine unnatürliche Körperhaltung. Sorgen Sie für
einen sicheren Stand und halten Sie jederzeit das Gleichgewicht.
Auf diese Weise lässt sich das Elektrowerkzeug in unerwarteten
Situationen besser kontrollieren.
f) Tragen Sie geeignete Kleidung. Tragen Sie keine weite Kleidung
oder Schmuck. Halten Sie Haare, Kleidung und Handschuhe fern
von sich bewegenden Teilen. Lockere Kleidung, Schmuck oder lange
Haare können von sich bewegenden Teilen erfasst werden.
g) Wenn Staubabsaug- und -auffangeinrichtungen montiert werden
können, vergewissern Sie sich, dass diese angeschlossen sind und
richtig verwendet werden. Verwendung einer Staubabsaugung kann
Gefährdungen durch Staub verringern.
WARNUNG: Bei der Benutzung mancher Werkzeuge wird der
Benutzer Vibrationen ausgesetzt, welche zum Verlust des Tastsinns, zu
Taubheitsgefühl, Kribbeln und zu einer Verminderung der Handgreifkraft
führen können. Langfristige Belastung kann zu chronischen Beschwerden
führen. Begrenzen Sie gegebenenfalls die Exposition zu Vibrationen.
Beurteilen Sie die Vibrationsbelastung unter Zuhilfenahme der Technischen
Daten des jeweiligen Werkzeuges und bestimmen Sie die zulässige
Belastungsdauer und -häufigkeit. Die EU-Richtlinie 2002/44/EG enthält
Informationen über zulässige Vibrationsbelastung am Arbeitsplatz und kann
auch auf Heimarbeiten angewandt werden. Beenden Sie die Benutzung
eines Werkzeuges sofort, wenn Sie in irgendeiner Art und Weise Unbehagen
aufgrund der Vibrationsbelastung verspüren.
WARNUNG: Tragen Sie in Bereichen, in denen der Lärmpegel 85 dB(A)
überschreitet, unbedingt angemessenen Gehörschutz und begrenzen Sie
gegebenenfalls die Belastungsdauer. Sollte trotz Gehörschutz Unbehagen
irgendeiner Art auftreten, beenden Sie die Arbeit unverzüglich, überprüfen
Sie den Gehörschutz auf korrekten Sitz und Funktion und stellen Sie sicher,
dass dieser einen angemessenen Schutz für den Lärmpegel bietet, der von
den verwendeten Werkzeugen ausgeht.
3) Verwendung und Behandlung des Elektrowerkzeugs
a) Pflegen Sie Elektrowerkzeuge mit Sorgfalt. Kontrollieren Sie, ob
bewegliche Teile einwandfrei funktionieren und nicht klemmen,
ob Teile gebrochen oder so beschädigt sind, dass die Funktion des
Elektrowerkzeuges beeinträchtigt ist. Lassen Sie beschädigte Teile
vor dem Einsatz des Gerätes reparieren. Viele Unfälle haben ihre
Ursache in schlecht gewarteten Elektrowerkzeugen.
b) Halten Sie Schneidwerkzeuge scharf und sauber. Sorgfältig
gepflegte Schneidwerkzeuge mit scharfen Schneidkanten verklemmen
sich weniger und sind leichter zu führen.
c) Verwenden Sie Elektrowerkzeug, Zubehör, Einsatzwerkzeuge usw.
entsprechend diesen Anweisungen. Berücksichtigen Sie dabei die
Arbeitsbedingungen und die auszuführende Tätigkeit. Der Gebrauch
von Elektrowerkzeugen für andere als die vorgesehenen Anwendungen
kann zu gefährlichen Situationen führen.
4) Service
a) Lassen Sie Ihr Elektrowerkzeug nur von qualifiziertem Fachpersonal
und nur mit Original-Ersatzteilen reparieren. Damit wird sichergestellt,
dass die Sicherheit des Elektrowerkzeuges erhalten bleibt.
955431_Z1MANPRO1.indd 17 28/08/2013 09:51

18
D
1Auslöser
2Druckluftanschluss/¼-Zoll-Schnellkupplung
3Spezialöl für Druckluftwerkzeuge
4Magazinhebel
5Beladeöffnung
6Magazinfedermechanismus
7Sicherheitssperre
8Schnellverschluss zum Entfernen von Blockaden
9Eintreibtiefeneinstellung
10 Drehbarer Abluftauslass
11 Innensechskantschlüssel
GeräteübersichtZusätzliche Sicherheitshinweise
für Druckluftwerkzeuge
Augen schützen
• Tragen Sie immer eine Schutzbrille.
Gehör schützen
• Tragen Sie immer einen Gehörschutz.
Schutz vor Vibrationen
• Tragbare Druckluftwerkzeuge können Schwingungskräfte erzeugen und
sollten nie über längere Zeiträume ohne Pausen verwendet werden.
Vibrationen können gesundheitsschädigend sein. Handschuhe können zu
einer guten Durchblutung der Finger beitragen.
Schutzkleidung
• Tragen Sie stets geeignete Schutzausrüstung einschließlich, aber
nicht beschränkt auf Arbeitsschutzanzüge, Schutzhandschuhe,
Gesichtsmasken usw.
• Es liegt in der Verantwortung des Benutzers, dafür zu sorgen, dass
allen in der Nähe des Arbeitsbereichs befindlichen Personen ebenfalls
angemessene Schutzausrüstung zur Verfügung steht.
Den richtigen Luftschlauch verwenden
• Verwenden Sie zwischen Werkzeug und Kompressorkupplung immer
leichte Schläuche.
• Die meisten Druckluftwerkzeuge sollten mit einem Spiralschlauch
verwendet werden.
Ausschalten nicht vergessen
• Stellen Sie stets sicher, dass der Betrieb des Druckluftwerkzeugs
vollständig eingestellt wurde, bevor Sie es ablegen.
• Trennen Sie Druckluftwerkzeuge stets von der Druckluftquelle, bevor
Sie Wartungsarbeiten daran durchführen oder Klingen, Teller und andere
Aufsätze austauschen.
• Stellen Sie vor dem Anschluss an die Druckluftquelle sicher, dass alle
Klingen, Teller und anderen Aufsätze ordnungsgemäß angebracht sind.
• Stellen Sie stets sicher, dass das Druckluftwerkzeug ausgeschaltet ist,
bevor Sie es an die Druckluftquelle anschließen. Beachten Sie, dass
Druckluftwerkzeuge nach dem Gebrauch noch Restdruck enthalten
können. Lassen Sie nach dem Abstellen der Druckluftquelle stets den
Luftdruck aus dem Gerät ab.
Gerät nicht unsachgemäß verwenden
• Überlasten Sie das Gerät nicht. Der Betrieb bei optimaler Drehzahl
verlängert die Lebensdauer des Werkzeugs und steigert die Effizienz.
• Erhöhen Sie den Luftdruck nicht über das empfohlene Maß hinaus.
Übermäßiger Druck führt zum Verschleiß der beweglichen Teile und
kann zum Ausfall des Geräts führen. Zudem kann das Werkzeuggehäuse
dadurch reißen.
• Versuchen Sie nicht, Druckluftwerkzeuge zu modifizieren.
Modifikationsversuche führen zum Erlöschen der Garantie und können
schwerwiegende Verletzungen des Bedieners oder umstehender
Personen verursachen.
• Halten Sie das Gerät stets auf das Werkstück gerichtet, wenn es mit der
Druckluftversorgung verbunden ist.
Setzen Sie die Schutzvorrichtungen niemals außer Kraft
• Richten Sie das Gerät niemals auf Personen im Arbeitsbereich oder in
Richtung des Druckluftreservoirs des Kompressors.
Verwenden Sie das Gerät nicht auf Leitern oder Gerüsten
• Schließen Sie das Gerät niemals an mit brennbaren Gasen befüllte
Druckbehälter an und betreiben Sie das Gerät nicht mit Druckluftflaschen
oder -patronen. Es ist zum Betrieb mit Kompressoren ausgelegt.
955431_Z1MANPRO1.indd 18 28/08/2013 09:51

www.silverlinetools.com 19
955431 Druckluft-Stauchkopfnagler, 64 mm
Auspacken des Gerätes
Packen Sie Ihr Werkzeug vorsichtig aus und überprüfen Sie es. Machen Sie
sich vollständig mit all seinen Eigenschaften und Funktionen vertraut.
Vergewissern Sie sich, dass sämtliche Teile des Werkzeugs vorhanden und
in einwandfreiem Zustand sind. Sollten Teile fehlen oder beschädigt sein,
lassen Sie diese ersetzen, bevor Sie das Werkzeug verwenden.
Vor Inbetriebnahme
Schnellkupplung einbauen
• Montieren Sie die Schnellkupplung (2) am Nagler. Diese wird in den
Drucklufteingang des Gerätes eingeschraubt. Dichten Sie das Gewinde
mit PTFE-Band ein. Das Gerät kann anschließend in Druckluftsysteme mit
passenden Schnellkupplungen eingesteckt werden.
Empfohlene Druckluftversorgung
• Dieses Werkzeug muss an eine Druckluftversorgung mit Druckluftöler
und Wasserabscheider angeschlossen werden.
• Überschreiten Sie niemals den angegebenen maximalen Arbeitsdruck
(siehe „Technische Daten“).
• Verwenden Sie stets den niedrigsten möglichen Luftdruck, um die Schall-
und Vibrationsbelastung für den Benutzer zu reduzieren. Dies schont
zudem das Werkzeug und beugt Fehlfunktionen vor.
• Verwenden Sie stets trockene, gefilterte Druckluft. Ungefilterte
Druckluft hat einen hohen Feuchtigkeitsgehalt und wird schnell zu
schwerwiegender interner Korrosion des Werkzeuges führen und dessen
Lebensdauer verkürzen. Feuchtigkeitsansammlung im Druckluftbehälter
Ihres Kompressors führt auch dort schnell zu Korrosion. Angesammeltes
Wasser muss täglich aus der Druckluftversorgung abgelassen werden.
• Verwenden Sie ausschließlich Komponenten (wie Schläuche, Verbinder
usw.) die für den Druckbereich des Werkzeuges geeignet sind.
• Geben Sie vor jeder Benutzung einige Tropfen an Druckluftwerkzeugöl in
den Druckluftanschluss des Gerätes, falls Ihre Druckluftversorgung nicht
über einen automatischen Öler (siehe Abb. unten) verfügt.
ACHTUNG! Verwenden Sie ausschließlich Spezialöl für Druckluftgeräte.
Andere Öle könnten das Gerät und den Kompressor beschädigen.
Verwenden Sie niemals Zweitakt- oder KFZ-Öle.
Sicherheitssperre überprüfen
WARNHINWEIS: Trennen Sie das Gerät stets von der Druckluftversorgung,
bevor Sie Einstellungsänderungen vornehmen oder Wartungsarbeiten
durchführen.
• Stellen Sie sicher, dass das Magazin leer ist.
• Die Sicherheitssperre (7) muss sich frei hinein- und herausbewegen
können.
• Kontrollieren Sie die Sicherheitssperre wie folgt auf ordnungsgemäße
Funktion:
1. Schließen das Werkzeug an die Luftversorgung an.
2. Drücken Sie die Sicherheitssperre (7) gegen ein Stück Holz, ohne den
Auslöser (1) zu betätigen. Das Gerät sollte nicht auslösen. Falls das
Gerät dennoch auslöst, muss es vor dem weiteren Gebrauch repariert
werden.
3. Nehmen Sie das Gerät vom Holzstück. Die Sicherheitssperre (7) sollte
jetzt in ihre ursprüngliche Stellung zurückkehren.
4. Betätigen Sie den Auslöser (1). Das Gerät sollte nicht auslösen. Falls
das Gerät dennoch auslöst, muss es vor dem weiteren Gebrauch
repariert werden.
5. Drücken Sie die Sicherheitssperre (7) erneut gegen das Holz, aber
betätigen Sie diesmal den Auslöser (1). Das Gerät sollte jetzt auslösen.
Dies zeigt an, dass das Gerät normal arbeitet.
Magazin bestücken
WARNHINWEIS: Trennen Sie das Gerät stets von der Druckluftversorgung,
bevor Sie es bestücken, Einstellungsänderungen vornehmen oder
Wartungsarbeiten durchführen.
1. Ziehen Sie den Magazinfedermechanismus (6) zurück, so dass er
durch Betätigung des Magazinhebels (4) arretiert wird.
2. Legen Sie einen Nagelstreifen in die Beladeöffnung ein.
3. Halten Sie den Magazinfedermechanismus fest und betätigen Sie den
Magazinhebel, damit der Federmechanismus zurückspringen und
so die Nägel in betriebsbereiter Position halten kann. Lassen Sie den
Federmechanismus nicht zu plötzlich zurückspringen, sondern achten
Sie auf eine kontrollierte Bewegung.
ANSCHLUSSSTÜCK FÜR
DRUCKLUFTGERÄT
FÜHRUNGSSCHLAUCH
NIPPEL
SCHNELLKUPPLUNGSADAPTER
WASSERABSCHEIDUNG
NEBELÖLER
NIPPEL
DRUCKLUFTREGLER
TÄGLICH
ABLASSEN!
DRUCKLUFTZUFUHR
DRUCKLUFTSCHLAUCH
955431_Z1MANPRO1.indd 19 28/08/2013 09:51
20
D
Betrieb
WARNHINWEIS: Stellen Sie sicher, dass Ihre Druckluftversorgung
innerhalb des in den „Technischen Daten” angegebenen Druckbereichs
arbeitet.
Auslöser
• Drücken Sie zum Betreiben des Naglers die Sicherheitssperre (7) gegen
das Werkstück. Halten Sie das Gerät gut am Griff fest und betätigen Sie
den Auslöser (1), um einen Nagel in das Werkstück einzutreiben.
WARNHINWEIS: Zu schnelles Betätigen des Auslösers (1) kann Schäden
an den Innenteilen des Gerätes verursachen und zum Erlöschen der
Garantie führen.
Abluft
• Drehen Sie den Abluftauslass (10) so, dass austretende Luft vom
Benutzer wegströmt.
Eintreibtiefe einstellen
WICHTIGER HINWEIS: Vergewissern Sie sich stets, dass das
Befestigungsmittel in der gewünschten Tiefe in das Werkstück
eingetrieben wird.
1. Treiben Sie einen Nagel probeweise in ein Reststück des Werkstoffes
ein und kontrollieren Sie die Eintreibtiefe des Nagels.
2. Geringfügige Änderungen lassen sich über die
Eintreibtiefeneinstellung (9) vornehmen, z.B. Feineinstellungen auf
unterschiedliche Nagelabmessungen und verschiedene Werkstoffe.
3. Für umfangreichere Änderungen der Eintreibtiefe muss der
Zuluftdruck verändert werden. Niedrigerer Druck der Luftversorgung
verringert die Eintreibtiefe.
WARNHINWEIS: Sorgen Sie stets dafür, dass der Luftdruck sich im unter
„Technische Daten“ angegebenen Bereich befindet.
Verklemmungen beseitigen
WARNHINWEIS: Trennen Sie das Gerät stets von der Druckluftversorgung,
bevor Sie Einstellungsänderungen vornehmen oder Wartungsarbeiten
durchführen.
Befestigungsmittel steckt im Magazin fest
1. Ziehen Sie den Magazinfedermechanismus (6) zurück, so dass er
durch den Magazinhebel (4) arretiert wird.
2. Entfernen Sie die Blockade mit einer Zange.
3. Laden Sie das Magazin wieder und verschließen Sie es sicher.
Befestigungsmittel steckt im Plattenbereich fest
1. Öffnen Sie den Schnellverschluss zum Entfernen von Blockaden (8)
sowie die Nagelplatte.
2. Entfernen Sie die Blockade mit einer Zange.
3. Schließen Sie die Platte und den Schnellverschluss wieder
und prüfen Sie vor dem Gebrauch des Gerätes, dass die
Sicherheitssperre ordnungsgemäß funktioniert.
Wartung
WARNHINWEIS: Trennen Sie das Gerät stets von der Druckluftversorgung,
bevor Sie Wartungs- oder Reinigungsarbeiten vornehmen.
Hinweis: Im Lieferumfang sind zwei Innensechskantschlüssel (11)
enthalten, mit denen dieser Druckluftnagler teilweise demontiert werden
kann. Dies kann bei der Reinigung, dem Entfernen von Blockaden und beim
Ersetzen von Teilen notwendig sein. Eine solche Demontage ist durch diese
Bedienungsanleitung jedoch nicht abgedeckt.
WARNHINWEIS: Verwenden Sie für dieses Produkt ausschließlich
durch Silverline oder durch von Silverline zugelassene Fachhändler bzw.
Reparaturwerkstätten vertriebene Ersatzteile und keinesfalls Ersatzteile
anderer Hersteller.
• Halten Sie Ihr Gerät stets sauber. Durch Schmutz und Staub verschleißen
die Innenteile schnell und die Lebensdauer des Gerätes wird verkürzt.
• Säubern Sie das Gerätegehäuse mit einer weichen Bürste oder einem
trockenen Tuch.
• Träufeln Sie nach jedem Gebrauch etwa 1,5 ml Spezialöl (3) in den
Druckluftanschluss (2).
• Falls das Gerät den Betrieb einstellt oder vorübergehend ausfällt, träufeln
Sie einige Tropfen Druckluftwerkzeugöl in den Druckluftanschluss (2)
und schließen Sie das Gerät an die Druckluftquelle an. Betreiben Sie
das Gerät in kurzen Schüben. Falls der Mechanismus danach nicht
wieder anläuft, lassen Sie das Gerät in einer von Silverline zugelassenen
Reparaturwerkstatt warten.
Lagerung
• Bewahren Sie dieses Gerät sorgfältig an einem sicheren, trockenen Ort
außerhalb der Reichweite von Kindern auf.
Entsorgung
• Druckluftwerkzeuge dürfen wie auch Elektrowerkzeuge nicht über den
Hausmüll entsorgt werden.
• Druckluftwerkzeuge können Spuren von Maschinenöl und anderen
Schmierstoffen enthalten und müssen dementsprechend der
Wiederverwertung zugeführt werden.
• Lassen Sie sich von der zuständigen Behörde bezüglich der
ordnungsgemäßen Entsorgung von Druckluftwerkzeugen beraten.
955431_Z1MANPRO1.indd 20 28/08/2013 09:51
Table of contents
Languages:
Other Silverline Nail Gun manuals

Silverline
Silverline 837800 User manual

Silverline
Silverline 282400 User manual

Silverline
Silverline 456932 User manual

Silverline
Silverline 656578 User manual

Silverline
Silverline 633524 User manual

Silverline
Silverline 868245 User manual

Silverline
Silverline 675062 User manual

Silverline
Silverline 282400 User manual

Silverline
Silverline 633524 User manual
Popular Nail Gun manuals by other brands

Harbor Freight Tools
Harbor Freight Tools Central Pneumatic Professional 90437 Assembly and operating instructions

Ozito
Ozito SNGK-036 instruction manual

primatech
primatech P250AR operating instructions

Grizzly
Grizzly H2911 instruction manual

Porter-Cable
Porter-Cable PIN138-CA instruction manual

Milwaukee
Milwaukee 7140-21 Service parts list