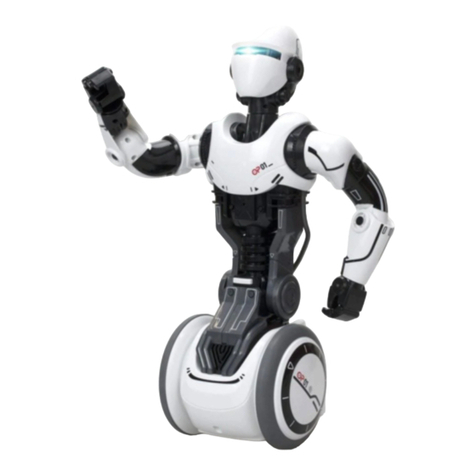
Silverlit OP ONE User manual

1
ENGLISH
3. Part Identification
4. General Feature
2. Battery Installation
1. Delivery Contents
1. LED Eyes (Robot)
2. Demo Button
3. Microphone
4. Power Switch / Auto mode / Manual mode
5. Wheels Direction Control Lever
6. Tracking (pre-programming)
7. Execute (enter / playback)
8. Left Shoulder + Elbow Control Pad
9. Demo Button
10. Head Direction Control Pad
11. Press to Talk Button (for Live Broadcast)
12. Repeat Button (for Live Broadcast)
13. Right Shoulder + Elbow Control Pad
14. Save Slot Selection (for Tracking Function)
15. Voice Changing Effect Selector
16. Monitoring ON/OFF button
- Robot x 1 - Controller x 1 - Instruction Manual x 1
Make sure the power switch is on “OFF” position.
Controller
- Open the battery compartment: loosen the screw by turning counter clockwise
with a Philips screwdriver. (Fig.1)
- Insert 3 AA batteries in the battery compartment with correct polarity. (Fig.2)
- Close the battery compartment: tighten the screw by turning clockwise with a
Philips screwdriver.
Robot
- Open the battery compartment: loosen the screw by turning counter clockwise
with a Philips screwdriver. (Fig.3)
- Insert 6 AA batteries in the battery compartment with correct polarity. (Fig.4)
- Close the battery compartment: tighten the screw by turning clockwise with a
Philips screwdriver.
- Lively motions – motorized head, shoulder & Elbows
- All Directional control – motorized wheels
- Dance – Performs 5 demo dances
- Spy Feature – listen Robot’s surrounding sound on the controller's speaker
- Live Broadcast – Talk to the controller and broadcast via the Robot
- Voice Change – broadcast your voices in 5 preset voice changed effects
- Code Tracking – records & playback the customize movements in 3 sets of memories
4
5
6
7
14
8
15 16
10
9
3
11
12
13
Fig.1 Fig.2
Fig.4
1
3 x AA
6 x AA
2
Fig.3

2
ENGLISH
5. How To Play
5.1 STAR TO PLAY
- To prevent any damage caused by falling, do not play the robot on a table or raised surfaces. (Fig.5)
- It is recommended to play the robot on a flat and smooth surface or short pile carpet, unsmooth
surfaces or long pile carpet will affect the robot’s performance
- Make sure the robot is in a vertical position, slide its Power Switch to ON position
- Slide the Power Switch of the controller to AUTO or MANUAL mode position. (Fig.6)
- If the light indicator on the controller turns from blinking to still, the robot and the controller are
successfully connected and it is ready to play.
- If the light indicator on the controller keeps blinking, turn off the Robot and controller then turn on
again, repeat the steps above for connecting again.
- In an AUTO mode – the Robot’s head and arms will move automatically, but they can still be
controlled manually.
- In a MANUAL mode – the movement of Robot’s head and arms will only be controlled manually.
5.2 ORIENTATION SENSING
- The Robot will generate warning sound effects & stops all in-progress motions if it is not vertically
placed or fall over.
- Place the robot in an upright position to disable the warning sound effect.
5.3 SOUND SENSOR
- When the Robot is in idle status, it will response to the sound commands, clap or make sound
noises and Robot will turn its head to the sound direction. (Fig.7)
5.4 DEMO
- Press the DEMO button on the controller or the Robot to play a
demo dance. (Fig.8 and 9)
- The Robot contains 5 demo dances, press the button from 1 to 5
times to select a dance.
- During the dance, press the Demo button once to stop.
5.5 DIRECT CONTROL
- Use the controller to control the Robot’s movements
- Robot’s directional movement - Joystick (Fig.10)
- Head up/down & Head turning Left/Right – Directional pad 1
(Fig.11)
- Robot’s Left shoulder & elbow movement - Directional pad 2
(Fig.12)
- Robot’s Right shoulder & elbow movement - Directional pad 3
(Fig.12)
5.6 LIVE BROADCAST
- Pull up the Microphone, select a Voice Effect by turning the
VOICE CHANGE knob(V1-V5) (Fig.13)
- Press & hold the TALK button until the controller generates a
“BEEP” sound
- Facing to the microphone to talk & the messages will be
transmitted through the speaker on the robot with voice
changing effect
- Release the TALK button & the controller generates a “BEEP BEEP” sound
- Press the REPEAT button once to play back the message once
- Press the REPEAT button twice to loop the message. Press the button again to stop
Remarks: The recorded message will be replaced if there is a new message input.
Fig.5
Fig.6
Fig.7
Fig.11
Fig.8
Fig.10
Fig.12 Fig.13
Fig.9

3
ENGLISH
5.7 SPY FEATURE
- To listen to the sound picked up by the robot, press the MONITOR button on the controller once.
(Fig.14)
- During the spying, the light indicator on the controller will flash slowly.
- Press the monitoring button again to cancel the monitoring
5.8 CODE TRACKER FEATURE
- The robot is able to memorize 3 sets of arms and head movements, each set stores up to 30
steps.
- Select one of the memories (A/B/C) by sliding the MEMORY selector, press the TRACKING
button until you hear a “Beep Beep Beep” sound to start step recording. (Fig.15)
- Use the directional pads to control the head, shoulder or elbow to the posture you want.
- Press the EXECUTE button to confirm the step input. (Fig.16)
- Repeat above steps for next step input
- After the last step input, press the TRACKING button again to save the input steps.
- Press the EXECUTE button to playback the memorized steps. You can use the joystick to control
wheel movements
- During the playback, you can broadcast a message by using the LIVE BROADCAST feature or
pick up the sounds from the Robot by using SPY feature.
Remarks: The recorded steps will be replaced if there is a new step input.
5.9 POWER SAVING
- If the Robot is idled without any input received, it will stop all the movements & enter SLEEP
mode after 3 minutes & 10 minutes respectively.
- To wake up the Robot from SLEEP mode, slide the Power switch of Robot and Controller to OFF position then turn ON again
5.10 TROUBLESHOOTING
- The robot is not connected to the Controller – Switch off both Robot and Controller then turn it on again.
- Robot keep generates a warning sound – place the Robot in an upright position. If the Warning still exists, switch off the
power and then turn it on again.
- The robot has no responses – Switch off both Robot and Controller the turn it on again.
Fig.14
Fig.15
Fig.16
Other Silverlit Robotics manuals

