manuals.online logo
Brands
  1. Home
  2. •
  3. Brands
  4. •
  5. SImx
  6. •
  7. Outdoor Light
  8. •
  9. SImx LHT1148 User manual

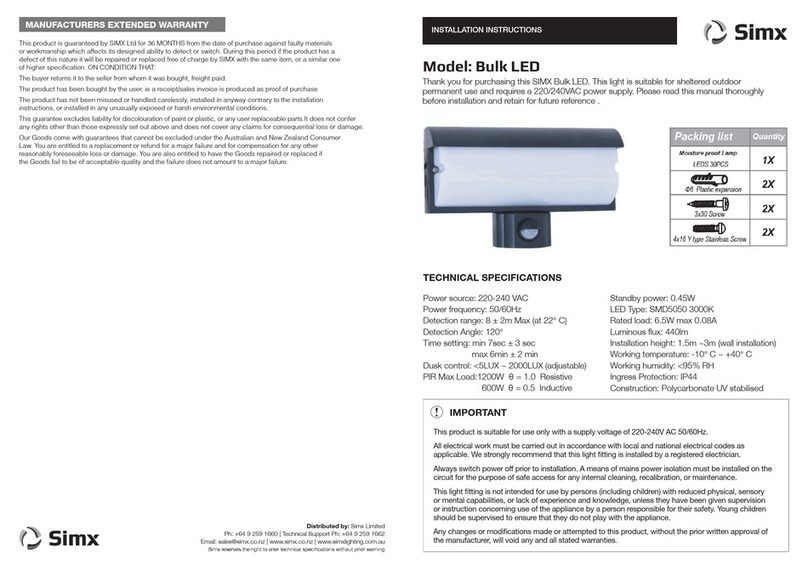
SImx LHT1148 User manual

INSTALLATION INSTRUCTIONS
PUB1630 2106
Distributed in New Zealand by Simx Ltd
Ph: +64 9 259 1660 | Technical Support Ph: +64 9 259 1662
e: [email protected] | www.simx.co.nz
Distributed in Australia by Ventair Pty Ltd
4 Capital Place, Carrum Downs, 3201 VIC, AUSTRALIA.
Technical Support: 1300 665 926
e: [email protected] | www.ventair.com.au
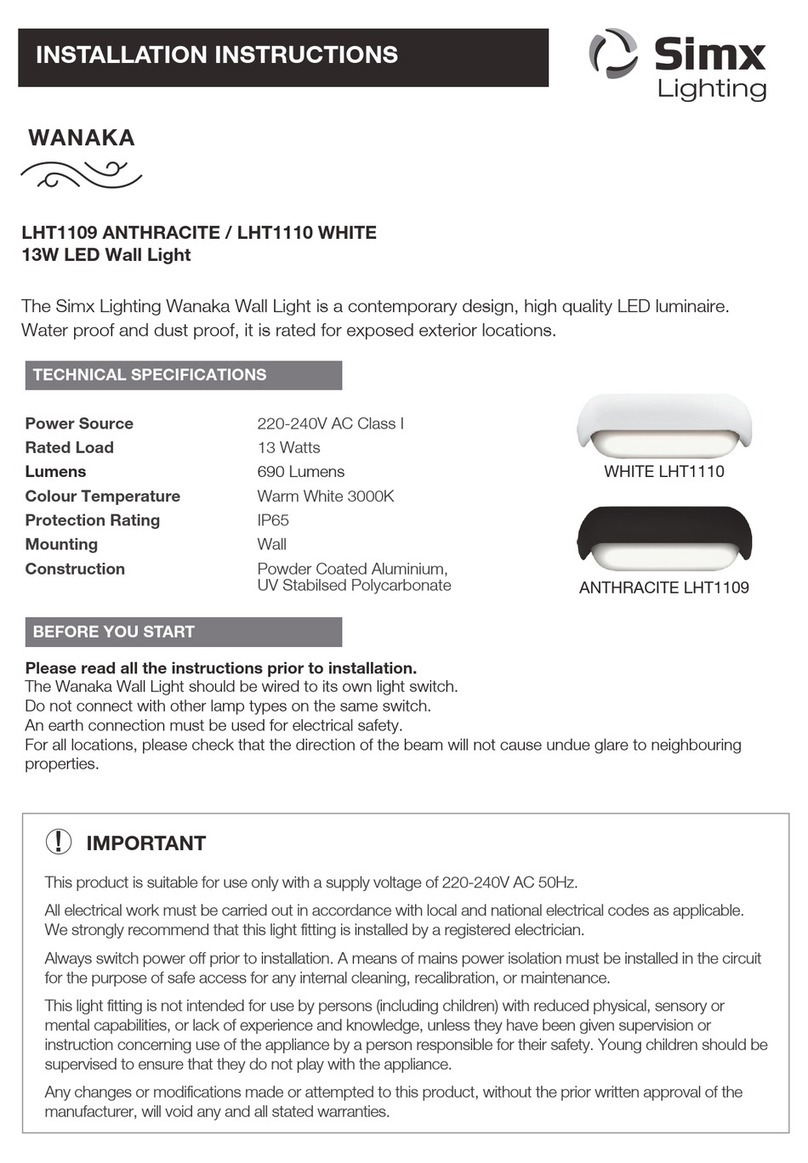
WAITOMO STEPLIGHT
3W LED - ROUND FAN
LHT1148 BLACK
LHT1149 WHITE
TECHNICAL SPECIFICATIONS
Power Source 220-240V AC 50Hz
Wattage 3W
LED Colour Selectable 3000K, 4000K, 6000K
Lumens 120 lm (approx.)
Beam Spread 38° (approx.)
IP Rating IP44
Safety Class II
Mounting Wall
Construction Die-cast aluminium housing
Warranty 3 years
DIMENSIONS (mm)
Cut-out Size Cut-out Size
Model Solid Wall Hollow Wall Cover Depth
Round Fan 73 Ø 65 Ø 79 x 79 54
Square Fan 73 Ø 65 Ø 85 x 85 57
Square Tier 73 Ø 65 Ø 85 x 85 57
PRODUCT COMPLIANCES
EN60598-1:2015 EN60598-2.1:1989 EN61347-1:2015 EN61347-2.13:2014
EN62031:2008 EN62471:2008 EN62493:2015 EN55015:2013
EN61547:2009 EN61000-3.2:2014 EN61000-3.3:2013 and all relevant amendments
Thank you for purchasing the Simx Lighting Waitomo steplight. This product is suitable for sheltered
exterior locations. It requires a 230V AC power supply to operate and should be installed by a registered
electrician. Please read this manual before installation and retain for future reference.
WAITOMO STEPLIGHT
3W LED - SQUARE FAN
LHT1150 BLACK
LHT1151 WHITE
WAITOMO STEPLIGHT
3W LED - SQUARE TIER
LHT1152 BLACK
LHT1153 WHITE
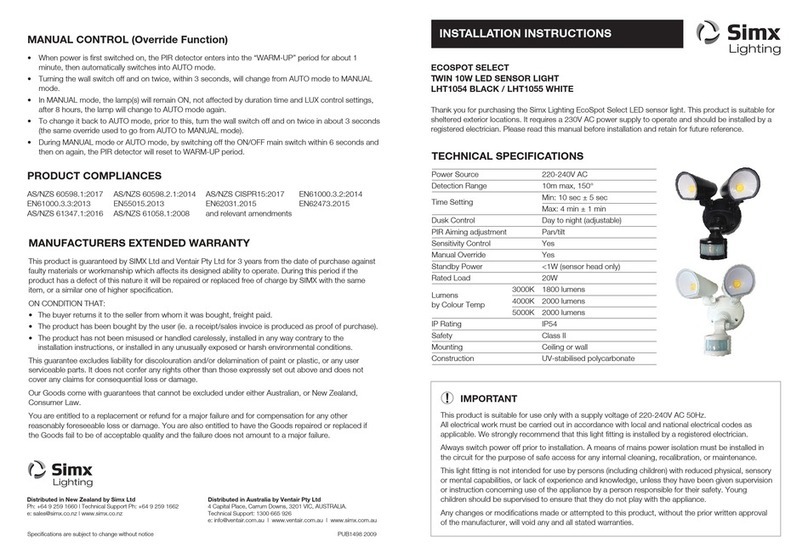
MANUFACTURERS EXTENDED WARRANTY
This product is guaranteed by SIMX Ltd and Ventair Pty Ltd for 3 years from the date of purchase against
faulty materials or workmanship which affects its designed ability to operate. During this period if the
product has a defect of this nature it will be repaired or replaced free of charge by SIMX with the same
item, or a similar one of higher specification.
ON CONDITION THAT:
• The buyer returns it to the seller from whom it was bought, freight paid.
• The product has been bought by the user (ie. a receipt/sales invoice is produced as proof of purchase).
• The product has not been misused or handled carelessly, installed in any way contrary to the
installation instructions, or installed in any unusually exposed or harsh environmental conditions.
This guarantee excludes liability for discolouration and/or delamination of paint or plastic, or any user
serviceable parts. It does not confer any rights other than those expressly set out above and does not
cover any claims for consequential loss or damage.
Our Goods come with guarantees that cannot be excluded under either Australian, or New Zealand,
Consumer Law.
You are entitled to a replacement or refund for a major failure and for compensation for any other
reasonably foreseeable loss or damage. You are also entitled to have the Goods repaired or replaced if
the Goods fail to be of acceptable quality and the failure does not amount to a major failure.
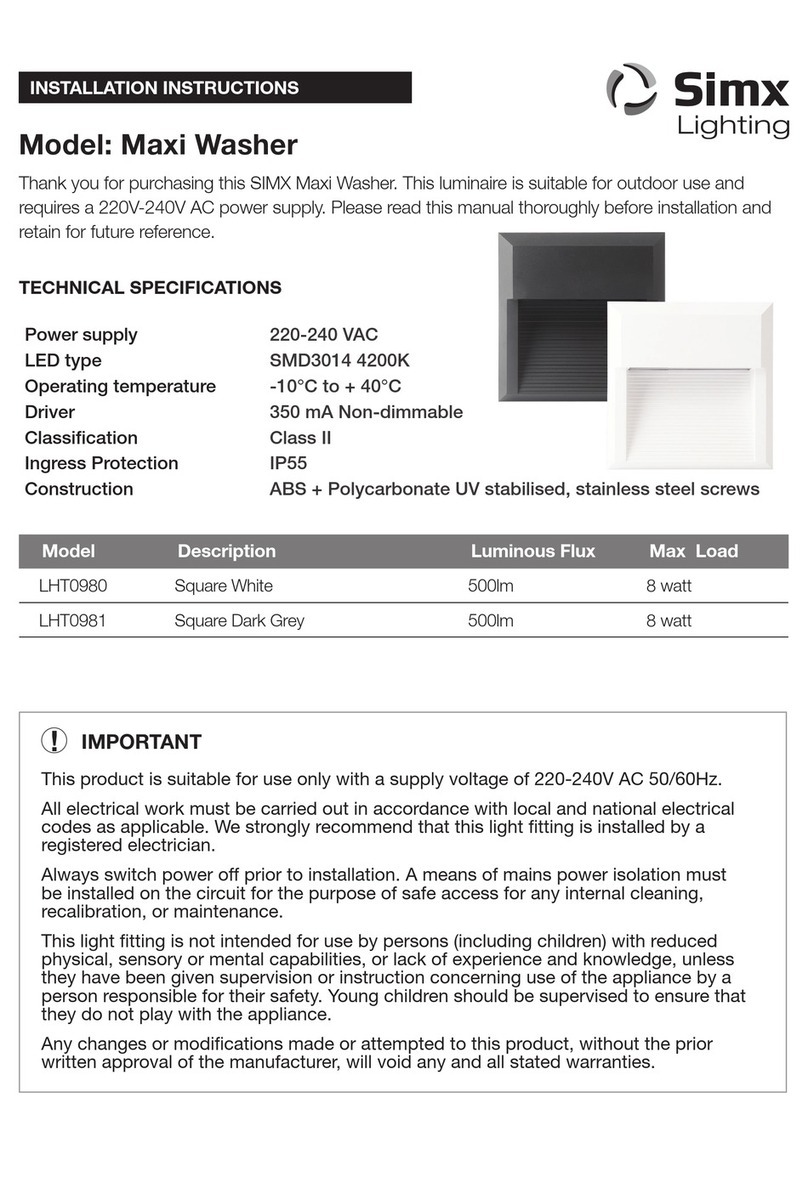
IMPORTANT
!
This product is suitable for use only with a supply voltage of 220-240V AC.
All electrical work must be carried out in accordance with local and national electrical codes as
applicable. We strongly recommend that this light fitting is installed by a registered electrician.
Always switch power off prior to installation. A means of mains power isolation must be installed in
the circuit for the purpose of safe access for any internal cleaning, recalibration, or maintenance.
This light fitting is not intended for use by persons (including children) with reduced physical, sensory
or mental capabilities, or lack of experience and knowledge, unless they have been given supervision
or instruction concerning use of the appliance by a person responsible for their safety. Young children
should be supervised to ensure that they do not play with the appliance.
Any changes or modifications made or attempted to this product, without the prior written approval
of the manufacturer, will void any and all stated warranties.
Specifications are subject to change without notice
Fig. 1
LED Colour Selectable
3000K 
4000K 
6000K 
Fig. 2
Fig. 3 Fig. 4
Fig. 5 Fig. 6
INSTALLATION
We strongly recommend this light fitting is installed by a registered electrician
• Switch off the power supply before commencing any electrical work.
• Select desired mounting location and drill a 73mm diameter hole if into a solid wall or a 65mm
diameter hole if into a hollow wall. Care should be taken to avoid drilling or screwing into concealed
electrical wiring/plumbing.
• For solid wall installations, fit the supplied flush box, with the mounting screw holes horizontal to line up
the light base.
• For hollow wall installations, discard the flush box and install the supplied springs as follows:
- Fit the end with the hook to one end of the fixture bracket. Hook should be inside the fixture
bracket (between bracket and fixture housing), pointing downwards, to create a resistive force.
- Fit the other end of the coiled spring into other end of the fixture bracket.
- Sleeve the remaining long end inside the coiled spring and the spring should now only lift under
tension.
• Connect the power supply to the external cabling of the light base. Incorrect polarity may cause
catastrophic failure of the driver or LED.
• This is a good time to select the desired colour temperature of the LEDs, using the selector switch on
the rear of the light base. Clip the front cover in place before doing this.
• Once the colour temperature is selected, remove front cover temporarily and, use the light base as a
template to locate, mark, and drill the four mounting screw locations.
• Screw the light base to the flush box, then screw the front of the light base to the wall. For hollow
walls, use the installed springs to secure the fitting into the wall cavity.
• Clip the front cover on to the base unit, ensuring it sits flush and firm to the base. This maintains the
moisture rating at the front when fitted correctly.
• Reconnect power supply and test.
BEFORE YOU START
Please read all the instructions prior to installation.
The Waitomo steplight should be wired to its own light switch. Do not interconnect with other lamp
types on the same switch.
To achieve best results, please consider the following points:
• This light fitting is rated to IP44 making it suitable for sheltered exterior locations. Please ensure
the desired location does not exceed this rating.
• The recommended mounting height is between 400-600mm above ground level.
HOOK
LONG END
Selecting lamp colour with power supply connected may cause
irreparable damage. Always disconnect at mains before making
any colour selection.
Solid Wall - 73 
Hollow Wall - 65 

This manual suits for next models

5

Other SImx Outdoor Light manuals

SImx Pukaki LHT1111 User manual

SImx

SImx Pukaki LHT1111 User manual

SImx TARAWERA LHT1137 User manual

SImx

SImx TARAWERA LHT1137 User manual

SImx LHT1054 User manual

SImx

SImx LHT1054 User manual

SImx Maxi Washer User manual

SImx

SImx Maxi Washer User manual

SImx LHT0337 User manual

SImx

SImx LHT0337 User manual

SImx Bulk LED User manual

SImx

SImx Bulk LED User manual

SImx Aoraki LHT1128 User manual

SImx

SImx Aoraki LHT1128 User manual

SImx ELITE LED LHTC637 User manual

SImx

SImx ELITE LED LHTC637 User manual

SImx LHT1081 User manual

SImx

SImx LHT1081 User manual

SImx WANAKA LHT1109 User manual

SImx

SImx WANAKA LHT1109 User manual

SImx LHT0255 User manual

SImx

SImx LHT0255 User manual

SImx LHT0240 User manual

SImx

SImx LHT0240 User manual

Popular Outdoor Light manuals by other brands

Aurora EN-HBD100MS quick start guide

Aurora

Aurora EN-HBD100MS quick start guide

Beachside Lighting MB-SERIES quick start guide

Beachside Lighting

Beachside Lighting MB-SERIES quick start guide

BEMKO JASPER JAS1-030DG installation instructions

BEMKO

BEMKO JASPER JAS1-030DG installation instructions

LIGMAN KIOS 10 installation manual

LIGMAN

LIGMAN KIOS 10 installation manual

Simx Lighting Ruapehu LHT1131 installation instructions

Simx Lighting

Simx Lighting Ruapehu LHT1131 installation instructions

smania G-LAMP instructions

smania

smania G-LAMP instructions

Maretti QUATRO SUSPENDED L 410x255 quick start guide

Maretti

Maretti QUATRO SUSPENDED L 410x255 quick start guide

Vaxcel T0321 Assembly and installation instructions

Vaxcel

Vaxcel T0321 Assembly and installation instructions

LUTEC SECURY'LIGHT VESTA ST1906-CAM manual

LUTEC

LUTEC SECURY'LIGHT VESTA ST1906-CAM manual

BEGA 84 299 Installation and technical information

BEGA

BEGA 84 299 Installation and technical information

Malmbergs SLA166SB instruction manual

Malmbergs

Malmbergs SLA166SB instruction manual

Springdale Lighting STT11129 Assembly instructions

Springdale Lighting

Springdale Lighting STT11129 Assembly instructions

ring Spotlight manual

ring

ring Spotlight manual

Lunux Hellux HELIUS 120 instruction manual

Lunux

Lunux Hellux HELIUS 120 instruction manual

HEPER MINIMO 3x90 Installation & maintenance instructions

HEPER

HEPER MINIMO 3x90 Installation & maintenance instructions

LIGMAN MV-30002 instruction manual

LIGMAN

LIGMAN MV-30002 instruction manual

Hubbardton Forge Edge 302560 Assembly/installation instructions

Hubbardton Forge

Hubbardton Forge Edge 302560 Assembly/installation instructions

Lucci LEDlux 221053 installation instructions

Lucci LEDlux

Lucci LEDlux 221053 installation instructions

manuals.online logo
manuals.online logoBrands
  • About & Mission
  • Contact us
  • Privacy Policy
  • Terms and Conditions

Copyright 2025 Manuals.Online. All Rights Reserved.