Sinmag Europe SE42 User manual

SE42
Manual ●Mode d’emploi ●Handleiding ●Handbuch ●Manuale
Water meter .Doseur d’eau . Watermeter
.Wasserdosiergerät .Dosicadora de agua .
Dosatore-miscelatore d’acqua
FR
FR
ENG
NL
ES
IT
D

Nous vous félicitons pour l’achat de votre doseur d’eau.
Avant l’expédition, cette machine a été contrôlée dans notre dépôt
en Belgique. De cette façon, nous pouvons vous assurer la livraison
d’une machine prête à l’installation.
Pour une bonne utilisation et une longue durée de vie de la
machine, nous vous recommandons de lire ce mode d’emploi
avec attention avant d’utiliser la machine.
Sinmag Europe vous remercie pour la conance et l’intérêt et nous
vous souhaitons beaucoup de joie au travail avec cette machine
Sinmag Europe Team.
2
SINMAG EUROPE BVBA
FR
Une alimentation en eau supérieure à 50°
peut endommager le doseur
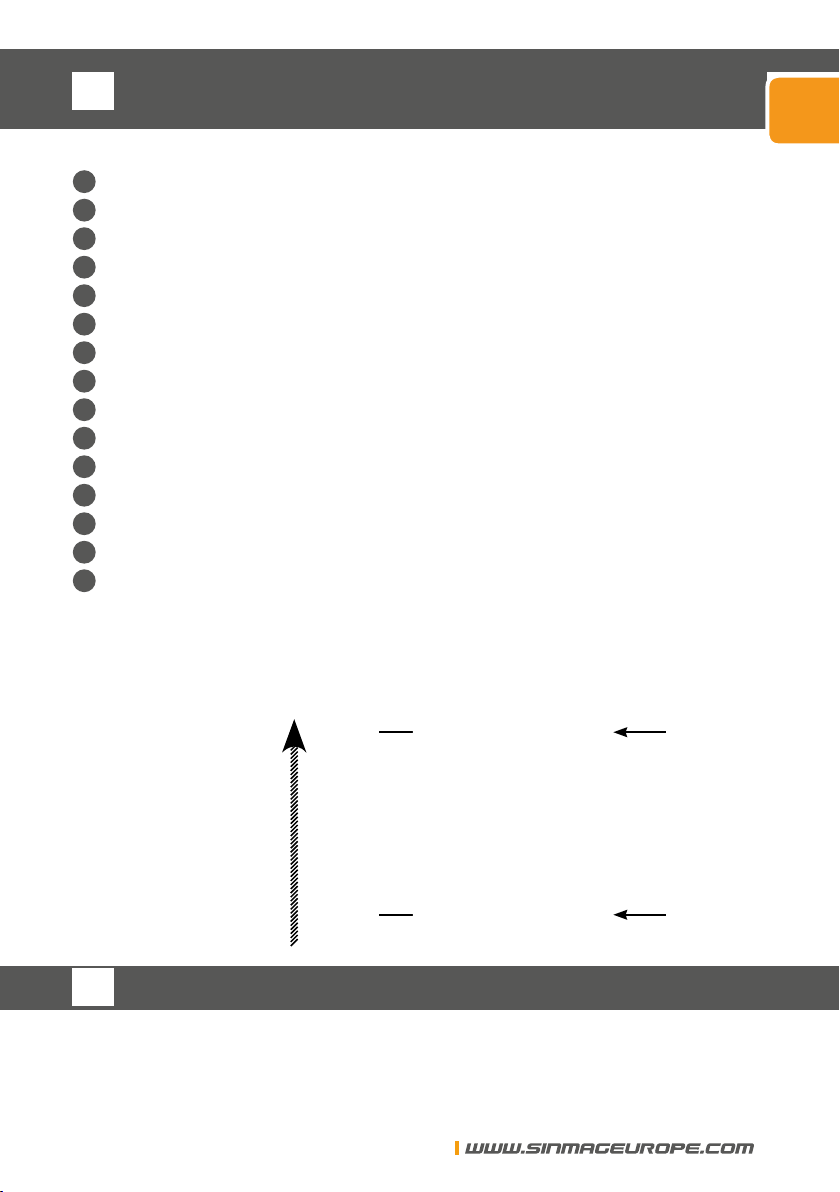
1. DESCRIPTIF
1 Doseur
2 Alimentation eau chaude
3 Alimentation eau froide
4 Sortie eau
5 Interrupteur et fusible
6 Câble d’alimentation
7 Réglage quantité d’eau
8 Start et stop
9 Afcheur digital litrage
10 Afcheur digital température
11 Electrovanne
12 Sonde de débit
13 Electro ltre
14 Sonde de température
15 Contrôleur électronique
2. INSTALLATION
2.1. Fixation au mur
TOUJOURS FIXEZ L’APPAREIL À LA VERTICALE !
• Avant de placer l’appareil veuillez faire des repères pour les trous au
crayon.
• Assurez- vous d’une hauteur idéale pour l’utilisation.
FR
SINMAG EUROPE BVBA
3
FR

2.2. Raccordement à l’eau
• Raccordez l’eau froide sur le raccord en bleu
• Raccordez l’eau chaude ou l’eau courante sur le raccord en rouge
• Veuillez suivre les instructions de raccordement comme indiqué sur le
schéma.
2.3. Raccordement électrique
• Raccordez l’appareil selon les informations de la notice et de la plaque
signalétique.
• Assurez-vous d’un bonne mise à la terre.
• Pour une plus grande sécurité, nous conseillons de prévoir un fusible en
amont.
Ne pas réparer ou entretenir l’appareil sans l’avoir débranché
auparavant!
Seul un technicien qualié est autorisé à réparer ou entretenir
cet appareil!
• Si l’appareil ne démarre pas, veuillez contrôler l’interrupteur et le fusible.
Si ce dernier pose problème, veuillez le remplacer par un fusible équiva-
lent de 2 ampères.
4
SINMAG EUROPE BVBA
FR

3. FONCTIONNEMENT
1. Mettre l’interrupteur en position 1
2. 888 s’afche pendant 3 secondes.
Afchage litres
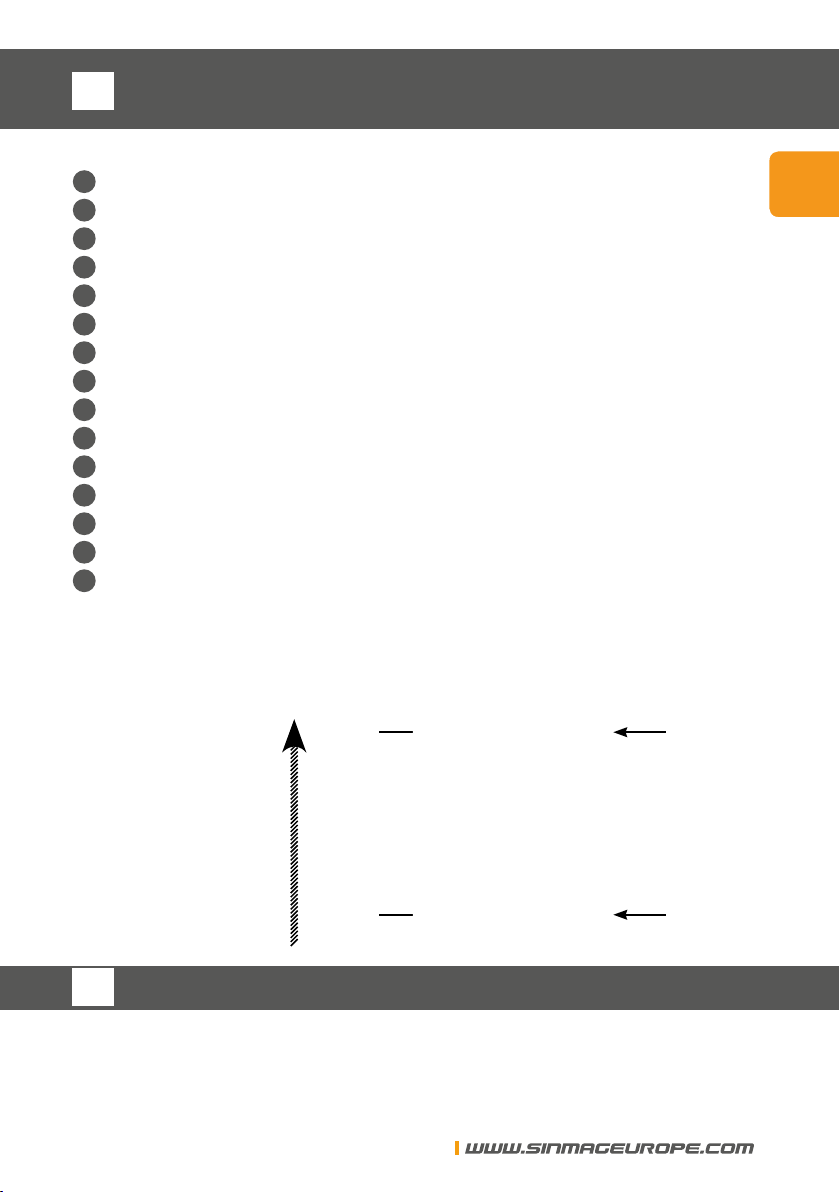
3. Sélectionnez la quantité désirée grâce au boutons up et down.
UP ON
DOWN OFF
4. Appuyez sur ON pour obtenir la quantité d’eau souhaitée.
L’eau commence à s’écouler jusqu’à ce que le compteur arrive à 0,
le doseur s’arrête alors automatiquement.
5. Si vous voulez répéter ce processus, appuyez de nouveau sur UP et
DOWN, la dernière quantité d’eau demandée apparaît sur l’écran.
Si vous voulez modier cette quantité, répétez les étapes 3 et 4.
6. Si pendant le dosage, pour l’une ou l’autre raison, vous voulez arrêter
le processus, il suft d’appuyer sur OFF. Le dosage est stoppé et la
quantité d’eau restante est afchée sur le compteur. Si vous voulez re-
démarrer, il suft d’appuyer sur ON. Si vous voulez modier la quantité,
répétez les étapes 3 et 4.
7. Pendant le dosage vous pouvez visualiser le débit en appuyant simulta-
nément sur UP et DOWN (L/minute).
8. Grâce au mitigeur, vous pouvez sélectionner la température de l’eau.
Le doseur mitigeur va mélanger automatiquement l’eau de distribution
avec de l’eau chaude ou froide. Sur l’écran s’afche la T° de l’eau que
vous avez demandée.
S’il y a des variations de température dans l’alimentation d’eau pendant le
dosage, le mitigeur adaptera automatiquement le dosage pour maintenir la
température d’eau demandée.
SINMAG EUROPE BVBA
5
FR
Toujours sélectionnez une température qui est raisonnable!
Exemple
Si vous voulez de l’eau à 3° mais votre source d’eau vous fournit de l’eau à 5°,
il ne sera pas possible de l’amener à 3°.
3.1. Conseil pour optimiser votre doseur
1. Le diamètre de vos tuyaux d’alimentation d’eau doivent être de min.
18mm pour garantir une pression correcte. La pression doit être de
1 BAR min et idéalement à 3 BAR sur les deux entrées.
2. La pression doit être équivalente pour l’arrivée d’eau chaude et froide.
Une différence supérieure à 1,5 BAR entraînera des difcultés pour
votre mélange.
3. Si la température d’eau obtenue est différente par rapport à celle de-
mandée, vous pouvez règler le mélangeur. Enlevez le couvercle de
l’appareil et ajustez le thermostat à la température réelle.
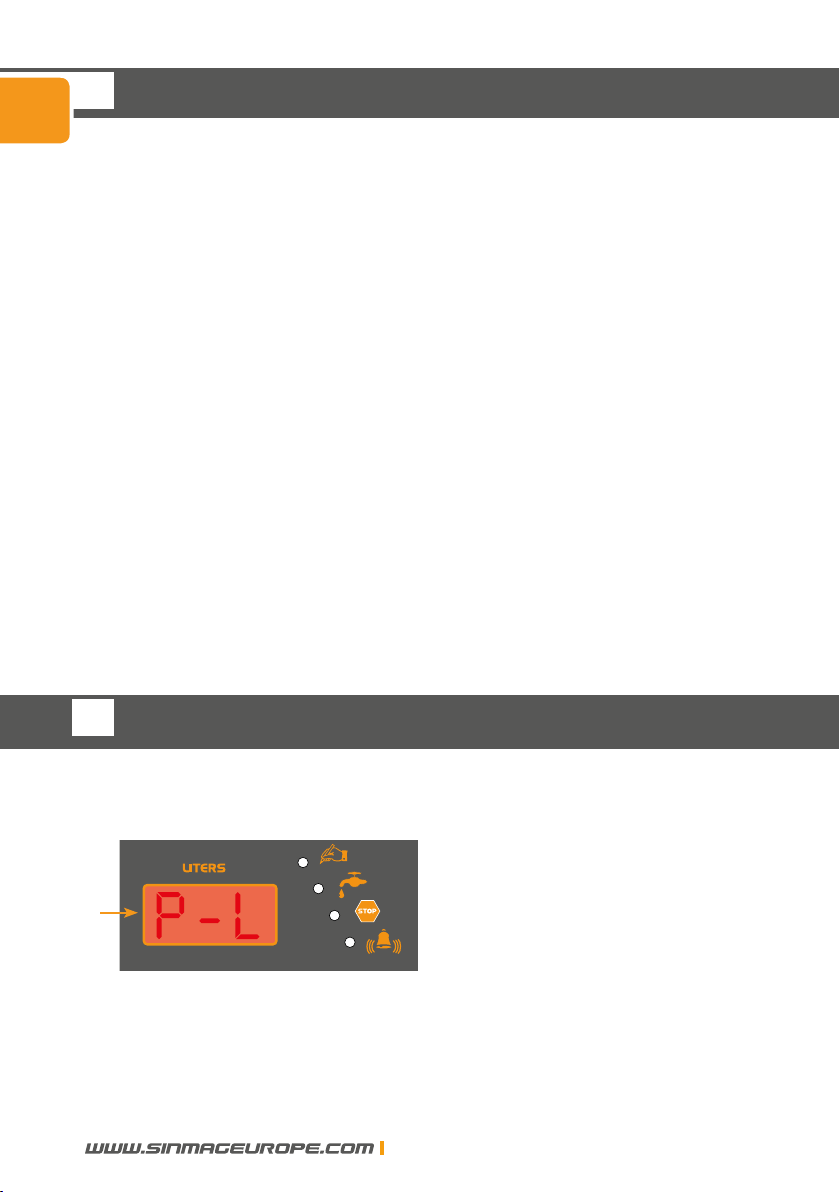
3.2. Calibrage automatique des pulsions
Seulement si vous avez un problème sur le dosage
1. Avant de démarrer le doseur tenez le bouton OFF enfoncé.
2. Mettez l’interrupteur sur 1.
3. Le message “P-L” apparaît sur l’écran.
4. Prenez un récipient de 10L.
5. Poussez sur ON pour commencer à doser. Sur l’écran apparaît la
quantité d’eau vidée.
6. Appuyez sur OFF pour arrêter le processus de dosage. Si vous appuyez
sur ON le processus recommence.
FR
6
SINMAG EUROPE BVBA
FR
7. Quand vous avez la quantité de 10 l dans votre récipient, ajustez la
quantité à l’écran avec les touches UP et DOWN.
8. Conrmez ces données en appuyant simultanément sur UP et DOWN.
9. Pendant deux secondes les nouvelles valeurs de pulsation apparaîtront
à l’écran.
3.3. Calibrage manuel des pulsions par litre.
1. Avant de démarrer le doseur tenez les boutons UP et DOWN enfoncés
2. Mettez l’interrupteur sur 1.
3. Pour adapter le nombre de pulsions par litre, poussez sur UP et DOWN.
En usine on règle sur 70 pulsions par litre. Si vous diminuez le nombre
de pulsions, vous aurez moins d’eau et l’inverse si vous augmentez.
4. Pour valider vos paramètres appuyez en même temps sur UP et DOWN.
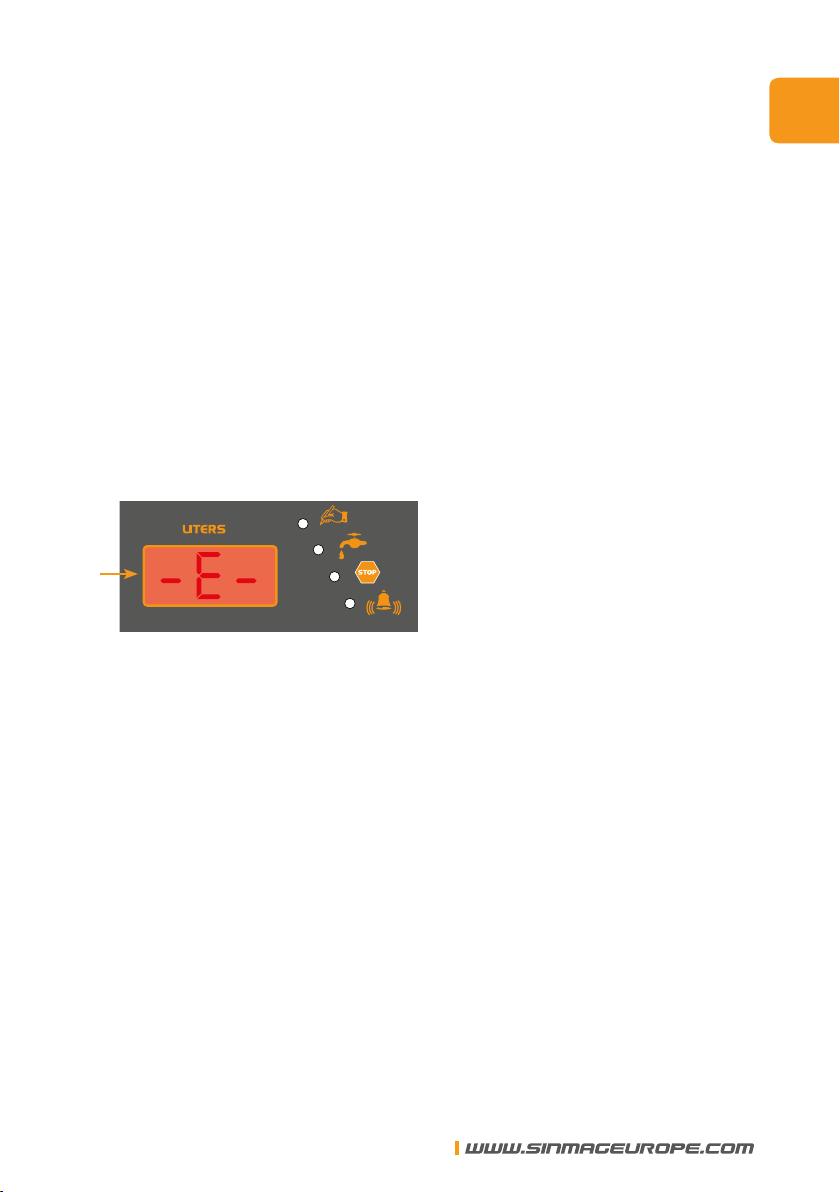
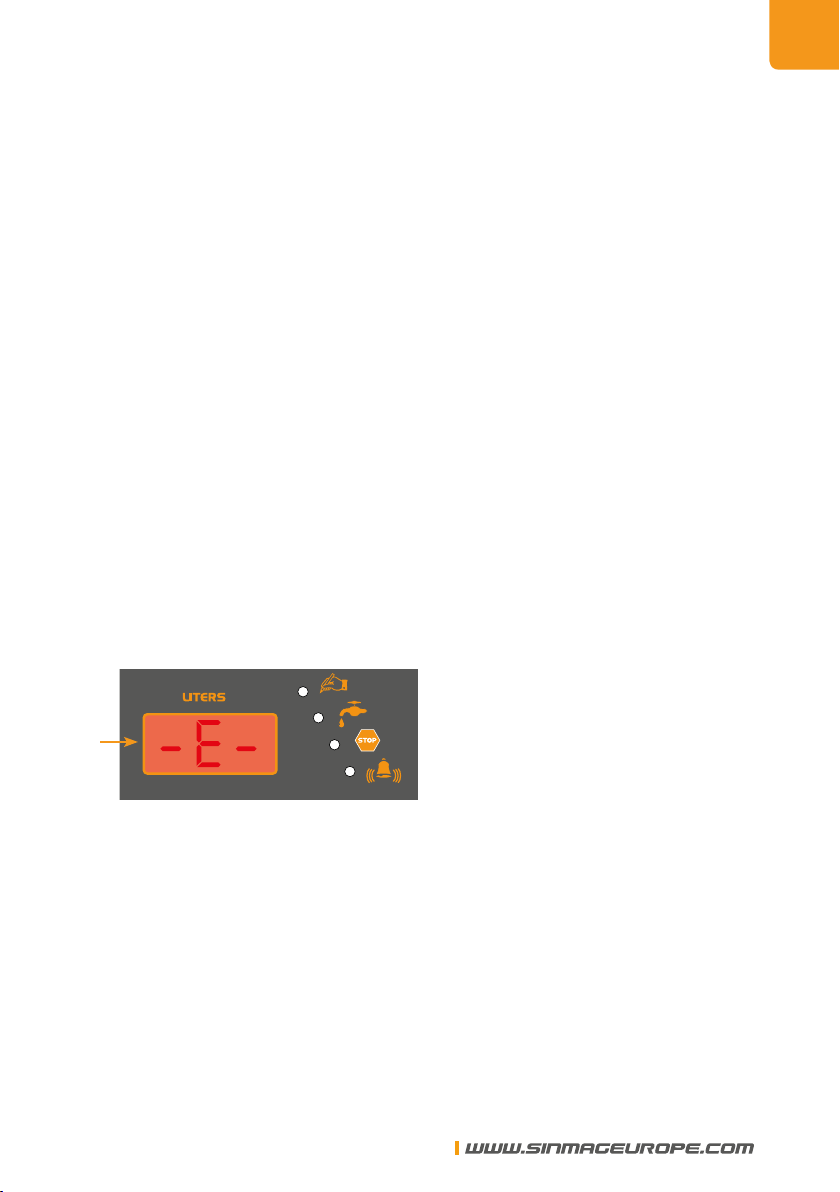
4. ALARME SUR L’ELECTRO VANNE
1. Le doseur s’arrête en cas de problème sur l’électro vanne. Une alarme
acoustique se fait entendre et le signe E apparait à l’écran.
2. Pour stopper l’alarme appuyez sur OFF..
3. Débranchez l’appareil et remplacez l’électro vanne.
SINMAG EUROPE BVBA
7
FR

5. RÉGLAGE
5.1. Doseur avec décimales ou sans:
1. Eteignez le doseur, puis mettez l’interrupteur sur 1.
2. Quand l’écran afche 888, appuyez sur OFF pendant 3 secondes.
Avec décimale Sans décimale
REMARQUE: Si l’écran vous indique un point, c’est que le doseur
travaille en décimale jusqu’à 99,9 litres.
3. Répétez les étapes 1 et 2 pour revenir au dosage sans décimale.
6. DONNÉES TECHNIQUES
Poids 6,8 Kg
Raccordement eau ¾” mâle
Pression d’eau max 10 BAR
Pression d’eau min 1 BAR
Pression d’eau recommandée 2-4 BAR
Différence de pression d’eau max entre les
alimentations
1,5 BAR
Température maximum alimentation eau! 50°C
Règlage température 0 tot 40°C
Débit minimum 180 L/h
Débit maximum 2500 L/h
Tolérance 2°C
Alimentation électrique 220V-230V
Fréquence 50-60Hz
Puissance 25W
8
SINMAG EUROPE BVBA
FR

SE42
Manual ●Mode d’emploi ●Handleiding ●Handbuch ●Manuale
Water meter .Doseur d’eau . Watermeter
.Wasserdosiergerät .Dosicadora de agua .
Dosatore-miscelatore d’acqua
ENG
FR
ENG
NL
ES
IT
D

Congratulations with the purchase of this automatic water meter.
This machine has been tested thoroughly in our warehouse in Belgium
before delivery.
This way, Sinmag Europe is able to guarantee delivery of a machine
ready for installation.
For correct use and long service life of your water meter,
we recommend that you read this manual attentively before starting
to use the machine.
Sinmag Europe thank you for your trust and wish you much job
satisfaction with this machine.
Sinmag Europe Team.
2
SINMAG EUROPE BVBA
ENG

The hot water may never surpass 50º C / 122º F,
this will dammage the mixer irreversibly.
1. EQUIPMENT PARTS
1 water mixer
2 hot water entrance
3 cold water entrance
4 water exit
5 switch and protection fuse
6 power supply cable
7 preselection litres button
8 on and off button
9 litres display
10 water thermometer display
11 electrovalve
12 litres sensor
13 water lter
14 temperature sensor
15 electronic control
2. INSTALLATION
2.1. Wall attachment
ALWAYS INSTALL IN VERTICAL POSITION
• In order to t the dispenser, mark the four drill holes indicated for the
xation of the apparatus in wall.
• Ensure an ideal working height.
SINMAG EUROPE BVBA
3
ENG

2.2. Water connection
• Connect the cold water entrance (marked in blue) to the water cooler,
and the hot water entrance (marked in red) to the network
• Follow the connection instructions from the drawing.
2.3. Electrical connection
• Connect the water dispenser to a compatible current socket as indicated in
the label, which indicates the voltage and frequency.
• It is recommended that the electrical socket has earth return.
• For greater security, it is recommended that the electrical socket has
electrical protection, by means of a fuse.
Do not manipulate the water meter inside without disconnecting
the electrical plug. The device can only be manipulated by experts
and authorized personnel.
• If the water meter does not ignite, verify the protection fuse located in the
electrical plug. If the fuse is defective, replace it by a 2 Amperes fuse.
4
SINMAG EUROPE BVBA
ENG

3. OPERATION
1. Move Power SWITCH to position I
2. During 3 seconds the screen displays ‘888’.
Litres screen
3. Select the desired volume by means of the UP and DOWN button.
UP ON
DOWN OFF
4. In order to begin the measuring process, press ON key. The device will
begin to release water and the litres/gallons will be discounted. When
arriving at 0, It closes automatically the liquid passage.
5. In order to repeat the process, press up or down button to visualize the
last preselected litres/gallons. In order to begin the measuring process,
repeat points 3. and 4.
6. If during the process, for whatever reason, you desire to interrupt the
water exit, press the “OFF” button. The metering is interrupted, and the
remaining litres/gallons stay in preselection. If you wish to continue the
process, press “ON” button. If you wish to begin a new cycle, repeat
points 3. and 4
7. During the metering process you can visualize the ow in the installation,
pressing simultaneously the keys UP and DOWN. (Litres/min)
8. With the water mixer we will select the temperature of the exit water.
The mixer will open automatically or close the cold or hot water to obtain
the selected temperature by means of the mixture. On the thermometer
screen we can see the water temperature.
If the temperature of the water in the entrance changes, the mixer will correct
this variation automatically to maintain the selected water temperature
SINMAG EUROPE BVBA
5
ENG
Always select a temperature that is reasonable!
Example
Always select a temperature of water in the margins of temperature of the
cold and hot water. If there is a cold water temperature of 5 degrees, and you
requested the mixer water at 3 degrees, it will open the passage of the cold
water; but the temperature will not arrive at 3 degrees, because the minimum
is 5 degrees.
3.1. For correct mixer operation
1. The diameter of the pipes must always be equal or superior to 18 mm to
guarantee a correct volume. The pressure has to be equal or superior to
1 bar as well, 3 bars being the ideal in both entrances.
2. The inlet pressure of cold and hot water must be similar, if there is a
difference superior to 1.5 bars, the regulation of the temperature can be
difcult
3. If the temperature of the mixed water is very different from the selected
one, you can readjust the mixer. Remove the cover and screw. Extract
the graduated control and insert the real temperature to which the mixed
water comes out.
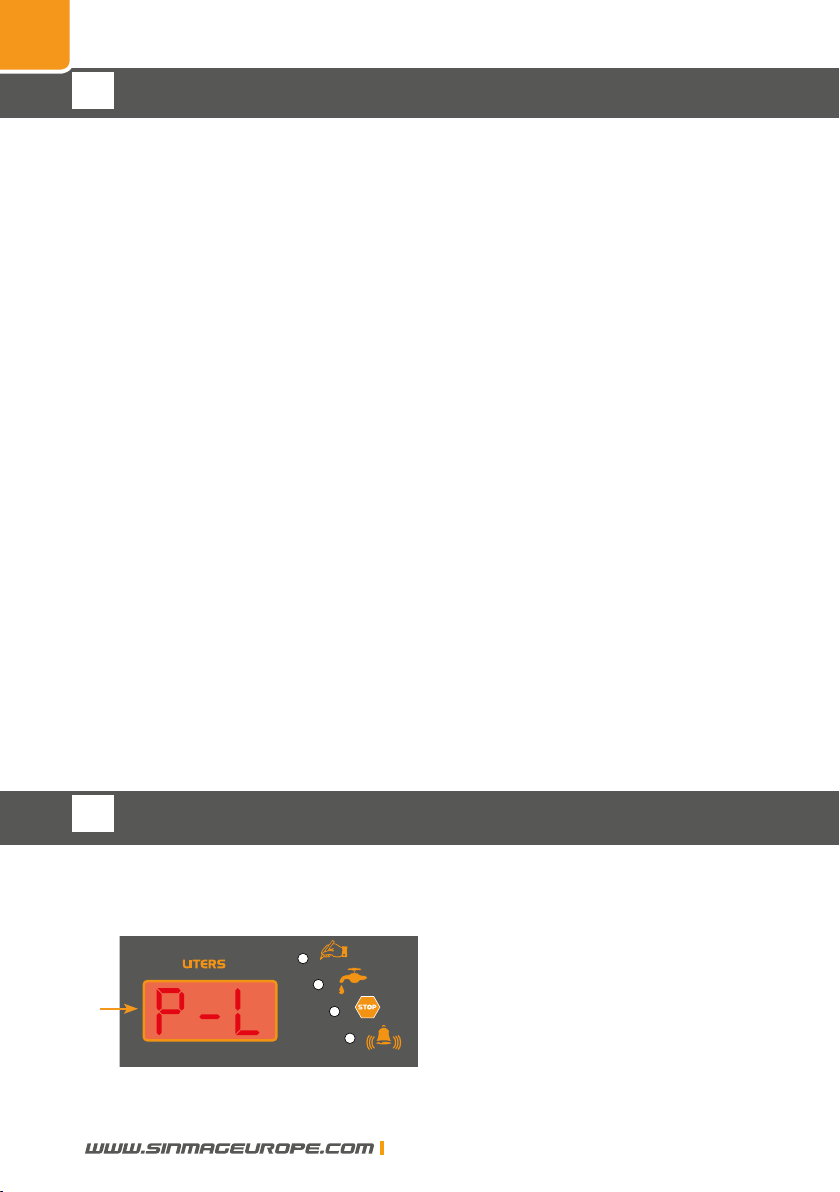
3.2. Automatic tuning pulses
Only in case of a measurement error
1. Before switching ON the equipment hold the “off” key pressed.
2. Move Power SWITCH to position I.
3. The message “P-L” is displayed.
4. Prepare a container of 10L.
6
SINMAG EUROPE BVBA
ENG
5. Press ON key to begin dosing. The amount of emptied water is dis-
played.
6. Press OFF button to stop water dosing procedure. If ON key is pressed
the procedure will begin again.
7. When you have 10 litres in your container, adjust the quantity on the
display with the UP and Down buttons.
8. Press Up and DOWN button at the same time to conrm the volume.
9. During 2 seconds the screen will display the new value of pulses calcu-
lated by the dispenser
3.3. Manual tuning pulses for litres.
1. Before switching ON the equipment hold simultaneously the ‘UP and
‘DOWN’ buttons.
2. Move Power SWITCH to position I. The programmed pulses will display.
3. To adapt the pulses per litre, press UP and DOWN keys. The factory
value is programmed to 70 pulses per litre. If you put a higher number
the meter will let more water pass. If you put a lower number, the mixer
will let less water pass.
4. Press Up and DOWN button at the same time to conrm parameters.
4. ELECTROVALVE WARNING FAILURE
1. The dispenser will stop if it detects liquid passage by the electrovalve
during stop. It will activate the acoustic alarm signal and will display the
error message -E -.
2. To deactivate the alarm signal, press the OFF key.
3. Disconnect the water meter from the power supply and repair the elec-
troválve as soon as possible.
SINMAG EUROPE BVBA
7
ENG
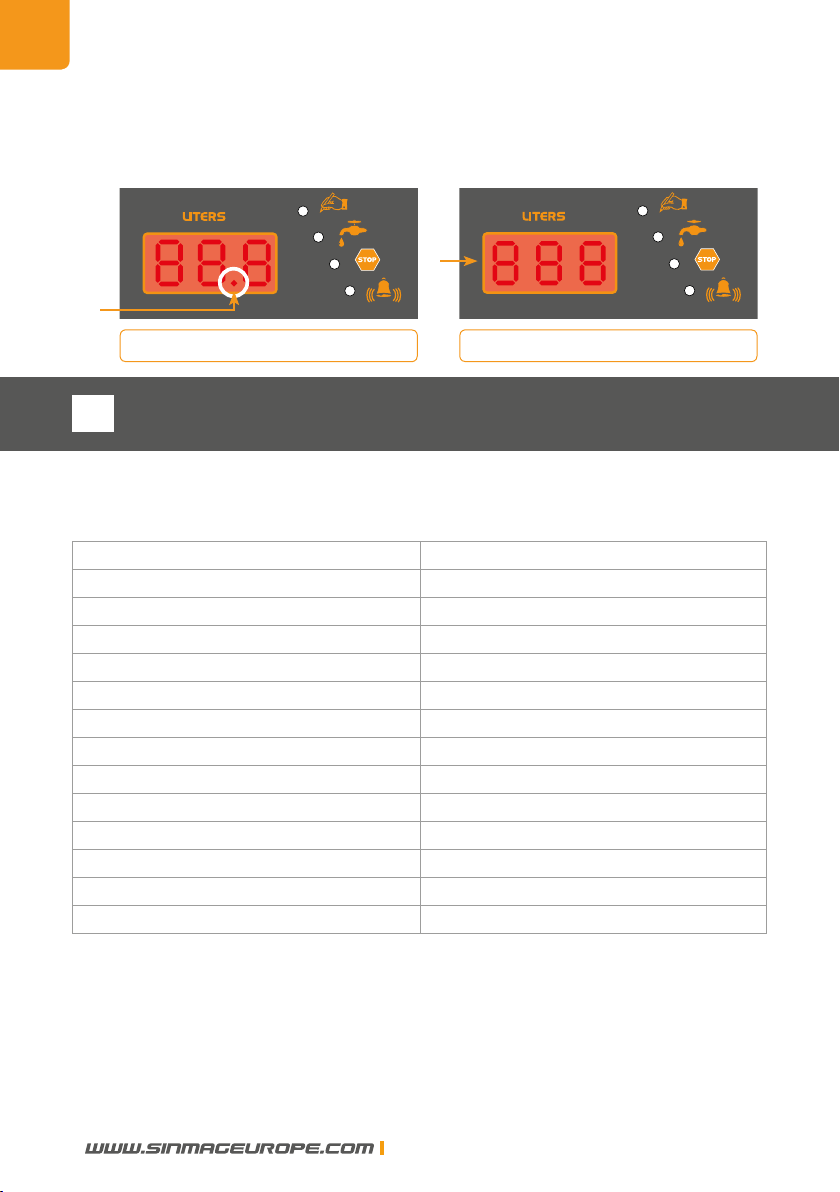
5. CONFIGURATION
5.1. Dispenser decimal - no decimal:
1. Switch off the watermeter, move power switch to position 1.
2. When the screen displays ‘888’, hold OFF button during 3 seconds.
with decimal Without decimal
NOTE: If the decimal point appears in the screen, the dispenser is
prepared to work like decimal 99,9.
3. Repeat steps 1 and 2 to go back to dosage without decimal.
6. TECHNICAL DETAILS
Weight 6,8 Kg
Pipes connection ¾” male
Max. operating pressure 10 BAR
Min. operating pressure 1 BAR
Recommended operating pressure 2-4 BAR
Max. pressure difference between entrances 1,5 BAR
Max. temperature hot water entrance 50°C
Adjustable temperature 0 tot 40°C
Minimal ow 180 L/h
Maximal ow 2500 L/h
Maximal error 2°C
Power supply 220V-230V
Frequency 50-60Hz
Power 25W
8
SINMAG EUROPE BVBA
ENG

SE42
Manual ●Mode d’emploi ●Handleiding ●Handbuch ●Manuale
Water meter .Doseur d’eau . Watermeter
.Wasserdosiergerät .Dosicadora de agua .
Dosatore-miscelatore d’acqua
NL
FR
ENG
NL
ES
IT
D

Prociat met de aankoop van uw automatische watermeter. De machine werd
alvorens te leveren getest in het magazijn te België. Zo kan Sinmag Europe
garant staan voor de levering van een machine die klaar is voor installatie.
Voor een goede werking en lange levensduur van uw watermeter raden wij
u aan deze handleiding grondig door te nemen alvorens aan de slag te gaan
met uw machine.
Sinmag Europe dankt u voor het vertrouwen en interesse en wenst u veel
werkgenot.
Het Sinmag Europe Team
2
SINMAG EUROPE BVBA
NL
Opgelet! Warmwatertoevoer “heter dan 50°C” kan de watermenger
onherroepelijk beschadigen!
1. ONDERDELEN WATERMETER:
1 Watermenger
2 Warmwateringang
3 Koelwateringang
4 Wateruitgang
5 Schakelaar en beveiligingszekering.
6 Voedingskabel
7 Keuzetoets gewenste aantal liter water
8 Aan en uit toetsen
9 Digitaal liter weergavescherm
10 Digitaal temperatuurscherm
11 Electro magneetventiel
12 Doseerventiel
13 Water lter
14 Temperatuursensor
15 Elektrisch sturingspaneel
2. INSTALLATIE:
2.1. Muurbevestiging:
HET TOESTEL STEEDS VERTICAAL PLAATSEN!
• Voor plaatsing van het toestel, kies de juiste positie en markeer de boor-
gaten vooraf op de muur met potlood.
• Zorg steeds voor een makkelijke bedieningshoogte van het toestel.
SINMAG EUROPE BVBA
3
NL

2.2. Wateraansluiting:
• Sluit het gekoelde water aan op de koudwateraansluiting
(aangeduid in blauw)
• Sluit de warmwatertoevoer of leidingwater aan op de warmwater-
aansluiting. (aangeduid in rood)
• Gelieve de aansluitomschrijving zoals aangegeven op de foto hierboven
correct op te volgen!
2.3. Elektrische aansluiting:
• Sluit de watermeter op een correcte stroomtoevoer aan, zoals aangege-
ven in deze handleiding en op het identicatieplaatje van het toestel.
• Voorzie een goed geaard stopcontact voor dit toestel.
• Voor nog grotere bescherming wordt aangeraden het toestel aan te sluiten
op extra elektrische beveiliging (30mA).
Voer geen herstelling of onderhoud uit aan de watermeter
vooraleer de stroom af te sluiten!
Laat enkel een gekwaliceerd technicus onderhoud of
herstellingen uitvoeren aan de watermeter!
• Indien de watermeter niet opstart, contoleer de zekering aan de schake-
laar van het toestel. Indien nodig, vervang deze door een nieuwe zekering
van 2 ampère.
4
SINMAG EUROPE BVBA
NL
Table of contents
Languages:
Popular Measuring Instrument manuals by other brands


LaMotte
LaMotte WaterLink Spin Touch DW manual

Tektronix
Tektronix YT-1 instruction manual

ThermoFisher Scientific
ThermoFisher Scientific Nicolet AEM user guide

Withings
Withings Sleep Analyzer Quick installation guide

Sony
Sony MDX-C800REC Service manual

Seres OL
Seres OL TOPAZ Total Alkalinity Operator's manual