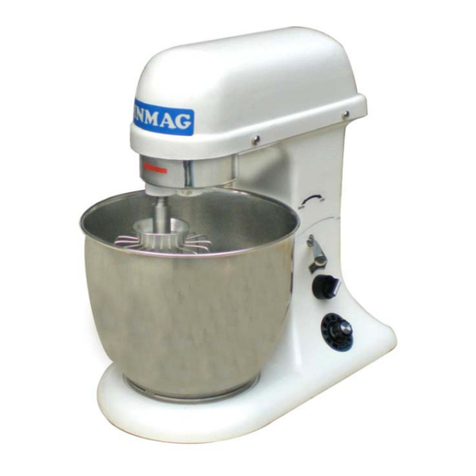
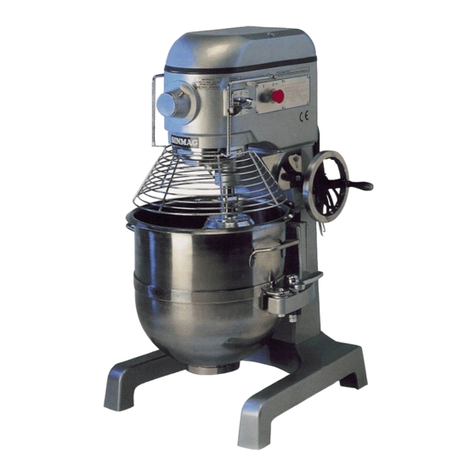
sinmag SM-500CSH User manual

OWNER’S MANUAL
SM-500CSH
(Planetary Mixer)

CONTENTS
1
Introduction••••••••••••••••••••••••••••••••••••••••••••••••••••••••••••••••••••••••••(2)
Installation & Commissioning•••••••••••••••••••••••••••••••••••••••••••••••••••(3)
Operation•••••••••••••••••••••••••••••••••••••••••••••••••••••••••••••••••••••••••••••(4)
Attention••••••••••••••••••••••••••••••••••••••••••••••••••••••••••••••••••••••••••••••(6)
Cleaning & Maintenance••••••••••••••••••••••••••••••••••••••••••••••••••••••••••(7)
Parts List••••••••••••••••••••••••••••••••••••••••••••••••••••••••••••••••••••••••••••••(8)
Electric Control Diagram••••••••••••••••••••••••••••••••••••••••••••••••••••••••(11)

INTRODUCTION
2
Brief introduction
The SM-500CHS planetary mixer has a total bowl capacity of 50 Litres,
combined with a 3 speed gearbox to ensure that all mixing requirements
can be met. They are produced to mix liquid ingredients, paste and viscid
ingredients, and dough.
Owners and operators should carefully read and familiarize themselves
with this entire manual before attempting to operate or service this machine.
Complying with this manual will ensure years of safe and trouble-free
operation.
All of the information, illustrations and specifications contained in this
manual are based on the latest product information available at the time of
printing. SINMAG reserves the right to make changes at any time without
notice. If questions arise during the operation or servicing, please contact
us before proceeding.
Specification

INSTALLATION AND COMMISSIONING
3
Installation
After uncrating your planetary mixer, inspect the machine for any damage
that might have occurred during shipment. Report any damage to us before
proceeding to operate this machine. Never attempt to operate this machine
with damaged or inoperable parts.
The following accessories are packed in the machine: One Dough Hook,
One Beater, One Whipping Ball.
Select a location for your mixer to allow sufficient room for operating,
cleaning and servicing the machine. The floor must be solid and level.
Commissioning
Check available voltage to your mixer. This mixer should have its own,
isolated electrical supply. Check your machine’s identification/electrical
plate to determine the appropriate breaker and wire size needed.
To ensure safety and years of trouble-free operation, the manufacturer
recommends that a licensed electrician check the electrical supply to
ensure that the proper breaker and wiring is being used.
After the machine has been connected to the electric supply, first of all
check the direction of rotation of agitator. When look from above, the
agitator should rotate clockwise. The arrow on the machine head indicates
the rotation direction of hook, beater or whipping ball. If the rotating
direction is wrong, please exchange any two of the electric cables to
reverse the rotating direction.
Then test the operation of the safety emergency stop button. The machine
must stop operating immediately. Test the operation of the microswitch
cut-out on the bowl safety cover. When the cover is lifted the machine must
stop immediately.

OPERATION
4
Operating Instructions
Tool Selection
Whipping ball: Light mixes such as whipped cream, mayonnaise, egg
white, pancakes and meringue.
Beater: Firm mixed such as light pastry, cakes, biscuits, icing, fillings and
mashed vegetables.
Hook: Heavy mixes such as dough and pastry.
Bowl Lift
Crank the lift level counterclockwise to lower the bowl. It is necessary to
lower the bowl change agitators, and to provide better access for filling and
emptying the bowl. To raise the bowl, crank the lift level clockwise until it
hits the upper stops.
Speed Control:
To change speeds, first TURN OFF MIXER, then move the shifter handle to
the desired speed. Number 1 is the slowest speed and number 3 is the
highest speed.
Slow Speed: or heavy mixtures such as dough, biscuits, etc.
High Speed: or fast, light work, such as whipping cream, beating eggs, and
mixing thin batters.

OPERATION
5
Operation Steps
1). Put the mixing materials into the bowl together with the agitator. Then fix
the bowl into the bowl bracket.
2). Lift the bowl to the topnotch by lift handle.
3). Fix the agitator onto the maxing head.
4). Place the shifter handle to the required speed, then turn on the machine.
5). Turn off the machine and lower the bowl by lift handle then take off the
agitator when mixing work is finished.
6). Take out the bowl together with agitator. Finally take out the mixed
materials.

ATTENTION
6
Working Safety
1). Disconnect from the power source when cleaning or servicing this
machine.
2). Never attempt to clean this machine while it is in motion, serious injury
could result.
3). Never place your hand or any kitchen utensil in the bowl whilst the mixer
is in operation.
4). Never operate this machine with safety covers removed or with safety
switches inoperative.
5). Many mixer operations may be started at the low speed then advanced
to a higher speed as the mixing progresses.

CLEANING AND MAINTENANCE
7
Cleaning and Maintenance
1).Clean the surface of the machine with dishcloth after operation everyday.
Use a damp cloth with a mild dish washing soap.
2).Wipe some lubricating oil on the bowl lifting gliding track. Lift the bowl up
and down for several times to full lubricate the track. If you are difficult to
lift the bowl, please scrape off the dough residue from the track then
wipe the lubricating oil. Please help to lift the bowl up and down to make
full lubrication when the bowl still has difficulty to be lifted up and down.
3).If it is still difficult to lift the bowl up and down by lift handle after the full
lubrication, please adjust the inner screw under the spring to strengthen
the strain of the spring as to strengthen the lifting force.
4).To check the gear oil level to avoid oil leak every month.

PARTS LIST
8

PARTS LIST
9
Parts List Parts Code Parts Name Specification
SM500C001 12402-320 Gear Shaft(13T)
SM500C002 15ZC401-6204-2RS Bearing
SM500C003 12402-340 Gear Wheel(20T)
SM500C004 12402-660 Block Ring
SM500C005 12402-330 Gear Wheel(30T)
SM500C006 12402-350 Gear Shaft(52T)
SM500C007 15ZC401-6204-2RS Bearing
SM500C008 15ZC401-6207-2RS Bearing
SM500C009 12420-190 Main Shaft
SM500C010 15ZC401-6206-2RS Bearing
SM500C011 12402-054 Ring Of Mainshaft
SM500C012 12402-300 Ring Of Gear Wheel
SM500C013 12402-290 Gear Wheel(45T)
SM500C014 12402-075 Shifting Block
SM500C015 12402-260 Gear Wheel(35T)
SM500C016 12402-200 Gear Cover
SM500C017 12402-210 Gear Wheel
SM500C018 12402-051 Oil Block Ring
SM500C019 12402-004 Gear Cover
SM500C020 12402-003 Bottom Cover
SM500C021 12402-520 Fixed Shaft
SM500C022 12402-500 Gear Wheel(21T)
SM500C023 Nut M16×1.5
SM500C024 Key 6×6×15
SM500C025 Ring Φ16
SM500C026 15YF402-62*35*10 Oil Seal
SM500C027 21402-001 Machine Head
SM500C028 21402-480 Internal Gear
SM500C029 15YF402-45*72*13 Oil Seal
SM500C030 12402-950 Conical Gear(30T) Φ71×32
SM500C031 12402-950 Conical Gear(30T) Φ71×32
SM500C032 15ZC201-6005-2RS Bearing
SM500C033 12402-700 Guide Rod
SM500C034 16WDKG Micro Switch
SM500C035 16JLJCQ Contactor
SM500C036 16JDQRHN10A-5 Thermal Relay

PARTS LIST
1
0
SM500C037 12402-012 Motor Belt Wheel
SM500C038 15PD402-800L Belt
SM500C039 21402-011 Big Belt Wheel
SM500C040 12402-031 Spring
SM500C041 12402-101 Spring
SM500C042 21402-037 Shifting Cover
SM500C043 16HTLTAD-Y-636 Micro Switch
SM500C044 12402-024 Plate
SM500C045 12402-036 Handle
SM500C046 12402-035 Shaft Of Handle
SM500C047 12402-025 Cover
SM500C048 16KGLK22-81R Stop Switch
SM500C049 15BSL22*250 Handle Wheel
SM500C050 15SBL2M*12 Handle
SM500C051 12402-910 Shaft Of Handle Wheel
SM500C052 21402-002 Frame
SM500C053 21402-005 Bowl Bracket
SM500C054 12402-029 Fixed Handle
SM500C055 12402-030 Pin
SM500C056 21402-170 Top Cover
SM500C057 21402-490 Safety Grid
SM500C058 12402-200 Bowl
SM500C059 21402-006 Base
SM500C060 17JD402 Foot Mat
SM500C061 16KGLK22-21G-N29 Start Button
SM500C062 21402-082 Beater
SM500C063 21402-083 Ball
SM500C064 21402-081 Hook
SM500C065 12402-280 Shifting Gear
SM500C066 12402-020 Ring
SM500C067 16402-380-50 Motor

ELECTRIC CONTROL DIAGRAM
1
1
Table of contents
Other sinmag Mixer manuals

