TECHNICAL SPECIFICATIONS
660-3150-0013-D
1
Connect the sensor
to the detector.
3
Put down the sensor
or attach it to the wall.
The electrodes must
face the ground.
2
Attach the detector to a
clean surface where there is
no risk of immersion. Use
the provided screws or the
non-permanent adhesive
located on the back of the
product.
4
Test the detector by putting the electrodes in
contact with a small amount of water (1 tsp).
The audible alarm will be activated. Wipe the
electrodes with a dry cloth to cease the alarm.
If the alarm isn't activated, refer to our Website.
STEP 3
INSTALLATION OF THE SMART WATER LEAK DETECTORS
Place detectors (WL4200) where potential water
leakage may occur:
• Water heater
• Drain pump
• Bathtub
• Sink
• Etc.
Water leak detectors with sensor (WL4200S) are
designed to be used in hard-to-reach places :
• Below dishwasher
• Behind washing machine
• Etc.
1
Make sure the valve is
in the "OPEN" position
before proceeding
with the installation.
Separate the controller
from the ball valve:
A) Remove the pin
B) Tilt the controller
back and slide it
backwards
4
Before replacing the
controller, make sure
that both the valve and
controller are in the
"OPEN" position.
6 7
Power the valve using
the AC adapter.
To add an emergency
power supply in the event
of a power failure, insert
4 AAA lithium batteries
(not included).
Open the main water supply to make
sure there are no leaks.
5
Put the controller back in place and
insert the pin to secure the controller
to the valve.
2
Close the main water
supply. Open the hot
and cold faucets near
the main water supply
to reduce the water
pressure.
Remove the valve
safety caps.
3
Install the smart water valve just
downstream of the main water
shut-off valve. Depending on your
plumbing, additional fittings may
be required (not included).
STEP 4
INSTALLATION OF THE SMART WATER VALVE
IMPORTANT: Do not insert the batteries before the valve is installed
to your main water supply and powered by the supplied adapter.
A
B
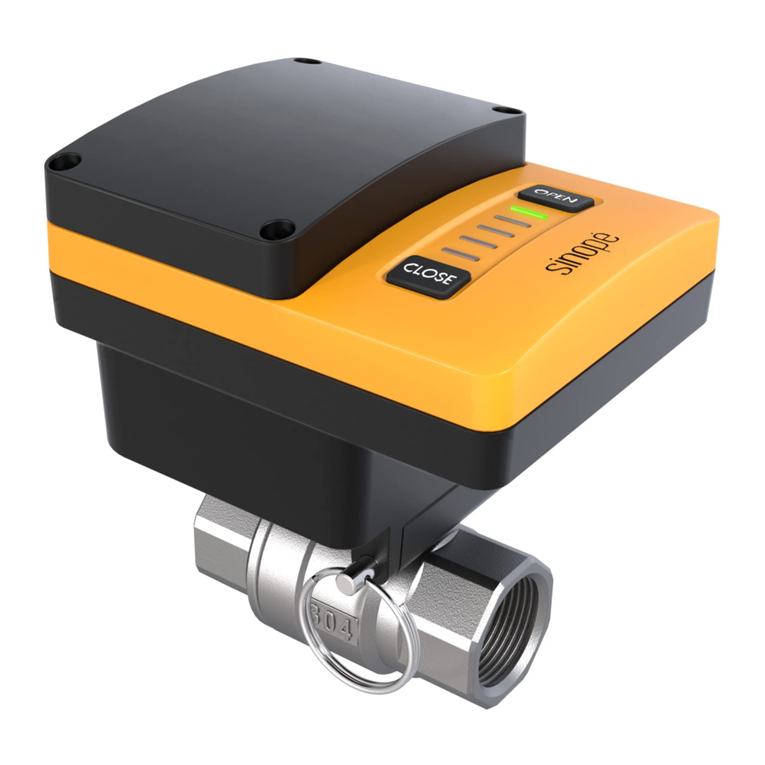
Smart water valve
Ambient temperature: 0 °C to 40 °C (32 °F to 104 °F)
Maximum water temperature: 85 °C (185 °F)
Storage: -20 °C to 50 °C (-4 °F to 122 °F)
Valve body: stainless steel
Controller base: fiberglass reinforced
Maximum pressure: 145 PSI
Maximum torque: 2.5 N.m
Power supply: 5 V / 5 W (included)
Emergency power supply: 4 AAA lithium batteries (not included)
Certifications:
Conforms to CSA B125.3-12 Plumbing fittings
Valve body tested EU RoHS 2 (Directive 2011/65/EU)
Diameter
VA4220WF: ¾ in NPT x ¾ in NPT
VA4221WF: 1 in NPT x 1 in NPT
Wi-Fi: 2.4 GHz (802.11 B/G/N)
Zigbee 3.0 profile
Frequency: 2.4 GHz
Transmission power: +20 dBm
Receiver sensitivity: -108 dBm
Indoor installation only.
Transmitter module IC: 22394-ZBM1501/ FCC ID: 2AK2T-ZBM1501
This device complies with Industry Canada license exempt RSS standard(s).
Operation is subject to the following two conditions:
(1) this device does not cause interference, and (2) this device must accept
any interference, including interference that may cause undesired operation
of the device.
This equipment has been tested and found to comply with the limits for a
Class B digital device, pursuant to part 15 of the FCC Rules. These limits are
designed to provide reasonable protection against harmful interference in a
residential installation. This equipment generates, uses and can radiate radio
frequency energy, and if not installed and used in accordance with the
instructions, may cause harmful interference to radio communications.
However, there is no guarantee that interference will not occur in a
particular installation. If this equipment does cause harmful interference to
radio or television reception, which can be determined by turning the
equipment OFF and ON, the user is encouraged to try to correct the
interference by one or more of the following measures:
Reorient or relocate the receiving antenna.
Increase the separation between the equipment and receiver.
Connect the equipment into an outlet on a circuit different from that
to which the receiver is connected.
Consult the dealer or an experienced radio/TV technician for help.
Apple and the Apple logo are trademarks of Apple Inc., registered in the U.S. and other
countries. App Store is a service mark of Apple Inc., registered in the U.S. and other
countries.
Google Play and the Google Play logo are trademarks of Google Inc.
3-year limited warranty
SINOPÉ TECHNOLOGIES INC. warrants the components of their products against
defects in material and workmanship for a 3-year period from the date of
purchase, under normal use and service, when proof of purchase of such is
provided to the manufacturer. If at any time during the warranty period the product
is determined to be defective, SINOPÉ TECHNOLOGIES INC. will replace it. This
warranty does not cover any transportation costs that may be incurred by the
consumer. Nor does it cover a product that has been improperly installed, misused
or accidentally damaged. A water detector's casing that has completely been
immersed in water will not be covered by the warranty. The obligation of SINOPÉ
TECHNOLOGIES INC., under the terms of this warranty, will be to supply a new unit
and this releases the manufacturer from paying the installation costs or other
secondary charges linked to replacing the unit or the components. The
manufacturer shall not be liable for incidental, consequential, or special damages
arising at, or in connection with product use or performance. This warranty does
not cover damages or loss caused by defects, and the owner's use of the SINOPÉ
TECHNOLOGIES INC. product confirms the understanding that this product does
not constitute an insurance policy, and is only a product used to reduce the risk of
water damage.
For more information, visit our Website:


