Sirius XM RAdio GDI-SXTTR2 User manual

User Guide
Sound Station
Model: GDI-SXTTR2


3
Table of Contents
Introduction ...................4
Features .......................... 4
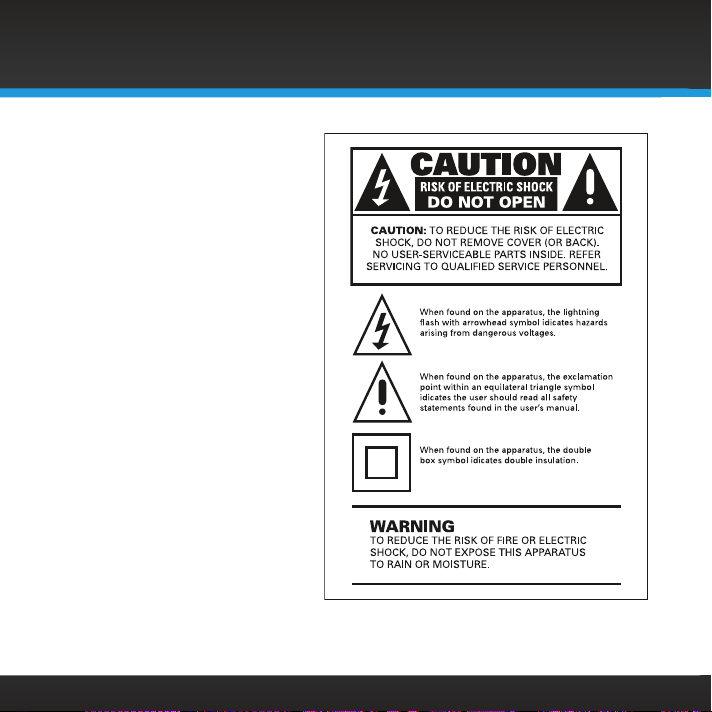
Safety and Care Information......... 5
What’s in the Box? ................. 8
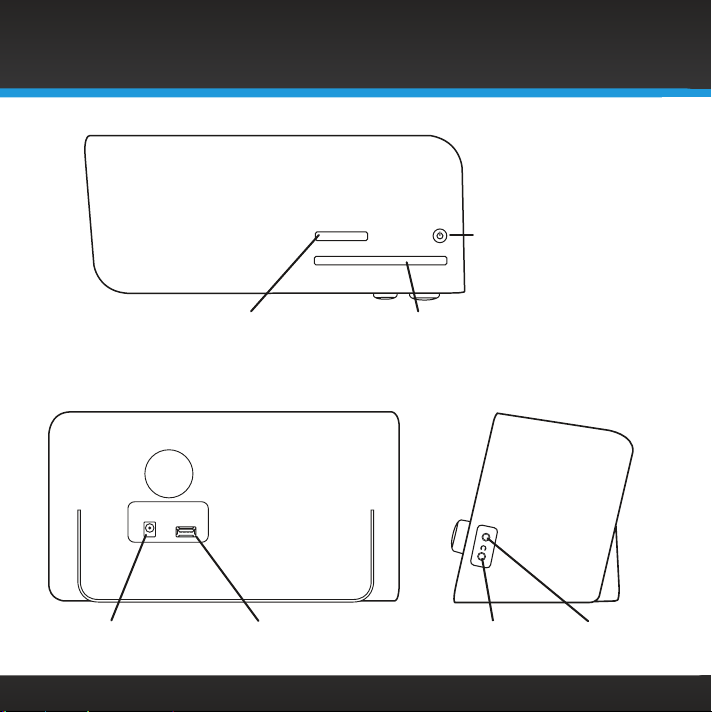
Sound Station Controls ............. 9
Remote Control ....................11
Main Display Screens ...............12
Installation ...................13
Step 1: Connect to a Wireless
Network .........................14
Step 2: Enter Your Username
and Password ....................18
Navigation Basics ............ 20
Using the Sound Station........23
SiriusXM Internet Radio ............ 23
On-Demand: ...................... 23
Favorites:......................... 23
Listening to Internet Radio .....24
Tuning a Channel..................24
Viewing a Category: ............... 24
Returning to Home Screen ......... 25
Direct Tune ....................... 25
Favorite Channels .................26
Parental Control................... 27
Advanced Features ............32
Pause, Rewind, and Replay ......... 32
Alarm Clock ...................... 33
Snooze........................... 35
Sleep Timer.......................36
Equalization Settings .............. 37
Aux In. . . . . . . . . . . . . . . . . . . . . . . . . . . . 37
Configuring the Sound Station ..38
System Setup ..................... 38
Troubleshooting ..............52
Product Specifications .........56
Patent and Environmental
Information .................57
Patent Information ................ 57
Environmental Information . . . . . . . . . 57
FCC Statement ...............58
Important Legal Information ....59

4
Features
Thank you for purchasing the SiriusXM Sound Station!
Your new SiriusXM Sound Station comes with everything you need to enjoy
SiriusXM Internet Radio in your home.
Use this manual to familiarize yourself with all of your Sound Station’s
features and capabilities. For the latest information about your Sound
Station and other SiriusXM products and accessories, visit siriusxm.com.
Please read this User Guide before using your SiriusXM Sound Station!
Introduction

5
Introduction
Safety and Care Information
IMPORTANT! Always read and understand all the instructions to avoid injury to
yourself and/or damage to your device. Sirius XM Radio Inc. disclaims all
responsibility for damage from data loss due to breakdown, repair, or other
causes.
•Do not expose to extreme temperatures (above 140°F or below -4°F, or
above 60°C or below -20°C).
•Do not expose to moisture. Do not use device near or in water.
•Do not let any foreign matter spill into device.
•Do not store in dusty areas.
•Do not expose to chemicals such as benzene and thinners. Do not use
liquid or aerosol cleaners. Clean with a soft damp cloth only.
•Do not expose to direct sunlight for a prolonged period of time, and do
not expose to fire, flame, or other heat sources.
•Do not try to disassemble and/or repair device yourself.
•Do not drop your device or subject it to severe impact.
•Do not place heavy objects on device.
•Do not subject device to excessive pressure.
•If the screen is damaged, do not touch the liquid crystal fluid.
WARNING!
• Opening the case may result in electric shock.
• Make sure that you insert the plug all the way into the outlet.
• Do not touch the device with wet hands.
• Do not install near any heat sources such as radiators, heat registers,

6
stoves, or other apparatus
(including amplifiers) that
produce heat.
• Do not defeat the safety
purpose of the polarized
or grounding type plug. A
polarized plug has two blades
with one wider than the other.
A grounding type plug has two
blades and a third grounding
prong. The wide blade or the
third prong is provided for
your safety. When the provided
plug does not fit into your
outlet, consult an electrician for
replacement of the obsolete
outlet.
• Protect the power cord
from being walked on or
pinched particularly at plugs,
convenience receptacles, and
the point where they exit from
the apparatus.
• This product contains chemicals
known to the State of California
to cause cancer and birth
defects or other reproductive harm.
Introduction

7
Introduction
• This device should be unplugged from the AC outlet during a thunder and
lightning storm, and when the device will not be used for an extended
period of time.
• Use the power plug to disconnect the device from the power source. To
begin using the device again, reconnect it to an AC outlet.
• Connect the device to an easily accessible AC outlet, so that the device
can be quickly disconnected, if necessary.

8
What’s in the Box?
SiriusXM Sound Station
AC Power Adapter Remote Control
Introduction
HOME
BACK
12
select
vol - vol +
back home
3
456
78
0
9

9
Sound Station Controls
Introduction
HOME
BACK
HOME Button
Press to display the Home
screen for listening modes
and configuration options.
TUNE Knob (Multifunction)
Turning the knob at the Now Playing screen
displays the Home screen; pressing the knob at
the Now Playing screen displays the Direct Tune
screen; turning the knob in a menu or user input
screen scrolls through and highlights menus and
choices; pressing the knob in a menu or user input
screen selects the highlighted item.
Context Sensitive Buttons (4)
These buttons change their
functions according to the
context. Press to select
the function shown on the
display screen just above the
button.
Volume / Mute Knob
Turn to adjust the volume;
press to mute and un-mute
audio.
0-9 Number Buttons
Press to tune to a favorite
channel; press and hold to
set the current channel as a
favorite channel.
BACK Button
Press to return to the
previous display screen.
Action Panel Button
Press to learn more about
the channel, show, or artist,
and find similar channels.
Front View

10
Introduction
AUX IN
Headphone
Connection
Side View
Aux In
Connection
Alarm Button
Press to edit alarms or
edit the sleep timer.
Top View
Sleep / Snooze Button
Press to mute the alarm, or set
the sleep timer; press and hold
to enable/disable alarms, also
edit alarms.
Power/Standby
Button
ALARM
SLEEP / SNOOZE
Power Connection USB Connection
For external wired Ethernet
Adapter, sold separately.
Rear View

11
Remote Control
Battery Replacement
Introduction
Power Button
Turn Radio On and Off.
Select Button
Press to select highlighted
items; pressing at the Now
Playing screen displays the
Direct Tune screen.
Back Button
Press to return back to the
previous display
screen.
Home Button
Press to display the Home
screen for listening modes
and configuration options.
0-9 Number Buttons
Press to tune to a favorite
channel; press and hold to
set the current channel as a
favorite channel.
Release
Arrow Buttons
Press in a menu or user input
screen to scroll through and
highlight menu items and
choices
Vol+/Vol- Buttons
Press to increase or decrease
the audio volume.
12
select
vol - vol +
back home
3
456
78
0
9
IMPORTANT!
Pull tab and remove
before using the
Remote Control.
CR2025
OPEN
PUSH
RELEASE
Follow the instructions on the back
of the Remote Control to replace the
battery. The battery is a CR2025.

12
Main Display Screens
Introduction
The Now Playing Screen
The Home Screen
Listen to Internet Radio
Find Channels by
Category
Listen to Your
Favorite Saved Shows
Change Equalization
Settings
Listen to Shows
which already Aired
Listen using the Aux
In Connection
Configure and Change Settings
Alarm Clock On Clock
WiFi Signal Strength
Channel Number
Album Art
Pause and Replay
Timebar
Channel Logo
Artist Name
or Talk Show Host
or Sports Teams/Score
Song/Program Title
or Talk Show Schedule
or Game Time/Game Details
Return to Live Broadcast
Rewind Play/
Pause Fast-
Forward
Start Show Now

13
The SiriusXM Sound Station allows you to listen to all of the channels on
your SiriusXM Internet Radio subscription package using a wireless Internet
connection (Wi-Fi®).
You must be subscribed to SiriusXM Internet Radio to use the SiriusXM
Sound Station. You can add this service to your existing Sirius or XM
subscription, or subscribe only to the SiriusXM Internet Radio service.
To subscribe to SiriusXM Internet Radio, go to
siriusxm.com/internetradio
or
call 866-635-2349. When subscribed, you will be provided with your account
user name and password.
Once you have subscribed, verify that you are subscribed to the service by
listening online:
•Go online to siriusxm.com/internetradio. Click on the Listen Online link,
enter your username and password, and click Login. If you can listen,
then you are subscribed to SiriusXM Internet Radio. Close the browser
window to exit the player before continuing.
The SiriusXM Sound Station supports a wireless Internet connection through
any standard 802.11b/g access point. This includes wireless networks which
are WEP/WPA/WPA2 protected and require a password, and wireless
networks where the network name (SSID) is hidden. Once you have
connected to a wireless network, the Sound Station will remember your
network settings so you will not have to enter the information again, unless
you perform a Factory Reset of the Sound Station.
Installation

14
Step 1: Connect to a Wireless Network
Turning the TUNE knob scrolls through menus and lists to highlight items,
and pressing the TUNE knob selects a highlighted item.
The easiest way to connect to a wireless network is to have the Sound
Station scan for wireless networks, and then choose your network from the
list of wireless networks. The Sound Station will automatically do this the
first time you power it on.
However, if your wireless network name (SSID) is hidden, or if your network
is DHCP disabled, you’ll have to manually enter the network settings. Refer
to “Manually Connecting to a Wireless Network” on page 16.
Easy Connection to a Wireless Network
1. Plug the AC Power Adapter into an AC outlet, and plug the power plug
into the connector on the rear of the SiriusXM Sound Station. Press the
Power button.
2. If the Sound System has not previously connected to a wireless network,
wait while the Sound Station scans for wireless networks and go to the
next step.
Otherwise, press the HOME button, turn the TUNE knob to highlight
System Setup and press the TUNE knob to select. Turn the TUNE knob
to highlight Network and press TUNE knob to select. Turn the TUNE
knob to highlight Scan for Network and press TUNE knob to select.
Wait while the Sound Station scans for wireless networks.
Installation

15
3. Select your wireless network from the
list. Turn the TUNE knob to highlight your
wireless network and press the TUNE knob
to select.
4. The Sound Station will attempt to connect
to the wireless network. If you chose a
network that requires a password, you will
be prompted to enter the Network Key (password). Otherwise, the
Sound Station will attempt to connect to the wireless network.
5. To enter the network key, turn the TUNE knob to highlight each
character of the password and press the
TUNE knob to select the character. If you
make an error, press the BACK button
to erase the character. When you have
completed entering the network key,
highlight Enter and press the TUNE knob
to select.
6. When the Sound Station has successfully connected to the wireless
network, Network OK will be displayed. Wait while the Sound Station
updates itself after which it will enter Standby mode.
If you have not yet entered your username and password, continue with
“Step 2: Enter Your Username and Password” on page 18.
Installation

16
Manually Connecting to a Wireless Network
To manually connect to a wireless network, you’ll need to know the following
information about your wireless network:
SSID (wireless network name)
IP Address for the Sound Station
Gateway IP Address
Network Mask IP Address
Primary Name Server IP Address
Secondary Name Server IP Address (optional)
1. Plug the AC Power Adapter into an AC outlet, and plug the power plug
into the connector on the rear of the SiriusXM Sound Station. Press the
Power button.
2. If the Sound System has not previously connected to a wireless network,
wait while the Sound Station completes the scan for wireless networks
and then press the BACK button. Turn the TUNE knob to highlight
System Setup and then press the TUNE knob.
3. Turn the TUNE knob to highlight Network and then press the TUNE
knob.
4. Turn the TUNE knob to highlight Enter Network Name and then press
the TUNE knob.
5. Enter the SSID (wireless network name) by turning the TUNE knob to
Installation

17
highlight each character of the SSID and press the TUNE knob to select
the character. If you make an error, press the BACK button to erase the
character. When you have completed entering the SSID, highlight Enter
and press the TUNE knob.
6. Wait until the Sound Station has found the wireless network.
If you have not yet entered your username and password, continue with
“Step 2: Enter Your Username and Password” on page 18.
Installation

18
Installation
Step 2: Enter Your Username and Password
The SiriusXM Sound Station requires your SiriusXM Internet Radio account
username and password to connect to SiriusXM Internet Radio. If are not yet
subscribed to SiriusXM Internet Radio, go to
siriusxm.com/internetradio
or
call 866-635-2349. When subscribed, you will be provided with your account
username and password.
1. If you have not previously entered your username and password, or
have manually configured the wireless network in the previous step,
the Sound Station will already be prompting your for your username.
Continue with the next step.
Otherwise, press the HOME button, turn the TUNE knob to highlight
System Setup and press the TUNE knob to select. Turn the TUNE knob
to highlight Set Credentials and press TUNE knob to select. Turn the
TUNE knob to highlight Username/Password Setup and press TUNE
knob to select.
2. Enter your SiriusXM Internet Radio
username and select Enter. Your username
is case sensitive. If you entered an incorrect
username you will be prompted that the
username does not exist. Repeat this step
and enter the correct username.
3. Next enter your password and select Enter. Your password is case
sensitive.
4. When the Sound Station connects to SiriusXM Internet Radio the

19
Installation
Category Listing screen will be displayed.
Turn the TUNE knob to scroll through the
category choices and highlight a category.
Press the TUNE knob to display the sub-
categories in the category. When you
select a sub-category, the channels in the
category will be displayed. You can select a
channel to begin listening.
The installation is complete.

20
Navigation Basics
Power Button
The Power button turns the Sound station On or places it in Standby.
ALARM Button
Pressing the ALARM button displays the Alarms setup menu screen. Select
Set Alarms to configure the options for each alarm. You can set up to seven
different alarms.
SLEEP / SNOOZE Button
Sleep: When the alarm clock is sounding, pressing the SLEEP/SNOOZE
button will silence the alarm for 5 minutes. Each additional immediate press
of the SLEEP/SNOOZE button increases the snooze time for 10, 15, 30, 45 or
60 minutes. While snoozing, the snooze countdown time is displayed on the
display screen.
Snooze: While the Radio is playing, pressing the SLEEP/SNOOZE button
and pressing the TUNE knob enters the sleep mode. The first press displays
Sleep OFF, or whatever time the sleep timer had been previously set to. Turn
the TUNE knob to adjust the amount of sleep time and press the TUNE knob
to set the time and start the sleep timer.
To cancel the sleep timer, press the SLEEP/SNOOZE button. Wait a moment
and Timer Disabled will be displayed.
Context Sensitive Buttons (5)
These buttons change their functions according to the context. Press to select
the function shown on the display screen just above the button. These buttons
will be described in this User Guide in the context where they appear.
ALARM
SLEEP / SNOOZE
...
Table of contents
Other Sirius XM RAdio Telephone manuals