SK magic WPU-IAC302 User manual

Ice-making Water Purier
WPU-IAC302
( Hot / Cold / Ambient )
• Please read the safety precautions in this manual thoroughly before use to ensure safe operation.
• Please store the manual in a safe location close to the appliance for future reference.
• The structure and exterior of the appliance may be enhanced for quality improvement without prior notice.
M510300023 (REV.01)

2
Safety Information 3
Installation 7
Features 8
Product Description 9
Control Panel 11
How To Use 13
Usage Cautions 13
Operation Method 13
Additional Functions 15
Filter Replacement 18
Water Flow Diagram 20
Cleaning Method 21
Product Exterior and Outlet 22
Drip Tray 22
Ice Outlet 23
Ice Room 24
Cooling Fan and Radiator Grill 25
Troubleshooting 26
Specifications 30
Disposal Guidelines 32
Contents

3
• The following precautions are for the safe and proper usage of this product. Be sure to
follow them to prevent unexpected risks and damage.
• If used incorrectly, safety-related precautions are classified according to the expected risk, the
magnitude of damage, and the level of risk.
• This product should not be used by anyone who lacks physical, sensory, or mental abilities, or
by those who lack experience and knowledge (including children) about how to safely use
the device without supervision or instruction.
WARNING
If these warnings are not observed, there is a possibility of serious injury or death.
CAUTION
If these cautions are not observed, there is a possibility of injury or product damage.
WARNING
Do not use anything other than AC220V-240V.
• Failure to do so may cause an electric shock or fire.
Do not repeatedly insert and remove the power plug.
• This may result in electric shock, fire, or product damage.
Do not use a damaged power cord/plug or a loose power outlet.
• This may result in electric shock or fire due to a short circuit.
• If the power cord is damaged, contact the purchased store or the customer center for
replacement.
Do not excessively bend, pull, twist or tie the power cord.
• This may result in electric shock or fire due to a short circuit.
Do not place any heavy objects on the power cord.
• This may result in electric shock or fire due to a short circuit.
If any foreign materials (dust, water, etc.) are on the terminal or contacts of the power plug,
clean them completely before use.
• Failure to do so may cause an electric shock or fire.
Completely remove water from your hands before inserting or removing the power cord from
the power outlet.
• It may cause electric shock.
Use a single outlet with a ground terminal rated at 15 A or greater.
• Multiple connections to a single power outlet may lead abnormal overheating, which may result
in fire.
• A power outlet without a ground terminal may pose a risk of electric shock due to a short
circuit.
Safety Information

4
Do not install the product outdoors or in a place exposed to direct sunlight, in a place near the
bathroom, or in front of an air conditioner or heater.
Do not connect the power cord to any other cable or change the cord at your own discretion.
• Failure to do so may cause an electric shock or fire.
Do not place any heating device or spark-generating device near the product.
• This may result in fire.
Install the product with 10 cm or more of space on all sides for sound airflow.
• Failure to do so may result in fire due to overheating.
Be careful not to damage the refrigerant piping when moving or installing the product.
• Failure to do so may result in sparks resulting in fire and burn injuries.
After installation, check if the source water supply hose has any leaks by opening the source
water supply valve.
• Failure to do so may result in electric shock or a short circuit.
Do not move the product during operation.
• This may result in electric shock or product failure.
Do not disassemble or repair the product at your discretion.
• Failure to do so may cause fire or an electric shock.
Do not insert any wires or tools in the mechanical compartment.
• This may result in electric shock or product failure.
Avoid subjecting the product to any heavy impacts.
• Failure to do so may result in electric shock, product damage, or product failure.
Do not insert fingers or other objects in the heat-dissipating fan (exhaust).
• This may result in electric shock or injury.
Do not obstruct the back and sides of the product with covers, etc.
• If the vent is blocked, the internal temperature will rise, causing a malfunction or stopping the
system.
Do not spray any pesticides or flammable liquids during operation.
• This may result in fire or product failure.
Avoid allowing water to enter the product.
• This may result in fire or electric shock.
Do not lean on or hang on the product.
• This may result in product damage, product failure, or injury.
If the gas (town gas, propane, etc.) leaks, do not touch the product or the power cord.
Immediately open a window for complete ventilation.
• If a spark is created, it may result in an explosion, fire, or burn injuries.

5
If the gas (refrigerant) leaks, do not touch the product or the power cord. Immediately open a
window for complete ventilation.
If water leaks out of the product or is found around the product, immediately close the source
water supply valve and remove the power plug from the outlet. Then, contact the customer
service center.
• Failure to do so may result in electric shock.
Remove the power plug before cleaning the product.
• This may result in fire or electric shock.
Do not spray water on the product or use thinners, benzene, or alcohol to clean the product.
• This may result in discoloration, deformation, damage to the product, electric shock, or fire.
If any abnormal noise, burning smell, or smoke is detected from the product, immediately close
the source water supply valve and remove the power plug from the outlet. Then, contact the
customer service center.
• Failure to do so may result in electric shock or fire.
When replacing the filter, please replace it after unplugging the power plug.
• It may cause electric shock.
Do not install in a location exposed to water, such as dripping water or rain; a bathroom;
outdoors; a place with high humidity; or a place where the ambient temperature is below 4 ˚C.
• This may result in electric shock, fire, or product failure.
CAUTION
If the tap water is cut or the product is not in use for a long period, close the source water
supply valve and unplug the power cord.
• Failure to do so may result in abnormal water quality or water leakage.
Do not place the product on a slanted surface or unstable floor.
• This may result in abnormal vibrations, noises, or a malfunction.
Do not place the product on a table in a way that allows it to stick out over the edge of the
table.
• This may result in product damage.
Ensure to secure the drain hose
• Drain water may splash into other places.
Connect the source water supply hose to the back of the product.
Do not place any heavy objects on the product.
• This may result in product failure or injury.
Do not place any cup or other object on the water collector grill when the product is not in use.
• The cup could fall and cause damage or injury.

6
Do not use the water collector grill for any purpose other than water collection.
To move the product, do not pull the power cord or connection hose or hold the ice spout.
• This may result in product damage.
Do not leave the product in subzero conditions.
• This may result in malfunction or product failure.
Do not remove the hose from the back of the product during use.
• This may result in product failure due to water leakage.
If the product is not in use for a long period, close the source water supply valve and unplug
the power cord.
Do not use the product in a manner not described in the user manual.
Install the product at least 2m away from electronic products, such as induction heating (IH)
microwave ovens and electric pressure cookers.
• Failure to do so may result in electromagnetic interference.
When the product is used by persons with disabilities who lack physical, sensory or mental
abilities (including children), supervision or special instructions are required.
• It may cause injury.
When discharge ice, place the container close to the ice spout to avoid splashing the ice.
• The contents of the cup may splash due to falling ice.
Do not put foreign objects into the ice spout or block the outlet.
• This may result in product failure.
This product should not be used by anyone who lacks physical, sensory, or mental abilities
(including children), or by those who lack experience and knowledge about how to safely use
the device without supervision or instruction.
When positioning the appliance, ensure the supply cord is not trapped or damaged.
Do not locate multiple portable socket-outlets or portable power supplies at the rear of the
appliance.
Do not use mechanical devices or other means to accelerate the defrosting process, other than
those recommended by the manufacturer.
The water inlet of this appliance shall not be connected to inlet water obtained from any other
water heating system.

7
Installation
10cm
Where to Install
• Install the product on a solid and even surface at least 10 cm away
from the wall.
After Installation
• When newly installed or relocated, connect the power only after 30
minutes have elapsed.
Drain Hose Connection
• When connecting the drain hose, ensure that the hose is not bent or
stacked under a heavy object. When the hose is clogged, water will
not flow smoothly which may result in potential malfunction.
• Ensure that the drain hose is fixed tight to prevent splashing. Water
from the drain hose can be used for chores such as toilet cleaning,
general cleaning and laundry to prevent wastage of water. However,
NEVER drink or use the water for consumption.
• Do not raise the drain hose higher than the installation surface or
connect it more than 20 meters away from the product. Should the
drain hose inevitably have to be connected to a floor drainage such
as in a kitchen, ensure that the hose is not raised more than 4 meters
from the floor.
8
Features
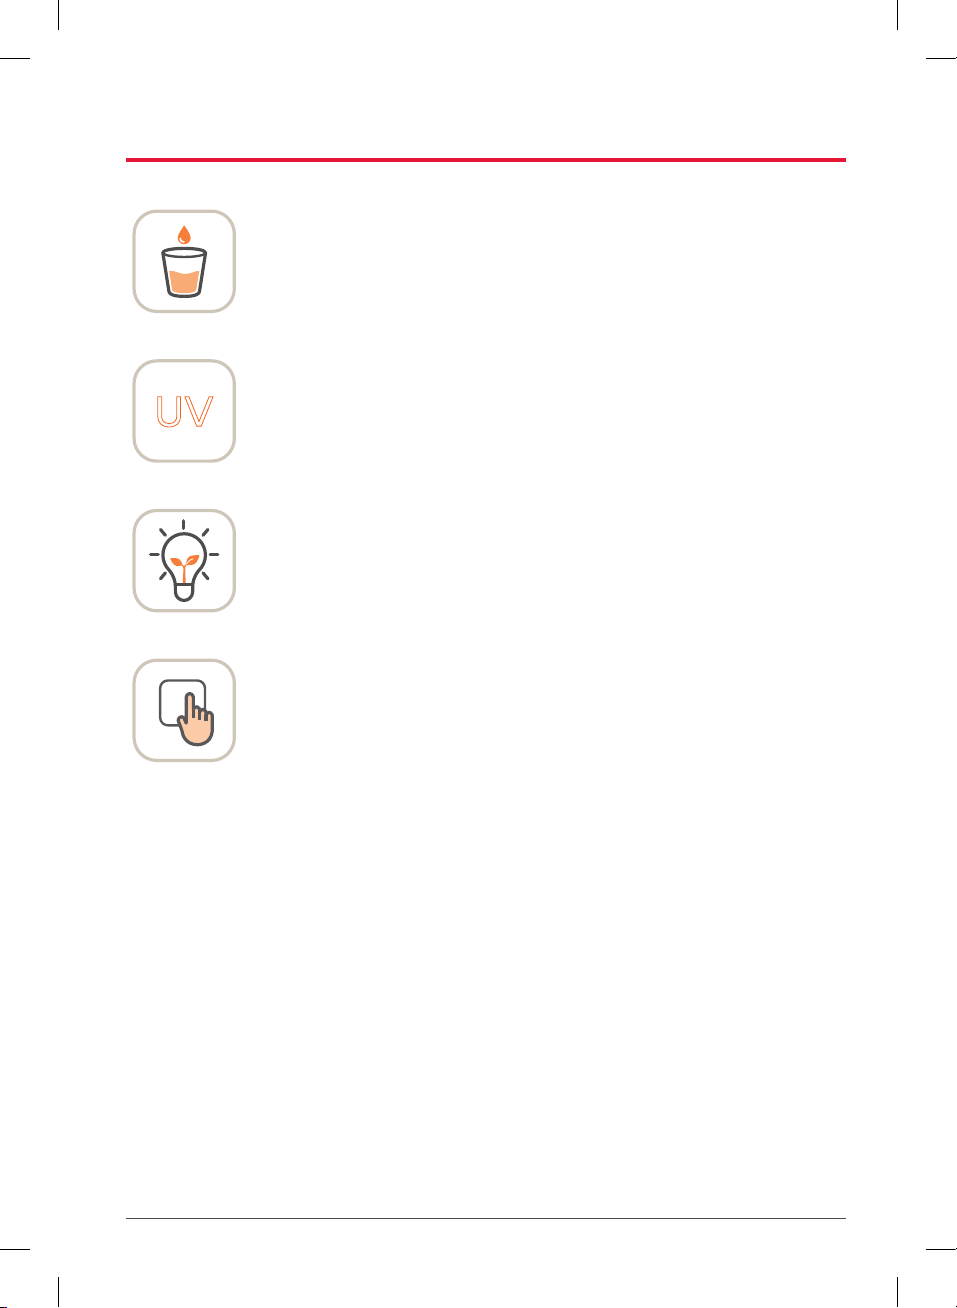
• Slim size (width 255mm) to maximise kitchen space.
• Vast ice production, ice storage and water dispense volume despite its
slim size.
UV • Periodic water tab and ice room UV Care for hygienic usage and
maintenance.
• Tankless instant cooling method using ice thermal storage for cleaner
and fresher water.
• High efficiency invertor compressor and instant heating system for
reduced electricity consumption.
• Easy touch control for convenient temperature and volume selection.
• [Dispense]indicator light indicating the temperature and operation
status with its intuitive lighting and movement.
9
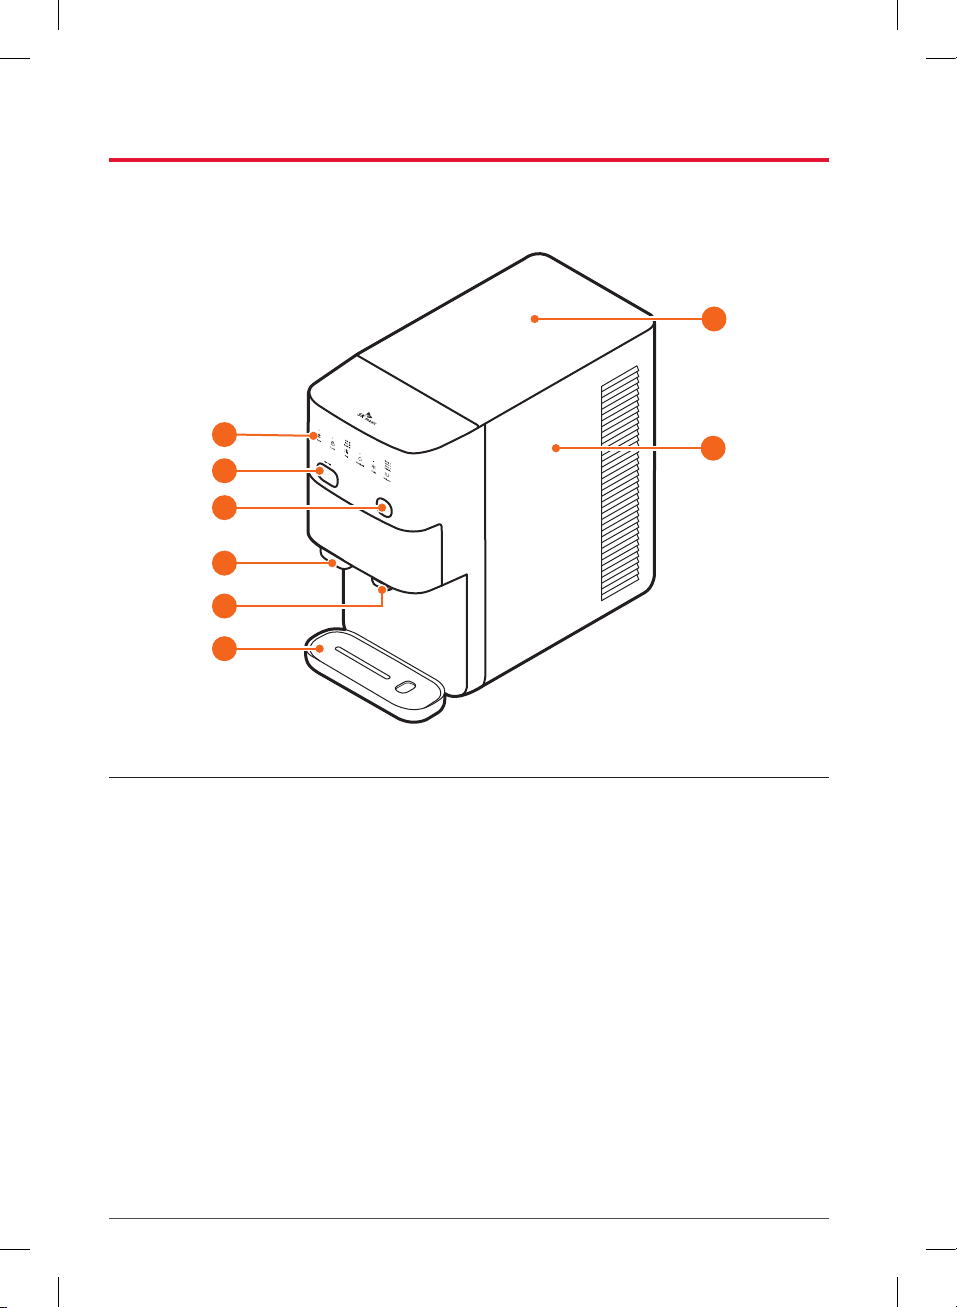
Front
08
01
07
02
03
04
05
06
01 Control Panel 02 Ice Dispense Button 03 Water Dispense Button
04 Ice Outlet 05 Water Tab 06 Drip Tray
07 Top Cover 08 Side Cover
Product Description
10
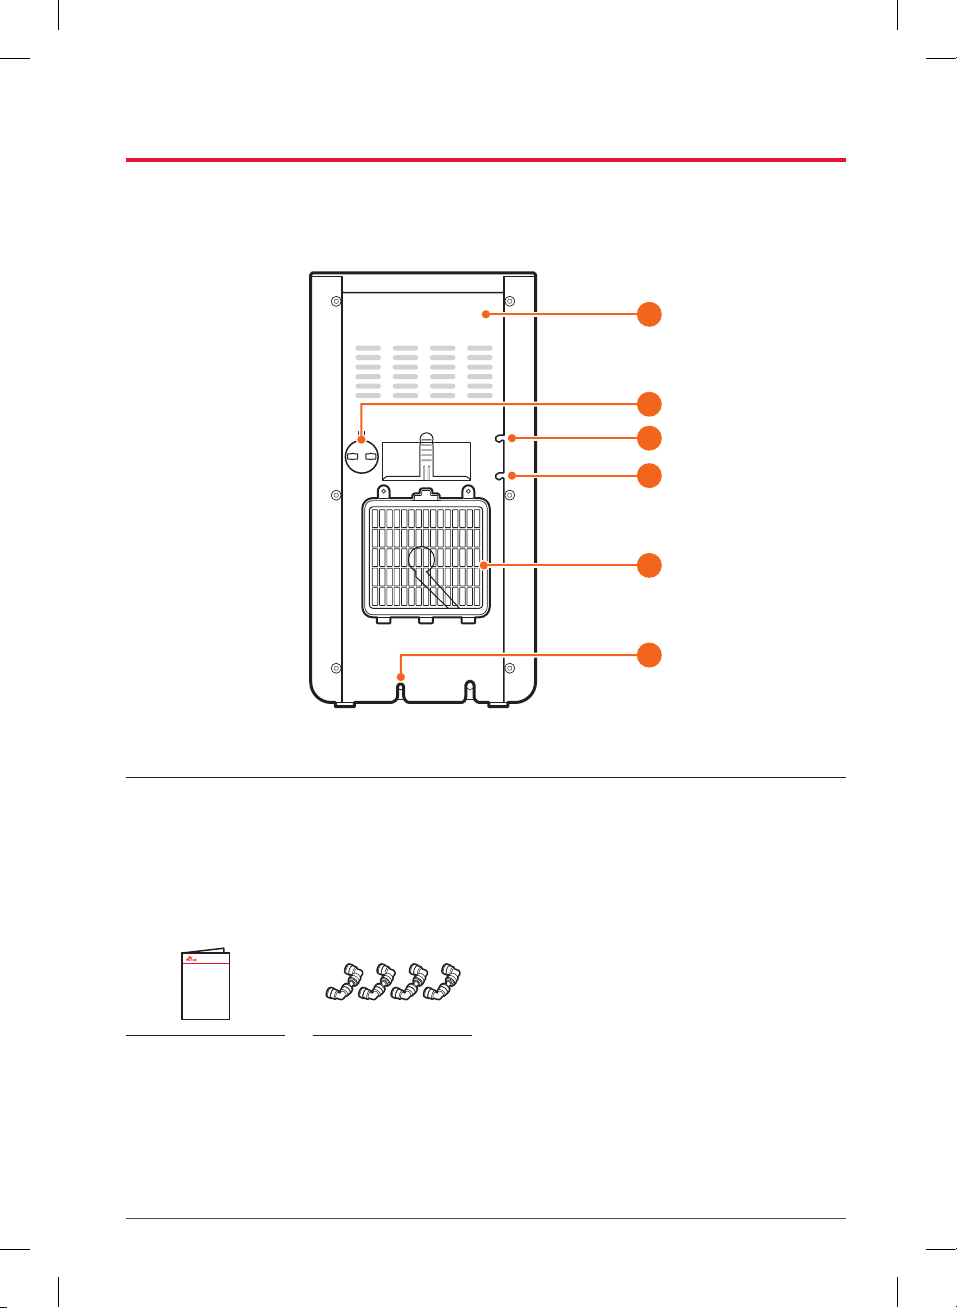
Back
01
03
04
05
06
02
01 Rear Cover 02 Power Socket 03 Water Inlet Hose
04 Faucet Inlet Hose 05 Radiator Grill 06 Drainage Outlet Hose
Accessories
User Manual Filter Connectors
(4 PCS)
11
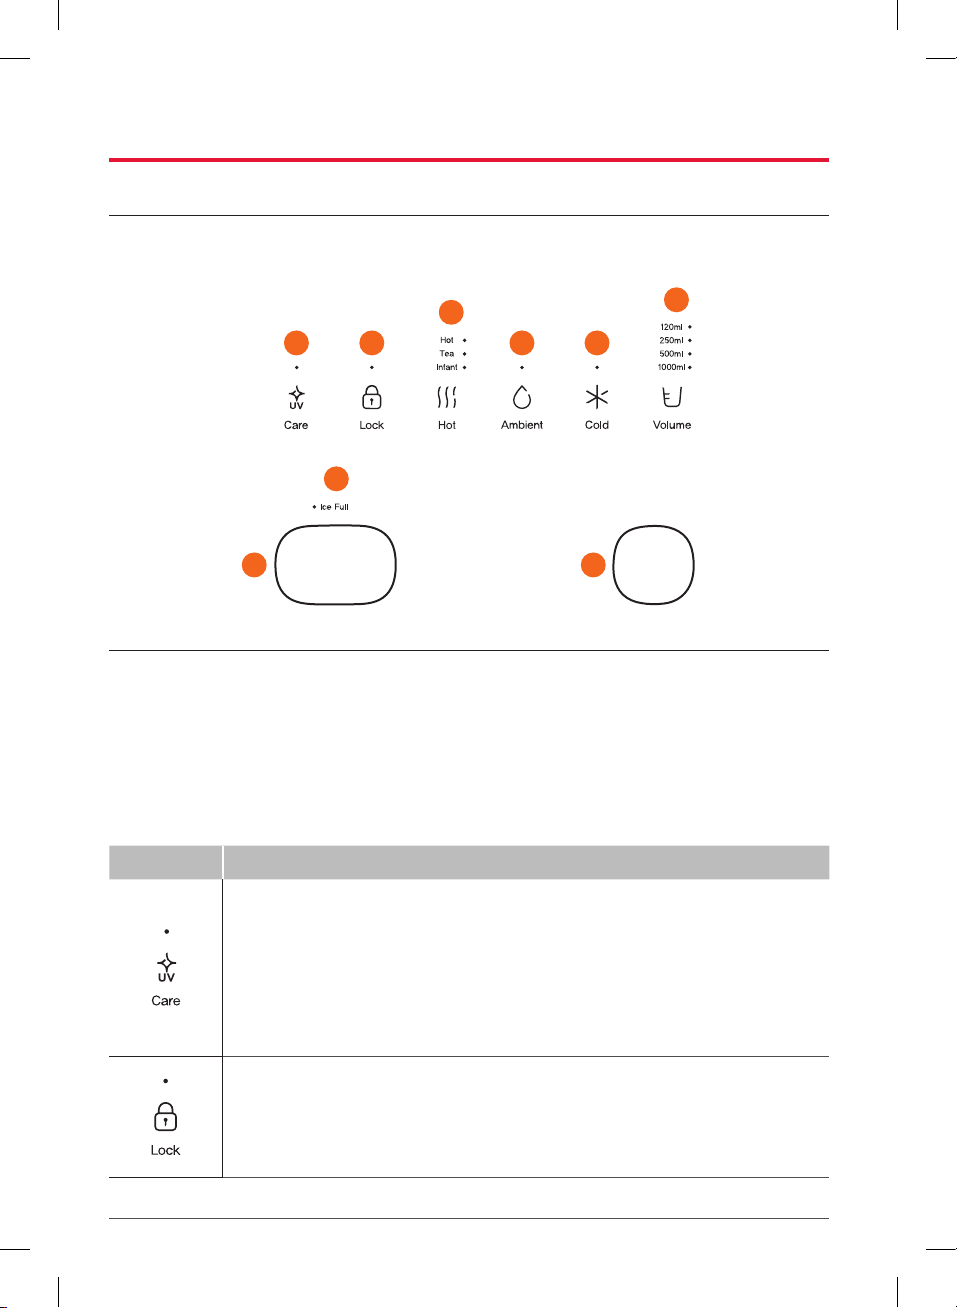
Control Panel
WPU-IAC302
01 02 04 05
03 06
08 09
07
01 UV Care Button 02 Lock Button 03 Hot Water Button
04 Ambient Water Button 05 Cold Water Button 06 Volume Control Button
07 Ice Full Display 08 Ice Dispense Button 09 Water Dispense Button
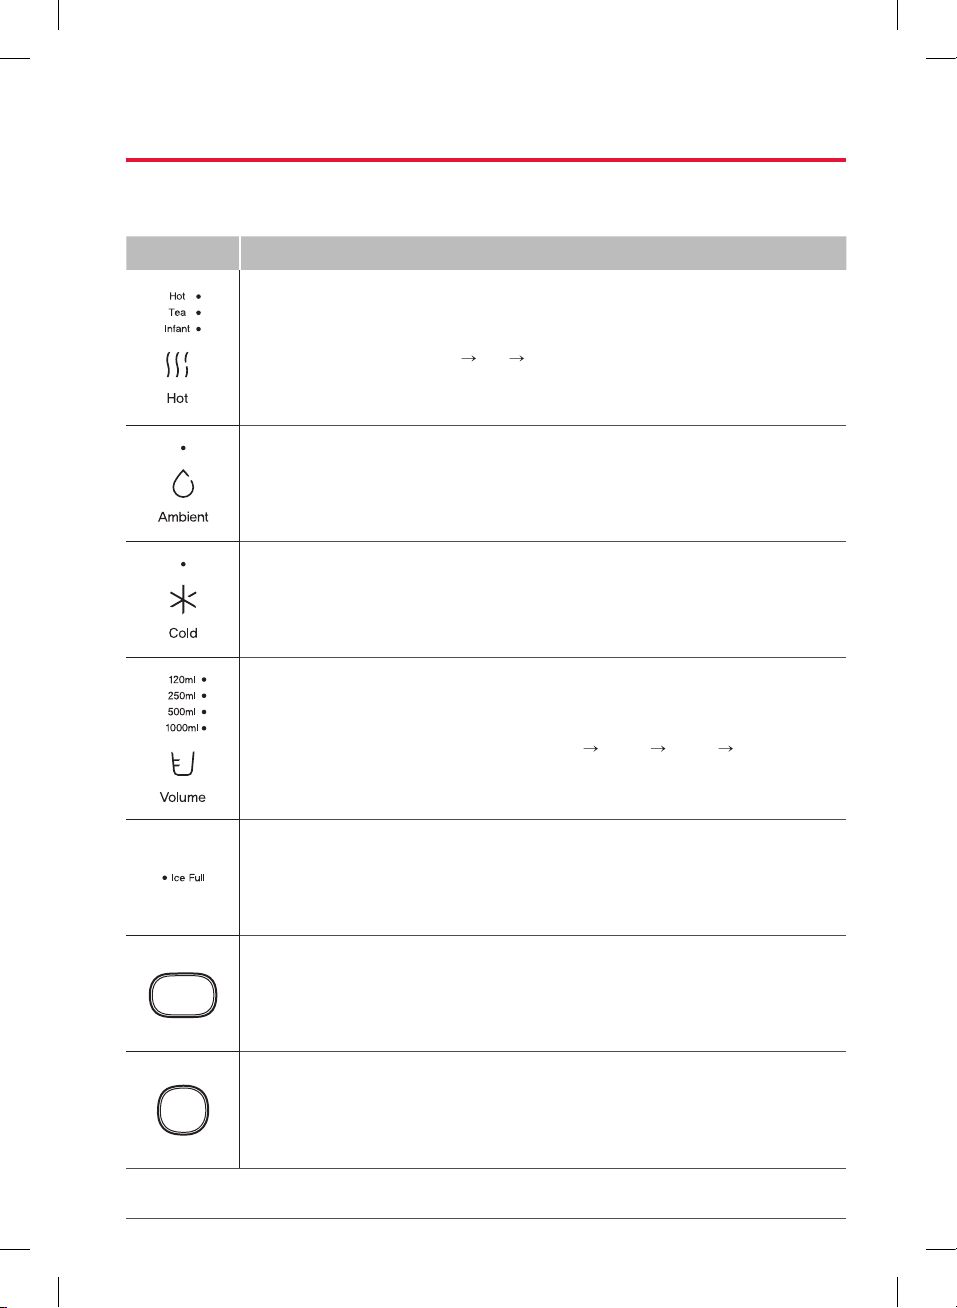
Buttons and Indicators
Name Description
• Displays the UV Care operation status.
- The indicator light is ON when automatic or manual UV Care is in progress.
- The indicator light is OFF when automatic or manual UV Care is on standby.
• Press the [UV Care] button once to activate manual UV Care when the
[UV Care] button indicator light is OFF.
• Press the [UV Care] button once to deactivate UV Care when the [UV Care]
button indicator light is ON.
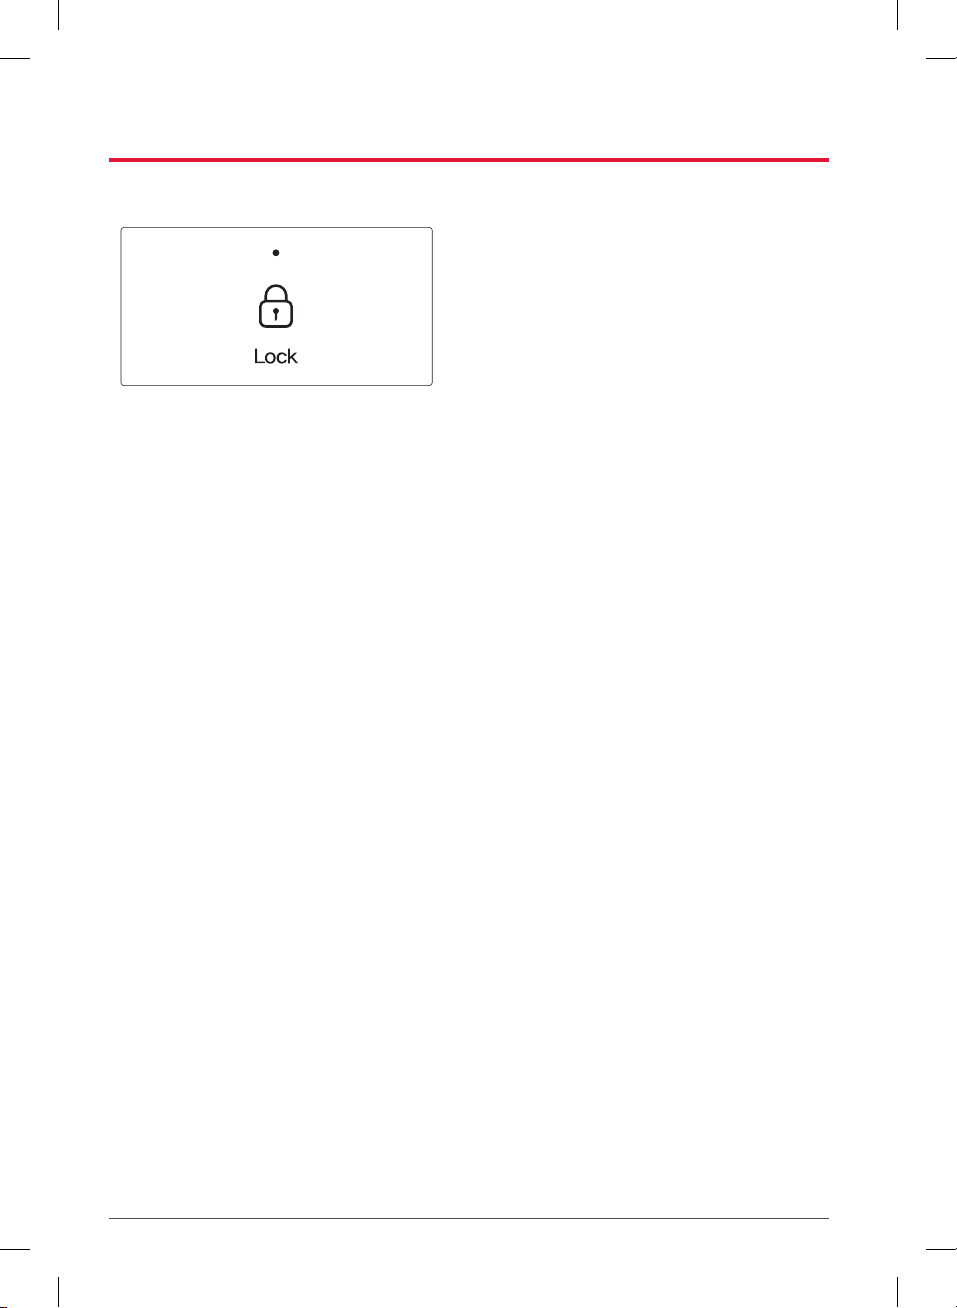
• Use this button to lock/unlock functions.
- When any one of the lock functions (Cold, Hot, Ice) is activated, the
[Lock]button indicator light switches ON.
- When none of the lock functions are activated, the [Lock] button
indicator light switches OFF.
12
Name Description
• Use this button to select hot water temperature settings.
- Each time the [Hot]button is pressed, the temperature will change in the
following order : Hot Tea Infant.
• Press and hold for 5 seconds to change the infant water temperature.
• Use this button to select ambient water.
• Press and hold for 5 seconds to adjust the brightness.
• Use this button to select cold water.
• Use this button to select volume settings.
- Each time the [Volume] button is pressed, the volume settings will
change in the following order : 120ml 250ml 500ml 1,000ml.
• Press and hold for 5 seconds to Mute/Unmute button sound.
•Ice Full indicator light switches ON when the ice room is full with ice.
• Press and hold the [Ice Dispense] button to dispense ice.
• Press the [Water Dispense]button once and the water will be dispensed
according to the temperature and volume selected.

13
Usage Cautions
CAUTION
• Close the lid of the ice room after cleaning.
-If the lid of the ice room is not properly closed, insects such as ants may enter the ice room.
• If the touch button does not function when touched, try using your thumb to widen the
contact area of the button.
• When dispensing ice, refrain from using a glass cup or dispensing ice with beverage or hot
water contained within.
-The glass cup may break due to sudden temperature change or impact.
-When water splashes into the outlet, contamination and mold may be caused.
-When ice is dispensed into a cup filled with hot water, there is a risk of burn from splash.
• When liquid splashes on the ice outlet, clean both the interior and exterior of the outlet
immediately and also clean the outlet regularly once a week.
• Clean the ice dispense guide once a week.
• If ice has not been dispensed for a long time, ice may stick to each other and ice may not
be dispensed smoothly. In this case, press the [Ice Dispense] Button 3 or 4 times for
3-4 seconds each time.
Operation Method
Selecting water volume
Press the [Volume]button and select the
desired water volume.
• Each time the [Volume] button is pressed,
the volume will change in the following
order : 120ml 500ml 1,000ml.
• The default volume is automatically set to
120ml if no manual selection is made for a
certain period of time.
How To Use

14
Selecting water temperature
Select the desired water temperature.
• If the indicator light is switched on for the
desired temperature, you do not need to
press the button.
• The colour of the indicator light changes
according to the water temperature
selected.
-Cold : Blue
-Ambient : Green
-Hot : Red
• Each time the [Hot]button is pressed, the
temperature will change in the following
order : [Hot] [Tea] [Infant].
• The default temperature is automatically set
to Cold or Ambient if no manual selection
is made for a certain period of time after
selecting [Hot].
-It automatically changes to Cold or Ambient
depending on the last temperature used.
Dispensing water
Press the [Water Dispense] button.
• Water automatically stops dispensing once
the selected volume of water has been
dispensed.
• The [Water Dispense]indicator light
blinks according to the selected water
temperature and stops dispensing when
pressing the [Water Dispense]button again.
Dispensing ice
Press the [Ice Dispense]button.
• Ice is dispensed when [Ice Dispense] button
is pressed and the [Ice Dispense] button
indicator light blinks.
• It may take some time for ice to be
dispensed when ice storage is low in the ice
room.

15
Additional Functions
UV Care
• How to activate the Manual UV Care
function.
-Press the [UV Care] button once to activate
manual UV Care when the [UV Care] button
indicator light is OFF.
• The indicator light is ON when automatic or
manual UV Care is in progress.
• The indicator light is OFF when automatic
or manual UV Care is on standby.
Mute function
Press and hold the [Volume]button for
5 seconds.
• The Mute function turns ON/OFF together
with a beep sound.

16
Adjusting brightness of water/Ice Dispense Button
Press and hold the [Ambient] button for
5 seconds.
• The [Ambient] button indicator light blinks
with a beep sound.
• Each time the [Water Dispense] button is
pressed, the brightness will change in the
following order : Off High Low.
• Upon completing the brightness
adjustment, wait for 7 seconds or press the
[Ambient]button to complete the setting
with a beep sound.
• When pressing the [Water Dispense]button
after button brightness has been set to
OFF, the [Water Dispense] indicator light
will blink in the colour of the temperature
selected during dispense and switch
back OFF 5 seconds after water has been
dispensed.
• When pressing the [Ice Dispense]button
after button brightness has been set to OFF,
the [Ice Dispense] indicator light will blink
during dispense and switch back OFF
5 seconds after water has been dispensed.
Setting infant water temperature
Press and hold the [Hot] button for 5 seconds.
• The [Infant] indicator light blinks with a
beep sound.
• Each time the [Water Dispense] button
is pressed, the brightness of the [Water
Dispense]button will change in the
following order : Low Moderate High.
(High: 55˚C, Moderate: 50˚C, Low: 45˚C)
• Upon completing the infant water
temperature control setting, wait for
7 seconds or press the [Hot] button to
complete the setting with a beep sound.
• The default infant water temperature
setting is 50°C.
17
Lock Function On/Off : Cold, Hot, Ice
Press and hold the [Lock] button for 5 seconds.
• The indicator lights of the functions that
can be locked (Cold/Hot/Ice) starts blinking
with a beep sound and indicator lights
of the functions that are already locked
switches OFF.
• Press the button of the function you want
to lock and the indicator light of the
function will switch OFF.
• If you press the button of a function that
is in a locked state, the indicator light will
start blinking.
• Wait for 7 seconds or press the [Lock]
button once to complete the lock setting
with a beep sound.
• The [Lock]button indicator light will switch
ON when any one of the functions (Cold/
Hot/Ice) are locked.

18
CAUTION
• Replace the filter according to the recommended replacement cycle.
-The purification volume and effect may be reduced when filter is not replaced promptly.
• Ensure that the power plug is unplugged when replacing the filter.
-There is a risk of electric shock if you touch the power plug with wet hands.
Open
Lock
Source Water
Supply Valve
90°
1. Close the water supply valve and select
Cold or Ambient water. Press the [Water
Dispense] button and completely drain the
water inside the filtration unit.
2. Unplug the power cord.
3. Remove the top cover as shown in the
picture.
Filter Replacement

19
4. After removing the fittings from the filter
to be replaced, replace the new filters. (use
a proper tool for the separation)
5. Assemble the filters, fittings and filter cover
in the reversed order.
Open
Lock
90°
Source Water Supply Valve
6. Open the water supply valve and check the
filter connectors for leaks.
7. Insert the power cord.
NOTE
• To purchase or replace your filter, please contact the Customer Service Center at 1800 18
7878.
• Our service agent will get in touch with you to during the month your filter replacement is
due.
• Filter Replacement Period
The filter replacement period is defined as the period in which the filter can perform at its
maximum performance and capacity.
Filter replacement period may be shortened if the water quality in the location installed is
poor or if the usage is excessive.

20
Water Flow Diagram
The water purification system is composed as shown in the illustration below.
CAUTION
• Do not disassemble the product at your own discretion.
-Failure to do so may cause fire or an electric shock.
WPU-IAC302
Source
Water
Supply
Valve
Instantaneous Hot
Water Module
NOS Valve Water intake
valve
Cold
Water
intake
Valve
Hot Water
intake Valve
Direct and
Cold Water Pipe
Ice water
Flow Sensor
Ice
water
valve
Sediment
Filter
Block
Carbon
Composite
Filter
Nano Tech.
PAC Filter
Pressure
Reduction
Valve
Source
Water
Supply
Valve
90°
Purified
water
Water
source
Ensure that each filters are cleaned upon
product installation or filter replacement.
Flush the filters for approx. 10 minutes (based
on a water flow of 20L at approx. 1 kg/cm2).
Bubbles or dark water may come out due
to the nature of the filters. However, please
note that this only occurs during the initial
flushing and does not affect the purification
performance of the filters.
NOTE
Purified water comes out white
This is a state that may temporarily occur for tankless type water purifiers when micro bubbles
are formed when water is dispensed. The micro bubbles will naturally disappear and has no
effect on the water quality. White minerals may form when purified water from the water
purifier is boiled. These deposits are mineral components and not contaminants.
Table of contents
Other SK magic Water Filtration System manuals


Popular Water Filtration System manuals by other brands


SMC Networks
SMC Networks AFF70D Operation manual

Merlin
Merlin 58182 quick start guide

Excalibur Water Systems
Excalibur Water Systems Filtermax EWS POUPCS075 Installation and user guide

BWT
BWT AQA drink Magnesium Mineralized Water Protect... Installation and operating instructions

Pentair
Pentair EVERPURE PRO Installation and operating instructions

Armstrong
Armstrong 980-BVSW Series instructions


