Slane CALEDON User manual

SLANE EBIKE LTD.
www.ebikeslane.ca
CALEDON & VICTORIA
MANUAL
THANKS FOR YOUR CHOOSING SLANE EBIKE! PLEASE READ THE MANUAL
BEFORE YOU ASSEMBLE & RIDE YOUR EBIKE

PRECAUTIONS:
Obey the local traffic regulation.
Never drive too fast to exceed the limited speed(32km/h)
Avoid frequently braking and starting and check tire pressure before riding.
please charge the battery after riding. If you do not ride for a long time, please
charge fully and take away the key. Please charge the battery not longer than every
60 days.
Regularly check the brakes. Properly use the brakes in snowy & rainy weather.
Modification is not suggested (you may loose your warranty).
Users under sixteen years of age are not allowed to ride.
Please check all parts before driving in order to ensure your safe driving. Driving at
rainy or snowy weather is at your own risk.
Overloading is prohibited strictly. (not more than 250lb)
It is recommended to charge the battery after each riding, to completely run out the
battery is strongly not recommended.
when battery case is taken out, both pins in the bottom ( positive + negative - )
can’t be touched by hand (particularly damp hands) at the same time, or any metal
material to avoid short-circuit.
Please don’t charge the ebike when unattended and disconnect the battery from the
power source after it is fully charged. The charging must always take place in a dry
and clean area .Do not charge it on a carpet .
Always wear an approved helmet when riding your ebike,
Pay extra caution to the brakes and front wheel when you ride on a downhill road.
Check before driving
Check before driving in order to ensure your safety of driving.
Turn power on , check whether all indications of bicycle are normal?
Whether tire pressure is normal or not?(A flat tire will influence running speed or
distance.)
Whether nut of front and rear wheel is locked or all quick release are tightened ?
Whether battery is charged enough?
Whether braking system is adjusted suitably and reliably?
Whether handgrip and saddle is adjusted well and tightened?
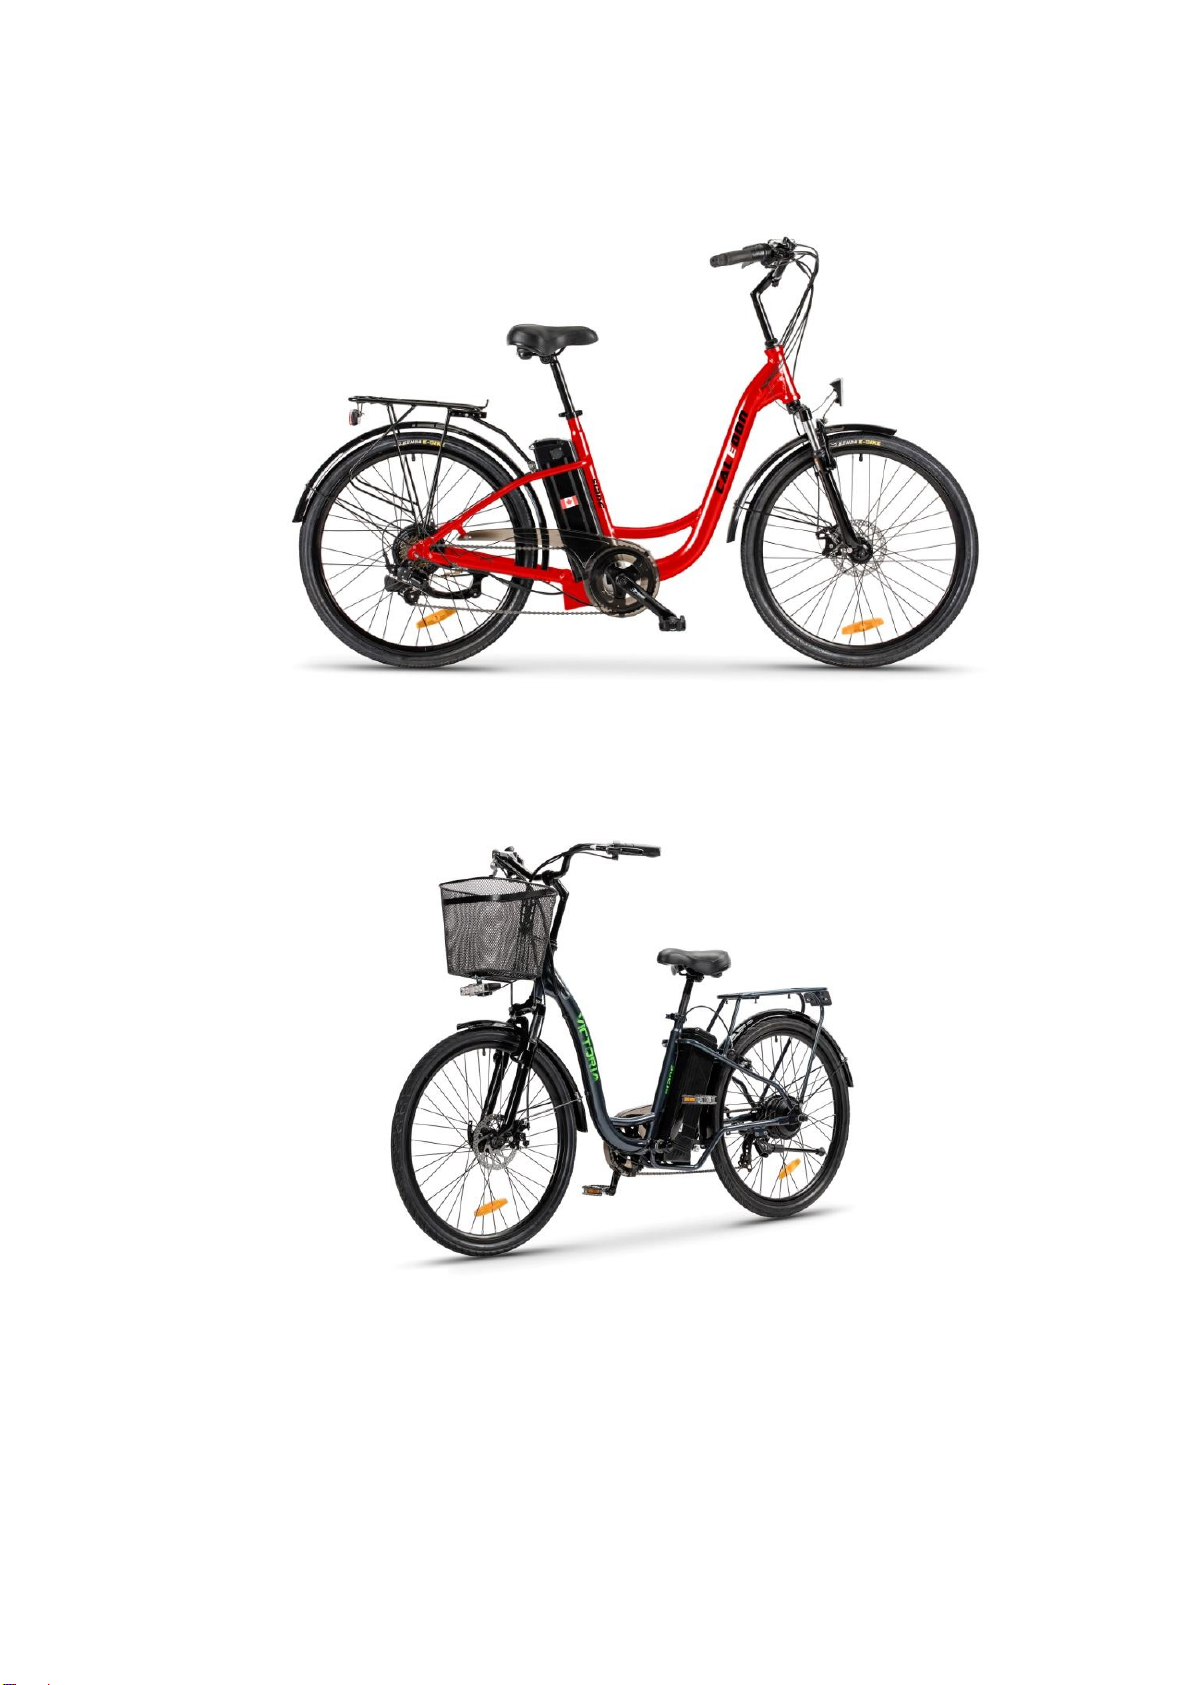

SPECIFICATION:
Model
Caledon
Victoria
Frame
Alloy
Steel
Motor rated power (W)
350
350
Motor rated voltage (V)
36
36
Max Speed (Km/h)
27
27
Range (Km)
30 - 45
30 - 40
Load capacity (LB)
250
250
Front brake
Disk brake
Disk brake
Rear brake
V brake
V brake
Front suspension
Yes
Yes
Battery type
Lithium battery
Lithium battery
Battery capacity (Ah)
10
9
Battery charging time (H)
4 –6
4 –6
Net weight (LB)
56
61
Reflectors
- Reflectors are important safety devices which are designed as an integral part of
your E-Bike. Federal regulations require every bicycle to be equipped with front, rear
wheels and pedal reflectors. These reflectors are designed to pick up and reflect
streetlights and car light in a way that helps you to be seen and recognized as a moving
bicycle. Checking reflectors and their mounting brackets regularly to make sure they are
clean, straight, unbroken and securely mounted. Replace damaged reflectors and
straighten or tighten any that are bent or loose.
Many bikes are shipped with the handlebar and stem disconnected. In
this case make sure to attach the handlebar to the stem as per described
below before proceeding to next steps
Assembly
Unpack from box
Open the box from the top, take the bike, parts and accessories box out.
Carefully remove all protective carton pieces, foam pads, tie wraps, plastic fittings,
recycle all material that can be recycles, dispose of the rest.
Threaded stem
Apply grease inside steer tube
Insert the stem into the steer tube, align with
center axis of the bike and tighten the top cap bolt.

Make sure the minimum insertion mark is hidden inside the steer tube
Install the front wheel
Insert the front wheel into the fork
Make sure that the wheel is seated and centered
in the fork, and the brake disc should be fitted in
between the brake linings.
Tighten the wheel into the fork as per provided
retention device specific requirements (refer to
the following figures).
Test wheel attachment by lifting the front end of
the bike and firmly hit downward on the front wheel with your palm. There should
be on play in the connection.
Quick release binder
This type of binder is most commonly used to attach wheels to the frame and fork as well
as to tighten the seat post into the frame. They allow for a tool-free, quicker use than nuts
and bolts but require knowledge on how to properly use them.
Put the lever in an opened position (A)
Tighten the adjustment nut (1) by small increments until you need considerable
force to push (2) the lever to its closed position (B) with your fingers or palm
Warning
The front wheel must be fastened, or it will result in accident !

Adjustment of steering wheel
Inserted depth of vertical tube of wheel should be not lower than minimum depth (red
Safety mark); safety mark must be inserted into below hexagonal nut. (See fig. 1)
Stand in the front of wheel, clamp the front wheel by both legs and hold the handgrip
with both hands to adjust the angle degree at between cross tube of handgrip and vehicle
body. (See fig. 2)
Adjustment of saddle
Inserted depth of saddle tube should be more than minimum depth of insert (safety
mark is for reference of minimum depth) to ensure the safety.
Loosen the clamping screw of saddle and put into saddle tube, tighten the screw
suitably, and then insert saddle tube into vertical tube of frame; put your both legs on
the saddle to adjust the position of saddle tightly in order to ensure you can drive
comfortably. (See fig. 3)
fig 1 fig 2 fig 3
Adjustment of brakes
Keep the brake in the middle, and make sure the two brake pads work properly.
Level up the brakes (in its normal condition)
Adjust the brake pads, to keep it in linings with the curve of the wheel.
Make sure the brake pads can have fully touch with the surface of the disc .
If only one side of the brakes works, adjust the nut.
Assemble the front fender ( see the attached pictures)
1. Loosen the nut fixing the headlight with a 10mm rancher , then put the fender's hook and front
light holder together with the suspension bracket , tighten them together ;
2. Fix the fender support in each side by the screws and washers provided . .

Install Pedals
Check the sign on the pedal
BASKET ASSEMBLY
Remove the clips and screws from the box and use a screwdriver and an
open-end wrench
After completing the above steps,tighten the screws again with the tool
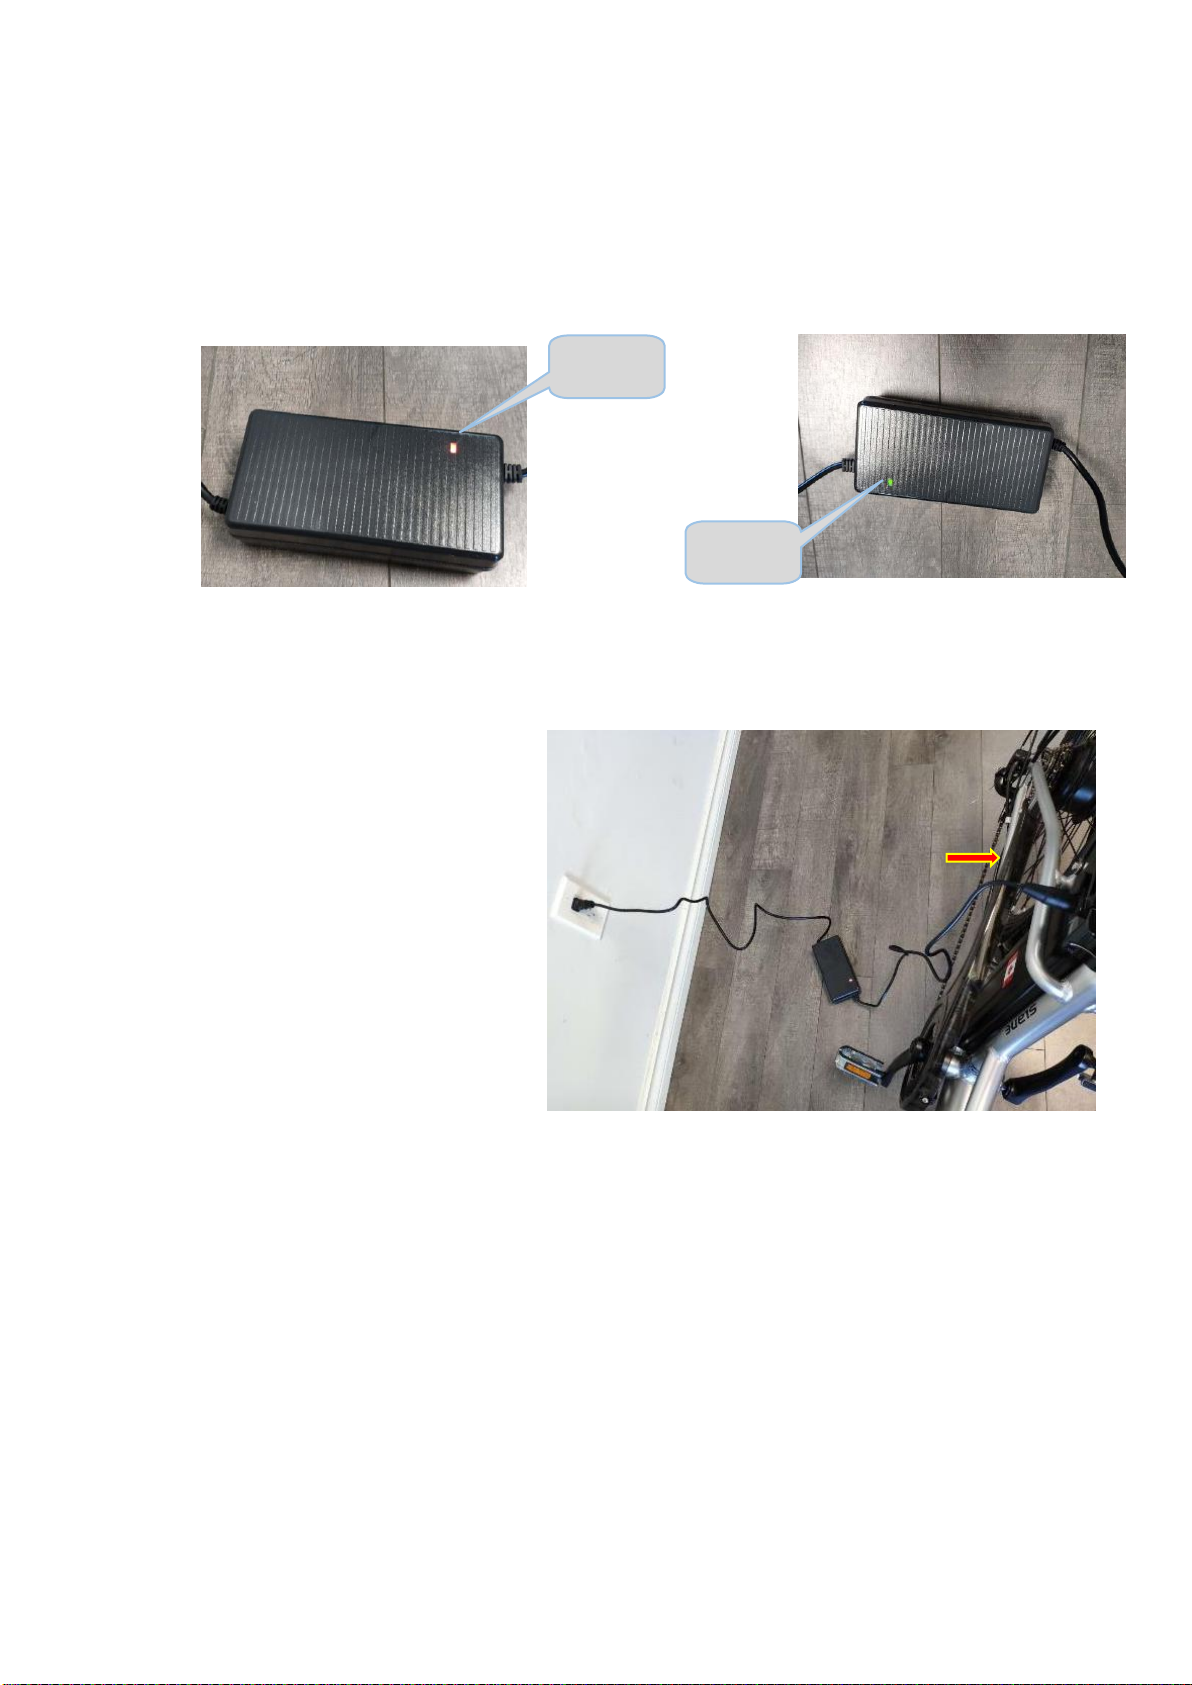
Charging
Before riding the electric bike for the first time, you must charge the batteries for 4-6 hours
using the charger provided. Plug in the charger into the charging socket, plug the
charger into a wall outlet.
IMPORTANT CHARGING INSTRUCTION:
The Power Switch Lock must be in the off position when the electric bicycle is in
charging.
The batteries don’t have memory. You can charge your electric bike after each ride.
Recharging time is between 4-6 hours.
WARNING:
L: pedal for the
left pedal-arm
R: pedal for the
right pedal-arm
Do not place the battery near heat objects or fire. Do not expose the
charger near water.
LED indicator of the charger:
Red:Charging Green:Charged
Duration of charging
The red indication light of the
charger means in charging .
The green indication light of
the charger means fully
chrarged.
This charger has the
protection device for
over-charging. Long-time
charging should not be more
than 24 hours.
Attention for charging
The charge doesn’t need to be grounded.
During charging, please place the charger in safety location which is beyond the
reach of children.
Do not charge with charger from other brands and the charger is also not for other
storage battery.
The charger has 110V circuit; please do not dismantle.
The charger should not be covered with other stuff during charging.
Please keep it in a dry, well-ventilated circumstance when it is under using.
charging
charged
During charging, if there is bad smell or the charger is overheated, please stop
charging immediately and send it back to the dealers.
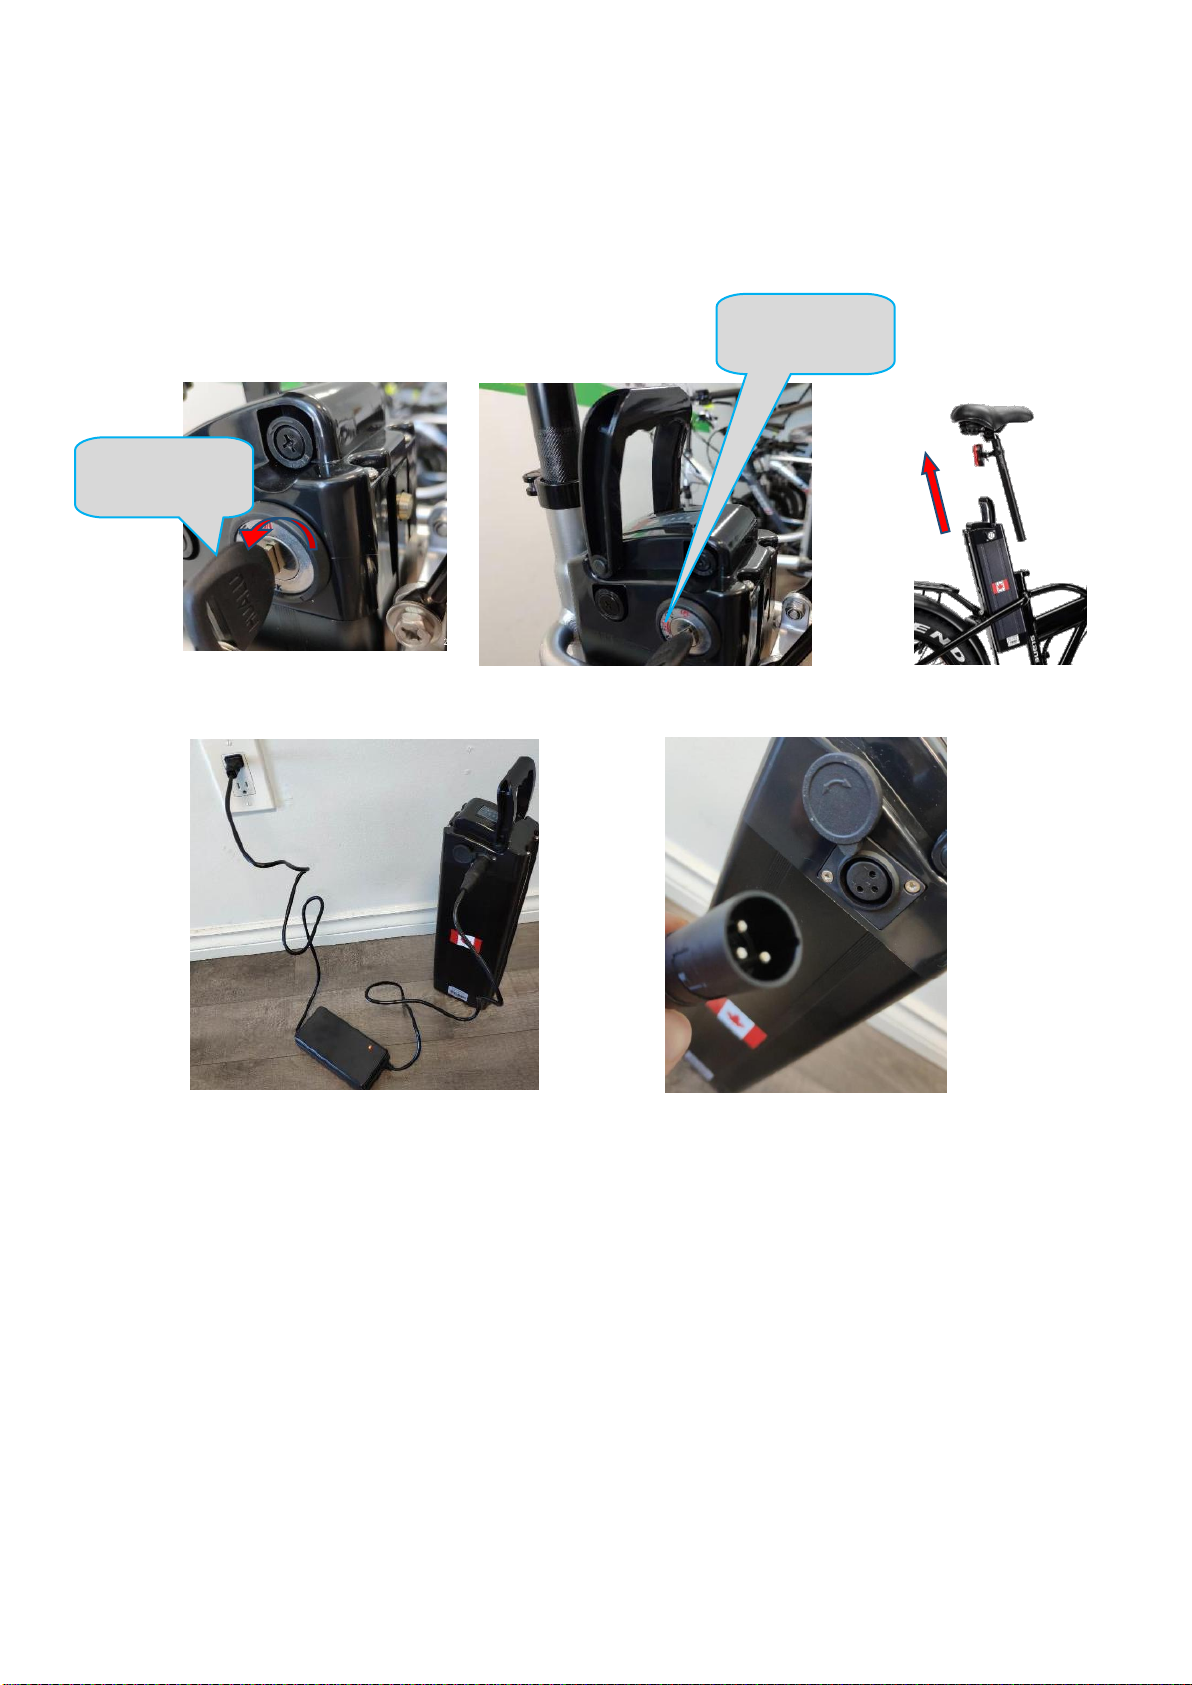
The battery can be charged on the bike or separately .
Remove the Battery
Follow the steps below .
Battery
Remember to charge if the battery capacity drops to 20%, and avoiding running out of the
battery, which might shorten the battery life New battery should be fully charged before
use.
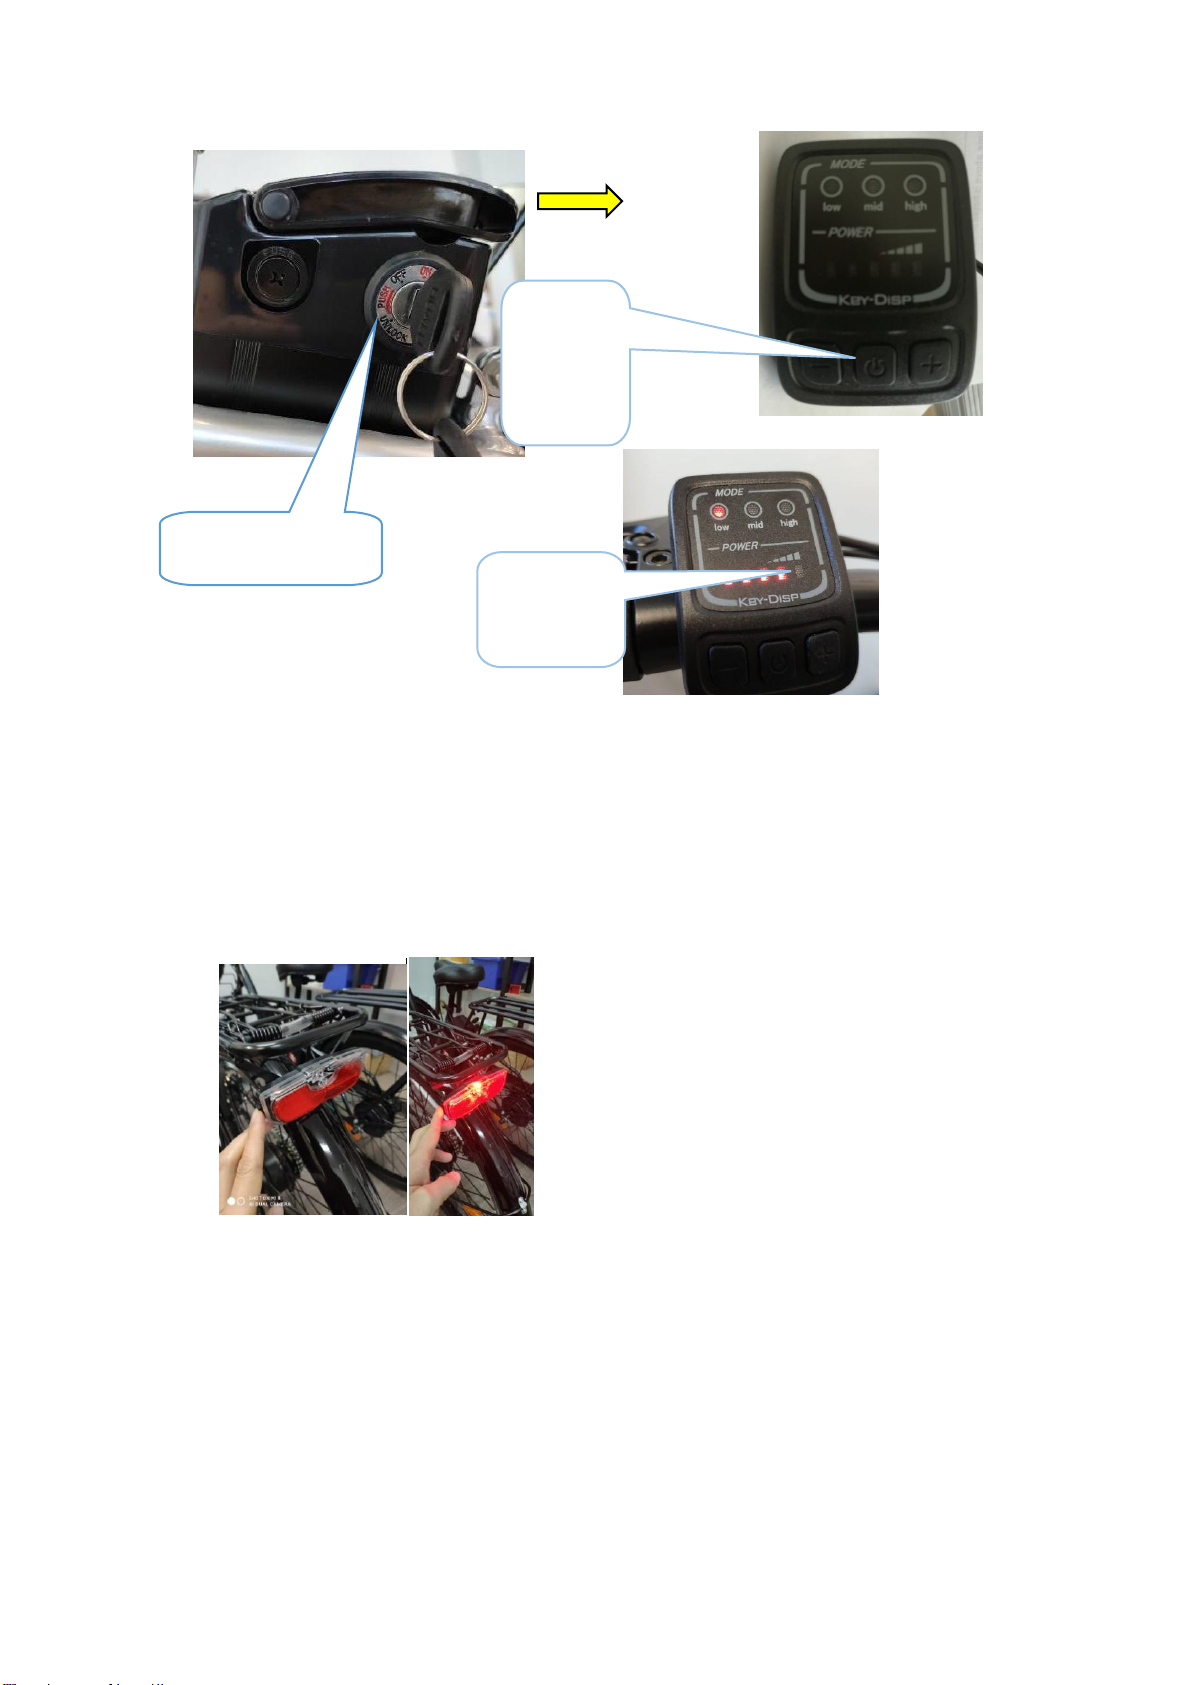
Powering on/off & Entering Settings
Make sure the battery switch the power on.
-Press power button to start the LED and the electric system.
-When powered on, press the Power button for 3s to powered off.
TURN THE
KEY
LOCKED
Turn “ON” the
power switch of
the battery
In power On ,Keep press the “+ ”for 2s , you will have the front light turned on , and
press another 2s to turn off it .
Night Riding
1. Ensure that the front and rear lights are on. The rear light( byAA battery) is
integrated with the rear reflector ( see the ON/OFF switch below )
2. Wear reflective and light colored clothing.
Pedal assistant system
This E-Bikes have an electric pedal assisted driving system
The motor will provide power assistant during your pedaling in automatic. Do not use
throttle during pedaling .
Press the
switch
button for
3s
This mark is
battery
capacity
display,

Throttle Throttle is equipped on this electric bicycle. Throttle is operated
by rotating the throttle toward the rider much like a motorcycle. The
more you twist the throttle, the faster the motor system will propel
the bicycle. Donot pedal during the throttle is in function.
Gear Shifter & Derailleur
This e-bikes go with gears, which consists of:
* A rear sprocket cluster, called a freewheel or cog set* Arear derailleur* One shifter
* One control cable* One front sprocket called a chaining* A drive chain
Adownshift is a shift to a lower or slower gear, which is easier to pedal.
An upshift is a shift to a higher or faster gear, which is harder to pedal.
Aderailleur will shift only if you are pedaling forward.
CAUTION:
Never move the swifter while pedaling backward. Also do not pedal backwards after moving the
swifter. Either of these actions could jam chain and cause serious damage to the E-Bikes.
Although the derailleur is initially adjusted in our factory, you will need to inspect and
adjust it before riding the E-Bike.
Wheel V-brake
This screw is used to tighten the
brake line and adjust the brake effect.

Saddle position
Correct saddle adjusted position is an important factor to get the best performance
and comfort from your E-Bike.
If you find the saddle position is not comfortable, adjust it Up and down adjustment
with the quick release .
Parking attention:
1. Shut off the power switch after you get off, in order to prevent accident by turning
accelerator without attention and start-up the bicycle abruptly
2.Shut off the power after parking and remove the key.
BATTERY STORAGE
When storing your batteries for a long period of time:
* Charge your batteries every 60 days to avoid capacity loss. Batteries will self-discharge
slowly when left unused for a long period of time;
* Disconnect your charger from the wall outlet and battery before storing the battery.
* Avoid storing your batteries in extreme hot or cold.
* Batteries are best kept in a cool, dry place.
* The recommended storage temperature for LI-ion batteries is between32-77ºF (0-25ºC).
* Avoid exposing the battery to extreme heat (104ºF or higher) for long periods of time.
Maintenance and service
Do not wash with high pressure water to avoid short circuit .
The dirt on paint surface or the surface of plastic parts should be cleaned with cloth and
neutral detergent .Please use lubrication oil to maintain mechanical parts of the ebike.
FLAT TIRE
Warning:
Riding your E-Bike with a flat or under-inflated tire can damage the tire, tube , and the wheel , and
it also can result in out of control or falling .
BROKEN SPOKE
A wheel with a loose or broken spoke is much weaker than a fully tensioned wheel.

If you break a spoke on a ride, you need ride home much more slowly and carefully because the
weakened wheel could break other spokes .
Warning:
A broken spoke seriously weakens the wheel and may cause it to wobble, striking the brakes or
the frame. Riding with a broken spoke can cause you to lose control and fall.
PROBLEMS AND SOLUTION
Use approved replacement parts, particularly for safety critical components.
Consult with your dealer as needed
No
Description
of
malfunction
Analysis of malfunction
Way of eliminating
1
Can not be
started
(1) low voltage of battery
(2) bad touching between battery
box and socket
(3) power lock switch is not in
correct position
(1) charge the battery
(2) clean the dirt on the
touching piece (*)
(3)turn to correct position
2
Fail to adjust
the speed or
max speed is
relatively
slow
(1) low voltage of battery
(2) magnetic steel in the
speed-adjusting handle is loose
(3) spring in the speed-adjusting
handle fails to work or damage
(1) charge the battery
(2) clamp after welding (*)
(3) look for projectionists
or maintenance station.
3
Motor
doesn’t work
after
switching on
(1) wire connection is loose
(2) magnetic steel in the
speed-adjusting handle is loose
(3) connectors of motor wire
connection loose or damage
(1) connect after repair (*)
(2) clamp after welding (*)
(3) look for projectionists
or maintenance station.
4
Driving miles
is not enough
after one
charge
(1) air pressure low in the tire
(2) not enough charging or
charger fault
(3) too much up slope, heavy
dead wind, brake quite often, big
load
(4) discharge battery completely
for long time, and not charge in
time, the battery is aging or
damaged
(5) low temperature in winter
affects driving miles obviously
(1) charge air
(2) fully charge or check
the touching of
connectors (*)
(3) suggest use feet
under these situations
(4) change the battery
(5) suggest charge longer
indoor
5
Charger
doesn’t
charge
(1) socket of charger falls off or
loose between plug and socket
(2) burnt fuse in battery box
(3) wire connection of battery falls
off
(1) tighten socket and
connector (*)
(2) change the fuse
(3) welding the
connection wire (*)
6
Electric
wheel has a
strange
sound
(1) abrasion of motor bearing
(2) abrasion of carbon brush
(3) big deviation of the wheel or
deform
(1) change the bearing (*)
(2) change the carbon
brush (*)
(3) adjust the rim

WARRANTY POLICY :
NO.
Parts Description
Warranty
Problem description
1
Motor
1 Year
Not working
2
Controller
1 Year
Functional failure
3
Charger
1 year
Functional failure
4
Lithium-ion battery
1 Year
Not working
5
Handlebar, frame, front fork,
steering column, rear flat fork
1 Year
Broken
Special Note: The warranty time above is based on the date of e-bike sold ; The warranty
above is based on the quality problem and functional failure which are not caused by misuse or
accident. The tire, tube, chain & spoke are without warranty .
Other manuals for CALEDON
1
This manual suits for next models
1
Table of contents
Other Slane Bicycle manuals


