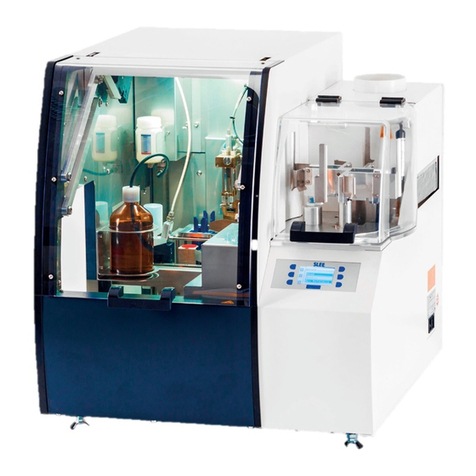
Slee Cromatec I User manual

2 Manual_Cromatec_I_II_2021-10-007.00_EN.docx

Manual_Cromatec_I_II_2021-10-007.00_EN.docx 3
Table of Content
1 Introduction
1.1 About this manual 5
1.1.1 Used symbols and their meanings 5
1.2 Intended use 6
1.3 Authorized operators 6
1.4 Instrument type 6
1.5 Safety Instructions for working with the Cromatec I / II and reagents 7
2 Components of the Cromatec linear stainer
2.1 Instrument components 9
2.2 Standard components 10
2.3 Technical specification 10
3 Setting up the instrument
3.1 Installation site requirements 13
3.2 Tap water supply connection 14
3.3 Waste water hose connection 15
3.4 Electrical connection 17
3.5 Connection of air evacuation (optional) 17
3.6 Inserting/Changing the activated carbon filter 17
3.7 Levelling the instrument 18
3.8 Inserting the cuvettes 19
3.9 Inserting the slide baskets 20
3.10 Setting the water pressure for running water station 21
3.11 Store samples in xylene at the end of the process 21
4 Operation
4.1 Switching on the instrument 22
4.2 Main menu 22
4.3 Programs – only for Administrator
4.3.1 Edit a new or existing program 30
4.4 Users – only for Administrator
4.4.1 Edit a new or existing user 38
4.5 Reagents – only for Administrator
4.5.1 Edit or create a new reagent 43

4 Manual_Cromatec_I_II_2021-10-007.00_EN.docx
4.6 Settings
4.6.1 Setting of Cromatec 48
4.6.2 Agitation / Fan 49
4.6.3 Filter 50
4.6.4 Options 53
4.6.5 Language 54
4.6.6 Time and date 55
4.6.7 Display 56
4.6.8 Service 58
4.7 Running staining program
4.7.1 Place slide baskets in the loading station 59
4.7.2 Select the program you want to stain 59
4.7.3 Start the program 61
4.7.4 Symbols during program 63
4.7.5 End of program 64
4.7.6 Stop a running program 65
4.7.7 Emergency stop 66
5 Errors
5.1 Notes 67
5.2 PopUp messages 67
5.3 Error messages 70
5.4 Power failure 72
5.5 Hood 73
6 Cleaning
6.1 General cleaning advice 74
6.2 Disposal 74
6.3 Schedule of cleaning for staining system 75

Manual_Cromatec_I_II_2021-10-007.00_EN.docx 5
1. Introduction
1.1 About this Manual
This manual shall help you handling the device. Please read the manual completely and
follow the advice. Acquaint yourself to the control elements and their functionality by
studying the figures. This way, an adequate use of the device is ensured.
1.1.1 Used symbols and their meanings
Danger warning: Danger warnings are marked by a red framed triangle.
Warning: Warnings are marked with a yellow warning triangle, showing an exclamation
mark.
Notice: Notices, meaning important information for the user, that are not classified as
danger or warning, are marked with an information symbol.
Heat warning: Heat warnings identify parts and situations of the device with high
temperatures.
Flammability: Warnings regarding flammability are marked with a yellow triangle,
showing a flame.

6 Manual_Cromatec_I_II_2021-10-007.00_EN.docx
1.2 Intended Use
The Cromatec I / II is an automated stainer and is made for the purpose of staining tissue
specimens in histology and pathology laboratories only. The instrument may be operated
only according to the instructions contained in this manual. Any other use of the
Cromatec I / II is considered improper.
The conditions for operation, maintenance and service mentioned in this instruction
manual have to be strictly observed.
1.3 Authorized Operators
The Cromatec must be used only by those persons who have been authorized by the
owner. In his working area, the operator is responsible with regard to third persons. The
owner must give the operator access to this instruction manual and make sure that the
operator has read and understood its contents.
1.4 Instrument type
All information provided in this manual applies only to the instrument type indicated on
the title page. A name plate indicating the instrument serial number is attached to the
rear panel of the instrument.
To prevent damages to the instrument and specimens, only use accessories and spare
parts which have been approved by SLEE medical GmbH.

Manual_Cromatec_I_II_2021-10-007.00_EN.docx 7
1.5 Safety Instructions for working with the Cromatec I / II and reagents
When working with the Cromatec I / II, please pay particular attention to the used
reagent’s characteristics regarding flammability and further hazards. Read the manual
carefully before working with the Cromatec I / II and reagents for the first time. Keep the
manual near and easily accessible to the device. Consult the manual in case of obscurities.
Many reagents’ fluids and vapours are flammable. If you are not sure about using a
reagent, please contact the manufacturer.
Do not eat, drink or otherwise consume reagents and/or reagent vapours! Do not eat,
drink, smoke within the surrounding area of the device!
In case of accidental eating or drinking of, or skin contact with a reagent or its vapours,
immediately consult the correspondent safety data sheet and follow the instructions
stated in the corresponding sections!
Always wear protective clothes (e.g. laboratory coat, gloves, safety glasses) to prevent
accidental contact with reagents!
Make sure the exhaust air decontamination system is working before starting to work
with the Cromatec and reagents!
Ensure that the device is cleaned and maintained according to the schedule and advice
given in Chapter 5!
If you have trouble understanding instruction, questions, or are not sure about the safety,
please consult your Sales Representative first!
If the cromatec II is not in use, the water supply must be switched off at the tap
independently. In case the device becomes a defect, the warranty expires.

8 Manual_Cromatec_I_II_2021-10-007.00_EN.docx
•An incorrect operation may stop or interrupt tissue processing. Make sure
that the device is not interfered with or changed by unauthorized
personnel during operation.
An incorrect operation may stop or interrupt tissue processing. (If power is turned
off by unauthorized personnel, the dying process may be interrupted and dyeing
problems may occur.) Design the work environment so that only operators with
expertise can use the machine. (As a precaution, also consider the use of external
alarms, etc.)
•Do not bring open flames near the device.
The device uses organic solvents that can ignite when exposed to fire.
•Never allow foreign objects to enter the device.
The ingress of water, metal, paper or other foreign objects into the air inlets (to
the fan, etc.) may result in fire, electric shock, operator injury, equipment failure,
etc. If foreign objects have entered the device, switch off the device immediately
and contact the technical service department or a local representative of SLEE
medical GmbH.
•Do not operate the device while wearing metal objects on the body.
Body-worn wires (pins, jewelry, clothing, etc. made of metal) may come into
contact with the device and cause an electric shock.
•Never block the ventilation openings or air inlets on the device.
Never block the ventilation openings (air inlets) by setting them up against a wall
or objects, and do not use the unit in a poorly ventilated place or with the dust
cover still attached. This can lead to heat build-up in the device and a drop in its
performance and also cause fires, accidents, failures, etc. due to abnormal
overheating.
•Check the power cord, other cables and the power outlet regularly for
damage and dust accumulation.
Foreign objects and dust accumulation on the wall outlet can cause fires. Clean
the mains socket at regular intervals.
•Make sure that no tissue gets into the drying station and still sticks with
flammable solvent.
If stored flammable solvents are heated in the drying station and evaporate, this
can cause fires or explosions.
•Do not place the device in a place that is used as a living area.
If a common room is used, an exhaust system is required. Provide protection
against electrostatic discharge at the installation site.
•Install the device indoors. Do not place the unit in a location exposed to
direct sunlight, snow or rain.
This product is designed for indoor use; do not use it outdoors. UV radiation and
high temperatures can cause damage to the device. Never use the device when it
is exposed to snow or rain, as this could result in electric shock or short circuit.

Manual_Cromatec_I_II_2021-10-007.00_EN.docx 9
2. Components of the Cromatec I / II linear stainer
2.1 Instrument Components
Touch screen display
Loading station for 5 slide baskets
Unloading station for 5 slide baskets
Handle

10 Manual_Cromatec_I_II_2021-10-007.00_EN.docx
1
Water drain receptacle
2
Water drain washing cuvettes
3
Water connection / inlet
4
Connection power cable
5
Network connection RJ45
6
USB connector type B
7
Hose connection exhaust air Ø 100 mm
8
Water flow pressure regulator
9
Pressure gauge
10
Emergency stop button
1
2
3
7
10
9
8
7
1
2
3
4
5
6

Manual_Cromatec_I_II_2021-10-007.00_EN.docx 11
2.2 Standard components
Cromatec I
Art.-No.:
Description
Quantity
41000566
Cover plate
2 pcs
41000017
Plastic cuvettes normal
20 pcs
41000410
Plastic washing cuvettes complete
6 pcs
41000584
Insert tub assembled
1 pcs
41000580
Drip tray with lifting plate
1 pcs
41000270
Receiving bracket
6 pcs
38500051
Slides
6 pcs
41000655
Inlet hose
1 pcs
41000657
Drain hose à 2 m
2 pcs
33010428
Hose clamp (mounted)
2 pcs
41000654
Reducer ¾ x ½ inch
1 pcs
-
Mains cable
1 pcs
-
Instruction manual
1 pcs
41000558
Transport handles
4 pcs
Cromatec II
Art.-No.:
Description
Quantity
41000750
Heating cuvette / drying station
Adjustable from 30 °C until 70 °C
1 pcs
41000767
Filter pad for heating cuvette, for
collecting dripping wax
1 pcs
41000566
Cover plate
2 pcs
41000017
Plastic cuvettes normal
20 pcs
41000410
Plastic washing cuvettes complete
6 pcs
41000584
Insert tub assembled
1 pcs
41000580
Drip tray with lifting plate
1 pcs
41000270
Receiving bracket
6 pcs
38500051
Slides
6 pcs
41000655
Inlet hose
1 pcs
41000657
Drain hose à 2 m
2 pcs
33010428
Hose clamp (mounted)
2 pcs
41000654
Reducer ¾ x ½ inch
1 pcs
-
Mains cable
1 pcs
-
Instruction manual
1 pcs
41000558
Transport handles
4 pcs
41000782
Extension cable for drying station
1 pcs

12 Manual_Cromatec_I_II_2021-10-007.00_EN.docx
2.3 Technical Specification
General
Nominal Voltage
100 – 240 V AC +/- 10 %
Nominal frequency
50 / 60 Hz
Max. power consumption
350 VA
Max. heat emission
350 J/s
IEC 1010 classification
Protective class 1
Pollution degree 2
Overvoltage installation category II
Fuses
2 x T 3,15 A
Interfaces
USB, RJ 45
Operating temperature range
+10 to +35 °C
Operating humidity
max. rel. 80 % non-condensing
Storage temperature range
+5 to +55 °C
Storage humidity
max. rel. 80 % non-condensing
Battery running time
4 h (the heating station is switched off in
battery mode)
Exhaust air volume
Minimum air volume approx. 200 m³/h,
required pressure difference of approx.
100 Pascal (Pa), nominal diameter for
hose connection on the back is 100 mm
Dimensions and weight
Dimensions (W x D X H)
1.560 mm x 640 mm x 620 mm
Weight unpacked (without accessories)
120 kg
Capacity
Specimen slide throughput
Up to 1.800 slides/h*
Loading capacity
Up to 20 slide baskets simultaneously
Slide basket capacity
30 slides
Total number of stations
19 + 1 heating / drying station
Number of heating / drying stations
1
Temperature heating stations
30 – 70 °C
Number of washing stations
Max. 6
Reagent / Washing cuvettes volume
400 ml
Water flow regulation for washing stations
0,5 to 2,0 l/min
Load / Unload stations
5 each
Programs
20 programs, up to 20 steps each
Incubation time setting
5 sec. up to 59 min, 59 sec.
*depending on staining protocol

Manual_Cromatec_I_II_2021-10-007.00_EN.docx 13
3. Setting up the instrument
3.1 Installation site requirements – first time
Requirements for the installation site:
•The device may only be used indoors.
•Stable, precisely horizontal laboratory table with a uniform surface of 1.80 m and
a depth of 0.80 m, which can hold a weight of 120 kg!
•The minimum distance between the device and the wall or other instruments
should be at least 10 cm to ensure adequate ventilation. Also make sure that
there are no flammable objects in the area heated by the unit.
•Tap water connection of maximum 2.50 m and waste water pipe of 2.00 m from
the corresponding input / output on the rear wall of the device.
•If the device is to be operated with an exhaust air hose, a fume cupboard with a
maximum distance of 3.50 m from the device is required. Alternative: Operation
with activated carbon filter.
•Sufficient space of min. 0.90 m above the bench to easily open / close the
instrument cover.
•Stable ambient temperature between + 10 ° C and + 35 ° C
•Relative humidity of maximum 80%, non-condensing.
•Do not place any equipment nearby that could cause vibration.
•The device must not be exposed to direct sunlight.
Lift the instrument by carrying the handles (see picture below). Four people are needed
to lift and / or carry the instrument as the instrument weighs approximately 120 kg in
total.
After installation please remove the handles on both sides!
Handle left-hand side – two each side
Handle righthand side – two each side

14 Manual_Cromatec_I_II_2021-10-007.00_EN.docx
3.2 Tap water supply connection
•Unpack the water inlet hose (including safety-aqua stop).
•Connect the hose to the inlet connection.
Always connect the water inlet hose!

Manual_Cromatec_I_II_2021-10-007.00_EN.docx 15
3.3 Waste water hose connection
•Connect the waste hose to the waste water connection. Please note that water
can escape in the upper drain hose, but in the lower only in an exceptional case.

16 Manual_Cromatec_I_II_2021-10-007.00_EN.docx
Please do not bend the hoses and ensure an adequate slope.
The two drains on the rear of the unit must never be brought together.
The lower drain is to be used only for cleaning purposes to rinse and clean the cuvette
trough. Connect as required and provide sufficient slope.
The upper drain is only for the maximum of 6 water baths and must be connected
constantly with sufficient slope.

Manual_Cromatec_I_II_2021-10-007.00_EN.docx 17
3.4 Electrical connection
•The electronical connection is located at the rear of the unit.
•Connect the mains cable to the mains power supply socket.
3.5 Connection of air evacuation (optional)
•For the connection to an external air evacuation please contact the local Slee
service.
3.6 Inserting / Changing the activated carbon filter
•For changing the filter, unscrew the 4 screws at the rear of the instrument panel.
•Take out the filter and replace with a new one.
•Connect the filter housing to the rear panel again.
•Set filter change in the menu (see chapter 4.6.3).
The instrument must be connected to a grounded mains power outlet socket.
Make sure to use the appropriate mains cable for the local voltage supply.
The Cromatec will be delivered with the filter already installed.

18 Manual_Cromatec_I_II_2021-10-007.00_EN.docx
3.7 Leveling the instrument
•Once all accessories are installed move the instrument to its final position.
•The easiest way to find the right level is using a spirit level.
•The right level will be achieved by adjusting the instrument feet.

Manual_Cromatec_I_II_2021-10-007.00_EN.docx 19
3.8 Inserting the cuvettes
•There are three different cuvette types:
-Reagent cuvettes
-Running water cuvettes
-Heating cuvette / drying station (only Cromatec II)
Reagent cuvette
The reagent cuvette can
simply be placed at the any
station.
Washing cuvette
The washing cuvette can
simply be clicked into the
water tube at the button of
the station. The position can
be freely selected.

20 Manual_Cromatec_I_II_2021-10-007.00_EN.docx
Only Cromatec II: Inserting the heating cuvette / drying station
Heating cuvette / drying
station
Connection of heating
cuvette / drying station
The heating cuvette is only available once in the device, as a heating cuvette / drying
station in station 1, or as a heating cuvette / drying station in station 20. Only the plastic
cuvette in station 1 or 20 is replaced by the heating cuvette or drying station. The heating
station in station 1 the power supply and air supply are connected directly at the bottom
left of the tub. For dry station in station 20, the power supply and the air supply are
connected each with an extension in the bottom left of the tub. When placing the power
supply and the air supply, it is important to ensure proper installation. For power
connection, the white mark on the plug must face up.
This following step is very important to obey: In station 1 as hot air station, the figure
1 on the housing facing to the user. In station 20 as drying station, the figure 20 must
face to the user, so the hot air station has to be turned 180 degrees.
Please do not use chloroform, acetone and toluene (Methylbenzene).
This manual suits for next models
1
Table of contents
Other Slee Industrial Equipment manuals
Popular Industrial Equipment manuals by other brands
Pepperl+Fuchs
Pepperl+Fuchs Bebco EPS 6100 Series manual
THORLABS
THORLABS PDA400 operating manual
ABB
ABB HT611546 Operation manual
DRIVE SOLUTIONS
DRIVE SOLUTIONS TRASCO GRMP Series User and maintenance manual
DESSALATOR
DESSALATOR FREEDOM DC 60 Assembly and user's manual

ipf electronic
ipf electronic VY200120 manual
Loepfe
Loepfe YARNMASTER 3N1 FITTING INSTRUCTION
Nidec
Nidec LSA 52.3 Installation and Maintenance
Hitachi
Hitachi MICRO-EHV+ OBV-AIG quick start guide
ABB
ABB HT577414 Operation manual
Danfoss
Danfoss VX Solo HWS Instructions for installation and use
schmersal
schmersal AZM201Z-CC-T-1P2PW Instructions for operation

