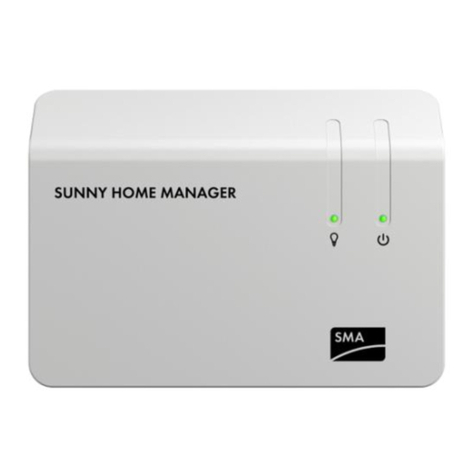
SMA SUNNY WEBBOX with Bluetooth Parts list manual

SWebBox-TEN101232 | 98-0002232 | Version 3.2
EN
System Monitoring
SUNNY WEBBOX
Technical Description


SMA Solar Technology AG Table of Contents
Technical Description SWebBox-TEN101232 3
Table of Contents
1 Notes on this Manual. . . . . . . . . . . . . . . . . . . . . . . . . . . . . . 8
1.1 Validity . . . . . . . . . . . . . . . . . . . . . . . . . . . . . . . . . . . . . . . . . . . . 8
1.2 Additional Information . . . . . . . . . . . . . . . . . . . . . . . . . . . . . . . . 8
1.3 Symbols Used . . . . . . . . . . . . . . . . . . . . . . . . . . . . . . . . . . . . . . . 9
1.4 Syntax. . . . . . . . . . . . . . . . . . . . . . . . . . . . . . . . . . . . . . . . . . . . . 9
2 Sunny WebBox . . . . . . . . . . . . . . . . . . . . . . . . . . . . . . . . . 10
3 Safety . . . . . . . . . . . . . . . . . . . . . . . . . . . . . . . . . . . . . . . . . 12
3.1 Appropriate Usage. . . . . . . . . . . . . . . . . . . . . . . . . . . . . . . . . . 12
3.1.1 Target Group . . . . . . . . . . . . . . . . . . . . . . . . . . . . . . . . . . . . . . . . . . . . . . . . 12
3.1.2 Certified Countries . . . . . . . . . . . . . . . . . . . . . . . . . . . . . . . . . . . . . . . . . . . . 12
3.2 Safety Precautions. . . . . . . . . . . . . . . . . . . . . . . . . . . . . . . . . . . 13
4 Unpacking. . . . . . . . . . . . . . . . . . . . . . . . . . . . . . . . . . . . . . 14
4.1 Scope of Delivery . . . . . . . . . . . . . . . . . . . . . . . . . . . . . . . . . . . 14
4.2 Identifying the Sunny WebBox . . . . . . . . . . . . . . . . . . . . . . . . . 15
5 Device Overview . . . . . . . . . . . . . . . . . . . . . . . . . . . . . . . . 16
5.1 Overview of the Sunny WebBox LEDs . . . . . . . . . . . . . . . . . . . 16
5.2 Overview of the Connection Area . . . . . . . . . . . . . . . . . . . . . . 17
5.3 Overview of the LEDs on the Network Connection. . . . . . . . . . 18
6 Commissioning . . . . . . . . . . . . . . . . . . . . . . . . . . . . . . . . . . 19
6.1 Information on Starting up the Device . . . . . . . . . . . . . . . . . . . 19
6.2 Mounting- /installation location requirements . . . . . . . . . . . . . 19
6.3 Connecting the Sunny WebBox directly to the Computer . . . . 20
6.4 Configuring Network Settings on the Computer. . . . . . . . . . . . 20
6.4.1 Information on Network Settings on the Computer. . . . . . . . . . . . . . . . . . . . 20
6.4.2 Windows 7, Windows Vista . . . . . . . . . . . . . . . . . . . . . . . . . . . . . . . . . . . . . 21
6.4.3 Windows XP, Windows 2000 . . . . . . . . . . . . . . . . . . . . . . . . . . . . . . . . . . . 22

Table of Contents SMA Solar Technology AG
4 SWebBox-TEN101232 Technical Description
6.5 Logging into the Sunny WebBox for the first time. . . . . . . . . . . 23
6.6 Configuring Sunny WebBox for the Local Network . . . . . . . . . 25
6.6.1 Information on Integrating the Sunny WebBox into a Local Network. . . . . . 25
6.6.2 Adjusting the static network settings in Sunny WebBox . . . . . . . . . . . . . . . . 25
6.7 Configuring the Sunny WebBox for Modem Operation . . . . . 27
6.7.1 Notes on Configuring the Sunny WebBox with an Analog or GSM Modem . . .27
6.7.2 Connect Modem Cable or GSM Antenna . . . . . . . . . . . . . . . . . . . . . . . . . . 27
6.7.3 Configure modem settings for the Sunny WebBox . . . . . . . . . . . . . . . . . . . . 30
6.7.4 Determining the Mounting/Installation Location in the GSM version . . . . . . 30
6.7.5 Mounting a GSM Antenna with the Bracket or Extension Set . . . . . . . . . . . 31
6.8 Connect the Sunny WebBox to the inverter . . . . . . . . . . . . . . . 34
6.8.1 Connecting the Sunny WebBox to the Sunny Central . . . . . . . . . . . . . . . . . 34
6.8.2 Connecting the Sunny WebBox to the RS485 Communication Bus . . . . . . . 35
6.9 Mounting the Sunny WebBox (wall or top-hat rail) . . . . . . . . . 38
7 Logging into and out of the Sunny WebBox . . . . . . . . . . 40
7.1 Logging into the Sunny WebBox . . . . . . . . . . . . . . . . . . . . . . . 40
7.2 Logging out of the Sunny WebBox. . . . . . . . . . . . . . . . . . . . . . 41
8 Operation . . . . . . . . . . . . . . . . . . . . . . . . . . . . . . . . . . . . . . 42
8.1 User interface . . . . . . . . . . . . . . . . . . . . . . . . . . . . . . . . . . . . . . 42
8.1.1 Explanation of the Status Symbols . . . . . . . . . . . . . . . . . . . . . . . . . . . . . . . . 43
8.1.2 Structural view and device view . . . . . . . . . . . . . . . . . . . . . . . . . . . . . . . . . . 43
8.1.3 Overview by Device Type. . . . . . . . . . . . . . . . . . . . . . . . . . . . . . . . . . . . . . . 44
8.1.4 Individual Device Overview . . . . . . . . . . . . . . . . . . . . . . . . . . . . . . . . . . . . . 44
8.2 Detecting Devices . . . . . . . . . . . . . . . . . . . . . . . . . . . . . . . . . . . 45
8.3 Parameterizing Devices. . . . . . . . . . . . . . . . . . . . . . . . . . . . . . . 45
8.4 Event Report Display. . . . . . . . . . . . . . . . . . . . . . . . . . . . . . . . . 46

SMA Solar Technology AG Table of Contents
Technical Description SWebBox-TEN101232 5
9 Managing Plant Data . . . . . . . . . . . . . . . . . . . . . . . . . . . . 47
9.1 Information on the plant data . . . . . . . . . . . . . . . . . . . . . . . . . . 47
9.2 Plant Presentation in Sunny Portal. . . . . . . . . . . . . . . . . . . . . . . 47
9.2.1 Registering Sunny WebBox in the Sunny Portal . . . . . . . . . . . . . . . . . . . . . . 48
9.2.2 Activating/Deactivating Data Transmission to Sunny Portal . . . . . . . . . . . . . 49
9.2.3 Adjusting the Plant ID for Sunny Portal . . . . . . . . . . . . . . . . . . . . . . . . . . . . . 49
9.2.4 Delete Sunny portal buffer . . . . . . . . . . . . . . . . . . . . . . . . . . . . . . . . . . . . . . 49
9.2.5 Accessing the Sunny WebBox via Sunny Portal . . . . . . . . . . . . . . . . . . . . . . 50
9.3 Integrated FTP server . . . . . . . . . . . . . . . . . . . . . . . . . . . . . . . . 50
9.3.1 Assigning Write and Read Access Rights for the FTP Server. . . . . . . . . . . . . 51
9.3.2 Accessing FTP Server via the Web Browser . . . . . . . . . . . . . . . . . . . . . . . . . 51
9.4 FTP Push Function . . . . . . . . . . . . . . . . . . . . . . . . . . . . . . . . . . . 51
9.4.1 Activating / Deactivating FTP Push function . . . . . . . . . . . . . . . . . . . . . . . . . 52
9.4.2 Testing the FTP Push Function . . . . . . . . . . . . . . . . . . . . . . . . . . . . . . . . . . . . 52
9.5 HTTP Download Via the User Interface. . . . . . . . . . . . . . . . . . . 53
9.6 Storing Recorded Data on an SD Card . . . . . . . . . . . . . . . . . . 54
9.6.1 Setting Data Compression. . . . . . . . . . . . . . . . . . . . . . . . . . . . . . . . . . . . . . . 55
9.6.2
Displaying the Free Memory Space for Data Storage on your Sunny WebBox . . 55
10 Settings . . . . . . . . . . . . . . . . . . . . . . . . . . . . . . . . . . . . . . . . 56
10.1 System. . . . . . . . . . . . . . . . . . . . . . . . . . . . . . . . . . . . . . . . . . . . 56
10.1.1 Setting Date and Time. . . . . . . . . . . . . . . . . . . . . . . . . . . . . . . . . . . . . . . . . . 56
10.1.2 Setting the Language . . . . . . . . . . . . . . . . . . . . . . . . . . . . . . . . . . . . . . . . . . 56
10.1.3 Setting the Operator Name . . . . . . . . . . . . . . . . . . . . . . . . . . . . . . . . . . . . . 57
10.2 Setting the Communication Type of the PV Plant . . . . . . . . . . . 57
10.2.1 Setting SMA-COM . . . . . . . . . . . . . . . . . . . . . . . . . . . . . . . . . . . . . . . . . . . . 58
10.2.2 Setting ETHERNET. . . . . . . . . . . . . . . . . . . . . . . . . . . . . . . . . . . . . . . . . . . . . 59
10.3 Ethernet Network . . . . . . . . . . . . . . . . . . . . . . . . . . . . . . . . . . . 59
10.3.1 Information on Extended Network Settings. . . . . . . . . . . . . . . . . . . . . . . . . . 59
10.3.2 Activating DHCP . . . . . . . . . . . . . . . . . . . . . . . . . . . . . . . . . . . . . . . . . . . . . . 59
10.3.3 Network Ports . . . . . . . . . . . . . . . . . . . . . . . . . . . . . . . . . . . . . . . . . . . . . . . . 60

Table of Contents SMA Solar Technology AG
6 SWebBox-TEN101232 Technical Description
10.4 Enable Modem Dialup . . . . . . . . . . . . . . . . . . . . . . . . . . . . . . . 61
10.4.1 Testing the Connection . . . . . . . . . . . . . . . . . . . . . . . . . . . . . . . . . . . . . . . . . 61
10.4.2 Testing the Signal Strength of the GSM Modem . . . . . . . . . . . . . . . . . . . . . 61
10.4.3 Terminating the Connection . . . . . . . . . . . . . . . . . . . . . . . . . . . . . . . . . . . . . 62
10.5 Ensuring Access Security. . . . . . . . . . . . . . . . . . . . . . . . . . . . . . 62
10.5.1 Password Quality . . . . . . . . . . . . . . . . . . . . . . . . . . . . . . . . . . . . . . . . . . . . . 63
10.5.2 Changing the Password . . . . . . . . . . . . . . . . . . . . . . . . . . . . . . . . . . . . . . . . 63
10.6 Setting Data Upload. . . . . . . . . . . . . . . . . . . . . . . . . . . . . . . . . 64
10.7 Setting CSV Data Format . . . . . . . . . . . . . . . . . . . . . . . . . . . . . 65
10.8 Notification in Case of Error Enabled. . . . . . . . . . . . . . . . . . . . 66
10.8.1 Notes on Notification in Case of Error . . . . . . . . . . . . . . . . . . . . . . . . . . . . . 66
10.8.2 Enabling/Disabling Notification in Case of Error . . . . . . . . . . . . . . . . . . . . . 67
11 Service Functions . . . . . . . . . . . . . . . . . . . . . . . . . . . . . . . . 68
11.1 Updating the Firmware . . . . . . . . . . . . . . . . . . . . . . . . . . . . . . . 68
11.1.1 Firmware update via the Sunny Portal . . . . . . . . . . . . . . . . . . . . . . . . . . . . . 68
11.1.2 Firmware Update via SD Card . . . . . . . . . . . . . . . . . . . . . . . . . . . . . . . . . . . 69
11.2 Stopping the Sunny WebBox . . . . . . . . . . . . . . . . . . . . . . . . . . 70
11.3 Resetting the Sunny WebBox . . . . . . . . . . . . . . . . . . . . . . . . . . 71
11.4 Erase Unit Description. . . . . . . . . . . . . . . . . . . . . . . . . . . . . . . . 73
12 Maintenance and Care . . . . . . . . . . . . . . . . . . . . . . . . . . . 74
12.1 Maintenance. . . . . . . . . . . . . . . . . . . . . . . . . . . . . . . . . . . . . . . 74
12.2 Care . . . . . . . . . . . . . . . . . . . . . . . . . . . . . . . . . . . . . . . . . . . . . 74
13 Decommissioning . . . . . . . . . . . . . . . . . . . . . . . . . . . . . . . . 75
13.1 Disassembling the Sunny WebBox . . . . . . . . . . . . . . . . . . . . . . 75
13.2 Packaging the Sunny WebBox. . . . . . . . . . . . . . . . . . . . . . . . . 75
13.3 Disposing of the Sunny WebBox . . . . . . . . . . . . . . . . . . . . . . . 75
14 Troubleshooting . . . . . . . . . . . . . . . . . . . . . . . . . . . . . . . . . 76

SMA Solar Technology AG Table of Contents
Technical Description SWebBox-TEN101232 7
15 Annex . . . . . . . . . . . . . . . . . . . . . . . . . . . . . . . . . . . . . . . . . 81
15.1 Allocating an IP Address in a Local Network . . . . . . . . . . . . . . 81
15.2 Determining the network settings of the Sunny WebBox. . . . . . 81
15.3 Structure of the Config.xml File . . . . . . . . . . . . . . . . . . . . . . . . . 82
15.4 Structure of the Info.xml file. . . . . . . . . . . . . . . . . . . . . . . . . . . . 83
15.5 Structure of an XML Data File . . . . . . . . . . . . . . . . . . . . . . . . . . 84
15.6 Sunny WebBox with GSM Modem . . . . . . . . . . . . . . . . . . . . . 85
15.6.1 Notes on GSM Card Contract . . . . . . . . . . . . . . . . . . . . . . . . . . . . . . . . . . . 85
15.6.2 Selecting a GSM Tariff . . . . . . . . . . . . . . . . . . . . . . . . . . . . . . . . . . . . . . . . . 85
15.6.3 GSM card contracts within Germany . . . . . . . . . . . . . . . . . . . . . . . . . . . . . . 86
15.6.4 Retrofitting the SIM Card . . . . . . . . . . . . . . . . . . . . . . . . . . . . . . . . . . . . . . . 86
15.6.5 Replacing the SIM card . . . . . . . . . . . . . . . . . . . . . . . . . . . . . . . . . . . . . . . . 87
15.6.6 Accessing Sunny WebBox via an integrated analog modem. . . . . . . . . . . . 89
16 Accessories . . . . . . . . . . . . . . . . . . . . . . . . . . . . . . . . . . . . . 91
16.1 Outdoor GSM Antenna . . . . . . . . . . . . . . . . . . . . . . . . . . . . . . 91
16.2 SD Cards . . . . . . . . . . . . . . . . . . . . . . . . . . . . . . . . . . . . . . . . . 91
16.3 RS485 communication cables . . . . . . . . . . . . . . . . . . . . . . . . . 91
17 Technical Data . . . . . . . . . . . . . . . . . . . . . . . . . . . . . . . . . . 92
17.1 Sunny WebBox. . . . . . . . . . . . . . . . . . . . . . . . . . . . . . . . . . . . . 92
17.2 Plug-in Power Supply . . . . . . . . . . . . . . . . . . . . . . . . . . . . . . . . 93
18 Contact . . . . . . . . . . . . . . . . . . . . . . . . . . . . . . . . . . . . . . . . 94

Notes on this Manual SMA Solar Technology AG
8 SWebBox-TEN101232 Technical Description
1 Notes on this Manual
This manual describes the mounting, installation, commissioning and operation of the Sunny WebBox.
Keep this guide in a convenient place for future reference
This manual does not contain any detailed information about the connected devices. Detailed
information about the devices connected is provided in the manuals for the devices.
1.1 Validity
The technical description is valid for the Sunny WebBox from hardware version E1 and firmware
version 1.51 and up.
1.2 Additional Information
You will find further information on the Sunny WebBox in the download area of www.sma.de/en.
Among other things, the download area contains the following items:
• Certificates and approvals for the Sunny WebBox.
• Information on setting up a local FTP server for automatic reception of plant data via the FTP
push function of the Sunny WebBox (see the Technical Information "Configuring a Local FTP
Server").
• Information on data transmission of the Sunny WebBox (see the Technical Information "GSM -
Background Information on Data Transmission to GSM and UMTS Cellular Networks for Sunny
WebBox / Sunny Boy Control").
• Information on the Remote Procedure Call Protocol of the Sunny WebBox.
• Information on the Modbus Protocol of the Sunny WebBox.

SMA Solar Technology AG Notes on this Manual
Technical Description SWebBox-TEN101232 9
1.3 Symbols Used
The following types of safety instructions and general information appear in this document as
described below:
1.4 Syntax
In this manual the term "photovoltaic system" will be abbreviated to "PV system"
DANGER!
"DANGER" indicates a hazardous situation which, if not avoided, will result in death or
serious injury.
WARNING!
WARNING indicates a hazardous situation which, if not avoided, could result in death or
serious injury.
CAUTION!
CAUTION indicates a hazardous situation which, if not avoided, could result in minor or
moderate injury.
NOTICE!
NOTICE indicates a situation that can result in property damage if not avoided.
Information
Information provides tips that are valuable for the optimal installation and operation of
your product.
Formatting Meaning
[Save] Buttons are displayed in square brackets [ ].
"Menu1" Menu items are displayed in quotation marks.
"Menu1 > Menu2" Menu paths are given in quotation marks. The angle bracket > separates
individual menus.
Example Examples are represented in italics.

Sunny WebBox SMA Solar Technology AG
10 SWebBox-TEN101232 Technical Description
2 Sunny WebBox
As the central communication interface, the Sunny WebBox connects the PV plant and its operator.
The Sunny WebBox collects and documents all data of the connected devices, thus permitting
interruption-free monitoring of the PV plant. The Sunny WebBox provides the operator with all
recorded data via an Internet connection or a GSM modem.
The Flashview presentation software and the Sunny Portal Internet portal allow data to be processed
and the collected data to be displayed graphically. Both presentation programs are freely available
on the www.sma.de/en or the www.SunnyPortal.de websites.
This means that operators can see the yields from their plant both in the local network and via the
Internet at any time using Flashview and the Sunny Portal. The large-format display Sunny Matrix,
suitable for installation indoors and outdoors, is another display option.
The Sunny WebBox is also a powerful tool for operators when configuring plants and for remote
diagnostics via computer. It allows continuous monitoring of the PV plant and early detection of
disturbances. Thus, the Sunny WebBox helps optimize yield from the PV plant.

SMA Solar Technology AG Sunny WebBox
Technical Description SWebBox-TEN101232 11
Operators can expand large-scale PV plants, which must contribute to the utility operator's feed
management, accordingly using the Sunny WebBox. By connecting the Power Reducer Box to the
Sunny WebBox, the requirements of the utility operator are forwarded to the inverter and logged. The
Sunny WebBox informs the operator of the requirements of the utility operator.
The Sunny SensorBox allows the operator to expand their plant additionally via the Sunny WebBox.
The Sunny SensorBox records the environmental data relevant to performance monitoring at the PV
plant. For this purpose, the Sunny SensorBox has an integrated irradiation sensor as well as an
external module temperature sensor. The operator can also connect an optional ambient temperature
sensor and a wind sensor to the Sunny SensorBox. Further information on monitoring your PV system
and SMA Solar Technology products can be found on the Internet at www.sma.de/en.

Safety SMA Solar Technology AG
12 SWebBox-TEN101232 Technical Description
3 Safety
3.1 Appropriate Usage
The Sunny WebBox is a data logger that records, logs and makes available the data of a PV plant.
The Sunny WebBox can receive the requirements of the utility operator via the Power Reducer Box
and forward them to the inverters in the PV plant. The Sunny WebBox is suitable for monitoring PV
plants of any size.
The data collected by the Sunny WebBox may deviate from the data of the electricity meter. The
Sunny WebBox data must not be used for billing purposes.
3.1.1 Target Group
The Sunny WebBox with is intended for private and industrial use. When you log in to the Sunny
WebBox there are 2 user groups at your disposal, "Installer" and "User". The "Installer" user group
comprises only qualified personnel who are authorized to make changes to network parameters for
the connected devices. Only the installer may carry out the Sunny WebBox commissioning.
3.1.2 Certified Countries
The Sunny WebBox is certified for the following countries:
Australia, Belgium, Germany, France, Greece, Great Britain, Italy, Korea, The Netherlands, Austria,
Portugal, Switzerland, Spain, The Czech Republic, the United States of America

SMA Solar Technology AG Safety
Technical Description SWebBox-TEN101232 13
3.2 Safety Precautions
Please follow all operating and safety instructions in this manual. Failure to follow these instructions
could result in damage to the device and cause personal injury.
General safety instructions, in order to avoid physical damage.
• Never open the plug-in power supply.
• Install the cabling in such a way that no-one can stand on or trip over it.
• The Sunny WebBox is only to be operated using the supplied plug-in power supply and in the
voltage range intended for this.
General information in order to avoid damage to the device.
• By touching electronic components you can cause damage to or destroy the device through
electrostatic discharge (ESD). Do not touch component connections and plug contacts
unnecessarily. Ground yourself before working on the device.
• With the help of the Sunny WebBox you can change safety relevant parameters of the SMA
inverters (e.g. SMA Grid Guard parameters). Incorrectly set parameters can damage or destroy
the inverter. Do not alter these safety-relevant parameters without prior consultation with your
electric power company operating the grid into which your plant feeds.
Data Security
• You can connect the Sunny WebBox to the Internet. However, connecting to the Internet entails
a security risk. SMA recommends changing the login password after the initial installation in
order to protect it from unauthorized access by third parties. Select a number-letter combination
with at least 8 characters for your password (see section 10.5.1”Password Quality”
(page63)).

Unpacking SMA Solar Technology AG
14 SWebBox-TEN101232 Technical Description
4 Unpacking
4.1 Scope of Delivery
Check the scope of delivery for completeness and for any external damage. Please contact your
dealer if you find any damage or if the delivery is incomplete.
Position Quantity Designation
A1Sunny WebBox
B 1 Plug-in power supply with travel adapter (travel adapter according
to the country version ordered)
C 1 red network cable (patch cable)
D 1 blue network cable (crossover cable)
E1Screwdriver
F 1 Plug for SMACOM (1 plug connector, 1 connector shell, 1 cable
tie)
G 10 Jumper as replacement
H2Screws
I 2 Wall anchors
J 1 Technical Description with drilling template and Quick Start.
K 1 SD card — inserted in Sunny WebBox (only with the ordering
option Sunny WebBox with SD card).
L 1 Modem cable with RJ11 plug and RJ11 to TAE adapter (only with
the ordering option Sunny WebBox with analog modem).

SMA Solar Technology AG Unpacking
Technical Description SWebBox-TEN101232 15
* T-Mobile card contract only available for Germany.
4.2 Identifying the Sunny WebBox
Type label
You can identify the Sunny WebBox using the type label.
The type label can be found on the back of the enclosure.
Firmware Version
The firmware version can be found in the user interface of
the Sunny WebBox. The current firmware version is displayed on the bottom right corner of every
page.
C 1 Envelope with T-Mobile contract and an information sheet
including PIN and PUK. The SIM card is already installed in the
Sunny WebBox. (Only with the ordering option Sunny WebBox
with GSM modem including SIM card).
N 1 GSM antenna with (bracket and 3 meter antenna cable (only with
the ordering option Sunny WebBox with GSM modem).
Position Quantity Designation

Device Overview SMA Solar Technology AG
16 SWebBox-TEN101232 Technical Description
5 Device Overview
5.1 Overview of the Sunny WebBox LEDs
LED designation State Meaning
USBCOM flashes green no function
glowing red no function
off no function
NETCOM flashes green The Sunny WebBox is currently transmitting data to
Sunny Portal.
glowing green The most recent data transmission to Sunny Portal/FTP
push was successful.
glowing red The most recent data transmission to Sunny Portal/FTP
push failed. The Sunny WebBox will attempt to transmit
the data again according to its settings. The Sunny
WebBox internal memory can retain the accumulated
data for approximately 2 days.
off Data transmission is deactivated.
SMACOM flashes green The Sunny WebBox is communicating with a device.
glowing green Plant communication took place within the last 5 minutes.
glowing red More than one device logged into the communication
bus is set as a master.
off There has been no communication on the communication
bus for more than 5 minutes.
MEMORY glowing green SD card is inserted. The Sunny WebBox can write data to
the SD card.
flashes orange The Sunny WebBox is writing data to the SD card.
glows orange The inserted SD card can be written (available memory <
10%).
glowing red SD card memory is full
off No SD card inserted.
REPORT Glowing green no function

SMA Solar Technology AG Device Overview
Technical Description SWebBox-TEN101232 17
5.2 Overview of the Connection Area
SYSTEM Flashing red The Sunny WebBox is starting.
glowing red A fault has occurred in the Sunny WebBox.
glowing green The Sunny WebBox is ready for operation.
POWER glowing green The Sunny WebBox power supply is active.
off The Sunny WebBox power supply is not active.
Position Designation
A Connection for GSM antenna cable (optional)
B Connection for the plug-in power supply
CJumper socket J1
DSMACOM
E AUXCOM (no function)
FJumper socket J2
GModem connection
H USB connection client (no function)
I USB connection host (no function)
J Network connection
KSD card slot
LED designation State Meaning

Device Overview SMA Solar Technology AG
18 SWebBox-TEN101232 Technical Description
5.3 Overview of the LEDs on the Network Connection
Position LED State Meaning
A Speed On 100 MB connection speed
Off 10 MB connection speed
B Link / Activity On Connection (link) established
Flashing The Sunny WebBox is currently transmitting or
receiving data (activity).
Off No connection established

SMA Solar Technology AG Commissioning
Technical Description SWebBox-TEN101232 19
6 Commissioning
6.1 Information on Starting up the Device
Starting up the Sunny WebBox entails the following steps:
• Connect the Sunny WebBox directly to the computer (see page 20).
• Configure network settings on the computer (see page 20).
• Configure Sunny WebBox for the local network (see page 25) and/or configure Sunny
WebBox for modem operation (see page 27).
• Connect the Sunny WebBox to the inverter (see page 34).
• Set the PV plant communication mode (see page 57) and detect the PV plant devices (see page
45).
6.2 Mounting- /installation location requirements
Please note the following information on the mounting / installation location of the Sunny WebBox:
• The Sunny WebBox is suited only for mounting indoors.
• The ambient temperature must be between -20°C and +65°C.
• The maximum cable length of the entire RS485 communication bus is 1,200 m.
• The maximum permitted network cable length is 100 m per segment.
• The maximum permitted telephone cable length is 200 m.
• The Sunny WebBox requires an outlet with a grid voltage of 100 V ... 200 V.
• Protect the Sunny WebBox from dust, wet conditions, corrosive substances and vapors.
• Observe the minimum clearances to walls, other
devices or objects as shown in the diagram in order
to guarantee sufficient heat dissipation.
• Do not cover the Sunny WebBox.
• The distance from the Sunny WebBox to the inverters
may not be greater than the maximum permitted
distance of the corresponding communication type.
Please note the specifications in the respective
sections.
• During installation, make sure there is optimal
reception for the transmission paths. Please note the
specifications in the respective sections.

Commissioning SMA Solar Technology AG
20 SWebBox-TEN101232 Technical Description
6.3 Connecting the Sunny WebBox directly to the Computer
1. Connect the Sunny WebBox with the blue network cable (crossover cable) to the computer
(see ➀ ).
The connection of the computer is normally indicated by the same symbol as the Sunny WebBox
network connection. If necessary refer to the computer manual.
2. Connect the plug-in power supply to the Sunny WebBox and plug this into the socket (see ➁ ).
☑ As soon as the "SYSTEM" and "POWER" LEDs glow green, the Sunny WebBox has started up
and is ready for operation. The start-up procedure can take up to 90 seconds.
–IF the "SYSTEM" or "POWER" LEDs do not glow green, please refer to section
14”Troubleshooting” (page76).
6.4 Configuring Network Settings on the Computer
6.4.1 Information on Network Settings on the Computer
Before you can commission the Sunny WebBox for the first time, you must set the computer to the
network area of the Sunny WebBox in its delivered status. Read the section relevant to the operating
system of your computer.
Recommendation on network cabling
If the supplied network cable is too short, please observe the following network cable
requirements:
• You will need a crossover cable.
• Use a cable of type Cat5 or above.
• Use an insulated cable.
• For a total length of no more than 100 m, observe the guidelines for structured
cabling as described in EIA/TIA-568, ISO/IEC 11801 and/or EN 50173 (cable for
fixed layout at least AWG24).
• For a cable with no more than 50 m total length, a AWG26/7 cable may be used.
Other manuals for SUNNY WEBBOX with Bluetooth
10
Table of contents
Other SMA Controllers manuals
Popular Controllers manuals by other brands

Mitsubishi Electric
Mitsubishi Electric FX3U-1PG installation manual

Mitsubishi Electric
Mitsubishi Electric L02SCPU User's manual and reference

Watlow
Watlow PM LEGACY PM3 user guide

Galil Motion Control
Galil Motion Control DMC-42 0 Series user manual

SIGMA TEK
SIGMA TEK SR 011 Technical manual

SWARCO
SWARCO McCain Omni eX quick start guide