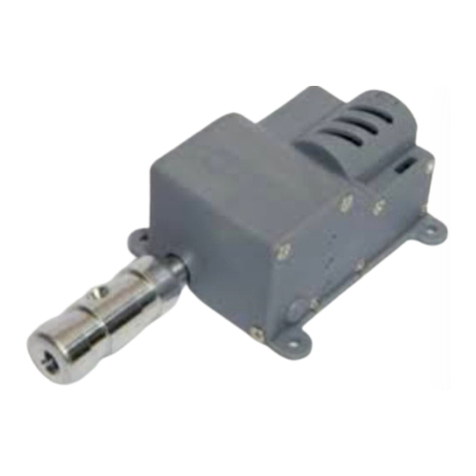
SMAC CBC-EIP User manual

CBC-EIP
USER MANUAL
Version 1.1

2
Disclaimer
The contents of this user manual are intended to be as accurate as possible, but may be subject to
change without prior notification. SMAC shall not be liable for any damages that may arise as a
consequence of the use of information presented in this user manual.
Document Version
Note
By
Date
1.0.3
STO and I/O connections updated
VM
10/16/2019
1.0.4
List of software troubleshooting is added
VM
12/04/2019
1.0.5
Motor quick stop section has been added
VM
01/02/2020
1.0.6
Implicit message data lengths are altered
VM
03/09/2020
1.1
Corrected the STO and implicit message tables,
modified the appendices to be more compact
RZ
5/4/2021
Copyright SMAC Moving Coil Actuators, 2021.

3
Content
1 Introduction ....................................................................................................................................4
2 Setup guide .....................................................................................................................................6
2.1 Hardware ................................................................................................................................6
2.1.1 Power/signal/communication connectors......................................................................6
2.1.2 STO..................................................................................................................................8
2.1.3 I/O and STO electrical schematics.................................................................................10
2.1.4 Deactivating the STO (OPTIONAL).................................................................................12
2.2 Software................................................................................................................................13
2.2.1 CBC-EIP basic configuration ..........................................................................................13
2.2.2 Modification of IP (Internet Protocol) settings.............................................................14
2.2.3 Connecting with a PLC...................................................................................................15
2.2.4 Explicit messaging .........................................................................................................15
2.2.5 Implicit (IO) messaging..................................................................................................15
3 Add-On Instructions (AOI) for STUDIO5000/RSLogix5000 PLC software......................................17
3.1 Position move .......................................................................................................................17
3.2 Softland.................................................................................................................................19
3.3 Homing..................................................................................................................................21
3.4 Velocity move........................................................................................................................22
3.5 Force Move ...........................................................................................................................24
3.6 Fault Status ...........................................................................................................................25
3.6.1 Performing a fault reset................................................................................................25
3.7 Motor halt.............................................................................................................................28
3.8 Motor On...............................................................................................................................30
3.9 Motor Off ..............................................................................................................................31
3.10 Motor Quick Stop..................................................................................................................32
A PLC Software Configuration..........................................................................................................33
A.1 Allen-Bradley PLCs ................................................................................................................33
A.2 Other PLCs.............................................................................................................................38
B Common Software Issues Troubleshooting..................................................................................39

4
1Introduction
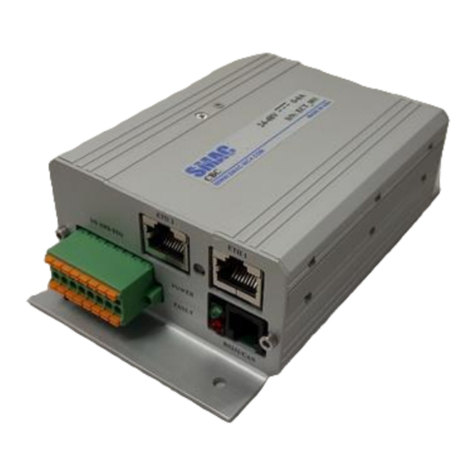
The CBC-EIP, shown in Figure 1.1, is an Ethernet/IP servo drive with specifications as presented in
Table 1.1. An example of Ethernet/IP network architecture involving CBC-EIPs can be seen in Figure
1.2.
Table 1.1. CBC-EIP specifications.
Description
Single axis servo motor controller/driver
Supported motor types
3-phase brushless rotary/linear, 1-phase rotary/linear
Control loop update rate
•Position loop: 1 kHz
•Current loop: 10 kHz
Power supply voltage
8 VDC –48 VDC
Power supply current
2 A –7 A
Continuous current
3 Arms
Peak current
6 Arms (for 1 s)
Power stage PWM frequency
20 kHz
Available feedback inputs
Differential digital encoder with index, analog input
Memory
1024 kB of program memory, 512 kB of EEPROM
memory
Digital inputs
4 x PLC level isolated digital inputs
Digital outputs
4 x SSR (solid-state relay) isolated digital outputs
Output supply
1 x 5V output supply for powering external circuitry
Analog input
1 x 0 –5V single ended analog input
Protections
•Driver overtemperature warning at 125 ⁰C
•Driver overtemperature at 150 ⁰C
•Overcurrent
•Reverse polarity protection
STO (Safe Torque Off)
SIL 3 compliant:
•2 x STO inputs, 5 V to 30 V isolated inputs
•1 x STO feedback output (optional)
•External diagnostics capability
•Abnormal operation detection
Communications
•RS232
•Ethernet/IP (2-port):
oODVA certified
oUp to 6 simultaneous Class 3 connections
(explicit messaging)
o1 simultaneous class Class 1 connection
(implicit messaging) of type exclusive owner
oRequested Packet Interval rate: 1 –3200 ms
oDevice Level Ring

5
Figure 1.1.CBC-EIP.
Figure 1.2. Typical Ethernet/IP network architecture with CBC-EIPs.
Ethernet/IP
master device, e.g. PLC
CBC-EIPs
Actuators

6
2Setup guide
2.1 Hardware
2.1.1 Power/signal/communication connectors
Figure 2.1 shows the connectors and status LED indication of the CBC-EIP. Further details
about these connectors are presented in Table 2.1.
Figure 2.1. Connectors and status LED indication on the CBC-EIP.
ETH 2
ETH 1
POWER
FAULT
RS232
I/O AND STO
POWER
ENCODER
GND
V+
U
V
W
GND
1
2
3
4
5
6
7
8
9
10
11
12
13
14
15
16
1
2
3
4
5
6

7
Table 2.1.Details of connectors in Figure 2.1.
CONNECTOR
PIN DEFINITION
POWER (Terminal block header, 5 mm pitch)
1: Ground (DC power Return)
2: +24VDC/+48VDC supply
3: Actuator winding phase U
4: Actuator winding phase V
5: Actuator winding phase W
6: Ground
ENCODER (Standard D-SUB 15 pin, female)
1: A+
2: I+
3: B+
4: +5V
5: +5V
6: +5V
9: A-
10: I-
11: B-
12: Ground
13: Ground
I/O AND STO
(Manufacturer: Phoenix Contact, P/N:
1790357)
1: Digital input 1
2: Digital input 2
3: Digital input 3
4: Digital input 4
5: Digital input common
6: Analog input 1
7: Ground
8: +5VDC supply
9: Digital output 1
10: Digital output 2
11: Digital output 3
12: Digital output 4/STO Feedback (only
available by special request)
13: Digital output common
14: STO 1
15: STO 2
16: STO common
RS232 (RJ-25 Jack)
1: NC
2: NC
3: RS232 RX
4: RS232 TX
5: Ground
6: NC
ETH 1 & ETH 2 (Standard Ethernet jacks for
Ethernet/IP connection)

8
2.1.2 STO
The STO (Safe Torque Off) is a safety system that prevents motor from delivering torque in
an emergency event while the CBC-EIP remains connected to the power supply. When STO
is activated, the drive’s power stage is disabled regardless of what the CBC- EIP is doing and
the motor shaft will slow down until it stops under its own inertia and frictional forces.
The STO of CBC- EIP has been designed to be compliant with Safety Integrity Level 3 (SIL3)
according to IED 61800-5-2. To meet the requirements, the STO reliability has been
increased by means of the following characteristics:
•2x fully independent STO channels
•STO feedback output for external diagnostics. Note that by default this is not available
in the CBC- EIP, please ask SMAC to have this enabled when required.
•Detection of abnormal STO operation
Figure 2.2 depicts the schematic of the STO circuit in the CBC- EIP. The STO works with
negative logic: power stage is deactivated by default and in this state, a software fault (error
code 0xFF60) with will be generated if there is an attempt to activate the power stage. To
allow the activation of the power stage (by turning on the power stage transistors), STO
inputs 1 and 2 must be energized by supplying them with a DC voltage (see Figure. 2.7 for
the detailed electrical schematic). Alternatively, the STO inputs can be disabled by applying
jumper connections as described in section 2.1.4.
Figure 2.2. STO circuit schematic.
Figure 2.3 shows the behavior of STO_FB in relation to one of the STO inputs. The objective
of STO_FB is to provide external diagnostics of the STO circuit, to allow an increased system
reliability. A common practice in the diagnostics is to delay the stop of the power stage from
the deactivation of STO_FB and the STO inputs. This way, short pulses can be applied for
testing the STO circuit without stopping the system operation.
When only one of the STO input channels is energized, the STO operation is viewed as
abnormal. If only one channel is energized for more than the latching time (0.6 s < Tlatching <
2.6 s), a dangerous failure in the system is considered and the STO is activated in latching
STO1
STO2
STO_FB
Feedback
Logic
+12 V
DC/DC
+SUPPLY
PH. U
PH. V
PH. W
Power stage

9
mode. The generated software fault cannot be reset until a power supply reset is performed.
Figure 2.4 illustrates the abnormal STO operation.
Table 2.2 summarizes the STO modes that are previously described.
Figure 2.3. Timing diagram of CBC-ECT STO.
Figure 2.4. Illustration of the abnormal STO operation.
Table 2.2. Summary of STO modes.
Mode
Status
STO1
input
STO2
input
Power
stage
STO
FB
Drive function
Normal
operation
STO ACTIVE
0
0
Disabled
0
Drive cannot start or
provide power to motor
STO
INACTIVE
1
1
Enabled
1
Drive is enabled to run
under firmware control
Diagnostic
STO ACTIVE
PULSE (1 ms
< t < 23 ms)
x
0
Enabled
0
A short STO ACTIVE (“0”)
pulse does not stop the
motor operation.
However, it activates STO
FB. It can be used for
performing system
diagnosis.
STO ACTIVE
PULSE (1 ms
< t < 23 ms)
0
x
Enabled
0
Time
STOx
input
STO_FB
output
Power
stage state
0
800 ns
23 ms
Logic level
Time
STO1
input
STO2
input
Power
stage state
0
23 ms
0.6 s < Tlatching < 2.6 s
Logic level

10
Abnormal
operation
Abnormal
STO ACTIVE
0
1
Disabled
0
Drive cannot start or
provide power to the
motor. STO trip reported to
MCU. If this persists for
latching time the STO will
lock in FAULT state. To
reset this fault a power
cycle is needed (Toff > 3.2
s).
0.6 s < TLatching< 2.6 s
Abnormal
STO ACTIVE
1
0
Disabled
0
STO FAULT
x
x
Disabled
AND
(STO1,
STO2)
After exceeding latching
time of abnormal STO the
driver will stay latched in
this state until power
cycle (Toff > 3.2 s).
2.1.3 I/O and STO electrical schematics
For the purpose of interfacing I/Os and STOs between the CBC-EIP and external devices,
electrical schematics are given in Figures 2.5 –2.8.
Figure 2.5. Digital inputs electrical schematic.
+3.3 V
GPI_COM
GPI1
10KΩ
10KΩ
10KΩ
(5 –24 VDC)
(5 –24 VDC)
(5C –24 VDC)
(5–24 VDC)
To μC
10KΩ
GPI2
GPI4
GPI3
To μC
To μC
To μC
Internal to CBC

11
Figure 2.6. Digital outputs electrical schematic.
Figure 2.7. Analog input electrical schematic.
GPO1
GPO_COM
(200 mA, 60 VDC tolerant)
From μC
From μC
From μC
From μC
330Ω
330Ω
330Ω
330Ω
GPO2
GPO3
GPO4/STO_FB
(200 mA, 60 VDC tolerant)
(200 mA, 60 VDC tolerant)
(200 mA, 60 VDC tolerant)
(200 mA, 60 VDC tolerant)
Internal to CBC
(0 –5VDC)
AI
10.33 kΩ
20 kΩ
To μC ADC
(10-bit)
1 nF
Internal to CBC

12
Figure 2.8. STO electrical schematic.
2.1.4 Deactivating the STO (OPTIONAL)
In case the STO functionality is not required, the on-board +5VDC can be conveniently
applied to the STO inputs conveniently without needing an external voltage source. This can
be done by applying jumper connection on the I/O and STO connector as shown in Figure
2.9.
Figure 2.9. Disabling the STO on the I/O and STO connector.
STO1
STO2
STO_COM
(5VDC –30 VDC)
+5V
To STO circuit
To STO circuit
2.5 kΩ
2.5 kΩ
(5VDC –30 VDC)
Internal to CBC
14
15
16
7
8
➢Connect pins 8, 14, 15 together
➢Connect pins 7 , 16 together

13
2.2 Software
Remark: in order to work with the software part of CBC-EIP, the user is expected to have basic
familiarity with the Embedded Motion Control Library (https://www.smac-
mca.com/documents/PDFs/Embedded%20Motion%20Control%20Library.pdf) and the
CANopen protocol.
2.2.1 CBC-EIP basic configuration
Essentially, the CBC-EIP consists of an improved version of SMAC CBC controller and an
Ethernet/IP hardware and software interface. The improved version of the CBC controller
shares the basic functionalities of SMAC CBC/LCC controller and therefore, controller
configuration software such as LCC Control Centre, Motionlab and Composer can be used
(further details can be found here: https://www.smac-mca.com/lcc-single-axis-brushless-
controller-p-125.html?cPath=1_10 ).
The typical steps to perform a basic configuration of CBC-EIP are as follow:
1. Establish a physical connection between a PC (with LCC Control Centre software) and
the RS232 connector on the CBC-EIP (powered with 24/48VDC). Make sure that the STO
inputs are energized, see section 2.1.4 of this manual for an instruction on how this can
also be done easily by using the on-board +5V power supply.
2. Install the LCC Control Centre software (downloadable from the link above) and copy
the file “System Macro V2.mlm” (obtainable from a SMAC sales/tech representative,
ask for a specific version for the CBC-EIP) into the LCC Control Centre folder, which is
typically located in the directory path: C:\Program Files(x86)\SMAC\LCC Control
Centre . Overwrite the existing file of the same name.
3. Using the LCC Control Centre software, download the configuration file of the actuator
that is connected with the CBC-EIP. This file can be obtained from the link above or a
SMAC sales/tech representative.
4. Create an actuator initialization routine in macro 0:
a. For 1-phase actuators: Homing and a jump to macro 40
b. For 3-phase actuators: Phasing, homing and a jump to macro 40
Below is an illustration of the routine defined in macro 0. The command parameters
may be different from those indicated below.
If it is decided that the homing is to be done from the PLC through Ethernet/IP, then
the homing routine in macro 0 above could be removed.
5. Download macro 0 above into the CBC-EIP through the “Save all in controller” button.
6. If required, after executing macro 0 above, optimize the position control loop PID
parameters through the tuning feature in the LCC Control Centre software.

14
In step 2 above, the “System Macro V2.mlm” file contains the CBC-EIP default macros (see
Table 2.3) in addition to the standard LCC/CBC system macros. In conjunction with the
default implicit messaging mapping in Tables 2.5 and 2.6, the CBC-EIP default macros
facilitate the execution of various types of motions through Ethernet/IP.
To evaluate the contents of the macros in Table 2.3, Composer software (downloadable
from the same link as for the LCC Control Centre) can be used to open up the “System Macro
V2.mlm” file.
Table 2.3. Default macros in CBC-EIP.
Macro
Function
37
Motor halt
38
Motor on
40
Main program loop
41
Homing
43
Position move
44
Velocity move
45
Force move
46-48
Softland
2.2.2 Modification of IP (Internet Protocol) settings
By default, the IP address of the CBC-EIP is: 192.168.1.80
Table 2.4 presents the objects within CBC-EIP that can be modified.
Table 2.4. IP-settings-related objects of CBC-EIP
Index
Subindex
Name
Type
Default value
Description
0x2005
0x01
IP address
UINT32
0x5001A8C0
(192.168.1.80)
x.y.z.n → 0xNNZZYYXX
0x2005
0x02
Subnet mask
UINT32
0x00FFFFFF
(255.255.255.0)
x.y.z.n → 0xNNZZYYXX
0x2005
0x03
Gateway
UINT32
0
x.y.z.n → 0xNNZZYYXX
0x2005
0x04
Enable DHCP
UINT32
0 (disabled)
0x00 disabled, 0xFF enabled
0x2005
0x05
DNS 1
UINT32
0
x.y.z.n → 0xNNZZYYXX
0x2005
0x06
DNS 2
UINT32
0
x.y.z.n → 0xNNZZYYXX
The procedure to modify parameters in Table 2.4are as follow (assuming RS232
communication is used, see https://www.smac-mca.nl/Downloads/TechNote-SerialToPC-
LCC.pdf ):
1. Write the desired values to the objects
2. Save the parameters to non-volatile memory through the command:
0x00 W 0x11010 1702257011
3. Power cycle the CBC-EIP or perform a reset through Ethernet/IP explicit message
(service: 0x05, Class ID: 0x01, Instance: 1)
Another alternative to modify parameters in Table 3 is by through Anybus webserver of the
CBC-EIP (accessible through a web browser using the IP address 192.168.1.80), wherein a
table of parameter list can be found and changes can be performed.

15
2.2.3 Connecting with a PLC
See Appendix A for more information about this.
2.2.4 Explicit messaging
The CBC-EIP supports up to 6 simultaneous Class 3 connections. The explicit messaging
service provides access to standard Ethernet/IP objects such as Identity, TCP/IP Interface
and Ethernet Link, as well as all the objects belonging to the drive functionalities of CBC-EIP,
as can be found from object dictionary list in the embedded motion control library manual
(https://www.smac-
mca.com/documents/PDFs/Embedded%20Motion%20Control%20Library.pdf).
The supported explicit message CIP service codes are:
•0x0E: Get attribute single
•0x10: Set attribute single
Meanwhile, the mapping between CIP addressing and the CBC-EIP objects are:
•Class ID: 0x64
•Instance ID: CBC-EIP object Index from Embedded Motion Controller Library manual
•Attribute ID: CBC-EIP object Subindex from EMCL manual
Example: to obtain the value of object Max torque through Explicit messaging →service
code: 0x0E, Class: 0x64, Instance: 0x6072, Attribute: 0x00
2.2.5 Implicit (IO) messaging
The CBC-EIP supports a simultaneous class 1 connection type of exclusive owner, with the
specifications:
•Input data assembly (T→O, Target to Originator): Instance 100
oMax. number of mapped objects: 8
oMax. mapping length: 32 bytes
•Output data assembly (O→T, Originator to Target): Instance 150
oMax. number of mapped objects: 8
oMax. mapping length: 32 bytes
SMAC has defined a default mapping between the above IO data assemblies and CBC-EIP
objects to allow the execution of macros discussed in section 2.2.1 of this manual. The default
mapping is presented in Tables 2.5and 2.6, which have been tailored to work with Add-on
instructions in the programming environment of Allen-Bradley PLCs, as further described in
Section 3 of this manual. Please contact SMAC sales/tech representative if a different object
mapping is desired.

16
Table 2.5. Default mapping between CBC-EIP and input data assembly.
CBC-EIP object
Description
Input data byte location
(total: 26 bytes)
Status word
Actuator motion status
0 - 1
W4
Reserved-Macro status for AOI
2 - 5
Position actual value
Encoder actual position
6 - 9
Current actual value
Force/current value
10 - 11
Following error value
Position error value
12 - 15
Error code
Actuator fault code
16 - 17
W5
Register available to user
18 - 21
W6
Register available to user
22 - 25
Table 2.6. Default mapping between CBC-EIP and output data assembly.
CBC-EIP object
Description
Output data byte location
(total: 24 bytes)
W30
Macro-specific parameter
0 - 3
W31
Macro-specific parameter
4 - 7
W32
Macro-specific parameter
8 - 11
W33
Macro-specific parameter
12 - 15
W34
Macro-specific parameter
16 - 19
W35
Macro-specific parameter
20 - 23

17
3Add-On Instructions (AOI) for STUDIO5000/RSLogix5000 PLC
software
3.1 Position move
This AOI is used to perform a linear or rotary position move.
Position Move AOI: input and output parameters
Parameter
Unit
Description
INPUT
Busy bit
N/A
This bit is active when the AOI is being
executed, until Done bit is active.
Done bit
N/A
This bit is active when the target position has
been reached.
Actual_position
Counts
Actual position of the actuator/motor.
OUTPUT
Mode_SetPoint
N/A
1: Enables absolute position move
3: Enables relative position move
Target_Position
Counts
Final position to be reached by the actuator
Profile_Velocity
Counts/s
Max. velocity of the motion profiler
Profile_Acceleration
Counts/s2
Max. acceleration of the motion profiler
Profile_Deceleration
Counts/s2
Max. deceleration of the motion profiler
Max_Torque
‰ of motor
rated current
Max. permissible torque/force. Unless this
parameter is specified, the default value from
config. file is used.
Enable bit
N/A
Enables the AOI. Tis needs to be included in the
program after the AOI rung is energized.

18
Ladder logic example:
Mapping between position move AOI parameters and PLC IO data assemblies
Byte address
Description
Input: 2 –5
43: Position move in progress
53: Target position has been reached
Input: 6 - 9
Actual Position
Output: 0 - 3
Macro value of position move (Table 3)
Output: 4 - 5
Setpoint mode
Output: 6 - 7
Max. torque
Output: 8 - 11
Target position
Output: 12 - 15
Profile velocity
Output: 16 - 19
Profile acceleration
Output: 20 –23
Profile deceleration

19
3.2 Softland
This AOI is used to perform SMAC’s softland.
Softland Move AOI: input and output parameters
Parameter
Unit
Description
INPUIT
Done bit
N/A
This bit is active when the target position has
been reached.
Soft landed Position
Counts
Position of the actuator after softland action
Busy bit
N/A
This bit is active when the AOI is being
executed, until the Done bit is active
OUTPUT
Soft land direction
N/A
0-positive direction 1- negative direction
Soft land action
N/A
This bit is used to specify the action of the
actuator after softland operation
1: Apply force
2: Hold force
3: Hold position
4: Motor off
Soft land velocity
Counts/s
Max. velocity of the motion profiler
Soft land acceleration
Counts/s2
Max. acceleration of the motion profiler
Soft land sensitivity
Counts
This tag is used to set the sensitivity of softland.
Smaller value means higher sensitivity.
Max Torque
‰ of motor
rated current
Max. permissible torque/force. Unless this
parameter is specified, the default value from
config. file is used.
Enable bit
N/A
Enables the AOI. Tis needs to be included in the
program after the AOI rung is energized.

20
Ladder logic example:
Mapping between softland move AOI parameters and PLC IO data assemblies
Byte address
Description
Input: 2 - 5
46: Softland move in progress
56: Softland is complete
Input: 6 - 9
Softlanded Position
Output: 0 - 3
Macro value of softland move (Table 3)
Output: 4
Direction
Output: 5
Action after land
Output: 6 - 7
Max. torque/force
Output: 8 - 11
Profile velocity
Output: 12 - 15
Profile acceleration
Output: 16 - 17
Position error
Output: 18 - 19
Force
Other manuals for CBC-EIP
1
Table of contents
Other SMAC Controllers manuals
Popular Controllers manuals by other brands
Siemens
Siemens Simatic S7-1500R Equipment manual
Hytronik
Hytronik HEM02 instruction manual
MKS
MKS 649B instruction manual
Atlas Copco
Atlas Copco MINI-REG-1/4-BSP Product instructions
Rockwell Automation
Rockwell Automation PowerFlex 700S installation instructions
bentrup
bentrup TC 500 Series operating instructions
