EN EN
areas protected by the required smoke detectors under 2-4.1.1
above. The recommended additional areas are living room, dining
room, bedroom(s), kitchen, attic (nished or unnished), furnace
rooms, utility room, basement, integral or attached garage, and
hallways not included in 2-4.1.1 above. However, the use of
additional detectors remains the option of the householder.” We
recommend complete coverage and use of additional smoke
detectors.
Locations not to Install Your Smoke
Detectors
Nuisance alarms take place when smoke detectors are installed
where they will not work properly. To avoid nuisance alarms, do not
install smoke detectors in the following situations:
Combustion particles are the by-products of something that is
burning. Thus, in or near areas where combustion particles are
present you do not install the smoke detectors to avoid nuisance
alarms, such as kitchens with few windows or poor ventilation,
garages where there may be vehicle exhaust, near furnaces, hot
water heaters, and space heaters.
Do not install smoke detectors less than 20 feet (6 meters) away
from places where combustion particles are normally present, like
kitchens. If a 20-foot distance is not possible, e.g. in a mobile home,
try to install the detector as far away from the combustion particles
as possible, preferably on the wall. To prevent nuisance alarms,
provide good ventilation in such places.
IMPORTANT: For any reason, do not disable the detector to avoid nuisance
alarms.
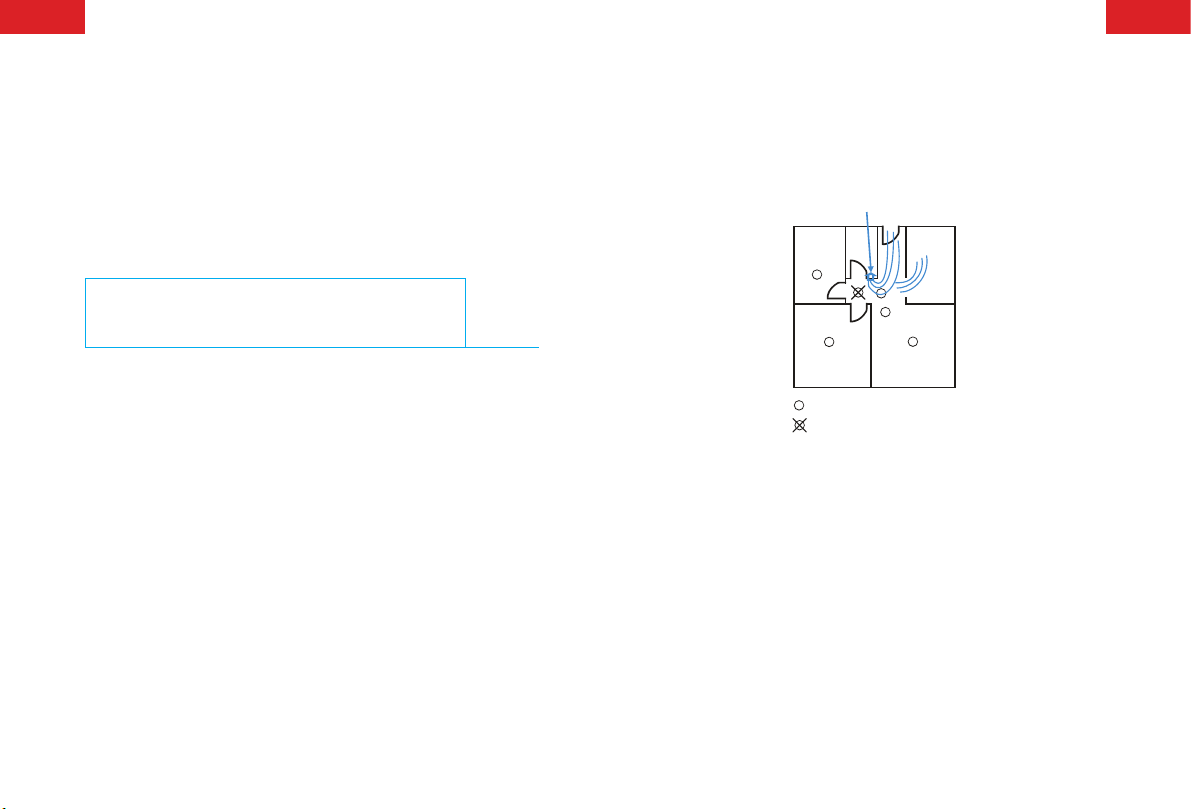
When air streams passing by kitchens, the way how a detector can sense
combustion particles in normal air-ow paths is graphically shown in Figure 6,
which indicates the correct and incorrect smoke detector locations concerning
this problem.
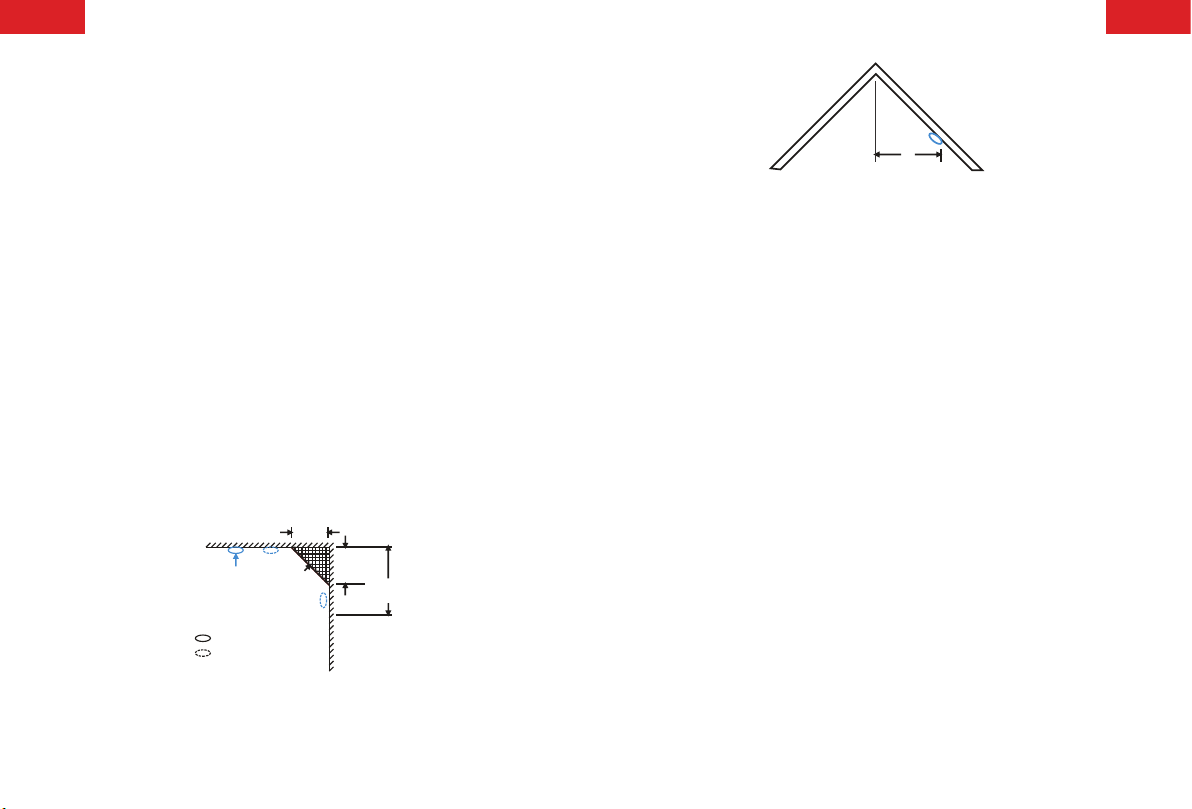
BEST LOCATION
ACCEPTABLE
LOCATION
CEILING
4in
(10cm)
CENTER OF
CEILING NEVER
HERE
4in
(10cm)
Minimum
6in(15cm)
Maximum
DETECTOR
9 FEET
HORIZONTAL DISTANCE
FROM PEAK
BEDROOM
AIR ENTRY
STOVE
KITCHEN
BEDROOM LIVING ROOM
CORRECT LOCATION
INCORRECT LOCATION
BATH
Figure 6: recommended smoke detector locations to avoid air
streams with combustion particles
In damp or very humid areas, or near bathrooms with showers.
Moisture in humid air can enter the sensing chamber, then turns
into droplets upon cooling, which can cause nuisance alarms. Install
smoke detectors at least 10 feet (3 meters) away from bathrooms.
In very cold or very hot areas, including unheated buildings or
outdoor rooms. If the temperature goes above or below the
operating range of smoke detector, it will not work properly. The
operating temperature range for your smoke detector is 40 °F to
100 °F (4 °C to 38 °C).