CONNECTING THE HDR-8X8-PLUS
ConnectHDR‐8X8‐PLUSHDMIinputtosignalsources.
ConnecttheHDR‐8X8‐PLUSHDMIoutputstodisplays,monitors,orprojectors.
ConnectHDR‐8X8‐PLUStopowersupply.
PresstheOn/OffswitchtoactivatetheHDR‐8X8‐PLUS.
Switchbetweensignalswitheitherfront‐panelcontrols,IRRemoteControlorviaPCwithRS232
andTCP/IPwebsupport
TCP/IP and RS232 Control
TCP/IP:Pluganetwork‐connectedEthernetcabletotheHDR‐8X8‐Plus.Bydefault,thedevicewill
connecttothenetworkviaDHCP.InputyourconnectedIPaddressinfo,andenteryourbrowser
toaccessthecontrolwebsite.
RS232:PluganRS232cableintothecorrespondingconnectorsonyourPCandHDR‐8X8‐Plus.A
SmartPRORS232controlwindowwillauto‐runonyourPC,fromwhichyoucancontrolthedevice
withease.
EDID Learning
PresstheEDIDlearningfront‐panelbuttontoacquireinformationaboutoutputportsignals.
Oncepressed,theEDIDbuttonwillilluminateLEDindicators.
Pressingbuttons1or2illuminatestheAUTOorMANUALLEDs.
CONTROLLING THE HDR-8X8-PLUS
Front Panel Control
Switch between input signals easily with corre-
sponding numeric buttons. Backlit SAVE, RECALL,
LOCK, and EDID function buttons enhance control,
as well.
Lock
The LOCK button restricts switching with front-panel
buttons. It can be deactivated by pressing the LOCK
button again.
Save
Assign and store routed signals (ex: signal 1, 2, etc).
Recall
Switch between recently used signal configurations.
EDID
Learn and automatically switch between signals
with the EDID learning button.
Back Panel Control
Activate the HDR-8X8-Plus with the On/Off switch,
and control the device with RS232 connections or
TCP/IP web controls via Ethernet.
IR Remote Control
Switch inputs to outputs with ease.
Save
Assign and store routed signals (ex: signal 1, 2, etc).
Recall
Switch between recently used signal configurations.
NOTE: Activate the HDR-8X8-Plus with the On/Off
switch on the back. The power on, off button on the
remote is not functional at this time.
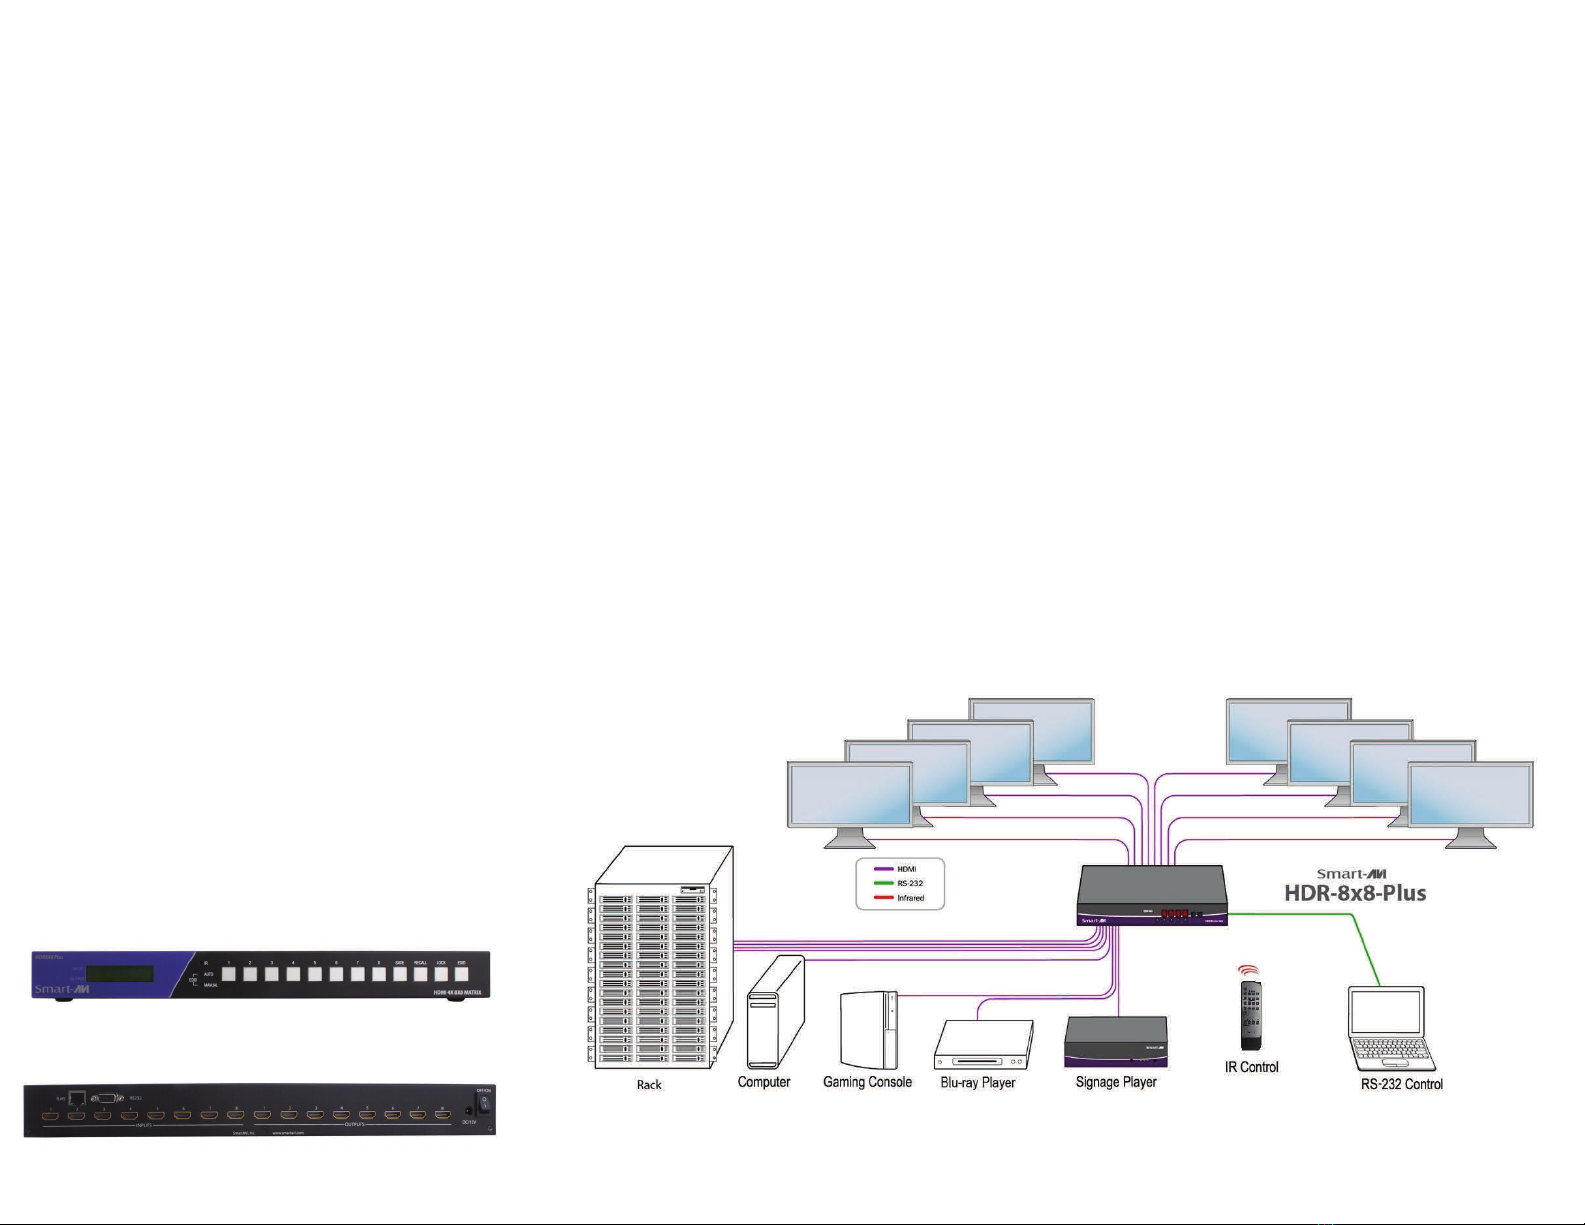
INSTALLATION DIAGRAM
HDR-8X8-PLUS FRONT
HDR-8X8-PLUS REAR


