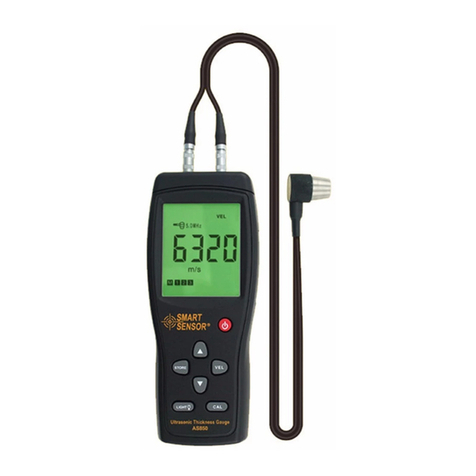
Smart Sensor AR860 User manual

MODEL: AR860
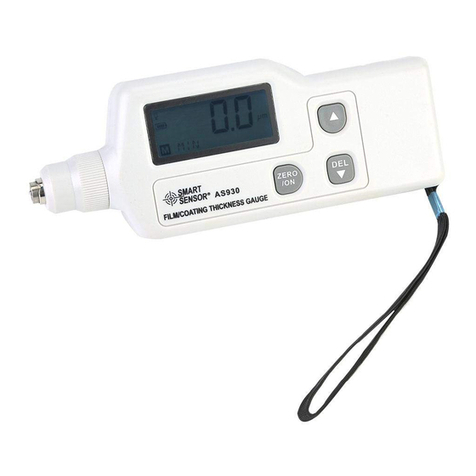
Ultrasonic Thickness Gauge
Instruction Manual

Contents
1. Introduction-----------------------------------(01)
2. Specification----------------------------------(04)
3. Operation instruction------------------------(05)
4. Measurement Tips --------------------------(11)
5. Precautions for accuracy-------------------(13)
6. Maintenance ----------------------------------(15)
7. Warranty ---------------------------------------(16)
8. Table of sound velocity----------------------(17)
-17-
Sound velocity ofcommon materials
Speific Declarations:
a. The product design and the manual updating, repairing
by technician authorizedby us, donot try anyalternations
or repair attempts.
B. Dispose ofbattery should inaccordance with locallaws
and regulations.
8. Table of sound velocity
Aluminum
Zinc
Silver
Glod
Tin
Iron/Steel
Brass
Copper
SUS
Acrylic resin
Water 20
Glycerinl
soluble glass
2670
3530
4430
5440
5720
6310
6020
5630
5850
5660
6070
4650
2620
Acetate resin
Phosphor bronze
Turpentine
Glass
Incoloy alloy
Magnesium
Monel alloy
Nickle
Steel 4330 mild
Steel 330
Titanium
Zirconium
Nylon
6320
4170
3600
3240
3230
5900
4640
4700
5790
2730
1480
1920
2350
Material Velocity(m/s) Material Velocity(m/s)

-01-
1. Introduction
This unit isan intelligent handheldproduct, which adopts
ultrasonic measuring principle,and is controlledby micro
processor, providesquick and precisemeasurement of
thickness for mostof industrial material.This unit is widely
used in variousprecise measurement fordifferent hardware /
parts in industrialrealm; one ofits important application
is to monitorthe level ofthickness-decreasing during
operation of variousand pressure container. Diffusely
applied in manufacturefields, metal processing,and
commercial inspection.
1. 1 Scopeof application
This unit issuitable for measuringmaterials that aregood
ultrasonic conductor suchas metal, plastic,ceramic, glass etc.,
as long asthe measured partin two parallelsurfaces for
measurement of thickness.This unit is not suitable for cast iron
due to itsbig crystalloid composition.
1.2 Standard Packand Diagram ofthe unit
1.2.1 Standard Pack
Ultrasonic Thickness Gauge:1 PCS
Transducer: 2PCS( 10mm 5MHz , 6mm 5MHz)
Coupling agent: 1PCS 50ml
Standard sample block:4mm1PCS
-16-
6.6 When thetolerance is overthan stated inthis manual,
please refer tothe 3, 4,5 chapter,in this manual.
6.7 Please contactus or distributorif the followingoccurs:
A. Component beingdestroyed, enable tomeasure.
B. AbnormalLCD display.
C. The tolerance is too big in proper operation.
D. Malfunction ofkeypad.
6.8 This gauge is a advanced technology product, the repai-
-ring only bytechnician authorized byus, do nottry any altera-
-tions or repairattempts.
7 Notice
7.1. Warranty policy
Please fill thewarranty card withyour cachet/chop afterpurc-
-hasing this products,the warranty periodfor repaired is12
months form thedate of originalpurchase. During warranty
period, product mustbe returned withthe invoice(copy) and
warranty card toour customer servicedepartment. The product
will not bewarranted which withoutthe warranty card.
Over warranty period,any repairing /maintenance will charge
the fee onthe buyer instandard rate bylocal distributor.The
standard rate isnot including theaccessories which notpacking
in standard package(Forexample, abnormity transducer,
lengthen lead-wire, specialsoftware) .
We disclaims any liability due to: transportation damages;
incorrect use oroperation; manipulation, alterationsor repair
attempts; without warrantycard, invoice.
7.2. Non-warranty list
LCD, battery, probe, sample block, plastic case, coupling agent

-02-
.2 Diagram ofthe unit
1.3 LCD display:
LCD display
SENSOR
SMART
ZERO
ON/
OFF
LCD
Receive socket
Transducer
Battery compartement
(rear case)
Case
Sample block
-15-
Control
pannel
AR860
SENSOR
SMART
RR
VEL
DEL
ENTER
CAL
ALARM
RECALL
6. Maintain
6.1 Battery replacement
When low batteryicon is showed,please replace thebatteries.
A. Press toturn off.
B. Open thebattery door properly.
C. Replace thelow power batteriesby new batteries.
When the gaugeis not usefor long period,please take outthe
batteries.
6.2 Protection oftransducer
Because the wearface of transduceris propylene materialwhich
easy to bescratched. During takingmeasurement on rough
material, please usingthe transducer ingentle motion. The tem-
-perature of thehardware should notover 60 , otherwise itwill
cause damage onthe transducer.Adhering oil,dust on thewear
face will speedup aging oftransducer and leadto rupture. Clean
the lead-wire &transducer after use.
6.3 Cleaning thecabinet
Do not usesolvent/alcohol for cleaningwhich erode thecabinet
& LCD window, brush andsweep only witha moist cottoncloth.
6.4 Cleaning thesample block
Because of couplingagent should beput on thesample block
during calibration, afteruse the sampleblock should becleaned
for preventing rust.In higher temperatureenvironment, be sure
protect the blockform the dropletof water.If the gaugeis not use
for a longperiod, please applysome antirust onthe sample block.
6.5 Avoid shocking/impact. Do not store the unit in high humidity
environment.
---- Battery power
---- Coupling indicator
m/s ---- Sound velocityunit
mm ---- Thickness unit
VEL ---- Sound velocity indicator
---- Back lighticon
---- TransducerFrequency
---- Velocitystored unit
Receive socket

-03-
Control Panel
-14-
ENTER
CAL
ALARM
RECALL
VEL
DEL
1.4 Control Panel
-- ON/OFF
-- Alarm set-up/Data recall
-- Velocityset-up/ Select /
Stored data delect
-- Enter / Calibration
-- Velocity / Thickness /
Alarm adjust
-- Velocity/ Thickness /
Alarm adjustand Back lightON/OFF
ENTER
CAL
ALARM
RECALL
VEL
DEL
5.6 Multilayer /composite material
It is impossibleto read outthe thickness ofthe uncoupled mult-
-ilayer for theultrasonic wave cannot go throughthe uncoupled
space. Further more,the sonic wavecannot travel inthe comp-
-osite material atan even speed,so ultrasonic reflectprinciple
cannot be appliedto measure themultilayer/composite material.
5.7 Influence fromthe oxidized surface
For some metals,such as aluminuma layer ofoxide being
generated on theirsurface. The oxidized layer combined with
the substrate tightly, but thesonic wave travel within 2 different
material which willlead to errorreading, the moreoxidized layer
the reading willbe more tolerant.Please calibrated theunit with
the sample blockthat pick upalong the hardwareto be measured,
and obtain thethick of sampleblock by usingmicrometer.
5.8 Abnormal reading
A seasonedoperator should becapable to distinguishthe
abnormal reading, practicallyresult from rusting,erosive recess
surface / incorrectcalibrate sample block/the inner flawof
material.
5.9 Choose andusing coupling agent
Coupling agent serves the high frequency ultrasonic wave tran-
-smitting between thetransducer to thehardware. Choose inco-
-rrect agent orwrong operation mancause error orpoor coupling
which lead tofailure of measuring.The coupling agent should
be used inproper way, typiccally, a singledroplet of agentis
sufficient.
It is importantto use proper coupling agent, low viscosity
agent(the provided agent/ machining oil)is suitable forsmooth
surface. For rough/ veritcal /aluminum surface, highviscosity
agent like glycerinand lubrication greaseis applicable.All kinds
of coupling agentis available inlocal market, youcan buy itform
local distributor aswell.
Auto calibration toassure the accuracy
Sound velocity measurement:with a giventhickness
to measure thesound velocity toimprove accuracy
12 sound velocitiesfor different material
Coupling status indication
12 thickness measurementdata store andrecall
Thickness alarm setup
Back light function
Low battery indication
Auto power off
1.5Features and Functions

-04- -13-
5. Precautions foraccuracy
5.1 For verythin material
Any ultrasonic thicknessgauge, when thethickness of themat-
-erial to bemeasured is lessthan the minimumlimit the fault
reading will occurs.Using sample blockcompare method to get
a minimum limitof this material.
5.2 For stained,rusting surface
The stained/rusting surfaceon the contraside will occurs the
ruleless wrong readings.Sometimes a smallstained spot is
hard to findout. Take care formeasurement while measuring the
known rusting spot/suspiciousarea. Or usingsound insulation
boardcelotex to locatesthe spot indifferent testing angles.
5.3 Identify different velocity with vary material
A faultreading would obtains,when measuring the hardware
with the velocitycalibrated by priormaterial. So acorrect
velocity should beadopted. The fault reading may also result
form the difference between the actual velocity with the calibr-
-ated value.
5.4 Abrasionfo the transducer
Because the transduceris made ofpropylene, long period use
will cause thesurface of transducerbecame more rough which
will decline thesensitivity lead tothe wrong reading. Please
polish the surfacewith sand paperor whetstone to assure the
smoothness and parallel.If the readingstill unsteady, the tran-
sducer should bereplaced with newone.
5.5 ZERO function
ZERO(calibration) is usedto calibrate theunit with thestandard
block on thepanel, do pressthis key forcalibration with other
materials or willthe wrong measuringwill take place.
4.11. Selection of transducer
ITEM Characteristic Range Operation
temperature
4.10 The wear of the transducer will effect the measurement,
when below situationhappen, please replace the transducer:
A only display onereading when measured different thickness
B reading display withouttake measurement
General-purpose
Thin workpeice
General-purpose
1.00mm to 300.0mm(steel)
1.00mm to 50.0mm(steel)
1.00mm to 300.0mm(steel)
-10 to 60
-10 to 60
-10 to 60
2. Specification
Measuring range: 1.00to 300.0mm(steel)
Accuracy: (1%H+0.1mm)
Resolution:0.01mm(1.00 to 99.99mm)
0.1mm(100 to 300mm)
Minimum limit fortube measuring steel :
15*2.0mm( 6 transducer)
20*3.0mm( 10 transducer)
Sound velocity:1000 to9999m/s
Thickness 20mm, accuracy of velocity: 1mm/H 100%
Thickness 20mm , accuracy of velocity: 5%
Operating environment :
Operation temperature: 0to 40
Temperature of workpiece: <60
Relative Humidity: <90%
Do not apply in violent vibration / erosive material
Avoidimpact and humidity
Power supply:1.5V AAA * 3 PCS
Operation current: 35mA (withback light on)
10mm
6mm
10mm

-05-
3. Operation Instruction
3.1. Before measurement
(1). Connectthe transducer withthe unit, press to turn on,
LCD with fullscreen display withback light for0.5 second, then
LCD display thelast applied soundvelocity, now the unit is ready
for use.
(2). Soun velocityselection
Press twice toentre sound velocityadjustment with
icon blinking, press and to selectyour desired
velocity, to finish the selection by press .
-12-
Ready to use
Velocity selection
4.7 Influence ofthe material temperature
The size &sound velocity ofmaterial will change with the tem-
-perature, when theprecision is critical,please make measur-
-ement in 2samples of thematerial under thesame temperat-
-ure to determinethe proper readingresulting from the temp-
-erature. When takingmeasurement for steelparts in high
temperature, this methodmay be adoptedto obtain the
correct reading.
4.8 High acousticreduction material
For materials infiber, poriferousor big granular, acoustic disp-
-ersion will causethe energy attenuationthat may result in
abnormal readings(practically thereading less thanthe actual
thickness), in thiscase the materialis not suitablefor the unit.
4.9 Reference sampleblock
For calibration forthe gauge, agiven thickness orsound veloc-
-ity of thematerial is veryimport. Calibration needsat lest one
referring standard sampleblock. This gauge is provided with a
4.0mm sample block,please check forcalibration operations.
In different material & situation, only one sample block may not
satisfy every calibration.The more similar sample block, the
more exact readingobtained. Ideally, referring block is a group
of different thickness and same material, by calibrating to the
referring block, theeffect of variation of sound velocity will be
minimized. To get themost exact measure, a set ofreferring
block is veryimportant.
When measuring thinmaterial which thicknessclose to the
minimum limit rangeof this unit,please use areferring block to
define exact limitof this material.Do not measuringthe
material that thethickness under theminimum limit.
VEL
DEL
ENTER
CAL

-06-
3 Sound velocity adjustment
Press one time to entre velocity adjustment with
stored velocity unit blinking, press and to adjust
the velocity to obtain desired value then press
to finish the adjustment. The revised velocity will be saved
into the unit.
-11-
3.2. Calibration
On normal status,press for 3second CAL symbol
shows in LCDwith 5900 m/svelocity and 4.00mm display.
Use the standardsample block forcalibration, until CAL
symbol disappeared, press or to entre
measurement mode.
Ready to calibration Ready to use
After adjustment
Before adjustment
4.Measurement Tips
4.1 Cleaning surface
Before measuring, thedust, dirt, rustingand grease etcthat
adheres on thehardware/workpiece must beremoved off and
cleaned.
4.2 Decreasing theroughness of surface
Toorough surface mayresult in measureerror/ fault reading.
Please try tomake the surfacesmooth by milling,polishing,
filling or usinghigh viscosity couplingagent.
4.3 Rough machiningsurface
The regular tinytexture/slots resulting formrough machining
process may causeerror, andthe compensation methodis the
same as in4.2, adjusting theangle between thecrosstalk segr-
-egating board ofthe transducer ametal membrane crossing
the detector bottomcentre and lineartexture/slots (parallel or
vertically) may alsoget a betterresult.
4.4 Measuring pipeand tubing
When measuring cylindricalparts to determinethe thickness
of the pipewall, orientation ofthe transducers isimportant. If
the diameter ofthe pipe islarge than approximately4 inches,
measurements should bemade with thetransducer oriented so
that the gapin the wearfaceis perpendicular (atright angle) to
long axis ofthe pipe. Forsmaller pipe diameters,two measure-
-ments should beperformed, one withthe wearface gapperpe-
-ndicular, anotherwith the gapparallel to thelong axis ofthe
pipe. The smaller of the two displayed values should then be
taken as thethickness at thatpoint.
4.5 Complex shapematerial
For complex shapematerial measurement, pleaserefer to the
4.4, the smallerof the tworeading should thenbe taken asthe
thickness.
4.6 Non-parallel surface
Toget a satisfyingultrasonic response, thesurface must have
its one measuringside parallel withanother, otherwisewill
obtain wrong result.
VEL
DEL
ENTER
CAL
ENTER
CAL

-07-
3.3 Thickness measurement
Put few couplingagent on thearea to bemeasured to couplethe
transducer with thehardware/workpiece, LCD willdisplay the
thickness reading. Duringmeasurement, indicates awell
coupling, if theicon flashed ornot shows meansa poor coupling,
after remove transducer, the readingwill hold without .
-10-
In a wellcoupling measurement
3.4 Velocity measurement
With a giventhickness to readout velocity ofmaterial: Obtains
the thickness ofmaterial by usingvernier caliper /micrometer,
then couple thetransducer with thatsample material untila
thickness displays, press or to adjustthe reading match
the thickness bycaliper/micrometer, thenpress to display
the velocity andsave in currentvelocity memory unit.
REMARK: 1 Toselect / adjustthe velocity asthe table of
sound velocity forthickness measurement, butthe actual
velocity in thehardware / workpiecewill slightly different, in
this case thereading of thicknessnot very accurately.
2 Select a sample block with same material to the hardware
or workpiece tobe measured toread out thevelocity, then apply
this velocity forthickness measurement, inthis way thereading
of thickness muchmore accurately.
3.8.Data delete
1 Press for 3 second will clear all stored data,
symbol will showon LCD.
2 In data recall mode, press will delete current
stored data.After delete data,the vacant memorywill display
---- on theLCD.
3.9 Low battery indication
When battery power down to 3.3V 0.2V, the low batteryiocn
will display, please replace the batteries for further
measurement.
3.10. Back lightselection
In power off statu, press + to turn on the unit, select back
light on/off function. The back light will be actived for 10 seconds
in operations.
3.11. Turn off: Press to turn off/on the unit. The unit will be
auto turn off in 1 minute without any operation.
Remark: Press and to adjust/select different velocity
or thickness.
Clear all data Delete current data
ENTER
CAL
VEL
DEL
VEL
DEL
Measurement accomplished

-08- -09-
Memory full
Data store
3.5. Thickness alarm set-up
Press will entreLOW thickness alarmset-up, press
and to adjustthe limit, thenpress to confirmed.
Then will turninto HIGH thicknessalarm set-up, press
to save thesetting as defaultalarm. During measurement, if
the thickness over/under the setting limit, BIBI sounds and
HIGH/LOW will indicates for alarming.
LOW
Low Limit set-up High Limit set-up
HIGH
3.7. Store thickness data record
Press for 3 seconds to entre data record mode, press
and to review M01 to M12 stored data. If the memory
unit is vacant, LCD will display ----, press again turn
to normal status.
Data recall
Vacant Memory
Thickness measurement Velocity measurement
ALARM
RECALL
ENTER
CAL
ENTER
CAL
ALARM
RECALL
ENTER
CAL
ENTER
CAL
3.6. Thickness data storage
During measurement, press once to savethe thickness
reading, if aFUL symbol show in the LCD that indicates the
memory is full.
Table of contents
Other Smart Sensor Measuring Instrument manuals
Popular Measuring Instrument manuals by other brands
Tekon
Tekon 960 user manual

Sierra
Sierra INNOVA-MASS 240-VT instruction manual

PCB Piezotronics
PCB Piezotronics B353B33 Installation and operating manual
Omega Engineering
Omega Engineering CL521 Operator's manual
BRUEL & KJAER
BRUEL & KJAER 2031 instruction manual
janitza
janitza UMG 96 RM Operating instructions and technical data
