SmartDrive Systems SR4 User manual

© 2019 SmartDrive Systems, Inc. All rights reserved. SmartDrive, the SmartDrive logo, and Measured Safety Program are registered trademarks of SmartDrive
Systems, Inc. SmartDrive SmartIQ is a trademark of SmartDrive Systems, Inc. All other marks are the property of their respective owners.
Rev 2, 4/23/2019
SR4 Keypad Removal and Reinstallation Procedure
Purpose
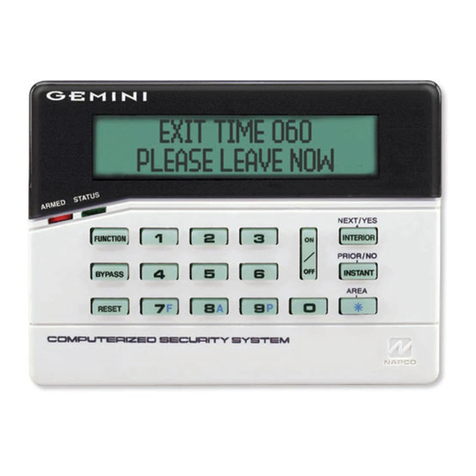
Follow these instructions when a SmartDriveTM SR4 Keypad is not functioning properly and needs to be
replaced. The replacement only includes the Keypad. Follow the steps below to ensure that the Keypad
is located and adjusted properly.
Tools Required
SmartDrive M4
Security wrench
Cutting Snips
Process to Remove the SmartDrive SR4 Keypad
1. Remove the Keypad from the mounting bracket
2. Remove dashboard covering as needed
3. Gently pull keypad’s cable and remove the zip ties that were used to secure the wire
4. Using the SmartDrive M4 security wrench, loosen the two screws on the controller’s mounting
bracket to allow the controller to be removed from the mounting bracket

© 2019 SmartDrive Systems, Inc. All rights reserved. SmartDrive, the SmartDrive logo, and Measured Safety Program are registered trademarks of SmartDrive
Systems, Inc. SmartDrive SmartIQ is a trademark of SmartDrive Systems, Inc. All other marks are the property of their respective owners.
Rev 2, 4/23/2019
5. Remove the Top Cover of the controller, which allows you to access cables from the side of the
controller
6. Unplug the keypad cable from the side of the controller

© 2019 SmartDrive Systems, Inc. All rights reserved. SmartDrive, the SmartDrive logo, and Measured Safety Program are registered trademarks of SmartDrive
Systems, Inc. SmartDrive SmartIQ is a trademark of SmartDrive Systems, Inc. All other marks are the property of their respective owners.
Rev 2, 4/23/2019
7. Bundle and zip tie all loose cables out of the way so as not to interfere with the driver’s
operation
Reinstallation
8. Plug the new keypad into the keypad bracket

© 2019 SmartDrive Systems, Inc. All rights reserved. SmartDrive, the SmartDrive logo, and Measured Safety Program are registered trademarks of SmartDrive
Systems, Inc. SmartDrive SmartIQ is a trademark of SmartDrive Systems, Inc. All other marks are the property of their respective owners.
Rev 2, 4/23/2019
9. Run the cable to the controller
\
10. Plug the keypad cable into the side of the controller

© 2019 SmartDrive Systems, Inc. All rights reserved. SmartDrive, the SmartDrive logo, and Measured Safety Program are registered trademarks of SmartDrive
Systems, Inc. SmartDrive SmartIQ is a trademark of SmartDrive Systems, Inc. All other marks are the property of their respective owners.
Rev 2, 4/23/2019
11. Replace the controller’s top cover
12. Mount the controller into the controller’s bracket and secure the two screws with the M4
wrench
a. Secure the cable with zip ties to keep the cable clear of the driver’s operation

© 2019 SmartDrive Systems, Inc. All rights reserved. SmartDrive, the SmartDrive logo, and Measured Safety Program are registered trademarks of SmartDrive
Systems, Inc. SmartDrive SmartIQ is a trademark of SmartDrive Systems, Inc. All other marks are the property of their respective owners.
Rev 2, 4/23/2019
Diagnostic Mode
1. Run Diagnostic Mode to test the system
a. Run diagnostic mode on the keypad to test the system
b. The user can initiate Diagnostic Mode by pressing the green button on the keypad 5
times in 10 seconds.
c. The SR4 Controller will reboot after the test is complete.
d. If the test finds any problems, it will display the fault code on the keypad. If there is
more than one code, the keypad cycle between each fault code.
e. Refer to slide 22 to understand the fault code and follow the instructions to resolve the
problem.
f. After correcting all fault codes, rerun the Diagnostic mode until the keypad displays all
Zeros (000000). You need to have all zeros before calling Tech Support for QA
verification.
2. Complete Post Installation Verification Check with SmartDrive Technical Support
a. After a manual event has been created, the event MAY take up to 10 minutes to
be visible to our QA Specialists in the event player
b. Please wait 10 minutes BEFORE calling Technical Support to allow time for the
event to offload
c. Then call Technical Support to do a QA checkout
3. Technical Support Call In
a. Call Toll free number (866) 933-9930 Option 1
Table of contents

