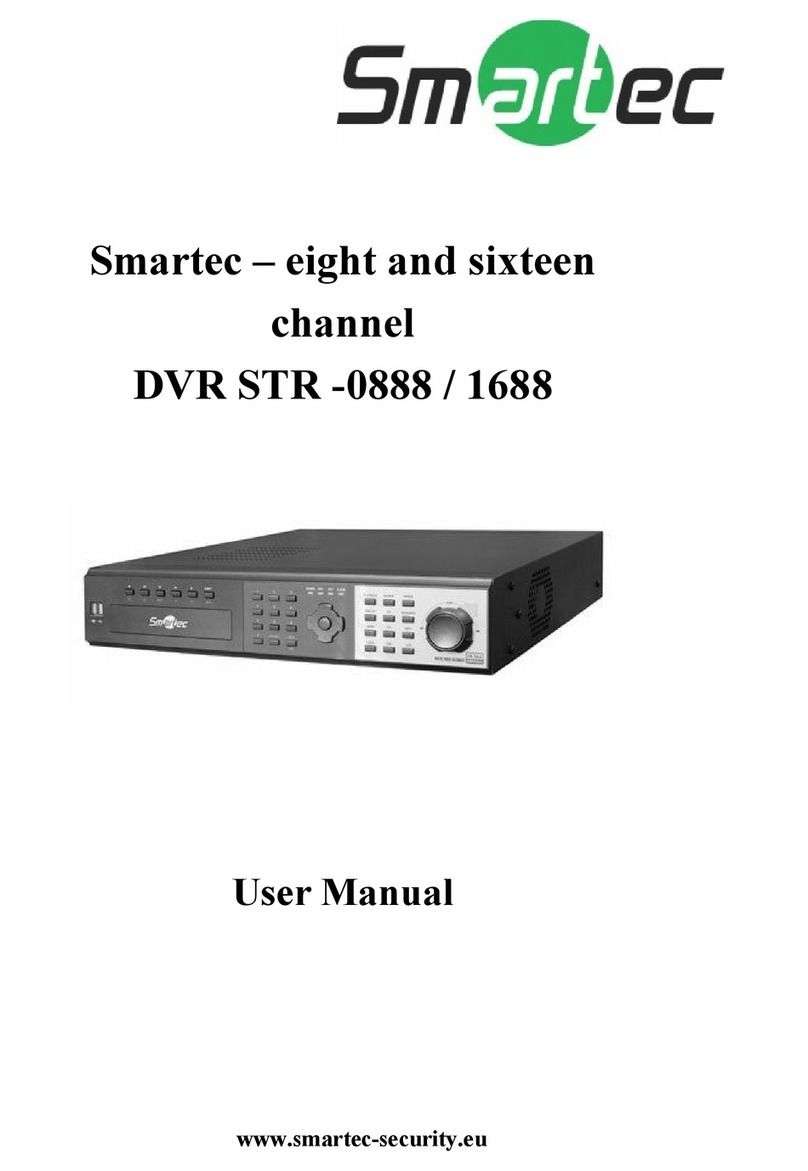
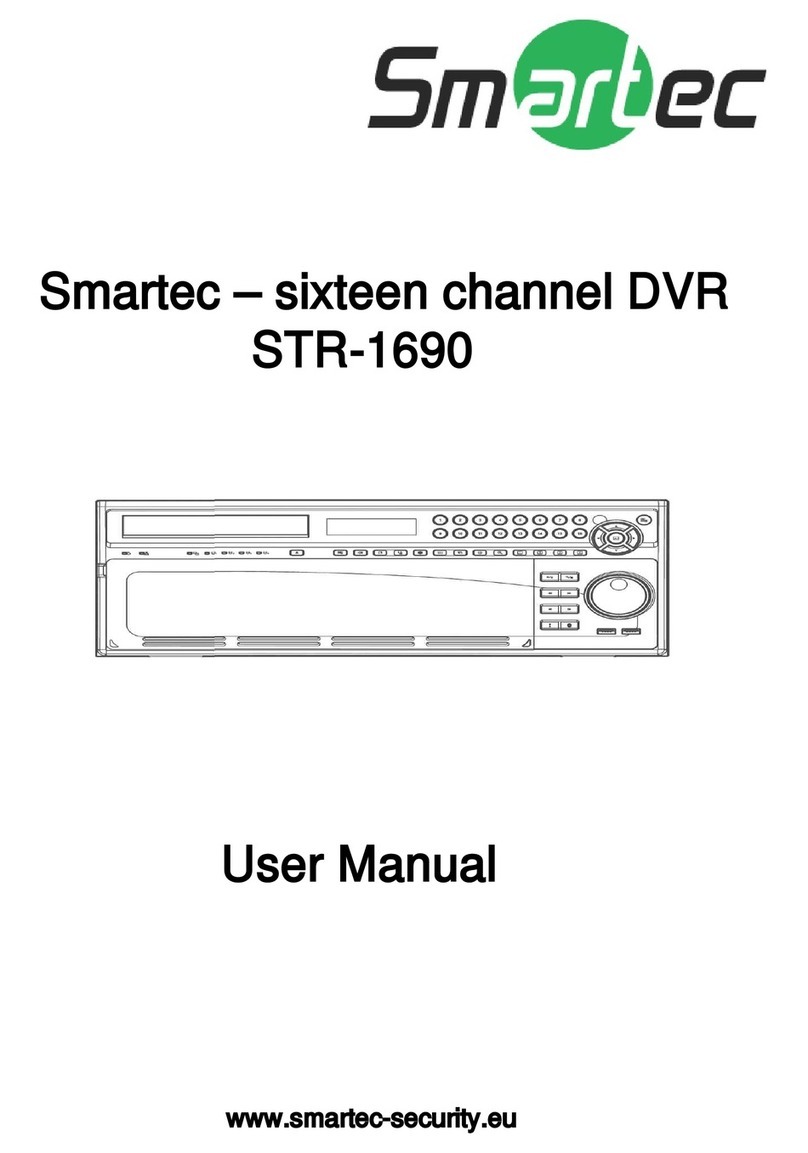
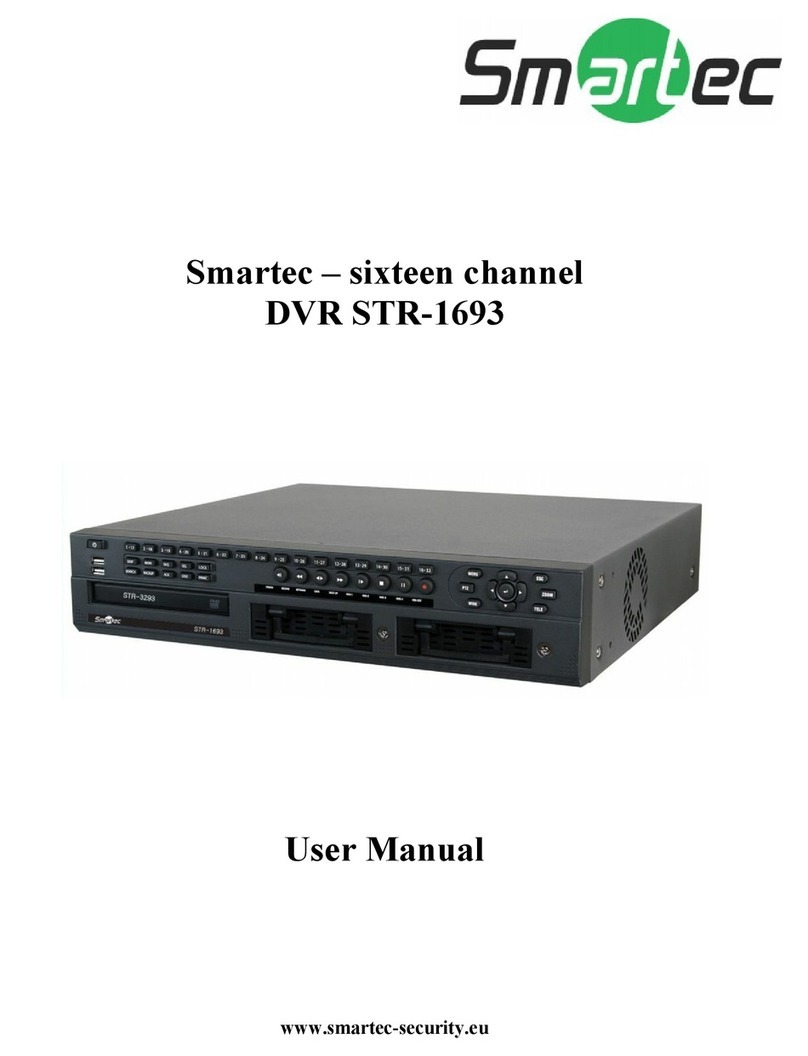
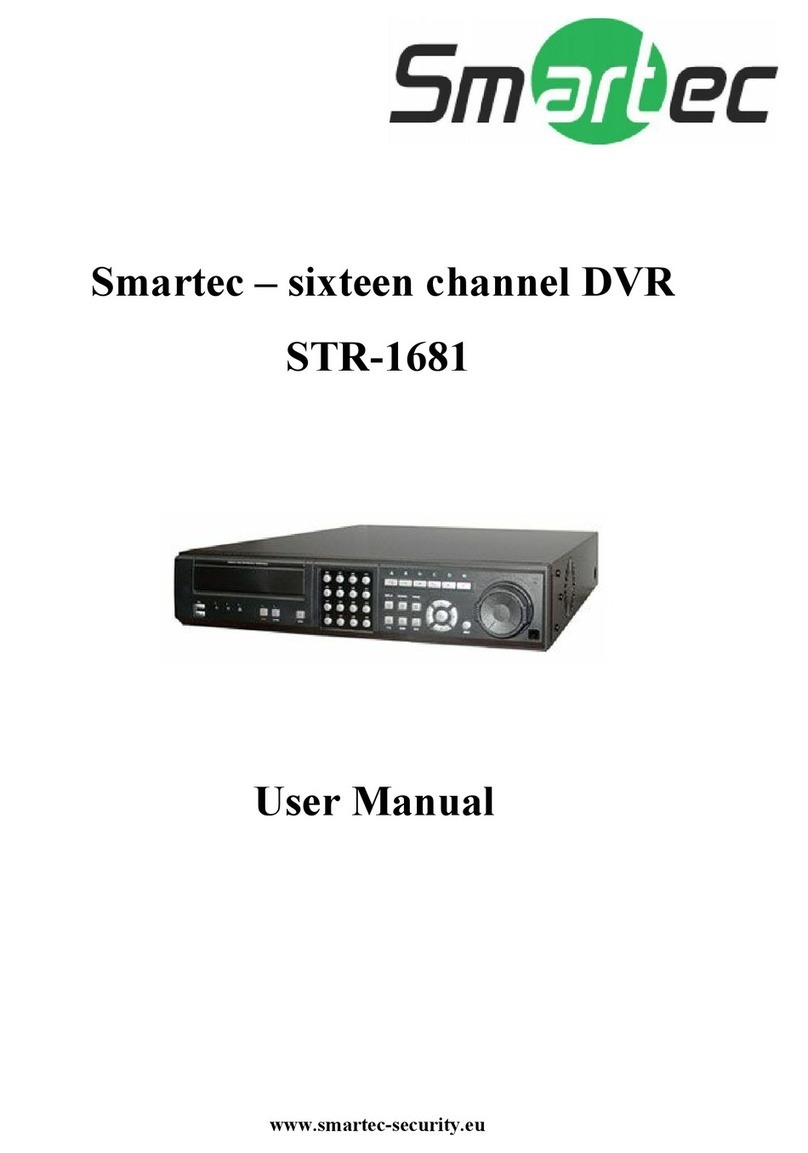
Smartec STR -1682 User manual

www.smartec-security.eu
Smartec –sixteen channel
DVR STR -1682
User Manual

i
WARNING
RISK OF ELECTRIC SHOCK
DO NOT OPEN
WARNING: TO REDUCE THE RISK OF ELECTRIC SHOCK,
DO NOT REMOVE COVER (OR BACK).
NO USER-SERVICEABLE PARTS INSIDE.
REFER SERVICING TO QUALIFIED
SERVICE PERSONNEL.
The lightning flash with arrowhead symbol, within an equilateral triangle, is intended to alert
the user to the presence of uninsulated "dangerous voltage" within the product’s enclosure
that may be of sufficient magnitude to constitute a risk of electric shock.
The exclamation point within an equilateral triangle is intended to alert the user to the
presence of important operating and maintenance (servicing) instructions in the literature
accompanying the appliance.
COMPLIANCE NOTICE OF FCC:
THIS EQUIPMENT HAS BEEN TESTED AND FOUND TO COMPLY WITH THE LIMITS FOR A CLASS A DIGITAL
DEVICE, PURSUANT TO PART 15 OF THE FCC RULES. THESE LIMITS ARE DESIGNED TO PROVIDE
REASONABLE PROTECTION AGAINST HARMFUL INTERFERENCE WHEN THE EQUIPMENT IS OPERATED
IN A COMMERCIAL ENVIRONMENT. THIS EQUIPMENT GENERATES, USES, AND CAN RADIATE RADIO
FREQUENCY ENERGY AND IF NOT INSTALLED AND USED IN ACCORDANCE WITH THE INSTRUCTION
MANUAL, MAY CAUSE HARMFUL INTERFERENCE TO RADIO COMMUNICATIONS. OPERATION OF THIS
EQUIPMENT IN A RESIDENTIAL AREA IS LIKELY TO CAUSE HARMFUL INTERFERENCE, IN WHICH CASE
USERS WILL BE REQUIRED TO CORRECT THE INTERFERENCE AT THEIR OWN EXPENSE.
WARNING: CHANGES OR MODIFICATIONS NOT EXPRESSLY APPROVED BY THE PARTY RESPONSIBLE
FOR COMPLIANCE COULD VOID THE USER’S AUTHORITY TO OPERATE THE EQUIPMENT.
THIS CLASS OF DIGITAL APPARATUS MEETS ALL REQUIREMENTS OF THE CANADIAN INTERFERENCE-
CAUSING EQUIPMENT REGULATIONS.
The information in this manual is believed to be accurate as of the date of publication. IDIS Co., Ltd. is not responsible
for any problems resulting from the use thereof. The information contained herein is subject to change without notice.
Revisions or new editions to this publication may be issued to incorporate such changes.

ii
Important Safeguards
1. Read Instructions
All the safety and operating instructions should be read before the
appliance is operated.
2. Retain Instructions
The safety and operating instructions should be retained for future
reference.
3. Cleaning
Unplug this equipment from the wall outlet before cleaning it. Do not
use liquid aerosol cleaners. Use a damp soft cloth for cleaning.
4. Attachments
Never add any attachments and/or equipment without the approval of
the manufacturer as such additions may result in the risk of fire, electric
shock or other personal injury.
5. Water and/or Moisture
Do not use this equipment near water or in contact with water.
6. Accessories
Do not place this equipment on an unstable cart, stand or table. The
equipment may fall, causing serious injury to a child or adult, and
serious damage to the equipment. Wall or shelf mounting should
follow the manufacturer's instructions, and should use a mounting kit
approved by the manufacturer.
This equipment and cart combination should be moved with care.
Quick stops, excessive force, and uneven surfaces may cause the
equipment and cart combination to overturn.
7. Power Sources
This equipment should be operated only from the type of power source
indicated on the marking label. If you are not sure of the type of power,
please consult your equipment dealer or local power company.
8. Power Cords
Operator or installer must remove power and TNT connections before
handling the equipment.
9. Lightning
For added protection for this equipment during a lightning storm, or
when it is left unattended and unused for long periods of time, unplug it
from the wall outlet and disconnect the antenna or cable system. This
will prevent damage to the equipment due to lightning and power-line
surges.
10. Overloading
Do not overload wall outlets and extension cords as this can result in
the risk of fire or electric shock.
11. Objects and Liquids
Never push objects of any kind through openings of this equipment as
they may touch dangerous voltage points or short out parts that could
result in a fire or electric shock. Never spill liquid of any kind on the
equipment.
12. Servicing
Do not attempt to service this equipment yourself. Refer all servicing
to qualified service personnel.
13. Damage requiring Service
Unplug this equipment from the wall outlet and refer servicing to
qualified service personnel under the following conditions:
A. When the power-supply cord or the plug has been damaged.
B. If liquid is spilled, or objects have fallen into the equipment.
C. If the equipment has been exposed to rain or water.
D. If the equipment does not operate normally by following the
operating instructions, adjust only those controls that are covered by
the operating instructions as an improper adjustment of other
controls may result in damage and will often require extensive work
by a qualified technician to restore the equipment to its normal
operation.
E. If the equipment has been dropped, or the cabinet damaged.
F. When the equipment exhibits a distinct change in performance —
this indicates a need for service.
14. Replacement Parts
When replacement parts are required, be sure the service technician has
used replacement parts specified by the manufacturer or that have the
same characteristics as the original part. Unauthorized substitutions
may result in fire, electric shock or other hazards.
15. Safety Check
Upon completion of any service or repairs to this equipment, ask the
service technician to perform safety checks to determine that the
equipment is in proper operating condition.
16. Field Installation
This installation should be made by a qualified service person and
should conform to all local codes.
17. Correct Batteries
Warning: Risk of explosion if battery is replaced by an incorrect type.
Dispose of used batteries according to the instructions.
18. Tmra
A manufacturer’s maximum recommended ambient temperature
(Tmra) for the equipment must be specified so that the customer and
installer may determine a suitable maximum operating environment
for the equipment.
19. Elevated Operating Ambient Temperature
If installed in a closed or multi-unit rack assembly, the operating
ambient temperature of the rack environment may be greater than room
ambient. Therefore, consideration should be given to installing the
equipment in an environment compatible with the manufacturer’s
maximum rated ambient temperature (Tmra).
20. Reduced Air Flow
Installation of the equipment in the rack should be such that the amount
of airflow required for safe operation of the equipment is not
compromised.
21. Mechanical Loading
Mounting of the equipment in the rack should be such that a hazardous
condition is not caused by uneven mechanical loading.
22. Circuit Overloading
Consideration should be given to connection of the equipment to
supply circuit and the effect that overloading of circuits might have on
over current protection and supply wiring. Appropriate consideration
of equipment nameplate ratings should be used when addressing this
concern.
23. Reliable Earthing (Grounding)
Reliable grounding of rack mounted equipment should be maintained.
Particular attention should be given to supply connections other than
direct connections to the branch circuit (e.g., use of power strips).

iii
Table of Contents
Chapter 1 — Introduction ..........................................................................................1
Features ..................................................................................................................1
Technical Overview................................................................................................1
Chapter 2 — Installation ............................................................................................ 3
Package Contents ..................................................................................................3
Required Installation Tools ...................................................................................3
Connecting the Video Input...................................................................................3
Connecting the Loop-Through Video...................................................................4
Connecting the Monitor .........................................................................................4
Connecting Audio ..................................................................................................4
Connecting Alarms ................................................................................................5
AI 1 to 16 (Alarm-In) .............................................................................................5
GND (Ground) ......................................................................................................5
AO 2 to 16 (Alarm-Out).........................................................................................5
NC/NO (Normally Closed/Normally Open) ...........................................................5
ARI (Alarm Reset In) ............................................................................................6
Connecting to the RS485 Port...............................................................................6
Connecting to the USB Ports ................................................................................6
Connecting to the RS232 Port...............................................................................7
Connecting to the Ultra Wide SCSI Port ..............................................................7
Connecting to the Network Port ...........................................................................8
Factory Reset..........................................................................................................8
Connecting the Power Cord ..................................................................................9
Chapter 3 — Configuration......................................................................................11
Front Panel Controls............................................................................................11
HDD LED............................................................................................................12
NETWORK LED .................................................................................................12
POWER LED......................................................................................................12
Camera Buttons (1 to 16) ...................................................................................12
DISPLAY Button.................................................................................................13
SEQUENCE Button............................................................................................14
FREEZE Button..................................................................................................14
SPOT Button ......................................................................................................14
ZOOM Button .....................................................................................................14
PTZ Button .........................................................................................................14
ALARM Button....................................................................................................13
PANIC Button .....................................................................................................13
MENU Button .....................................................................................................14
Up, Down, Left, Right Arrow Buttons..................................................................14
Enter Button .......................................................................................................14
RW (Rewind) Button...........................................................................................13
PLAY/PAUSE Button..........................................................................................13

FF (Fast Forward) Button ...................................................................................13
BACKWARD Button ...........................................................................................13
SEARCH/STOP Button ......................................................................................13
FORWARD Button .............................................................................................13
Shuttle Ring........................................................................................................15
Jog Dial ..............................................................................................................15
ID Button on Remote Control .............................................................................15
Turning on the Power ..........................................................................................15
Initial Unit Setup ...................................................................................................15
Setup Screen ........................................................................................................16
System Information ............................................................................................17
Date/Time Setup ................................................................................................20
Storage Screen ..................................................................................................22
User Setup Screen .............................................................................................24
Shutdown Screen ...............................................................................................26
Logout Screen ....................................................................................................26
Network & Notification Setup..............................................................................27
Network Screen..................................................................................................27
LAN Setup Screen..............................................................................................28
Modem Setup .....................................................................................................30
DVRNS Setup ....................................................................................................31
WebGuard Setup................................................................................................32
Notification Setup ...............................................................................................33
Configuring Devices ............................................................................................35
Camera Setup Screen........................................................................................35
Audio Setup Screen ...........................................................................................37
Alarm-Out Screen...............................................................................................38
Display Screen ...................................................................................................39
Remote Control Screen......................................................................................42
Recording Settings ..............................................................................................43
Record Screen ...................................................................................................43
Schedule Screen ................................................................................................45
Pre-Event Screen ...............................................................................................47
Archive Screen ...................................................................................................48
Event Settings ......................................................................................................49
Alarm-In Screen .................................................................................................49
Motion Detection Screen ....................................................................................52
Video Loss Screen .............................................................................................55
Text-In Screen....................................................................................................57
System Event Screen.........................................................................................61
Event Status Screen...........................................................................................63
Chapter 4 — Operation ............................................................................................65
Turning on the Power ..........................................................................................65
Live Monitoring.....................................................................................................65
Active Cameo Mode ...........................................................................................66

PIP Mode............................................................................................................66
Zoom Mode ........................................................................................................66
PTZ Mode...........................................................................................................66
Image Adjustment ..............................................................................................68
Event Monitoring ..................................................................................................68
Covert Camera......................................................................................................69
Spot Monitoring....................................................................................................69
Using a Mouse ......................................................................................................70
Recording Video...................................................................................................71
Recording Audio ..................................................................................................71
Playing Recorded Video ......................................................................................71
RW (Rewind) Button...........................................................................................72
FF (Fast Forward) Button ...................................................................................72
BACKWARD Button ...........................................................................................72
FORWARD Button .............................................................................................72
SEARCH/STOP Button ......................................................................................73
Camera Buttons (1 to 16) ...................................................................................73
DISPLAY Button.................................................................................................73
ZOOM Button .....................................................................................................73
Shuttle Ring........................................................................................................73
Jog Dial ..............................................................................................................73
Searching Video ...................................................................................................74
Go to...................................................................................................................75
Calendar Search ................................................................................................75
Record Table Search .........................................................................................76
Event Log Search...............................................................................................77
Text-In Search....................................................................................................79
Motion Search ....................................................................................................81
Clip-Copy Screen ...............................................................................................82
Print Screen........................................................................................................85
Disk Mirroring .......................................................................................................85
Appendix A — USB Hard Disk Drive Preparation .................................................87
Preparing the USB-IDE hard disk drive in Windows 2000................................87
Preparing the USB-IDE hard disk drive in Windows 98....................................87
Appendix B — Text-In Search Examples ...............................................................88
Search Example I..................................................................................................88
Search Example II.................................................................................................89
Appendix C — WebGuard........................................................................................90
Web Monitoring Mode..........................................................................................91
Web Search Mode ................................................................................................93
Appendix D — Time Overlap ...................................................................................95

Appendix E — Troubleshooting.............................................................................. 96
Appendix F — Connector Pin Outs ........................................................................97
I/O Connector Pin Outs........................................................................................97
RS485 Connector Pin Outs..................................................................................97
Appendix G — Map of Screens ...............................................................................98
Appendix H — System Log Notices .......................................................................99
Appendix I — Error Code Notices.........................................................................100
Appendix J — Specifications ................................................................................101

List of Illustrations
Figure 1 — Typical DVR installation. ......................................................................................... 2
Figure 2 — 16-Channel DVR rear panel.................................................................................... 3
Figure 3 — Video input connectors............................................................................................ 3
Figure 4 — Video Loop-Through connectors............................................................................. 4
Figure 5 — Video Out connectors.............................................................................................. 4
Figure 6 — VGA connector ........................................................................................................4
Figure 7 — Audio In and Out connectors................................................................................... 4
Figure 8 — Alarm Input connectors. .......................................................................................... 5
Figure 9 — Alarm Output connectors......................................................................................... 5
Figure 10 — Relay Alarm Output connectors. ........................................................................... 5
Figure 11 — Alarm Reset Input connectors............................................................................... 6
Figure 12 — RS485 connector................................................................................................... 6
Figure 13 — Front USB connectors. .......................................................................................... 6
Figure 14 — Rear USB connector. ............................................................................................ 6
Figure 15 — RS232 connector................................................................................................... 7
Figure 16 — SCSI connector. .................................................................................................... 7
Figure 17 — Network connector. ............................................................................................... 8
Figure 18 — Factory reset switch. ............................................................................................. 8
Figure 19 — Power cord connector. .......................................................................................... 9
Figure 20 — 16-Channel DVR front panel. .............................................................................. 11
Figure 21 — Infrared remote control........................................................................................ 12
Figure 22 — Login screen........................................................................................................ 16
Figure 23 — Setup screen. ...................................................................................................... 16
Figure 24 — Virtual Keyboard.................................................................................................. 17
Figure 25 — Information screen............................................................................................... 17
Figure 26 — Upgrade screen................................................................................................... 18
Figure 27 — Setup Import screen. ........................................................................................... 18
Figure 28 — Setup Export screen............................................................................................ 19
Figure 29 — System Log screen.............................................................................................. 19
Figure 30 — Date/Time setup screen. ..................................................................................... 20
Figure 31 — Holiday setup screen........................................................................................... 21
Figure 32 — Time Sync. screen............................................................................................... 21
Figure 33 — Storage Information screen................................................................................. 22
Figure 34 — Device Format screen. ........................................................................................ 22
Figure 35 — Device Information screen................................................................................... 23
Figure 36 — Storage Status screen......................................................................................... 23
Figure 37 — User setup screen. .............................................................................................. 24
Figure 38 — New Group setup screen..................................................................................... 25
Figure 39 — New User setup screen....................................................................................... 26
Figure 40 — Shutdown screen................................................................................................. 26
Figure 41 — Logout screen...................................................................................................... 26
Figure 42 — Network menu. .................................................................................................... 27
Figure 43 — Network setup screen.......................................................................................... 27
Figure 44 — LAN (Manual) setup screen................................................................................. 28
Figure 45 — Port Numbers setup screen ................................................................................ 29
Figure 46 — LAN (DHCP) setup screen. ................................................................................. 29
Figure 47 — LAN (ADSL) setup screen................................................................................... 30
Figure 48 — Modem setup screen........................................................................................... 30

Figure 49 — DVRNS setup screen. ......................................................................................... 31
Figure 50 — WebGuard setup screen. .................................................................................... 32
Figure 51 — Notification Mail setup screen. ............................................................................ 33
Figure 52 — Authentication setup screen................................................................................ 33
Figure 53 — Notification Callback setup screen. ..................................................................... 34
Figure 54 — Device menu. ...................................................................................................... 35
Figure 55 — Camera setup screen. ......................................................................................... 35
Figure 56 — Camera PTZ setup screen. ................................................................................. 36
Figure 57 — PTZ Device list. ................................................................................................... 37
Figure 58 — Port Setup window. ............................................................................................. 37
Figure 59 — Audio setup screen.............................................................................................. 37
Figure 60 — Alarm-Out Settings screen. ................................................................................. 38
Figure 61 — Alarm-Out Schedule screen. ............................................................................... 39
Figure 62 — Display OSD screen. ........................................................................................... 40
Figure 63 — OSD Margin screen............................................................................................. 41
Figure 64 — Main Monitor screen............................................................................................ 41
Figure 65 — Spot Monitor screen. ........................................................................................... 42
Figure 66 — Remote Control setup screen. ............................................................................ 42
Figure 67 — Record menu....................................................................................................... 43
Figure 68 — Record setup screen. .......................................................................................... 43
Figure 69 — Schedule (Simple Mode) setup screen. .............................................................. 45
Figure 70 — Schedule (Advanced Mode) setup screen. ......................................................... 45
Figure 71 — Schedule – Settings (Advanced Mode) setup screen. ........................................ 46
Figure 72 — Default (Advanced Mode) setup screen.............................................................. 47
Figure 73 — Pre-Event setup screen....................................................................................... 48
Figure 74 — Archive setup screen........................................................................................... 48
Figure 75 — Event menu. ........................................................................................................ 49
Figure 76 — Alarm-In Settings screen..................................................................................... 50
Figure 77 — Alarm-In Actions 1 screen. .................................................................................. 50
Figure 78 — Alarm-In Notify menu........................................................................................... 51
Figure 79 — Alarm-In Actions 2 screen. .................................................................................. 51
Figure 80 — Motion Detection Settings screen. ...................................................................... 52
Figure 81 — Motion Detection Sensitivity screen. ................................................................... 52
Figure 82 — Motion Detection Min. Blocks screen. ................................................................. 52
Figure 83 — Motion Detection Zone screen. ........................................................................... 53
Figure 84 — Motion Detection Zone menu. ............................................................................. 53
Figure 85 — Daytime Setup screen. ........................................................................................ 54
Figure 86 — Motion Detection Actions 1 screen...................................................................... 54
Figure 87 — Motion Detection Actions 2 screen...................................................................... 55
Figure 88 — Video Loss Settings screen................................................................................. 55
Figure 89 — Video Loss Actions 1 screen............................................................................... 56
Figure 90 — Video Loss Actions 2 screen............................................................................... 57
Figure 91 — Text-In Settings screen. ...................................................................................... 57
Figure 92 — Text-In Device Settings screen. .......................................................................... 58
Figure 93 — Text-In Actions 1 screen...................................................................................... 59
Figure 94 — Text-In Actions 2 screen...................................................................................... 60
Figure 95 — Health Check screen. .......................................................................................... 61
Figure 96 — Check Recording screen..................................................................................... 61
Figure 97 — Storage screen. ................................................................................................... 62
Figure 98 — System Event Actions screen. ............................................................................ 62
Figure 99 — Event Status screen. ........................................................................................... 63

Figure 100 — PTZ Select Camera menu................................................................................. 67
Figure 101 — PTZ Preset screen. ........................................................................................... 67
Figure 102 — Preset view screen. ........................................................................................... 67
Figure 103 — PTZ menu.......................................................................................................... 68
Figure 104 — PTZ controls ...................................................................................................... 68
Figure 105 — Spot Monitor menu. ........................................................................................... 69
Figure 106 — Sequence menu. ............................................................................................... 69
Figure 107 — Mouse menu...................................................................................................... 70
Figure 108 — Mouse Display menu......................................................................................... 70
Figure 109 — Select Playback Camera menu......................................................................... 72
Figure 110 — Mouse Playback controls. ................................................................................. 73
Figure 111 — Search menu. .................................................................................................... 74
Figure 112 — Go to menu........................................................................................................ 75
Figure 113 — Go to the Date/Time screen. ............................................................................. 75
Figure 114 — Calendar Search screen. .................................................................................. 75
Figure 115 — Record Table Search (Standard View) screen. ................................................ 76
Figure 116 — Record Table Search (Expanded View) screen................................................ 76
Figure 117 — Event Log Search screen.................................................................................. 77
Figure 118 — Event Log Search Option screen. ..................................................................... 78
Figure 119 — Text-In Search screen....................................................................................... 79
Figure 120 — Text-In Search Option screen. .......................................................................... 80
Figure 121 — Motion Search screen. ...................................................................................... 81
Figure 122 — Motion Search Option screen............................................................................ 81
Figure 123 — Clip-Copy screen............................................................................................... 83
Figure 124 — Print screen. ...................................................................................................... 85
Figure 125 — Storage Information screen............................................................................... 85
Figure 126 — Text-In Search Example (1) screen. ................................................................. 88
Figure 127 — Text-In Search Example (2) screen. ................................................................. 89
Figure 128 — WebGuard login screen..................................................................................... 90
Figure 129 — WebWatch screen. ............................................................................................ 91
Figure 130 — WebSearch screen............................................................................................ 93

Chapter 1 — Introduction
Features
Your color digital video recorder (DVR) provides recording capabilities for eight or 16 camera inputs. It
provides exceptional picture quality in both live and playback modes, and offers the following features:
y8 or 16 Composite Video Input Connectors
yCompatible with Color (NTSC or PAL) and B&W (CCIR and EIA-170) Video Sources
yAuto Detection for NTSC and PAL
yMultiple Monitor Connectors: 1 BNC Video Out, 1 SVHS, 4 Spot, 1 VGA
yMultiple Search Engines (Date/Time, Calendar, Event)
yRecords up to 480/400 Images per Second (NTSC/PAL) (8-channel model: 240/200 ips)
y“Loop-Through” Video Connectors
yContinuous Recording in Disk Overwrite Mode
yTriplex Functionality (Monitoring, Recording and Playback at the same time)
yVideo Archiving via Ultra SCSI Interface
y3 USB 2.0 Ports
yContinues Recording while Archiving, Transmitting to Remote Site and during Playback
yUser-friendly Graphical User Interface (GUI) Menu System
yMultiple Recording Modes (Time-lapse, Pre-event, Alarm, Motion and Panic)
yTwo-way Audio Communications
y4-Channel Audio Recording and 1-Channel Audio Playback
yText Input for ATM and POS
yAlarm Connections Include: Input, Output and Reset Input
yBuilt-in Alarm Buzzer
yLive or Recorded Video Access via Ethernet or Modem
yTime Synchronization using industry standard protocol
yBuilt-in CD-RW Drive
ySelf-diagnostics with automatic notification including hard disk drive S.M.A.R.T. protocol
yInfrared Remote Control
Technical Overview
In addition to replacing both a time-lapse VCR and a multiplexer in a security installation, your DVR has
many features that make it much more powerful and easier to use than even the most advanced VCR.
The DVR converts analog NTSC or PAL video to digital images and records them on a hard disk drive.
Using a hard disk drive allows you to access recorded video almost instantaneously; there is no need to
rewind tape. The technology also allows you to view recorded video while the DVR continues recording
video.
Digitally recorded video has several advantages over analog video recorded on tape. There is no need to
adjust tracking. You can freeze frames, fast forward, fast reverse, slow forward and slow reverse without
image streaking or tearing. Digital video can be indexed by time or events, and you can instantly view
video after selecting the time or event.

Your DVR can be set up for event or time-lapse recording. You can define times to record, and the
schedule can change for different days of the week and user defined holidays.
The DVR can be set up to alert you when the hard disk drive is full, or it can be set to record over the
oldest video once the disk is full.
Your DVR uses a proprietary encryption scheme making it nearly impossible to alter video.
You can view video and control your DVR remotely by connecting via modem or Ethernet. There is a
SCSI port that can be used to record or archive video to external hard disk drives, and there are also three
USB ports that can be used to upgrade the system or copy video clips to external hard disk, CD-RW and
flash drives.
NOTE: This manual covers the 8- and 16-channel digital video recorders. The DVRs are identical
except for the number of cameras and alarms that can be connected and the number of cameras
that can be displayed. For simplicity, the illustrations and descriptions in this manual refer to the
16-camera model.
Figure 1 — Typical DVR installation.

Chapter 2 — Installation
Package Contents
The package contains the following:
yDigital Video Recorder
yPower Cord
yUser’s Manual (This Document)
yRAS Software CD and User’s Manual
yRack-mount Kit
yAssembly Screws Guide Rails for Adding Hard Disk Drives
yScrews for Attaching SCSI Connector
yInfrared Remote Control
Required Installation Tools
No special tools are required to install the DVR. Refer to the installation manuals for the other items that
make up part of your system.
Figure 2 — 16-Channel DVR rear panel.
Your DVR can be used with either NTSC or PAL equipment.
NOTE: You cannot mix NTSC and PAL equipment. For example you cannot use a PAL camera
and an NTSC monitor.
Connecting the Video Input
Figure 3 — Video input connectors.
Connect the coaxial cables from the video sources to the BNC Video In connectors.

Connecting the Loop-Through Video
Figure 4 — Video Loop-Through connectors.
If you would like to connect your video source to another device, you can use the Loop BNC connectors.
NOTE: The Loop BNC connectors are auto terminated. Do NOT connect a cable to the Loop BNC
unless it is connected to a terminated device because it will cause poor quality video.
Connecting the Monitor
Figure 5 — Video Out connectors.
Connect the main monitor to either the Video Out or SVHS Out connector.
NOTE: If your main monitor has an SVHS input, use it because it will give you better quality video
display.
Up to four Spot monitors can be connected to the DVR. Connect the spot monitors to the SPOT 1,
SPOT 2, SPOT 3 and SPOT 4 connectors as needed.
Figure 6 — VGA connector
A VGA connector is provided so that you can use a standard, multi-sync computer monitor as your main
monitor. Use the cable supplied with your monitor to connect it to the DVR.
NOTE: The Video Out (BNC), SVHS Out and VGA connectors may be connected to individual
monitors for simultaneous operation.
Connecting Audio
NOTE: It is the user’s responsibility to determine if local laws and regulations permit recording
audio.
Figure 7 — Audio In and Out connectors.

Your DVR can record audio from up to four sources. Connect the audio sources to Audio In 1, Audio In
2, Audio In 3 and Audio In 4 as needed using RCA jacks. Connect Audio Out to your amplifier.
NOTE: The DVR does not have amplified audio output, so you will need a speaker with an
amplifier. The DVR does not have a pre-amplifier for audio input, so the audio input should be
from an amplified source, not directly from a microphone.
Connecting Alarms
Figure 8 — Alarm Input connectors.
NOTE: To make connections on the Alarm Connector Strip, press and hold the button and insert
the wire in the hole below the button. After releasing the button, tug gently on the wire to make
certain it is connected. To disconnect a wire, press and hold the button above the wire and pull
out the wire.
AI 1 to 16 (Alarm-In)
You can use external devices to signal the DVR to react to events. Mechanical or electrical switches can
be wired to the AI (Alarm-In) and GND (Ground) connectors. The threshold voltage is 4.3V and should
be stable at least 0.5 seconds to be detected. See Chapter 3 — Configuration for configuring alarm input.
GND (Ground)
NOTE: All the connectors marked GND are common.
Connect the ground side of the Alarm input and/or alarm output to the GND connector.
AO 2 to 16 (Alarm-Out)
Figure 9 — Alarm Output connectors.
The DVR can activate external devices such as buzzers or lights. Connect the device to the AO
(Alarm-Out) and GND (Ground) connectors. AO is an active low open collector output which sinks
30mA@12VDC. See Chapter 3 — Configuration for configuring alarm output.
NC/NO (Normally Closed/Normally Open)
Figure 10 — Relay Alarm Output connectors.

Connect the device to the COM and NC (Normally Closed) connectors or COM and NO (Normally
Open) connectors. NC/NO is a relay output which sinks 2A@125VAC, 1A@250VAC, 1A@30VDC
(NC) and 5A@125VAC, 2A@250VAC, 3A@30VDC (NO).
ARI (Alarm Reset In)
Figure 11 — Alarm Reset Input connectors.
An external signal to the Alarm Reset In can be used to reset both the Alarm Out signal and the DVR’s
internal buzzer. Mechanical or electrical switches can be wired to the ARI (Alarm Reset In) and GND
(Ground) connectors. The threshold voltage is below 0.3V and should be stable at least 0.5 seconds to be
detected. Connect the wires to the ARI (Alarm Reset In) and GND (Ground) connectors.
Connecting to the RS485 Port
Figure 12 — RS485 connector.
The DVR can be controlled remotely by an external device or control system, such as a control keyboard,
using RS485 half-duplex serial communications signals.
The RS485 connector can also be used to control
PTZ (pan, tilt, zoom) cameras. Connect RX-/TX- and RX+/ TX+ of the control system to the −and +
(respectively) of the DVR. See Chapter 3 — Configuration and the PTZ camera or remote controller
manufacture’s manual for configuring the RS485 connection.
Connecting to the USB Ports
Figure 13 — Front USB connectors.
Figure 14 — Rear USB connector.
Three USB ports are provided to connect external hard disk,
CD-RW or flash drives for video clip copying
or system upgrades. One USB port is on the rear panel and the other two are on the front panel. Position
external drives close enough to the DVR so that you can make the cable connections, usually less than 6
feet. Use the USB cable provided with the hard disk drive to connect it to the DVR.
A USB mouse (not supplied) can be connected to one of the ports. You can use the mouse to navigate
through the screens and menus much like you would on a computer.

A PostScript™ USB printer (not supplied) can be connected to one of the ports. You can print selected
images resulting from a search. Refer to Chapter 4 — Operation, Searching Video.
A USB to Serial converter can be connected to the USB port. Multiple text-in devices can be used with a
USB to Serial converter.
Connecting to the RS232 Port
Figure 15 — RS232 connector.
An RS232 port is provided to connect an external modem for remote monitoring, configuration and
software upgrades, and to connect a remote control keyboard. Use a modem cable with a DB-9S (female)
connector to connect to the DVR. See Chapter 3 — Configuration for configuring the modem.
NOTE: The DVR is not supplied with a modem cable, and many modems are not supplied with
cables. Make certain you have the correct cable when purchasing the modem.
Connecting to the Ultra Wide SCSI Port
Figure 16 — SCSI connector.
A SCSI port is provided to connect external storage devices for recording or archiving video. Connect
the external SCSI hard disk drive (RAID) cable to the high-density 68-pin female UltraWide SCSI port.
The length of SCSI cable should not exceed 5 feet (1.5 meters). You can connect up to 8 UltraWide SCSI
devices with SCSI IDs set from 0 to 15 except for 7, which is assigned as the Host ID.
NOTE: The SCSI bus must be terminated, otherwise the DVR will not operate properly.
NOTE: When using low speed SCSI devices, the recording speed might decrease.
CAUTION: Do NOT connect or disconnect SCSI devices while the DVR power is on. The
DVR must be powered down to connect or disconnect SCSI devices. Power up SCSI
devices so they are ready for operation before powering up the DVR. Power down SCSI
devices after powering down the DVR and then disconnect SCSI devices.
CAUTION: If the SCSI device is shut down while the device is operating, the DVR system
might not operate normally.

Connecting to the Network Port
Figure 17 — Network connector.
The DVR can be networked using the 10/100Mb Ethernet connector. Connect a Cat5 cable with an RJ-45
jack to the DVR connector. The DVR can be networked with a computer for remote monitoring,
searching, configuration and software upgrades. See Chapter 3 — Configuration for configuring the
Ethernet connections.
CAUTION: The network connector is not designed to be connected directly with cable or
wire intended for outdoor use.
Factory Reset
Figure 18 — Factory reset switch.
The DVR has a Factory Reset switch to the left of the USB port on the rear panel. This switch will only
be used on the rare occasions that you want to return all the settings to the original factory settings.
CAUTION: When using the Factory Reset, you will lose any settings you have saved.
To reset the unit, you will need a straightened paperclip:
1. Turn the DVR off.
2. Turn it on again.
3. While the DVR is initializing, the front panel LEDs will blink. When any of the Camera 1 to 8
LEDs blink, poke the straightened paperclip in the unlabeled hole to the left of the USB port.
4. Hold the switch until all the LEDs on the front panel are lit.
NOTE: When the DVR successfully resets to factory defaults all the LEDs on the front panel flash
five times.
5. Release the reset switch. All of the DVR’s settings are now at the original settings it had when it
left the factory.

Connecting the Power Cord
Figure 19 — Power cord connector.
Connect the AC power cord to the DVR and then to a wall outlet.
CAUTION: The power cord must be connected to the DVR before it is connected to a
wall outlet, otherwise, the DVR might NOT be powered up properly. If the DVR is not
turned on after connecting the power cord, disconnect the power cord, wait 10 seconds,
and restart the DVR by following the proper connection procedures.
WARNING: ROUTE POWER CORDS SO THAT THEY ARE NOT A TRIPPING HAZARD.
MAKE CERTAIN THE POWER CORD WILL NOT BE PINCHED OR ABRADED BY
FURNITURE. DO NOT INSTALL POWER CORDS UNDER RUGS OR CARPET.
THE POWER CORD HAS A GROUNDING PIN. IF YOUR POWER OUTLET DOES NOT
HAVE A GROUNDING PIN RECEPTACLE, DO NOT MODIFY THE PLUG. DO NOT
OVERLOAD THE CIRCUIT BY PLUGGING TOO MANY DEVICES IN TO ONE CIRCUIT.
Your DVR is now ready to operate. Refer to Chapter 3 — Configuration and Chapter 4 — Operation.

Chapter 3 — Configuration
NOTE: Your DVR should be completely installed before proceeding. Refer to Chapter 2 —
Installation.
Front Panel Controls
Figure 20 — 16-Channel DVR front panel.
The front panel looks and operates much like a VCR combined with a multiplexer. Many of the buttons
have multiple functions. The buttons on the infrared remote control, while laid out differently, perform
the same functions as those on the front panel. The following describes each button and control. Take a
few minutes to review the descriptions. You will use these to initially set up your DVR and for daily
operations.
NOTE: The infrared sensor on the DVR is just to the lower left of the jog-shuttle. Make certain that
nothing blocks the sensor, or the remote control will not function properly.
NOTE: You can also use a USB mouse (not supplied) to navigate through the screens and menus
much like you would on a computer.
This manual suits for next models
2
Table of contents
Other Smartec DVR manuals

