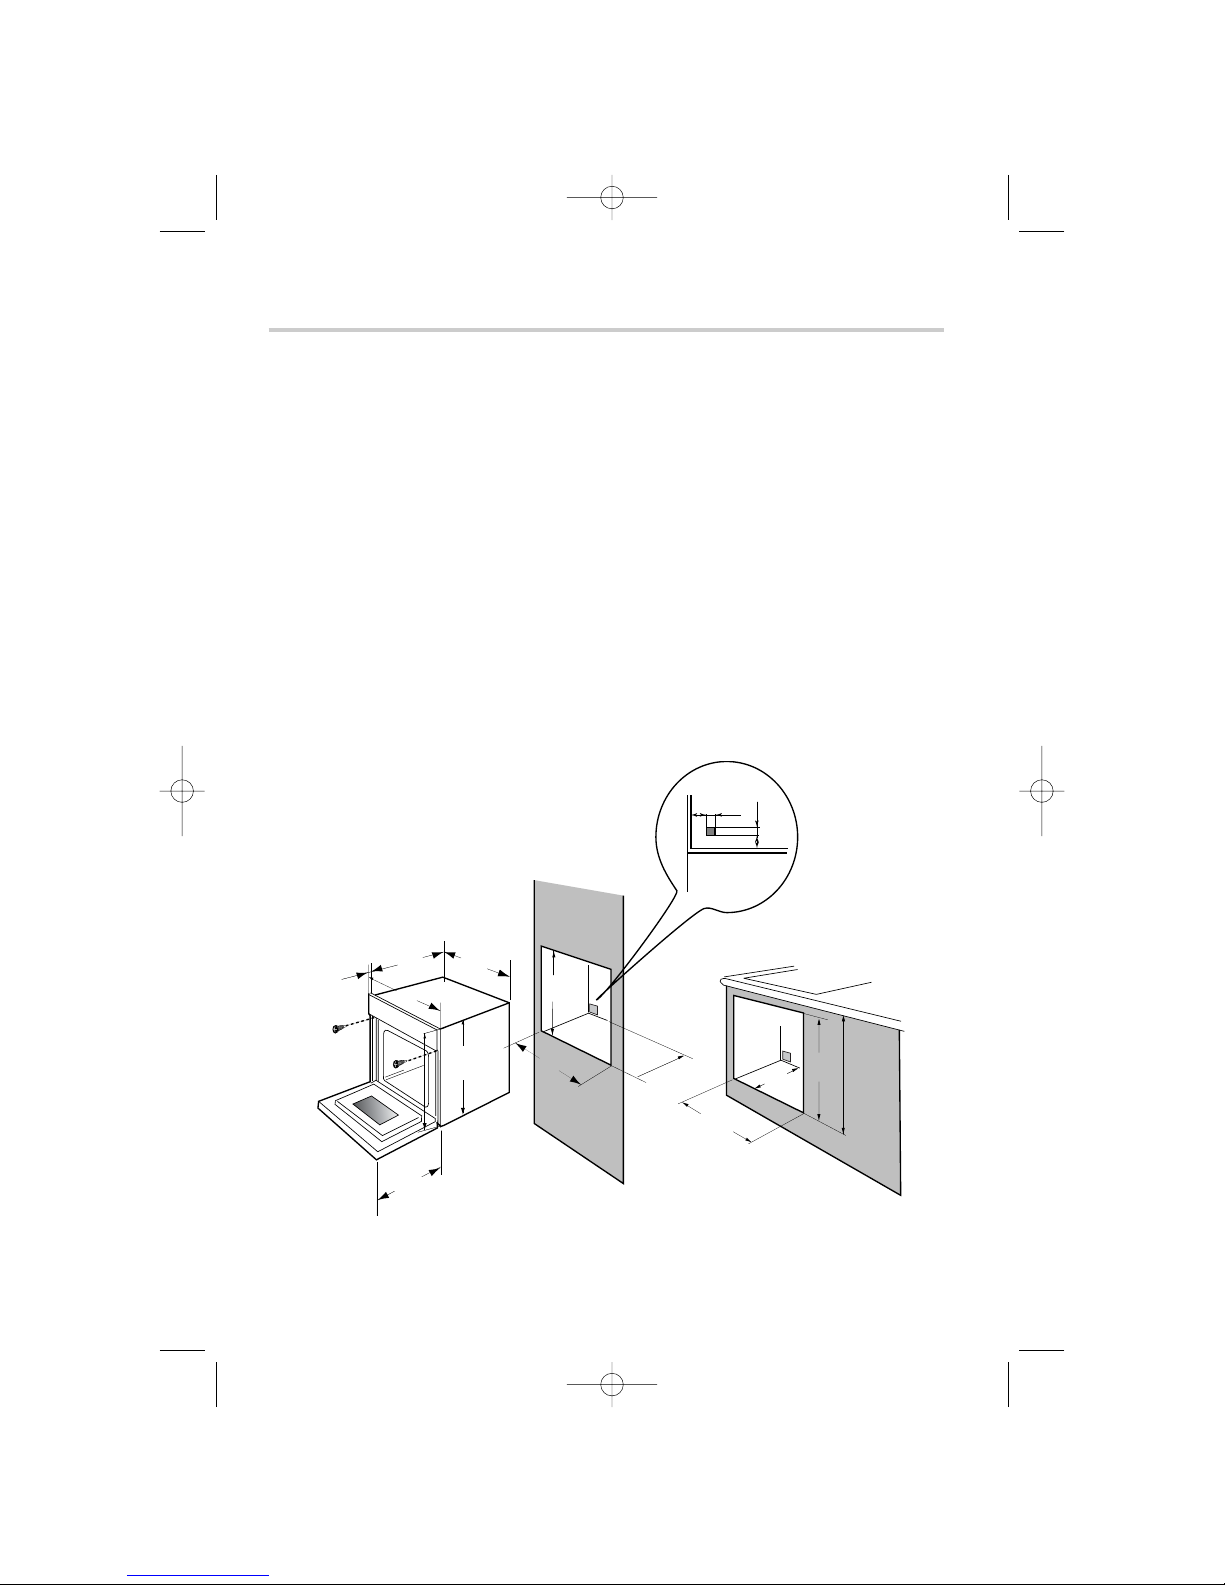
Smeg FP38X User manual

Le guide d'utilisation de votre four
Bedienungsanleitung Ihres Backofens
Your oven's operating guide
La guía de utilización de su horno
Guia de utilização do seu forno
Manuale d'uso del vostro forno
IT
FR
NL
DE
GB
ES
PT
Gebruikshandleiding van uw oven
START
STOP
FP38X
99634242_ML_pyro.qxd 19/11/04 14:25 Page 1

82
Contents
Introduction p.83
Your oven p.84
Accessories p.85
Safety recommendations p.86
Oven installation
Connection p.87
Dimensions for installation p.88
Oven use
Setting the clock p.89
Immediate cooking p.90
Setting cooking temperature p.91
Starting a programmed cooking session p.91
Programming your chosen cooking end time p.92
Using the timer p.93
Using the child safety lock p.93
Putting the display in standby mode p.94
Changing a lamp p.95
Cooking settings p.96-97
Cleaning the oven
Pyrolysis explained p.98
When to clean by pyrolysis p.98
How to use the pyro-clean programme p.99-100
Troubleshooting p.101
Throughout this manual, indicates safety recommendations,
indicates tips and advice to help you make
the best use of your oven
99634242_ML_pyro.qxd 19/11/04 14:30 Page 82

83
GB
Dear Customer,
Thank you for buying a SMEG oven.
Our design staff have produced a new generation of kitchen equipment, to
make everyday cooking a pleasure.
The clean lines and modern look of your SMEG oven will blend in perfectly
with your kitchen décor. It is easy to use and performs to a high standard.
SMEG also makes a range of appliances such as hobs, cookerhoods, built-in
dishwashers, washing-machines, microwave ovens and refrigerators, all of
which can be coordinated with your new SMEG oven.
SMEG is certain that by setting new standards of excellence, customers will
find that SMEG appliances offer a better and more exciting way of living.
Introduction
99634242_ML_pyro.qxd 19/11/04 14:30 Page 83

84
Your oven
START/STOP button
Time and temperature setting
Temperature setting
Cooking time
End cooking
Independent timer
Programme selector
1
2
3
4
5
6
7
The oven programmer
12
ST
ST
AR
AR
T
ST
ST
OP
OP
132 4567
Timer indicator
End cooking indicator
Cooking time indicator
5
6
1
2
3
4
Wattage indicator
Clock and time display
Temperature indicator
6543
99634242_ML_pyro.qxd 19/11/04 14:30 Page 84

85
GB
Accessories
Never cover the inside of your oven with aluminium foil in order to avoid
cleaning. You will cause overheating, which damages the oven's interior
enamel.
After cooking, never pick up hot pans, utensils and accessories using
your bare hands (oven shelf, spit, dripping plan, spit cradle, etc).
Oven shelf
This is used to catch cooking juices.
You should not cook roasts directly in the drip-
ping pan to avoid smattering and smoking.
Enamelled dripping pan
Rotisserie
To use it:
• Put the roasting tray into the oven at level
no. 1to collect cooking juices or on the bottom
of the oven if the roast is to big.
• Slide one of the forks onto the spit; put the
piece of meat to be roasted onto the spit;
slide on the second fork; centre and tighten
the two forks.
• Place the spit on its cradle.
• Push gently to locate the tip of the spit in the
turning mechanism situated at the back of the oven.
• Remove the handle by unscrewing it. After
cooking, screw the handle back onto the spit to
take it out without burning yourself.
At the end of the handgrip, a depression
enables you to unscrew the forks.
99634242_ML_pyro.qxd 19/11/04 14:30 Page 85

86
Safety recommendations
Please read these instructions before installation and use.
The oven has been designed for normal household use only. No asbestos has been
used in its construction.
USING FOR THE FIRST TIME:
Before you use your oven for the first time, leave it empty and, with the door
closed, turn it on to maximum temperature and let it heat up for 15 minutes. This
"breaks the oven in". During this time there may be some smell from the mineral
wool that insulates the oven. Some smoke is also possible. This is perfectly
normal.
NORMAL USE:
- Always close the door completely. The oven is fitted with a seal designed
to work with a closed door.
- Never lean or let anyone sit on the oven door when it is open.
- When using the grill with the door partly open, and during pyrol-
ysis, the accessible parts or surfaces can get hot.
Always keep children at a safe distance.
- The oven is hot when in use. Do not touch heating elements inside the
oven.
- Always protect your hands with oven mitts or protective fabric when
removing food accessories or containers from the oven.
- Do not line your oven with aluminium foil. The metal will increase the heat
produced and could ruin the food and damage the enamel.
Always check that the oven is off before cleaning.
- During the cleaning cycle, accessible surfaces become much hot-
ter than during normal cooking. Keep children at a distance.
- If the oven is fitted with an electrical outlet, it must remain
accessible after installation.
99634242_ML_pyro.qxd 19/11/04 14:30 Page 86

87
GB
Oven installation
Connection
Electrical connections must be made as per the connection plate fixed to the back of the
appliance, by an electrical fitter, who must ensure that the appliance has been connected
up in accordance with fitting instructions and local regulations.
Where the appliance is not connected to the mains electricity supply by a plug, an omni polar
cutout device (with a contacts gap of at least 3 mm) must be fitted on the supply side of
the connection to meet safety requirements.
NOTE: When power is connected, the electronics of the oven are initialised; this neutralizes
the lighting for a few seconds.
If the oven is connected to the power supply by a plug, this must remain accessible once
the oven has been installed.
We cannot accept any liability in the event of an accident resulting from non-existent or
faulty earthing.
If the power supply cable is damaged, it presents a potential hazard. It must be replaced by
the manufacturer, its after-sales service.
Operating voltage .....................................................................220-240 V ~ 50 Hz
Total wattage of oven .............................................................................2.925 kW
Nominal wattage of grill ............................................................................2.65 kW
Energy consumption
-while heating to 175°C........................................................................0.205 kWh
-to maintain 175°C for 1 hour ................................................................0.410 kWh
TOTAL ..................................................................................................0.615 kWh
Inside dimensions of oven
Width.........................................................................................................43 cm
Height........................................................................................................19 cm
Depth.........................................................................................................38 cm
Effective volume ....................................................................................32 litres
min.
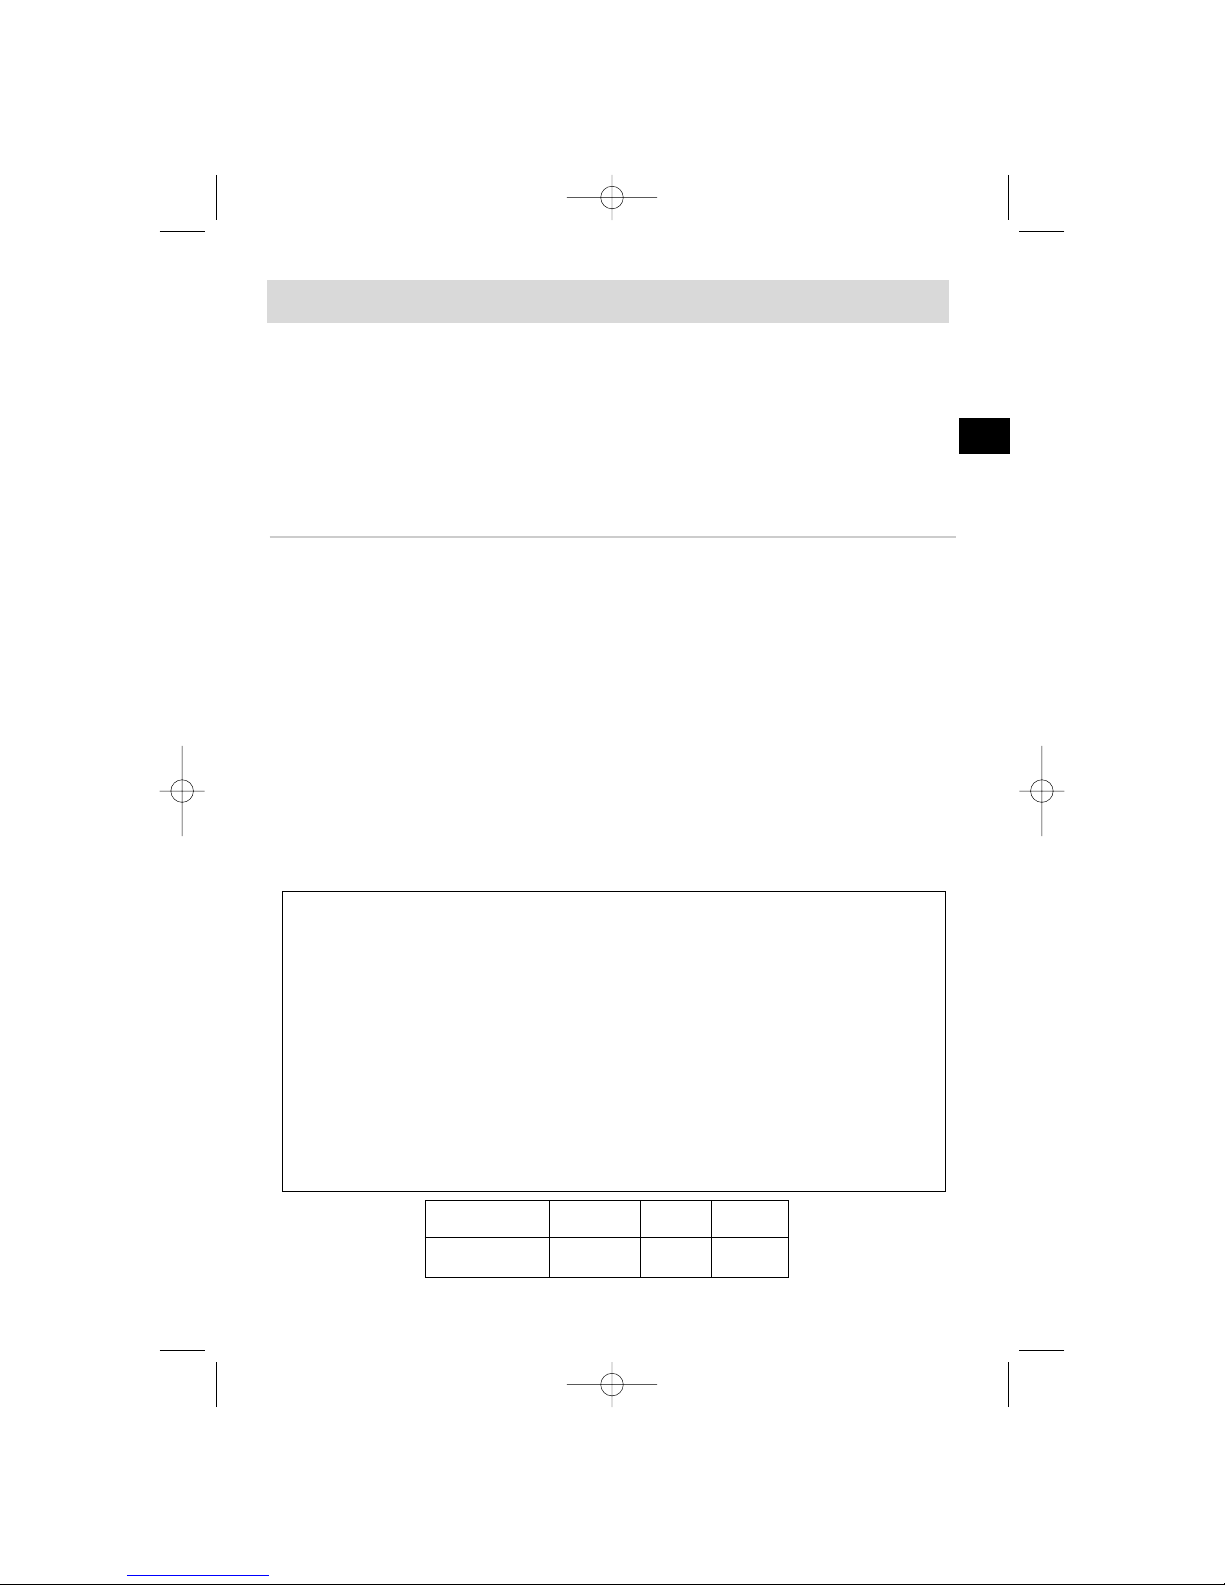
network voltage connection diameter of fuse
cable
230V~ 50Hz 1 Ph + N 1.5 mm216 A
99634242_ML_pyro.qxd 19/11/04 14:30 Page 87

88
Dimensions for installation
The oven has an high-performance air circulation system which gives remarkable results
for cooking and cleaning, as long as the following points are applied:
The oven may be fitted either underneath a work surface or in a suitable sized col-
umn unit. Cut a hole measuring 50 mm x 50 mm in the back wall of the insert space for
the electric cable to pass through (See diagram, left).
Centre the oven in the unit, and make sure that it is at least 2 mm from any other
unit beside it.
The unit must be heat-resistant (or covered with heat-resistant material).
The oven must be disconnected from the power supply while it is being installed in
the unit.
For greater stability, fix the oven in the unit with 2 screws in the holes on the side
walls (see diagram). Make a 3 mm diameter hole in the side of the unit first to prevent the
wood from splitting.
555
595
536
22
376
380
560-568
20 50
10 50
550
mini
560-568
550 mini 400
310
388
380
99634242_ML_pyro.qxd 19/11/04 14:30 Page 88

89
GB
Setting the clock
If the button is not pressed, the oven will automatically set the
time after a few seconds.
Oven use
Changing the clock
• Press on both and buttons
together for a few
seconds until the display blinks
• Adjust the time using the + and - buttons
• Confirm the time by pressing .
When the oven is first switched on
• The display blinks.
• Press the + and - buttons to set the
time. (Keeping a finger on the button,
rather than tapping it, is quicker)
The example shows 12:30.
• Press button START/STOP to confirm
the time.
START
STOP
START
STOP
START
STOP
ST
ST
AR
AR
T
ST
ST
OP
OP
START
STOP
START
STOP
ST
ST
AR
AR
T
ST
ST
OP
OP
START
STOP
START
STOP
ST
ST
AR
AR
T
ST
ST
OP
OP
START
STOP
START
STOP
ST
ST
AR
AR
T
ST
ST
OP
OP
START
STOP
START
STOP
START
STOP
99634242_ML_pyro.qxd 19/11/04 14:30 Page 89

90
Immediate cooking
• Select the cooking mode
Select the programme of your choice with the
button.
Example : position " ".
Note:
You can scroll through the cooking programmes by keeping your finger on the button .
The proposed temperature is displayed:
Example : 220°C.
• Push the START/STOP button to start cook-
ing.
Your oven displays the most frequently used
temperature.
You may nevertheless adjust this temperature yourself.
• Press the °C.
The symbol °C button.
• Adjust the temperature using the + or -
button.
• Even if pressing °C does not confirm your
choice immediately, your programme will be
validated automatically a few seconds later.
When the oven reaches that temperature, the display glows steadily and beeps for 3 sec-
onds.
Exception:Variable wattage grill:
- Wattage level proposed: - 4 - = 100%
- Can be adjusted from - 1 - = 50% to - 4 - = 100%
The door may only be left ajar when the grill is at maximum wattage
(-4-).
For other grill wattage settings, the door must remain closed.
Turn off the cooking cycle by pressing on the START/STOP button for 1 second.
During a grill cooking session, your oven's accessible parts are hotter than dur-
ing normal cooking. Be sure to keep young children at a safe distance.
ST
ST
AR
AR
T
ST
ST
OP
OP
START
STOP
START
STOP
START
STOP
START
STOP
ST
ST
AR
AR
T
ST
ST
OP
OP
START
STOP
ST
ST
AR
AR
T
ST
ST
OP
OP
START
STOP
99634242_ML_pyro.qxd 19/11/04 14:30 Page 90

91
Setting cooking temperature
During the selection of the cooking mode or during the cooking cycle, you can set or change
the temperature.
Press on the °C button for about two seconds
until the temperature figures starts flashing.
Adjust the temperature using the + or - but-
tons until you reach the temperature that you
wish to record.
Confirm your choice by pressing on button °C.
For later cooking sessions, the temperature that you have just recorded will be saved.
This cooking temperature adjustment operation can be renewed as often as you wish
Starting a programmed cooking session
Set the chosen cooking mode and adjust the temperature if necessary.
Example:
Natural convection
Temperature: 220°C.
Press the “cooking time” button
The cooking time (0:00) will flash with the symbol to show that the cooking time can be
set.
Press on the + or - buttons to set the desired
cooking time.
Example: 25 minutes cooking time.
The cooking time that you have set will be auto-
matically recorded after a few seconds or can be confirmed by pressing once again on the
button. The clock time will then appear once again on the display and the sym-
bol stops flashing.
START
STOP
START
STOP
START
STOP
START
STOP
ST
ST
AR
AR
T
ST
ST
OP
OP
ST
ST
AR
AR
T
ST
ST
OP
OP
START
STOP
START
STOP
START
STOP
ST
ST
AR
AR
T
ST
ST
OP
OP
START
STOP
START
STOP
START
STOP
ST
ST
AR
AR
T
ST
ST
OP
OP
START
STOP
START
STOP
GB
99634242_ML_pyro.qxd 19/11/04 14:30 Page 91

92
After performing these actions, the oven starts heating.
At the end of the cooking cycle, a series of beeps will sound for a few minutes and the
symbol will start flashing.
You can stop the beeps by pressing on the START/STOP button for 1 second.
You may consult or modify the cooking end time at any moment by pressing on the
button.
To cancel your programme, press the START/STOP button.
- Perform the above procedure. After setting
cooking time,
- Press the "end cooking" button; the cook-
ing end time is indicated and flashes, as does
the symbol to indicate that it may be
adjusted.
Example : It is 12:30
You have programmed a cooking time of 30 min
The cooking end time indicated is 1 pm (13:00).
- Adjust the cooking end time using the +or -buttons
Example: Cooking end time: 2 pm (14:00).
Once the cooking end time has been programmed, normal time is displayed.
The oven will now start heating up in time for cooking to be finished by 2 pm (14:00).
When cooking is complete, the oven will beep for several minutes. You can stop the oven
from beeping by pressing on the START/STOP button for 1 second.
You may consult or change the cooking end time at any time by pressing
the .
To cancel your programme, press the START/STOP button.
Programming your chosen cooking end time
START
STOP
ST
ST
AR
AR
T
ST
ST
OP
OP
START
STOP
START
STOP
START
STOP
ST
ST
AR
AR
T
ST
ST
OP
OP
START
STOP
START
STOP
START
STOP
START
STOP
99634242_ML_pyro.qxd 19/11/04 14:30 Page 92

93
Using the child safety lock
Using the timer
• Press on the START/STOP button until you
hear a long, drawn-out beep.
Keep pressing on the button until the beep
stops and a key appears on the indicator
panel.
• To unlock the controls, repeat the operation.
Press the START/STOP button until you hear
a long beep.
Keep your finger on the button until the beep
stops and the key disappears from
the display panel. Only the "independent
timer" function remains functional.
You may change the remaining time at any point by pressing the button and
using the + or - button. To cancel the timer programme, set the time at 0:00 and
press the START/STOP button.
Your oven has a separate timer, independant
from the oven's programmes. It can be
used as a kitchen timer. For this, the timer dis-
play makes the time temporarily disappear.
• Press the hourglass symbol . The display
flashes; the hourglass symbol appears and
flashes.
• Press + or - until the display shows the
length of cooking time required (up to 59 min-
utes and 50 seconds).
The display stops flashing after a few seconds
and the timer starts, counting down the time in
seconds. When the timer is up, the timer beeps
and the symbol flashes. Stop beeping by
pressing the button or START/STOP but-
ton. Normal time is now displayed.
To prevent your oven from being accidentally turned on, you may lock the controls by per-
forming the following steps:
ST
ST
AR
AR
T
ST
ST
OP
OP
START
STOP
ST
ST
AR
AR
T
ST
ST
OP
OP
ST
ST
AR
AR
T
ST
ST
OP
OP
START
STOP
GB
(key)
99634242_ML_pyro.qxd 19/11/04 14:30 Page 93

94
Putting the display in standby mode
To reduce your oven's power consumption to a minimum when it is not in use, you can put
the display in STANDBY MODE.
To perform this operation, proceed as follows:
ACTIVATING STANDBY MODE:
- Your oven must be in normal time display
mode.
- Press the + and –buttons together for five
seconds at the same time.
- The display reads “Lcd off”.
- Take your fingers off the two buttons.
- 30 seconds later your display will switch off.
Your oven is now in standby mode; when it is
in normal time display mode it will turn off
automatically after 30 seconds.
DISACTIVATING STANDBY MODE:
- Your oven must be in the normal time
display mode.
Press the + and –buttons together for five
seconds at the same time.
- The display reads “Lcd on”.
- Take your fingers off the two buttons.
- You are now out of STANDBY MODE; the dis-
play is now permanently on.
START
STOP
ST
ST
AR
AR
T
ST
ST
OP
OP
START
STOP
ST
ST
AR
AR
T
ST
ST
OP
OP
START
STOP
START
STOP
START
STOP
START
STOP
ST
ST
AR
AR
T
ST
ST
OP
OP
ST
ST
AR
AR
T
ST
ST
OP
OP
START
STOP
START
STOP
99634242_ML_pyro.qxd 19/11/04 14:30 Page 94

95
GB
•The light lamp is housed in the oven ceiling.
a) Unscrew the protective shade
(see diagram).
b) Unscrew the lamp, turning it to the
left.
Lamp specifications:
- 15 W
- 220-240 V
- 300°C
- E 14 fitting
c) Change the lamp, replace the shade and
switch power back on.
Warning! To avoid electrocution, switch off power to the oven
before attempting to change the lamp. Let the oven cool off if
necessary.
Changing a lamp
lamp fitting
unscrew cover
Use a rubber glove to easily unscrew the lamp and its cover.
99634242_ML_pyro.qxd 19/11/04 14:30 Page 95

96
Combined
Cooking is carried out by the lower
and upper elements at the bottom
of the oven, and by the air circula-
tion device.
Turbo grill
Cooking is done alternately by the
top element and by the fan.
Double grill
Cooking is carried out by the upper
element.
Single grill
Cooking is carried out by the upper
element.
Symbol Feature Setting dDescription
* Cooking settings referred to in the advertisement about energy labelling in accord
Fan oven
The fan and the heater element at
the back of the oven cook the food.
Oven rapidly reaches the
selected temperature.
Some dishes can be placed
directly in the cold oven.
Three combined heat
sources: lots of heat at the
bottom of the oven, a little
ambient heat and a slight
heat from the grill to brown
your food.
The double grill covers the
full surface of the oven
shelf.
The single grill is equally ef-
ficient, and covers a smaller
area for smaller quantities of
food.
This setting combines the
turbine and the grill; the grill
cooks food with infrared rays
and the turbine's air circula-
tion accentuates the effect.
Conventional oven
Food is cooked by a top and bottom
element. No fan.
*Oven rapidly reaches the
selected temperature. Some
dishes can be placed directly
in the cold oven.
Defrosting
The defrosting function is provided
by the fan, which circulates ambi-
ent air around the food product to
be defrosted.
The temperature never
exceeds 50°C, thereby pro-
viding optimum defrosting
conditions.
Cooking settings
99634242_ML_pyro.qxd 19/11/04 14:30 Page 96

dance with European Standard EN50304 and the European Directive 2002/40/EC.
97
Recommended for juicy quiches, pies and
fruit tarts.
Recommended for grilling chops,
sausages, and large prawns and for
making toast.
Recommendations
Recommended to keep white meats, fish,
and vegetables tender. Can be used on
up to 3 shelves at once.
Recommended for searing and thouroughly
cooking red and white meat.
Also for slow cooking poultry up to 2 kg.
Recommended temp.
Min. recom’d
40° 180° 250°
Min. recom’d Max.
40° 200° 250°
1 to 4
Recommended to keep white meats, fish,
and vegetables tender. Can be used on up
to 3 shelves at once.
Recommended for defrosting meat and
poultry. Use the shelf with the dripping pan
placed below it, or the pastry tray. Never
use the juice from defrosted meat, as it is not
edible.
Min. recom’d Max.
30° 40° 50°
Min. recom’d Max.
40° 195° 250°
Min. recom’d Max.
40° 220° 275°
Max.
GB
99634242_ML_pyro.qxd 19/11/04 14:30 Page 97

98
Pyrolysis explained
FOOD WITH SOME Biscuits, vegetables, cakes You do not need to use
SPATTERING quiches, soufflés pyrolysis feature
FOOD WITH HIGH Meat, fish (in an open dish) Use the pyrolysis feature
SPATTERING stuffed vegetables every 3 oven uses
FOOD THAT Large pieces of meat If a lot of spattering occurs
SPITS BADLY cooked on the spit, duck run the pyrolysis feature
afterwards
If your oven smokes when it preheats or if there is on or if there is a lot of smoke during
a cooking cycle, run the pyrolysis cycle.
You can also use this feature if there are unpleasant cooking odours when the oven is cold
Do not wait until the oven is coated in grease to clean it.
It is not necessary to run the pyrolysis feature after every use; only clean the oven when
it is dirty.
When to clean by pyrolysis
Do not wait until the oven is coated in grease to clean it.
- Pyro-cleaning involves heating the oven to a high temperature (pyrolysis) in order to
remove grime and grease that builds up inside the oven due to splashing or dripping dur-
ing cooking. The resulting smoke and smell are removed by a catalyst.
The oven has three pyro-clean cycles suited to all situations.
- An economic cycle that lasts 1h30 (the oven is locked for 2 hours to allow for cool-
ing down). This cycle consumes 25% less the standard pyro-clean cycle. When used regu-
larly (every two or three times you cook meat) this cycle keeps the oven clean under any
conditions).
- A medium cycle that lasts 1h 45 (the oven is locked for 2hours 15m to allow for
cooling down). This cycle cleans dirty ovens efficiently.
- A super-cleaning cycle that lasts 2 hours (the oven is locked for 2hours 30m to
allow for cooling down). This cycle is for extremely dirty ovens.
- For safety reasons, the door is automatically locked shut after about 2 minutes of
pyro-cleaning.
Cleaning the oven
99634242_ML_pyro.qxd 19/11/04 14:30 Page 98

99
Using the pyro-clean programme
1) Carrying out an immediate pyrolysis cleaning session
a) Remove any accessories from the oven and wipe off any excess grime.
b) Check that the programmer displays normal time and that it is not flashing.
c) Press the program selection button until the "Pyro-clean" programme appears.
Your oven has 3 pyrolysis symbols that
correspond to 1 two-hour pyro (Non-adjustable).
You can select two other non-adjustable cycles
( 1:45, or 1:30) non-adjustable, by
pressing the - or +.
The oven cannot be used for 2:00, 2:15 or
2:30 respectively after each cleaning cycle.
These times allow for cooling down, after which
the door is automatically unlocked.
d) Press the START/STOP button
- The door is locked during pyro-cleaning
(after about 2 minutes).
- You can consult the finishing time for
the pyro-clean cycle by pressing button . At
the end of pyro-cleaning, the symbol
remains lit until the door is automatically unlocked.
e) Stop the oven by pressing the START/STOP button.
f) Use a damp cloth to remove white ash after the oven has cooled down.
The oven is now ready for use.
Note: The pyro-cleaning temperature cannot be altered. During the cleaning cycle, the light
is off. If your oven is still not clean after pyro-cleaning, it means that you have delayed
cleaning too long. Repeat the pyro-clean programme.
Never hang household linen (towels, dishcloths, etc.) on the oven door
handle.
During the cleaning cycle, accessible surfaces become much hotter than
during normal cooking. Keep children at a distance.
GB
START
STOP
START
STOP
ST
ST
AR
AR
T
ST
ST
OP
OP
START
STOP
START
STOP
ST
ST
AR
AR
T
ST
ST
OP
OP
START
STOP
START
STOP
START
STOP
START
STOP
START
STOP
ST
ST
AR
AR
T
ST
ST
OP
OP
99634242_ML_pyro.qxd 19/11/04 14:31 Page 99

100
2) How to programme a pyro-cleaning cycle
Follow the instructions given in the section entitled "How to use the pyro-clean
programme", then:
a) Press button , the finishing time for
the pyro-clean programme will flash, as
well as the symbol, indicating that this time
can be modified.
b) Set the programme end time by pressing the
+or-buttons.
Example: End pyro-clean pro-
gramme at 5:00.
When the pyro-clean programme is over, press the START/STOP button.
ST
ST
AR
AR
T
ST
ST
OP
OP
START
STOP
START
STOP
START
STOP
99634242_ML_pyro.qxd 19/11/04 14:31 Page 100
Table of contents
Other Smeg Oven manuals

Smeg
Smeg SFA4395VCX1 User manual

Smeg
Smeg SAP3900X User manual

Smeg
Smeg Oven SC709X User manual

Smeg
Smeg SF4395MCX User manual

Smeg
Smeg SFA4303VCPX User manual

Smeg
Smeg FU65-5 User manual

Smeg
Smeg S399XPZ6 User manual

Smeg
Smeg SF122PZ User manual

Smeg
Smeg Classica Aesthetic SFPR9395X User manual

Smeg
Smeg Oven PIRO10NE User manual